Matter and form v2 portable 3d scanner
Matter and Form V2 Portable 3D Scanner – Profound3D
- $ 74900 $ 749.00
- Save $ 50
Default Title - $ 749.00 USD Quantity
Only -13 left!
ASK A QUESTION
Affordable 3D scanner quickly and easily produces accurate, high quality
3D scans!If you work with 3D printing and 3D design, the Matter and Form V2 3D scanner is here to make your life easier. Put an object on the scanner, click a button, and in as little as 65 seconds, the Matter and Form V2 scanner generates a standard format 3D design file, which you can modify with your 3D design software or print with your 3D printer. Scans are detailed and accurate, so you can spend more time creating and less time on the tedious design work. Digitize real life objects in no time!
Simple Operation
After completing an easy one-time set up procedure, scanning an item is as placing it on the scanner and clicking a button
Scan Quickly
The Matter and Form 3D scanner scans objects in as little as 65 seconds (scans at the highest quality settings will take longer).
Scan Big
Scans objects up to seven inches in diameter and up to 9.8 inches in height.
Produce High Resolution, Accurate 3D Scans
Matter and Form's moving HD camera head with dual eye-safe red lasers produces 3D scans that are watertight and accurate to within ±0.1mm of the size and detail of the original.
Wide 3D Design File Compatibility
With the ability to export STL, OBJ, PLY, and XYZ file formats, the Matter and Form's 3D scans will work with virtually any 3D design software or 3D printer.
Compact Design with Integrated Case
Matter and Form designed its 3D scanner with a small footprint to easily fit any work area. When not in use, fold up the scanner's base for even more compact storage. When folded, the scanner's integrated case protect the camera and turntable.
Spectacular Detail
The Matter and Form 3D scanner produces incredible surface detail. Real-time scanning allows you to watch as the scanner generates a point cloud that eventually becomes the external surface of your scanned 3D model.
MFStudio +Quickscan Software Included
Complete your 3D scanning projects in less time with the intuitive MFStudio +Quickscan software. With the help of user feedback, Matter & Form designed its powerful 3D scanning software over a five year period to give you total control of and get the best possible results from the Matter & Form 3D scanner. The included +Quickscan upgrade captures complete geometry in as little as 65 seconds.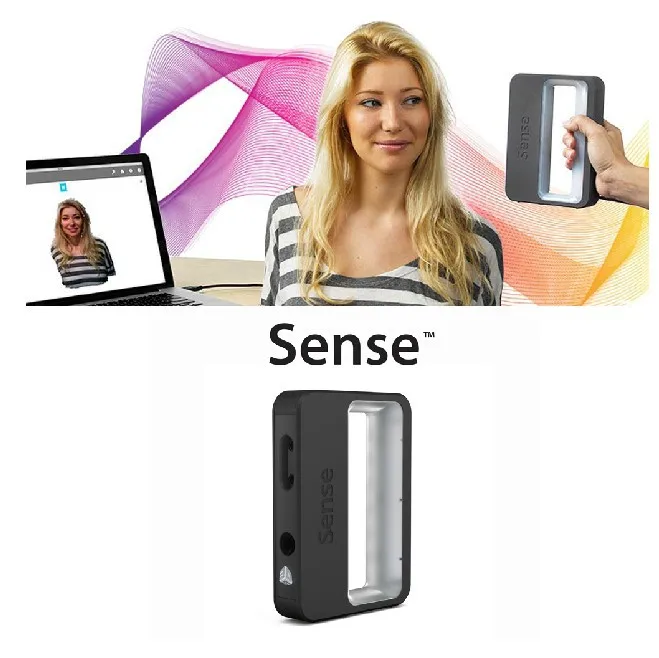
We Also Recommend
Matter and Form 3D Scanner V2 Review
Introduction
This is a bit of background info about the history of affordable 3D scanners, so feel free to skip the intro and drive right into the Review.
Back in 2013, desktop 3D printers were supposedly going mainstream. That is when I bought my first 3D printer, a 5th Gen MakerBot Replicator. I didn’t like it at all, so I started complaining about it on my website. Accidentally, I created my very first blog post. That review drove a lot of interest and got me into reviewing other 3D printers until I decided I didn’t like those machines at all and switched to 3D scanning — the rest is history.
When I was testing 3D printers I did know that there were also 3D scanners because they used to be marketed towards the same audience. MakerBot had the Digitzer — a small turntable combined with two lasers and a camera. It was originally priced at $1400. Truth be told, you couldn’t scan a lot of things with it — mainly small toys and trinkets. It didn’t capture color and the geometry it captured wasn’t very detailed. But it was probably an experiment just as desktop 3D printers were.
Anyway at that moment in time (and it’s only 5 years ago really) more companies started betting on the affordable 3D scanner market. 3D Systems introduced the Sense handheld 3D scanner, which actually was the first 3D scanner I reviewed. But not much later a company called Matter and Form announced their take on the MakerBot Digitizer. This first generation device, now known as MFS1V1, also featured two lasers but did have a color camera.
And on top of that, the scan head could automatically move upwards by means of a threaded rod, very similar to desktop 3D printers. This meant it could scan objects that were taller. And the whole contraption could be folded into a case so you could take it everywhere. Is was originally priced at $600 — less than half of the MakerBot Digitizer. Nowadays you can still get one brand new for $399 on Amazon.
I have used both the MakerBot Digitizer and Matter and Form V1 a few times but I never officially reviewed them because their scan quality and long scanning times seemed a bit sub-par to me at the time I started reviewing 3D scanners. Structured light-based desktop scanners were just becoming more affordable with the introduction of the EinScan-S (Review) which was a bit rough around the edges but made detailed scans quite fast.
So I thought that desktop 3D scanners with lasers where a bit passe. I recently reviewed the Eora3D smartphone-based scanner which I think as great potential but is still a bit too limited for automatic 360-degrees object scanning with the current app, especially the meshed results. And Matter and Form’s Bevel (Review) didn’t convince me as a face scanner at all.
So it kind of surprised me that Matter and Form is re-releasing its laser-based desktop scanner. It’s now called the MFS1V2, or Matter and Form 3D Scanner V2.
Changes & Pricing
Not a lot has changed on the hardware side.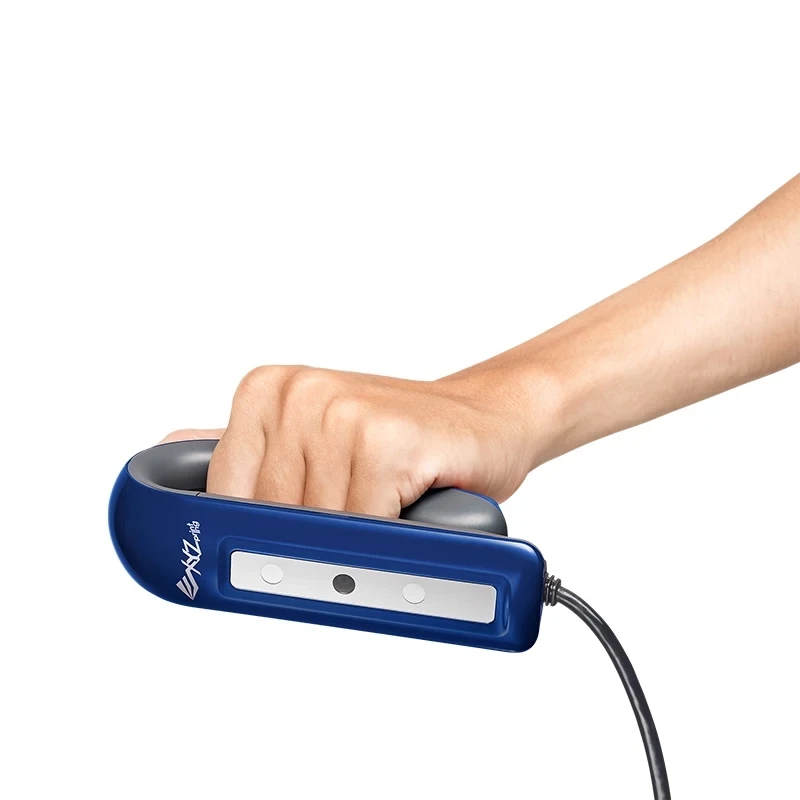 The enclosure is now totally black instead of the black and white color scheme of the V1 and, according to the manufacturer, improvements to the design of the hardware have been made to enable a higher scan accuracy of 0.1mm vs. 0.25 – 0.45mm (depending on which spec sheet you read) on the older model. But al major components, such as the lasers, HD CMOS sensor and motors, are the same.
A bigger change is on the software side. In April this year, Matter and Form introduced new 3D scanning software called MFStudio. It’s available for both Mac and Windows and boasts a completely new user interface and a modular add-on system.
The first module is called +QuickScan which, as the name implies, reduces the scanning time. It’s apparently a single-laser scanning algorithm that M&F invented for the Bevel (Review) and have now ported to the desktop product. This feature is an in-app purchase of $79 for existing users of the MFS1V1 — which is reduced to $499 on the Matter and Form site but sells for $399 on Amazon while stock lasts — but is included with the MFS1V2, which retails at $749.
The price surprises me because the press release on the Matter and Form website mentioned a price of $649. I also can’t find a listing of the scanner for $599 without the +QuickScan feature.
Hardware
The Matter and Form 3D scanner can fold into a small suitcase. The idea that this makes it portable is nice but I’m not sure if people would transport a desktop 3D scanner often. And it’s still too large to put in a big with a laptop. It’s made entirely out of plastic and is very light. It feels a bit cheap for a $749 product, especially compared to the Eora3D (Review) which is also a small laser-based desktop scanner that costs $599 on Amazon but made out of anodized aluminum.
The Eora3D doesn’t have a built-in camera and uses the one on your smartphone. But almost every modern smartphone camera sensor is better than the HD CMOS sensor in the Matter and Form 3D Scanner.
The electric turntable on the MFS1V2 is 16 centimeters in diameter.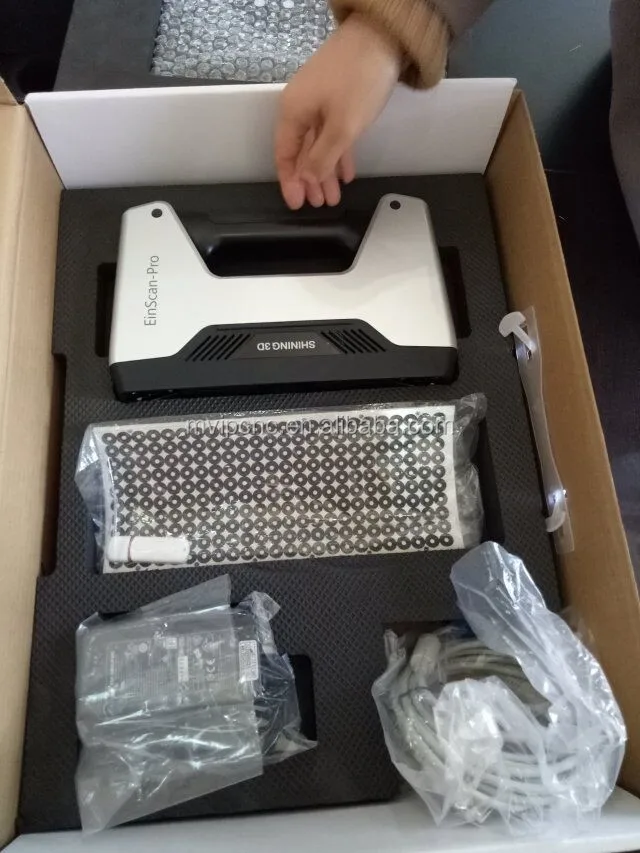 This is larger than the 12cm plate included with the Eora3D but notably smaller than turntables that come with most structured light scanners. For example, The EinScan-SE (Review) comes with a 20cm wide turntable. But that device costs $1299, $550 more than the MFSV2. According to the specs, the maximum diameter of scannable objects is 18cm so they can hang a bit over the edge of the turntable.
The scanner is all made out of one part, so the distance between the scan head and turntable is fixed. The head can move upwards to enable scanning objects up to 25cm tall, according to the specs. It’s noteworthy that while the turntable operated almost completely silent, the stepper motor that moved the head upwards is very loud. Luckily it only moves after each 360-degrees cycle and 5 times maximum.
The red lasers are Class 1, so they are eye safe. However, the downside of consumer grade red lasers is that they aren’t very bright so you’ll quickly run into contrast problems as I’ll demonstrate later in this review.
For comparison, the Eora3D’s Class 2 (also “eye safe”, but a bit less) green laser is notably brighter and offers more contrast on a greater variety of surface colors and characteristics. That effect is enhanced by using a better, more light sensitive smartphone camera and that, like our eyes, camera sensors are usually more sensitive to green than to red (or blue).
Besides the scanner, the box contains a calibration card and a rubber ducky that can be used as a test subject. Also included is a USB cable and a power adapter with add-ons for every thinkable international power outlet.
The scanner has a single button to turn it on and off. The idea of using the MF logo as a button is nice but the LED is very dim so it’s hard to tell if the device is on in average room lighting.
Finally, the specs state this scanner has an accuracy of “within ± 0.1mm”. Even if that is really true, actually getting that accuracy in scan detail depends on a lot of variables such as object color, material, lighting condition and the size of the object. I usually judge these figures the same as I do with mileage figures on cars: I’ll judge it myself after a long test drive!
Software
MFStudio is the big new thing. They could have just introduced the software without a new scanner but I do understand some of the marketing thoughts behind it. The good news is: the software is really nice! It’s very user friendly with clear instructions for turning the device on, calibration and scanning. Totally new is that you can make more than one scan with an object in various positions and align the results to create more complete 3D models.
All settings can be made though sliders and the live viewports respond to what you’re doing. That’s nice, but it still means you have to dial in exposure values for geometry and color capture manually and separately. It would have been great if the software was smart enough to do initial auto exposure in both cases. Manual override would of course be nice for advanced, but for beginners a single scan button would have been nice. I wouldn’t be surprised if MF would introduce a +AutoExposure add-on in the future.
You can select how high the scan head must go in 5 blocks and you can also opt to scan only a part of an object by limiting the turntable rotation to a minimum of 45 degrees. Unfortunately, the fact that the meshing algorithm always produces watertight meshes makes partial scanning useless for most purposes.
No matter what settings you change, you’ll always have a clear indication of the expected scanning time in the top of the interface. This is really important because scanning times on the Matter and Form scanners can be very long. Regular scanning can easily take up to an hour. Of course there’s now the +QuickScan feature that indeed greatly reduces the scanning time so it’s great to see indications between 1 and 15 minutes, depending on various settings. The question of course is how much this speed increase impacts scan quality.
Calibration
Most light or laser-based scanners need calibration but the fact that this scanner has a fixed camera-to-turntable distance means that you won’t have to do it often.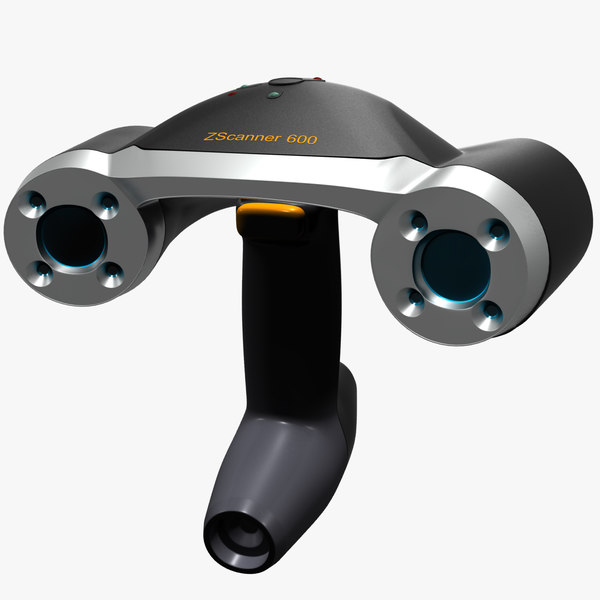 Calibration is also simple and quick: just put the card on the turntable in two positions and you’re done within minutes. I normally hate calibration but this is one of the fastest procedures I’ve every encountered on a desktop 3D scanner so kudos for that.
Scanning in Regular Mode
If your project needs the best quality you’ll have to use the regular scan mode. It uses both lasers which are positioned in different distanced from the camera. So the scan will contain the least amount of holes and scan data from two laser lines makes the procedure more robust than using a single laser.
Yes, regular mode is slow. Scanning a 10cm tall toy figure would require the height to be set to 3/5, although I found that setting it to 4/5 filled in a little bit more details on the top. If you want to scan just geometry, a scan would take 37 minutes. With color capture enabled, it jumps up to 57 minutes. That might be fine if you just want to scan stuf for fun. And people that use desktop 3D printers are pretty well used to lang waiting times for printing small, fun objects.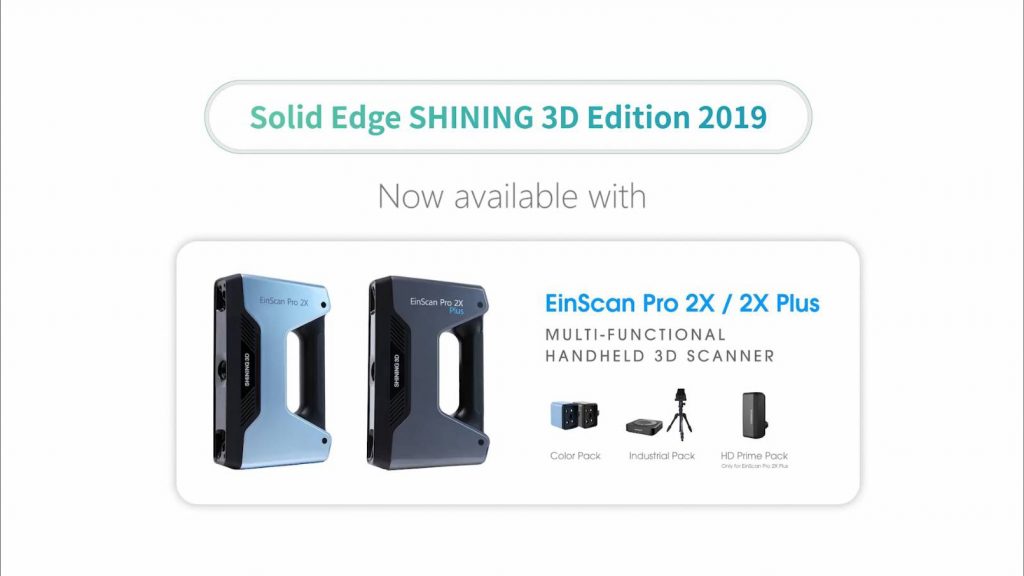 But for more professional use cases where you’d want to scan multiple objects it’s very slow. For comparison, an entry level structured light scanner like the EinScan-SE an scan a small object like this in less than four minutes.
In regular scan mode the turntable stops many times (I guess 360 times but I didn’t count) to allow a capture of the first laser, second laser and then a color capture with a different exposure value. After a full rotation, the scan head moves up and the procedure is repeated. It’s nice to see the point cloud being built in real time on your screen. And in this mode this is also in color. There’s a clear indication of the remaining scanning time.
Color capture in this mode is made from stills so RGB exposure time is automatically increased when you increase the brightness. This does further add to the total scanning time but it does prevent motion blur in the final texture. It’s good to know that while the point cloud is colored, the actual texture of the final meshed model will be generated through UV-mapping based on the separately captured HD color frames.
Scanning in +QuickScan Mode
In QuickScan mode (let’s drop the + for better reading) you have to choose if you want to use the first or second laser. The first one is further away from the camera which will result in scans that are more accurate but can possibly contain more holes. Laser two will capture more of the object but with slightly reduced quality.
In this mode I could scan the same 10cm tall toy figure in 6.5 minutes instead of almost an hour, so that’s a huge speed increase. The scanner can scan this fast because the turntable now rotates in a continuous motion. It does one pass for the geometry with the chosen laser on and a second pass for color capture with the laser off and a higher exposure on the camera. Keep in mind that the highest exposure values can result in motion blur, depending on the lighting conditions. As a hack, this mode does allow to switch on studio lights after the laser pass and switch them off again when the scan head moves upwards.
It’s noteworthy that while QuickScan does capture color it does not color the point cloud. It will UV-map the model in the meshing phase with the captured color frames.
Anyway, QuickScan is faster. And those scan times are realistic for a $599 device in my option. In most cases it does result in a lesser result though. If that’s a problem really depends on the object. I found that most QuickScans has more holes in them. And because the software fills all holes when meshing this can result in unwanted surface details.
I’ve added results from both modes later in this review.
Unscannable Colors, Materials & Shapes
In general 3D scanning has the problem that not every object is scannable. The usual problems are surface characteristics like transparency or glossiness. And many 3D scanners have a hard time scanning surfaces that are very dark or black. But as I wrote before, the Class 1 red lasers on the Matter and Form 3D scanner had problems with relatively light colors, notable blue and red. Even in perfect lighting conditions I sometimes couldn’t capture geometry of objects made of red or blue plastic.
Where did Miffy’s arms go?
Some parts also can’t be captured because the lasers are fixed and only the turntable is moving. So these parts are literally in the shadow of other parts. For comparison, the Eora3D’s single laser also moves horizontally in a sweeping motion. Below is an example of a scan of a dog figurine that’s clearly a hard shape for this scanner to capture. And this was made in regular scan mode.
Lighting Condition Hacks!
Lighting conditions for this scanner are tricky. I found that to get the best contrast on the lasers, the room lighting should be almost off. But that of course does greatly impact color capture. The design of the device also makes it hard to light the object properly from the front with external because the casing is so close to the turntable.
Directional light from windows, even on an overcast day, can also impact scan quality of both the geometry and color. So I ended up placing the whole scanner inside a $70 Foldio 2 light tent. I didn’t use the LEDs in the tent itself but the semi-translucent white material of the tent made the scan area dark enough for proper laser contrast and diffuse enough for proper color capture. Depending on the surface characteristics of the object I switched on external studio softboxes to get the best geometry/color-capture balance.
Christmas vibes!
This experiment made me realize that it’s a pity that Matter and Form didn’t put more thought into upgrading the hardware. Especially now that the QuickScan feature does a separate color capture pass, a built-in LED light that would automatically switch on during color capture could greatly increase texture quality without any hassle.
In the photo above I’ve attached a $1.49 USB-powered LED Strip to the inside of the casing which I plugged in and out manually. It’s a bit short and not very bright, but actually works pretty well as a proof of concept. If only the inside of the casing was white like the V1 model, which would have allowed for more diffuse light. But then there’s office paper!
Scan Density vs Size
An interesting thing I found was that because of the fixed amount of line captures during a 360-degree rotation, object with a small diameter result in denser point clouds than larger objects. For objects wider than 8-10cm there’s quite a bit of spacing in between them, causing a loss of detail. It would require a lot more captures per rotation to fill these in but there’s no setting for that.
Editing & Aligning
In the new MFStudio you can add an unlimited amount of scans to a project. In practice you’ll probably make two scans with an object in different positions. You can use a brush tool to select and clean unwanted points.
You can clean noise with a slider but for me it wasn’t entirely clear when I was deleting actual noise of started deleting valuable data. But it’s a visual tool and the software has a great undo feature so you can experiment.
If you’ve cleaned your scans you can align them by clicking the A icon on the base scan and than the A icon on the scan that needs to be aligned. This is an automatic feature so success will depend on distinctions in shape of the object and the overlap between two scans. You can’t assist the algorithm manually so you’re either in luck or not.
While you can hide, unhide or delete scans in the project window, I greatly miss a way to duplicate scans. That feature would allow users to experiment more with different variations of editing an noise reduction.
Meshing
Meshing is a separate tab with only two options: a quality slider and a checkbox to enable or disable texturing. The software fills all holes by default, and there’s no way to turn this off. Great for 3D printing purposes but very annoying if you want to create a 3D asset for digital use. A slider to control hole filing is an absolute necessity in a future update of MFStudio in my opinion.
Alternatively you can export the raw point cloud data and perform meshing externally but you can export the captured color frames so you can’t perform UV-mapping then.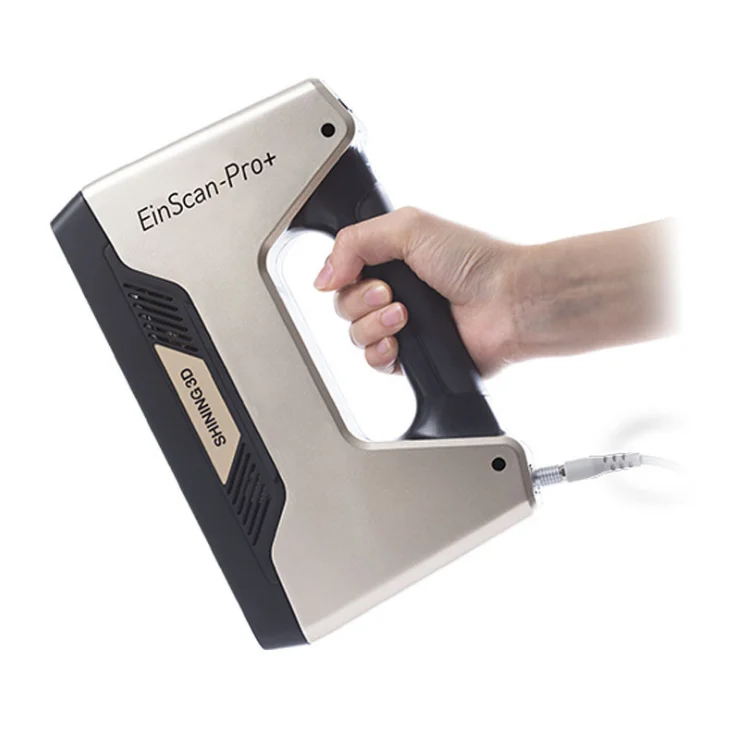
While meshing just the geometry is pretty fast on my Surface Book with i7 processor and 16GB of RAM, the texturing algorithm takes a lot of time and is very resource intensive. There’s just an animation and no status bar so I often wasn’t sure if the program had crashed or was still working hard. It actually always finished but sometimes after 20 minutes for a 10 cm tall model and up to an hour for large objects meshed at the highest quality setting. I can imagine that this will be a problem on less powerful computer hardware.
What I also miss is a way to edit the final texture in terms of brightness and contrast. This would have been a great way to counteract the fact that geometry capture works better in lower light conditions. Luckily you can edit the texture files easily in a photo editor of choice as you’ll see below.
As you will see in the results below, some of the textures have black parts on them. Sometimes it’s just a spot, sometimes it’s a larger part.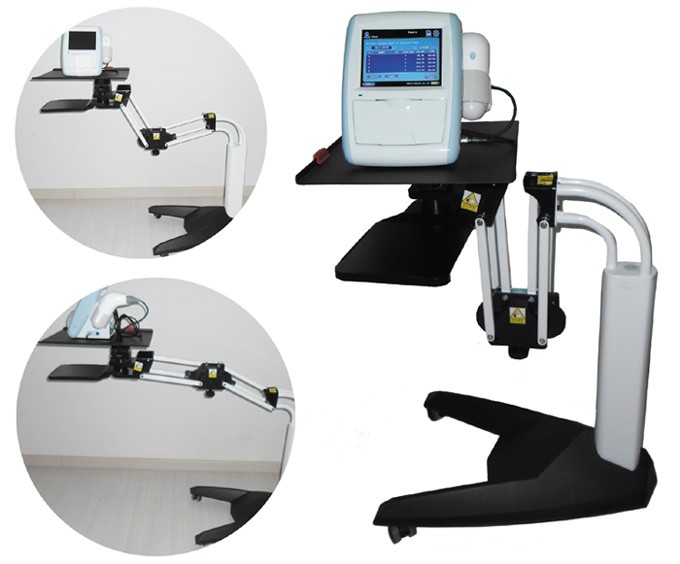 Either way, they shouldn’t be there and I hope it’s a bug that can be fixed.
Exporting
You can export the point clouds as PLY or XYZ files and meshes as STL or OBJ files. The latter includes a UV Texture map. It’s good to know that, regardless of using the regular or QuickScan option, the OBJ always has a separate texture map. It’s usually a 3840 x 1920 map that consists of 6 views of the model.
It’s not an efficient UV map at all but it is very easily editable in a photo editor like Photoshop this way, which I actually like.
It would be great if Matter and Form added a few more export formats and maybe a Sketchfab exporter in the future. The embeds below were made by uploading the exported OBJ files. Finally, it’s also noteworthy that after the time-consuming meshing and texturing phase, exporting to OBJ again can take a while, even on a PC with an SSD drive. So there’s a lot of waiting involved.
Results
Below is a scan of the toy you see in the photos in regular scan mode, followed by the same object made in QuickScan mode.
Small Toy (Regular Scan) – Matter and Form V2 by Nick Lievendag | 3D Scan Expert on Sketchfab
Small Toy (+QuickScan) – Matter and Form V2 by Nick Lievendag | 3D Scan Expert on Sketchfab
As you can see, the textures both scans are similar, and not as sharp as I had hoped. If you press the 3 key on your keyboard to view the models without texture, you can see that the geometry is also similar but the regular scan did capture more actual details of the front of the ears while the QuickScan uses more hole filling. But that’s a small difference. In general I think that for this model the QuickScan feature is similar enough to be the one to choose. However, I do find that both (and all) results contain quite a lot of surface noise since the actual plastic toy is completely smooth. Smoothing the noise externally would also reduce the details in the necklace.
Below is another example of another small toy. It’s a combination of a horizontally and vertically placed scan with the pre-meshing noise filter of MFStudio at full effect:
vtech toy (full noise filter ) – MFS1V2 by Nick Lievendag | 3D Scan Expert on Sketchfab
As you can see the noise filter has removed quite some noise compared to the other toy but you’ll probably never get the super smooth results that structured light scanners can deliver. It’s also noteworthy that this figurine again doesn’t have complete arms. Whether that’s because of the red color, specularity or position of the laser (or a combination of all) isn’t totally clear to me but scanning objects like this doesn’t result in complete models.
Next up is a toddler-size sneaker that just fits on the turntable. It’s matte and white so it should be ideal for any scanner, except for maybe the black stripes. Again I aligned two scans: one with the shoe on its sole and one positioned on its side.
Toddler sneaker – Matter and Form V2 by Nick Lievendag | 3D Scan Expert on Sketchfab
I don’t like the texture quality but the geometry is actually quite usable although there’s also still quite some noise. And the scanner wasn’t able to capture the patterns on the nose of the sneaker.
To better illustrate which parts of the mesh above are actual captured details and which are generated through hole filling, here’s the unedited point cloud from the MFS1V1:
Toddler Sneaker (Point Cloud) – MFS1V2 by Nick Lievendag | 3D Scan Expert on Sketchfab
You can clearly see that the laser line captures have been further apart in near the front and back. Combining the two scans made the lines into a grid which does create a better mesh but that this has quite large holes in it.
This point cloud also allows me to best compare the scan data of the MFS1V2 with the Eora3D because the latter didn’t have a high quality meshing feature at the time of testing (I will re-test it soon).
Toddler Sneaker (Point Cloud) — eora3D Studio by Nick Lievendag | 3D Scan Expert on Sketchfab
It’s really hard to compare scans this way but to me it shows that the Eora3D captures a denser point cloud throughout the object with less noise.
For a totally different comparison, here’s the same sneaker scanned with the EinScan-SE structured light scanner. The embed below is a fully textured mesh.
Toddler Sneaker — EinScan-SE by Nick Lievendag | 3D Scan Expert on Sketchfab
It might be comparing apples and oranges, but even though the texture of that scan will need some retouching it’s sharp and usable. And the geometry is a lot more detailed. It’s also smooth where it needs to be and textured where the actual model has actual depth patterns. You won’t be surprised if I say I like the last result a lot better. And it was also a lot faster to scan than both the laser scans.
Onto something bigger, in this case an old jar that’s 18cm wide and 14cm wide at the handles. This is actually the largest object I could fit on the Matter and Form V2 that also has some definition on the top part.
Old Jar (+QuickScan) – Matter and Form V2 by Nick Lievendag | 3D Scan Expert on Sketchfab
I’m happy that the Matter and Form V2 is able to scan objects beyond the small trinket category, but there are quite a lot of part’s I’m not really happy about. The texture has funky black parts and the color changes upwards. That might very well be because of changes in room lighting during scanning (the texture is scanned in 5 different height passes) but that further proves that that approach has downsides. I was surprised to see that the edge of the opening on the top has been captured quite good but unfortunately the same can’t be said about the handles of the jar.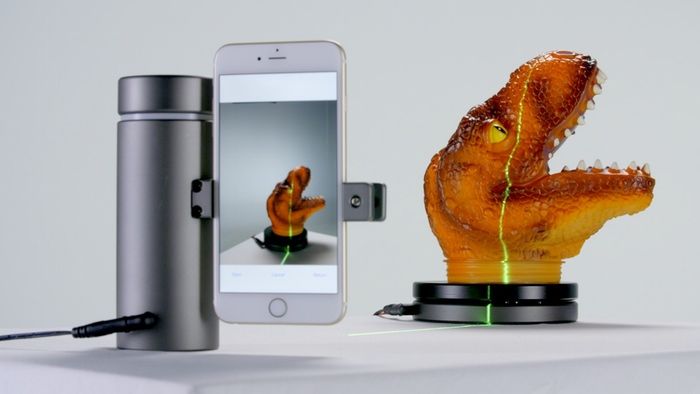 I also couldn’t put this object on the turntable sideways because the opening of the jar would almost touch the scan head and completely block the lasers from reaching the handles.
Putting the same model on the larger turntable of the EinScan-SP (which will give similar results as the SE for objects like these) which also has a larger distance to the scan head (even when mounted on the included stand), I could easily scan to separate positions and combine them into a more complete (and mode detailed) model of the jar:
Old Jar — EinScan-SP by Nick Lievendag | 3D Scan Expert on Sketchfab
To wrap up, here’s a scan of the small, full color sandstone 3D print you saw in some of the photos above. I’m including it because it seems to be the ideal subject for this scanner: it’s matte, it’s small, it’s bright and it doesn’t have arms (or other extruding parts). It’s a regular scan.
Lorentz 3D Print (Regular Scan) – MFS1V2 by Nick Lievendag | 3D Scan Expert on Sketchfab
Even for this object, the top of the head and shoulders couldn’t be captured in a single scan in standing position. I could have improved the texture with better lighting conditions but the geometry is good. There’s more noise in the geometry than the actual sandstone material has, though.
Conclusion
The V2 is an evolution of the original Matter and Form 3D scanner from 2014 but it’s not a revolutionary new product. No major hardware parts were changed so it’s a combination of very small hardware design changes and a large change in the software. This might indeed result in higher accuracy from a measurement perspective, but it will depend on your use case if that is relevant.
While this the MFS1V2 is capable of capturing a lot of details for a scanner of this price, the output is inconsistent. Some objects turn out okay while others are disappointing. This is true for any scanner to a certain extend but extra noticeable on this one. The fixed setup greatly limits the size of scannable objects and on top of that the red laser has problems with certain surface colors, especially when they are even a bit glossy.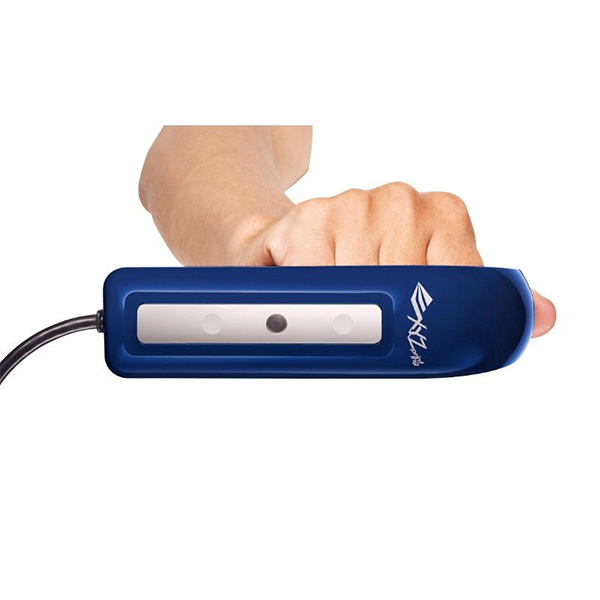 The scanner very much prefers matte surfaces so you might have to treat objects with matting spray to get better results. But even when doing so, scans of smooth objects can contain quite a bit of noise.
The position of the lasers in relation to the camera is fine for some object but can be problematic for others. Even when using both lasers in regular scan mode, complex objects often contain holes because the lasers can’t reach extruded parts or into some cavities. The new MFStudio software does allow aligning multiple scans but not all objects (certainly not larger ones) can be put sideways on a turntable and the increase in total scan time also makes doing this unrealistic, at least in regular scan mode.
You also can’t just put the scanner anywhere as room lighting conditions greatly impact the scan quality. If you want to have control over both geometry and color capture, you’ll have to put the scanner in a light tent or something similar.
The new, single-laser +QuickScan feature is a big time saver. It brings scanning most object under the 10 minute mark which is a lot more realistic than scan times of an hour or more in regular scan mode. Again, it works nicely on some objects but depending on the laser you choose you can end up with a model with even more holes. The software will fill those holes automatically when meshing but that might be an unwanted feature for purposes other than 3D printing.
While the scanning phase does offer an indication of the remaining time, meshing does not and if you want textures it can take very long. There’s no progress bar at all and sometimes it took up to an hour on my quite powerful Surface Book. The resulting textures sometimes contain black parts or other inconsistencies.
Need Tailored Advice?
Want to know if scanning with a laser or with structured light is better for your specific use case?
Consider my affordable Consulting Service.
I consult for individuals and startups and educational facilities, as well as large Fortune 50 corporations, so don’t hesitate to send me an email with your 3D scanning challenges.
Ultimately, even though the MFS1V2 is quite picky about the objects it can scan and doesn’t always produce consistent, complete results, there aren’t many other scanners (see alternatives in the panel below) in this price range that can scan small objects with this level of detail. Even if you would clean the scans of the surface noise, you will still have a lot more details than any depth sensor (like Structure Sensor or Intel RealSense) can capture on objects this small.
For $749 I expected a bit more of this updated hardware/software combination. As it stands now the $599-$649 price tag mentioned in the original press release would make a more sense te me. I’m also not convinced by the add-on software business model. I hope that M&F will also keep adding free improvements to MFStudio and won’t be charging users $79 for each new feature.
Using laser lines still seems to be the only way to produce a commercially viable desktop 3D scanner for less than $1000, but with structured light scanners coming very close to that mark I’m very curious how this market will develop in the coming years.
Alternatives
Besides open-source DIY laser scanner kits like the $115 Ciclop, there are no other computer-connectable desktop 3D scanners that cost less than $750 so there’s little competition for the MFS1V2.
The only logical competition in the commercial laser scanner range is the $599 Eora3D. That smartphone-based device has the benefit of using a more powerful laser your smartphone’s great camera. It had the downside of working with complex 3D calculations and editing on a mobile device but Eora3D Studio did just add iPad (Pro) support so you don’t have to do everything on a smartphone anymore. However, I should note that when I last tested the Eora3D Studio app, the alignment and messing features weren’t well enough developed to do proper mesh-to-mesh comparisons with the Matter and Form V2.
If your pockets are a bit deeper than $749, there’s the $1299 EinScan-SE structured light scanner. Like the MFS1V2 it also works on Windows and Mac (the latter is in beta) but it does allow scanning objects with more diversity in surface characteristic, that are a lot bigger, in less time, and often with less noise in the geometry. It also offers 0.1mm accuracy if that’s important to you and updates of the EinScan software have so far always been free.
If you’re on a budget and just want to make 3D scans of small stuff for fun (meaning you don’t care about the increased accuracy), probably the best alternative for the Matter and Form 3D Scanner V2 is the V1 that’s now $399 on Amazon while supply lasts. You can use it with the new MFStudio (download here for free) and get the +QuickScan feature as an in-app purchase for $79, which I recommend.
Subscribe to my Monthly Newsletter
Get great contents delivered straight to your inbox everyday, just a click away, Sign Up Now.
Email address
90,000 3D printed bathroom taps from American Standard! 3D printing crane!Apr292016
3D printed bathroom faucet from American Standard!
Without a doubt, everyone who is planning a renovation dreams of bringing something completely special to their home, adding original and unusual elements to the interior, the analogues of which will be difficult to find.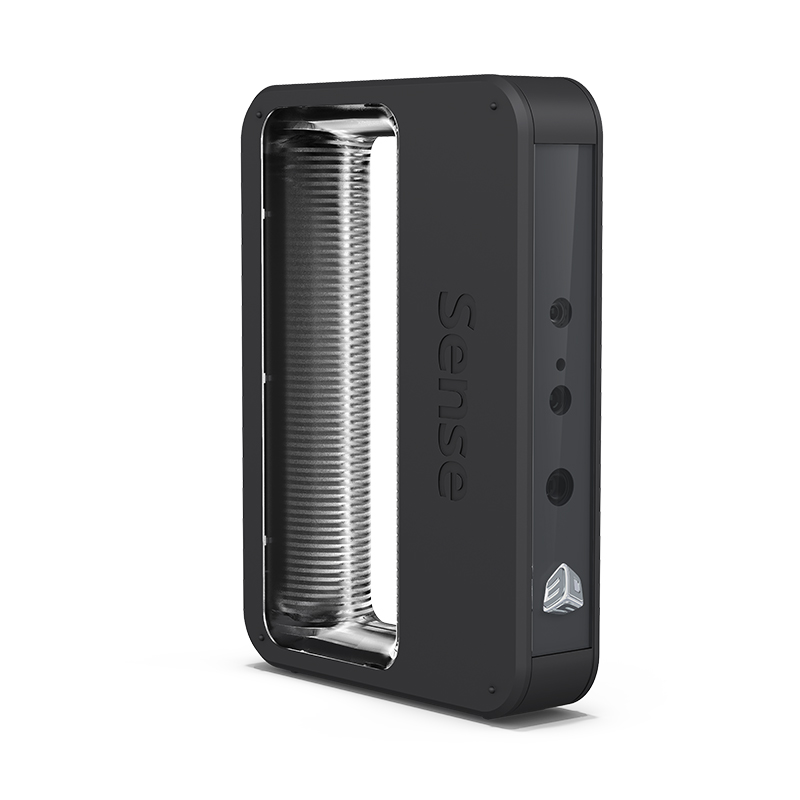 Usually, the fulfillment of such desires depends on the material well-being of a person, since exclusive, custom-made things are unlikely to please the buyer with a low price. Another option for solving this issue is to independently manufacture the necessary product. However, this method, in addition to a good imagination, requires certain skills in working with tools, which not everyone can boast of.
3D printing crane
3D printing crane!
But today we will talk about the third method, which has become available thanks to the development of innovative technologies - the use of 3D printing to create functional and aesthetic interior elements. And let's consider this option using the unique 3D-printed products of American Standard Brands as an example - elegant bathroom faucets that not only fully perform their functions, but also please with an attractive appearance. A line of amazing 3D printed metal faucets is called Shadowbrook and its innovativeness has earned the organization a Platinum A'Design Award in the 3D printed molds and products category.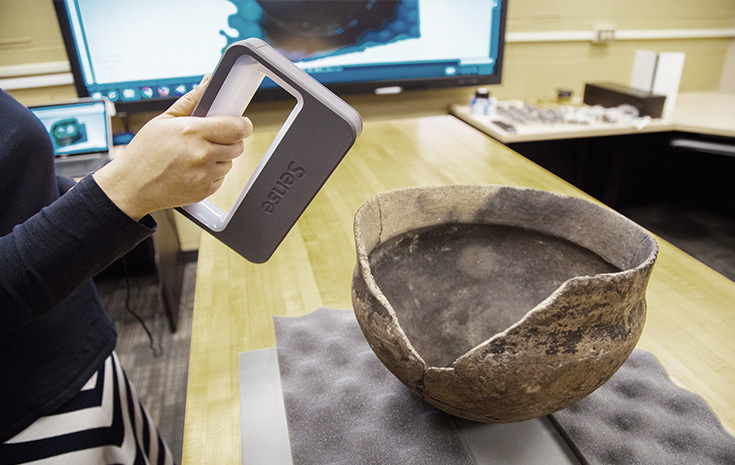
In fact, these faucets are so unusual and so complex in design that most people look at them for a while and wonder how the water flows through this original system. Thanks to 3D printing with metal (which is tested and proven non-toxic), the company has managed to create a real work of art from such a familiar thing as a water faucet. Using SLS printing technology, developers produce highly detailed elements that are mesmerizing with falling water with a waterfall effect. It is noteworthy that without 3D printing, the manufacture of such products would not have been possible. And the unusual design affects not only the external perception of the taps - it also saves up to 1.2 gallons of water per minute.
3D printed crane!
This approach will certainly appeal to all lovers of exclusive solutions in interior design. It is easy to guess that a significant advantage is the ability to design almost any design. 3D modeling technology removes most design restrictions.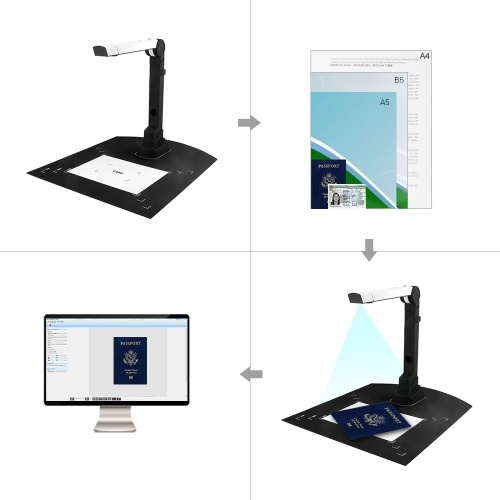 Now, if desired, any of your fantasies regarding stylish decor elements can be realized quickly and easily. Unfortunately, due to the lack of distribution of 3D printing technology, this method will not be widely available at the moment. But, apparently, in the future we expect a large-scale transition to additive manufacturing technology.
3D printed crane!
Back to main page
REC "Composites of Russia" MSTU. N.E. Bauman (MIC)
1. The complex should allow the following operations:1.1. To obtain compositions with homogeneously mixed components, such as heat-resistant dielectric superstructural polymers and nanomaterials (graphene, nanoclay, etc.).
1.2. To produce parts from thermoplastics by injection molding, including standard samples of various shapes (blade, bar, cylinder, etc.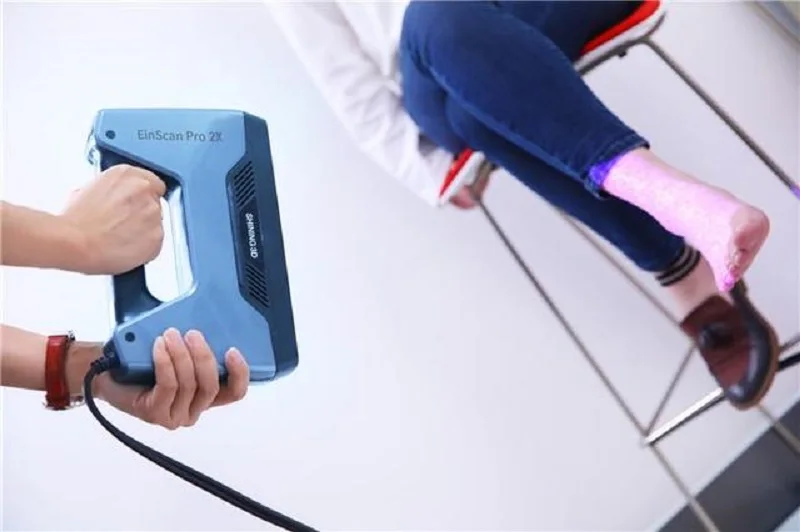 ) designed to establish the physical and mechanical characteristics of base polymers and filled with dispersed composites.
1.3. Synthesize superconstructional polymers such as PSF, PES, PEC, PEEK, PEI, etc.
1.4. To produce tapes of polymer composite materials by impregnating the reinforcing material (carbon filler) with superstructural polymers such as PSF, PES, PEC, PEEK, PEI, etc.
1.5. Have a node for controlling the geometry of products of various shapes.
1.6. Have a node for determining the molecular weight characteristics of superstructural polymers using high performance liquid chromatography with a mass spectrometric analyzer.
2. The scientific laboratory complex should include the following units:
Characteristics of the units of the complex:
2.1. Node (Device) for preparing a composition with homogeneously mixed components:
Drive:
Motor power - 2.2kW
Type of control - computer with digital indicators or LCD touch panel
Auger speed - 1 to 800 rpm
Maximum torque (at 600 rpm) - 2×18 Nm
Extruder:
Construction - Co-rotating twin screw
Auger diameter - 16mm
Cylinder lengths - 32 to 52 L/D
Max. cylinder heating temperature - 400°C
Cylinder and screws - stainless steel (M390)
Cylinder lining surface hardness - min. 70 HRC
Extrusion pressure - up to 200 bar
Dynamic bearing load - up to 3.2 kN
Die hole diameter - no more than 3 mm
Material Feed - Volumetric Hopper
Accessories:
1) Vacuum degassing system with vane pump with protective filter:
Material: stainless steel steel
Must contain sight glass, vacuum adjustment valve and vacuum gauge.
Vacuum pump vanes must be self-lubricating.
2) Auxiliary feed hopper positioned at 90° to the main feed hopper to feed material into the barrel section (with two powder screws).
3) Feeder bracket to be installed to feed into the main mouth of the extruder and dispense into the side feeder.
4) Strand equipment:
- Housing for installation of strand processing equipment (bath and granulator):
Should be the same height as the bottom body of a twin screw extruder to easily form a comfortable base for the whole line.
Must have wheels with locks for ease of movement.
- Cooling bath:
Material: stainless steel steel
Must be equipped with two immersion rollers
Immersion rollers must be height adjustable
Must be equipped with a strand-drying vacuum device to remove moisture.
- Compact granulator:
Number of cutter edges - 6 pcs,
Edge material - high quality carbon steel
Rotation speed - 50 to 1400 rpm.
- Strand feeder for granulator, variable speed
2.2. Unit (Device) for the manufacture of parts and samples from thermoplastics by injection molding with interchangeable molds (spatula, bar, cylinder, etc.) designed to establish the physical and mechanical characteristics of base polymers, including filled ones.
Injection unit:
Injection volume - min. 58 cm³
Injection stroke - 95 mm
Auger diameter - 28 mm
Nozzle clamping force - not less than 1.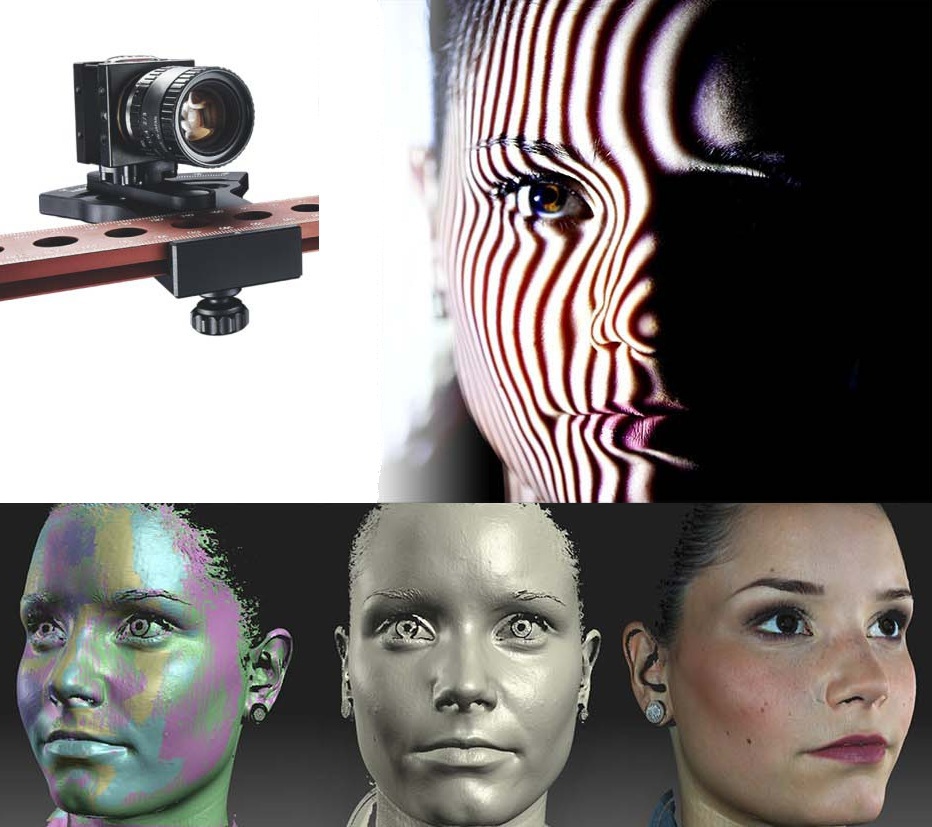 5 kN
5 kN
Injection speed - not less than 330 mm/s
Injection pressure - 250/190 MPa
Auger speed - 0-450 rpm
Clamping unit:
Locking system - double toggle
Auger diameter - 28 mm
Clamping force - 500 kN
Opener stroke - 250 mm
Distance between columns – 360×320 mmxmm
Board size – 500×470 mmxmm
Double plate mold height (min-max) - 350-150 mm
Stroke - 70 mm
Max. pusher force - not less than 20 kN
General indicators:
Heater power - not less than 7.2 kV
Input power supply - AC200V±10% 50/60Hz±1Hz
Weight - no more than 3000 kg
The following functions must be provided:
- automatic clamping force optimization;
- automatic mold height adjustment;
- intelligent control of pressure, dosing and injection parameters;
- quality control of the casting process.
- Extended decompression control with auger reverse rotation after plasticizing
- Checking volume after mastication and adjusting speed, pressure and decompression parameters in automatic mode
- Material backflow control
- Closing check valve before injection
- 100% injection dose accuracy control
- Guaranteed the same, independent of the condition of the granulate, the dose of plastic from injection to injection
Check valve wear check without dismantling the screw pair
- Possibility of scheduled valve replacement
- Pre-injection function
- Mold and ejector protection system
- Automatic clamping force adjustment
- Energy recovery system
- Automatic cleaning of the material cylinder at the end of work and/or emergency stop
- Decompression control with automatic reverse rotation of the auger after dose
- Locking ring wear monitoring on controller monitor
- Automatic temperature control of the material cylinder and hot channels at shutdown and/or emergency stop
Package Contents:
- Pneumatic valves, 2 channels, 800L/min
- Distribution of the cooling system for the mold with flexible hoses
- Manifolds for mold cooling connection on fixed platen
- Electrical panel with sockets for connecting external devices
- Hopper for granular material
- Tool kit and spare lubrication cartridge
- Commissioning
-Training
2. 3. Unit (set of equipment) for the synthesis of superstructural polymers such as PSF, PES, PEC, PEEK, PEI, etc.
2.3.1. Tank for diluting the reaction solution
Volume - 50l
Material - stainless steel AISI304 (08X18H10)
Thermal insulation - no;
Lid type - hinged 1/3;
Position - vertical;
Stirrer - low-speed frame stirrer up to 100 rpm,
Mixing power - 1.1 kW;
Drain valve disk - DN=50 mm for product unloading;
Type of supports - racks
2.3.2. Druk filter 1/50
Purpose - to filter the dilute reaction solution from salts
Volume - 50l
Material - stainless steel
Presence of an agitator - a frame agitator adjacent to the grid (gap 0.5-0.7 mm).
Pressure - 5atm
Lid type - removable
Interchangeable steel mesh mesh size - 5 µm
Spare nets - 2 pcs.
Diameter of bottom drain with side outlet and ball valve - D30
2. 3.3. Tank for planting polymer from solution into water
Volume - 100l
Material - stainless steel AISI304 (08X18H10)
Thermal insulation - no;
Stirrer - high-speed stirrer, cutter 1500 rpm, power - 3 kW;
Lid type - hinged 1/3;
Location - vertical;
Drain valve disk - DN=50 mm for product unloading;
Type of supports - racks
2.3.4. Container for washing polymer powder from solvent and salts
Volume - 100l
Material - stainless steel AISI304 (08X18H10)
Stirrer - low-speed frame stirrer up to 100 rpm.
Thermal insulation - no;
Lid type - hinged 1/3;
Position - vertical;
Drain valve disk - DN=50 mm for product unloading;
Type of supports - racks
2.3.5. Druk filter 2/50
Purpose - for filtering and washing aqueous suspension of polymer
Volume - 50l
Material - stainless steel
Presence of an agitator - a frame agitator adjacent to the grid (gap 0. 5-0.7 mm).
Pressure - 5atm
Lid type - removable
Replaceable steel mesh size - 30-50µm
Spare nets - 2 pcs.
Bottom drain diameter with side outlet and ball valve - D30.
2.3.6. Drying cabinet
Purpose - for drying polymer powder granules
Material - stainless steel
Type of ventilation - forced
Temperature - up to +200°С
Heater power - 4.5 kW
Number of trays - 9 pcs.
Capacity - 90 kg
Overall dimensions - 1440x800x610 mm
2.3.7. Slurry pump
Purpose - for pumping suspensions of polymers
Quantity - 4pcs
Productivity - 1m3/hour
2.3.8. Barrel pump
Purpose - for pumping viscous organic solvents from drums.
Pump type - electric.
Mains voltage - 220 volts.
Quantity - 2 pcs.
2.3.9. Druk filter compressor
Type of compressor - piston
Productivity, l/min — 420
Pressure, bar — 10
Power, kW — 2. 2
2
Operating voltage - 220 V
Quantity - 2 pcs.
2.3.10. Reverse osmosis plant for water desalination
Purpose - to obtain demineralized water intended for washing polymer
Productivity - 0.6m3 / day, or 25l / hour.
Electrical conductivity of water - no more than 5 μS/cm.
2.3.11. Scales
Type - platform
Weighing limit - 60kg
Reading resolution - 10/20g
Minimum load - 0.2 kg
Completeness: weighing module + weighing terminal
Terminal body material: stainless steel steel
Overall dimensions of the terminal (LxWxH) - 260x161x52mm
Quantity - 1pc
2.3.12. Scales
Type - laboratory
Weighing limit - 3kg
Reading resolution - up to 0.05g
Minimum load - 0.0025 kg
Quantity - 1pc
2.3.13. Scales
Type - laboratory
Weighing limit - 600g
Reading resolution - up to 0. 01g
01g
Minimum load - 0.0005 kg
Quantity — 2pcs
2.3.14. Scales
Type - Laboratory
Weighing limit - 300g
Reading resolution - up to 0.005 g
Minimum load - 0.0001 kg
Quantity - 1pc
2.3.15. Laboratory oven
- Operating temperature - up to + 300 ° С;
- Accuracy of maintaining temperature (in the range up to 250 ° C) - ± 1 ° C;
- Temperature setting resolution - 0.1 ° С;
- Temperature irregularity by volume - ± 2 ° С;
- Timer time range - 9999 min;
- Standard / maximum number of installed shelves - 2/13 pcs;
- Permissible distributed load on the shelf - 15 kg;
- Chamber volume - 65 l;
- Chamber dimensions (WxDxH) - 405x350x458 mm;
- External dimensions (WxDxH) - 615x610x875 mm;
- AC power supply (50 Hz) - 220 ± 10 V;
- Maximum power consumption - 1600 W;
- Weight - 68 kg.
2.3.16. Vacuum oven
-Temperature: up to +200°С
- Pressure adjustment: from 10 to 1100 mbar.
- Chamber dimensions, WxHxD: 385 x 305 x 250 mm
- Cabinet dimensions, WxHxD: 550 x 607 x 400 mm
-Chamber volume: not less than 29l
- Weight: not more than 55 kg
- Thermoshelf included / max: 1/2
-Max. load per shelf: 40 kg
- Power: 420 W
2.3.17. Vacuum diaphragm pump for oven
- Pumping speed: 10 l / min;
- Vacuum: up to 8 mbar;
- Fitting for hoses with an internal diameter: 10 mm;
— Permissible gas and ambient temperature: +5…+40°С;
- Power supply: 230 V, 50 Hz;
- Motor protection class: IP44;
- Power consumption: 90 W;
- Weight: 6.9 kg;
- Dimensions LxHxW: 281x187x140 mm;
- Pump head material: PTFE;
- Diaphragm material: PTFE coated;
- Valve material: FFPM rubber (perfluorinated rubber)
2. 3.18. Melt flow tester
- 10 min melt flow rate - 0.1 - 99.9g
- Temperature range in the working chamber - from +50 to +450 ° С
- Discreteness of setting the temperature of the chamber - 1 ° С
- Time to enter the operating mode - no more than 40 minutes
2.3.19. Laboratory fume hood
Dimensions -1840x690x2000 mm
Worktop material - ceramics
Steel flange diameter for ventilation connection – D=200 mm
Quantity - 1pc
2.3.20. Fume cupboard fan
Compatible with 1840x690x2000mm fume hood
Type: channel
Productivity - 1700 cubic meters per hour
Quantity - 1pc
2.3.21. Bag Sealer
Type - desktop;
Operating principle - pulsed;
Type of control - manual;
Purpose — for packing polymer granules and powders in plastic bags;
Sealing length - 500mm;
Sealing width - 3 mm;
Blade presence - yes;
The maximum thickness of the material to be welded is 0.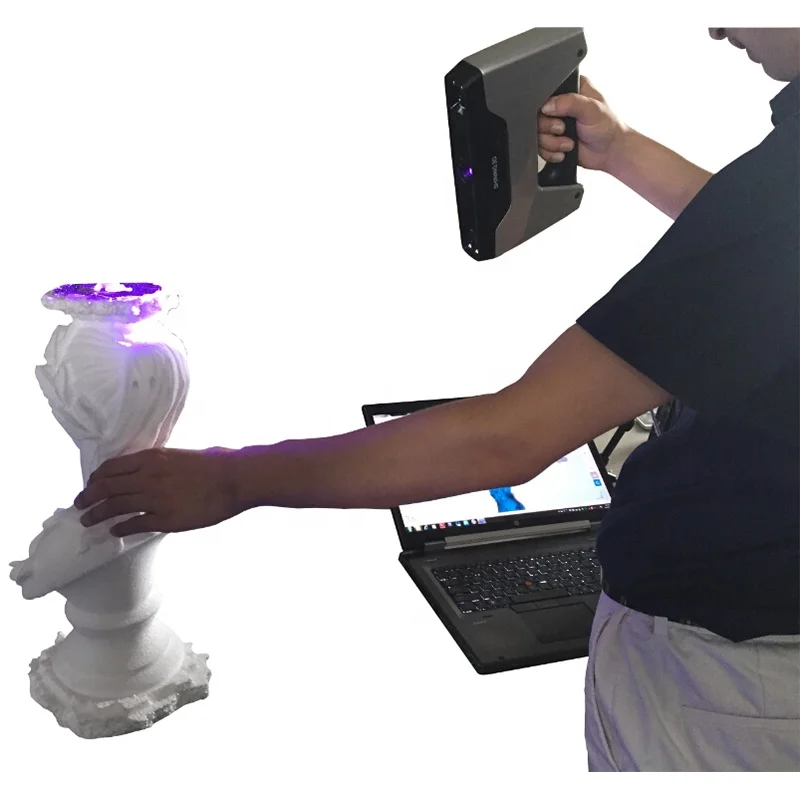 3 mm;
3 mm;
Sealing time: 0.2 to 1.3 sec.
2.3.22. Heated magnetic stirrer
Mixing volume - up to 20-25l
Heater power - 600 W
Heating plate diameter - min. 135 mm
Rotation speed - 0/50 to 1700 rpm.
Max. length of magnetic stirrer - 80 mm
Connector for contact thermometer - PT1000
Heating temperature range - 50-310 °C
Heating temperature fluctuation - 1 ± K
Heating rate - 6.5K/min
Quantity - 3 pcs.
2.3.23. Overhead Lab Stirrer
Type - top drive with tripod
Sample volume (H₂O) - up to 25 L
Rotation speed - 50 to 2000 rpm
Rated power - 120 W
Speed setting - manual - stepless
Dynamic viscosity - up to 25000 mPa*s
Chuck clamping diameter - 1 to 10 mm
Quantity - 4 pcs.
2.3.24. Dissolver
Type of container - interchangeable
Bed material - Steel St3
Container volume - 12l
Tare locking mechanism - latches
Cutter speed - 3000 rpm
Cutter motor power - 0.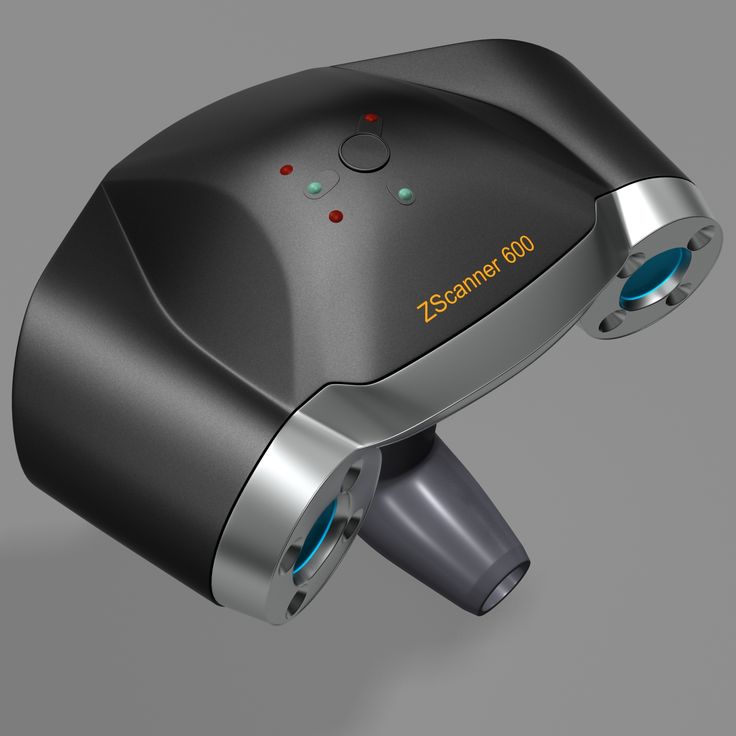 55 kW
55 kW
Frequency converter - Yes
Shaft material - Aisi 304
Cutter material (three configurations) - Aisi 304
Loading hatch KF - 40 mm
Network - 380V/50Hz
Dimensions (D*H*W) – 500mm*700mm*500mm
Weight, not more than - 40 kg
Quantity - 1pc
2.3.25. Mantle heater
Type - digital
Body - steel, coated with a highly chemical resistant powder paint
Heating element - woven glass fiber with nichrome wire
Maximum heater temperature - 450°C
Flask volume - 2l
Overall dimensions - 220x330x130 mm
Voltage - 220-230V, 50/60 Hz
Power - 470 W
Quantity - 3pcs
2.3.26. Mantle heater
Type - digital
Body - steel, coated with a highly chemical resistant powder paint
Heating element - woven glass fiber with nichrome wire
Maximum heater temperature - 450°C
Flask volume - 0. 5 l
5 l
Overall dimensions - 220x310x120 mm
Voltage - 220-230V, 50/60 Hz
Power - 230 W
Quantity - 2pcs
2.3.27. Reactor
Reactor volume - not less than 10 l
Purpose: synthesis of superstructural materials such as polysulfone (PSF), polyethersulfone (PES), polyetherketone (PEK), polyetheretherketone (PEEK), polyetherimide (PEI)
Material - stainless steel
Type of heating - electric heating with control panel. 92
- Water absorption, max: 0.5%
- Shear strength: 70 MPa
- Tensile strength, not less than 4000 MPa. When laying 0/90: 2500 MPa
- Glass transition temperature: 170-215C about
Equipment set:
- Unwind unit
- Dispenser
- Heating block
- Impregnation unit
– Calender
- Winding unit
- Control cabinet
Main characteristics of processed materials:
Polymer initial state: powder 20-50 µm
Processable polymer types: PEI, PEEK, PPS, PSU, PA6. It must be possible to work with any kind, shape and fraction of the polymer, without restrictions.
Shaft Compression Drive - Pneumatic
Unwinder with material tension adjustment with pneumatic brake
Surface density of the resulting PCM tape: up to 330 g/m2
Limit mass content of carbon filler: 70± 5%
Main equipment features:
Width of resulting tape before cutting: 300 mm
Weight of a roll of finished products with a sleeve: not less than 70 kg.
Maximum diameter of the spool with material, not less than: 500 mm
76 mm pneumatic expansion shaft for 3" sleeve reels
Pulling device with rubberized shafts. Number of pairs of shafts - 2 pcs. Pneumatic clamping of the upper shafts.
Dosing type: bulk
Impregnation unit heating type: electric
Working speed: 0-2 m/min
Edge cutter: on both sides.
Possibility to adjust tension force in automatic mode with brake adjustment up to 300 N
It must be possible to use a separating film between the wound layers of the finished product
It must be possible to use the device in a tunnel oven with a length of at least 700 mm. The total heating power is not less than 6 kW.
Calender roll sleeves made of steel 40X13/40X with surface hardening and grinding, with a roughness not worse than Ra 0.012
Heating of the calender rolls with an oil thermostat. Oil temperature up to 300 degrees.
Winding unit with web edge alignment system to ensure even winding: edge sensor and linear servo as actuator.
Pulling device with rubberized shafts. Number of pairs of shafts - 2 pcs. Pneumatic clamping of the upper rolls
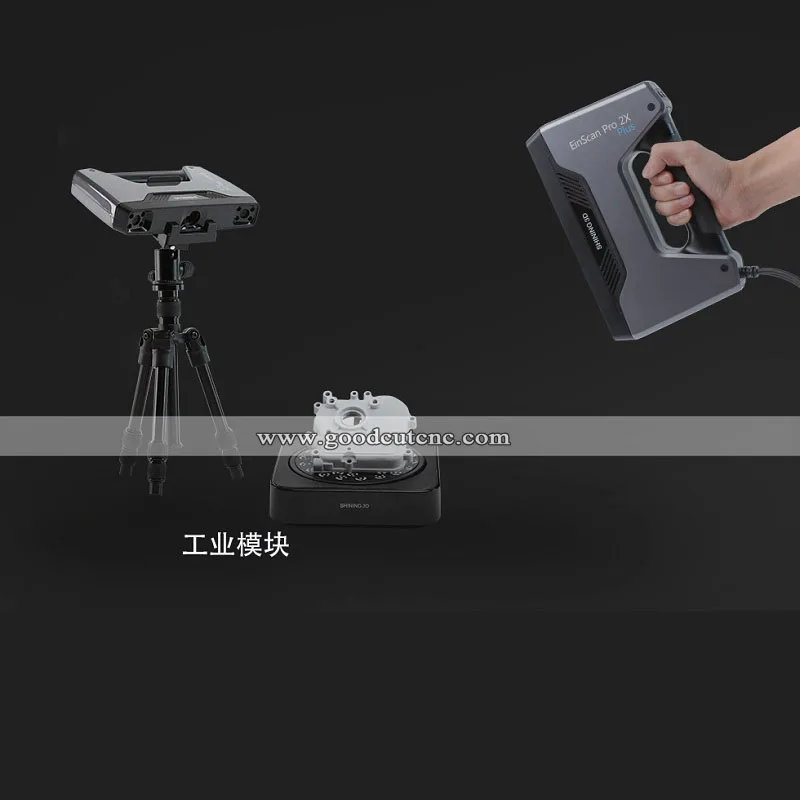
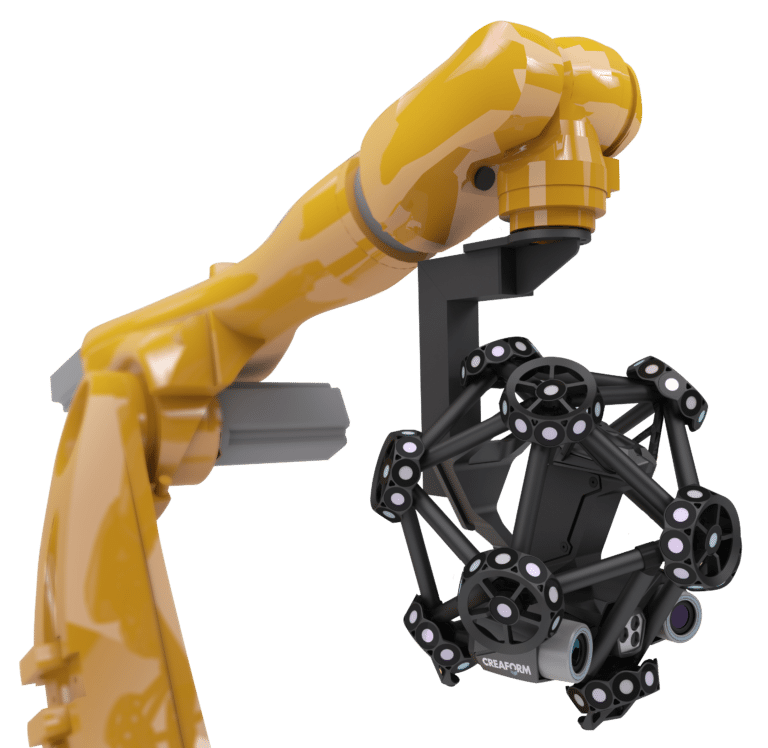
2.5. Node (Device) for controlling the geometric shape
Contents: 2 scanners, photogrammetry system, portable battery, anti-reflective matting spray, software.
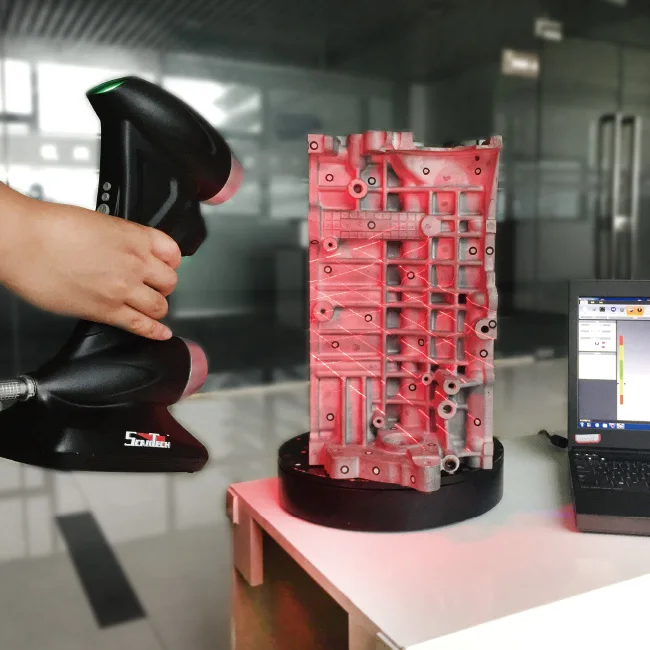
Scanner type 1: portable handheld
Scanning technology: non-contact optical scanning
Camera resolution - 1.3Mpx
Accuracy - 0.1 mm
3D resolution - 0.5 mm
Acquisition rate - up to 2,000,000 points/sec
Movie speed - 16fps
Transfer color and texture of the object - Yes
Working distance to the object - 0.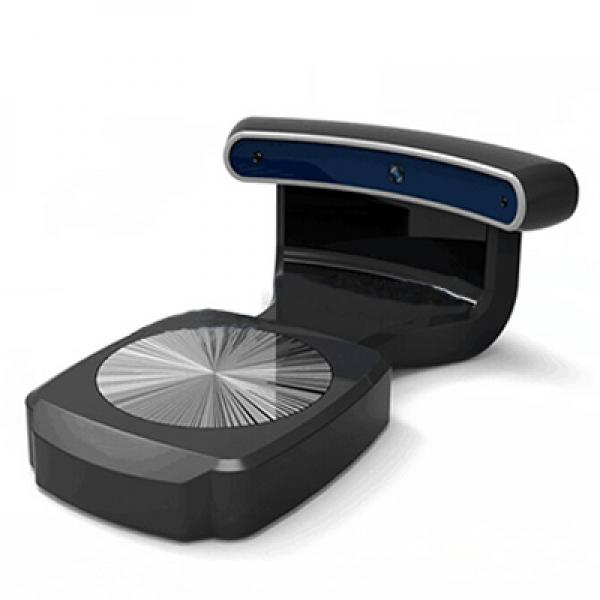 4-1 m
4-1 m
Output data formats - OBJ, STL, WRML, ASCII, AOP, CSV, PTX
Supported OS - Windows XP and above
Device weight - 0.85 kg or less
Warranty - at least 1 year
Mandatory completeness:
— Interface cable: at least 2 pcs.
- Power supply: yes
- Accessory for carrying and storing the device: protective plastic case
Scanner Type 2: Portable Handheld
Scanning technology: non-contact optical scanning
Camera resolution - 1.3Mpx
Accuracy - 0.05 mm
3D resolution - 0.1 mm
Acquisition rate - up to 1,000,000 points/sec
Movie speed - 7.5 fps
Transfer color and texture of the object - Yes
Working distance to the object - 0.17-0.35 m
Output data formats - OBJ, STL, WRML, ASCII, AOP, CSV, PTX, PLY
Supported OS - Windows 7 and above
Device weight - 0.85 kg or less
Warranty - at least 2 years
Mandatory completeness:
— Interface cable: at least 2 pcs
- Power supply: yes
- Artec Studio 14 Professional software: at least 20 licenses
Photogrammetry System:
- Accuracy: ± (0.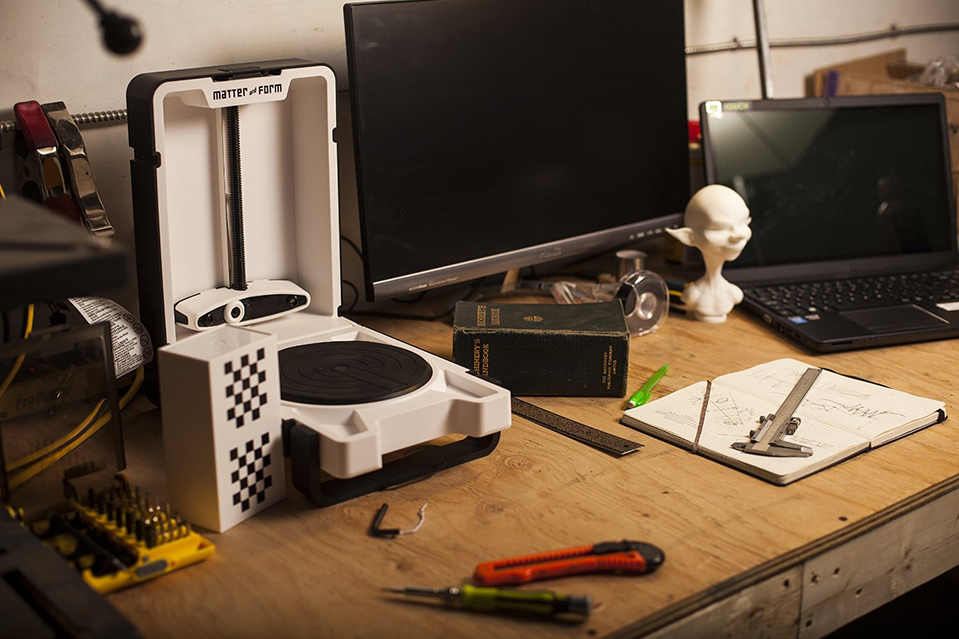 05 mm + 0.05 mm/m)
- Sensor system: 14.2 Megapixels
- Software: availability
Mandatory completeness:
- Digital Camera
- Battery with charger;
- Lenses;
- SD card with a capacity of at least 8 GB;
- Calibration table (800 mm x 400 mm or 400 mm x 400 mm)
- Label set;
- Coded templates for self-printing
- ScanReference software;
- Carry case
Battery:
- Battery type: Li-Pol
- Voltage: 12V
- Capacity: at least 16000mAh
- Battery life: at least 1 hour
Cylinder:
- Coating: anti-reflective
— Volume: not less than 400ml
2.6 Node (Device) for the analysis of molecular weight characteristics of polymers.
2.6.1. Spectrophotometric diode array detector for liquid chromatography-mass spectrometer with thermostatted standard cell. Variable slit width to achieve high resolution and high sensitivity (1. 2nm and 8nm)
Wavelength range: 190 to 800
Light source: deuterium and tungsten lamps: conform to
Wavelength accuracy, nm: ±1 nm
Wave setting reproducibility, nm: 0.1
Noise Unit Abs: 0.3 × 10⁻⁵
Drift Unit Abs/hour: 0.5 × 10⁻³
Full hardware and software compatibility with LCMS-2020 LCMS-2020, SHIMADZU, Japan:
complianceAbility to run on LabSolutions LCMS software without additional software: Compliance
2.6.2. Atmospheric pressure chemical ionization kit: at least 1 pc.
Maximum flow, ml/min: min. 2
Maximum sample heating, °C: not less than 500
Maximum atomizing gas flow, l/min: min. 4.4
Full hardware and software compatibility with LCMS-2020
Cable and box for APCI: compliant with
Sample for mass detector in (volume min. 200 ml)
2.6.3. A set of analytical columns made of hypercrosslinked polystyrene for determining the molecular weight characteristics of polymers by chromatographic methods.