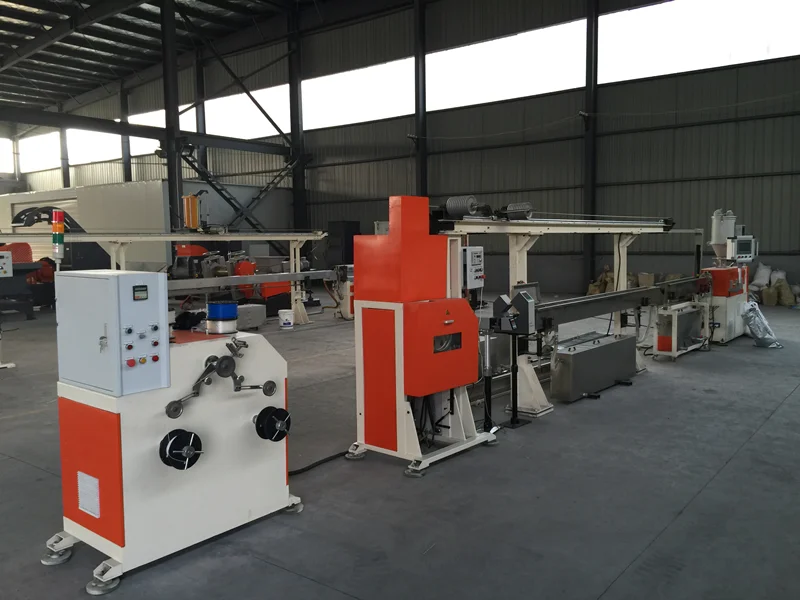
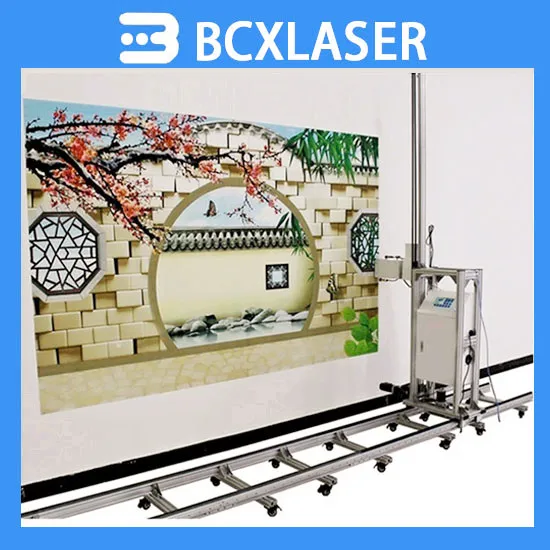
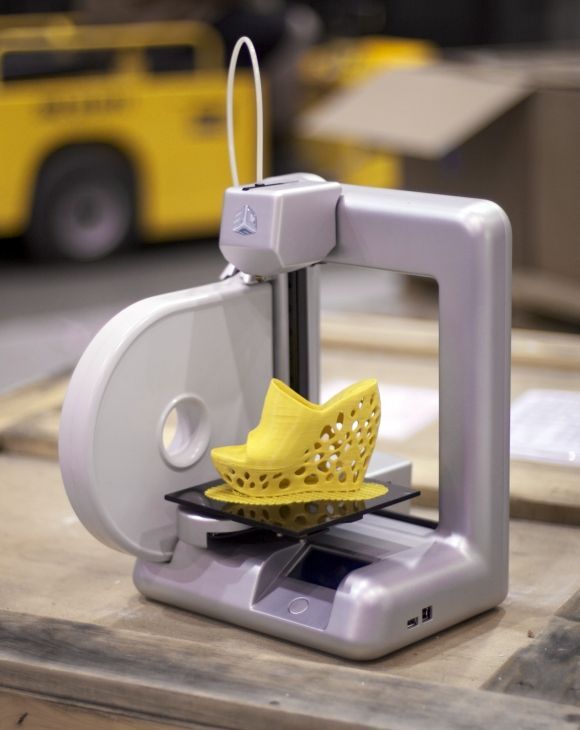
Wipe wall 3d printing
The Importance Of Wipe Walls – Open World Learning
3D printing is a process of making three-dimensional solid objects from a digital file. It is achieved using additive processes, where successive layers of material are laid down in different shapes. Wipe walls are one of the most important elements in 3D printing. They are used to remove excess material from the build platform and keep the build area clean. Without wipe walls, the build area would be full of excess material and the 3D printer would not be able to function properly. Wipe walls are usually made of metal or plastic. They are placed around the build platform and have a hole in the middle. The hole is used to attach a wiper blade. The wiper blade is made of a soft material such as silicone or rubber. The wiper blade is attached to a motor. The motor is controlled by the 3D printer’s software. When the 3D printer starts a build, the software will send a signal to the motor. The motor will then start moving the wiper blade back and forth. The wiper blade will wipe away the excess material from the build platform. The material will be collected in the hole in the wipe wall. The collected material can be reused for future prints. Wipe walls are an essential part of 3D printing. They help to keep the build area clean and allow the 3D printer to function properly.
What Is Wipe Distance?
Credit: wiki.mattercontrol.comWipe will drag the nozzle a few feet over the extrusion that has been laid down so that it can be wiped to avoid stringing. The wipe distance determines the amount of time it takes to overlap a previously extruded piece of equipment.
The outer wall wipe distance parameter in Cura causes the nozzle to travel a certain distance after finishing up each outer wall without making any extruded movements, lowering the visibility of the Z-seam. The ability to introduce an element that does not occur during 3D printing by default significantly improves the surface quality of your 3D printed model. The distance between the outer wipe wall and the end of the wall is determined by the outer wipe wall distance feature in Cura. It will also reduce the chance of filament that is not required to be removed from the nozzle traveling to the next layer. When the configuration is incorrect, the feature’s ability to conceal the Z-seam may be compromised. When an outer wall is completed, the distance that the nozzle can travel without being extruded is determined by the distance between the outer wall and the nozzle. The distance from the nozzle to its next location reduces the visibility of the Z-seam caused by it traveling to its next position as it approaches the end of the wall. You must only use it in exceptional circumstances to avoid negatively impacting the 3D printing process.
What Is Outer Wall Wipe Distance?
Credit: UltimakerIn Cura, the outer wipe wall distance provides the extrudedless distance of the nozzle at the end of an outer wall. By cleaning the outer wall of excess material that had previously been printed, it can achieve a smoother Z-seam. The standard settings are 0.2 to 0.4 millimeters.
The Outer Wall Wipe Distance in Cura is defined as the distance between the nozzle and the outer wall. As a result, excess material on the outer wall’s already printed sections can be removed, resulting in a smoother Z-seam. The millimeters are set to 0.2 – 0.4 mm. The flow rate and retract settings are not significantly different here if you use them correctly. For wipe distances of between 0.2mm and 0.4mm, the default settings are set to the latter. When the wipe distance of the outer wall is comparable to the wipe distance of the inner wall, it is analogous to coastal behavior. Excess material exits and the line is completed when extruded past the end of the line. Stringing or blobbing can no longer occur as a result of this.
Setting The Extruder To The Correct Color Before Starting
Setting the extruder to the proper color before starting a print is critical if you want to print with multiple colors. If you don’t set the extruder to the appropriate color, it will start printing with the incorrect color, so clean the extruder and start over.
The Restart Distance setting on the extruder determines the distance from the retractor to the restart point. It determines how far apart the extruder is from the priming and is a must-have setting.
What Is An Ooze Shield?
An ooze shield is a type of magical protective barrier that is used to repel ooze creatures. It is typically created using a magical device orScroll and is inscribed with various runes and symbols. The barrier typically takes the form of a spherical or dome-shaped barrier that surrounds the area to be protected.
The Many Benefits Of Proofreading
These tools will benefit your print by providing you with protection against issues at an early stage and by keeping any spills to a minimum.
What Is Oozing In 3d Printing?
Small plastic strings are left behind when 3D printed models are “stinged” (also known as oozing, whiskers, or “hairy” prints). The nozzle of the extruder is typically leaking plastic as the filament moves to a new location.
Martin now owns and operates his fourth 3D printer, and he is happy to share it with friends, family, and himself as a hobby. Through our guide, we will walk you through the causes of this problem. If you understand the cause, you can proceed with your precautions and settings. You can avoid filament drip-outs by taking precautions during the printing process. This countermeasure will take effect if your extruder has printed a section of the object as soon as it is retracted. The filament is pulled back into the nozzle after it has been attached. It is best to retract when the retract speed reaches the sweet spot.
In the past, Simplify3D has provided a number of pre-configured profiles that can serve as a starting point. The length of the movement over the free surfaces has a great deal to do with the thread pulling. The movements of the print head should be as short as possible across the open areas.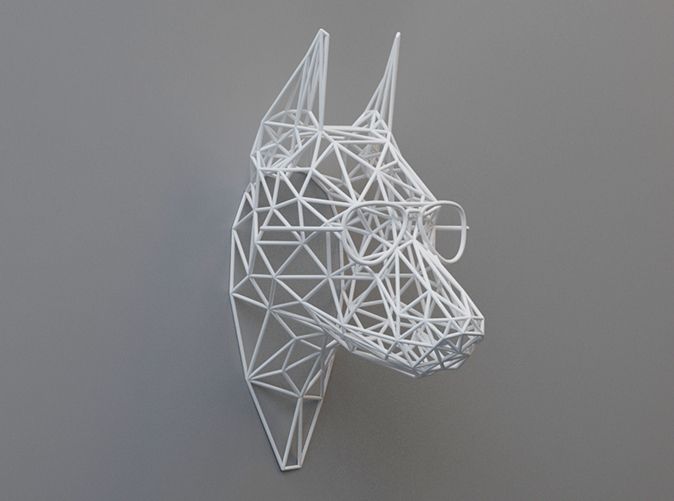 Stringing can become too much at the most extreme temperature of the extruder. Although minor changes can make a big difference in the final quality of a 3D object, they can be insignificant. It is critical for you to be able to run fast. The speed of your 3D printer can be increased to reduce the time it takes your extruder to move.
It is critical that the nozzle diameter and print line width are in agreement. According to some users, trimming the line width can result in improved print quality. When too much pressure is applied to an filament nozzle, it becomes impossible for the filament to escape the nozzle. Because nozzles are prone to wear, they should be replaced in this case. Because 3D material tends to absorb water molecules, keep your filament roll airtight after use.
Ideamaker Wipe Wall
There is no one definitive answer to this question. However, one possible interpretation is that an ideamaker is someone who is good at coming up with new ideas, and a wipe wall is a blank wall that can be used as a canvas for brainstorming or for writing down ideas. So, in this context, ideamaker wipe wall could mean someone who is good at coming up with new ideas and is able to quickly erase any mistakes they make while brainstorming on a blank wall.
Wipe tower | Prusa Knowledge Base
Relevant for
:
MMU1MMU2S
Last updated
2 years ago
This article is also available in following languages:
Smart wipe tower
The smart wipe tower ensures sharp color transitions and stable filament flow after a color change while aiming to waste as little filament as possible. There is always only one wipe tower no matter how many objects are being printed at once.
The size of the wipe tower is independent of the size of the object being printed.
Printing multiple copies at once or printing big objects improves the overall efficiency of the filament used.
Wipe tower placement
As soon as you select a multi-material printer in the Printer selection box, the smart wipe tower will appear in the 3D view. The preview shows its maximum footprint, because the size may decrease after slicing, based on the number of color changes in each layer. The size will decrease from the edge with the polyline. You can change the placement of the wipe tower by dragging it with the left mouse button. Make sure the wipe tower doesn’t intersect any of the objects.
To shorten the travel moves between the object and the wipe tower, place it in the near proximity of the object/objects.
The real size of the wipe tower is visible in the G-code preview
Wipe tower size
In Print settings - Multiple Extruders - Wipe tower you can set the Width of the wipe tower. The other dimension is calculated automatically based on the amount of filament necessary to purge.
The purge amount can be set by clicking on the Purging volumes... button in the right panel.
The wipe tower is rarely solid. Instead, the ratio of sparse and dense infill is automatically adjusted every layer, based on the current number of color changes, in order to waste as little filament as possible.
Wipe tower ramming line
If you see a line in the air above the Wipe tower, that's normal. It's the visualization of the final extruder ramming before it unloads the last used filament (in order to create a sharp tip).
Wipe tower without sparse layers
The wipe tower size can be reduced by skipping the sparse layers (layers without a tool change). This saves material and in almost all cases reduces the print time.
- Go to Print settings - Multiple extruders
- Tick No sparse layers (EXPERIMENTAL)
On our set of multi-material projects, this feature reduced the total print time by 3. 16%, and the filament deposited on the wipe tower was reduced by 16.17%.
The wipe tower without sparse layers feature is very useful together with ColorPrint with the mmu. Only a handful of filament switches are needed to print a colored sign unattended and as a result, a lot of material is saved compared to a full wipe tower.
Turn off Crash detection if you're using a wipe tower without sparse layers. Otherwise, you're risking a potential collision between the x-axis and the printed object during crash recovery.
As PrusaSlicer currently does not check for collisions of the extruder with the printed object when lowering down to the top of the wipe tower, this feature is marked as experimental, and it is recommended to place the wipe tower to the rear right corner of the MK3S's print bed, while the object is placed to the opposite corner.
Wipe to infill
Since the inside of the model isn’t visible, it can be used to wipe the nozzle during the color transition. The wipe tower cannot be eliminated completely, because some models do not have enough infill, but wipe to infill can greatly reduce the amount of wasted material.
- Right-click on a model in the 3D view.
- Choose Wipe options.
- Then in the right panel tick Wipe into this object’s infill.
Dark filament purged into infill may be visible through light-colored walls. To avoid this issue, we suggest increasing the number of perimeters.
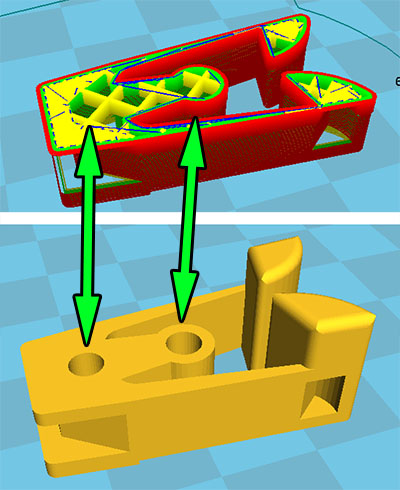
Wipe object
To further decrease the amount of material used for the smart wipe tower, you can choose to wipe residual filament into an object. The so-called ‘wipe object’ will be used during the color transition to wipe the nozzle. As a result, the colors of the object will be mixed - this is handy in case you don’t care about the surface color (e.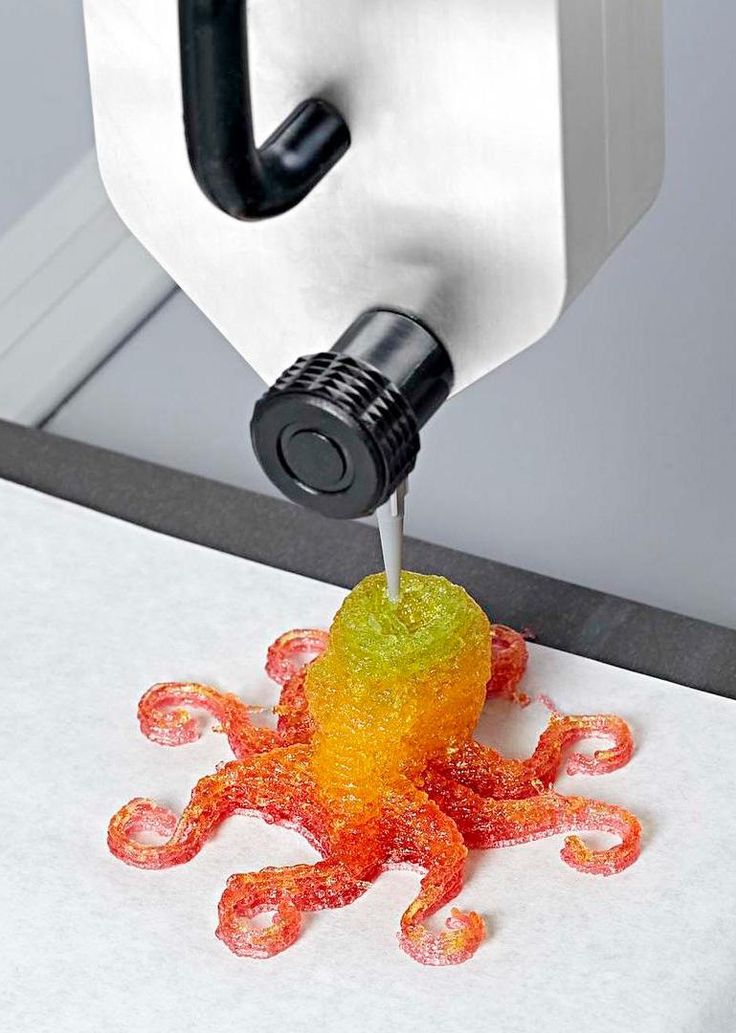 g. mechanical parts).
- Right-click on a model in the 3D view
- Choose Wipe options.
- Then in the right panel tick Wipe into this object
Wipe object taller than the multi-colored object
The wipe object will be finished with the last filament used during the multi-colored print.
Multi-colored object taller than the wipe object
After the wipe object is finished printing, wiping will move to the smart wipe tower.
During a color change, the flow isn't perfectly stable. For example, a tiny amount of air can get trapped in the nozzle as the new melted material pushes from the top. As a result, slight artifacts can appear on your wipe object.
The footprint of the wipe tower is minimal thanks to the wipe object (gear)
3D printing defects - Let's try to introduce classification
Good afternoon, dear visitors of the portal.
Today I decided not to go into the artistic part of our work, but again into the scientific one.
By coincidence, I graduated from the university with a degree in foundry engineering. Why am I mentioning this: firstly, for the last 10 years, the foundry has been threatened that it will die due to stamping and 3D printing. Secondly, foundry uses a lot of its own terminology. Today I want to try to describe the main defects in 3D printing, possible names and ways to deal with them (defects, not names). Of course, within the framework of one article on one portal, we will not introduce our own terminology, but at least there will be something to discuss. I invite you to read and adequately comment.
Defect : Warp
Commonly used description: Peel off platform, bend
Description : Geometry distortion. Due to the transition of plastic from one state to another (liquid - solid-liquid - solid) and temperature changes, the plastic begins to decrease in volume. This process is uneven - first the edges cool down, and then only the central part. Because of this, internal stresses arise that tear off the edges or break the part.
Now some physics and explanation. It is IMPOSSIBLE to get rid of thermal shrinkage or shrinkage. This is a physical process - you can only compensate for it. In addition, remember - shrinkage of 0.5 -0.9% is mentioned everywhere. But this is only linear, which means you will have more volume.
How to fight:
- Reduce fill - less plastic, less to shrink - less tear force.
- Use a hot table - you heat up the lower layers, which gives an even distribution of stresses inside the part.
- Outline - You can print an outer layer around the part. This creates a kind of thermal barrier around the part, thereby maintaining the temperature throughout the volume, resulting in an even distribution of stresses throughout the part. An alternative is a closed build chamber, serving in the same way
- Use structural elements - First, check that your part is lying well on the table - if your flat side of the part is not flat at all (in art it's easy - to move a couple of polygons or vertices to the wrong place on a couple of mm), then it will easily come off.
 Secondly, if you understand the physics of the process, you can either add material somewhere, or make a hole in the part, etc. In this way, you will artificially cause stress redistribution in the part, however, this method is extremely complicated.
 - Increase your grip strength - you don't have to deal with tension, just provide the required grip strength. However, this option does not seem very good to me - these stresses will remain and your part can then be easily broken in this place.
Defect : Skewed
Frequently used description: Layers floated, the vertical is not respected, the layers do not lie exactly on top of each other
Description: Several variants of this defect are possible. Either the layers just lie unevenly, or the model is printed somehow in pieces, or just a slight skew. This defect is usually associated with the mechanical part of the printer. Due to friction, the actual path of the print head does not match the one that was loaded into the machine.
How to fight:
- Check the belts. Since there are many designs, it is difficult to give a universal answer here. Check that they lie normally at the points of contact and are not frayed anywhere. Look at the printer's instructions or some tips on the Internet - it is quite possible that the problem has already been sorted out before you.
- If the printer simply shifts the layers relative to each other, then it is possible that the pulleys are not fixed properly. With a black marker, you can mark the position, and after printing, compare and tweak this place if necessary.
- Move the print head without power - it should move without significant problems. If this is not so, then maybe it is worth finally lubricating the shafts?
- Squareness not ensured - again, due to poor mounting, the X and Y axes may not be perpendicular. This can lead to this defect, which means it's time to climb into the printer again and twist.
- Check the print platform - the glass may start to slide on your printer.
 And just like that, in the same direction. In this case, it is necessary to ensure its fixation in some way.
 - Electronic problem. Rare case, but possible.
Defect : Boiling, Puffiness (?)
Common Description: Holes in top layer, problem with outer layer.
Description : Protrusions on the upper layer of the part - can be either open or closed. In fact, this is due to the sagging of the plastic, which does not have time to cool when printed in the air without supports. Considering that there can be several such layers and all of them are of poor quality, we get this defect.
How to fight:
- Provide cooling - your plastic should cool well on the top layer. According to the recommendations, at this stage, cooling should go as much as possible.
- Ensure sufficient layer and wall thickness - In addition to sufficient cooling, you must have the required number of layers.
 Again, according to the recommendations, your wall should consist of at least 6 layers of your thickness. Thus, when printing with a layer of 0.1 mm, you want your wall to be at least 0.6 mm. But remember - too thin base layers will not work either - they simply will not hold themselves and other layers.
 - Try changing the occupancy - some slicers change the occupancy configuration at a certain percentage of infill, so the difference can be even between 24% and 25%. In addition, with a larger fill, the distance that is printed in the air is smaller, which can also remove this defect.
Defect : Lack of layers (?)
Commonly used description: Round things do not come out round, parallel straight things do not come out parallel
Description : Sometimes the geometry of the layers is not observed - this can manifest itself in circles, when the circle is not perfect, as well as in parallel lines. For example, parallel lines first diverge a little, and then, on the contrary, slightly overlap. This is due to the belts going to the stepper motors - most likely they are not fastened tightly enough.
How to deal:
- Tighten the straps near the print head - how to do this is best to look at the 3dtoday portal or ask your 3d printer supplier.
- Check that all fasteners are tight - use the tool that most likely came with your kit to do this
- Lubricate the guides - literally add one drop of light lubricant to your guides.
Defect : Elephant Leg
Commonly Used Description: Thick bottom layers, uneven layers at base.
Description : The effect when the bottom layers of your part are larger in area than they should be. Due to the fact that the nozzle at the beginning of printing is firmly pressed against the printing table at the beginning of printing, the layer begins to smear a little, thereby decreasing in thickness, but increasing in area. Then the print is evened out, because there is no longer a tight pressure
How to fight:
- Adjust the table - your nozzle should not rest against the print platform - there should be a slight, but still gap.
- Reduce the table temperature - a slight decrease in the table temperature can also reduce this defect. Do not get carried away with these methods too much - this may degrade the overall print quality.
- Structural model improvements - add small chamfers or fillets. You will have to play around with the settings a bit, but thanks to such a design improvement in the model, your model will be smooth and beautiful. However, it is impossible to say for sure which chamfer to make. Start with a 0.5 x 45 bevel, and then empirically find the best option.
Defect : External slack (?)
Common description: Snot, plastic between two parts part to another, a long, thin layer of plastic is created that spoils the outer shape of the part(s). This is due to the fact that the plastic that remains at the tip of the nozzle under the influence of gravity and friction is caught on one part and begins to drag through the air. Depending on the fluidity parameter and the hardening time, different plastics exhibit this defect in different ways.
How to fight:
- Use the retract function - thanks to it, the print head will slightly return the plastic, thus removing it from the tip of the nozzle. This setting is activated directly in the slicer (if it supports it). In the Cura slicer, the retract is drawn with thin blue lines and you can check this moment at the level of the finished task.
- Increase your print speed - the physics is simple - by increasing your print speed, you reduce the amount of time the plastic can catch on your part. However, increasing the print speed is not always possible and may cause other defects.
- Change the print temperature - print temperature has a direct effect on fluidity, especially with PLA.
 Reducing the temperature even by 10 degrees significantly reduces the effect of external sagging.
Defect : Waviness
Commonly used description: Discoloration at the edges of the part, defects along the edges
Description : This defect appears as darkening and slight waviness around the sharp ends. If you start typing the text, it will look like a slight shadow effect on it. This is due to the inertia that is imparted to the liquid plastic during printing. Regarding plastic, the print head has a large mass and during a sharp change in direction, liquid plastic is not able to sharply repeat the trajectory, which causes slight waviness in the corners.
How to deal with:
- Decrease print speed - Decreases print speed, reduces sharpness at corners, thereby smoothing the effect.
- Decrease print head acceleration - these settings are not available in all slicers, however, this will eliminate the defect without reducing the print speed.
- Change the print temperature - as we mentioned earlier, temperature affects fluidity, so lowering the print temperature can help get rid of the defect.
Defect : Looseness, Sagging (?)
Frequently used description: Snot on the part, sagging plastic on the part
Description: One of the most common and basic defects in plastic is due to printing in the air sags instead of getting a flat horizontal surface. This is due to the fact that the plastic does not have time to cool down and is printed without support where they are needed. Sagging can occur for many reasons, although the physical nature of the defect is practically unchanged. Because of this, the elimination of this defect may not be obvious.
How to fight:
- Cooling - Depending on the plastic, you may or may not need cooling. If it is necessary - provide it as much as possible.
- Print more than one part - for small parts, printing more than one part will help a lot.
 This will remove the heat source and give your part time to cool.
 - Work with the thickness of the layer - it is not possible to make a recommendation whether it is better to increase the layer or reduce it. Each situation must be decided, however, changing the thickness of the layer can improve or worsen the effect of sagging.
- Reduce print speed - very often reducing print speed can improve the quality of your part.
- Reduce temperature - if you decrease the temperature, the plastic will cool faster to a solid state. However, do not lower the temperature too low, otherwise the print quality may drop.
- Reposition the part - if possible without loss of quality, try to position the part differently. Stop, think, or use auto-positioning (like Meshmixer). Instead of fighting a defect, you can often simply eliminate it.
Defect : Layering of the bottom layer
Commonly used description: Clearly defined bottom layer, thick lines of the bottom layer
Description : Printing the bottom layer is one of the most important moments in printing. If we print too close, we will get an elephant leg defect. In the case of a large gap, we can get excessive layering of the lower layer.
How to deal with:
- Decrease the thickness of the first layer - many slicers have the ability to change the first layers of printing. Try to make it smaller to achieve a result that suits you.
- Recalibration - many problems with the bottom layers can be solved by recalibrating the table. Set the distance a little less and you might get the desired result.
Defect : Underextrusion
Common Description: Holes in Print, Layer Problems, Surface Defects
Description : Underextrusion is a defect worthy of its own article with a description. It can occur as a result of a huge number of factors, both related to the printer and plastic. It is very easy to observe it - the surface of the part comes out not even, but with all sorts of inclusions, or vice versa, the absence of plastic where it is needed. To eliminate this defect, an integrated approach may be required.
How to deal with:
- Change the speed - your printer may not technically be able to print at this speed. You may need to lubricate it or change the plastic, but first try printing at a slower speed. In addition, not all parts and not all plastics, the printer can print at maximum speed
- Change the temperature - all plastics have recommended temperatures for printing. If you print at the wrong temperature, then you do not provide the required fluidity parameters for working with this plastic and you will not print correctly with it.
- Check plastic - plastic may be damp, dirty or of poor quality. All this can lead to under extrusion, or that you will not print at all. In addition, plastic can break due to the feed mechanism and its strength properties. You may not be able to print with this plastic. Or maybe his diameter is walking .. As you understand, changing the plastic to another will allow you to quickly understand the problem in the printer or consumable.
- Check the paper feed mechanism - if you are working with soft plastic, the plastic may creased too much, which will prevent you from printing properly. Then, most likely, it will be necessary to loosen the grip of the bar, however, this should be done only after contacting those. support if you are doing this for the first time.
- Check the bar - during printing, sometimes your bar may become knotted or something is preventing it from entering the extruder. Be sure to check it out right now.
- Change or clean the nozzle - your nozzle will not last forever. In the course of work, it will become dirty - both from the soot of plastic, and from the dust that you allowed. Always have a pair of replacement nozzles available to help you understand this problem. In addition, when you refill plastic with a lower printing temperature, print at a high temperature so that the remnants of the old plastic completely come out and do not interfere with work.
- Check slicer settings - some slicers may use nozzle retraction and nozzle cleaning to get rid of external slack.
 Because of this, when you return the print head, you do not immediately start feeding plastic. This can lead to underextrusion in some parts of the model.
 - Check the Teflon tube - due to dirt allowed in the printing area, the Teflon tube may become contaminated. Because of this, the rod will experience friction, which will lead to underextrusion.
- Check the gears - if the gears that grip the bar do not work properly, then it will be problematic to exit the nozzle. If simpler measures do not suit you, check that this mechanism works correctly.
Defect : Notches (?)
Common description: Walls do not fuse together. Hollows in the walls.
Description: Mechanical problem. Due to the limited path of the printing part, there are voids and inconsistencies between the walls. Contact may be partial or absent entirely.
How to deal:
- Tighten the straps near the print head - how to do this is best to look at the 3dtoday portal or ask your 3d printer supplier.
 This option is best used in case of partial contact.
 - Reduce the print speed - plastic may not fit well at this speed. A slight increase in temperature may also help.
- Change the wall settings - this problem may arise due to the principle of laying this very wall. If you have a 0.3 nozzle, then it is impossible to lay a 1 mm wall in ideal layers of 0.3 mm. So the program can either represent the wall as 0.9mm and lay 3 layers, or somehow compensate for this. Try changing the wall thickness and maybe you can get rid of the defect.
Defect : Scratches
Commonly used description: Surface scratches and color unevenness
Description : During the movement of the surface, the print head leaves a mark on the plastic due to close contact with the plastic. This can be either grazing old plastic or smearing new plastic that flows out of the nozzle due to contact.
How to deal with:
- Increasing speed and decreasing temperature - as in other similar defects, when plastic leaves a mark, increasing speed and decreasing temperature can reduce the effect of this problem.
- Slicer setting change - To a large extent, this defect can be controlled by the slicer. Using Cura as an example, you can use the z-hop function (raises the nozzle). In addition, you can work on the retract.
- Change in geometry - this defect can still appear on complex surfaces. Try adding an even layer to your model or simplifying the geometry altogether if you're having this problem and it's making your life worse.
Defect : Underfill
Common Description: Part prints strangely. Incorrect entry of the part. Print supports where they shouldn't be
Description : The type of defects associated with the electronic model - can be associated with many things. If the polygons have incorrectly directed normals, if the model is not fully stitched (there are holes) or consists of several elements - all this can lead to this type of defects, when the slicer will misunderstand what they want from it.
How to fight:
- Check the model in Netfabb/Meshmixer - with the help of specialized products you can check the model and see what errors it has. These programs eliminate many of the problems that were made before printing. However, these programs may distort your geometry.
- Fix the electronic model - if you have the skills and the ability to use the functionality of 3d programs to fix the mesh. Sew the meshes, close the gaps, reverse the normals, then check the resulting g-code. In it you will see how your model will be printed and whether everything suits you.
Defect : Fluffiness
Commonly used description: Model as in hair. Snot. Sagging.
Description : Reduced external sag. Small hairs stick out on the model, which remain from the printing nozzle. The physics of the phenomenon is the same, but the amount of plastic is much less. However, this defect can occur even if the nozzle does not move from one object to another.
How to fight:
- Check the plastic - your plastic may be dirty or poorly made. Try a different plastic and you may be able to get rid of the
- Check the nozzle - this fluffiness may be the first sign that something is wrong with the nozzle. Check the outside of the nozzle to make sure nothing is sticking out or try a different nozzle
- Remove the defect after work - this is the rare type of defect that is quite easy to get rid of by post-processing. Use a sandpaper, needle file or other handy tool.
Defect: Skipped layer
Commonly used description: The layer is different from the other layers in the model. The model is flaking into pieces
Description: The case when one or more layers differ from the others. Then comes stable printing and the defect may recur. May be due to underextrusion or machine problems.
How to deal with:
- Familiarize yourself with underextrusion - it is possible that you will see more similar defects and you will know how to proceed.

- Lubricate the Z-track - since the table moves in the Z direction, it is possible that in some areas you have accumulated dirt or lack of lubrication. Lubricate the guide as recommended by the manufacturer and check operation.
- Bearing problem - it is possible that the problem is not in the guide, but in another element of the lifting mechanism. In this case, you need to check the bearing adjustment or return the printer for service. Look for more information on the portal 3dtoday
- Too much lubrication - too much lubricant - does not mean better. It can start to easily accumulate dirt and again begin to cause this effect. Wipe the shafts and lubricate with the necessary amount of material.
- Electronic problem - it is possible that the problem is not with the mechanical, but with the electronic part of the movement. If other methods do not help, then most likely the printer may need to be returned for repair.
- Defective parts - unfortunately this happens.
 It is possible that everything is done well, but some part of the mechanism is out of order. Again, this cannot be solved without disassembling the printer.
Defect: Misalignment of axes
Commonly used description: No right angle.
Description: Cases where the mating parts of the mechanism do not fit into the grooves due to misalignment. Another way to identify a problem is that the printer head moves with force.
How to fight:
- Editing axes - the defect is eliminated only mechanically. Ask the supplier or manufacturer for information on how to correct the axes and then reconfigure the printer.
I do not claim to be the final authority. For my part, I would like an adequate discussion and proposals in order to supplement and develop this article and formulate it into a finished version. Icons? mean that I still do not consider this name final and I expect other proposals for names from you. Only the names should be sensible so that a person imagines what it is and uses a short word to define it. It is better to mark grammatical and lexical errors in my personal - I hope we will agree with the editors so that they give the opportunity to correct the article. The material is based on this source. I did not specifically add some defects that are not related to the plastic, the printer and the printing mechanism (such as the detachment of the part from the table and the poor performance of the electronics), although you may say that it is more logical to add. In short, ready for discussion.
Sincerely, Sergey Panin
Cleaning the 3D printer table. Tips and Tricks.
3D printing is a very unstable process, I think everyone who is at least slightly familiar with plastic filament printing technology will agree with this. Unpleasant crashes in the 3D printer can occur for various reasons, and one of the most common reasons is the detachment of the model being grown from the desktop surface.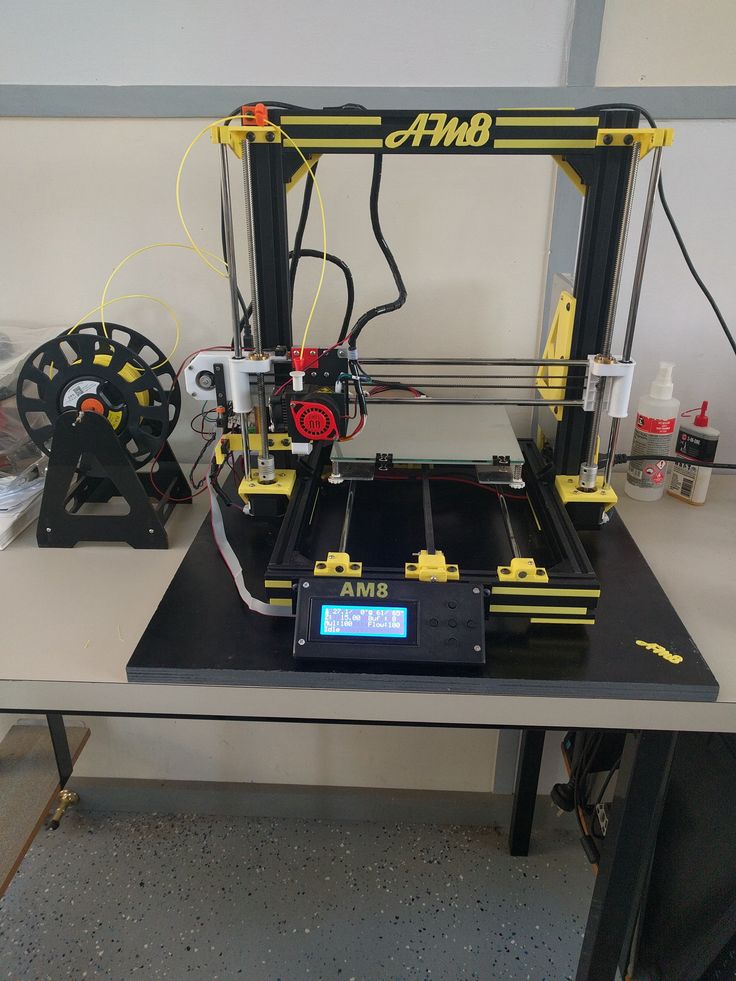 And as a rule, this happens in the middle of printing, when you are already convinced of the stability of the press and are distracted by another activity. It is precisely for this reason that ensuring good adhesion of the first layer to the platform is very important for the successful completion of 3D printing.
Today there are many ways to improve the adhesion of the first layer to the bed. A lot of articles and recommendations have been written about this, so we will not talk about them. It is worth noting one of the simplest methods - is keeping the desktop of a 3D printer clean . Regular and thorough cleaning of the platform will not only improve adhesion, but will make printed models more beautiful and smooth.
In this article we will look at the best way to clean a 3D printer table, using the example of popular coatings:
Remember to use caution when using the methods below, as spilled liquid may damage the 3D printer. We recommend removing the bed from the printer before cleaning (if possible).
PEI sheet surface cleaning
Recently, PEI sheet has become a very popular material for improving adhesion in 3D printers. It provides excellent adhesion to various materials, and when it cools down, the printed model lags behind it very easily. The sheets are very simple and not fussy to use, and most often it does not require additional application of glue or adhesive tape.
Unfortunately, in order to achieve maximum efficiency, the PEI surface also requires regular and high-quality cleaning. If PEI is touched frequently, it can develop greasy spots that reduce adhesion to the material. Rough cleaning can also damage the surface and reduce sticking. Regular cleaning and maintenance of PEI will ensure that your models do not come off.
How to clean the surface of PEI
To clean this surface, we recommend using isopropyl alcohol (Chemical pure, odorless) with a concentration of more than 70%. You can use it with a smell, but it is very caustic and unpleasant, the room will need to be ventilated.
Wait for the platform to cool, then liberally soak a dry cloth or paper towel with alcohol and wipe the surface. This will remove a significant portion of the fats and oils from the bed.
Acetone is also good at dissolving plastic residues on the surface. In the same way, liberally moisten the cloth with liquid, then gently wipe the surface of the 3D printer desktop. We strongly recommend doing this work in a well-ventilated area, as acetone is highly flammable and its vapors can penetrate the electronics of the device
If you have been using PEI sheet for quite a long time, and its resource is visually exhausted, then we recommend using fine grit sandpaper (1500+). With gentle, circular motions, sand the surface until light scratches and depressions are removed.
When should I clean?
Most manufacturers recommend cleaning the surface with isopropyl alcohol every 2 to 3 prints. After a few months of use, sand the surface and wipe thoroughly with acetone. If it is no longer possible to restore the surface by the listed methods, then replace it with a new sheet from PEI. The lifespan of such material varies depending on the brand and frequency of use of the 3D printer.
Glass Surface Cleaning
Glass is another very common 3D printer desktop material. Much more durable than PEI and similar surfaces. The glass plates provide a smooth and level surface at the bottom of the model.
This surface is usually used in combination with other aids (eg glue stick or hairspray) to improve the adhesion of the first layer. Such products are especially popular on tables that are not equipped with heating. Therefore, regular cleaning of the glass is necessary to prevent adhesive or varnish from sticking.
How to clean the glass platform
The easiest way to clean a glass plate is to use a scraper or a non-metal spatula. If the table is heated, then heat it until the material remains soft, after which they should be easily removed with a scraper.
Be careful when scraping. Depending on the scraper, the blade can be very sharp, so be careful not to scratch the surface. We recommend that you put your hand on the handle of the scraper, and with the other hand press down on its middle, so that the greatest force is directed downwards.
If this does not work, try wiping the glass with warm soapy water. Although simple, this method is very effective for removing hairspray, glue, and other adhesives. Keep in mind that this method is only recommended if the 3D printer allows you to remove the platform. Spilled water can seriously damage the heating element, power supply or other electronics of the device.
Dirt can also be removed with specialized cleaning agents. For example, wet alcohol wipes, window cleaner, isopropyl alcohol will also effectively wash away adhesive residue and restore the glass surface. However, do not take too strong cleaners. Such substances can severely damage the surface or even the 3D printer. In order to be sure to select a cleaning agent for your particular 3D printer, it is best to contact its manufacturer. Most often, they willingly make contact with users and willingly give advice.
When to clean the glass surface
Again, this will depend on how often you use the printer. We recommend cleaning the surface after each print to prevent buildup of glue or varnish. Such a procedure will not take much time, but the print will be more stable, and the resulting prints will have a beautiful and even surface. Once the models stop sticking (usually after a month), try washing the surface with soap and water. After about two to four months, you will have to resort to isopropyl alcohol or other specialty drugs. substances.
Cleaning adhesive tapes
Adhesive tape is another proven way to increase adhesion to the print platform. Today, this method is more common on 3D printers without the function of heating the desktop. Masking tape is the most common remedy, but so are Kapton and others.
One of the reasons for the popularity of such linens is their ease of use and relatively inexpensive cost. They are easy to stick to the surface and are available at almost any hardware store. However, there are also disadvantages: the tape quite often peels off when the printed model is removed, so it must be reapplied regularly.
How to clean?
Unfortunately masking tape is one of the most difficult to clean due to its fragility. however, we have found that gentle scraping is one of the most effective ways to clean it. With light pressure, evenly scrape off the remaining plastic thread from the surface, being careful not to tear it.
If the tape does break during cleaning, replace this area with a new strip. The main thing is not to overdo it and do not apply a thick layer, this can adversely affect the quality of the print.