Makerbot cyclops 3d scanner
CowTech Ciclop 3D Scanner
CowTech Ciclop 3D Laser Scanner
Over $180,000 raised on Kickstarter! 1700+ scanners sold and counting.
The 3D printing revolution has come, and it’s time for 3D scanning to follow. The CowTech Ciclop is a RepRap 3D scanner with a large scan volume, simple, yet elegant design, and a disruptive price point that blows any other laser scanner out of the water. The user prints the plastic parts on their own printer in any color and resolution they choose, and can assemble the scanner in less than 30 minutes. Then, simply take any object you want to replicate, set it on the 200mm laser cut acrylic turntable, and start scanning. We wanted to make sure our product was usable for anyone who owns a 3D printer, so we meticulously designed our parts for a print bed volume of only 115mm x 110mm x 65mm (4.5 x 4.3 x 2.6in) so they can be produced on even the smallest of printers.
Print your own parts and save money!
How It Works
Laser scanners are a very common type of 3D scanner that use a pair of line lasers that flash in succession in combination with a camera and a rotating turntable. As the lines flash on the object, they trace the outline of the object in red light. The camera then picks up the location of the laser lines in 3D space, converting those lines into hundreds of thousands of points, and as the turntable rotates, every side of the object is scanned into a cloud of points, which can then be stitched together to form a mesh that replicates the surface of the object with up to 0. 5mm precision.
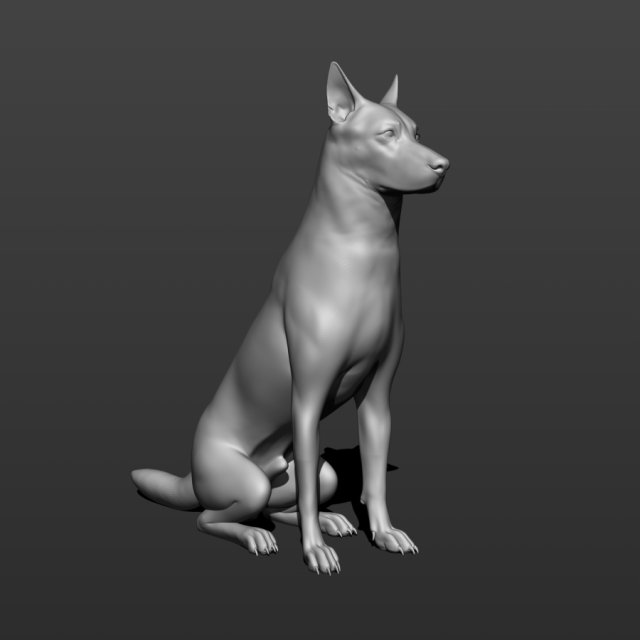
3D printed model lion, 0.2mm resolution, PLA, Prusa i3
The term 3D scanner is a bit of a misnomer. Technically, most 3D scanners are actually point cloud generators. The scanner itself is a tool to make a .PLY file, or a point cloud, made up of hundreds of thousands of points that represent the geometry of the object. The typical user will want to convert this point cloud to an .STL file, which can easily be printed on a 3D printer.
Scanned and post processed model loaded into Cura for slicing alongside the model mesh in CloudCompare
User submitted 3D prints
Once you have a digital 3D file of the part, the possibilities are endless. The CowTech Ciclop uses Horus, software developed by BQ for their version of the scanner. Unfortunately, Horus doesn't support direct .STL exports at this time, but this feature may be developed in later versions of the program. Fortunately, there are many options for post processing programs that can stitch the point clouds together into a printable file. These include Meshlab, Cloudcompare, Netfabb, Blender, and more. We recommend Meshlab and Cloudcompare, and provide detailed documentation with the scanner on how to use these programs.
The CT Ciclop scanner is a fully open source Rep Rap project, and part files and details on how to build your own can be found in the downloads section of our website.
All laser scanners can struggle with objects that are very black, very shiny, or furry, as the laser doesn't register properly with the camera. The CowTech Ciclop, is designed for experienced users who can familiarize themselves with different software programs in order to use the scanner and get high quality outputs from it.
We like to think of a 3D scanner like a video camera. A nice camera gives you the tools to take great pictures and videos, but without post production work in a video editing or photo editing program, you will likely be disappointed in the end result.
Shop Now
CT Ciclop
Ready to Scan Kit
Now Just $179
Ships Free!
Shop Now
CT Ciclop
Standard Kit
Now Just $139
Ships Free!
Shop All CowTech Ciclop Scanners and Accessories
Ciclop - RepRap
Ciclop 3D Scanner Documentation
Main page | Ciclop 3D Scanner Buyer's Guide | Ciclop 3D Scanner Build Manual | Ciclop 3D Scanner User Manual | Ciclop 3D Scanner improvements
Ciclop
Release status: working
| Description | 3D Laser Scanner |
| License | CC-BY-SA |
| Author | User:bq |
| Contributors | CowTech |
| Based-on | None |
| Categories | 3D Scanner |
| CAD Models | |
| External Link | GitHub |
Ciclop 3D Scanner
Ciclop is an open source 3D laser scanner with a rotative platform.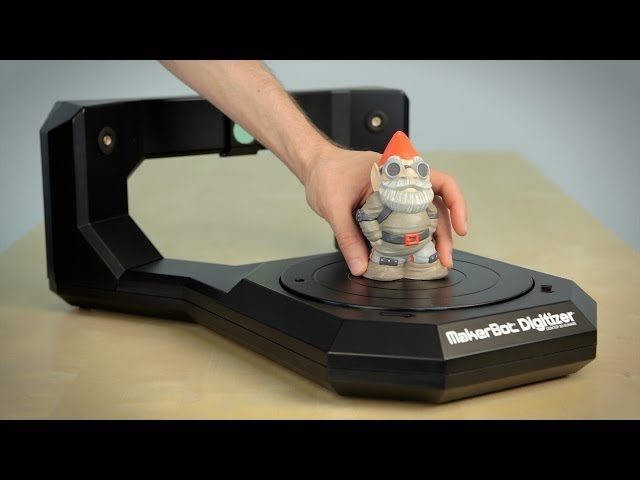 It has been developed from scratch by BQ, and now it has been released to the community, under Creative Commons Attribution-ShareAlike 4.0 International License.
This 3D Scanner is composed by a structure of 3D printed parts, threaded rod, a Logitech C270 web cam, two line lasers and a turntable platform with a stepper motor.
Related to this device, Horus, a complete desktop application for 3D scanning, has been developed also from scratch.
In early 2015, CowTech Engineering released their version of the Ciclop, raising over $183,000 USD on Kickstarter. They made some changes to the physical design, but still use Horus as the scanning software. The CowTech version uses adjustable laser holders and connects the scanner using laser cut acrylic instead of threaded rod. They also redesigned the printed parts and reduced the 3D printer build volume needed to make the parts at home.
Specifications
| CowTech Ciclop | BQ Ciclop (via Lulzbot) | |
|---|---|---|
| Scan Time | 2-8 min | 2-8 min |
| Resolution | 0. 5mm 5mm | 0.5mm |
| Cost (USD) w/o Printed Parts | $119 | na |
| Cost (USD) w Printed Parts | $159 | $400 |
| Scan Area (mm) | 200 x 200 x 205 (h) | 200 x 200 x 205 (h) |
| Adjustable Laser Position | Yes | No |
| Frame Material | Laser Cut Acrylic | Steel Threaded Rod |
Both the Ciclop and Horus are works in progress, and the developers at BQ and CowTech would appreciate it if users shared any modifications with the open source community to continue development of these projects.
Contact on the Google Group or send an email to [email protected]
Resources
Most the important resources for assembling, calibrating and using the scanner, CAD models and .stl files, as well as Google and FB communities from BQ and CowTech are compiled in one place at the CowTech Resources tab. For more detailed resources, particularly pertaining to the development of Horus, please explore the GitHub and DIWO links below.
GitHub
- Sources
- Wiki
- Background / Scientific documentation
DIWO
- Presentation
- 3D Design
- Electronics
- Firmware
- Software
Where to buy?
- he3d
- CowTech Ciclop 3D Scanner
- HE3D Ciclop DIY 3D Scanner Kit Free Worldwide Shipping 130 USD |3D Printers Bay
Contents of the article:
- The principle of operation of shooting in volumetric mode
- What is photogrammetry and how it affects the display of objects
- Turntable - the second stage of creating a scanner 0 Additional software
- Spinscan by Tony Buzer: the basis of all scanners
- FabScan
- VirtuCube
- BQ - laser scanning system
- "Atlas" - a completed project that needs some work
- CowTech Ciclop: a new model of a multifunctional device
- So what is the difference between the CowTech version and BQ DIY version
- Turntables and tables for creating scanners
- Microsoft Kinect 3D scanner 9007 Before you build a scanner
If you want to make your own 3D scanner, the first step is to find a webcam.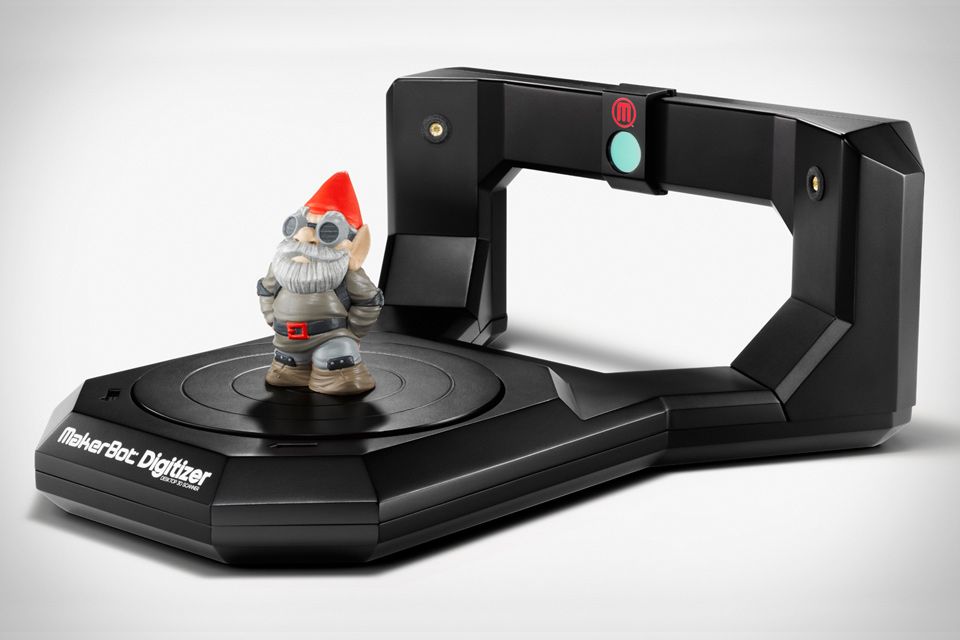 If you have it, the cost of the entire project will cost 40-50 dollars. Desktop 3D scanning has made great strides in recent years, but it still has major limitations. The hardware of the technique is built on the basis of a certain volume and resolution of scanning. You can get good results only if your subject meets the requirements and shooting resolution.
How 3D shooting works
You will be interested in: How to control your TV from your phone: recommendations
Photogrammetry uses a set of conventional 2D photographs taken from all sides around an object. If a point on an object can be seen on at least three images, its location can be triangulated and measured in three dimensions. By identifying and calculating the location of thousands or even millions of points, the software can create an extremely accurate reproduction.
Unlike a hardware scanner, this process has no size or resolution restrictions. If you can photograph an object, you can scan it:
- The limiting factor in photogrammetry is the quality of the photographs and therefore the skill of the photographer.
- Photographs must be clearly visible and clearly in focus.
- They must also be placed around the object so that every part of them is covered.
Without a 3D scanner, you can only make a 3D image of large objects. Small items cannot be scanned. To understand this in more detail, we will analyze the concept of photogrammetry.
What is photogrammetry and how does it affect the display of objects?
You will be interested in: Hair dryer for curling: an overview of the best models, specifications, reviews
Photogrammetry is the science of taking measurements from photographs, especially to reconstruct the exact position of points on a surface. It can also be used to reconstruct the motion paths of designated reference points on any moving object, its components, and in close proximity to the environment.
In short, it gives you the ability to create a 3D grid from multiple photos by comparing similarities between images and triangulating them in 3D space.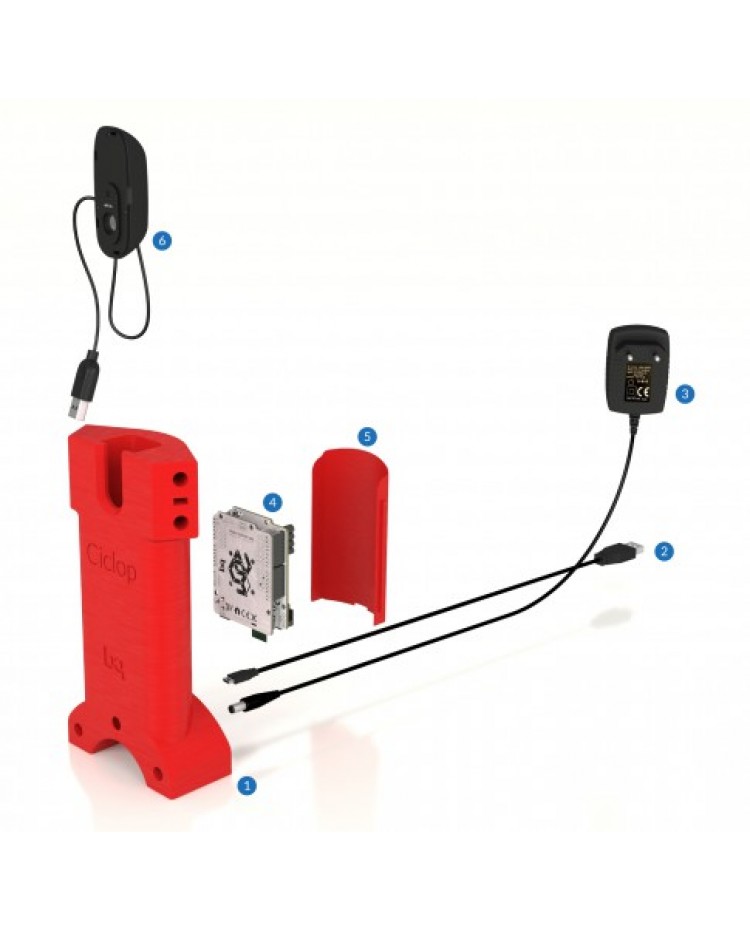
Photogrammetry has been around for a while, but it wasn't until Autodesk jumped into its Memento beta program that things started to work. Memento was renamed to ReMake when it left the beta phase. Sounds like magic, right? Well, it's not magic, it's reality. Now anyone can do 3D scanning without spending hundreds on a scanner. Even affordable open source 3D scanners require quite a lot of knowledge to get them to work properly. With photogrammetry anyone can get what they want.
Turntable - the second step of creating a scanner
All you need to create your own 3D scanner is your smartphone, the included headphones and a player. Here's how it works: you turn the crank, and for every full turn of the turntable, the phone's camera is triggered by the headphone volume 50 times.
You will be interested in:Audiophile headphones: rating, review of the best models
Simple! Transfer photos to your computer and then use Autodesk ReMake to do wonders. It's amazing, but not only is it good at meshing, it also provides tools to tweak the mesh, repair holes, align, prepare for 3D printing, or serve as a system shape as a 3D resource for games or renders!
Well, given that Apple has removed the headphone jack for the iPhone 7 and above, an updated version of the scanner creation will be used. It is based on the principle of working on a trigger for a Bluetooth camera. This will replace the need for a headphone jack.
- High quality photogrammetric scanning requires high quality photographs of the subject from all angles.
- The easiest approach for scanning small things is to rotate the object while taking the photo.
- To do this, the scanner uses a stepper motor controlled by the Arduino board.
- The stepper rotates the object by a fixed amount, and then the infrared LED goes out in a freaking ingenious series of flashes that mimic the camera's wireless remote control.
An LCD screen with a set of buttons allows the user to control the Arduino. Using the buttons, the user can select the number of shots to be taken per revolution. A high quality DIY 3D scanner can work in automatic mode, where it takes a picture, advances the stepper motor and repeats it until it completes a full revolution.
There is also a manual mode in which each press of the button takes a picture, moves the jog dial and waits. This is useful for scanning details. The 3D scanner focuses on the frame around the image.
Optional software
When the photogrammetry software detects a feature in a photo, it tries to find that feature in other images and records the location on all pictures that appear.
There are two solutions:
- One is to move the camera around the subject so that the background stays in sync with the movement.
 This is good for large objects, but it's much more difficult to automate the process.
 - An easier solution is to leave the background untouched. This is easier to do for small objects. Add the right lighting to that and you're on your way to featureless backgrounds.
Another tip is to overexpose your images with a stop or two. This allows you to capture more detail in the subject's shadow while separating the background so that any remaining background objects disappear into brilliant white.
- "Arduino". It has pins that are not covered by the LCD screen, making it easy to connect.
- SainSmart 1602 LCD Shield which has a display and some buttons to control the scanner.
- Stepper motor driver (Easy Driver).
The NEMA 17 stepper motor will rotate the scan object. With a large stepper motor (with appropriate driver and power supply), this high quality DIY 3D scanner could scale up the scan. 950 nm IR LED triggers the camera. Some popular models of handheld 3D scanners are based on this principle. You can repeat the building process with your own hands. We offer several options to choose from.
Spinscan by Tony Buzer: the basis of all scanners
You will be interested: Where to put the tablet in the dishwasher: instructions
In 2011, 3D printing genius Tony Buzer released Spinscan. This is a homemade open source 3D scanner based on a laser and a digital camera. Later, MakerBot used the ideas from Spinscan to create the closed source Digitizer Scanner.
FabScan
FabScan started as a graduation project and has since been adopted by a small community that continues to work on improving its capabilities. The FabScan works like many other laser scanners, but it's aided by a built-in housing that helps even out light levels, preventing scan distortion.
VirtuCube
An alternative method for laser scanners is the structured light scanner. Using a pico projector instead of a laser, the VirtuCube can be easily created with a few printed parts and basic electronics.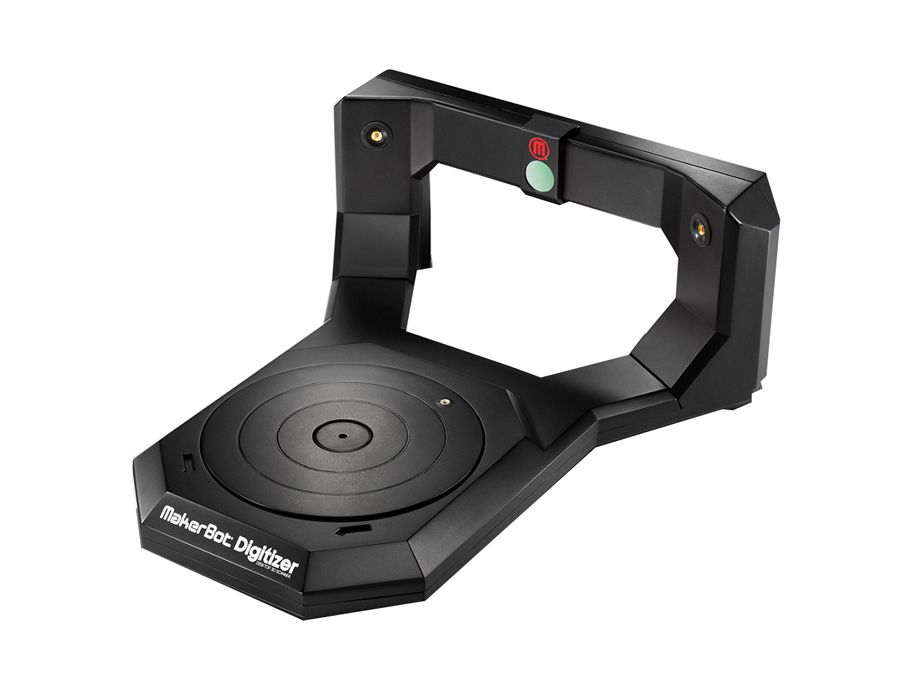 This whole system can be placed in a carton box to prevent other light sources from causing printing errors.
Two exciting new open source laser scanners have already been released: The BQ Cyclop and Murobo Atlas.
BQ - laser scanning system
Spanish consumer electronics company BQ announced the Cyclop 3D scanner at CES. Cyclop uses two laser line levels, a standard USB webcam, and BQ's custom Arduino controller. BQ has written his own scanning application called Horus. While reports say the Cyclop isn't available yet, BQ says it will be later this year.
"Atlas" - a project in progress, requiring further development
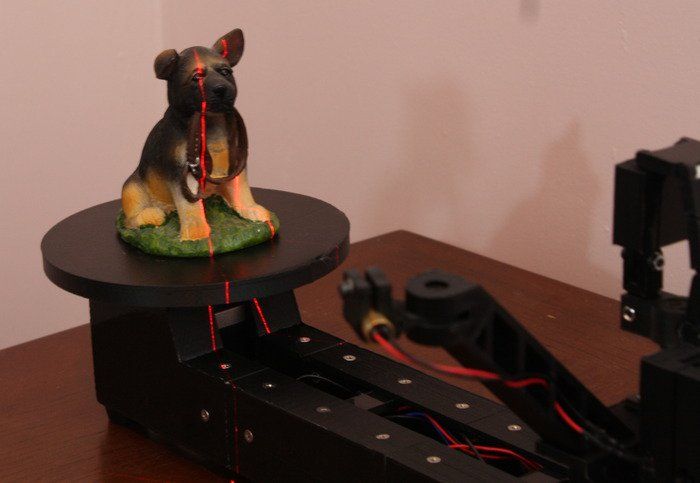
Murobo's 3D scanner with a description of how it works is currently seeking funds on Kickstarter. Like Spinscan, Digitizer and Cyclop, Atlas uses laser line modules and a webcam to scan an object on a rotating platform. Atlas replaces the Arduino Raspberry Pi to integrate control and capture into a device. Like Cyclop, the creator of Atlas promises it will be an open source project. Sets for 129dollars sold out, but some remained at $149 and $209.
In 2019, the company aims to launch a smartphone-based 3D scanner that not only displays background visibility but also constructs focus when capturing an image. In America, DIY novelties are amazing. If you don't know how to make a 3D scanner, use the unfinished version of Atlas. There is a fairly clear functionality, and developers only need to flash the device and ensure the operation of those functions that they want to see as a result.
CowTech Ciclop: new multifunctional
Price goes up to $160 (depending on whether you print 3D parts or not). The company is based in the USA. The resolution of the finished images reaches 0.5 mm. Maximum scanning volume: 200 × 200 × 205 mm. BQ formed the basis of a DIY 3D scanner kit for a 3D printer. With your own hands, you can modify the version of the model to create images in four-dimensional space.
CowTech Engineering leveraged BQ-led funds to give unique value to the updated model.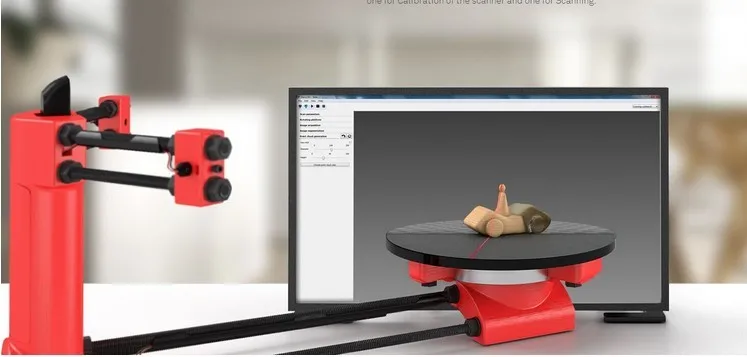 Opportunities added:
- environmental review,
- background capture,
- inverted style lens display.
True to the open source movement, Cowtech launched a Kickstarter campaign to raise money to launch a production version of the original, Ciclop CowTech. The team set a lofty goal of raising $10,000 but was greeted with surprise and delight when the community was able to raise $183,000. The CowTech Ciclop DIY 3D scanner kit from a camera and phone was born.
So what's the difference between the CowTech version and the BQ DIY version?
CowTech Ciclop still uses Horus 3D software as it is a fantastic store for 3D object scanning. The differences, however, lie in a slightly different design, which the team spent several days developing so that the parts can be 3D printed on any FDM 3D printer.
The same blanks can be used to design your own devices. The company's 3D scanners and printers only have a small build volume, so CowTech has designed parts that can be printed on any printer with a build volume of 115×110×65mm, which is found in almost all 3D printers.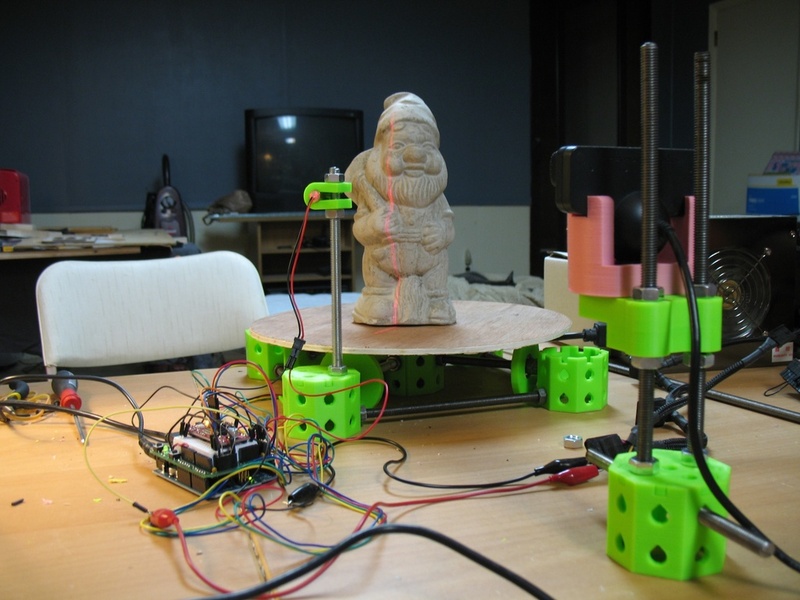
Ciclop from CowTech:
- There are adjustable laser holders here.
- CowTech DIY uses laser cut acrylic.
BQ Ciclop:
- Models use threaded rods.
- No laser cut acrylic.
No big deal, and the scanners still look pretty similar, but CowTech only intended to improve on the existing design, not reform it. CowTech sells scan-ready Ciclop for 159dollars on your website. All in all, this is a great cheap DIY 3D scanner, very efficient for laser triangulation 3D scanning.
Rotary machines and tables for creating scanners
This is because it is based on photogrammetry rather than laser triangulation and is compatible with your smartphone! You can download the 3D printable file to sync devices.
You can make a 3D scanner with your own hands from improvised means. You just need to trust the creators of DIY 3D. A simple device instantly turns your iPhone or Android into a 3D scanner by connecting it to this player. Then, using headphones and a phone camera, he takes over 50 photographs of the object, which will be scanned as the turntable rotates.
Once you have taken these images, you can load them into a program such as Autodesk ReCap to turn the photos into a full 3D file.
Overall this is a fantastic creative project and a great DIY 3D scanner for people on a budget.
Microsoft Kinect 3D Scanner
It's even lower at just $99 (but no longer sold, though Kinect V2 is still available with Xbox One). The company's slogan is: "Make your own 3D scanner from Kinect and surprise your friends.
While Microsoft has responded to demand by creating its own 3D Scan app for the Kinect scanner, there are a number of third-party options that may be preferable. These are:
- Skanect, made by Occupital, which also sells a structure sensor.
- Reconstruct Me. It provides a set of tools that allow you to perform 3D scanning for less than $100.
You will be interested in: How to measure the diagonal of a TV: basic methods
The results are not fantastic, but for the price they are quite acceptable. It has been shown to be inferior to traditional protogrammetry in quality, especially in fine detail, such as on small models such as shark teeth. However, for beginning 3D scanners this is a fantastic entry level product, especially since you may already have one for the Xbox 360. Of course, in order to know how to make a 3D scanner from your phone with your own hands, you need to calculate what is needed for this. If you plan to use Pi Scan to control your cameras, then you should use the Canon PowerShot ELPH 160. But if you are using some other setup, here are some general recommendations for choosing cameras:
 ).
).
Much depends on the budget. Scanners are sold at the same price as cameras. If you want to do everything yourself, then the budget is limited. Pay attention to the affordable segment of the optics and spare parts market.
- The first difficulty encountered in building a 3D laser scanner is finding a rotating platform. At the same time, it needs to be controlled only with the help of MatLab. Instead of spending a lot of money or time, you can buy a 28BYJ-48-5V stepper motor with a ULN2003 drive test module board.
- Next, glue the platform to the stepper motor shaft and place it in the groove inside the holder. The platform should be flush with the "marble", but keep in mind that the cheaper it is, the more inconsistent diameters that can make things not level.
- If you have a method for obtaining precise rotation that can be controlled in Mat Lab, set up the camera at any distance and height, as well as the laser line to the left or right of the camera and the turntable. The angle of the laser should be optimal to cover most of the turntable, but nothing needs to be exact, we'll handle the difference in model scale in code.
- The most important part for proper operation is camera calibration. Using the MatLab computer vision toolkit, you can get the exact focal length and optical center of the camera with an accuracy of 0.14 pixels.
Please note that changing the camera resolution will change the values of the calibration process. The main values we are looking for are the focal length, measured in pixel units, and the pixel coordinates of the optical center of the image plane.
Most cheap compact cameras do not have a software interface. They can only be operated manually or mechanically. But a team of volunteers has developed software that allows you to remotely control and configure Canon compact cameras. This software is called CHDK.
- The CHDK is downloaded to the SD card, which is then inserted into the camera.
- When the camera starts, CHDK starts automatically.
- Because CHDK never makes permanent changes to the camera, you can always just remove the dedicated CHDK SD card for normal camera operation.
CHDK is an essential prerequisite for the software controllers listed below. The controllers run on a PC or Raspberry Pi and communicate with the CHDK software running on the cameras via USB. With other kinds of cheap cameras, the only control option is some kind of mechanical or manual start through the installer programs as shown above.
Origin
▷ cyclop scanner 3d models 【 STLFinder 】
Cyclop scanner: Ball of wool
thingiverse
You can see in the photo the ball of wool on the Cyclop, and the Horus software in action. ...Print Settings Rafts: Doesn't Matter Supports: ...
Cyclop 3D scanner upgrades
thingiverse
Thse are just a few parts I designed and printed to make the scanning of the cyclop 3d scanner more accurate as I was getting a scan within a scan when using both lasers. ...This helps ensure that the lasers are set up at the same angle and distance...
bq cyclop scanner
thingiverse
camera holder in 2 parts printed on prusa i3 .
Optoma PK201 with Makerbot Cyclops 3D Scanner Chassis
thingiverse
Instructions Drill and enlarge holes on Cyclops 2. 0 3D Scanner front, left, bottom and rear plywood panels as described above Print extra parts from provided .stl files Clean printed parts Add rubber band or o-ring to focus wheel and attach to..
Scanner Project for a hybrid of FabScanPi and Cyclops type Scanner
thingiverse
This is a project I have been working on for sometime of using a Cyclops style fram for a fabScanPi based scanner with the added feature of vertical movement of the camera. These file will be updated as I progress and anyone who wishes to add or help...
Cyclop
cults3d
Cyclop Scale 1/8
Cyclop
sketchfab
High Quality Cyclop model with rig and 23 animations ready to be used in your projects. Mace is separated mesh attached to the hand. So you can change your weapon as you like. Cyclop 39.821 tris Mace 1.022 tris PBR materials with several texture sizes...
CYCLOP GLASSES
grabcad
CYCLOP GLASSES
Scanner
sketchfab
Scanner
Cyclop
sketchfab
Sculpted in ZBrush; Retopologised and rigged in Maya; Textured in Substance Painter
Cyclop
sketchfab
No description provided.
Cyclop
sketchfab
Cryclop
Cyclop
thingiverse
Warhammer 40000 style model approx 1:35 scale
Scanner
grabcad
Just Scanner
scanner
thingiverse
scanner tdm de radiologie imagerie medicale
Scanner
3docean
Scanner Computer 3D Models. ...3D model of computer scanner to use in your scenes.
Scanner
sketchfab
Scanner prop from The Love Bug Amanda Franke - sherida college - thesis film
Mekka : Cyclop
sketchfab
The Cyclop sacrifice his two side arms to mount two heavily armored side torso who use reactive armor incrusted with flares launchers to intercep incoming missiles. His foot wear two stabilizer to reduce recoil when he substain fire or take heavy...
Cyclop Minion - Easy print
thingiverse
Cyclop minion splitted for easy print Do not print under 50% scale, problems detected on belts.
Keycap cyclop robot
cults3d
Keycap cyclop robot Stem: MX cherry and clone This is for PERSONAL USE ONLY. ...NON-COMMERCIAL Please enjoy the keycap
cyclop extruder holder
thingiverse
it's an extruder holer for cyclop's likes extruder (made in china) working well since one week
Cyclop Hotend Support
thingiverse
... hotend on an eMotionTech Micro Delta Rework. ... The cyclop hotend is available here https://fr.aliexpress.com/item/Hot-12v-24v-Cyclops-and-Chimera-Extruder-2-In-1-Out-2-colors-Hotend-Bowden -with/32796885685.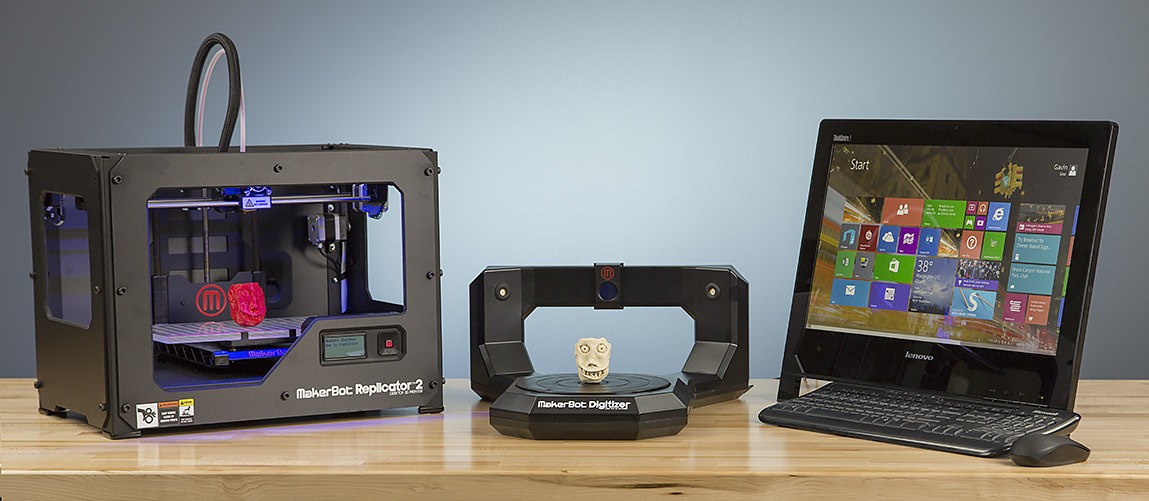 html You need M4 screws and bolts to fix it.
Cyclop Fan Duct
thingiverse
This is a cool fan duct for chimera and cyclop extruder. Put it on the original 30mm fan and add a 40mm fan in the back. Infill 100%. (Remove internal supports) 05/28/2016 UPDATED: fixed some issues 06/01/2016 UPDATED: complete redesign to fit...
Troll cyclop toon 3D model
cgtrader
Troll cyclop toon
E3d Cyclop chimera Kossel effector
thingiverse
Designed specially for E3D Cyclop and Chimera
E3d Cyclop and E3d Chimera
thingiverse
i modeled up the cyclop and chimera if looking for a fan shroud for it (check this out- http://www.