3D printer heated bed cover
3D Printer Heated Beds - How Important Are They?
Like most tech, 3D printers have a host of accessories and add-ons that improve the quality of prints, decrease the chance of a failed print, and make general use easier.
One such add-on is the 3D printer heated bed, an accessory key to printing more complex projects and tougher filaments, such as ABS, Nylon and PETG.
Without enough heat underneath the model, you run the risk of the filament cooling too quickly, leading to warped edges and corners, and sometimes even cracking in the model’s midsection.
The decision to get a heated bed can be a tough one, especially if you’re new to 3D printing and want to try adding a heated bed.
We’re going to cover some of the most important and frequently sought information regarding these add-ons here, as well as what the best 3D printer bed surfaces are depending on how they’re used.
What Does a Heated Bed Do on a 3D Printer?
Heated beds are a 3D printer bed that heat up to various temperatures in order to regulate the cooling temperature of a print.
Heated beds are a good choice for filaments and projects that are prone to warping, as the temperature stops a print from cooling too quickly and losing its shape mid-print.
While many commercial 3D printers come with a heated bed as standard (a few years ago this was much rarer), many printers have heated bed add-ons for better ABS printing.
As 3D printers have evolved, so too have the features that come with them as standard, and more and more 3D printers on the market today do come with heated beds.
What are the Benefits of a Heated Bed?
As mentioned before, 3D printer heated beds reduce the chances of warping or mishappen prints for a variety of reasons.
As well as regulating the cooldown, a heated bed will also ensure first layer adhesion. In other words, the first layer of the print will stick more securely to the 3D printer bed. This provides a more solid foundation for the rest of the print, making warping far less likely. This is similar to how a pottery wheel holds the clay steady as it’s reshaped.
A 3D printer’s heated bed also makes post-print removal easier and less likely to damage your project. While the printing material is normally set as one type per project, a heated build surface will ensure any filaments don’t shrink or harden too quickly and become difficult to remove without damaging the print. This is like to how steam makes a letter easier to open by warming the glue on the envelope.
Are Heated Beds Necessary?
Like oiling a squeaky door, 3D printer heated beds are not necessary for most purposes, but they can make things run much smoother. How important they are depends on how you use your 3D printer.
If you prefer to use PLA filaments, then you may be comfortable without a heated bed. PLA barely warps even without a heated bed, and tend to do well as prints. While a 3D printer bed will always do better if heated, PLA users may find the expense and effort of installing a heated bed to simply not be worth it
However, if you use more fragile filaments like ABS and PETG, then a 3D printer heated bed is considered absolutely necessary.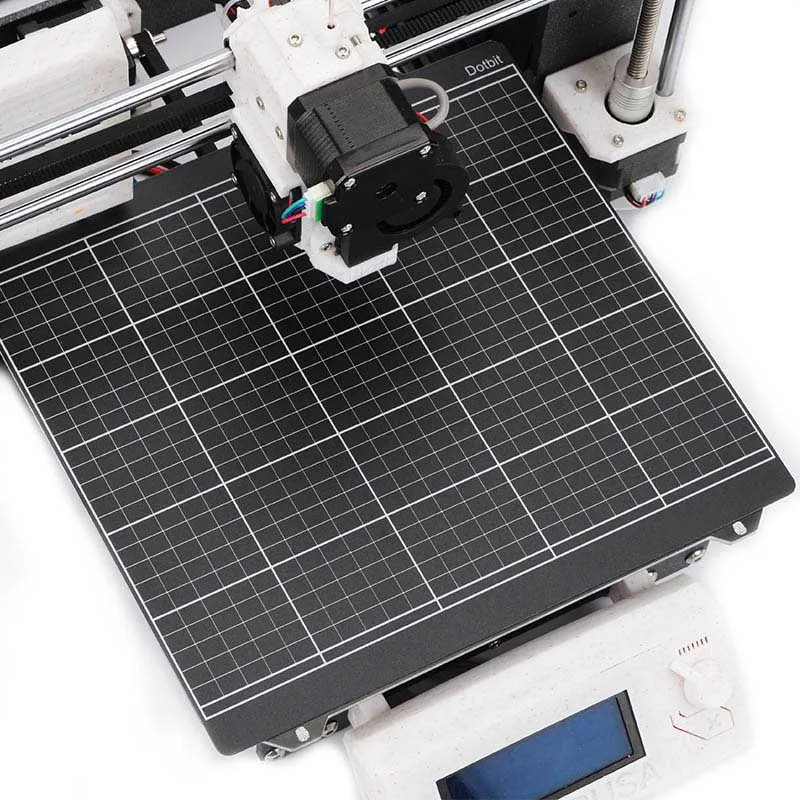 A heated bed is even more important if your 3D printer has an open build area, as cooler temperatures and even light breezes can warp these materials which are prone to becoming misshapen while printing.
It’s worth noting that there’s no such thing as the perfect filament, no matter the project you have in mind. All 3D printer filaments have the potential to warp, and a heated 3D printer build surface is one of the best ways to minimize the chance of a failed print.
Like with most things, the bigger the project, the higher the likelihood of failure. Smaller 3D printer projects like statuettes, bookmarks, and keychains will normally print and remove just fine. But larger projects, regardless of your chosen material, will always benefit from a heated build surface.
What’s the Best 3D Printer Bed Surface?
If your 3D printer didn’t come with a heated bed as standard, you may want to look into installing one yourself. Not all heated beds are created equal, and the best 3D printer bed surface – heated or not – also depends entirely on what you want to do with your printer.
3D printer bed surfaces, or build plates, come in many forms, each with their own benefits and drawbacks. We’ll look at a few of the more common ones here so you can decide which is the best 3D printer bed surface is right for you.
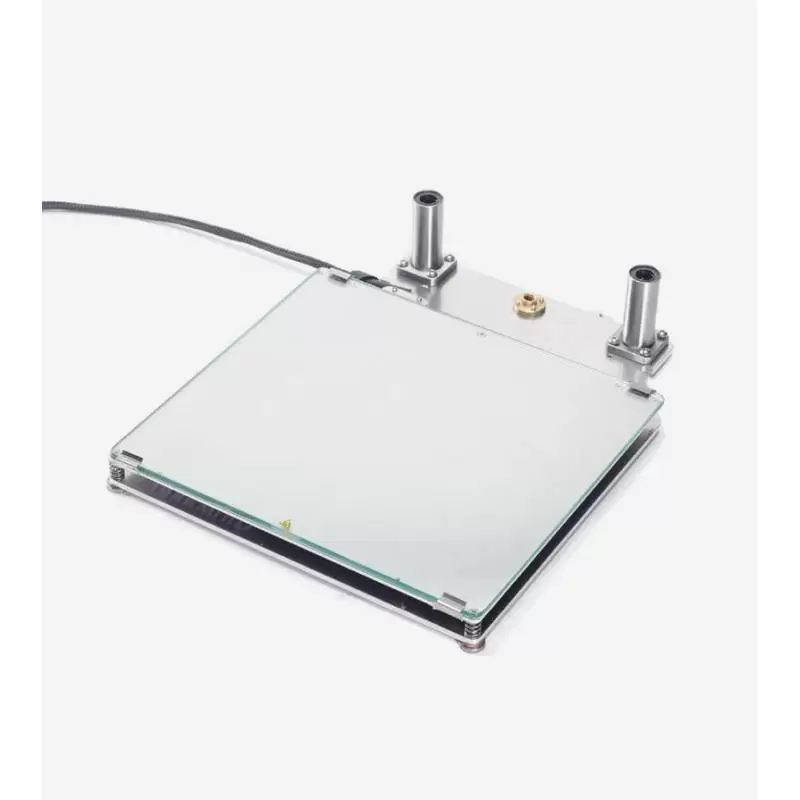
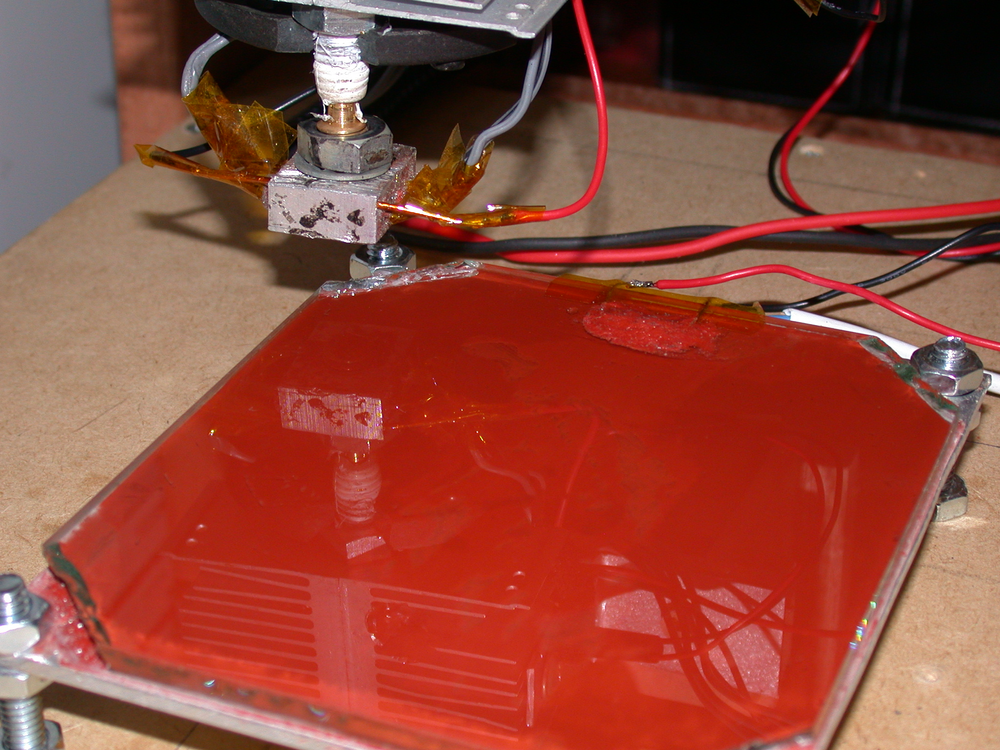
Glass
Glass is widely considered to be one of the best 3D printer bed surfaces. It’s solid, flat, and has a longer shelf life compared to most materials even when exposed to heat.
As a heated build surface, glass takes a longer time to heat up compared to others due to its low conductivity at room temperature. However, it’s one of the best 3D printer heated beds as it spreads the heat around more evenly than its metal and polypropylene counterparts.
However, in the event that heat is not spread evenly, glass can crack and even break, meaning it can provide a very dangerous environment if not used with cautious attention. While easily and cheaply replaceable, using glass as a 3D printer heated bed can go very wrong.
If you choose glass as your build plate, be sure to reduce this risk by going with good quality, even sheets at least 3mm thick.
It’s important to note that glass is not naturally adhesive, and so will require the use of glue or similar before printing.
Polypropylene
Polypropylene is similar to glass in that it can provide a smooth finish on the first layer of a print due to its flat, even surface.
While it doesn’t have as long a shelf life as glass, polypropylene sheets are fairly cheap to replace, and are durable enough to handle larger prints and high temperatures.
Polypropylene is also considered to be one of the best 3D printer bed surfaces due to its high adhesion while hot, and low adhesion when cool. This means that when used as a heated bed, it will have solid first layer adhesion to reduce the chance of warping, and is also easy to remove from the project after its cooled, further reducing the chance of breakage.
Ceramic
Ceramic is used as a heating bed due to its even spreading of heat, much like glass. But unlike glass, ceramic build plates are not as prone to fracturing and breakage if heated unevenly.
Ceramic may be one of the best 3D printer bed surfaces due to this reduced risk, though its conductivity is even lower than that of glass, and so fast heating can result in cracks.
Ceramic is also considerably heavier and more expensive than glass, making it somewhat more pricey and unwieldy should it need to be replaced.
As long as precaution is taken when used as a heated bed to ensure a slow increase of heat, ceramic makes an ideal 3D printer build surface.
Metal
Metal materials are commonly used as 3D printer build surfaces due to their high conductivity. Most machines that use metal build plates come with them as standard, as the differences between various metallic materials make it difficult for non-experts to install as 3D printer heated beds.
The magnetic properties of most medals make them easily connectible and removeable to the right devices, especially if they come as thin sheets such as the East-Peelzy or BuildTak FlexPlate.
While metal conducts heat very well and can spread it around evenly, most varieties will expand when used as 3D printer heated beds, which can increase the chances of warping projects and even damage your 3D printer if it has an enclosed build area.
3D Printer Heated Beds Frequently Asked Questions
Are heated beds safe?
Like an iron or oven, the safety of a 3D printer heated bed relies on the caution of the user. Heated beds can reach temperatures of over 110℃, and can be very dangerous if not used with care.
If you are careful not to touch a build plate until it has properly cooled down, and ensure young children and pets are kept away from your printer while it’s in use, a 3D printer heated plate should be as safe as any heated device in your home.
Do I really need a heated bed?
You don’t need to have a heated bed if you’re printing PLA (though it helps), but it’s key to keep a heated bed on for ABS, Nylon and other filaments to prevent warping – ideally within a heated chamber.
Can I use blue tape on a 3D printer heat bed?
Tape is commonly added to 3D printer build surfaces to increase bed adhesion, and the same is true for heated beds. Just be sure to use blue (or painters’) tape, as it is highly heat resistant and can withstand the temperatures of even the hottest and best 3D printer heated beds.
Related articles:
- Ender 3 glass bed – best options and guide
Mistakenly tore paper of heating bed - 3D Printers - Talk Manufacturing
jkbennett
#1
I just got an Anet A8 printer and while tearing off all the acrylic paper I mistakenly pealed the paper off the heating bed. Doh!
Is there a way to replace that or do I have to buy another heating bed?
Thanks,
-----
UPDATE: A lot of good information in the comments below. Here is my take on getting going with 3d Printing from tinkering and what I got from it beyond any comments below on specific items. Hope this helps some others as much as it has me.
Starting with a box of parts and knowing almost nothing about 3d printing, this forum really helped get my bearings.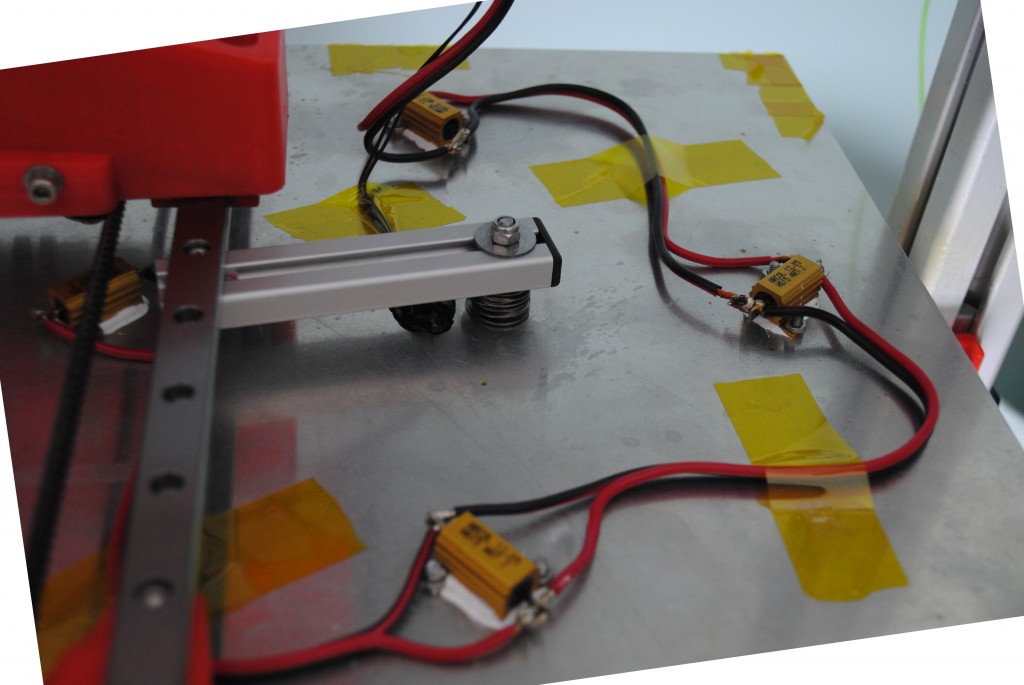 So thanks to all for that.
I quit using the Blue Painters Tape for now and moved to using a glass surface (below) which works great. I didn’t see the 3M tape listed below but found Scotch® Blue Multi-Surface Painter’s Tape 2in X 60yds (2090-48N). The 1.88 width allowed me to easily lay down 4 strips across and line up. I started from the center out from a mark I put on each side of the heatbed plate after measuring the halfway point. When I didn’t get the tape to seamlessly align just right, just pulled up the offending side and straightened it out. Pretty easy to not overlap nor leave any gaps. Still, glass works as good as I need, so going with that.
Researched a bit on the bed leveling and I redid it to where the A4 paper was movable but catching when the bed and nozzle were already heated up. I had to be careful moving the extruder around but I read that makes a difference and seemed reasonable to expect expansion from heat.
I was still having some issues with printing and noticed the heatbed was a bit jittery on forward and back motion and I tightened it a bit more and that smoothed that out.
Per below suggestion ordered Glass to replace tape (Heated Bed Tempered Borosilicate Glass Plate 213*200*3mm) from Amazon for about $12 and add some “extra hold” hairspray I guess and hold the glass down with binder clips to the heating bed. Just letting the bed cool and wiping the glass off with a paper towel and some isopropyl alcohol between prints and I was up and running with few failed prints. I did splurge $6 and bought a 3D Print Removal Tool fromToyBuilder Labs on Amazon that works great to pop the designs quickly.
Also, picking the right design with a very solid footprint on the glass really helped at first figure out what works. Something over an inch or two that was thin and flat worked great and helped me see what was what.
Of course I had to level the bed a few times to just it just so the paper would catch just a bit across the new glass bed. After getting the bed level and at the right height, haven’t had to adjust it since.
My final issue was getting blobs of brown plastic dropping on the designs and ruining them. The extruder was leaking above the nozzle and heating element and eventually dropping globs of burned plastic in the middle of prints. I am using a very small tool to clean off the plastic off both as it is printing. Takes a minute every 10 or fifteen minutes to keep it clean on long prints but easily getting through the print cycle many time successfully.
Getting there but it definitely takes some knowledge to do this well. Good to know.
Thanks everyone.
1 Like
kolbers3D
#2
Hello. This is no big problem. The ehite tape is to protect the bed from scratches during transport. You can buy blue masking tape to replace it. Or you print directly on the alumium surface. Do not forget to level the bed again. But in my opinion the best practise is to buy 3M 467MP adhesive tape and pertinax.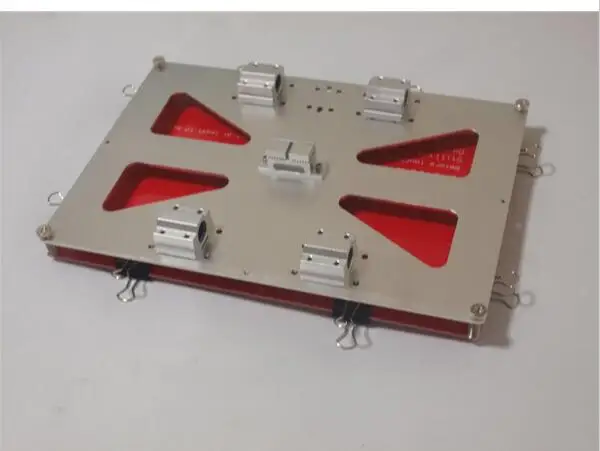 This is the best surface for printing.
1 Like
3dprops
#3
Hi
It is there to protect the bed during transport. I personally don’t use any tape for printing and haven’t had a problem doing so, the prints stick to the bed fine, only filament I have found troublesom is ABS, but other filiments have been fine to print. But if you wish you can buy the blue tape.
1 Like
Monsen
#4
dont worry, you can use masking tape to replace that
e.g. blue tape, but i just use cheap masking tape
ps.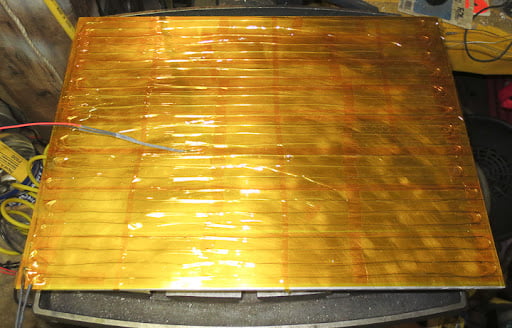 : maybe try some hairspray to increase the stickiness of the print area
1 Like
enwinston12
#5
Don’t worry. That is just masking tape. Just cover your head bed in painters tape
1 Like
kolbers3D
#6
Hello! Just remember to put the tape on when the bed is cold. There should be any need for gluestick or hairspray when using blue tape. Hairspray and gluestick are good on the aluminium bed. Check your bedleveling if prints do not stick. Maybe the original tape was slightly thicker than your bluetape. Until you use pla bluetape is okay. But abs often peels of the bluetape while warping. Best regards Sebastian
1 Like
Panic3D
#7
Buy any 220x220mm 3mm thick glass, and use it as “tape”. Clamp it to the hotbed, and use hair spray to get better adhession of pieces. Le the pieces cold down alone and they will almos pop themselves.
Tinotimefilms
#8
Buildtak I recommend that stuff over masking take. I can make ABS stick to it like cement. With masking tape it peels the tape up
1 Like
jkbennett
#9
I am using PLA for now but will keep this in mind to try as I go.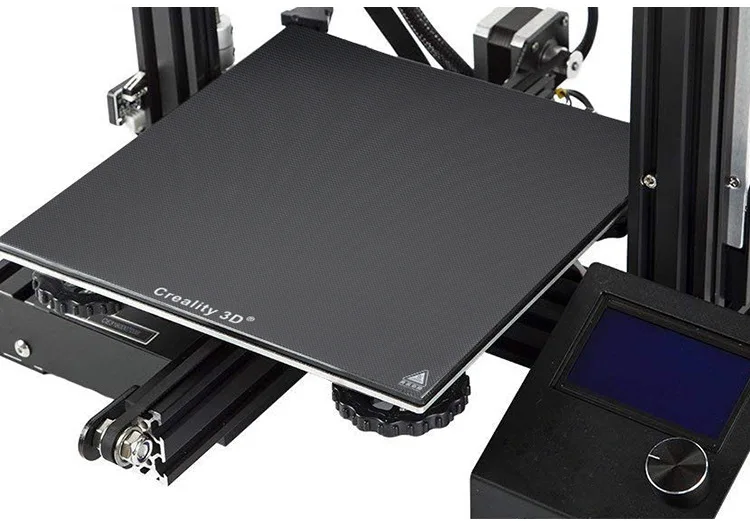 Thanks,
jkbennett
#10
That is a good suggestion. I found a good one to try for around $10 on Amazon. It is close enough I think: “Heated Bed Tempered Borosilicate Glass Plate 213*200*3mm”.
Just some binder clips and I should be good to go to give that process a shot. Thanks,
jkbennett
#11
moved to original question text
214*214mm A+B Magnetic Heated Flexible Bed 3D Printer Platform Printing Stickers Reviews
214*214mm A+B Magnetic Heated Flexible Bed 3D Printer Platform Printing Stickers Reviews - Banggood UK Online ShoppingCustomer reviews
- 5 star1 (100.
 0%)
0%) - 4 star0 (0%)
- 3 star0 (0%)
- 2 star0 (0%)
- 1 star0 (0%)
Write a review You'll get double Banggood points for a review if you're one of the first 3 to leave it!
- All reviews (1)
- Image (0)
- Video (0)
- All Stars
- All stars (1)
- 5 Star (1)
- 4 Star (0)
- 3 Star (0)
- 2 Star (0)
- 1 Star (0)
Sort by:
evaluation
- estimate
- utility
- date
Reviews only from your country (Russian Federation)
|
Show original
Part of the review is translated automatically.
General 0 page
Go to page
Go
Recommended
-
47.25€
Upgraded Version Creality 3D® BL-Touch Heated Auto Bed Leveling Sensor Kit For Creality V1 Motherboard Including 3D-at
(645)
-
13.
 22€
22€ Nema17 59Ncm 2A 1.8°4-lead 48mm Stepper Motor For 3D Printer CNC
(368)
-
47.25€
Creality 3D® CR-Touch Auto Leveling Kit Compatible with Ender-3 V2/Ender-3/CR-10/Ender-3 pro 3D Printer
(283)
-
425.34€
[EU Direct]TWOTREES® SP-5 Core XY Print Size 300*300*350mm 3D Printer with Full Metal Body/Double Linear Rail/DDB Extruder/Resume
(129)
-
29.
 22€
22€ TWO TREES® 220/235/310mm PEI Building Surface + Spring Steel Plate + Heated Magnetic Base Sticker Set for 3D Printer Part
(232)
-
75.61€
Bazeus 65W USB PD 30000mAh Power Bank PD QC3.0 FCP SCP Fast Charge External Charger Battery 3 inputs and 5 outputs with USB-C to USB-C cable 100W for
(201)
recommendation for you
Cleaning the 3D printer table.
 Tips and Tricks.
3D printing is a very unstable process, I think everyone who is at least slightly familiar with plastic filament printing technology will agree with this. Unpleasant crashes in the 3D printer can occur for various reasons, and one of the most common reasons is the detachment of the model being grown from the desktop surface. And as a rule, this happens in the middle of printing, when you are already convinced of the stability of the press and are distracted by another activity. It is precisely for this reason that ensuring good adhesion of the first layer to the platform is very important for the successful completion of 3D printing.
Today there are many ways to improve the adhesion of the first layer to the bed. A lot of articles and recommendations have been written about this, so we will not talk about them. It is worth noting one of the simplest methods - is keeping the desktop of a 3D printer clean . Regular and thorough cleaning of the platform will not only improve adhesion, but will make printed models more beautiful and smooth.
In this article we will look at the best way to clean a 3D printer table, using popular coatings as an example:
Remember to use caution when using the methods below, as spilled liquid may damage the 3D printer. We recommend removing the bed from the printer before cleaning (if possible).
PEI sheet surface cleaning
Lately, PEI sheet has become a very popular material for improving adhesion in 3D printers. It provides excellent adhesion to various materials, and when it cools down, the printed model lags behind it very easily. The sheets are very simple and not fussy to use, and most often it does not require additional application of glue or adhesive tape.
Unfortunately, in order to achieve maximum efficiency, the PEI surface also requires regular and high-quality cleaning. If PEI is touched frequently, it can develop greasy spots that reduce adhesion to the material. Rough cleaning can also damage the surface and reduce sticking. Regular cleaning and maintenance of PEI will ensure that your models do not come off.
How to clean the surface of PEI
To clean this surface, we recommend using isopropyl alcohol (Chemical pure, odorless) with a concentration of more than 70%. You can use it with a smell, but it is very caustic and unpleasant, the room will need to be ventilated.
Wait for the platform to cool, then liberally soak a dry cloth or paper towel with alcohol and wipe the surface. This will remove a significant portion of the fats and oils from the bed.
Acetone is also good at dissolving plastic residues on the surface. In the same way, liberally moisten the cloth with liquid, then gently wipe the surface of the 3D printer desktop. We strongly recommend doing this work in a well-ventilated area, as acetone is highly flammable and its vapors can penetrate the electronics of the device
If you have been using PEI sheet for quite a long time, and its resource has been significantly used up, we recommend using fine grit sandpaper (1500+).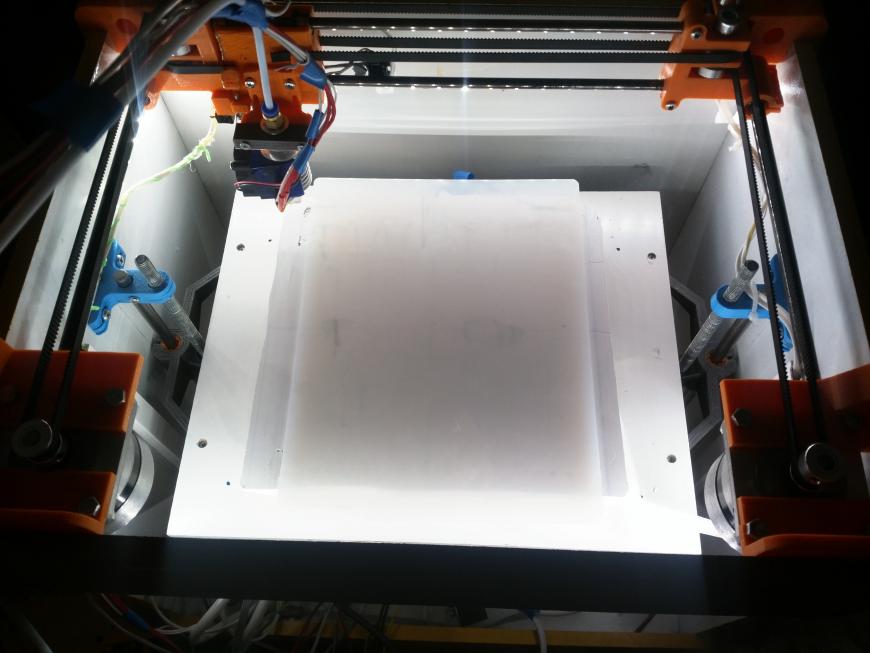 With gentle, circular motions, sand the surface until light scratches and depressions are removed.
When should I clean?
Most manufacturers recommend cleaning the surface with isopropyl alcohol every 2 to 3 prints. After a few months of use, sand the surface and wipe thoroughly with acetone. If it is no longer possible to restore the surface by the listed methods, then replace it with a new sheet from PEI. The lifespan of such material varies depending on the brand and frequency of use of the 3D printer.
Cleaning the glass surface
Glass is another very common 3D printer desktop material. Much more durable than PEI and similar surfaces. The glass plates provide a smooth and level surface at the bottom of the model.
This surface is usually used in combination with other aids (eg glue stick or hairspray) to improve the adhesion of the first layer. Such products are especially popular on tables that are not equipped with heating. Therefore, regular cleaning of the glass is necessary to prevent adhesive or varnish from sticking.
How to clean the glass platform
The easiest way to clean a glass plate is to use a scraper or a non-metal spatula. If the table is heated, then heat it until the material remains soft, after which they should be easily removed with a scraper.
Be careful when scraping. Depending on the scraper, the blade can be very sharp, so be careful not to scratch the surface. We recommend that you put your hand on the handle of the scraper, and with the other hand press down on its middle, so that the greatest force is directed downwards.
If this does not work, try wiping the glass with warm soapy water. Although simple, this method is very effective for removing hairspray, glue, and other adhesives. Keep in mind that this method is only recommended if the 3D printer allows you to remove the platform. Spilled water can seriously damage the heating element, power supply or other electronics of the device.
Dirt can also be removed with specialized cleaning products. For example, wet alcohol wipes, window cleaner, isopropyl alcohol will also effectively wash away adhesive residue and restore the glass surface. However, do not take too strong cleaners. Such substances can severely damage the surface or even the 3D printer. In order to be sure to select a cleaning agent for your particular 3D printer, it is best to contact its manufacturer. Most often, they willingly make contact with users and willingly give advice.
When to clean the glass surface
Again, this will depend on how often you use the printer. We recommend cleaning the surface after each print to prevent buildup of glue or varnish. Such a procedure will not take much time, but the print will be more stable, and the resulting prints will have a beautiful and even surface. Once the models stop sticking (usually after a month), try washing the surface with soap and water. After about two to four months, you will have to resort to isopropyl alcohol or other specialty drugs. substances.
Cleaning adhesive tapes
Adhesive tape is another proven way to increase adhesion to the print platform. Today, this method is more common on 3D printers without the function of heating the desktop. Masking tape is the most common remedy, but so are Kapton and others.
One of the reasons for the popularity of such linens is their ease of use and relatively inexpensive cost. They are easy to stick to the surface and are available at almost any hardware store. However, there are also disadvantages: the tape quite often peels off when the printed model is removed, so it must be reapplied regularly.
How to clean?
Unfortunately masking tape is one of the most difficult to clean due to its fragility. however, we have found that gentle scraping is one of the most effective ways to clean it. With light pressure, evenly scrape off the remaining plastic thread from the surface, being careful not to tear it.
If the tape does break during cleaning, replace this area with a new strip.