M3D micro 3d printer software
M3D Printer Review 2022 - Is This 3D Printer Worth The Money?
2.2
See Price
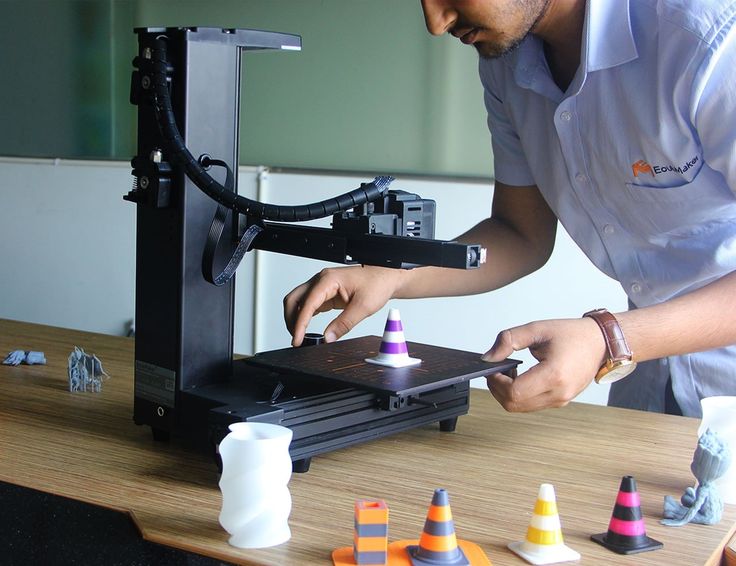
Usually, when you see a seemingly great product for a very low price, alarm bells start ringing. However, every once in a while, you’ll find a product that genuinely lives up to the hype. Today, we’re taking a look at the M3D (Micro 3D) – an extremely compact, budget 3D printer.
We’ll be looking out for any areas it excels, but won’t shy away from mentioning any flaws we uncover. This way, you’ll know our coverage is balanced and impartial. This not only benefits us but lets you decide if a given printer is right for your needs. With that said, let’s begin.
| Filament Diameter | 1.75mm |
| Extruders | 1 |
| Supported Materials | PLA, ABS, Nylon |
| Connectivity | USB only |
| Printing Speed | Up to 55mm/s |
| Build Volume | 4. |
Table of ContentsShow
Design
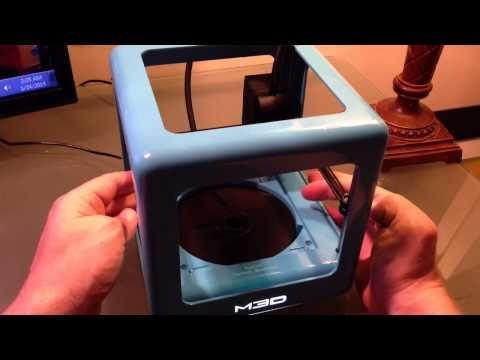
This printer comes in five bold shades: red, blue, green, grey, and black. It’s cube-shaped, 7.3” in every direction, meaning it’s among the most compact 3D printers on the market – perfect for sitting atop a standard desk. The whole thing weighs just 2.2lbs, too, thanks to its lightweight, carbon fiber frame.
As you might expect, the build area is fairly small. It’s not uniform either, as it’s a little wider than it is deep. Still, this offers enough flexibility for most small projects, and larger models can always be printed in several parts. That said, the print speed isn’t fascinating, so it might take slightly longer this way.
Notice the lack of a filament spool – it’s actually contained underneath the print bed! Now, this printer can only fit about half a spool at a time, so you’ll have to either buy smaller rolls or re-spool half of it each time. This isn’t a huge problem, but it’s definitely worth bearing in mind.
Printing
For its size and price, the M3D actually produces decent-quality prints. It has a layer resolution of between 50 and 350 microns, so you can reproduce fairly detailed models. However, it does have a tendency to produce loose threads and extra hanging material, particularly on areas with an overhang.
The edges come out crisp and well-defined, although supporting structures are often wispy. A quick buffing with a cloth will remove most of these imperfections after the fact, though, and supports are intended to be removed, so as long as they do their job, there’s no problem. All in all, not bad.
Usually, entry-level printers only support a handful of different materials, but this one is capable of printing with a whole host of different filaments. With the right nozzle upgrade, you can even use carbon fiber, if you’d like – something very few budget printers support.
Features
One of the best things about the M3D is the lack of fuss. Normally, there are several things to check before getting started, but the M3D does a whole range of checks and calibrations automatically. Everything is taken care of, leaving you free to get the good bit: the printing itself.
This printer comes with its own, specially-designed software, which is available for Windows and Mac. There’s no Linux support, unfortunately. This software is easy to use, although it does have to be left running for the entirety of the print. There’s a handy little percentage notice, though, to give you a vague idea of when it’ll be finished.
You can, of course, use different software if you’d like. However, for new users, the M3D application allows you to hit the ground running. It’s straightforward but allows for a good degree of versatility and control over your models.
Cost
Considering this model retails for less than $300, its print quality is astounding. This is among the least expensive printers available, yet it outperforms some far more expensive models. Sure, it’s likely not going to be enough to satisfy pro users, and it absolutely can’t stand up to commercial use, but for beginners, it’s perfect.
This unit doesn’t offer any upgrades or variants (other than the color), plus the software it uses is included for free. As such, there are no hidden costs beyond those of the proprietary, smaller spools of filament. These are entirely optional, though, and third-party filament can be used if you spool them manually.
As far as pricing goes, there’s nothing to complain about. What you see is what you get: a low-cost, compact printer with no additional charges.
Support
Micro 3D provide a good range of support options in case you run into trouble. There are tutorials, a Discord-based user forum, and even a dedicated area where you can log in and raise a support ticket. This is how you’re supposed to do customer support: as simply as possible.
That said, the warranty period is pretty short at just three months. You can extend this by a year or two for a price, but at the time of writing, the page to do so returned a 404 error. Still, we’d expect the price to be fairly low given the cost of the printer. We’ve seen printers where the extended warranty costs more than a brand new M3D though, so don’t take it for granted!
The knowledge base is pretty extensive, with guides covering everything from the basics of 3D printing to advanced tips for the software. Really, just about any issue you could face will be addressed in here somewhere, so in all likelihood, you’ll never need to request help from support.
Summary
Update: As of May 2019, we can no longer recommend this 3D printer.
The M3D was once a powerful and versatile printer, but it is no longer recommended due to its substandard customer service. It won’t do in 2022. If you want to buy a 3D printer but don’t know where to start, you could do far better than the M3D.
M3D Micro Troubleshooting - iFixit
Your device is cool to the touch, or filament does not extrude from the nozzle.
Caution: Device nozzle may be hot and may cause burns. Exercise caution when determining if device is cool.
Heater issues are most commonly caused by poor location of the heater and rubber insulation. If the elements are too high up the nozzle, the tip of the nozzle would be too cool. To fix this, reposition the heater to be near the tip of the nozzle.
If the front cover of the print head is off, air from the environment (such as air conditioning or a breeze from an open window), may cool the nozzle. Put the cover back on the printer head, or if you have lost it, you may purchase a new one with request to M3D’s Technical Support.
Unfortunately, the heating element might just be broken, or have disconnected wires. To confirm whether the heater is broken, load the filament into the machine as usual, and open the M3D Spooler application on your computer. At the bottom of the Spooler window, you should see the temperature rising. If the temperature doesn’t rise above 50 Celcius, the heater wires may be broken or disconnected. In this case, send a photo of the broken parts to helpdesk@printm3d. com to begin the Return for Repair process.
You have problems with incorrect placement of filament by the printer.
Residue from previous incorrectly configured prints such as poor print bed calibration can cause the print nozzle to drift. Ensure no residue is present on print bed and properly configure the print bed offset in the software.
The friction between the movement bands and support rods is causing the nozzle to improperly print. This issue might also be caused by obstructions in the bands. Ensure nothing is blocking the tracks and carefully clean if required.
The printer nozzle can become stuck moving in one direction as a result of uneven placement of the printer on a surface or friction between the movement bands. Ensure that the unit is on a level surface, and that tracks aren't blocked by debris.
Filament is not coming out of the printer head.
Upgrade the software by downloading it from the M3D website.
The print head may be overheating, which causes the printer to have difficulty extruding material. This can then cause the filament to get pushed back up into the extruder gear. Remove wallE cover to access the extruder gear and clear the area of filament. This can also cause the fan to stop running while printing. Refer to the “fan” section.
If filament is stuck in the print head, remove it. Refer to the nozzle removal guide and follow the steps.
Fan is not working while extruding.
If the fan is on full blast and very noisy, you may need to update the software to the latest version.
The actual M-code is not the correct one for your printer. A software upgrade will fix this problem.
If the fan is working at a slower speed than usual, there may be filament or a pinched wire trapped in the blades. Remove the obstruction.
The fan wires could be disconnected. Check the wires to be sure they are connected. Make sure the fan is positioned correctly in the extruder housing. If it is too high, it will not rotate.
If your fan is broken, you will need to replace it. Follow the fan replacement guide on how to replace it.
You have problems with the printer’s extrusion and motion controller chip.
Attempt to reconnect the USB cable from the printer to the computer. Restart the printer and ensure LED indicator light is on. Check to see if software continues to indicate the issue.
If the error indicating an issue with the motion control sensor reappears, follow the guide on how to replace it.
The print is either not sticking to the print bed (build surface) or not sticking to itself.
If the print bed is not perfectly level, the print will not adhere properly to it. Turn the 3D printer off for 5 minutes. When you turn it back on, run the bed leveling again.
Extra adhesive may be used to help keep the print from detaching from the print bed. Use blue painter’s tape or spray a little hairspray on the bed. You can also use a glue stick on it to help with adhesion.
If the print or the bed get too cool, the print can come loose. Block any drafts that might get to the print. Tape paper or plastic over the open sides.
The inks and their different materials print at different temperatures. The temperature may need to be increased to keep the print from cooling too quickly and the layers from separating.
Make sure the extruder nozzle is clean and free of debris. The layers will not fit together properly if the filament is not coming out correctly.
The first layer of print must be flat and level for the successive layers to adhere properly. Make sure the extruder nozzle is close to the bed and that the bed is level.
M3D Micro
3D printer overview The M3D Micro is a budget 3D printer with a small workspace. This model has a simple but pleasant design, it works quite quietly. From the very beginning, I would like to note the presence of an automatic calibration system for the printing table - this is a huge plus. There are also disadvantages. For example, the print speed is low, the surface of the model is not very high quality and requires additional processing if you want to bring it to the ideal.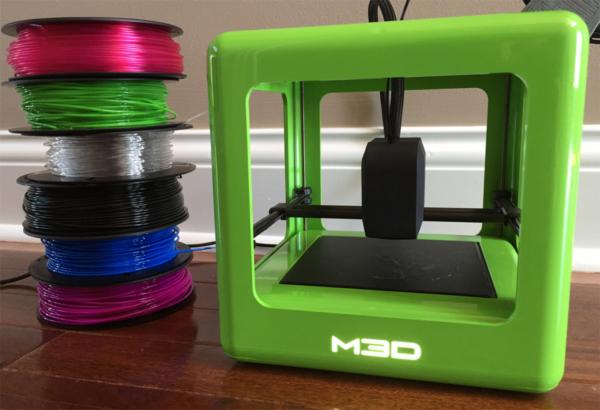 It's a strange decision not to cover the working area with acrylic, because there is a frame... However, given that the price for it is about $250, these shortcomings can be neglected.
Construction of the M3D Micro
I don't want to impose a personal opinion, but the M3D Micro is really nice to look at. This is a small 3D printer in a 7.3 inch plastic frame. The model used to write this review was blue, but black, white, green, orange, silver are also available.
Only the filament feed tube is exposed, which extends beyond the body and hides behind the back of the frame. On the front of the case is an LED M3D logo that lights up when the 3D printer is turned on. There are no buttons on the printer itself, you control the printing process from a personal computer via USB, the port for which is provided on the back of the frame.
Inside the frame is the 3D printer mechanism itself, which consists of several screws and belt drives. The print head moves in all directions: left and right, up and down, forward and backward. The print table is made of a textured plastic called BuildTak, so there will be no problem with the adhesion of the first layers. The table can be replaced.
Considering the dimensions of the M3D Micro, the maximum print size is impressive: 4.2 x 4.4 x 4.6 inches, that is 86 cubic inches! In this case, each of the sides of the cube of the body is 7 inches. This is certainly less than printers like Polar 3D (which works in the polar coordinate system and reaches 400 cubic inches) or LulzBot Mini (223 cubic inches), but still enough to print many useful and simply beautiful 3D models. .
M3D Micro 3D Printing Materials
M3D Micro uses a special 5" filament drum called 3D Ink. These drums are supplied by the company itself. Drum prices range from $14 (PLA and ABS) to $28 (special ABS plastics that change color depending on the temperature of the 3D printer's print head). That is, 1 kilogram of plastic will cost from $56 to $112, which is slightly more expensive than most 3D printing materials that are available in online stores.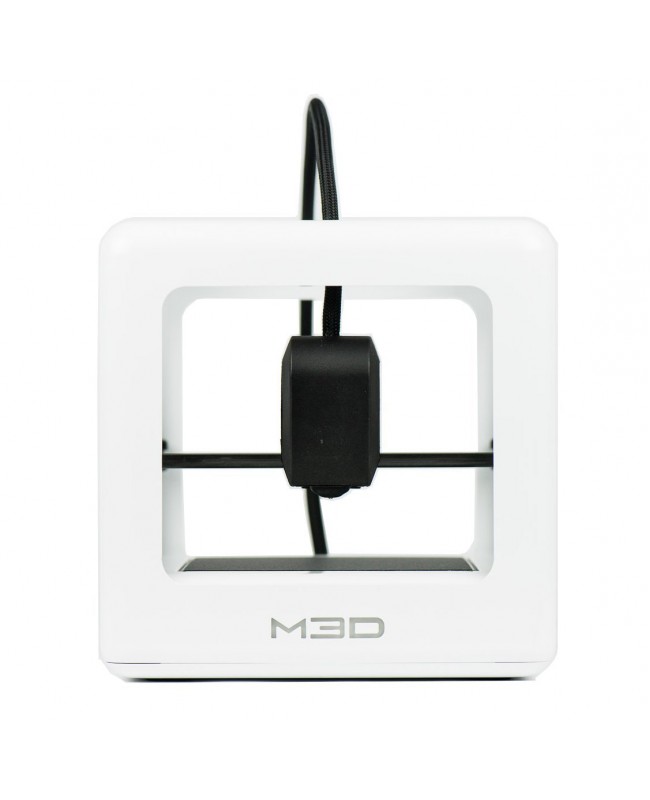
Fortunately, everything is not as sad as it might seem at first glance. Micro works with 1.75 mm materials from any manufacturer. The only thing you will have to figure out is how to install a larger reel. Most likely, it can simply be placed next to the printer. Everything will not look so refined and aesthetically pleasing compared to the original version, when the material is hidden in a case under the table, but this will not affect the quality of 3D printing.
With a heated bed, the M3D Micro can print on a wide range of materials including PLA, ABS, nylon and more. During the tests, PLA and ABS were used. The result of printing with PLA plastic was better. It was with 3D printing with PLA plastic that it was possible to make models that covered most of the table and at the same time gripped perfectly with it. ABS, of course, behaved worse. If the area of the first layer exceeded a few square inches, the material began to come off the table as it cooled.
Setting up the M3D Micro
3D printer In fact, setting up the M3D Micro is to take it out of the box, remove the protective films, plastic, install the supplied software on your Mac or PC, turn on the power and connect the USB cable.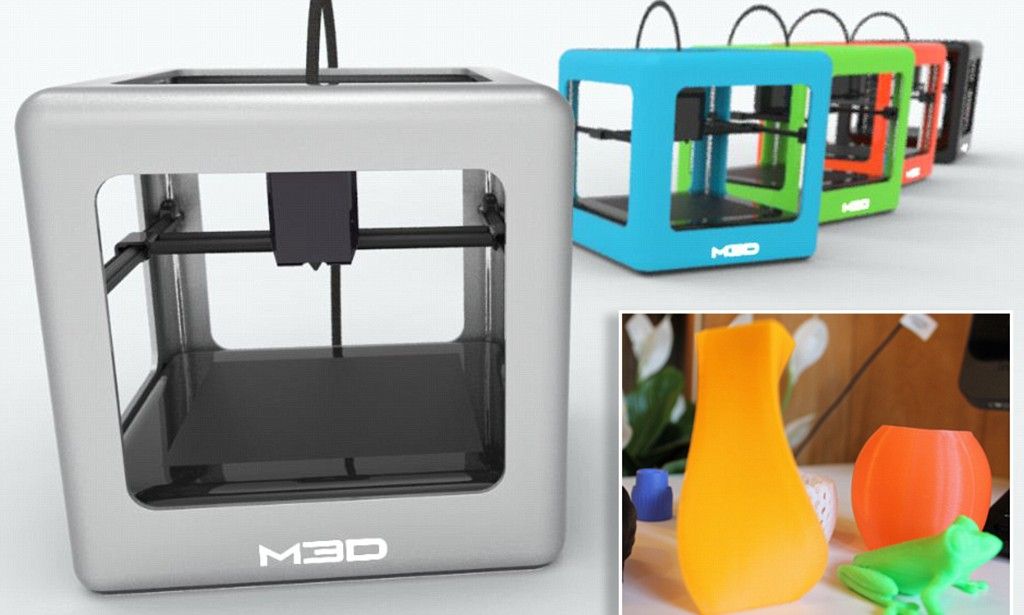 Our 3D printer came with a reel of PLA filament and was ready to print.
All I had to do was start the automatic calibration process in the M3D application. As a result, the print head is positioned exactly in relation to the print table. Very handy and useful feature. Those who have, for example, Anet A8, know how painful the manual process of calibrating a 3D printer table can be.
M3D Micro control software
The M3D Micro is only controlled by the supplied application. The application can be downloaded for free on Mac or Windows. There is no mobile version or app for a smartphone / tablet, as a USB cable is required for connection.
The program is easy to use. There are several options for loading a 3D model or reloading recently used ones. After loading the model, you will see a print preview with the ability to move, scale and rotate the model. There is no way to create a new model or modify an existing one. To do this, you will need a separate program.
Once the model is ready, press "print" and the program will process the model and start 3D printing. You have several options to control the 3D printing process: you can define the print quality and the fullness of the 3D model. More detailed settings, including adding support material, are available in the More Options section. But these possibilities are still quite limited. For example, you will not be able to select the number of calipers or specify the type of filling. It's a pity, as these two options, when properly matched, can provide better quality as well as speed up the 3D printing process.
3D printing process on M3D Micro
While the 3D printing process is in progress, a simple dialog box displays percentages. There is no information about how much time is left until the end of 3D printing, and a preliminary estimate of the time before starting work was too "optimistic". According to preliminary estimates, printing was supposed to take 16 hours, but in practice it lasted 25 hours. While 3D printing is in progress, you cannot use the program: it must continue to work in the same mode until the end of printing.
M3D Micro is quiet. You will only hear a slight hum from the cooler and motors. Since the frame of the printer is not closed, you will feel fumes. So do not get carried away printing ABS plastic in a poorly ventilated area.
There were several failed tests. In particular, there were problems with the nozzle, which was clogged or the motor did not supply enough material, and the print head still continued to move. This happened rarely and in general the model was not damaged, but it is very unpleasant when 3D printing lasts 24 hours and because of such a trifle it may not be printed.
Most 3D printers use a heated bed to improve material adhesion. This is not the case with the M3D Micro. A BuildTalk table is used here as an analogue of heating, which, unfortunately, does not perform very well during 3D printing with ABS plastics with a large contact area of the first layer.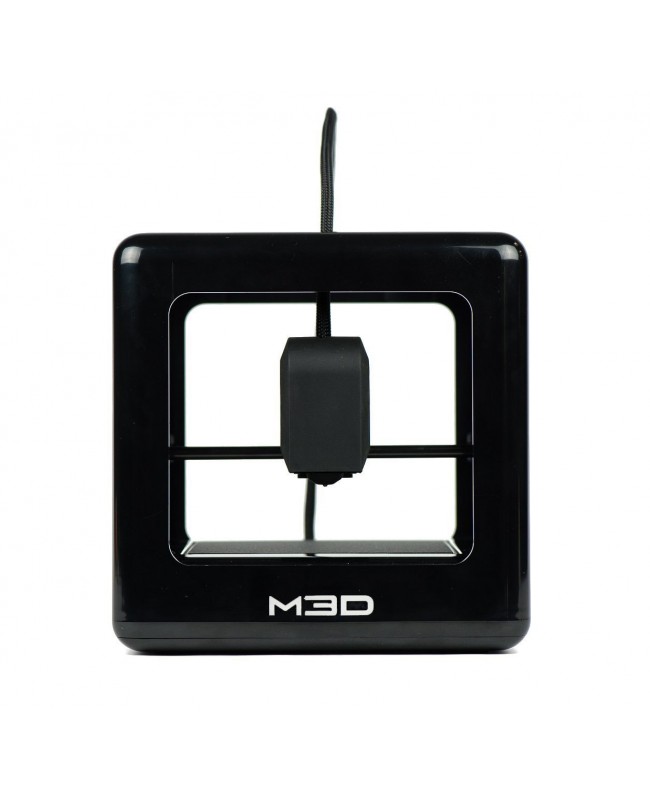 So blue tape or a solution of ABS plastic in acetone will come in handy. True, here, too, not everything is as smooth as we would like. Residual melted coating can get under the table onto the material spool or the mechanism itself. In general, there are some disadvantages.
3D print speed M3D Micro
The M3D is a very, very slow 3D printer. We have tested on standard models with standard settings and can summarize that the M3D is one of the slowest 3D printers we have ever encountered.
It took 14 hours and 54 minutes to 3D print a Thinker PLA model with low quality settings (layer height 0.3 mm). The high quality version (layer height 0.1 mm) took 25 hours and 34 minutes to print. This is twice as long as, for example, Polar 3D, which took 5 hours and 19minutes for draft 3D printing and 6 hours 51 minutes for 3D printing at medium quality settings.
3D print quality M3D Micro
The print result on M3D Micro is decent, but there is an obvious, recurring flaw: threads of material remain on the model when the nozzle changes direction (this is especially noticeable on the side surfaces of finished products). To test the possibilities of reproducing sharp and right angles, a three-dimensional star model was used. The result is good: even at medium settings, almost perfect angles and minimal layer shifts were obtained. However, this model also shows material residues when changing direction. In principle, the disadvantage is not critical and can be easily corrected by minimal surface processing of the model.
I would like to note once again that the Thinker model showed the strengths of M3D. The model has a large number of smooth transitions and smoothed corners, which show how well the 3D printer works out the given coordinates and how the melted material is applied. The enlarged photo below shows that the quality is good.
Conclusions
The M3D Micro is a nice little 3D printer that has a lot of positives. Good, convenient software and decent print quality. At the same time, let's not forget that it costs about $250.
One of the shortcomings is the low print speed.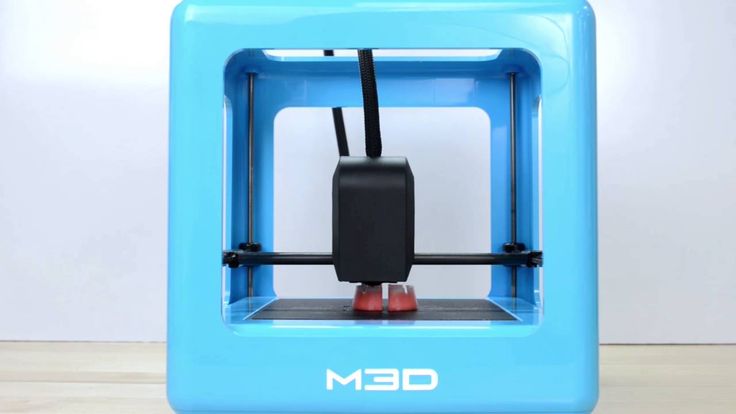 ABS plastic can be used, but problems can arise, especially if the area of the first base layer of the model is large. But if you don't mind using PLA, then the M3D Micro is a great option to get started with 3D printing. Definitely recommend for beginners.
Top 20 Free 3D Printing and 3D Printing Software
Looking for 3D printing software? We've rounded up the top 20 software tools for beginners and professionals alike. Most slicers are free.
What is a slicer? This is a program for preparing a digital model for printing. Models for 3D printing are usually distributed in STL files. To turn an STL file into G-code (a language that a 3D printer understands), a slicer program is required. It is called a slicer because it cuts (to slice - English) a 3D model into many flat two-dimensional layers, from which a 3D printer will add a physical object.
Which slicer should I choose? In this article, we will tell you which slicer is best for 3D printing for each stage of your work.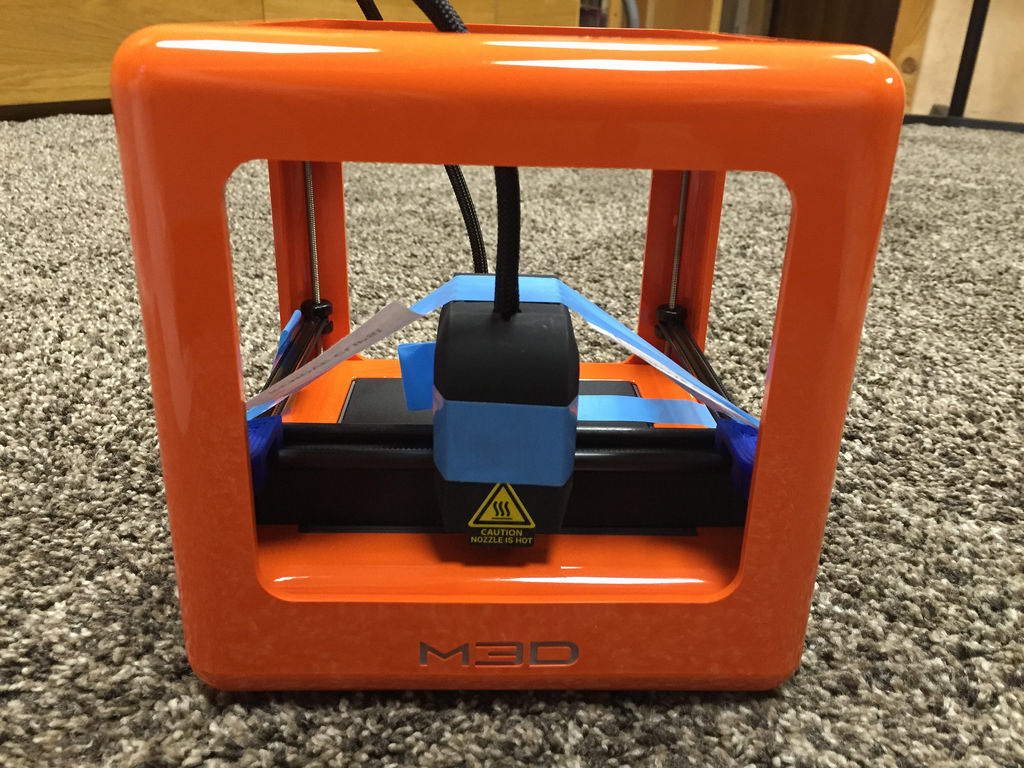 Which one is better for preparing a 3D model for printing? But what if you need to create a 3D model from scratch? And if you are only taking the first steps in 3D?
Don't be afraid, we've answered all of these questions, including the required skill level for each program and where you can download it. The great thing is that most of these programs are completely free and open source.
- Cura
- CraftWare
- 123D Catch
- 3D Slash
- TinkerCAD
- 3DTin
- Sculptris
- ViewSTL
- Netfabb Basic
- Repetier
- FreeCAD
- SketchUp
- 3D Tool
- Meshfix
- Simplify3D
- Slic3r
- Blender
- MeshLab
- Meshmixer
- OctoPrint
#1: Cura
For beginners who need a slicer to prepare STL files for 3D printing
Cura is the default slicer software for all Ultimaker 3D printers, but can be used with most others , including RepRap, Makerbot, Printrbot, Lulzbot and Witbox. The program is completely open source, its capabilities can be extended using plugins.
This program is very easy to use and allows you to manage the most important 3D printing settings through a clear interface. Start in Basic mode to quickly get up to speed and change print quality settings. If finer control is required, switch to Expert mode.
Cura can also be used to directly control the printer, but then the printer and computer must be connected to each other.
Download: Cura
Price: Free
Systems: PC, Mac, Linux
#2: CraftWare
For beginners to prepare STL files for 3D printing its crowdfunding device CraftBot. However, the program works with other printers.
Like Cura, CraftWare allows you to switch from "Easy" to "Expert" mode, depending on how confident you feel. It's a colorful app that features a visual G-code visualization with each function represented by a different color. But the most outstanding feature is the individual support service. As far as we know, only the paid program Simplify3D has this.
Please note, however, that this program is still in beta, so bugs may occur.
Download: CraftWare
Price: Free
Systems: PC, Mac
#3: 123D Catch
-systems, smartphones and tablets, which allows you to convert images of objects into a 3D model. Pictures can be taken with a smartphone/tablet or digital camera.
You need a lot of photos of the object from different angles - the more the better - after which a 3D model will be compiled from them.
123D Catch is more of a fun app than a professional 3D printing tool, but after some tambourine dancing, you can get good results, especially when paired with an STL editor like MeshLab or Meshmixer.
Price: Free
Systems: PC, Android, iOS, Windows Phone
#4: 3D Slash
For beginners who want to create 3D printable models
This is a 3D printing program that is both amazingly simple and refreshingly new. With 3D Slash, you can design 3D models using your dice skills.
You can start with a large block and, like a virtual sculptor, remove small cups from it with tools such as a hammer or drill, or start from empty space and build a model out of cubes and other shapes. You can paint with flowers or use template pictures.
Other features worth mentioning are tools for creating logos and 3D text. The Logo Wizard imports an image and creates a 3D model, while the Text Wizard allows you to enter and format text, and then turn it into 3D.
Recommended!
Download: 3dslash.net
Price: Free
Systems: PC, Mac, Linux, Browser
#5: TinkerCAD
For beginners who want to create printable 3D models
TinkerCAD is an online 3D printing computer-aided design (CAD) system that is a good starting point for beginners. Since its capabilities are limited compared to Blender, FreeCAD and SketchUp, many users switch to more powerful tools after some time.
As in 3D Slash, here you can build models from basic shapes. At the same time, unlike 3D Slash, TinkerCAD allows you to create vector shapes in 2D and convert them into three-dimensional models.
Come in: Autodesk TinkerCAD
Price: Free
Systems: Browser
#6: 3DTin
For beginners who want to create 3D printable models
another simple, intuitive tool online choice for beginners in 3D modeling. All you need is a Chrome or Firefox browser with WebGL enabled.
Choose from a huge library of 3D shapes and add them to your sketch. All sketches are stored in the cloud, access to them is free if you honor the Creative Commons license. Everything can be exported to STL or OBJ formats.
Enter: 3DTin
Price: Free
Systems: Browser
#7: Sculptris
For beginners who want to create 3D printable models
clay. This is a fantastic 3D modeling program if figurines are your main task. For example, you can make a bust of your favorite video game or comic book character. Sculptris is completely free and bills itself as a stepping stone to the more complex (and expensive) ZBrush tool.
Download: Pixologic Sculptris
Price: Free
Systems: PC, Mac
#8: ViewSTL
For beginners who want to view STL files
ViewSTL is the easiest way to view STL files . Simply open a web page and drag the STL onto the dotted box.
The STL online viewer allows you to display the model in one of three views: flat shading (for a quick view), smooth shading (for a high-quality image), and wireframe.
Enter: ViewSTL
Price: Free
Systems: Browser
#9: Netfabb Basic
some nice features that allow you to analyze, "repair" and edit STL files before moving on to the model cutting stage.
A good choice if you need more than just a slicer and want to be able to quickly fix STL files without having to learn programs like MeshLab or Meshmixer.
Don't let the 'Basic' in the name fool you, Netfabb Basic is actually a very powerful 3D printing tool. It's "basic" only in the sense that it doesn't cost €1,500 like Netfabb Professional!
Download: netfabb.de
Price: Free
Systems: PC, Mac, Linux
No. 10: Repetier
For advanced to prepare STL files for 3D printing
9002 the next level of 3D printer slicer software, but if you want to stay open source, you should look into Repetier. It is the great grandfather of 3D printing software and a favorite of the RepRap community.Today the program is moving by leaps and bounds from the level for beginners to advanced users. Packaged in an all-in-one configuration, it supports up to 16 extruders, multi-slicing via plug-ins, and virtually every fusing 3D printer on the market. Get ready to tinker!
What's more, Repetier Host works remotely via Repetier Server, so that the 3D printer can be controlled via a browser, tablet or smartphone.
Download: Repetier
Price: Free
Systems: PC, Mac, Linux
#11: FreeCAD
The program is a great option for developing your design skills. More technically, this parametric 3D modeling program allows you to easily change the project by rolling back through the history of the model and editing the parameters.
Download: freecadweb.org
Price: Free
Systems: PC, Mac, Linux
#12: SketchUp
For beginners who want to create 3D printable models
SketchUp is the perfect combination of simplicity and - the perfect combination functionality, with a user-friendly interface and a relatively flat learning curve (i.e., as experience grows with the time spent), the ideal program for developing three-dimensional models.
The Make SketchUp version is free and will have everything you need for 3D modeling if you also download and install the free STL exporter. There is also a professional edition for architects, interior designers and engineers.
Download: sketchup.com
Price: Free (SketchUp Make), $695 (SketchUp Pro)
Systems: PC, Mac, Linux
#13: 3D-Tool Free Viewer
view and check STL files
3D-Tool Free Viewer is a sophisticated tool that, among other things, allows you to check the structural integrity and printability of your file. With the Cross-Section function, for example, you can look at the model from the inside and check the wall thickness. Very useful if you want to check your STL file for killer errors before printing.
Download: 3D-Tool
Price: Free
Systems: PC
#14: Meshfix
your model for errors.
Price: Free
Systems: Browser
#15: Simplify3D
For professionals to prepare STL files for 3D printing print. A flexible algorithm checks the model for problems, fixes them, shows a preview of the printing process (ideal for identifying potential problems), and then slices it.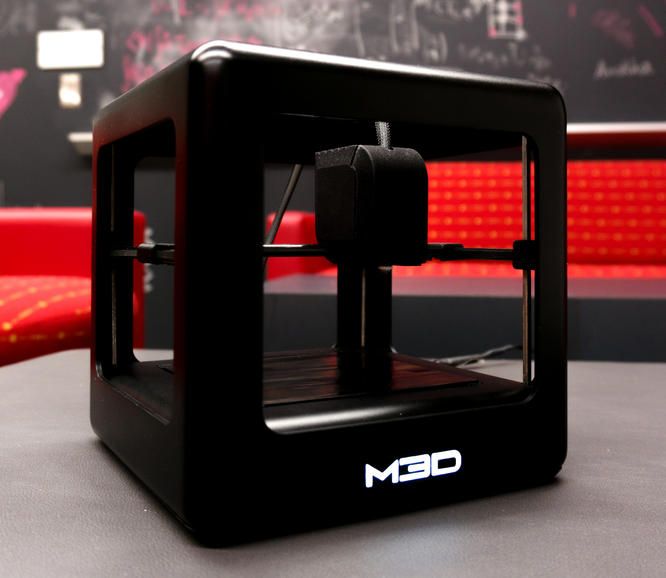
This slicer offers the best infill pattern options in the competition. For models that require supports, Simplify3D will create the appropriate structures on its own and give you full control over their placement. For printers with a dual extruder, when printing with different materials, the Dual Extrusion wizard will help, as a result of which, for example, it will be easier to remove the dissolving filament.
Simplify3D supports 90% of today's commercially available desktop 3D printers and is compatible with Marlin, Sprinter, Repetier, XYZprinting, FlashForge, Sailfish and MakerBot firmware. Simplify3D can also be used to directly control the printer, but then the printer and computer must be connected to each other.
Download: simplify3d.com
Price: $149
Systems: PC, Mac, Linux
#16: Slic3r
source code, which has a reputation as a carrier of super new functionality, which you will not find anywhere else. The current version of the program is able to show the model from multiple angles, so that the user gets a better preview experience.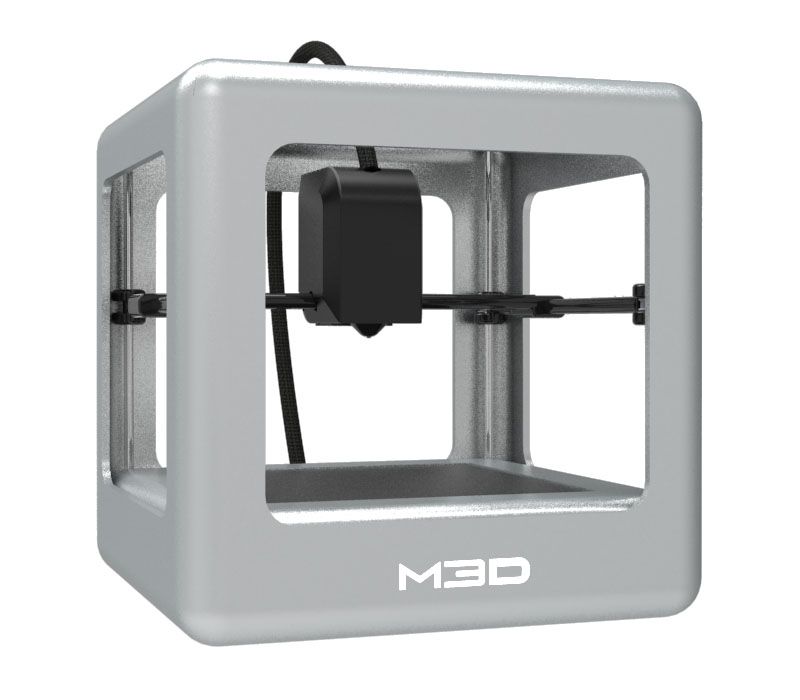
There's also an incredible 3D honeycomb infill, the first of its kind that can extend over multiple layers rather than repeating itself like a stamp. This significantly increases the strength of the internal filling of the model and the final printout.
Another option is direct integration with Octoprint. Once the files on the user's desktop are sliced, they can be directly uploaded to Octoprint with one click.
Download: Slic3r
Price: Free
Systems: PC, Mac, Linux
#17: Blender
For professionals who want to create 3D printable models
Blender is a popular computer-aided design (CAD) system with a steep learning curve. Not at all the best choice for beginners, but what you need if you are quite experienced and need something more complex for modeling and printing.
In short, Blender is one of the most powerful tools in existence. Its community is always ready to help, there are a lot of educational materials. It's also open source, so enthusiasts often write extensions to make it even better and more powerful.
Download: blender.org
Price: Free
Systems: PC, Mac, Linux
#18: MeshLab
For professionals to prepare STL files for 3D printing
MeshLab - advanced editor. It allows you to remove parts of a 3D model, merge two models into one, patch holes. If you need a program to modify models for 3D printing or some kind of "repair" work, MeshLab is the right choice.
Price: Free
Systems: PC, Mac, Linux
#19: Meshmixer
For professionals to prepare STL files for 3D printing files. It's especially good for identifying potential problems and fixing them automatically. For example, it will show paper-thin walls that can lead to problems with 3D printing. Meshmixer is part of the Autodesk family of 3D printer software, so it should work well with tools like TinkerCAD.
Price: Free
Systems: PC, Mac
#20: OctoPrint
start, pause or interrupt 3D print jobs.