Creality cr6 se 3d printer
Creality CR-6 SE | Hands-On Test & Review
- Author
- Recent Posts
Martin
Besides many test devices, Martin now has his fourth own 3D printer running and prints as a hobby for friends, family and himself. He is happy to share his experience with each new article.
Latest posts by Martin (see all)
Disclosure: Links marked with * are Affiliate Links. I earn from qualifying purchases if you decide to make a purchase through these links – at no additional cost for you!
The Creality CR-6 SE* is packed with useful features. It is virtually an improved Ender 3 V2 and offers even more reliable operation. The time between unboxing and the first 3D print is extremely short. It was hard to find negative points in the practical test!
If you’re looking for a 3D printer that will get you good results quickly, the Creality CR-6 SE is the one for you. With excellent auto-leveling, a sleek design, and many quality-of-life features, it looks very professional and rarely if ever gives you problems.
Check Price at:
Amazon*
Comgrow*
3DJake*
CAFAGO*
Table of Contents:
- 1 Key Takeaways
- 2 Who Should Buy the CR-6 SE?
- 3 Advantages & Disadvantages Creality CR-6 SE
- 4 Scope of Delivery Creality CR-6 SE
- 5 Setup Creality CR-6 SE
- 6 Print Quality Creality CR-6 SE
- 6.1 Cura Profiles
- 6.2 Test Print
- 7 Features Creality CR-6 SE
- 7.1 Automatic Leveling
- 7.2 Easy Setup
- 7.3 Sturdy Construction
- 7.4 Removable Carborundum Glass Plate
- 7.5 Silent Operation
- 7.6 Color Touch Screen & Menu
- 7.7 Double Z-Axis
- 7.8 Filament Sensor
- 7.9 Improved Extruder
- 7.10 New Hotend Design
- 7.11 Good Nozzle Quality
- 7.12 Easy Belt Tensioning
- 7.13 Resume Print Function
- 7.14 Meanwell Power Supply
- 7.
 15 Tool Drawer
 - 7.16 Carrying Handle
- 7.17 Filament Holder
- 8 Technical Specifications Creality CR-6 SE
- 9 Similar 3D Printers
- 9.1 Creality Ender 3 V2
- 9.2 Anycubic Mega X
- 9.3 Artillery Sidewinder X1
Key Takeaways
- automatic print bed leveling at the touch of a button
- comfortable operation
- easy setup
- reliable and durable
- very quiet
- 0.1 mm resolution
- nozzle up to 260 °C, print bed up to 110 °C
Who Should Buy the CR-6 SE?
The Creality CR-6 SE* should be purchased by anyone who wants to quickly achieve great results without any start-up problems. The 3D printer is very reliable and as long as it prints with dry filament, there are very rarely print errors.
The many different features offer a high level of comfort and ease of use. Especially the ingenious automatic leveling of the print bed is a blessing for all those who do not want to tinker too much.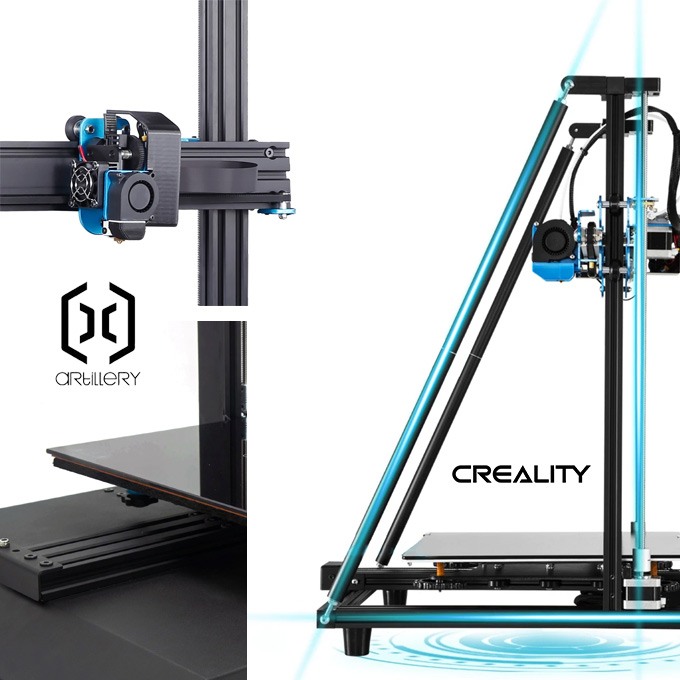 With this 3D printer, 3D printing is the main focus. Those who want to get their hands dirty should look in the low-budget range.
Advantages & Disadvantages
Creality CR-6 SE
PRO:
- good price-performance ratio
- perfect automatic leveling
- high print quality
- intuitive operation
- very quiet
- fast heat-up
- stable construction
- easy setup assembly
- stylish design
CON:
- open print volume
- PTFE tube not suitable for very high temperatures
- filament sensor sits very close to the extruder (the filament must be very straight so that you can do it without problems).
Check Price at:
Amazon*
Comgrow*
3DJake*
CAFAGO*
Scope of Delivery
Creality CR-6 SE
The Creality CR-6 SE* comes in a compact package and is very well packaged with cut foam inlays. Included is everything you need for assembly and later operation. In the base of the 3D printer is a drawer with tools, which is also well protected with foam.
There is also a small spool of 200g white PLA filament* included. To give you an idea of how much you can print with it, you can check out the test prints below. After all these test prints, the filament was pretty much used up.
Having unpacked and tested several other Creality 3D printers, I was immediately struck by the high quality of the components and the extent of the upgrades. Compared to the Ender 3 V2, it is really packed with upgrades! The high quality of workmanship, such as the individual cables and plugs, also guarantees a long service life at first glance.
The following things are included in the scope of delivery of the Creality CR-6 SE:
- pre-assembled base with printing plate and tool drawer
- pre-assembled frame with extruder and hotend
- display
- carrying handle
- power cable
- filament holder
- 200 g white PLA filament
- all required screws
- spatula
- wrench
- socket wrench
- nozzle cleaner
- side cutter
- allen key
- SD card reader
- 8 GB SD card
- spare parts, incl.
 2 Nozzles
 - Creality sticker
The SD card contains the following things:
- instruction manual
- 3D models
- Creality slicer software with drivers and manual
- troubleshooting guide
- installation aid for the extruder
- operation video
Setup
Creality CR-6 SE
Thanks to the pre-assembled components of the 3D printer, assembly is very simple. The included instruction manual has easy-to-understand pictograms that allow the assembly to be done within minutes.
These are the individual steps in the assembly:
- Mount the frame: The pre-assembled frame with the hotend is mounted onto the base with four screws. Thanks to the stable construction, you don’t need to worry about whether everything is well aligned because this is automatically given.
- Mounting the display: The display is mounted to the frame right next to the tool drawer with two screws. After that, you only need to plug the cable into the back.
- Mount the filament holder: The filament holder does not need to be mounted with screws. It is simply clipped into the frame. You can swivel it 90 degrees to save space.
- Mount the carrying handle: The carrying handle is mounted on the top of the frame. In principle, it is optional. If you never want to put the 3D printer somewhere else, you do not need the carrying handle.
- Tensioning the toothed belts: The timing belts are very easy to tighten or loosen using two knobs. They should be tight enough so that they do not slip, but not too tight so that they cannot break.
- Plug in the cables: Finally, only the cables need to be plugged in. This includes the cables of the stepper motors at the base and the cables from the cable harness. These need to be plugged into the filament sensor and the hotend. Make sure that you do not turn on the 3D printer until you have set the correct voltage on the back panel.
 This can be either 115 volts or 230 volts. If you select the wrong voltage, the power supply will burn out as soon as you turn it on!
How to get from here to your first test print can be found in this detailed tutorial.
Print Quality
Creality CR-6 SE
The print quality of the Creality CR-6 SE* can be compared with other Hobby 3D printers in this price range. In direct comparison with the Ender 3 V2, for example, almost no differences can be seen.
The print quality of the Creality CR-6 SE is very good with an accuracy of 0.1 mm and layer thicknesses between 0.1 and 0.4 mm. The individual layers are barely visible and can only be felt with a fingernail. This makes the CR-6 SE also suitable for printing mechanical parts.
To test the print quality, I printed various objects with the most accurate Cura profile until the supplied filament was used up.
Cura Profiles
In Cura there are 4 preset profiles for the CR-6 SE:
- Super Quality 0.
 12 mm
12 mm - Dynamic Quality 0.16 mm
- Standard Quality 0.20 mm
- Low Quality 0.28 mm
These profiles are set very well, which means that the 3D printer is ready to use without much effort. You don’t have to change anything in the settings to get started.
Test Print
I chose the highest quality for the test prints. The prints then take a little longer, of course, but you can see what accuracy I can achieve with the CR-6 SE.
The first print is always exciting because then you see whether you did something wrong during assembly or the 3D printer was delivered defective. Fortunately, everything was in order and directly the first test print of a 3DBenchy (link to model on Thingiverse) was a complete success.
On this first print, there were only minor issues like some stringing and with the round openings and arcs or overhangs.
After that, I used up the rest of the filament that came with it. My attention was focused on the following things:
- Repeatability
- Dimensional accuracy
- Reliability
I was particularly impressed with the CR-6 SE’s reliability.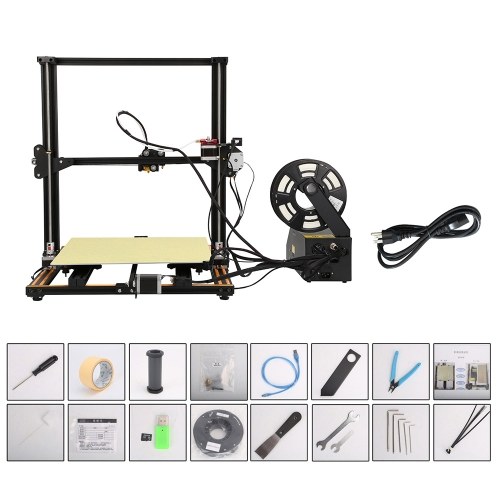 Every single object worked right away and there was never a problem. It’s always worth spending a little more money to save time and frustration in the long run. Too many times I’ve struggled with low-budget 3D printers to even successfully complete the first print…
Features
Creality CR-6 SE
The CR-6 SE is packed with useful features. Therefore, this list is quite long!
Automatic Leveling
Leveling at the touch of a buttonThe automatic leveling of the CR-6 SE differs significantly from the leveling of other 3D printers. Most 3D printers with automatic bed leveling use optical sensors like the BLTouch.
The CR-6 SE uses strain gauges. This also explains the design of the print bed. The print bed is permanently installed on the 3D printer base and cannot be adjusted in height. Via the strain gauge, the 3D printer notices when the nozzle touches the print bed. It then stops the movement in the Z direction immediately.
This measurement method is extremely accurate and only needs to be repeated very rarely, as the alignment of the print bed does not change as a result of the fixation.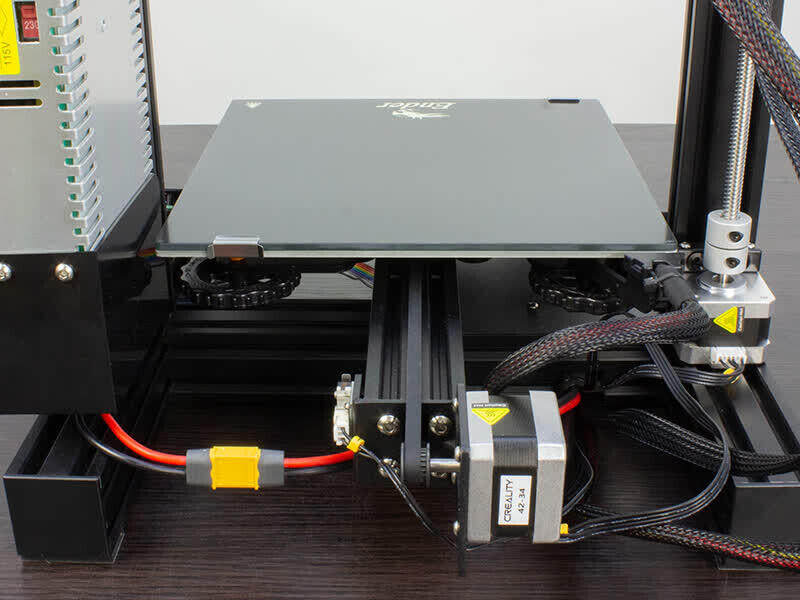
After many many hours of using the 3D printer so far, I have only leveled the print bed once!
The automatic leveling can be started easily via the touchscreen menu. You just have to make sure that the nozzle is clean. Then you can start the process by pressing a button. Everything else happens automatically!
Easy Setup
The design of this 3D printer has been developed from front to back to relieve the user of as many problems as possible.
This is reflected not only in the automatic bed leveling but also the setup is very simple. You do not have to pay meticulous attention to right angles or assemble 1000 parts like a puzzle.
Sturdy Construction
Like most other 3D printers today, the Creality CR-6 SE offers a very stable construction. Although the frame is connected with only a few screws, you very rarely need to re-level the print bed.
Once you have tightened the screws properly, nothing will move here. Vibrations are also virtually prevented by the stable construction, the dual Z-axis and the smooth movements of the print head via the toothed belts.
Removable Carborundum Glass Plate
The print bed of the Creality CR-6 SE is permanently installed on the 3D printer base. The Carborundum glass plate is placed on the fixed print bed and fixed with two snaps (Carborundum means tempered or hardened). This attachment of the glass plate is much more practical than the paper clips with which other glass plates are held, since they are much flatter and there is no danger of the nozzle colliding with them.
The fact that the print bed is permanently installed and has no freedom of movement of its own greatly simplifies leveling.
The eternal adjustment on 4 screw knobs with most low-budget 3D printers you will look in vain here. With the addition of automatic bed leveling, you don’t have to worry about an unleveled print bed at all!
Heating the print bed to 60 to 70 °C only takes about 2 to 3 minutes.
The cable for the power supply of the print bed has very good bend protection. It perfectly absorbs the movements of the printer, which means that the cable will never break.
The adhesion to the glass plate is really very good. With many other 3D printers, especially in the low-budget range, you have to make the printing plate more adhesive with various tools. These include, for example, blue tape, hairspray or glue sticks. There are now also PEI beds that have been made for the CR-6 SE*.
When hot, the adhesion is so good that even large objects with a small contact surface adhere well. As soon as the glass plate has cooled down, the objects can be released very easily.
Silent Operation
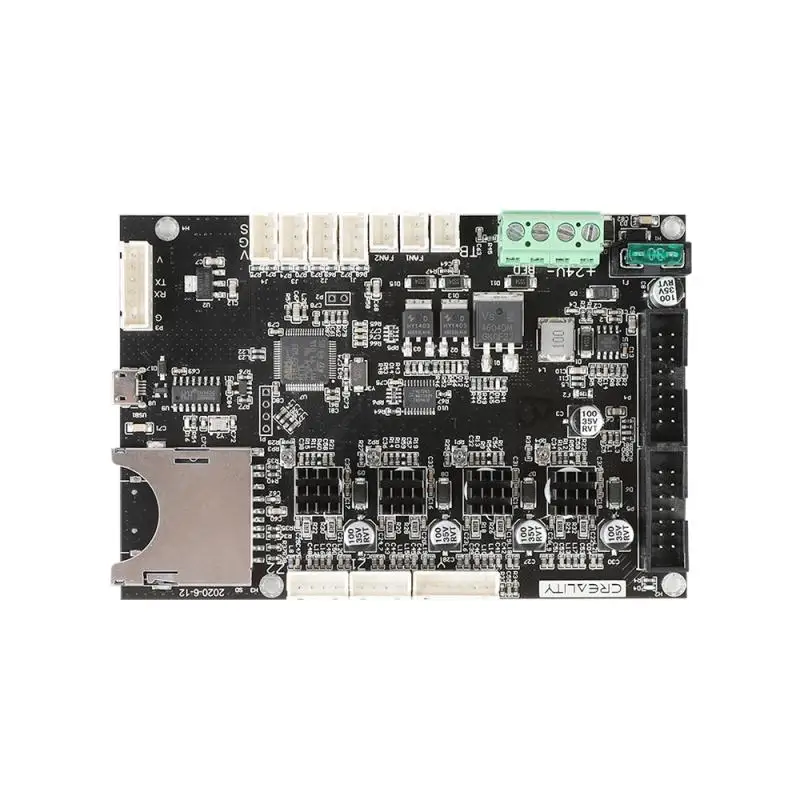
Thanks to the TMC2209 stepper motors and the Creality 32-bit silent motherboard, the CR-6 SE is very quiet. The built-in motherboard and stepper motors are often used as an upgrade for other Creality 3D printers. Here they are built directly into the standard device.
The stepper motors from Trinamic are extremely quiet and provide a very silent movement of the 3D printer.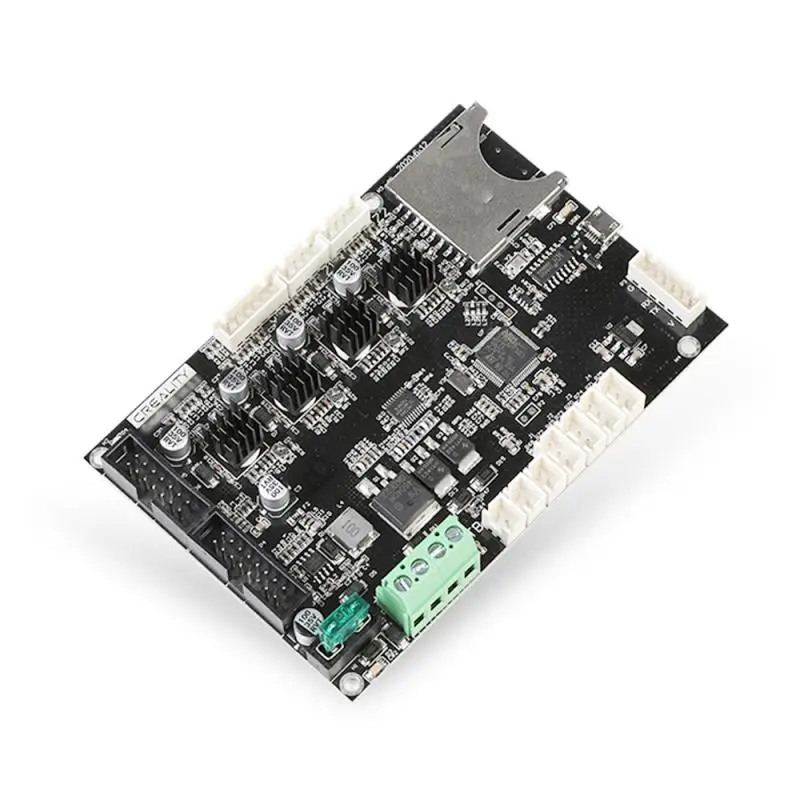 They are extremely popular in the 3D printer scene to make 3D printers as quiet as possible. Besides the fans, the stepper motors are usually the biggest noise generators.
I noticed that the 3D printer is extremely quiet during my first test print, or actually already during bed leveling. The only thing you can hear during operation are the fans. And the built-in fans are among the quieter models.
Color Touch Screen & Menu
The 4.3-inch color touchscreen responds very well to touch and has a pleasant dark design.
The menu is simple and shows you the most important settings such as the temperature for the hot end and the print bed in the main menu.
The main menu takes you to these four submenus:
- “Pint“: Here you can print your models stored on the SD cards.
- “Prepare: In this menu, you will find settings you need before and after your print. This includes, for example, moving, heating and cooling the hot end.

- “Control“: In the Control menu you can manually set the temperature, change languages and other settings.
- “Level”: This menu allows you to start the automatic bed leveling process.
Double Z-Axis
A very important feature of the CR-6 SE is the dual Z-axis. Many low-budget 3D printers have only one Z-axis and often suffer from a lack of stability. The resulting phenomenon is also called “gantry sag“.
Due to the double Z-axis, the 3D printer gains enormous stability and thus delivers much more accurate and reproducible results than 3D printers with only one Z-axis.
Many 3D printers with only one Z-axis also suffer from the phenomenon of “z-wobble“. Here, the construction is so unstable that the Z-axis vibrates slightly when moving, which can lead to various printing errors. Among these printing errors is e.g. ghosting or ringing.
To prevent the two stepper motors of the respective Z axes from getting out of sync, both Z axes are connected with a toothed belt. This prevents one stepper motor from moving more or less than the other.
In my opinion, every 3D printer should be equipped with a double Z-axis. The advantages speak for themselves and it is worth the extra cost.
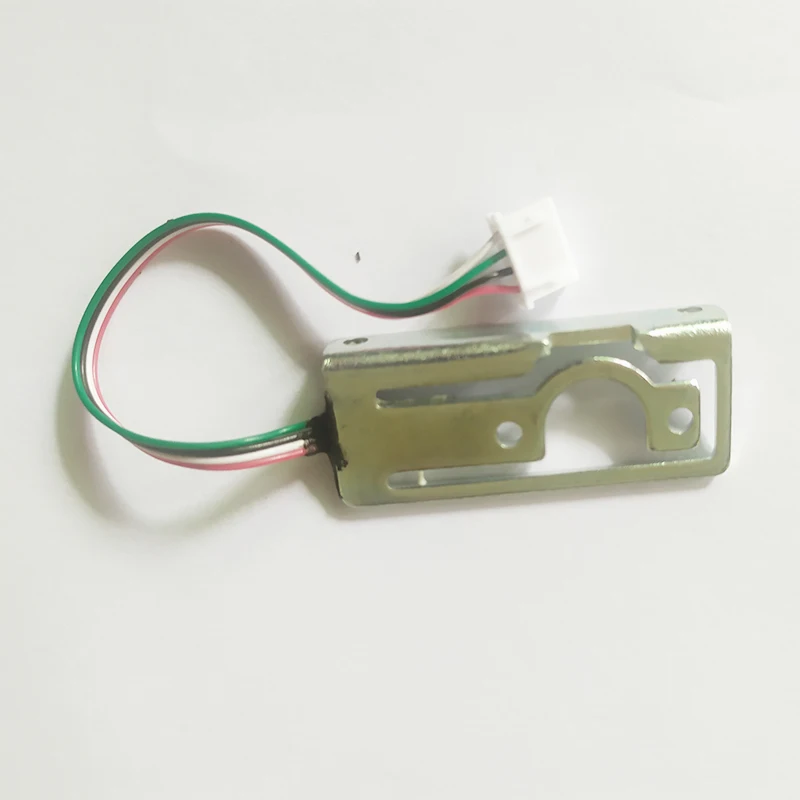
Filament Sensor
The Creality CR-6 SE gave me no problems at all from setup to the first print. The only thing that didn’t work right away was pushing the filament through the filament sensor into the extruder.
The filament supplied was slightly bent at the end (but that is normal). The first few centimeters of the filament must be exactly straight so that you can push the filament through the filament sensor.
But in relation to the many advantages of this 3D printer, this is already “complaining on a high level”!
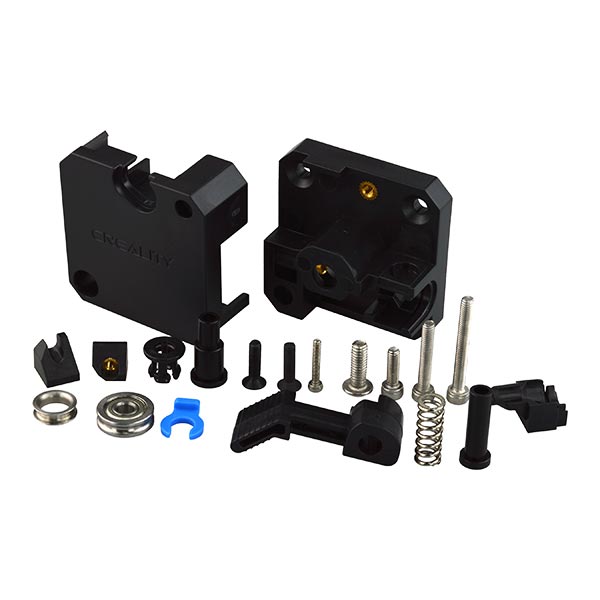
Improved Extruder
With many other Creality 3D printers, the extruder is often replaced with a better one. The CR-6 SE already has an improved extruder, so you have no reason to upgrade or replace it.
The extruder is not completely plastic like in cheaper 3D printers. It has metal components inside. This allows it to exert good pressure on the filament and wears out very slowly. In addition, the metal filament guide improves processing with flexible filaments.
Operating the extruder is also very easy thanks to the large lever on the outside. Also included on the included SD card is a guide on how to completely disassemble and reassemble the extruder. So if you ever want to replace any of the extruder’s components or make a repair, it’s no problem with the guide.
Without this guide, however, it would actually be a problem, since the extruder is built so compactly that there is hardly any room to maneuver in it.
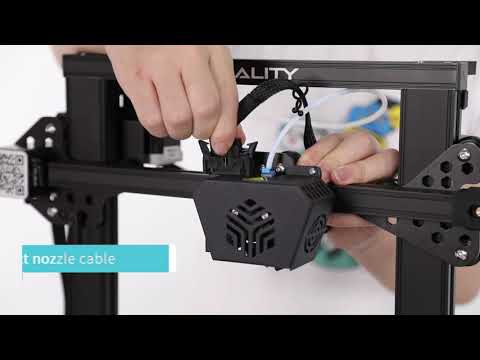
New Hotend Design
Besides the advantages of the new design described below, it also looks simply chic. The technically sensibly placed components are neatly distributed around the bright red heat sink of the Nozzle. This gives it a very sleek and modern look.
The new hotend design makes it easier to replace the components it contains. This makes it possible, for example, to change the nozzle with just one hand.
This advantage is particularly noticeable during maintenance. Cleaning the entire printhead and replacing certain parts is really convenient thanks to this new design.
Even if you want to disassemble the complete printhead (e.g. to install an all-metal hotend or new fans), this is simplified by the clever wiring. The cables that supply the hotend are connected with a single connector.
Two fans are installed in the hotend. One fan cools the hotend and one fan cools the print object. The cooling is absolutely sufficient and so far I have not had any problems. The fan gets a bit louder at high temperatures.
The tube that feeds the filament is made of PTFE and reaches quite deep into the heat sink. At about 250 °C PTFE starts to produce harmful fumes. You could theoretically go up to just over 260 °C but because of the fumes, you should limit yourself to filaments that have a printing temperature below 250 °C.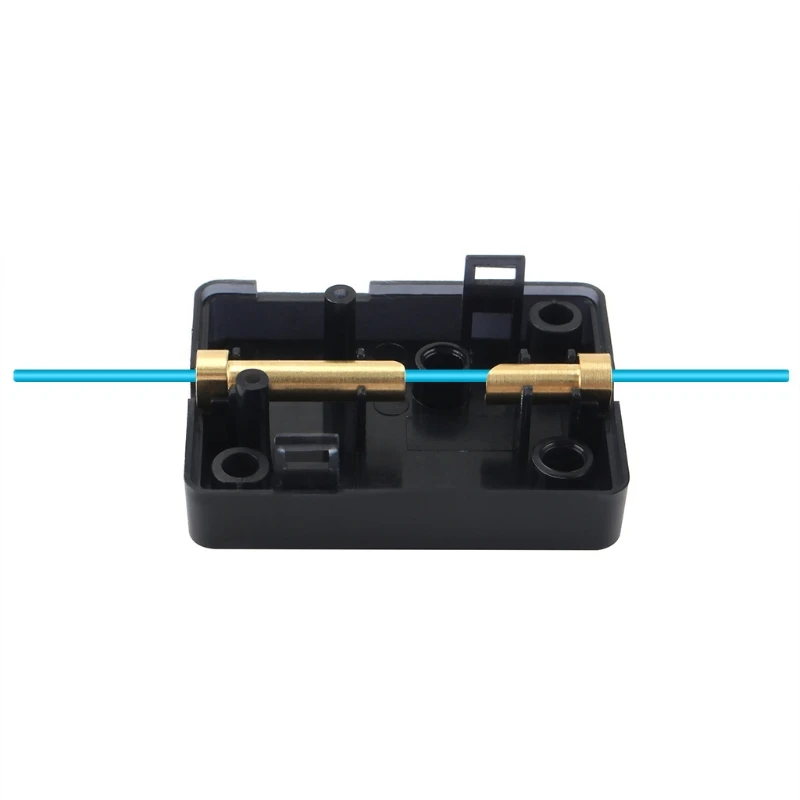 This includes most standard filaments like PLA or TPU. If you want to print hotter, e.g., for ABS, PETG or ASA*, you should replace the tubing with one that can withstand higher temperatures.
Good Nozzle Quality
With some low-budget 3D printers, the first thing I replaced was the supplied nozzle. Often cheap nozzles are very poorly formed or even have chips inside.
However, the nozzle of the CR-6 SE has the usual Creality quality. The two included replacement nozzles also meet this standard. If you always clean the nozzle properly and only rarely use highly abrasive filaments such as carbon* or wood*, you will get by with one nozzle for a very long time.
Easy Belt Tensioning
An incorrectly tensioned timing belt in a 3D printer quickly leads to various printing problems. Layer shifts are a frequent consequence. To avoid this, the timing belts must be correctly tensioned: not too tight and not too loose.
With many 3D printers, such as the Ender 3, tensioning the timing belts is relatively complicated and tedious.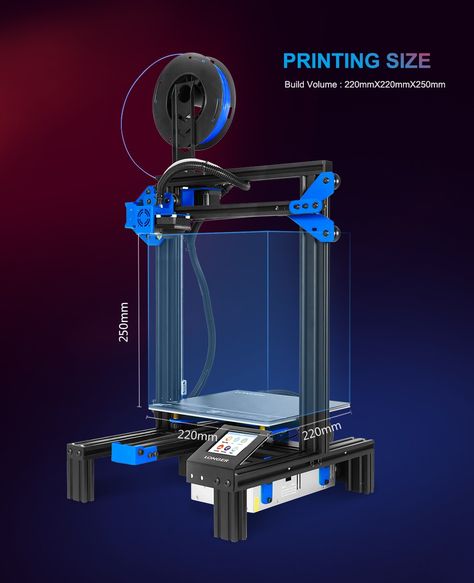 So it’s no wonder that many Ender 3 owners have added this upgrade to simplify this process for themselves.
The CR-6 SE has convenient tensioning wheels installed on both toothed belts. With these wheels, you can adjust the tension on the timing belts very quickly and precisely.
This integrated upgrade is definitely one of the quality-of-life upgrades!
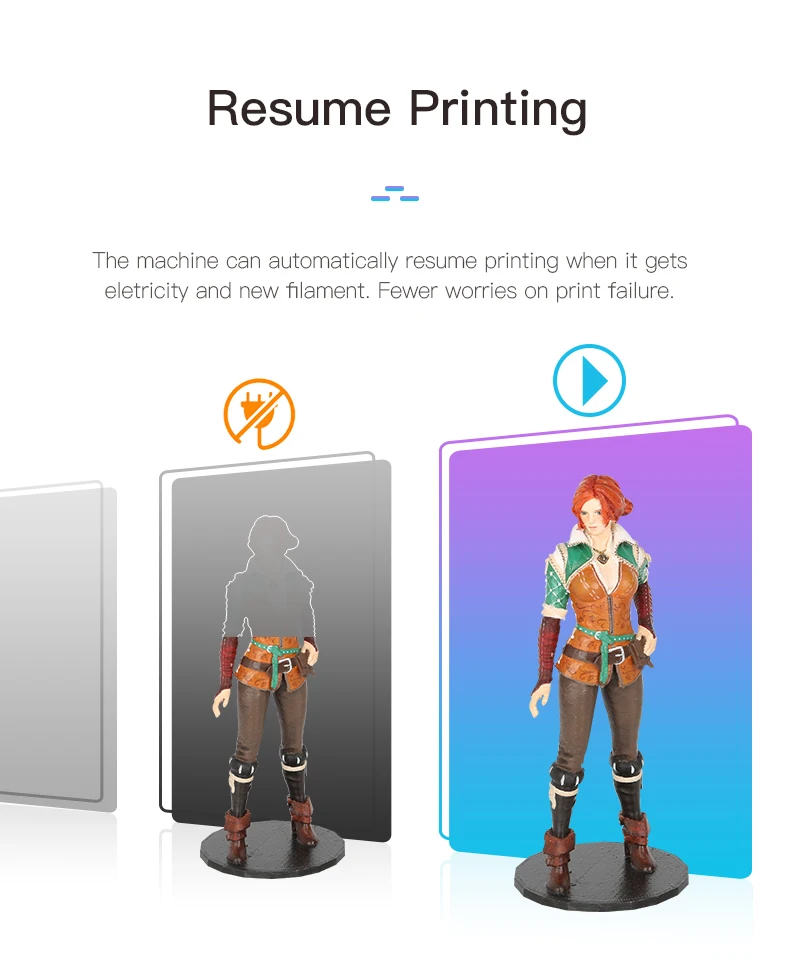
Resume Print Function
This feature is now widely used and offers you peace of mind in the event of power outages or other power supply disruptions.
During my testing, I pulled the power cord on a print. The CR-6 SE started right back up where it left off after I turned it back on.
Meanwell Power Supply
The CR-6 SE is equipped with a high-quality Meanwell power supply. The only downside to this power supply is that it gets louder and louder at higher loads. If you start with particularly high temperatures, the 3D printer will get louder and louder.
If you print mainly with PLA, the load on the power supply is not yet so high that the volume is greatly increased.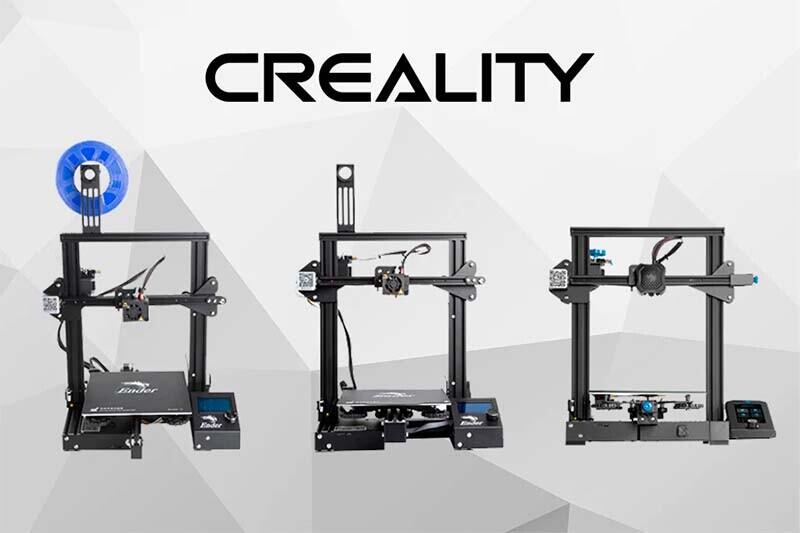
Tool Drawer
Hidden in the frame of the 3D printer is a small tool drawer. It holds all the tools, which makes the work surface look tidy and clean. I myself only put the tools in the drawer when I haven’t used the printer for a while. If you start a new print every day, or if the 3D printer runs all the time, it makes no sense to put the tool back neatly in the drawer. But this is of course a matter of taste.
This detail and the modern design of the printer, add to its well-thought-out overall look.
Carrying Handle
The carrying handle at the top of the frame allows you to easily transport the 3D printer. This will probably be a rare occurrence, but it is still a handy detail to have on the printer. If you know from the start that you will hardly ever or never move the printer, you do not need to mount the carrying handle.
Filament Holder
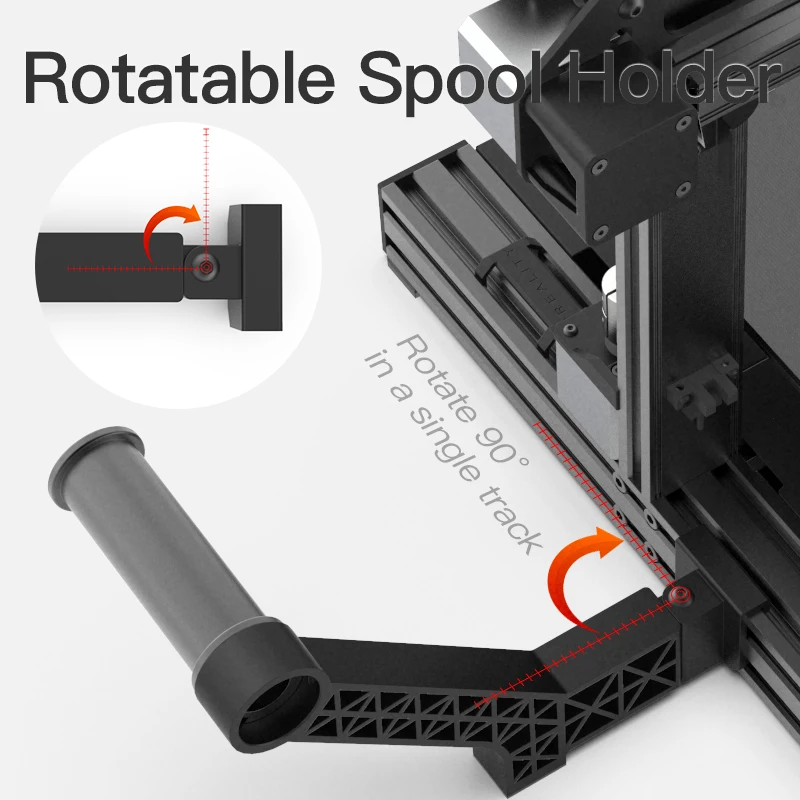
Probably the most insignificant but nevertheless practical feature is the adjustable filament holder. Not only can it be freely mounted along the horizontal frame (except exactly where the vertical frame is mounted), it can also be angled 90° to save space when the printer is not in use.
Technical Specifications
Creality CR-6 SE
DEVICE
- Technology: FDM
- Size: 442 x 462 x 540 mm
- Weight: 9,5 kg
- Touchscreen: 4.3-inch HD color LCD
- Structure: partially pre-assembled
- Power supply: AC 115/230 V, 50/60 Hz
- Power: 350 watt
- Languages: English, Chinese
PRINTING
- Print volume: 235 x 235 x 250 mm
- Accuracy: 0.1 mm
- Layer thickness: 0.1-0.4 mm
- Nozzle quantity: 1
- Nozzle diameter: 0.4 mm
- Filament diameter: 1.
 75 mm
75 mm - Print bed temperature: max. 110 °C
- Nozzle temperature: max. 260 °C
- Printing speed: 80-100 mm/s
SOFTWARE
- Slicer: Creality Slicer, Cura, Repetier-Host, Simplify3D
- File format: STL/OBJ/AMF
- Connectivity: online or SD card
Check Price at:
Amazon*
Comgrow*
3DJake*
CAFAGO*
Similar 3D Printers
Creality Ender 3 V2
The Ender 3 V2 from Creality is the further development of the popular first version. It also includes many upgrades, but not as many as the CR-6 SE*. For example, with the Ender 3 V2, you have to level the print bed manually. The print volume is 220 x 220 x 250 mm.
Ender 3 V2*Check Price at:
Creality*
Amazon*
3DJake*
CAFAGO*
Anycubic Mega X
The Mega series from Anycubic is very popular. The Mega X* with a print volume of 300 x 300 x 305 mm is also one of them. Like its brothers, it features a stable frame and can also process many different filaments.
Check Price at:
Amazon*
3DJake*
Artillery Sidewinder X1
The Artillery Sidewinder X1* is packed with useful features. It has a large print volume of 300 x 300 x 400 mm and can also process a wide range of filaments. Especially flexible filaments are particularly easy to process thanks to the Direct Drive Extruder.
Artillery Sidewinder X1*Check Price at:
Amazon*
3DJake*
CAFAGO*
Disclosure: This website is the property of Martin Lütkemeyer and is operated by Martin Lütkemeyer. Martin Lütkemeyer is a member of the Amazon Services LLC and other Affiliate Programs. These are affiliate advertising programs designed to enable websites to earn advertising revenue through advertising and linking to Amazon.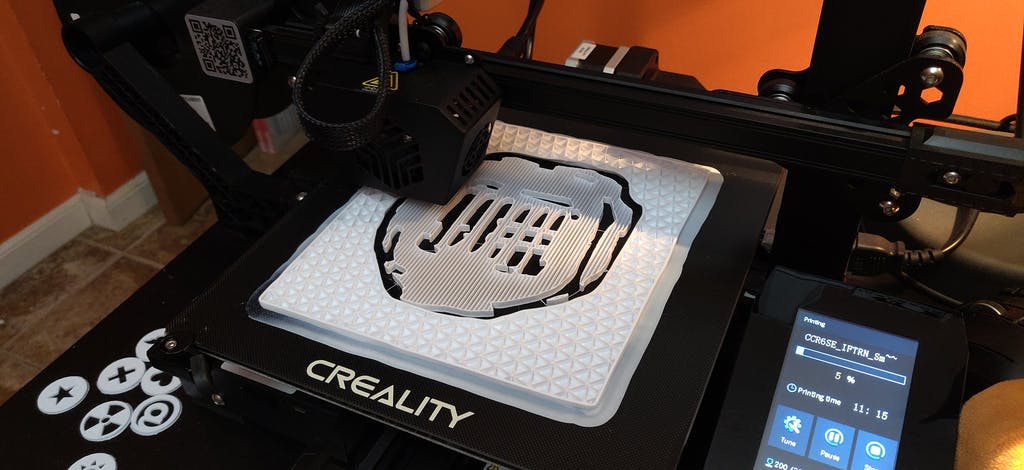 com and others. Links marked with * are affiliate links.
Creality CR-6 SE 3D Printer - Popular Choice in US & EU
Creality CR-6 SE 3D Printer
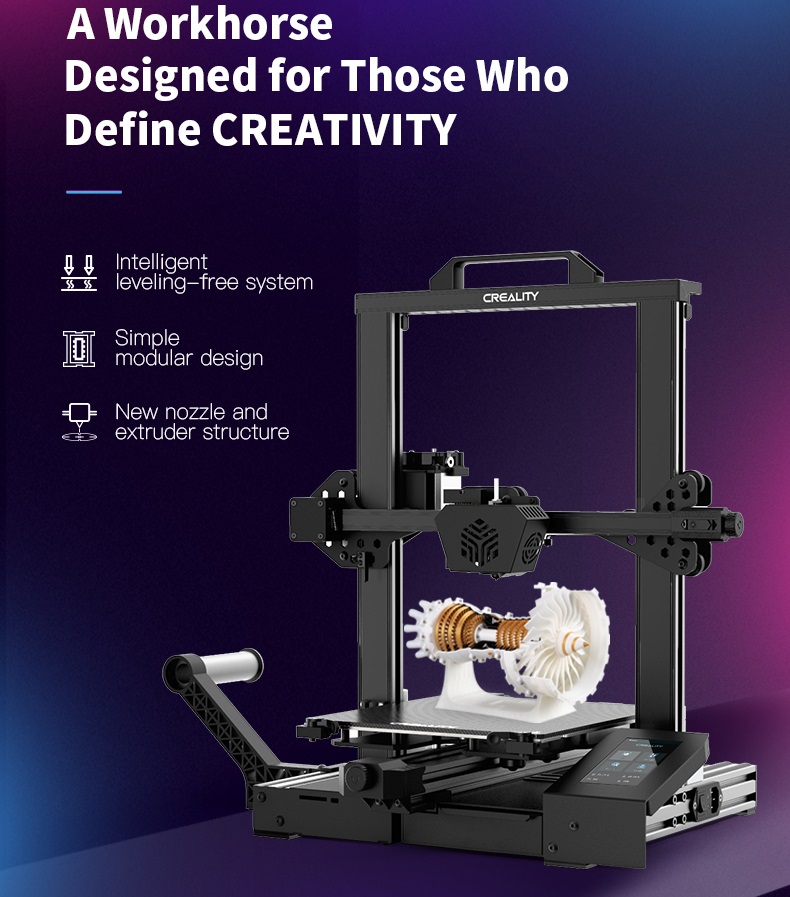
GROUND-BREAKING TRUE LEVELING-FREE TECHNOLOGY
For the most part, accurate 3D printing is the result of a leveled bed. That’s usually a challenging goal, though, because most 3D printers will present nozzle clogging, poor adhesion, and generally unleveled-related issues that compromise the quality of prints. The CR-6 SE offers precisely the opposite. Featuring an innovative true Leveling-Free Technology, this is a 3D Printer that lets you always rely on highly accurate results.
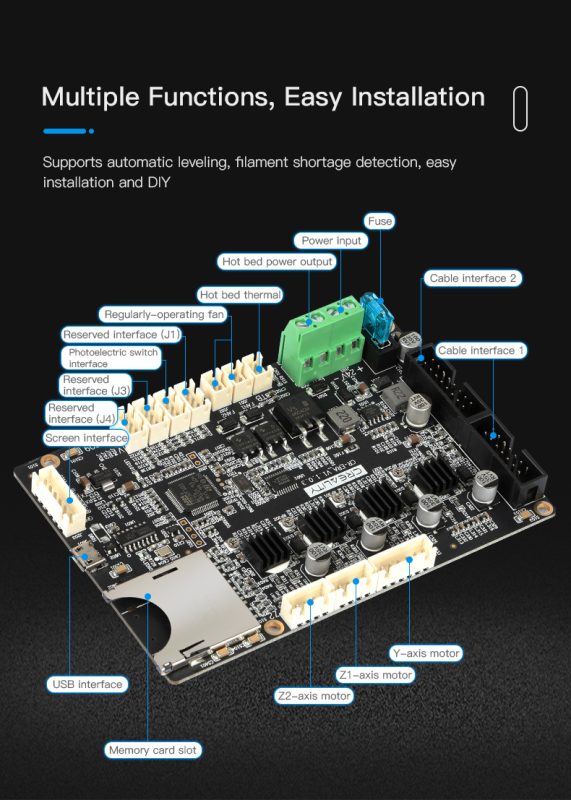
CUSTOMIZABLE AND EASY TO KEEP MODULAR NOZZLE
Never see your creativity and productivity affected by nozzle-related replacement issues. The CR-6 SE is designed with a modular nozzle that means you can customize it. From the heat block to the nozzle tip, among other parts, this is a Modular 3D Printer that’s easy to keep!
A DEPENDABLE EXTRUDER
With its compact and reliable extruder, you know that a smoother extrusion and an easier filament feed will ultimately generate faster, quieter, and smoother prints. Yes, this is what perfect 3D printing is all about!
CUT THE NOISE
3D printers shouldn’t be annoying in the noise they make, which is why we added a Silent Chipset to the CR-6 SE. Its latest Trinamic driver helps to ensure that voltage control, fast movement, and printing in silence are a given. We know: you’ll thank us dearly for that!
STRONG, STABLE AND STYLISH
The CR-6 SE 3D Printer looks as strong as it is. It also looks very stylish! This amazing work station has a beautiful design that compliments any desktop you use it on. Meanwhile, self-designed profiles and stepper motor cover prevent filament scraps and dust. The CR-6 SE also comes with a well-arranged ribbon cable that ensures safety issues are never a concern.
REDUCED VIBRATION FOR REFINED RESULTS
Sounds like the perfect 3D printing equation, right? This unique printer is designed with a wider foundation and equipped with dual Z-axises matched with an adjustable timing belt that translates into reduced unwanted motion and improved refined results.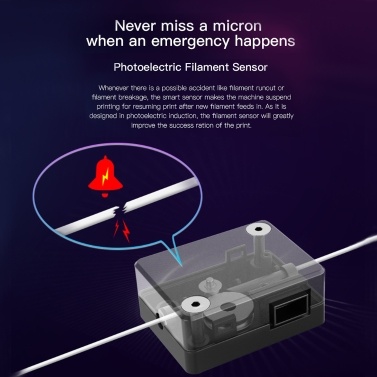 So the stability of the machine and its performance is simply impressive.
A 3D PRINTER YOU CAN CARRY
Weighing only 9.2kg and with manageable dimensions (442*462*540mm), the CR-6 SE is a 3D Printer that you can carry. In fact, it features a convenient removable handle that makes it easy to carry whenever you need to.
ADDONS -ALL YOU NEED IS WITHIN REACH
User experience improved by optimized details like sealed aluminum profiles, foldable filament holder, tools storage box, belt tensioner.
- Toolbox
- Foldable spool holder
- Adjustable belt tensioner
- Flexible hotbed fixator
PHOTOELECTRIC FILAMENT SENSOR
These are the three magic words that basically mean that your CR-6 SE will keep your printing performance running smartly and smoothly. If the machine suddenly runs out of filament or if it simply breaks, the printer’s photoelectric filament sensor will instantly pick up that disruption and will stop the machine. As soon as the new filament feeds in, the CR-6 SE will resume its operation without making you lose your work.
RESUME PRINTING FUNCTIONS
Did the power suddenly or accidentally go off? No worries! The CR-6 SE 3D Printer will resume printing if the power supply is interrupted. That’s right—you can forget about starting over because print failure is no longer an issue!
INTUITIVE USER EXPERIENCE
The CR-6 SE 3D Printer features a 4.3in HD Color LCD Touch Screen that allows you to easily and intuitively operate the device. Available in English and Chinese, and with a simplified and smart interface, this Touch Screen ensures that this very special printer’s user experience always equates to smooth sailing!
NO DUST. NEAT AND NOTABLE
CR-6 SE revamps in quite a distinguished look. From the bottom to the top, the flat aluminum profiles make the machine stylish and prevent dust.
ALL-ROUND SAFETY
Hassle-free printing with over current protection, over-load protection, and thermal runaway protection, always keep your mind at peace.
Creality CR-6 SE: Creality
3D printersfrom Creality
Starting price 39 900 ₽ - starting price 39 900 ₽
Starting price
39 900 ₽
39 900 ₽ - 39 900 ₽
Current price 39 900 ₽
| /
Savings 0 ₽ Savings -39.900 ₽
Available on order
The Creality CR-6 SE is an FDM 3D printer equipped with innovative true zero alignment technology. This 3D printer is one you can always rely on for high precision results.
3D printing properties | |
| Print Technology | Printing with plastic thread (FDM/FFF) |
| Application | Prototyping, Prototyping, Design, Architecture, For educational institutions, For business, For home, Advertising, For engineering, For makers |
| Maximum print size (LxWxH), mm | 235x235x250 |
| Number of printheads | 1 |
| Thread diameter | 1.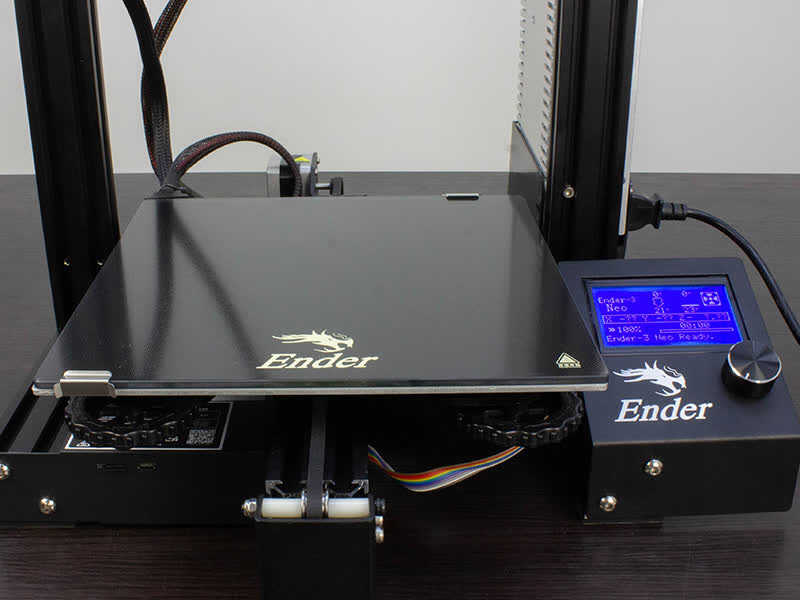 75 mm 75 mm |
| Media | ABS, PLA |
| Extruder operating temperature | 260°C |
| Platform operating temperature | 110°C |
| How to download a project | USB, SD |
Dimensions | |
| Width | 442 mm |
| Height | 540 mm |
| Depth | 462 mm |
| Weight | 9.5 kg |
Creality CR-6 SE Highlights
Modular Hotend
The Creality CR-6 SE 3D Printer is equipped with a modular nozzle, which means it can be customized. All parts, from the heater block to the nozzle tip, are replaceable and easy to maintain. The hotend is also equipped with improved fans for better heat dissipation.
Robust extruder
Compact and robust extruders provide smoother extrusion and easier filament feeding, resulting in crisp, smooth patterns. In addition, a lever has been added for easy filament installation.
Quiet Chipset
3D printers don't need to be distracted by their noise. That is why the Creality CR-6 SE is equipped with a silent chipset.
Silicon glass heated platform
The Creality CR-6 SE 3D printer is equipped with a carborundum glass heated bed that is flatter than aluminum and provides excellent thermal performance, ensuring fast heating, strong adhesion and easy model removal.
High stability and productivity
The printer has a wider base and dual Z-axis, combined with an adjustable toothed belt to reduce unwanted movement and achieve better results.
Photoelectric sensor
A new sensor ensures that printing stops if the filament runs out or breaks. After feeding a new filament, you can continue printing without any problems. Thus, the photoelectric sensor significantly increases the percentage of successfully completed tasks.
Materials for Creality CR-6 SE
- In stock
Ultrafuse ABS 1.75mm
- In stock
M200 Z-PCABS Filament 1.75 mm
- In stock
M200 Z-HIPS Filament 1.
 75 mm
75 mm - In stock
M200 Z-ABS Filament 1.75 mm
- In stock
Verbatim ABS 1.75
- In stock
M200 Z-ULTRAT Filament 1.75 mm
- In stock
Z-GLASS
-
Taulman Nylon 618 1.
 75mm
75mm -
Ultrafuse 316L 1.75mm
-
Ultrafuse InnoPET 1.75mm
-
Ultrafuse InnoFlex45 1.75mm
-
Verbatim PLA 1.
 75
75
Creality CR-6 SE 3D printer review
A budget novelty from the Chinese manufacturer Creality is the CR-6 SE 3D printer. We analyze its features, innovations of the creators, technical capabilities and competitive advantages.
Creality CR-6 SE 3D printer review
A new product from a large Chinese company Creality 3D aroused interest among users of modern 3D technologies in late spring. The owners of the brand, which has already launched a ton of printing machine variants on the market, announced that the new CR-6 SE model will appear on the Kickstarter crowdfunding platform as a fundraiser.
This was a very unusual decision, since Creality 3D can afford to launch the next model of a 3D printer into mass production without first collecting money from donors and future users.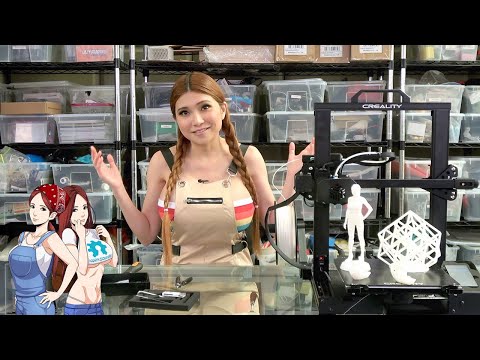 With this technique, the company wants to assess the market and understand the demand for its new product.
Description of the printer
Let's move on to reviewing the printer itself and its features. The new model works on FFF/FDM technology. This is an additive printing method using layer-by-layer fusing. Most Creality 3D devices work on this principle. The printer occupies a niche of open budget desktop models.
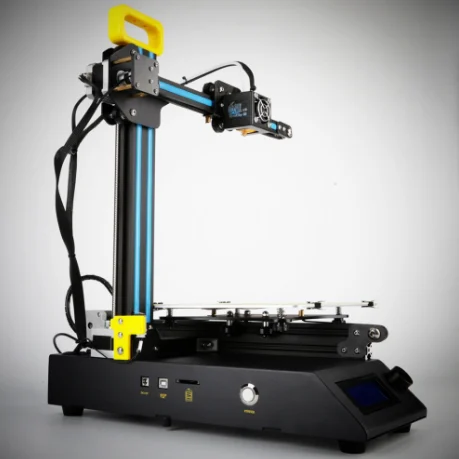
As is common with many 3D hardware manufacturers, the printer takes approaches from previous versions, including the popular Ender-3 device, while adding a number of improvements. The supporting structure of the model is made of aluminum profiles with closed ends. At the end of the guides along the X and Y axes are the handles for the belt tension control systems. This printer is similar to the updated Ender-3.
The differences begin when looking at the on-board control module. He got a color touch screen, its diagonal is 4.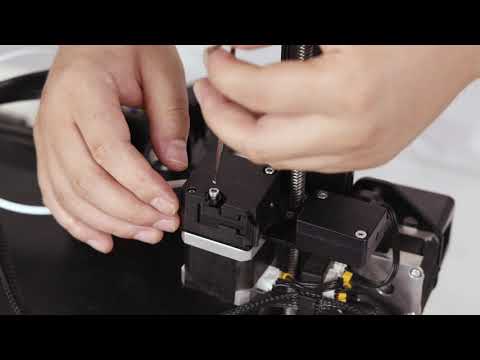 3 inches. Also added is an improved layout with an inverted system unit, like the Ender-3 V2 model. It has a drawer for storing various accessories, which is convenient. The frame has a handle for easy transportation of the device and a mount for the spool of printed material. There is an option to prevent the accumulation of dust and scale.
A more advanced print head cooling system has been added to the design, the replacement of nozzles and other components, such as fusers, has been facilitated. The filament (printed material) is fed according to the scheme of separate installation of the head and the plastic feed mechanism.
This solution reduces the weight and mobility of the extruder. Accordingly, the accuracy and speed of printing increases. However, it should be noted that such an approach complicates interaction with soft filaments.
A photoelectric sensor indicates that the working material is running low. After that, the system of automatic suspension of printing is launched.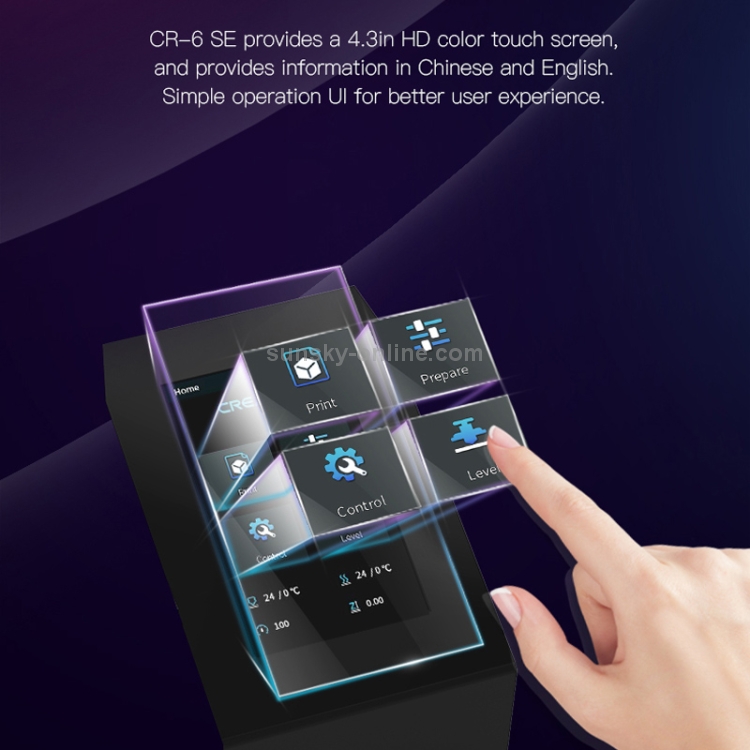 The desktop is made of glass. On top there is a coating of silicon carbide, which increases the strength of the structure and guarantees a more uniform heating of the surface. The maximum heating temperature reaches 110 °C. The highest temperature of the hot end rises to 260 °C.
You can start working with the device almost immediately after delivery. Everything is assembled in no more than 5 minutes and after that it is ready to go. Calibration is performed automatically.
Printing is almost silent. Trinamic drivers are running on the device. They do not allow noise to increase above 5 dB.
The horizontal plane is positioned as accurately as possible, the indicator reaches 0.01 mm. You can set the required layer thickness in the range of 100–400 microns. The working area scale is 23.5 x 23.5 x 25 cm. Users are recommended to print at a speed of 80-100 mm/s. For this device, the manufacturer considers this to be the best indicator.
You can work with the device both through native software (Creality Slicer) and other popular slicer options (Simplify 3D or Cura).
Pros and cons
Given the listed features and capabilities of the printer, you should separately dwell on its strengths and weaknesses. The pluses include:
- Budget price . For its class, the device has an affordable price, which cannot but please ordinary buyers with a limited budget.
- Smart design. Manufacturers have tried to improve the system of operation of the device, finalized the mechanism and achieved higher quality indicators. The device is easy and convenient to use, while it perfectly copes with all tasks.
- Print speed . Follows from the previous paragraph. The device received an improvement in the working system and the ability to produce items for a more limited period.
- Simplicity . Any user, including those who first encountered the use of 3D technologies, will cope with the assembly and commissioning. Assembly and calibration are made as easy as possible.
 All actions are intuitive.
 - Color touch screen . With a limited budget, manufacturers have managed to integrate touch controls, for which they can be said a special thank you. Typically, budget models suffer in this regard and either do not receive a screen at all, or are equipped with a monochrome display with push-button control.
- Robust design of the extruder. Since this is one of the most important elements in the operation of a 3D printer, it is worth highlighting it separately. The design improvement also affected the extruder, giving it greater stability and reliability when performing work.
- No noise . Quiet operation allows the device to be used close to the working area, and maybe even in it. Of course, the design of the case is open and the smell of plastic can be felt, so you should choose a well-ventilated area for printing. However, the printer will definitely not interfere with the rest of the work.
- Print quality . The best indicator of a printer's quality is the level of workmanship it prints. And here the CR-6 SE model is not inferior to competitors.
Among the minuses, only the minimum layer thickness can be noted. It is 100 microns. In general, this is a good indicator, but modern models are capable of more.
Creality 3D printer CR-6 SE
- File formats STL/OBJ/AMF
- Dimensions, mm 442x462x540
- Software Creality Slicer / Cura / Reptier-Host / Simplify3D
- Weight, kg 9.5
- Output voltage 115/230
- Z-axis Double
- Pause/resume printing Yes
- Seal FDM
- Nozzle working temperature <260 °C
- Print resolution ± 0.
 1 mm
1 mm - Print modes Print online / from SD card
- Chamber temperature <110 °C
- Accuracy along X, Y axes, mm 0.01 mm
- Software language Chinese/English
- Working chamber area 235x235x250 mm
- Speed 80-100 mm/s
- Layer thickness from 100 µm
- Nozzle diameter, mm 0.4 (optional options supported)
- Input voltage 24 V
- Rated power 350 W
- Display 4.
 3" color touch screen
 - Materials used PLA / TPU / PETG / ABS / Wood
- Motherboard Silent
Go to product
Package contents
The device is currently available only by pre-order and the scope of delivery may change during the development of production. So far, the equipment is delivered semi-assembled, with everything necessary to put the device into operation.
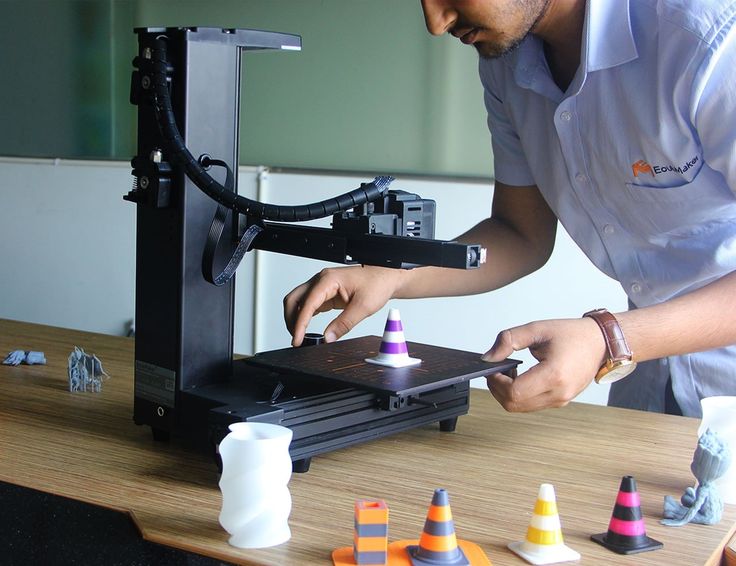
Print quality and product examples
Printing several models in different materials shows that the quality of the product remains consistently high.
For whom?
First of all, due to its affordable price and ease of use, the device will be a great option for beginners who want to try their hand at 3D printing.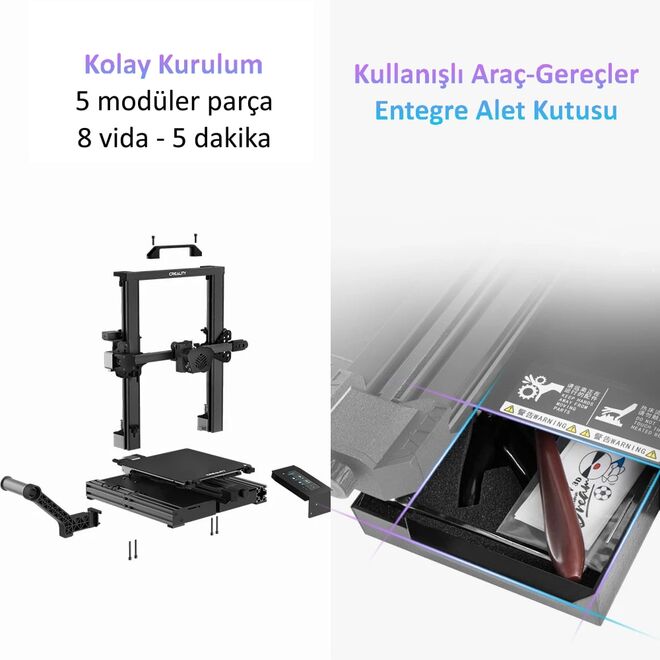 Therefore, the printer can be purchased for personal home use and put any experiments on it.
Also, such a budget option will be a good solution for educational institutions and classes with students.
The device is also suitable for small enterprises, that is, for doing business. The printer is able to print any small souvenirs, figurines, toys, small items and other products.
We can conclude that the CR-6 SE model is ideal for beginners, students and small business owners.
What materials are used?
The device is compatible with a range of print media, some of which are very interesting. It works with filaments such as PLA, ABS, TPU, Wood, and PET-G. Let's dwell on each in a little more detail.
PLA is one of the most popular plastics used in 3D printing. It is a biodegradable and biocompatible material. Widely used in the field of prototyping, because it has good resistance to deformation at low heat.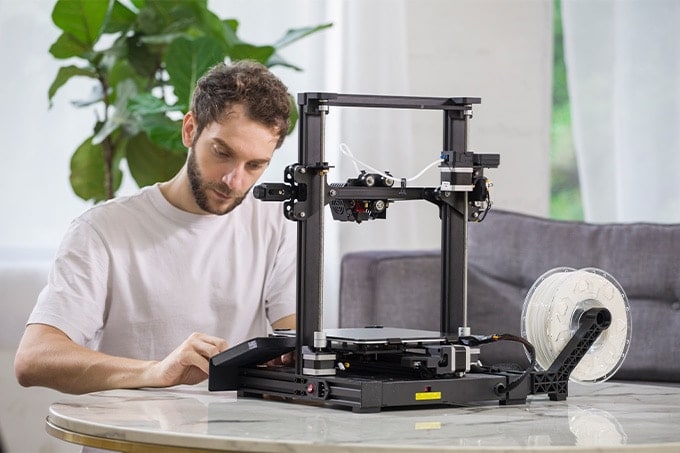 At the same time, it is impact-resistant and belongs to the category of engineering plastics. Has good wear resistance. It also prevents the attack of alkali, gasoline, grease and lubricating oils. Soluble in benzene, ether, acetone and other similar compounds.
ABS is the next hit in print materials. It is an impact resistant thermoplastic. Recyclable if desired. The material is non-toxic. If not exposed to direct sunlight, it has good durability. Resistant to moisture, oils and acids. It can be operated in a wide temperature range - from -40 to +90 °C. Dissolves when exposed to esters, acetone, ethyl acetate and ketones.
TPU stands for thermoplastic polyurethane. It is an elastomer containing signs of rubber and plastic. Objects printed from this material do not lose flexibility in -60°C frost conditions and do not melt in +80°C heat. They are also resistant to fats, oils, friction and wear.
Wood is an interesting material that will delight fans of creative solutions and small business owners. From the name you can understand that plastic is related to wood, and direct. He is able to create an excellent imitation of wooden products. Wood dust is added to its composition. At the output, the product receives a pleasant to the touch surface, reminiscent of a slightly rough wood. At the same time, the material is non-toxic.
Wood dust must be handled with care. Each manufacturer creates personal proportions and it is necessary to set up the device in advance to interact with this particular material, check the print quality. Also, plastic can clog the supply system, so it should be checked and cleaned in a timely manner.
PET-G is a durable polyethylene terephthalate. Sturdy plastic that does not emit odor during printing on a 3D printer. Very handy. If you correctly carry out all the preliminary settings of the equipment, then the process of creating the product itself will not cause any difficulties. Despite the high strength, the material is easy to scratch. It has less flexibility when compared to ABS and PLA. It is, however, softer. Suitable for printing large items, because it almost does not warp. Resistant to water, alkali and acids.
Instructions for initial setup and preparation for operation
The printer is delivered practically assembled. Manufacturers have done everything so that any person can handle the assembly of the device, since the design of the product is made in an intuitive way. The user will only have to connect the device to the network and press the power button. The device is calibrated automatically. After that, you can get to work.
Having analyzed the novelty from Creality, we can draw the following conclusions:
- The product is still only available for pre-order, so you may have to wait a little longer than with a standard online purchase.
- The instrument is well built and robust.
- The product is quiet, so fans of silent operation will be pleased. The sounds emitted by 3D printers are one of the main headaches of users, which has finally been solved.

Learn more