Lk4 3d printer
Longer LK4: 3D printer review - 3D Print
Post Views: 229
The Longer LK4, which we will talk about today, was born to impose itself in the market of the economic quality. It comes in the same shape as the modern small, as the Ender 3 (click here for the review) which follows excellent technical features, having some extra in the basic version though.
It’s the same brand that produces Alfawise U30. Consequently the shapes and operation are almost identical. But even compared to the latter the Longer LK4 has some advantages, which we will talk about when we explain the editing.
Let’s start firstly with the technical description, which immediately gives us a rough idea.
Technical Specifications
- Printing volume – 22 x 22 x 25 cm
- Heated bed – Yes
- Printable materials – PLA, ABS, PET, PETG, ASA, flexible and more
- Colour touch display – 2,8″
- Restart print after power outage
- End of filament sensor
- Plate with adherent surface
- Mosfets installed as standard
When buying a cheap device, above all, quality is one of the main concerns. So should we buy a more expensive model?
Fortunately, this is not a problem with the LONGER LK4. This 3D printer is made with a sturdy aluminum frame that weighs about 7 kg. It’s rock solid. The power supply and the motherboard connections are secure and provide excellent electrical protection. It’s actually a printer that brings together, as a result, quality and economy in a perfect marriage!
Unboxing the Longer LK4
The Longer LK4 comes packaged in a medium-sized cardboard box. About 20cm high and about 50cm wide.
Inside we find the printer immersed in the protective foam. This protection is more than adequate to cushion any impact.
I like the addition of sturdy cardboard corner protections, which keep the corners well intact!
The package arrived on time after 7 days from the order at the official Aliexpress store. It is well packed with no signs of damage. Once opened I found all the components well protected and ordered, each housed in their own compartment. I didn’t find a single “stray” bolt inside the package.
Inside you can find, in addition to the printer:
- Instructions
- Allen set (even more than the ones we actually use)
- Wrench 7/10
- Micro SD with USB adapter
- Spatula, very good, rigid and already pointed for the removal of prints
- Cable ties
- Power cable
- Filament 5m
- Reserve Filament End Sensor – Corect, a second Filament End Sensor!
The micro sd contains the digital copy of the instructions and several files to make the first test prints.
Assembly the Longer LK4
This machine, like all new generation 3D printers, comes pre-assembled at about 90%. Basically we deal with 3 pieces.
-
The base with the sliding plate already installed. Then below this motherboard and power supply ready to use.
- The second piece is the castle (the upper part).
- Last piece is the x-axis, then the bar where the extruder moves, already fully mounted!
Then beyond the 3 macro components we will still have the touch screen, the port filament and the motor with bar for Z movement.
Once all the components were removed from the packaging, I started finally the assembly of the machine.
The assembly is very simple and intuitive to carry out.
Just follow the excellent and complete instructions in English, but of course easy understanding thanks to the illustrative images. Also regarding the electrical wiring part it is all explained in detail in the instructions and also identified by labels on the cables. It’s almost impossible to make a mistake.
If you have average mechanical capabilities you will be able to make this printer operational in about 20 minutes, without any particular difficulty. The only thing that made me think about was the installation of the color monitor. An ultra-thin cable is used, which must be inserted and locked by tightening a special ring. Beyond this particular nothing to report.
Here I summarize the few assembly points
Note: before starting keep in mind that the Longer LK4 has (as shown in the photo) smooth profiles for the visible part. This makes the assembly even easier! The smooth part must always be visible!
-
Insert the fully mounted X-axis into the “castle”. The hot end part must be on the smooth side of the castle!
- Place the castle with the smooth part towards the front of the printer and tighten the 4 screws from under the base.
-
Place the flat cable with the bronzes towards the monitor board and tighten the ring. Then install the metal protection at the back of the screen.
- Secure the touch screen.
- Fix the filament port.
- Place the z motor on the back and fix to the holes on the profile.
- Make electrical connections following the labels.
After these simple steps the printer is ready to work!
Longer LK4: First impression
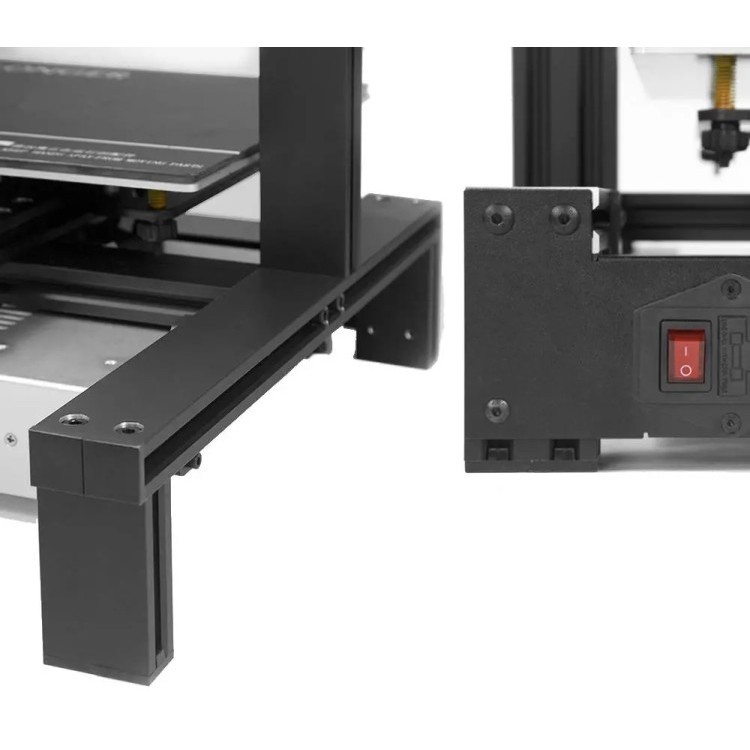
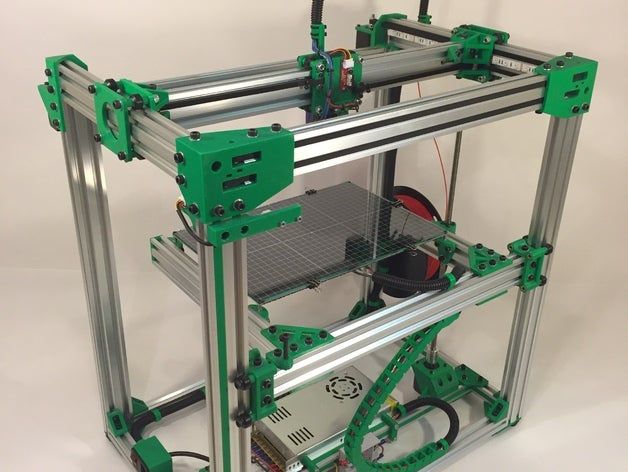
It is very solid, the frame is really solid! The project, with special extensions that lift it for about 10 cm is very functional.
They allow the electronics and power supply to stay below the printing table. This is an excellent solution because disappearing from view give it further clean and tidy line.
You see very few connecting cables. I like this!
Another point that struck me immediately was the plate. The surface is not smooth, it is recalling the surface of the Buildtak.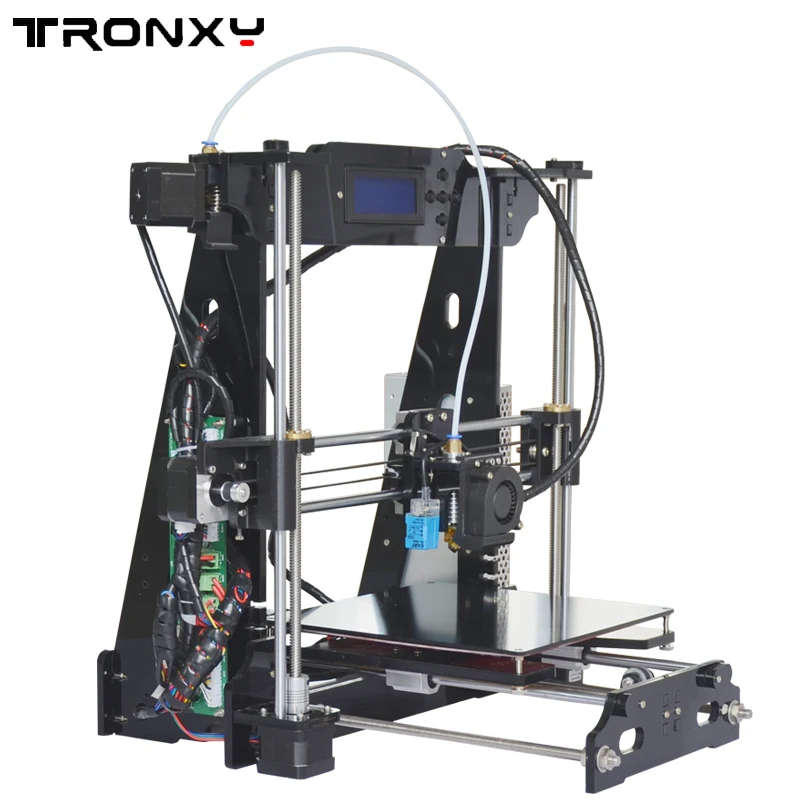
All the pieces that compose it, from the supports for the wheels, for the extruder and the plate are all made of aluminum, light and also very resistant. As aluminum is also the frame of the touch screen. Very convenient and intuitive interface of the touch screen display. In fact, allows you to access all the useful functions quickly and immediately, even when printing for the correction “on the fly” of some values. For example the cooling fan speed, the nozzle flow and temperature, the temperature of the printing table, etc..
Excellent is also the printing surface size, allows you to create objects of discrete size. Good flat leveling system (manual): a bit boring as an operation but effective.
The prints come off well from the plate, with the PLA just heat the top to 60°C. This will stick to the printing surface. On the one hand, I had a hard time pulling the press off at the end of the job.
Tip: To detach the press if you have difficulty, with one hand hold the plate and with the other, by sliding the spatula supplied on the plate give a nice shot. The movement must be done in the Y direction. So you will not cause damage to the plate leveling.
The idea of having a second filament end sensor as a replacement is excellent.
The first prints
After the assembly phase here are finally the first tests. I must say that this printer has a really impressive quality, right from the start without any modification!
Perhaps the most shocking thing is to compare print quality to price! Here is the print of some files that are already ready inside the SD and other tests:
The layers are practically invisible and the rendering of the details is very satisfying! What do you think?
Software features of LK4
We must certainly start with the touch screen color monitor. It is immediate to select what we want the machine to do for us.
Clear and simple menus even for those who have never seen a 3D printer. We can move easily between the various pages and even get to save the various settings in a very simple way! Just select the right entry, enter the new value and press “save” on the disk.
And to think that in little different models these modifications involved a bad job, to tinker inside the firmware. Certainly this printer is not one but several steps forward.
Another thing I cannot fail to mention is the firmware upgrade. I challenge anyone to find a machine where it is easy to change the firmware as well as this one. The operations to be done are:
- Download firmware and unpack it to SD card (Download link).
- Insert the SD card into the printer and turn it on.
- Wait for it to update automatically, turn off the machine and remove the SD.
Is that all? Well, that’s it…!
Longer LK4: Optional on board
This 3D printer, even if very cheap, can be a concentrate of technology, with many options on board.
Possibility of restoring printing if the electricity is missing. This option will save us several annoyances.
Here in Italy where the KW are reduced to three is very easy to overcome with other appliances in use. No more arguing with your wife who turns on the oven or your daughter always attached to the hairdryer!
Filament end sensor. The serenity of leaving the printer to work alone and not go back to printing with the item at half!
The wire will always be present! And do not worry if the end wire is damaged. There is the reserve inside the package!
Super adhesive printing plate. Let your grandmother use the hair spray. The plate on this printer has a great adhesion. Just heat the plate to 55/60° and the press will firmly adhere to the plate!
Longer LK4: 2 upgrades I recommend!
Here are 2 upgrades that I recommend right away.
Longer LK4: Everything that made me fall in love.
There are many design solutions that I liked very much, and here they are listed:
- Adhesion printing plan without adding any product.

- Stable and well built, solid materials.
- The Filament End Sensor: Allows you to go all the way to the coil without fear.
- Reboot after power failure: not to fear any more sudden blackouts.
- The touch color display: complete and intuitive, together with the menus allows us to move with extreme simplicity.
- Print quality in general: really good output from the box.
- Heating rate.
- The price: Even if we haven’t talked about money yet, the price of this super-equipped printer is the real and definitive strength. In other words a MUST have.
Longer LK4: To improve
- Slightly noisy power supply fan, but nothing excessive.
- Not very comfortable the housing of the micro SD.
- Very little filament supplied, equip yourself with a coil of filament! So you will use it!
Conclusion
Whatever is your knowledge of 3D printing world, Longer LK4 will be a great friend for your creativity! To summarize the print quality is amazing, and does not require any previous skills to use it at the best!
With some upgrades it can become a perfect 3D printer, therefore ready to compete with much more expensive and famous models.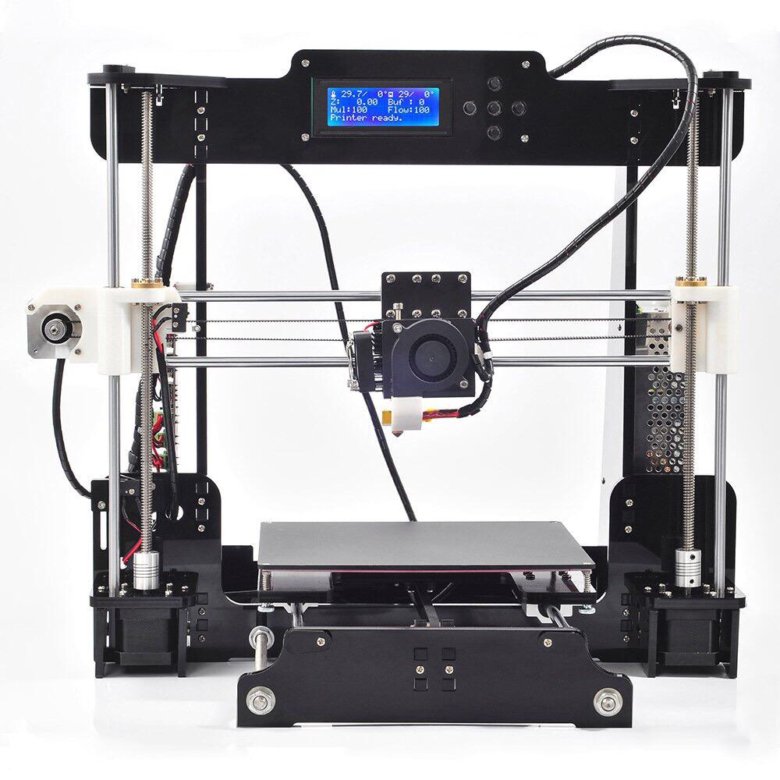 The fact that it can print almost all materials, also thanks to the short PTFE tube, makes it suitable even if you have special needs.
Where Can I Buy Long LK4?
The best shop to buy Longer LK4 is the Longer Global Store on Aliexpress. Here you will find the best prices of the network, fast shipping from Europe and a great after sale. Ready to solve your problems!
Currently Longer LK4 is available for sale on this shop at the incredible price of 120€! With shipment in 10 days without customs charges since the printer is already in Europe!
Price for Longer LK4 on Aliexpress
This store has the best prices on all Longer products! All models at the lowest prices in the market!
Longer LK4 PRO, Longer LK1, Longer Orange 10, Longer Orange 30
If you have found this post useful, please give a LIKE on Easy 3D Home Facebook’s page to receive updates and all the news of our Blog! You can read other reviews about 3D printers in our 3D Printers Reviews area.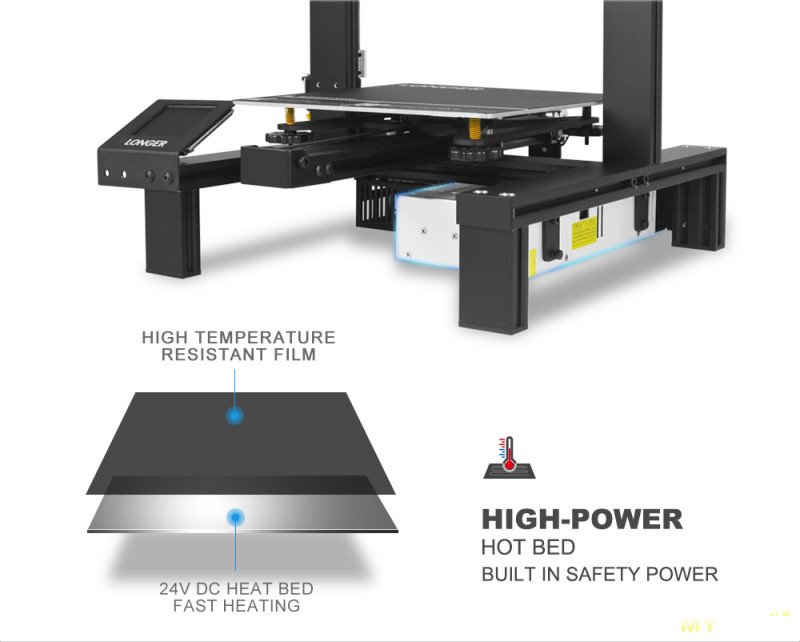 Enjoy!
Like this:
Like Loading...
Longer LK4 Pro 3D Printer Review - Pro Or No?
Table of Contents
I previously reviewed the Longer LK4 but now, Longer 3D have produced a pro version! Longer 3D has come out with some fantastic printers so far, including resin printers such as the Orange 10 and the Orange 30! Read on to find out more about this printer and what differences there are compared to its predecessor.
Specifications
Features
- Touch screen
- Filament detection sensor
- Open-source
- Power failure recovery
- TMC2208 drivers
LONGER LK4 Pro 3D Printer Open Source with Upgraded 4.3inch Touch Color Screen, TMC Ultra-Quiet...
LONGER LK4 Pro 3D Printer Open Source with Upgraded 4.3inch Touch Color Screen, TMC Ultra-Quiet...
$229.99
in stock
as of November 7, 2022 11:29 am
Buy Now
Amazon.com
Packaging
The Longer LK4 Pro comes packaged in a cardboard box. Inside it is surrounded by protective foam, which is more than adequate to cushion any knocks. I like the addition of the sturdy cardboard corner protectors!
What’s inside?
Inside, you will find the following for your LK4 Pro 3D printer:
- Instructions
- Allen Keys
- Spanner
- Micro SD card with adapter
- Cable ties
- Power lead
- Clips for hotbed
- 5m of filament
- All the parts to build the printer
It is sad to see that no scraper or snips are included as these are pretty much a must for 3D printing!
Putting it all together
If you’ve put together an Ender 3 before, you’ll have no trouble with this! The included instructions are proper, but not the best. A couple of things seem unclear, but its quickly figured out.
The first step is to install the uprights using four bolts secured from the bottom of the frame.
Next, we set up the extruder arm and secure the top frame piece.
This slideshow requires JavaScript.
We can now install the Z motor and rod to the extruder arm.
The limit switch is now secured into place and the spool holder secured to the top.
Now the heatbed is installed.
Finally, we can secure the touchscreen in place.
That is the printer now fully assembled!
All the tools you need are supplied to put this together. It must have taken me around 20 minutes to complete. The build quality is good, and the printer is sturdy. No major issues so far!
Let’s print!
On the included SD card are a selection of already sliced files. I noticed the Benchy, so I thought its a standard print, so let’s do it! I loaded up some pink Robosavvy filament I had lying around. The filament they give you is only 5 meters, so wouldn’t go very far!
This slideshow requires JavaScript.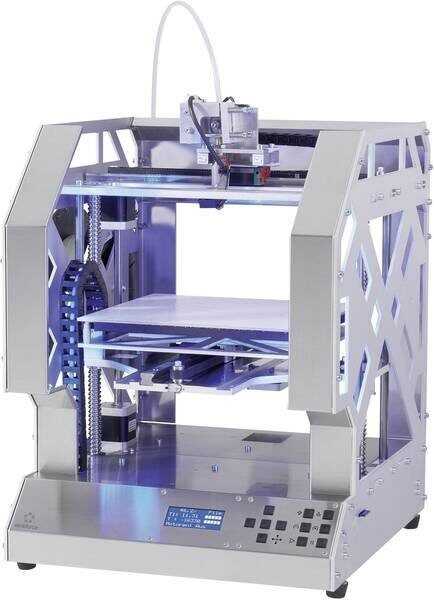
It didn’t print too severely considering. Room for improvement, though!
Let’s try something else here is a dragon modelled by Creative Geeks MB
This slideshow requires JavaScript.
Any bad bits?
Only a couple of bad bits to note.
- The touchscreen is excellent, and however, if a numerical keyboard were included, this would make it easier to type in the temperature you want, rather than going up or down in increments.
- The power supply fan is quite loud. Holding a soundmeter to the back of the machine, this is the result:
There is no doubt that the fan can easily be swapped out for a much quite one, so isn’t a deal breaker for me.
Where can I buy it?
Longer have a store on Gearbest, of which you can get the Longer LK4 Pro for just under £180! Also, Longer have a store on Amazon of which you may be able to buy one of these depending on if they are stocking them. At the time of writing, they only had the original LK4 3D printer for sale.
If you do decide to get one of these, be sure to join their Facebook group! Lots of help on there if required.
Have a look at ahsaws review on the Longer LK 4 Pro, there is some quite interesting information to be found.
Create Your Free Price Drop Alert!
Set Alert for LONGER LK4 Pro 3D Printer Open Source with Upgraded 4.3inch Touch Color Screen, TMC Ultra-Quiet... - $229.99
Conclusion
To sum up, the Longer LK4 Pro is an excellent beginner printer. At under £180, it is a contender for the Ender 3. With the addition of the touchscreen and its TMC stepper drivers, it’s a great buy! Unfortunately, the noise of the PSU fan does let it down slightly, but something that can easily be changed.
Like the Longer brand? Then check out all of these articles!
- Longer 3D Manufacturer – The Thousand Talents Plan
- Longer 3D LK4 3D Printer Review- One to watch?
- Orange 10 review – A budget resin 3D Printer!
- Longer3D Orange 10: All that you need to know
- Longer3D Skyline: All that you need to know
- Orange 120: All that you need to know!
- Longer3D Orange 30: All that you need to know
- Longer Orange 30 – A winner in the long run?
3d printer3d printing3dprintingbirdfdmLK4LK4 ProLongerpla 2020-03-18
Tags 3d printer 3d printing 3dprintingbird fdm LK4 LK4 Pro Longer pla
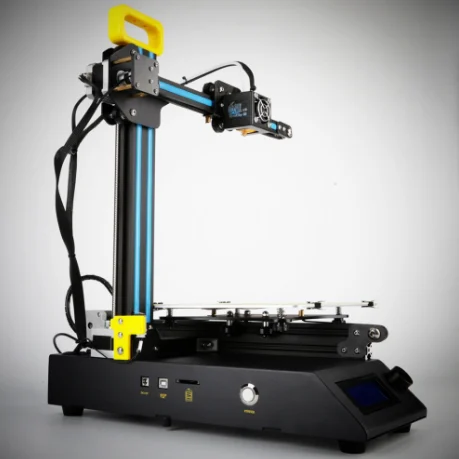
Review of the 3D printer LONGER LK4 FDM
Hello, today there will be a review of a budget 3D printer from the manufacturer LONGER. This printer was presented to me in December 2020. on the day of the jam. I have no experience with a 3D printer. But knowing my love for CNC machines, my wife gave me a gift and a surprise.
And so let's start, brief performance characteristics from the manufacturer with my additions;
Equipment model: LK4
Print technology: FDM extruder
Print size: 220*220*250 mm – I have actual print sizes 190*190*200
Printing temperature: 190-250℃
Nozzle diameter: 0.4 mm
Layer thickness: 0.1-0.4 mm
Filament sensor - very handy option
Heated table - up to 100℃
Resuming printing after a power outage - helped me 100% a couple of times
Color touch screen 2.8 – SUPER!!!
Slice software: Cura, Reptier-Host
File format: G-code, STL
Connection: TF card or USB cable
Input voltage: 100-120V AC 7A, 200-240V AC 3.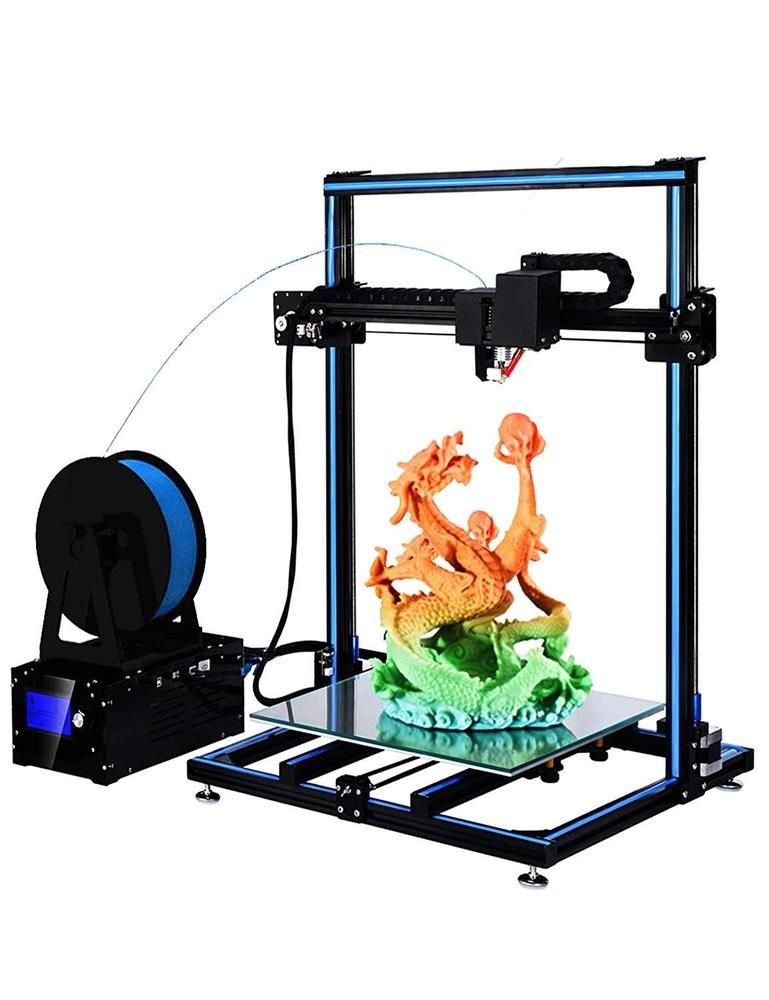 5 A, 50-60Hz
Output voltage: DC 24V 15A Power: 280 W
Weight 7.8 kg
Printer size: 425*402*505mm
Material: 1.75 mm PLA, ABS
The printer comes 90% assembled, it remains only to twist the U-shaped stand with the base, connect the motors, screen and table. the seller put together with the printer; a set of hexagons, a key, a TFT card with an adapter for USB and 10 meters of PLA plastic. The card had examples of G codes, its own slicer and drivers. The first inconvenience I encountered was connecting a TFT card and a connector for connecting to a computer located on the back of the printer.
I purchased an extension for the card and printed out a case for inserting the adapter on the screen.
.
I think that for a beginner this is what you need.
Also, the disadvantages include the inconvenience of adjusting the table, very small twists. I solved the problem by buying new handles and silicone inserts instead of springs.
It has become much more convenient to set up the table.
A little about the table:
- the table is curved as usual, in the middle of the table there is a small but still bump.
- there is a non-removable cover on the table to which the plastic adheres very well and the part does not come off during printing. On the one hand, this is both a plus and a minus, after the printer has printed the part, it is impossible to tear it off the table. It doesn't matter if the table is hot or cold. in the original version, the kit included glass with the same coating, but then the seller decided to immediately glue the coating on the table.
- the table has uneven heating, it will have to be insulated. Because of this, perhaps I got a small print area.
I can also refer to the disadvantages of the printer the fastening of wires, I solved the problem by printing fasteners.
Now let's touch on some electronics, unfortunately I'm not an expert in 3D printer boards. The SD drivers are not removable and not quiet, the processor is 32 bits, I can’t tell the Marlin firmware version because I couldn’t connect to the computer. If someone tells me about the fee I will be grateful.
The board is covered with a protective perforated casing, the cooling fan is only on the power supply unit (it makes noise like a tractor).
Smooth transition to the touch screen. The inscriptions are all in English, but everything is intuitive. Main menu.
Axle control.
Select files to print.
Filament change, this menu also contains the adjustment of the nozzle heating temperature, in the upper right corner, the choice of the step for heating (1, 5, 10 and MAX)
There are also preset heating parameters for the filament with the ability to adjust the temperature by the user.
Go to the second window of the general menu.
There is a five-point adjustment of the table (with handles by twisting the table).
Go to the next menu item, settings - printer settings.
And the last menu item, brief information.
So far, I see only pluses in the touch screen, it is very convenient, it seems to me that it is better than an encoder. But unfortunately sometimes it became buggy, it turns white during printing. The seller sent a new firmware file via a flash card, we will try. I liked the print quality, the nozzle costs a native 0.4, though I have nothing to compare with this is my first 3D printer. A few print photos. Printed with standard settings on a regular slicer. Please do not scold too much for the quality of the print. I also bought a new card reader and a block of diodes for stepper motors to remove the bounce of the motors.
Of the improvements, I would add auto table calibration, quiet fans, removable and quiet drivers. But it will be a completely different level of the printer and a different price. This 3D printer is a copy of Alfawise U30.
Summing up, I can say that for the money this printer is just a godsend for those who are just starting to learn the basics of 3D printing. The printer is very easy to use, despite the disadvantages that were listed above, I am very pleased with the printer and glad that I got it.
I am writing a review for the first time, so do not scold too much.
THANK YOU ALL FOR READING MY REVIEW.
Longer LK4 Pro 3D printer vs. LK4
Hi all. Today we will consider two FDM printers from Longer from the same line, visually similar, but different in cost. Let's evaluate the complexity of the assembly, understand the differences and compare the print quality. There will be a minimum of improvements, because. and out of the box the result is pretty good
.
Characteristics
Model: LK4 PRO
Print technology: FDM
Extruder: single
table size: *220*250 mm Press Tempeis Nozzle Diameter: 0.4mm
Layer Thickness: 0.1-0.4mm
Bar Sensor: Yes
Heated Table: Yes
Print Continuation: Yes
0016 4.3" color touch screen (2.8" in LK4)
Print speed: up to 120 mm/sec. (recommended 60-80mm/s)
Software: Cura, Reptier-Host
File format: G-code, STL
Connection: TF card or USB cable
Input voltage: 110-220V, 50-60Hz
Output voltage: 24V 15A
Power: 280W
Net weight: 7.8kg
Gross weight: 8.6 kg
Printer size: 425*402*505mm
The size of the parcel: 467*412*187mm
operating temperature: 20 ℃ -40 ℃
Relative humidity:
Unpacking and appearance of
The boxes for the two models are the same
LK4 Pro is delivered almost assembled, here are three Z-axis profiles twisted on top
The table is already in place, the X-axis carriage is ready
The wires are also connected
It remains to screw the motor with the Z-axis limit switch, there is a spare filament sensor in the kit
Fix the Z-axis shaft, install the screen, fix the glass on the table and you can start setting up
LK4 has only the main components assembled glass, film pulled together, clothespins were also thrown in0013 Pro model
And it is just as easy to assemble
But in my case, I have to assemble the carriage (the most tedious), the Z axis (three profiles), screw the table into place
By the way, the complete springs are normal, with flat coils
Well, then everything is like in the Pro version, we just screw everything into place. Assembly instructions are available both on paper and on a complete USB flash drive in video file format, just repeat step by step and there will be no assembly problems
Perhaps they sent me a sample from an old batch and now they are delivering in the same form as the Pro model. But in any case, these were flowers compared to the assembly of my first printer, which at the initial stage looked something like this)
Assembly flaws
walked relative to the body, which is not very good for models with an exact fit. I leveled it with a corner, you can also use a ruler, after which I tightened these four screws well
I also noticed that the belt of the axle X rubs on the corner of the profile. I loosened the clamping bolts
And pressed the pulley a little on the shaft so that the belt ran exactly in the middle. Do not forget to tighten the bolts
Well, I also checked the other connections and tightened them just in case
Differences
The first thing that catches your eye is the covers of the controllers, in LK4 the cooling is passive
The Pro model has active cooling.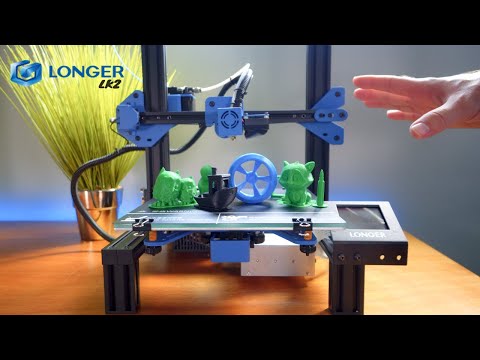 It is certainly good, but the fan is the noisiest design element
At the same time, the board LK4 does not heat up very much, the maximum that I have seen is 50+ degrees
In LK4 , the coil is installed from the side below, which is somewhat more convenient in Pro , according to the classics, it is in the upper part
Another noticeable difference this is noise, in the Pro model, as I wrote above, the board cooling fan makes the most noise, so in standby mode it behaves louder than its counterpart, but after the start of printing, LK4 catches up with engines, because. The drivers it has installed are simpler. No, it is not louder than the same anets, simply due to the use of TMC2208 engines 9The 0013 Pro models are virtually silent, so when they are running at the same time, the difference is quite noticeable. Also, updated drivers make movements smoother, which also affects print quality, but more on that below.
Well, LK4 also has a USB and flash drive connector located on the back, and not on the side like Pro , which is less convenient.
Interface
In LK4 the screen is smaller, it does not have its own controller and it is connected to the board with a rather wide cable.
The interface is not as colorful, but there are a few more options. The first item is moving
The second seal. You can put parts that consist of many models into subfolders, which is quite convenient
Third for extruder control, can be used to change filament There are three settings for different plastics and manual temperature adjustment
Recovery is inactive, in the sixth they hid the table alignment at 5 points
And quite subtle settings for the printer, which I do not advise beginners to climb into
Firmware version 2.15 based on marlin. They write that there is a new version, but it is being tested. extruder
The preheating and extruder points were combined into one, which is quite logical, next to the table alignment
Well, the last tab is the file selection for printing, only files in the root directory are indexed
Well, version
It turns out that in the Pro version, the interface seems to be more convenient, but somewhat simplified, you can’t scatter files into directories, during operation the end time is not shown, the status of blowing (only in the adjustment tab), well, there are no detailed firmware settings, which I would not show to a beginner, but in the future they may well be useful. Okay, let's move on.
Print preparation
The first thing to do is calibrate the table. The matter is simple. We go to the corresponding menu item, put a piece of paper on the table and launch the first point. The extruder will crawl home, after which it will drop to the zero position in height above the left adjustment screw. We twist it in the right direction until the paper begins to squeeze between the table and with the nozzle with little effort. We repeat for the rest of the points, the central one usually leaves a little, because. the surface of the table and glass is not perfectly flat, so it can be skipped. I usually repeat the calibration twice. The only problem that may arise at this stage is the loss of one or more limit switches, I just forgot to connect along the X axis. The extruder hit the profile a little and an error popped up on the screen. Connected the wire, restarted the power and everything worked
Next, insert the USB flash drive into the PC, go to the folder with the manual and software
By the way, I still recommend watching the video before assembly, the process will go faster
Done
And… in front of us is a circumcised chicken. The file is automatically saved to the flash drive after any changes
Quick settings
If you wish, you can go to detailed settings
Of which there are not so many
There are even several types of imaging, classic
Transparent walls
X-ray
And layered. It is strange that it is not set by default
In general, that's enough for a start, it's not difficult to figure it out and the result will be good, but I would switch to a full-fledged chicken as soon as possible so that later it would not seem too confused.
We download from the official site, it is free, the installation will be similar, at the stage of choosing a printer we find Alfawise U30 , this is the closest full LK4 clone. There are a lot of settings here, but usually there are about a dozen from model to model, so don't be alarmed. There are many guides on the internet.
Seal
The table was calibrated, the model was prepared in a slicer and put on a USB flash drive, the USB flash drive was inserted into the printer.
Go to the "Print" tab, select our file, confirm that we are ready to start. You can change the table temperature, extruder temperature, airflow rate, travel speed, and bar feed ratio at any time.
There is another problem with the Pro model. The table heated up, the extruder too, the carriage went to zero coordinates and the task was reset. If this happens, don't be alarmed, I've experienced this several times before. This happens because of buggy cheap flash drives. We just take the tested one up to 16GB and use it without problems.
We make sure that the first layers seize normally and you can go about your business, PLA and PETG are unpretentious, if everything sticks right away, there should not be any surprises, the main thing is that the light does not go out or the rod does not end. It's especially disappointing when this happens after 15 hours of printing. But these models have a function to continue printing after failures.
Here the light went out, after switching on, a window pops up with a suggestion to continue from the place where you finished.
We agree, wait for warming up and finish off the model. At the very beginning, of course, it was more reasonable to start again
And then the bar suddenly ran out, they didn’t watch it or it broke at a break. In order not to melt the wall for nothing, the nozzle is retracted to the far corner of the table and a window pops up offering to insert a new rod
where needed. After the plastic comes out of the nozzle, you need to press "OK" and the feed will stop, after which you will be prompted to continue printing
As a result, after two problems that have arisen, we will have an influx on one of the walls and in the corner of the table.
Agree, a small price for the opportunity to finish the process, which before that could take ten hours
If everything went well, the result will be quite good out of the box with stock settings I'm used to printing PLA on glass (just turned it over). You can tear off the figs from the complete cover of the model, you have to literally knock them down with a spatula, after which each time you calibrate the table. I use this glue, I bought it in absmaker
It is sufficient to spray several coats on cold, clean glass. After heating the table to 60 degrees, PLA will already hold quite well
And after cooling to 30, it is removed without much effort, parts from ABS often bounce
At the same time, the “sole” remains mirror-smooth
Works with many types of plastic, under the ABS table you need to heat up to 110 degrees, otherwise the edges may come off
To compare the quality and speed of printing, I peeled a model with the same settings and threw it into both printers, simultaneously started the task. LK4 started printing about a minute earlier, although the initial temperature was the same. The table warmed up longer, but the manufacturer declared a different type of glass, so it may well be due to the fact that it is more massive in the Pro model
But by 20% he caught up with his brother. By the way, LK 4 can still show the time until the end, at 15:15 it was 8:53
At 50%, the gap increased in favor of LK4 Pro
At 97%, LK4 was already 15% behind
And at 22:46 he promised to finish for 1 hour 58 minutes
But at the same time, the work time was 20 minutes behind the Pro (09:19 vs 09:42)
Okay, one could start counting at the start of heating, and the second after the start of the extruder, but not by 20 minutes.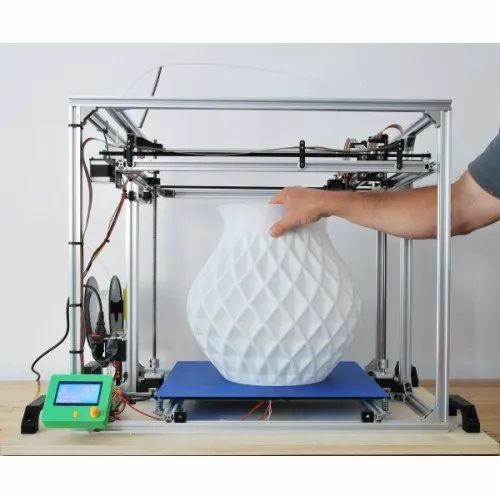 Fortunately, there are photos with different time periods. LK4 at 15:15 announced 2:06 work, at 22:46 already 9:19, that is, in 7 hours 31 minutes he counted only 7 hours 13 minutes, that's our lost 20 minutes. So I haven’t met a single model yet that would ideally calculate the time until the end of work, but usually it just adjusts a little, first it writes 2 hours, and after 2 hours there are still 10 minutes left, but here’s the main time to move ... the priority may be incorrectly set in the firmware, for 32 bit controllers marlin is still damp.
Well, okay, it's not so critical, anyway, the shift of 20 minutes for 11 hours of printing seems not so significant, let's compare the result better. Left LK4 , right Pro
Closer
Layers lay evenly, there are small differences in width, but it’s hard to get away from it
In Pro similar to
But in order to see these flaws, you still need to choose the right angle and turn on the flash. So, the built-in slicer, although it can cut in this mode, does not ignore the wall thickness parameter, what happened in the picture on the left.
But the classic chicken coped well with the task
Again, at a certain angle, the flash highlights not a perfect rounding
But if you look closely, you need to look for flaws from the side with your eyes
The situation is aggravated by the unevenness of the bar, so I lowered the coefficient feed up to 85%, for which he paid the price on the upper layers, where there was not enough plastic to cover the bridges.
Kratos printed first at 100% feed and in some places when zoomed in, excess plastic sags are visible
Yes, and models with many peaks were overgrown with cobwebs, so 85-90% of them disappeared, and the same dinosaurs that were made last already turned out without serious flaws, one was chosen by the son, the second was asked for by friends for the collection
Modifications
I did not find any serious design problems, you can use printers out of the box and nothing will break, so almost all the improvements are more of a cosmetic nature.
The most necessary thing is airflow. The complete one is not the worst of those that I have seen, and the link is also not the ultimate dream, but without additional alterations, the circular one cannot be squeezed out. Look carefully at the installation photo so that it blows on the model, and not on the table. AT Pro used a 2mm spacer instead of the stock one, in LK4 it fits fine without it. I have never broken, but when rubbed, it makes extra sounds, and it looks dumb. In LK4, the coil is located differently and the kink is not so big, so you don’t have to change it. Printed with an SLA printer, because with the same 0.1mm layer, the process is much faster. Well, it looks nice with transparent resin.
For the same reason, the upper filament guide will not be superfluous for the Pro, it slipped in the photo above set fire to, but there were fewer of them and the connection is not so reliable. But you can do it for insurance, I managed to put it in Pro, I didn’t get it in the regular version
Instead, you can use these fasteners, they cling to the engines, one lifts the corrugation of the table, the second the extruder wiring so that they don’t hang out at random.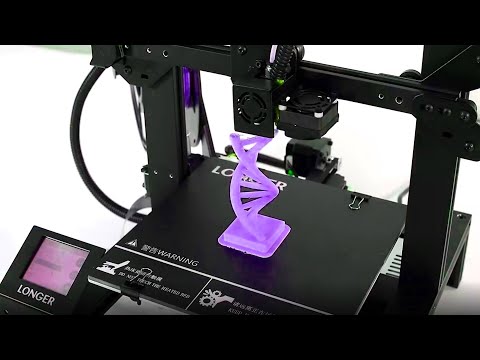 I printed it, but it turned out that extended propellers are needed (2x10 M3 for each engine), the supplied ones are too short
I printed soft footrests from TPU, they are better than stock plastic ones
I tried this plug for the power supply fan, although in LK4 the main noise is made by the engines during operation, and in Pro you need to turn off the main board fan, so the changes are hardly noticeable
And here they already suggested a solution to the main problem of noise in Pro, though you need to buy a fan and a lowerer
I dragged the printers to a temporary workshop, so the noise does not bother me, I have a monitoring camera and in case of problems, the power of each is turned off remotely. I also set up the automation in the outlet from the blitz so that it turns off when the consumption drops below 50W for 10 minutes. Convenient.
Well, that's all, of course, it was possible to analyze some aspects in more detail, but I think some users have not read this far because of the volume of the material (and I prepared it for a week).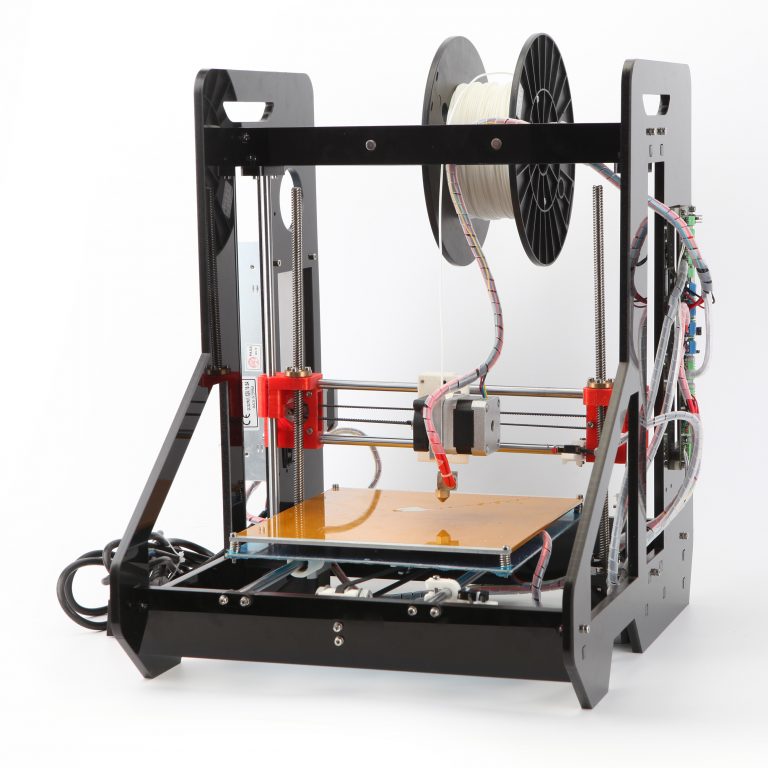 The rest of the fellows, we did it)
What's inside
LK4 board
LK4 Pro board, dedicated controller for screen
Summary
At the moment, the Pro costs $143 without filament, which is cheaper than the regular LK4 model ( $168 ) and its closest competitors, and for this price the option is really good:
+ Acceptable print quality out of the box. The frame is rigid, the structure does not sway or shake during operation, the rollers certainly do not reach the rails, but everything is better than the linear bearings of the old models
+ The main components are supplied assembled, it remains only to connect them together
+ Quiet drivers that give good smoothing
+ Table heating 24V three-channel, from 22 to 80 degrees it heats up in 5 minutes
+ Quite convenient touch control, there is a continuation of printing after failures, filament sensor
- Noisy board fan. If it were quieter, it would be hard to find fault with it.
The airflow is not ideal and there are already options for converting it to a circular one with additional fans, but the modified side model also gives a good result, so you can not bother too much.
Also in Pro 8-bit controller, but a separate one with its own firmware is allocated for the screen, in the normal version a 32-bit controller is used, but it processes both printing and the interface, so it’s hard to say which option turned out to be more stable in the end, I don’t one model showed no signs of blunting, the only thing was that LK4 was weird with counting the weaving print time. Yes, and marlin for 32 bits is released less often, although a new beta is currently being tested, but there is still silence about a stable release.
In my opinion, you can add a more advanced interface to the LK4 piggy bank (although not so beautiful), a little more information about the printing process is displayed, and in the advanced settings you can adjust many parameters embedded in the firmware, which may appeal to experienced users, otherwise that stumbled inexperienced can be rolled back to default.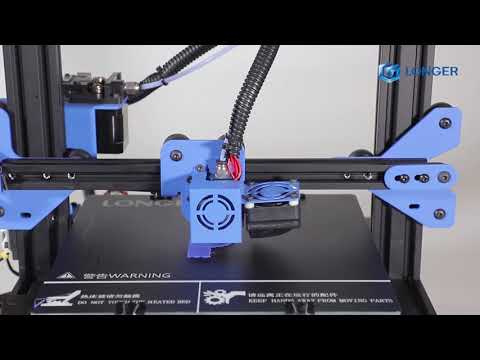
It is strange that in Pro this feature was removed, and in general, the more I compared these two models, the more it seemed that PRO in this case is an abbreviation for the word PRO more
As always, constructive criticism in the comments is welcome. Good luck to everyone =)
At the request in the comments, I added a comparison of printing models with small details, as for me, it turned out even better, apparently LK4 copes better with small radii, although this picture shows an arc on the toe, so you can guess which model what printer did it print. And then I had to look for another angle, because. lighting is bad.
Problems are not visible from a different angle
Well, the model from LK4 Pro is closer
Another angle
The striping is a little apparent, but again, you need to look for the right angle to see it
Plastic is not very good, also with inclusions, perhaps because of this, the uniformity of the feed is a little lame, but the same particles also mask minor flaws, so in general it turns out well.