Linux cad for 3d printing
Discover the Top 20 Linux CAD Software for 3D Modeling in 2022
Whether it is for professional projects or for hobbyists, a good 3D Modeling Software is a must-have to create efficiently. However, most of them were created and designed for use on Windows or Mac platforms. Besides the world-famous AutoCAD or SolidWorks, there are some alternatives for Linux users. Here is our Top 20 of the best Linux CAD software for 3D Modeling.
3D Linux CAD Software
Blender
We will start right off the bat with one of the most famous and versatile 3D design software. Blender has the advantage, compared to the other big names such as SolidWorks, to be free and Open-Source, enabling a lot of people to work on various projects with it.
The huge community behind it also ensures a constant flow of new models and addons to use, which is a great way to improve your skills. From 3D Printing to 3D Animation, you can make almost any design if you take the time to do so.
Do not hesitate to take a look at our Blender tutorial for more information and precious advice on this software.
FreeCAD
FreeCAD enables you to create a parametric 3D design, which makes it particularly efficient for mechanical or engineering designs. It is fairly easy to learn, so you could even use it if you never used CAD software before. Being Open-Source also makes it particularly customizable. For example, you can add new functionalities or automate processes directly by writing scripts.
HeeksCAD
HeeksCAD is a good way for people who are new to 3D design to learn how to handle this kind of CAD software. It offers all the common functions you would need to make basic (yet good) 3D models.
Just like FreeCAD, you can use parametric designs to create and modify your objects. You may encounter difficulties if you try to realize complex models (a lot of the usual tools are not available yet), but again this is not the main goal of HeeksCAD.
OpenSCAD
OpenSCAD is CAD software that enables you to work on solids in two different modes. Indeed, you can either use constructive solid geometry, where you define your design as a result of primary operations (such as sums or subtractions) or use a classic extrusion technique, where you make 2D designs that you then turn into 3D. Either way, the software is fitted to export an STL file and has a good community behind it to support you whenever you have issues.
LibreCAD
This open-source and free CAD software is perfect for beginners, as it is specifically designed as Linux CAD Software and offers general tools. However, LibreCAD just works in two dimensions. To actually print something in 3D this software on its own is not sufficient enough. Still, it is a good place to start, if you are relatively new to CAD.
QCAD
This Linux-compatible CAD software works like LibreCAD in 2D and is free as well as open-source. It is specifically designed for technical drawing plans. The compatibility with AutoCAD is a big advantage. QCAD is a great option for beginners and is used by all kinds of users, like hobbyists or successful architects. QCAD also impresses with its library of CAD parts, that users can use for their own work or as inspiration.
Solvespace
If you are not looking for aesthetics but pure efficacy, then Solvespace is made for you. Solvespace might interest you more if you know C++, as the software was written in this language. The advantages of Solvespace are that it’s free and open-source software.
The learning curve is quite rough, but if you are confident in your skills, there is no doubt that you’ll be able to make almost anything with this software.
This 3D software provides you with all the tools you would find in a big name of 3D Modeling Software, such as SolidWorks or AutoCAD. Even if the interface is minimalistic, the huge amount of possibilities it offers is more than enough to compensate. On top of this, it is a quite small software and needs only 6Mo to be installed.
Solvespace is a parametric CAD program that will allow you to work in both 2 and 3D. Among its tools, you can find volume measurements, exporting 3D wireframes as DXF and STEP tools, toolpath as G code, value entries thanks to arithmetic expressions, and analysis with STL check. On top of all of that, you will be able to work with dimensions and constraints
Wings 3D
Wings 3D is a good alternative to classic 3D Modeling Software. It is very user-friendly, all its commands are made to be clear and intuitive. The actions you can take depend on the context and the object you are working on.
As it is not a parametric modeling software, it is difficult to use Wings 3D for engineering or mechanical designs. However, you may find everything you need for every other project, so do not hesitate to give it a try.
DraftSight
AutoCAD is unfortunately not compatible, with Linux, but DraftSight is and may also be the closest thing to it. The advantage of downloading DraftSight for Linux is that there is no need in learning a new program. This Linux CAD software is not free, but there are different price levels to choose from depending on which version you need. DraftSight also offers users a 30-day free trial.
VariCAD
VariCAD is a license-based CAD program.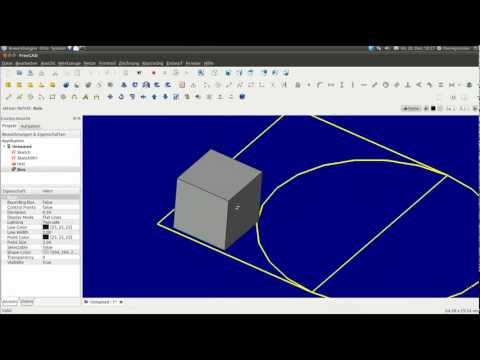 However, it is very affordable compared to other 3D software and offers precise tools to design mechanical parts. For example, besides the classical tools, you would find anywhere, predefined ISO parts are available for screws or bolts to make sure they fit with their real use.
Being one of the only software you can purchase for Linux platforms, VariCAD surely fills a niche in the world of 3D modeling software.
BricsCAD
This Linux CAD software can also be used as an alternative for AutoCAD. BricsCAD is located in a higher price segment. With $365 for one year BricsCAD classic is the cheapest option. This option offers 2D modeling on a high scale. If you want to purchase the full package it will cost $2,355, but you do not have to renew the license every year. In this package, BricsCAD provides everything that is needed from a Linux CAD software, like 3D design creation, simulations, and many more services.
3D Slash
3D Slash is a great software for beginners. It is easy to use, free, and works with blocks, like a popular game Minecraft. This 3D modeling software is based on editing the blocks with dedicated sculpting tools. It is very simple and straightforward. It is playful and great to get familiar with 3D design.
3D Slash also allows for STL file export which means you can 3D print your models, either with an online 3D printing service or on your desktop 3D printer.
MakeHuman
This 3D modeling software was designed especially for character creation. It is especially interesting for video games and animations.
MakeHuman is a free 3D software, but despite that provides you with really rich options. You will start with a basic humanoid, which you can adjust by parts: face, torso, arms, and legs. You can edit gender, hair, and characteristics depending on age. There are also plenty of options in terms of clothing, from formal to casual.
This software is quite powerful and also allows you to work with the character’s rigging options. The tools are extensive enough to even work with facial muscles.
Open Cascade
Open Cascade is a tool for simulation and helps to test your 3D model. However, it can also be used to create 3D models as well. It gives the user the option to view their model not only in AR but also in VR. And is capable of designing 2D as well as 3D models. As a beginner, this tool can be a bit challenging as it was created for engineering purposes, but users with experience can use the advantages of Open Cascade Software.
Meshmixer
Meshmixer is a very popular 3D modeling software. It is designed to work with already prepared 3D design. It has plenty of tools to optimize models, hollow them, generate joints between models, repair your models, or scale them. Thanks to all those options, Meshmixer is especially interesting for if you’re planning to 3D print your 3D design, it is truly powerful and definitely on top of the list of the most popular 3D software.
Onshape
This is a great CAD software for professional users. It will be very beneficial especially for teams working on one project. Onshape works with any device you can imagine, including smartphones.
It has a wide range of mechanical design tools. It allows multiple people to work within one file thanks to built-in cloud software where all the CAD data is stored. It manages a master model, so there is also no need to save multiple versions and avoids confusion and mistakes in sharing the file between different users.
Modo
We can confirm with our first-hand experience that Modo is has a fairly easy learning curve. It was developed with visual effects and industrial design in mind more than engineers. In terms of creating 3D models, this 3D software works with polygons and subdivision surface modeling.
When it comes to animation, Modo uses particle engine and procedural animations. To make the 3D modeling process faster, it also allows you to record macros and apply repeated actions when needed.
BRL-CAD
BRL-CAD is placed among one of the oldest. It is free and open-source software and with +30 years of experience, it will provide you with stable performance. Its User Interface is pretty straightforward and typical for a CAD program.
It offers interactive geometry options, ray-tracing rendering tools, scripting support, and network distributed framebuffer support.
LeoCAD
LeoCAD is a very user-friendly beginner 3D modeling software. Everyone knows LEGO, right? This 3D program works exactly with those bricks. It is open-source CAD software which is so easy to use, it’s literally child’s play.
It is capable of handling larger projects, however, it is not software aimed for professional applications unless your job requires a LEGO castle to be 3D modeled.
Siemens NX
This CAD software was developed for mechanical design. It provides the user with tools for engineering design, simulations, and tests that were designed to speed up the 3D modeling process.
The user interface of Siemens NX is quite typical for CAD software. It also provides you with tutorials to get a better, in-depth understanding of all the options.
What Linux CAD Software does fit to you?
And that is all for our Top 20 Linux CAD Software for 3D Printing. Overall, the solutions you will find cover every aspect of 3D modeling, as long as you put in the time to learn to handle them. You may also have to use several of them at once, in order to fully reach your goals.
However, all of them are good alternatives to the software you would find on other platforms. Furthermore, as most of them are Open Source software, you can count on the help of the whole community to support you in your project.
Once you get rolling with your favorite 3D modeling software for Linux, you should try 3D printing your models! With an online 3D printing service like Sculpteo, you can easily produce your models at the best quality. Simply upload your STL file and we will 3D print it for you!
Make sure you don’t miss the next dose of 3D printing news with our Newsletter!
Best 3D printing software on Ubuntu
3D printing software is a collection of tools that allow you to visualize three-dimensional or 3D models in a digital format before printing them out in real life. A 3D model created in a modeling program is the starting point for every 3D print. We invested a lot of money and effort to learn and purchase modeling software for some years. However, now there are several possibilities to learn and work in easy-to-use modeling software. Want to install 3D printing software for your Ubuntu system? Readout our post to know about the best 3D printing software on Ubuntu. So let’s start!
Wings 3D
Wings 3D is a free 3D modelling program developed by Dan Gudmundsson and Bjorn Gustavsson in 2001. Between 2006 and 2012, Richard Jones took control over Wings 3D and added many new features. Currently, Dan is actively maintaining Wings 3D.
Wings 3D includes a customizable interface, AutoUV mapping capability, support for materials and light, and various other modeling tools. It is developed for 3D modeling and texturing elements made up of a minimal number of polygons. Compared to other 3D programs like Blender, there are some distinctions, particularly in the GUI of the Wings 3D, which offers more flexibility in exchange for some constraints.
How to install Wings 3D on Ubuntu
Utilize the below-given command for installing Wings 3D on your Ubuntu system:
$ sudo apt-get install wings3d
The error-free output indicates that now Wings 3D is installed on your system. Open this 3D printing software by searching it manually in the Application’s search bar:
FreeCAD
FreeCAD is a freely available, open-source parametric 3D modeler. It was intended for the creation and design of real-world objects. You can check your model history and adjust its characteristics, as parametric modeling permits you to modify your design.
This application enabled you to create geometry-constrained 2D shapes and utilized them for building a base of some other 3D object. It includes numerous components for extracting design details and adjusting measurements from 3D models for producing high-quality production-ready 3D drawings. FreeCAD supports various file formats, including IFC, IGES, STL, DXF, SVG, OBJ, DAE, STEP, etc., allowing you to integrate it easily into your workflow. Applications in mechanical engineering, product design, and architecture utilize this software according to their requirements. You can work in FreeCAD, whether you are an experienced CAD user, a student, a programmer, or a teacher.
How to install FreeCAD on Ubuntu
Before getting started with FreeCAD, you have to install it on your system. To do so, write out the below-given command in your Ubuntu terminal:
$ sudo apt-get install freecad
The error-free output signifies that FreeCAD is installed on your system. Open up the FreeCAD software by searching it manually in the Application’s search bar:
OpenSCAD
OpenSCAD is a freely available, script-only 3D modeling package aimed at assisting engineers in creating solid 3D CAD models. It is dependable software for engineers on a budget who need a cost-effective solution with powerful CAD tools. This application is designed with engineers in mind, not artists; it concentrates on the CAD parts of 3D modeling rather than the various other features of 3D modeling. OpenSCAD 3D modeling is based on 3D methodologies: CSG which stands for Constructive Solid Geometry and 2D outlines extrusion.
This 3D compiler helps in the 3D models rendering and reading objects scripts. OpenSCAD application is more like a 3D compiler developed to read object-specific script files and render 3D models from them. It hands over complete access to your modeling process and allows users to change individual processes as required. You can quickly create well-defined designs with the OpenSCAD adjustable parameters.
How to install OpenSCAD on Ubuntu
Utilize the below-given to install the OpenSCAD application on your Ubuntu system:
$ sudo apt-get install openscad
The error-free output declares that OpenSCAD is installed on your system. Open up the OpenSCAD software by searching it manually in the Application’s search bar:
Cura
Ultimaker’s Cura is a simple but powerful 3D slicing program. For Ultimaker 3D printers, the print profiles are optimized; however, the Cura will slice 3D files for any model or brand of 3D printer. The software supports the 3D file formats OBJ, STL, and 3MF and importing and converting 2D photos to 3D extruded models. You will be able to open and arrange several models on the print bed using the Cura application, where each model will have the required slicing settings. This allows Cura users to print numerous models at once, making the printing process easily manageable in the classroom.
How to install Cura on Ubuntu
The below-given command will help you install the Cura application on your Ubuntu system:
$ sudo apt-get install curl
The error-free output indicates that Cura is installed on your system. Open up the Cura software by searching it manually in the Application’s search bar:
Blender
Blender is a freely available open-source 3D computer graphics software developed by a global community of visual effects experts, artists, students, animators, scientists, game creators, and other people. This software is utilized for creating 3D printed objects, 3D arts, visual effects, 3D applications, animated films, and video games. It is an intuitive and feature-rich software.
With Blender’s built-in path-tracer engine, its users can attain ultra-realistic rendering. It has a set of modeling tools that swiftly edit, develop or transform its 3D models. The object and camera tracking tools assist in importing and tracking raw footage and watch camera motions in 3D scenes. Its animation and rigging capabilities are great for making commercials, short films, and TV shows. Blender users can easily mix 2D and 3D in its viewport. It also has a 3D creation suite that comes with a Python API. This 3D creation suite helps change the size, colors, fonts, and layout of the interface.
How to install Blender on Ubuntu
Write out the below-given command in your Ubuntu terminal for installing Blender:
$ sudo apt install blender
The error-free output declares that now Blender is installed on your system. Open this 3D graphical application by searching it manually in the Application’s search bar:
Conclusion
Engineers and designers can easily create three-dimensional models and print them into real products using 3D printing software. The aerospace, automotive, and robotics industries are getting maximum benefits from 3D printing software. In this post, we have discussed the best 3D printing software for your Ubuntu system. Moreover, the installation methods of the 3D printing software are also provided for you.
Best 3D printing software on Ubuntu
3D printing software is a set of tools that allows you to digitally render 3D or 3D models before printing them in real life. The 3D model created in the modeling software is the starting point for every 3D print. We have invested a lot of money and effort to learn and acquire simulation software over several years. However, there are now several opportunities to learn and work in user-friendly simulation software. I want to install 3D printing software for you Ubuntu system? Read our post to learn about the best 3D printing software on Ubuntu . So, let's begin!
Wings 3D
Wings 3D is a free 3D modeling program developed by Dan Gudmundsson and Bjorn Gustavsson in 2001. Between 2006 and 2012, Richard Jones took control of Wings 3D and added many new features. Dan is currently an active supporter of Wings 3D.
Wings 3D includes a customizable interface, AutoUV display capability, material and light support, and various other modeling tools. It is designed for 3D modeling and texturing of elements that consist of a minimum number of polygons. Compared to other 3D programs like Blender, there are some differences, especially in the Wings 3D GUI, which offers a lot of flexibility in exchange for some limitations.
How to install Wings 3D on Ubuntu
Use the following command to install Wings 3D on your Ubuntu system:
$ sudo apt-get install wings3d
An error-free output means Wings 3D is now installed on your system. Open this 3D printing software by manually searching in the application's search bar:
FreeCAD
FreeCAD is a freely available and open source parametric 3D modeling tool. It was intended for the creation and design of real objects. You can check the history of your model and adjust its characteristics because parametric modeling allows you to modify your design.
This application allowed you to create 2D shapes with geometric constraints and use them to create the basis for some other 3D objects. It includes many components for extracting design details and adjusting the dimensions of 3D models to create high-quality, production-ready 3D drawings. FreeCAD supports a variety of file formats including IFC, IGES, STL, DXF, SVG, OBJ, DAE, STEP, and more, making it easy to integrate it into your workflow. Applications in mechanical engineering, product design, and architecture use this software in accordance with their requirements. You can work in FreeCAD whether you are an advanced CAD user, student, programmer or teacher.
How to install FreeCAD on Ubuntu
Before you can start working with FreeCAD, you must install it on your system. To do this, type the following command into your Ubuntu terminal:
$ sudo apt-get install freecad
The error-free output means that FreeCAD is installed on your system. Open the FreeCAD software by manually searching the application's search bar:
OpenSCAD
OpenSCAD is a freely available, script-only 3D modeling package designed to help engineers create solid 3D CAD models. It is a robust software for engineers on a budget who need a cost-effective solution with powerful CAD tools. This app is designed for engineers, not artists; it concentrates on the CAD parts of 3D modeling rather than various other 3D modeling features. OpenSCAD 3D modeling is based on 3D methodologies: CSG, which stands for Constructive Solid Geometry and 2D Contour Extrusion.
This 3D compiler helps in rendering 3D models and reading object scripts. The OpenSCAD application is more like a 3D compiler designed to read object-oriented script files and render 3D models from them. It provides full access to the modeling process and allows users to modify individual processes as needed. You can quickly create well-defined designs with customizable OpenSCAD options.
How to install OpenSCAD on Ubuntu
Use the following to install the OpenSCAD application on your Ubuntu system:
$ sudo apt-get install openscad
The error-free output states that OpenSCAD is installed on your system. Open the OpenSCAD software by manually searching the application's search bar:
Cura
Ultimaker's Cura is a simple yet powerful 3D slicing program. For Ultimaker 3D printers, print profiles have been optimized; however, Cura will slice 3D files for any model or brand of 3D printer. The software supports OBJ, STL and 3MF 3D file formats and also imports and converts 2D photos into 3D models. You will be able to open and arrange multiple models on the print platform using the Cura app, where each model will have the required slicing settings.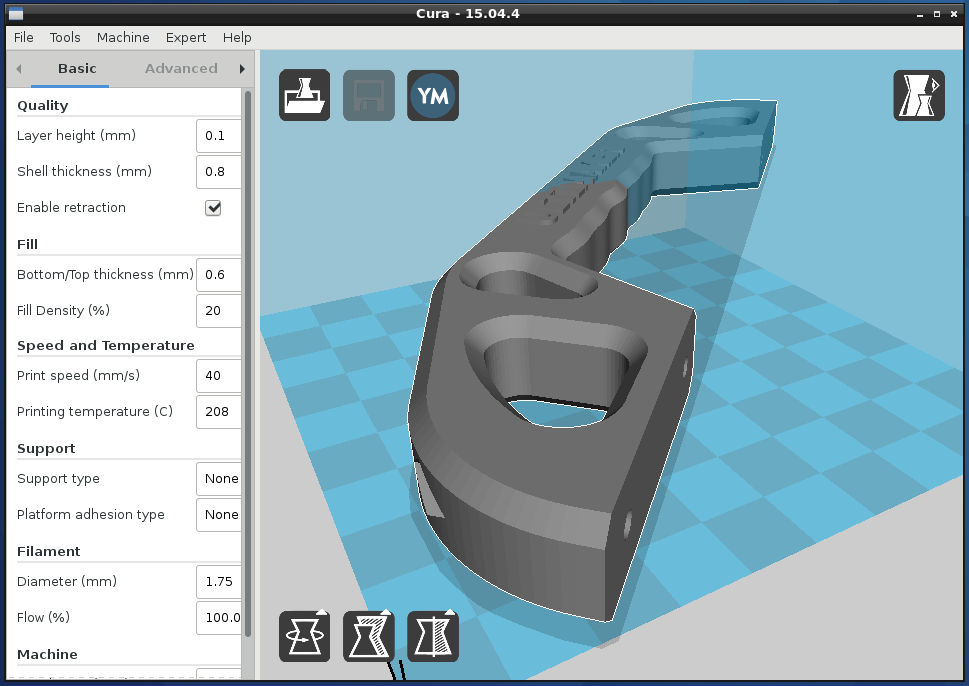 This allows Cura users to print multiple models at once, making it easier to manage the printing process in the classroom.
How to install Cura on Ubuntu
The following command will help you install the Cura application on your Ubuntu system:
$ sudo apt-get install curl
An error-free output means that Cura is installed on your system. Open the Cura software by manually searching the application's search bar:
Blender
Blender is a free and open source 3D computer graphics software developed by a global community of visual effects experts, artists, students, animators, scientists, creators games and other people. This software is used to create 3D printed objects, 3D art, visual effects, 3D applications, animated films and video games. This is an intuitive and feature rich software.
With Blender's built-in path tracking engine, users can achieve ultra-realistic rendering. It has a set of modeling tools that allow you to quickly edit, design or transform its 3D models.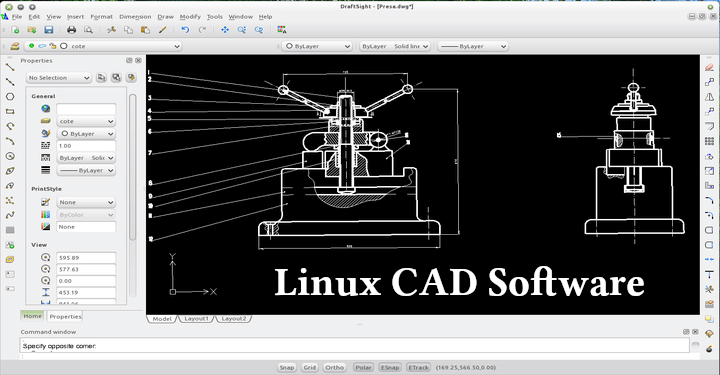 Object and camera tracking tools help you import and track raw footage and track camera movements in 3D scenes. Its animation and rigging capabilities are great for creating commercials, short films, and TV shows. Blender users can easily mix 2D and 3D in its viewport. It also has a 3D creation kit that comes with a Python API. This 3D rendering package helps you change the size, colors, fonts, and interface layout.
How to install Blender on Ubuntu
Write the following command in your Ubuntu terminal to install Blender:
$ sudo apt install blender
The error-free output announces that Blender is now installed on your system. Open this 3D application by manually searching in the application's search bar:
Conclusion
Engineers and designers can easily create 3D models and print them into real products using 3D printing software. The aerospace, automotive and robotics industries benefit the most from 3D printing software.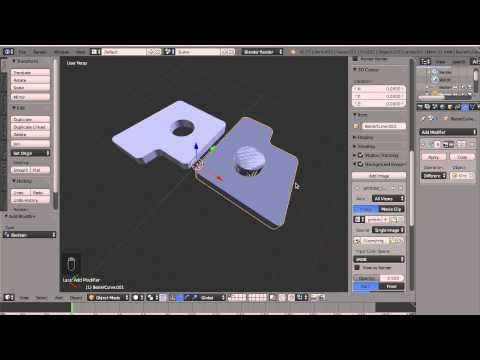 In this post, we discussed best 3D printing software for you Ubuntu system. In addition, you are also offered ways to install 3D printing software.
Cura 2.5, 3D printing software from Ubuntu 16.04
In this article, we will review the recommended software if you are a user of 3D printers. In order to get the most out of your 3D printer, in addition to setting up the printer well and setting its firmware properly, you need to tweak the settings of the program you are using as your laminator. Depending on the specifications of your printer, these options may vary greatly.
We are interested in the software Care . This is an "Open Source" program developed by Ultimaker which will take care of the communication with the printer and the lamination of 3D objects. This means that with this program we can complete all the necessary steps to go from a 3D model to a real object.
Cura prepares your model for 3D printing.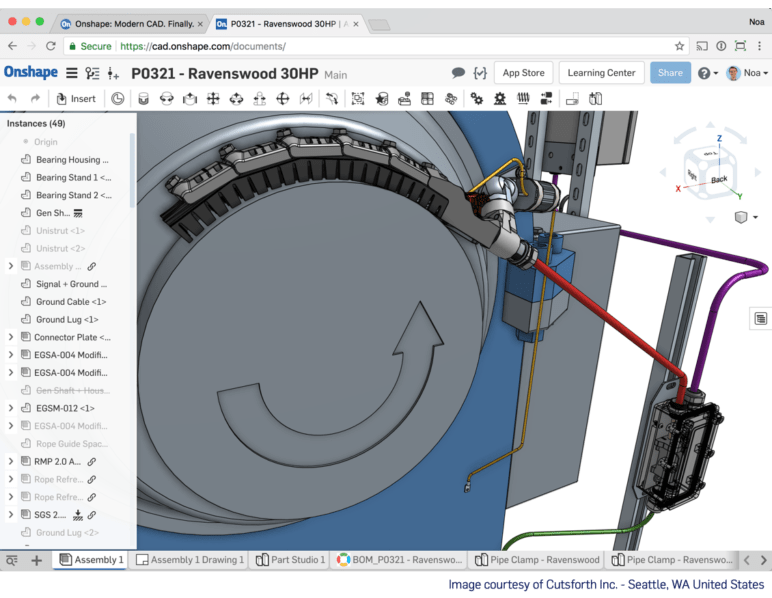 In general terms, we can say that Cura is a cutting program that prepares your 3D drawings for printing. For those new to 3D design (myself included), this program makes it easy to get attractive results. For more advanced users, there are over 200 settings available that can be tailored to the needs of each model. Since the program is open source, it has a community that can always help in case of doubt.
Cura software prepares your files by intelligently assessing the areas that need your attention. Has virtual 3D previews that will let you spin around the design. This way we can guarantee that everything will be where we want it to be.
Cura provides a good integration of our hardware, software and materials (which in my experience doesn't always have to be the cheapest) to achieve a enjoyable 3D printing experience .
Cura was developed for Ultimaker 3D printers and Ultimaker materials. But the program will offer us the opportunity to use it with a large list of printers. This list will be provided by the program, since we will need to select our printer when we first launch the program.
This software gives us the possibility to use it in different operating systems . There are versions of CURA compatible with Linux, MAC and Windows. Installing the program on different platforms is very similar, in general it is relatively simple.
Index
- 1 Install from repository
- 2 First run Cura
Install from repository
We can download software from your official website but we can also install the latest version of this software in Ubuntu 9004 from replacement storage.
Before proceeding with installation because Cura depends on python 3.x. We are going to satisfy dependencies first so that everything goes right. To do this, open the terminal (Ctrl + Alt + T) and write:
sudo apt-get install python3 python3-dev python3-sip
Next, it's time to add a repository that will provide us with a package to install. To do this, write in the terminal:
sudo add-apt-repository ppa:thopiekar/cura
To finish, we only need to update the package list and install the cure. We will need to write the following in the terminal:
sudo apt-get update && sudo apt-get install cura
After that, we can carry out the treatment. Either by the "cure" command from the terminal, or by searching for a launcher in our operating system's Dash.
Launching Cura for the first time
Once installed, there are a few things you need to do to set up the first time you launch Cura. We will simply open Cura from the applications folder (or wherever you have installed). The program will ask us for let's select the printer we have . You can give the printer a unique name if you wish.
To download the model, you just need to click the "Open File" button. It is located in the upper left corner of the screen. In the window that opens, we can find the model we want to prepare for printing and open it in the program.