3D printer layers not smooth
3D Print Walls Not Smooth – How to Fix – 3D Printerly
Everyone has a time when prints are going perfect, but what about when there are imperfections. I’ve experienced 3D printed walls not being smooth and I’m sure many of you out there have as well, so this article will address how to fix this issue.
The best way to fix 3D printed walls that are not smooth is to identify over-extrusion or under-extrusion issues that you are experiencing and tackle them by changing settings such as retraction or lowering printing temperature. Fixing vibration issues can solve walls that are not smooth.
So, smoothness of a finished product is really important if you want it to stand apart. When it comes to 3D printing and prototyping you would like the same for your printed model.
Sometimes this won’t be easy to achieve. If you are facing this problem with your model, here is everything you need to know to fix it.
There are a number of possible causes that make your walls not smooth. Overall, these will be to do with how your printer is extruding material. All it takes is for one imperfection in a 3D print to ruin the quality of it altogether.
Ghosting/Rippling
When walls aren’t smooth one of the main reasons that people experience is ghosting or rippling. This happens when your printer is moving too fast, at a pace where it can’t handle the vibrations emitted from the fast moving, heavy parts.
Your 3D printer needs to be sturdy and not too heavy in the wrong places to not experience ghosting. I’ve actually written a pretty useful article about How to Fix Ghosting so feel free to check that out.
This visually appears as waves and other irregular patterns formed on the surface of the print ruining its smooth finish.
Vibration of the printer caused by the motor is one of the problems that 3D printer manufacturers put in great effort to solve.
This is why most of the high precision printers weigh a lot. The reason is simple; increasing the stability of the moving parts of the printer can reduce the vibrations.
Adding weights in the right places a moving part can remove instabilities found. These parts are tightly packed into the printer.
Hence, if a part is loose, this can result in vibration. Fastening up the bolts and belts can prevent this issue and replace those that are worn out.
One major thing to consider while printing is to place it on a firm table-top. Wobbly tables can amplify the suppressed vibrations and feed it back into the printer.
If speed is too high for your printer to handle; reduce it to avoid vibrations. Check if the bearings and other moving parts of the printer are functioning smoothly without any jerks.
If that is the issue, you need to lubricate these parts.
Once you have solved this issue, it should stop the imperfection of uneven and wavy lines in your prints that cause walls not to be smooth.
Find the Right Extrusion Rate to PrintOne of the most important factors that determine precision and the quality of a print is the extrusion rate.
For a print to look smooth and fine, it should extrude an adequate amount of material through the nozzle. There are two main types of extrusion issues, over-extrusion and under-extrusion.
I’ll explain both of these types and advise you on how to fix them.
Over-ExtrusionThis happens when the printer extrudes more material than what is required. This will result in excess material that can ruin the dimension of the model.
Each layer of the model can be seen separately on the surface projecting as irregular forms. This can be solved within the printing software by adjusting the extrusion rate.
The parameter determining the extrusion rate is extrusion multiplier. Decreasing the extrusion multiplier should resolve this issue.
If the issue still remains, then the problem will be with the extrusion temperature. If the extrusion is too high, it will make the plastic less viscous (it flows more easily) which can lead to over-extrusion.
This can result in plastic beads oozing out from the surface which will destroy its smoothness.
This occurs when the extrusion rate is lower than the required. Lack of material while printing can result in imperfect surfaces with gaps formed between layers.
This can be caused due to the use of filament with wrong diameter. If the diameter of the filament fed into the printer is lower than the expected value, this will cause under-extrusion.
You can prevent this by using filament with the right diameter for printing or this can be rectified with the 3D printer software by increasing the parameter called the extrusion multiplier.
Overheating of the MaterialThe temperature at which the plastic exits the nozzle and the cooling rate are the two important factors that determines how good a print turns out to be.
Achieving a correct balance between the two factors will provide a print with good finish. The plastic that is printed at the moment is still hot and can form other shapes until it cools.
After cooling it retains to the shape it was printed. If the temperature is too high during the printing time, it will take more time to set.
Without proper cooling, the time to set will be further increased. Hot plastic has a tendency to flow and a longer setting time is sufficient to cause slight deformations.
Most likely, doing this will result in the print model to lose smoothness. It’s seen as more prominent in the case of printing smaller models.
This is because smaller models require less time to print each of its layers, which means that the new layer will print on top of a layer that is not set properly.
Some common solutions to avoid over heating is by decreasing the print temperature, increasing the cooling rate (increase the fan speed) or reducing the printing speed to give it time to set.
Tweak these parameters until you find the perfect conditions to print a model with smooth finish.
If you tried your best and still, there are some slight issues, then the best way is to print many parts at once. This gives other parts time to cool while one part is printed.
Keep in mind, different materials require different levels of cooling and setting times so, if you are changing filament you will have to retest these factors. PLA usually requires a good amount of cooling for smooth walls and high quality.
ABS, on the other hand, reacts quite badly to sharp temperature changes so cooling has to be less significant, along with a fairly constant printing temperature. These settings vary from brand to brand, material to material and even printer to printer.
Blobs and Zits Formed on the SurfaceIf you are trying to join two ends of a plastic structure together it is found nearly impossible to do it without leaving any trace.
This is a problem faced by 3D printers too. While printing, the extruder must stop extruding when it moves on the build platform from one position to a new one and start extruding again from that position.
While the extrusion stops and begins, this can cause improper flow rates creating irregular joining and structures at those points.
This is called blobs and zits formation and it can ruin the consistency of the surface. These are usually considered as surface defects as it is caused while printing the outline.
This can be prevented by adjusting the retraction or coasting settings in the 3D printer software. When your retraction settings aren’t set properly, they might take too much plastic away from the print chamber.
After your print tries to re-extrude material, there might be a little bit of a gap between the molten material and the tip of the nozzle. This means the lack of pressure to extrude causes under extrusion and leads to inconsistent flow rates.
A good retraction setting for you to use is 5mm retraction lengths at a speed of 40mm/s.
Ironing the Print SurfaceThis is a feature available in some 3D printers only. In this process, slightly heated print head moves over the finished model to warm the plastic and reshape any irregularities present on it producing a smooth surface.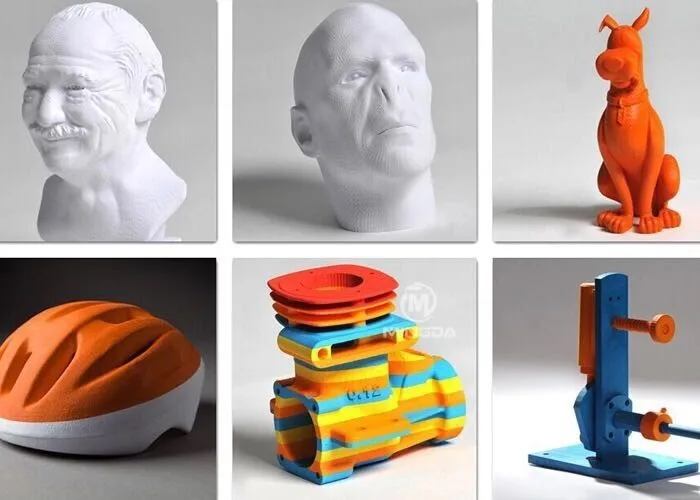
Ironing process can extrude and lay small amounts of plastic on the surface.
10 Ways How to Fix a Poor/Rough Surface Above 3D Print Supports – 3D Printerly
In your 3D printing experience, you might have come across a poor surface just above the supports in your 3D prints. I’ve definitely experienced it, so I set out to find out how exactly to fix this issue.
You should decrease your layer height and nozzle diameter for a better foundation in your supports. Adjust your speed and temperature settings to improve overhang performance, which helps in reducing rough surfaces above supports. Improve your cooling, as well as support roof settings and look towards better part orientation.
There are many different solutions and in-depth details on how to fix a poor or rough surface above 3D printed supports, so keep reading on to best solve this ongoing issue.
Why Do I Have a Rough Surface Above My Supports?
The usual reason why you have a rough surface above your supports is due to the overhang performance of your 3D printer, or just the way the model is structured in general.
If you have a bad model structure, it’s difficult to reduce rough surfaces above supports because there just isn’t an efficient way to smooth 3D print the object.
If the part orientation is poor, you can definitely discover rough surfaces above support structures.
Overhang performance can definitely help out in terms of this issue because when your layers don’t adhere properly, they can’t produce that smooth surface that you are looking for.
It’s hard to avoid supports for complex models so you just have to make do, however, we can still find ways to make smooth surfaces above supports in one way or another.
In all honesty, with some models you can’t completely cure these rough surfaces but there are techniques and workarounds where you can alter a number of settings, the orientation and much more to solve the issue.
Before we can do this, it’s a good idea to know the direct causes behind why this might happen.
- Layer height too high
- Fast printing speeds
- High temperature settings
- Z-distance setting not adjusted
- Bad model orientation
- Bad support settings
- Low quality filament
- Poor cooling on parts
How Do I Fix a Rough Surface above My Supports?
1.
 Lower the Layer Height
Lowering your layer height is one of the main fixes that will help fix rough surfaces above your supports. The reason for this is related to the overhang performance, where Your dimensional accuracy increases quite a bit the lower your layer height it, and this directly translates to better overhangs.
Since you are printing more layers, the extruded plastic has more of a foundation to build up from, which is your 3D printer creating smaller steps to create that overhang in the first place.
You want to avoid having to use supports in the first place, but if you do have to implement them, you want to make them as efficient as possible. You want to have support structures for overhangs above that 45° mark, especially at a layer height of 0.2mm
If you use a layer height of 0.1mm, your overhangs can reach further and may even stretch out to that 60° mark.
That’s why I want you to have support structures for any overhang that is above 45 degrees.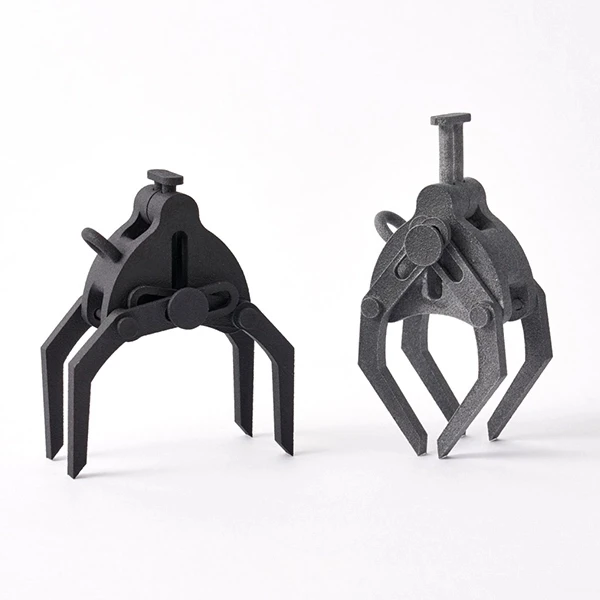 At this point, you can use a layer height of 0.2mm.
So to achieve better surfaces above your supports:
- Improve your overhang performance to reduce supports
- Use a lower layer height
- Use a smaller nozzle diameter
By doing this, you will be getting different advantages, that are:
- Reducing your print time
- The number of support structures will also be reduced for the print so material is saved
- Achieve a smoother surface on the underside parts.
This is how you can achieve a smooth surface on the parts above supports.
2. Reduce Your Printing Speed
This solution also relates to that overhang performance where you want your layers to adhere to each other as best as they can. When you use fast printing speeds, the extruded material can have a little trouble setting properly.
- Reduce your printing speed in 10mm/s increments until the problem is solved
- You can specifically slow down the speed of the supports rather than all speeds.
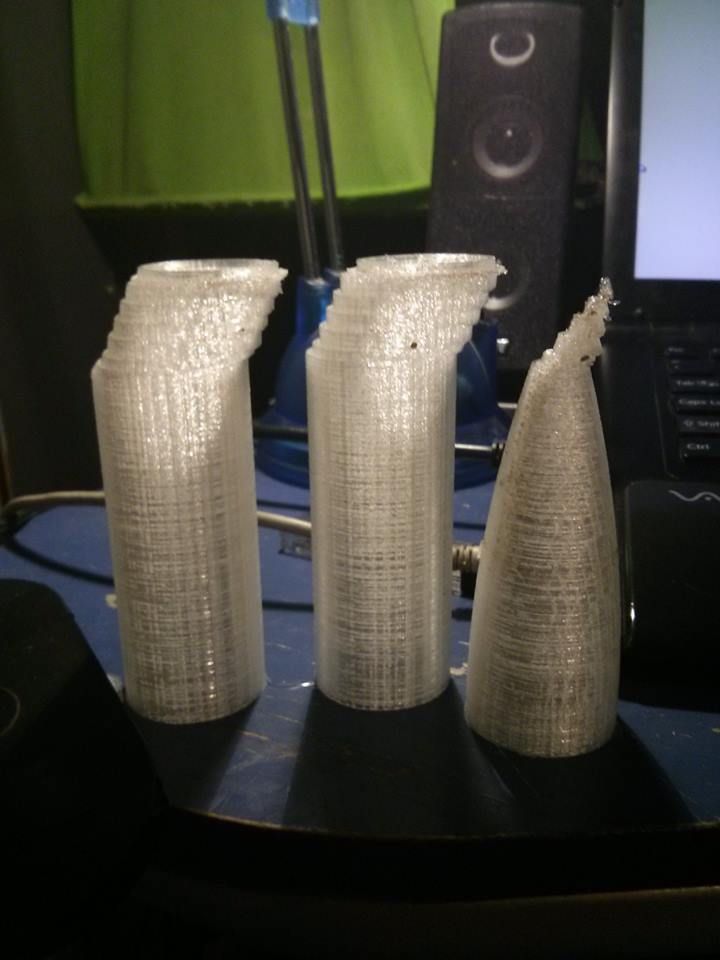
- There is ‘Support Speed’ and ‘Support Infill Speed’ which is usually half of your printing speed
This should help out in reduces the rough surfaces above supports by creating a more accurate model according to the dimensions rather than bad printing abilities.
3. Decrease Your Printing Temperature
Depending on whether you have already dialed in your printing temperature, sometimes you might be using a temperature that’s a little too high. If the filament is being melted past the necessary heat levels, it can cause the filament to be more runny.
This can easily result in sagging and drooping while printing those overhangs, which leads to rough surfaces above your support structures.
- Optimize your printing temperature by running a few tests
- Use a temperature low enough to not give under-extrusion and still print consistently.
4. Adjust Support Z-Distance Setting
The right settings can make the world of a difference in your 3D prints. The video below goes through some Cura support settings that you can implement to improve your 3D print quality.
The ‘Support Z-Distance’ setting in Cura is defined as the distance from the top/bottom of the support structure to the print. It’s a gap that provides clearance to remove supports after you have printed your model.
It’s usually at a value which is a multiple of your layer height, where mine is currently showing a multiple of two, which is actually a little much.
- You can narrow down the setting to ‘Support Top Distance’ in Cura and set it to the same as your layer height.
- A multiple of one should produce better surfaces above supports than a multiple of two.

The problem here though, is it may be harder to remove the supports afterwards, since the material can bond like a wall.
5. Split Your Model in Half
Instead of requiring the supports in the first place, you can split your model in half and put the two halves face down on your print bed. After they have printed, you can carefully glue the pieces together to form a nice bond.
Many users choose this option and it works out pretty well, but it works well for some models and not others.
The nature of supports means that you can’t get the same surface quality as the rest of your model because the material can’t be squished down as required to give a smooth surface.
If you manage to slice your model in a certain way, you can reduce the ‘scarring’ or rough surfaces above your supports, by reducing the number of supports and improving the angles that you are printing at.
6. Adjust Support (Infill) Roof Settings
There are a list of settings in Cura which relate to the ‘Roof’ of your supports which is the related to that rough surface above your supports.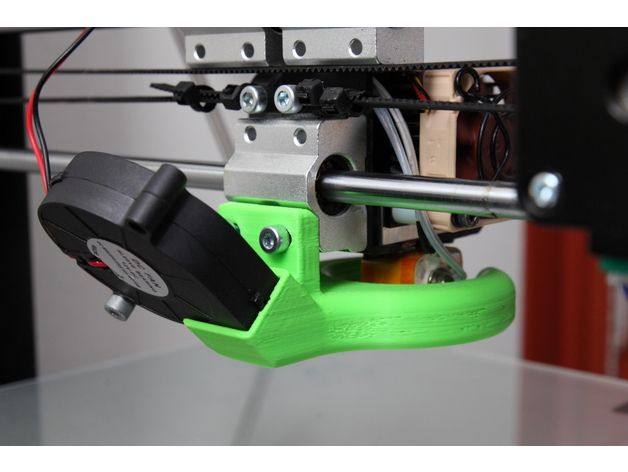 If you adjust these settings correctly, you can improve the support itself, as well as the surface. Rather than change the setting of the whole support, we can work towards just adjust the settings of the top of the support,
- Do some trial and testing on support roof settings
- ‘Enable Support Roof’ generates a dense slab of material between the top of the model and the support
- Increasing ‘Support Roof Density’ can improve overhang performance and fix those rough surfaces
- If you still notice sagging in the parts above your supports, you can increase it more
- You can also change the ‘Support Roof Pattern’ to Lines (recommended), Grid (default), Triangles, Concentric or Zig Zag
- Adjust the ‘Support Join Distance’ – which is the maximum distance between support structures in the X/Y directions.
- If separate structures are closer together than the set distance, they merge into one support structure. (Default is 2.0mm)
The default Support Roof Density setting in Cura is 33. 33% so you can increase this value and note the changes in performance to see if it helps out. In order to find these settings you can either search it in the search bar, or adjust your Cura view to show ‘Expert’ settings.
7. Use a Second Extruder/Material for Supports (If Available)
Most people don’t have this option, but if you have dual extruders, it can help out greatly when printing with supports. You can 3D print with two different materials, one being the main material for the model, and the other being your support material.
The support material is usually one that can break away easily or even be dissolved in a liquid solution or just plain water. The common example here is 3D printer users 3D printing with PLA and using PVA for supports which is dissolvable in water.
The materials won’t bond together and you’ll have better success printing models with less rough surfaces above the support.
These two materials won’t bond together, and you will get a better chance of printing the material with the less rough surface above supports.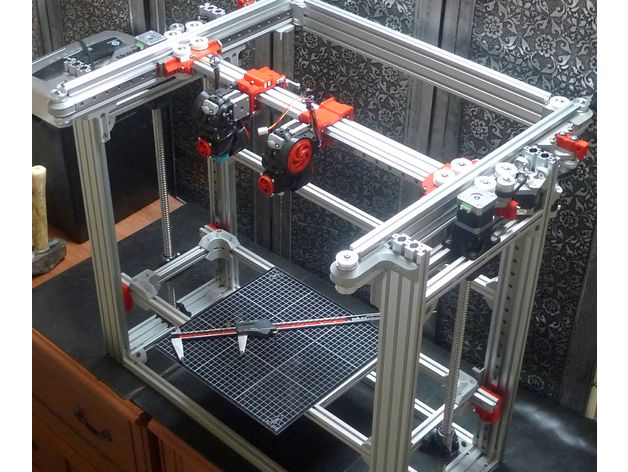
8. Use High Quality Filament
Low quality filament can definitely stunt your printing quality in a way that just works against getting successful prints.
Things like low tolerance accuracy, poor manufacturing methods, moisture absorbed within the filament, dust and other factors can contribute to getting those rough surfaces above supports.
- Start using high quality filament from trusted brand names with many exceptional reviews
- Amazon is a great place to start, but separate retailers like MatterHackers or PrusaFilament have great products
- Order a number of highly rated filaments and find the one which words best for your projects.
9. Improve Your Cooling
When you improve your cooling system, you can improve your overhang performance significantly. What this does is harden your melted plastic a lot quicker, giving it the ability to create a more sturdy foundation and build on top of that.
It may not be perfect, but good cooling can definitely help out with poor surfaces above supports.
- Implement the Petsfang Duct (Thingiverse) on your 3D printer
- Get higher quality fans on your 3D printer
10. Post-Print Work
Most of the solutions here are talking about adjusting the printing process so you no longer get the rough patches on surfaces above supports, but this one is about after the print is finished.
There are methods you can implement to smooth over those rough surfaces so you can have a good-looking 3D print.
- You can sand the surface using high-grit sandpaper and really make that surface smooth, inexpensively.
- If there isn’t much material left to really sand down, you can use a 3D pen to extrude extra filament on the surface
- After the filament has been attached, you can then sand it down to make the model look nice
Problems, defects, 3D printing errors and solutions
Often during the operation of a 3D printer, problems may arise due to which defects appear on the finished model.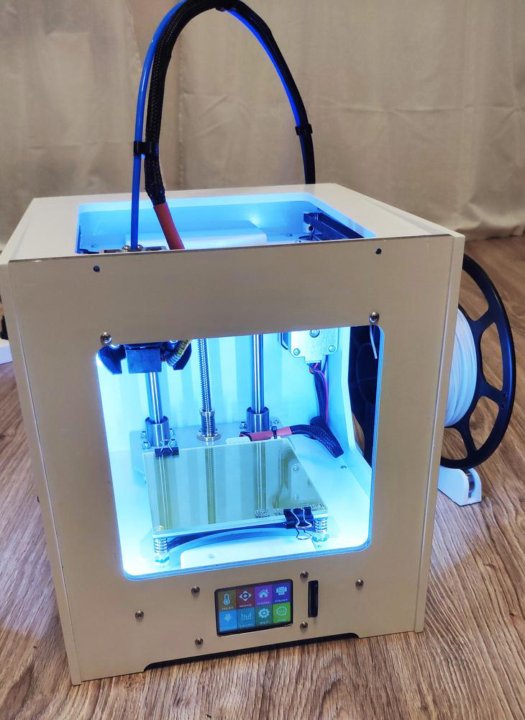 Or instead of a neat product, plastic noodles suddenly appear on the table.
In fact, the causes of defects can be conditionally divided into 2 types - these are physical and software.
Physical ones are those that arise due to problems with the mechanics or any other causes that can be eliminated physically. These include problems with printer mechanisms (belt tension, backlash), clogged or deformed nozzle, incorrect table geometry, etc.
Software - these are defects that occur due to incorrect slicer settings or, less often, errors in the printer firmware. For example, incorrectly selected print speed, retract settings, incorrectly selected temperature for plastic, etc.
Very rarely, the problem may lie in the wrong or “flying” printer firmware (although usually the printer simply will not start then), overheating of some boards during printing, etc. These are rather special cases, so we will not consider them.
Model peels off or does not stick to the build plate
This is the most common 3D printing problem.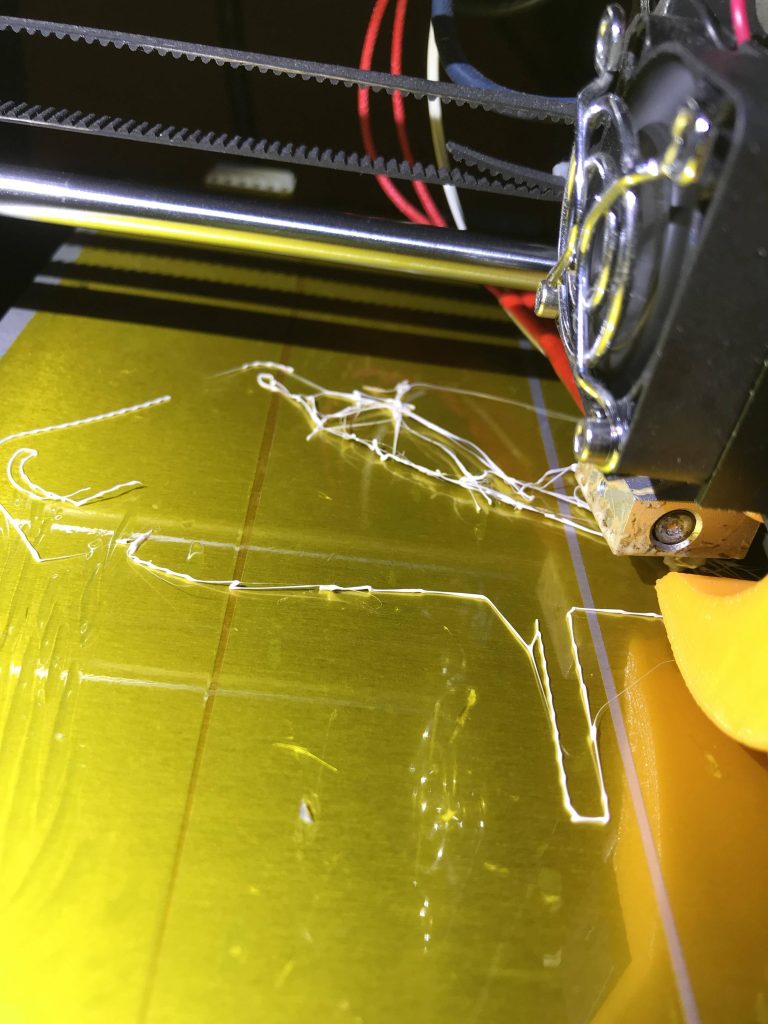 Every 3D printer has had a case when the first layer treacherously rolls, clinging to the extruder, or the most offensive - when it tears off a partially printed model from the table. The first layer must stick tightly otherwise nothing will be printed.
Gap between table and nozzle 9 too large0023
This is the most common reason. You just need to set the correct gap between the table and the nozzle.
Modern printers often use an auto-calibration (auto-leveling) table system or an auxiliary table leveling program. To calibrate such printers, use the instructions. If there is no manual, it can be downloaded from the manufacturer's website.
If you have a simple printer without auto-calibration, a self-assembly or KIT kit, use a probe or a piece of paper folded in half to calibrate. The probe should be slightly pressed against the table by the nozzle. Before calibration, the table and extruder must be heated. Align the table surface over each adjustment screw (there may be 3 or 4) in turn, and only then check the center point.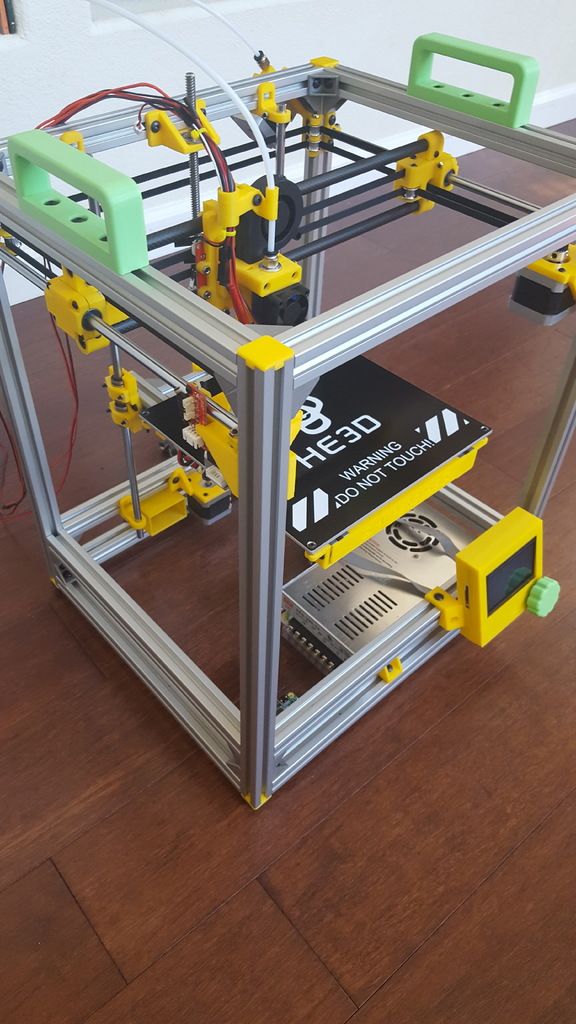
If you're having trouble getting your table surface perfectly level, try raft printing. Raft is a thick substrate in several layers that is printed under the model. It will help smooth out the slight curvature of the table.
A small cheat sheet to determine the correct gap on the first layer
Plastic with poor adhesion
Some types of plastic, due to various reasons, such as large shrinkage, do not adhere well to the surface of the printing platform. In this case, try using stickers or special 3D adhesives to improve adhesion between the table and the first layer of plastic.
In the early days of 3D printing, there were experiments with different homemade 3D adhesive recipes. ABS diluted in acetone, BF glue, sugar syrup and even beer. Some experiments have been successful. Until now, some enthusiasts use some types of hairspray or glue sticks as 3D glue. But still they are inferior in their properties to industrial 3D adhesives.
Some types of high temperature plastics with a high percentage of shrinkage (ABS, Nylon, etc.) may peel off the table during printing. This is due to uneven cooling and “compression” of the model (the lower layers have already cooled down, but the upper ones have not yet). For such plastics, it is imperative to use a 3D printer with a heated table and a closed case.
Plastic temperature too low
The hotter the plastic is when it exits the nozzle, the better it will adhere to the print bed. It is better to print the first 5-10 layers at a higher temperature (+ 5-10 degrees) and turn off the blower fan.
Wrong first layer settings (speed and thickness)
A thicker layer sticks easier, so the standard first layer is 0.3mm thick. With an increase in print speed, the heating block may simply not have time to heat the plastic to the desired temperature and it will stick to the table worse. Before printing, check the speed and thickness settings of the first layer in the slicer.
A lot depends on how the 3D printer prints the first layer. Try to control the printing of the first layer and only then leave the printer to work alone.
Plastic does not choke from nozzle
The printer has already begun to print, but the print table remains empty. Or part of the model did not print.
Clogged nozzle
In 3D printing, a nozzle is a consumable. The nozzles are clogged or worn out (frequency depends on the type of plastic). The simplest thing is to replace the nozzle. But if there was no spare at hand, you can try to clean the old one. To do this, there is a whole set of thin needles. Or you can heat a clogged nozzle above the melting point of the plastic and “burn out” the blockage. But later it is still better to replace the nozzle.
Low temperature nozzle
You need to increase the temperature of the extruder in the slicer settings or check the thermistor and heating block. Sometimes the thermistor may not read the temperature correctly due to a malfunction or incorrect 3D printer firmware settings.
If the problem occurs after replacing the thermistor - contact the manufacturer or read articles about PID tuning.
Empty extruder
As the extruder heats up, plastic begins to ooze out of the nozzle. Because of this, the extruder may start printing half empty. Because of this, part of the first layer is not printed. You can push the plastic manually by simply pushing the bar into the nozzle. Or solve this problem programmatically - in the slicer, add a contour print around the model (one line).
Some manufacturers and 3D enthusiasts add a line print on the edge of the table at the beginning of each GCode. This is done so that there is plastic in the nozzle by the time the model is printed.
Feed mechanism does not push through plastic
The plastic pushes the feed mechanism to the extruder - a motor with a special pulley put on the shaft. If for some reason the plastic is not pushed through (nozzle clogged, extruder temperature low, etc.), then the pulley “gnaws” through the bar. You need to push the plastic bar with your hands or cut off the damaged piece.
Elephant foot
The first layers of the model are wider and protrude beyond the boundaries of the model. This is due to the fact that the upper layers put pressure on the first ones that have not yet cooled down and flatten them.
High table temperature
Due to the too high temperature of the table, the lower layers remain soft for a long time. Try lowering the table temperature. It is better to reduce gradually (in increments of 5 degrees). You can try to turn on the blower when printing the first layers.
Small gap between nozzle and platen
If, when printing the first layer, the nozzle is too close to the table, then excess plastic will be forced out. After a few coats, this will not be as noticeable, but can lead to the effect of an “elephant's foot”.
Plastic re-extrusion
When too much material is squeezed out of the nozzle, the walls of the model are not smooth, but bumpy, with sagging.
The solution is software - in the settings of the slicer, you need to set the material feed rate (fluidity) to a lower value. The average value is 95-98%.
It is worth checking the diameter of the rod. If its size is greater than 1.75, then the plastic will be squeezed out more than necessary.
Plastic underextrusion
The plastic is squeezed out too little, because of this, gaps may appear between the layer. The finished model will be fragile and fragile.
Wrong thread diameter
Check the filament diameter in the slicer settings. Sometimes, instead of the popular 1.75, the default is 2.85.
Incorrect feed factor settings
Check the fluidity settings in the slicer. The average should be 95-98%.
Clogged nozzle
Something could get into the nozzle and partially block the exit of the plastic. Visually, the plastic will choke from the nozzle, but in a smaller amount than necessary for printing.
Hairiness or cobwebs on finished model
Thin threads of plastic protrude from the outer wall of the model (most often on one side). The defect appears due to the flow of plastic from the nozzle during idle movement.
Insufficient retract
A retract is a slight pull of a plastic filament from an extruder. Due to the retract when the extruder is idle (from layer to layer or from model to model), heated plastic does not drip from the nozzle. For some flowable plastics (eg PETG) the speed and amount of retraction must be increased.
"Hairiness" can be easily removed by grinding or cutting off the threads with a sharp scalpel.
High temperature extruder
The higher the extruder temperature, the more liquid the plastic becomes.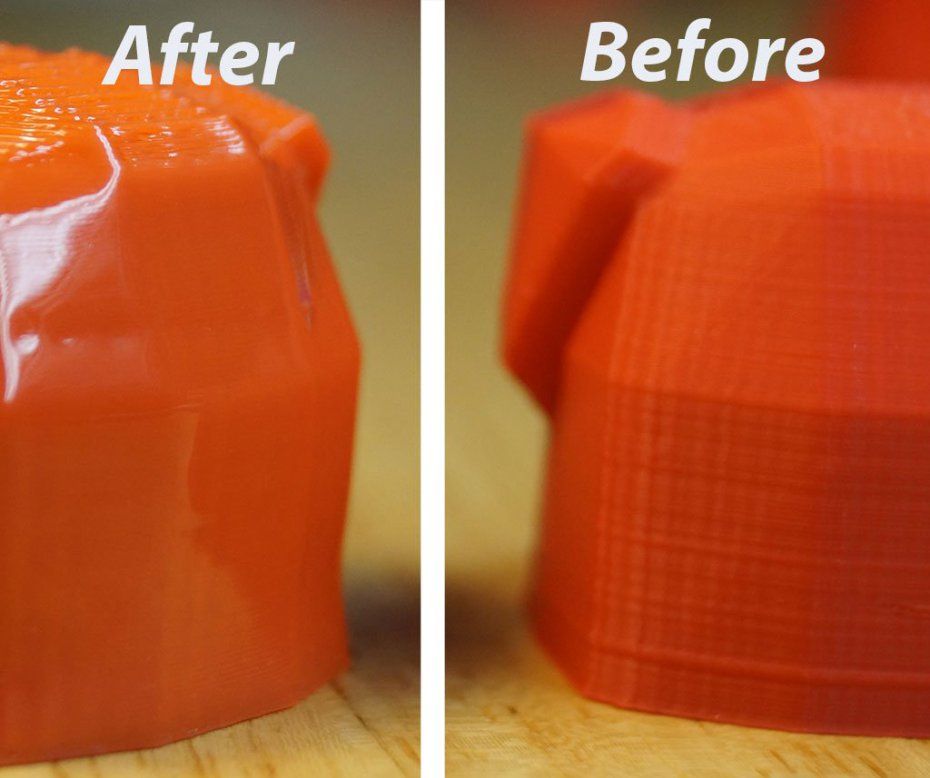 It is important to find a balance so that the plastic is not too liquid and sticks well in layers.
In the selection of the optimal extruder temperature, a test model - a tower - helps a lot. It clearly shows how plastic behaves when printed at different temperatures.
.
Temperature test
Top "perforated" or uneven
The top of the model is bumpy or with holes. The problem may arise if the top of the model is flat. For example, like a cube.
Insufficient airflow
When printing the top plane (cover), the plastic does not have time to cool down and remains too liquid. Because of this, the threads are torn and holes are formed. Increase the fan speed on the last layers.
Few top layers
The top of the print may be too thin and deform as a result. Check slicer settings. The number of upper layers is not recommended to be set less than 6.
Low percentage of filling
If the infill percentage is too low, then the top layer will simply have nothing to rely on. Increase the fill percentage in the slicer settings.
Model deformation
Some parts of the model seem to have melted in some places or on one side. The problem most often occurs when printing with PLA plastic. The defect appears due to the fact that the plastic does not have time to cool and deforms.
Insufficient airflow model
Turn the fans on to maximum. If their power is not enough (in some printers, the fan is located only on one side), you can put a regular desktop fan and direct it to the 3D printer table.
Small model
Small models are difficult to blow well. Try to print small items alongside larger ones, or place several identical models in different corners of the table. So the plastic will have more time to cool.
Layer offset
Layers shift along the x or y axis during printing.
Print head jam
Turn off the printer and try to move the extruder along the x and y axes with your hands. The extruder must move freely. If there are jams, check the mechanics of the printer. Bearing wear or the curvature of the shafts may be to blame.
Electronics overheating
Sometimes electronics problems can be to blame for misaligned layers. The most common cause is overheating of the drivers or too low current exposed to them.
Table top is loose
This is most often seen in 3D printers with glass. During printing, the nozzle may hit the model and move the glass slightly. Before printing, check if the glass or other printing surface is well fixed on the heating table.
Skip layers
Small holes are visible on the print, or the shell of the model is not continuous.
Teflon tube deformed
There are 2 types of thermal barriers - all-metal and with a Teflon tube. If overheated, the Teflon tube may deform. Plastic will pass through it, but in a smaller amount.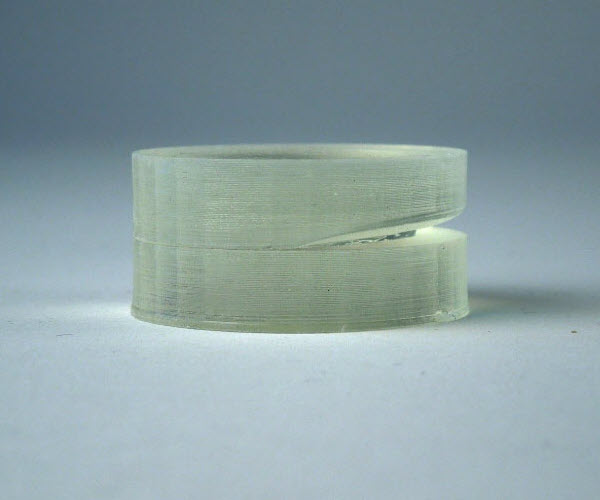
Low extruder temperature or high print speed
If the extruder is not heated enough, then the plastic will not be liquid enough and simply will not have time to be forced through the nozzle. The higher the print speed, the higher the extruder temperature should be.
Sometimes the outer walls print well, but the infill is “torn”. In this case, slow down the infill print speed in the slicer.
Model bundle
Cracks form on the surface of the printout during or after printing. Cracks can be large or very small. Most often, this problem occurs with plastics with a high percentage of shrinkage - ABS or Nylon.
Sudden temperature difference (if model delaminates during printing)
With a sharp temperature difference (for example, a draft), part of the model cools down faster. This leads to uneven shrinkage and incorrect distribution of internal stress. For plastics with low shrinkage, this is not critical. But if the shrinkage percentage is more than a few percent, the model may burst in layers.
For printing with such plastics, it is recommended to use a printer with a closed housing. If this is not possible, try to avoid drafts and sudden temperature changes in the room where the 3D printer prints as much as possible.
Print temperature
Due to too low printing temperatures, the layers may not “stick” well to each other. Raise the print temperature in the slicer settings.
Hardening (if the model cracks after printing)
Sometimes cracks appear on the model a few days after printing. This is due to uneven distribution of internal stress after cooling. You can try to “harden” the finished product.
For hardening, the model is placed, for example, in an oven, and heated to the softening temperature of the plastic. After that, the heating is turned off and the oven is left to cool slowly with the model inside.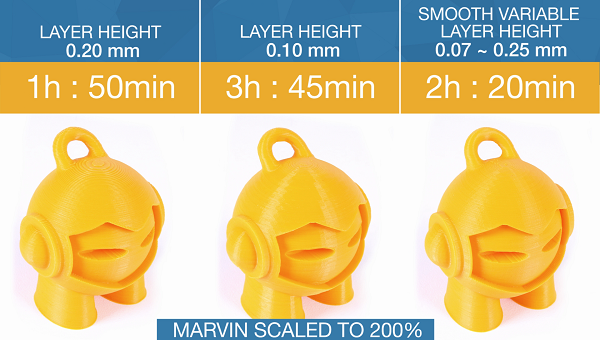 Due to this, the stress inside the print is distributed more evenly. But accuracy is very important in this method - if you make a little mistake with the temperature, the finished product can “float”.
Ringing
In places where the extruder changed direction, ripples are visible. Most often it looks like a shadow around the “sharp” protruding elements of the model.
Mechanical problems
Sometimes the problem occurs due to extruder play. Check if the extruder mount to the rails is loose. Be sure to check the tension of all belts.
High print speed or high accelerations
Moving the extruder too fast can cause vibrations that cause ripples on the wall of the model. The lighter the weight of the extruder, the less noticeable the ripples will be. To get rid of ringing, simply reduce the print speed in the slicer settings.
Slits for thin-walled models (not solid shell)
The thin wall of the model is not solid, but consists of two thin walls with a narrow gap between them.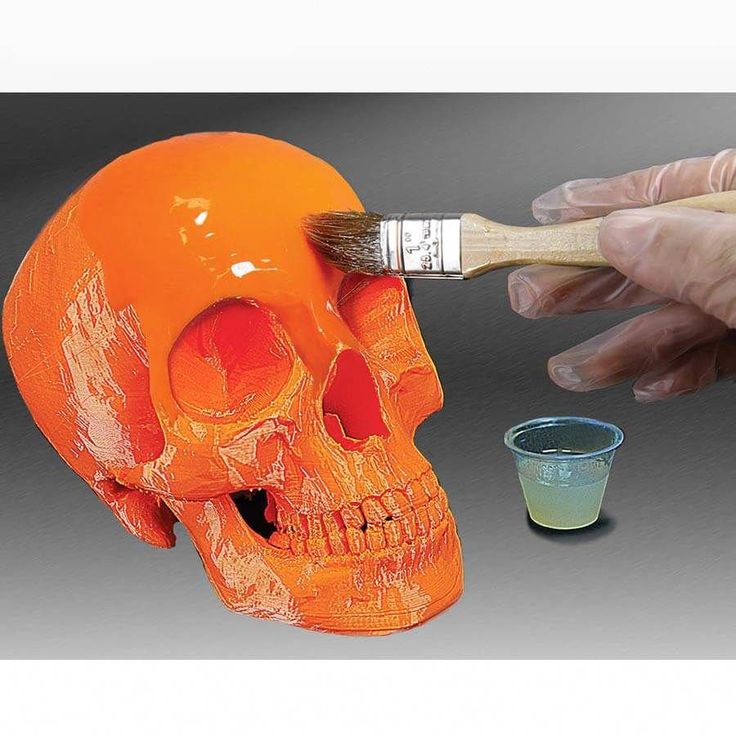 This problem is often faced by fans of printing "cutting" for baking.
Left model with wall defect, right without
Wall thickness and nozzle diameter mismatch
If the wall thickness is 1 mm, and the nozzle diameter is 0.4, it turns out that for a solid wall, 2 nozzle passes are few, and 3 are already many. The result will depend on the slicer algorithm, but most often you will get 2 walls with a thin slot in the middle (the slicer cannot change the wall thickness). The solution to the problem may be a slight refinement of the 3D model or the use of a different slicer.
Algorithms for calculating 3D models are constantly being improved and refined, and now this problem is less common.
When modeling, take into account not only the thickness of the nozzle, but also the percentage of “overlapping” of lines on each other. If you have a nozzle with a diameter of 0.4 - make the wall in your model not 0.
8, but 0.7 - 0.75.
Wrong model geometry
When instead of a circle you get an oval, and instead of a square you get a semblance of a rhombus.
The main reason is malfunctions in the mechanics of the printer. Be sure to check:
Belts
Check belt tension in x and y. Belts stretch over time and may need to be tightened or replaced. Each 3D printer has its own way of tightening the belt. If the belts are slightly stretched, you can tighten them with the help of a "spring".
Loose pulleys, etc.
Check if all bolts and nuts are tight. Are there backlashes. Pay special attention to tightening the pulleys located on the motors along the x and y axes.
Sagging of some parts of the model
Some parts are not printed, broken, or instead of a neat surface, a swollen plastic snot is obtained.
No support for overhangs
A 3D printer cannot print in the air, so if there are overhanging elements in the model, you need to set supports - supports.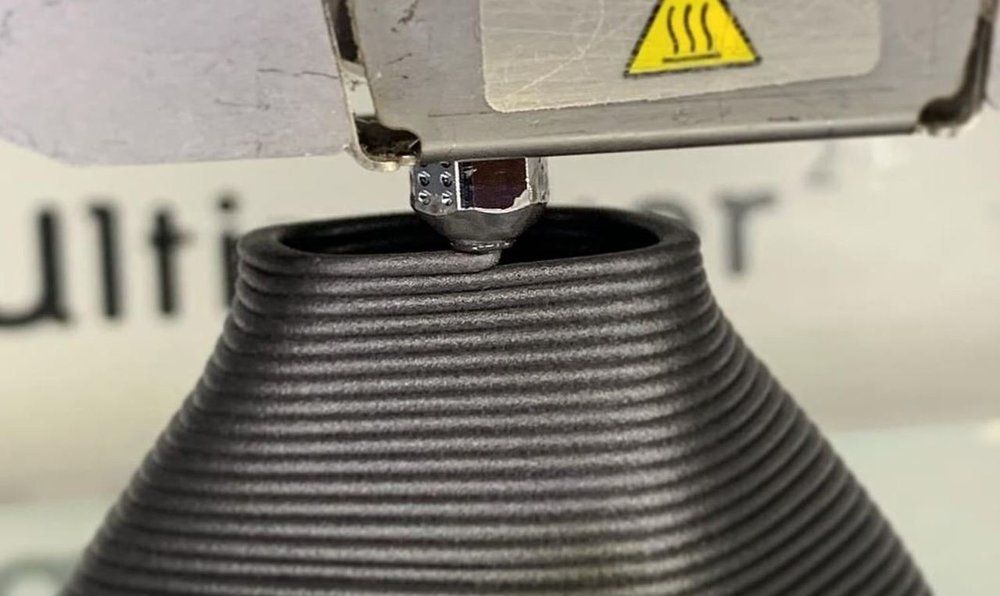 The slicer can set the necessary support itself, you need to check the appropriate box in the settings.
When printing with soluble support, you can set the gap between the model and support - 0. This will make the surface smoother. If the support material and the model are the same, you need to add a small gap. Otherwise, it will be difficult to separate the support from the model.
Split model
Sometimes the supports can take more plastic than the model. In this case, to save material and time, it will be more convenient to cut the model. If you have more than one 3D printer, then the model will print several times faster.
When cutting the model, you can leave grooves or mortgages so that the pieces of the model are connected without displacement.
Totals
In this article, we talked about the most popular 3D printing defects and how to solve them. Don't be intimidated by such a long list. Some problems are rare and you are unlikely to encounter them.
There is a list of problems that arise due to the design features of a 3D printer, so try to choose a printer that suits your needs. To do this, you need to understand what products and what material you need.
Problems associated with printing algorithms are quickly eliminated by software developers.
Do not be afraid of possible difficulties and each seal will be successful.
Beginner's Guide to Smoothing 3D Models
3DPrintStory 3D printing process Anti-Aliasing PLA: A Beginner's Guide to Anti-Aliasing 3D Models
Sooner or later, all owners of 3D printers think about smoothing the surface of printed 3D models. In this article, we will look at how to achieve a smooth surface of the printed model if you are using PLA plastic for 3D printing.
Sanding the printed model
Almost any model will require sanding to smooth it out. It is best to use sandpaper with different levels of grit. You can start with a grit of 200, and continue to increase the grit up to 4000. It is best to sand in a circular motion against the fibers of the layer lines.
Resist the urge to use a power tool because the strong vibrations generated by power tools will easily melt plastic, deforming the surface. Even when sanding by hand, remember that friction generates heat that can damage the 3D model by melting the plastic.
The best sandpaper is waterproof or wet/dry because you can wet it to cool the plastic. You should also constantly rinse the 3D model to remove any particles that form during the sanding process. An added benefit is that the water prevents small plastic particles from getting into the air and being inhaled.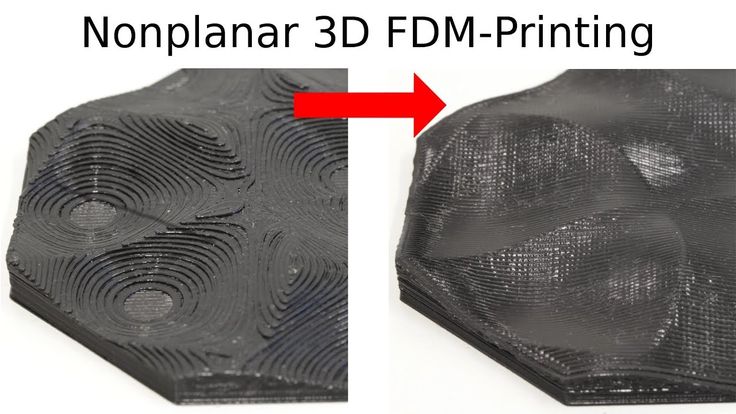 Wet/dry sandpaper can be distinguished by color. Its grains are black, not brown or beige.
Polishing options with pastes and special coatings
With PLA smoothing, sanding will never completely eliminate layer lines. One effective method is to apply polishing paste to the remaining lines of the layer. Polishing pastes have varying degrees of quality, following the example of sandpaper. These compounds are usually designed for use with metals, but work quite well with plastics. Simply apply the compound to a sanding wheel or similar rotary tool attachment, then apply it to the plastic for a smooth and shiny finish. As with sanding, remember that polishing creates friction and therefore heat. When smoothing PLA with a grinding wheel, it is better to use a lower speed.
Another method for smoothing PLA is to use a sandable primer with a high filler content. Thin, even coats dry quickly, after which the primer can be sanded down to plastic so that it remains only in the recesses of the layer lines.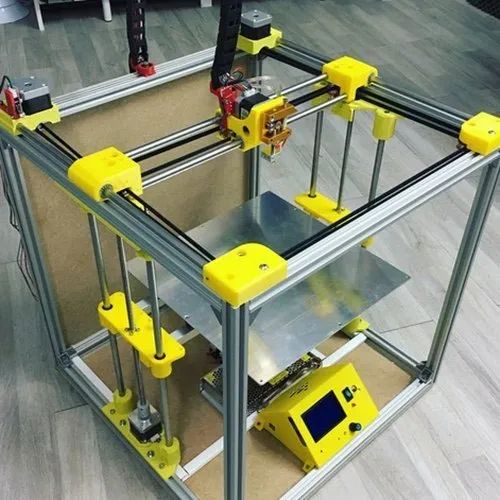 Repeat the process until all 3D printing flaws are gone.
For both procedures, always use primer and paint from the same manufacturer and never mix acrylic and enamel. This can crack the paint and put an end to all the hard work you've done before.
Another product worth mentioning is Smooth-On's XTC3D Finish Coat. It uses two liquids, one of which catalyzes the other, to create a resin-like material that can be brushed onto a 3D model. The coating is evenly leveled, leaving no brush strokes. Although Smooth-On claims that XTC3D does not melt plastic, the resin definitely gets hot as the mixture begins to set. The end result is a smooth and hard appearance that can be painted over or used as a final coat.
Heat gun
A less popular option for smoothing PLA plastic is to use a heat gun. This method requires some practice because the tool obviously generates a lot of heat which can destroy your 3D model. Pre-sanding the model helps to expose the plastic, making the final effect much more effective.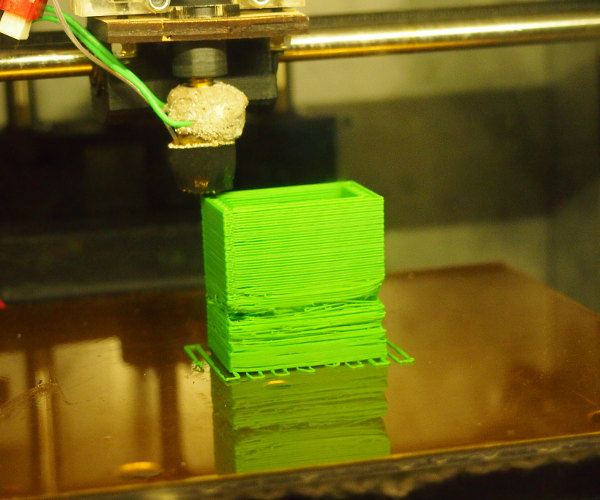 The key is to keep the gun moving across the surface of the model, never letting the gun linger on one area that could easily melt the plastic.
Although PLA does not generally emit odors when extruded, heat will certainly produce fumes as the plastic softens. Regardless of which PLA flattening method you choose, always try to work in a well-ventilated area because heated plastic, resins, and spray paint release potentially harmful fumes.
Using Polymaker's Polisher
A well-known method to get smooth 3D models out of ABS is to place the model in a sealed container filled with acetone mist. The acetone interacts with the ABS and slowly melts the plastic, creating a super smooth model. Note : be sure to read the necessary precautions if you decide to try this method.
Unfortunately, you cannot perform the same procedure with PLA because it does not react in the same way with acetone. Some other chemicals will do the same but are difficult to obtain and very dangerous and toxic to use.
Polymaker, best known for its 3D printing materials, has introduced its own anti-aliasing agent called Polysher. Using a proprietary PLA-like filament formula, the 3D model is lowered into a sealed chamber where isopropyl alcohol is sprayed, creating a mist around the object to be smoothed out. The 3D model rotates in an alcohol mist that reacts with the plastic and melts it. The longer the process, the smoother the model will be. When you take the 3D model out of Polysher, its surface will be sticky, so it's best to leave it for about half an hour. It also improves the final look, which may not be as smooth as you would expect.
As with the other procedures described here, a little sanding helps the process but is not necessary. Tip : Expose the 3D model to shorter Polysher sessions and flip the model between sessions. Surprisingly, this method also produces near-transparent models when used with Polymaker's transparent PolySmooth material.
Conclusions
Creating smooth surfaces on 3D models will require some work.