Lights for 3d printer
Light up your 3D prints with LEDs and bulbs!
Robots, automatic pet feeders, movie props, drones – the list of cool projects that combine the power of 3D printing and electronics is endless. That said, some if not most of the projects can be pretty intimidating. And you can get discouraged easily when you realize, that you need to learn how to solder, write your own code for Arduino or even design a circuit board. Fear not, because this time you won’t need any of that and yet we’ll light up our 3D prints!
Generally speaking, you have three options when it comes to simple light sources that work well with 3D prints:
- LED strips
- LED lightbulbs
- Small diodes
Old-school bulbs are not suitable since they generate a lot of heat.
LED strips
One of the easiest ways to add lights to your 3D prints are LED strips. They’re cheap, often come with a remote, they’re available both white and RGB and most importantly, they are easy to power. You could buy a whole roll of RGB LED strip and use your own LED controller and power supply, but not this time – we said no soldering! So instead we suggest buying an LED strip with a USB connector. This way, you can power it with any old phone charger, your PC, or a power bank.
The obvious downside of USB is its limited power, so you can’t get really long or extremely powerful LEDs. But really powerful LEDs can get pretty hot, so we wouldn’t want to use them anyway, especially with PLA.
LED strips always come with a double sided tape applied to their bottom side, so it’s really easy to install them. If you stick them on the inside wall of a box you can get nice and even illumination. Then print a front plate with a text or a logo and you’ll end up with a similar result as our recording sign.
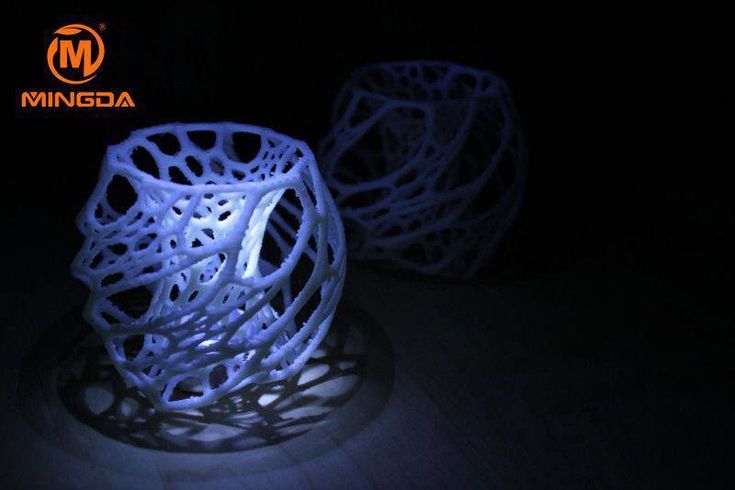
Alternatively, you can print and wrap a cylinder with the LEDs and this way you’ll have the light coming from the center of the object. Consider printing a diffusor from, for example, clear PETG. That will make the illumination more even and hide the individual LED chips, as seen on this Voronoi/triangles lamp.
Also, LED strips work great as a light source for the build plate. You just have to print a simple light bar holder and attach it to the top of the frame.
Here are some USB LED strip listings, but you can most likely get them in your local electronics store as well:
- Aliexpress
- US Amazon
- UK Amazon
Waterproof or non-waterproof strip led strips?
Whenever you can, go with the non-waterproof version. The GEL coating that manufacturers use to waterproof the LED strip adds weight, makes the strip much harder to bend or shape. Last but not least – without direct contact with air, the LED chips will run hotter. The gel coating is pretty much unnecessary for our use.
Cutting LED strips
A cool thing about LED strips is that you can cut them with regular scissors to adjust the desired length. The spots, where you can cut, are always clearly marked, so make sure to watch out for them.
LED Lightbulbs
Using lightbulbs with 3D prints is pretty straightforward, you just have to buy a lightbulb socket with a cord and attach it to your 3D print. We really like the IKEA SEKOND cord set. It has a nice textile sleeve for the cable and comes in a variety of colors.
There are a few commonly used sizes of sockets:
- Medium or Standard: E27 (diameter of 27 mm)
- E27 is usually interchangeable with E26
- Intermediate: E17 (diameter of 17 mm)
- European: E14 (diameter of 14 mm)
- Candelabra: E12 (diameter of 12 mm)
Oldschool light bulbs were terribly inefficient and used to produce a ton of heat, which would be a problem with our printed parts. Luckily for us, LED light bulbs are mainstream these days, and the amount of heat they produce is significantly lower. Still, be mindful of this and check how hot does your light bulb get.
It’s quite likely, you’re not going to 3D print all of your lamp shades, maybe just a few as a cool design piece. In that case, modern smart bulbs are a great way to make your creation even cooler! They can be controlled with a voice assistant (Google Home, Alexa, Apple Homepod) and change color on demand.
Here are some smart light bulb options:
- Xiaomi Yeelight – significantly cheaper than the competition, yet fully featured
- Phillips Hue – expensive, but lots of fancy accessories
- LIFX – expensive, but greater maximum brightness
Whichever lightbulb or cord set you choose, there is one challenge in front of you. And that’s hooking up the power. Mains electricity voltage, which light bulbs run on, varies between 120V to 230V. Either of which is high enough to seriously burn you or even kill you.
So if you don’t know what you’re doing, please just stop right here and consider asking someone with more experience for help.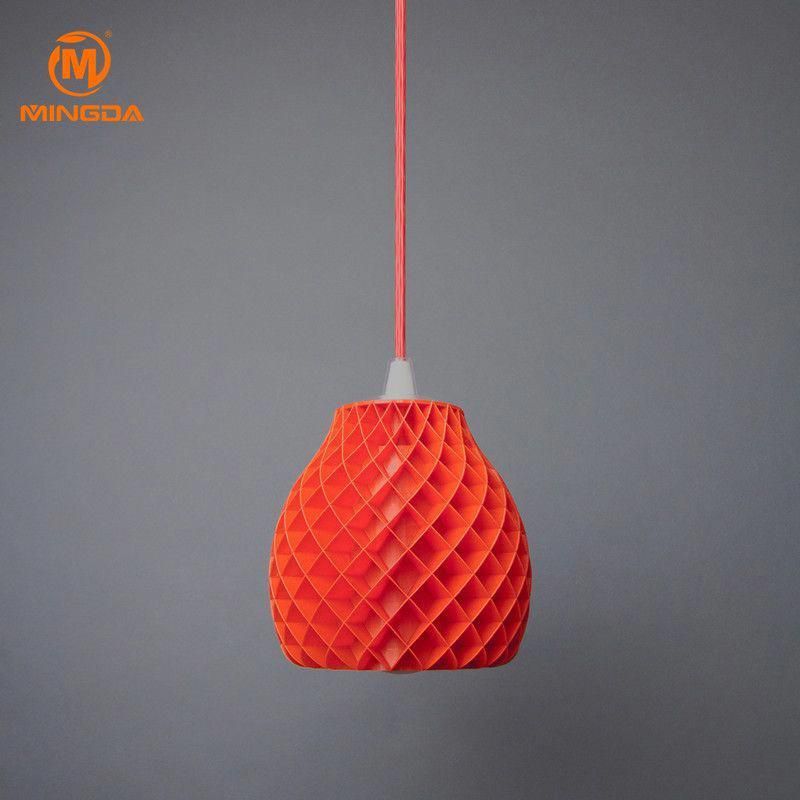 But if you know what you’re doing it’s as simple as switching the circuit breaker off, triple checking that it actually is off, connecting the phase (brown/black) and neutral cable (blue), insulating the connection and turning the power back on. Most cord sets even come with a quick release mechanism for the cable connection.
Model links
- “Recording – quiet please” backlit sign
- Voronoi/triangles lamp
- Zuzanna lamp on Cults3D
- Ribbon lamp on Cults3D
- Prusa LED lightbar
- LED bridge lamp
- Halloween Crow on Thingiverse
Small diodes
The two previous solutions were for rather big prints. In contrast to that, individual diodes can be really tiny and fit almost everywhere. They’re usually powered by 3.3V, which is (un)coincidentally the voltage of most button cells, a type of small batteries.
For under $10 you can get a set of hundreds of LED diodes in various colors, which will usually last you, well, forever.
LED diodes on:
- Amazon US
- Amazon UK
- Aliexpress (just $0.80 per 100)
And to attach the battery to the diode, you can either use a rubber band or a printed part.
We’ve used this technique in our Halloween crow and in our miniature tabletop gaming article.
Conclusion
We’ve just scratched the surface with using electronics in 3D prints. But it’s often easy to overcomplicate things, even when it’s not necessary at all. Add even a small light to your 3D print and the result will go from good to awesome! Now we want to see what you’ll come up with! Post your creations on Twitter with the handle @Prusa3d, on Instagram with the hashtag #prusa or in any of our fan facebook groups. Happy printing!
How to Add LED Lights to Your 3D Printer
The success of a 3D print depends on the integrity of the first layer. But just a bit of plastic oozing out of the nozzle can ruin everything. Not everyone can afford a printer equipped with servo-assisted nozzle wipe routines to get around this problem, but you can still spare a few minutes to manually babysit the first layer.
Good lighting, however, is the bare minimum requirement for that purpose. And incorporating it in your existing 3D printer is cheaper and easier than you think. Here’s how you can upgrade your printer with slick LED lighting to improve first-layer visibility.
Tools and Materials Required
In addition to a 3D printer, you will have to make sure you have these tools and materials ready before diving into this project. Since this guide offers options in terms of skills, tools, and materials required, the requirements are split into the mandatory and optional categories.
Most of the items listed are commonly found in a typical household, but you may need to purchase some of these. Although you can buy the mandatory items right away, please read through the guide once to figure out which one of the optional items you already have and make a note of those that you may need to procure.
Nothing is as frustrating as finding out you have a critical tool or component missing in the middle of a build.
Items You Absolutely Need
- 3D printer.
- SMD LED strip.
- Scissors.
- 3D printing filament (PLA, PETG, or ABS).
- Hookup wire (gauge varies according to voltage chosen).
- Wire stripper (recommended) or sharp blade.
- M3 T-slot nut (drop-in type recommended).
- 6mm M3 button head cap screw and compatible screwdriver.
Optional Items
- Phillips head screwdriver (standard sizes: #1 or #2).
- Solderless LED strip-to-wire connectors.
- Soldering kit.
- Heat-shrink tubing (10mm).
- Heat gun or lighter.
- Ring or fork insulated terminals.
- Insulated terminal crimping tool.
Related: How to Use RGB LED Strips to Light Up Your Life
Step 1: Figuring Out LED Strip Placement
For the majority of 3D printers sporting the Prusa/Mendel bed-flinger design, such as the Prusa i3 or Creality Ender 3, there’s only one optimal location where you can install the LED strips.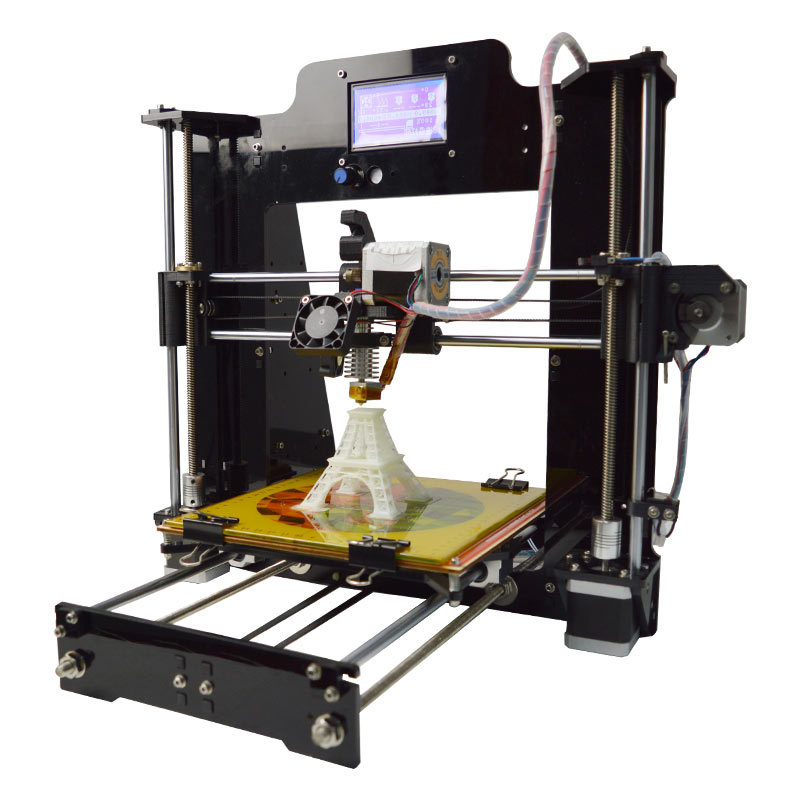 And that’s on the underside of the aluminum extrusion acting as the cross-member between the pair of Z-axis extrusions.
Installing the LED strip in this location will not interfere with your 3D printer’s motion system, while shining light directly down onto the build surface. The vertical Z-axis extrusions also serve as a convenient means to route any wires safely without fouling with the motion components such as linear rails or V-slot wheels.
Step 2: Download and Print the LED Strip Holder
Using the adhesive backing on the LED strip to attach it anywhere on the printer is a risky proposition. Adhesives may fail over time, which can cause the LED strip come loose and fall into the motion components. That’s a recipe for electrical shorts and subsequent fires.
It’s safer to download and print an LED strip holder for Creality Ender 3, Prusa i3, Voron, or any other printers off free 3D model repositories such as Thingiverse or Thangs. You might also want to 3D print cable covers to organize cables out of the way.
It’s possible to increase or decrease the length of these cable covers in the slicer software to fit the exact dimensions of your printer.
Step 3: Choosing the Right LED Strip Type
SMD LED strips are available in a wide array of options, but getting the voltage rating right is of the utmost importance. The LED strips are typically available in 5V, 12V, and 24V options, with the choice depending on the operating DC voltage output supplied by your 3D printer’s power supply unit (PSU).
There are a couple of ways to ascertain the DC voltage supplied by the PSU. You can either get the information off the product page on the printer manufacturer’s website, or you can refer to the manual. In the worst-case scenario, you can physically check the compliance label on the PSU to figure out the DC output voltage.
SMD LED strips are also available in various color configurations. Single-color cold or warm white LEDs (bearing positive and negative terminals) are ideal for the purpose of illumination over RGB LED strips.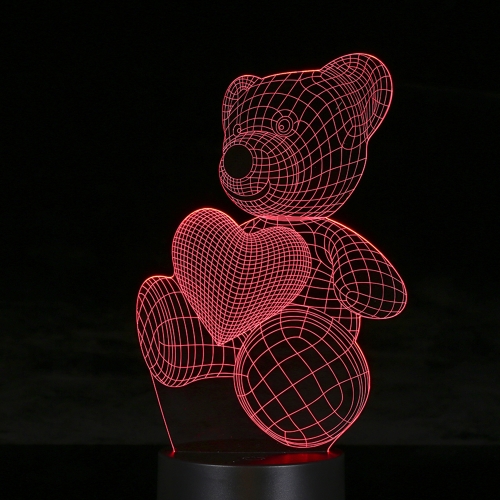 You can also opt for high-density LED strips packing in more LEDs per meter for brighter illumination at the cost of higher power consumption.
Step 4: Wire Sizing Calculation
The thickness of the wire used to power the LED strips is directly proportional to the maximum current drawn. It is fine to use thicker wires than needed, but thinner wires tend to overheat and cause voltage drops.
Calculating the maximum current drawn by the LEDs is a good way to optimize wire thickness. This is done by dividing the power rating of the LED strip by its operating voltage. For example, if the LED strip is rated at 24 watts per meter and you are using half a meter, the power consumption of your LED strip is 12 watts.
For 24V LED strips, the maximum current drawn would come out at 0.5 amp. At half the voltage, 12V LEDs require twice the current, which works out at 1 amp. Finally, 5V LED strips would require a substantial 2.4 amps. This handy JST DC wire-sizing chart should help you choose optimal wire size for your particular LED strip.
Step 5: Cut the LED Strip to Size
Cut the LED strip to size as per the fitting requirements of the 3D-printed holder of your choosing. Be sure to cut the LED strip only where exposed copper pads/terminals are visible. This is marked with a scissor icon on most LED strips.
Step 6: Prepare the Hookup Wires
The length of the wire should be sufficient to bridge the gap between your 3D printer PSU and the LED strip. It’s safer to keep a margin of error and oversize the wire. You can always cut it down to size later.
Using either dedicated wire strippers or a sharp blade, expose about an eighth of an inch of the red and black hookup wires.
Related: Understanding the Basics To Succeed at Soldering
Step 7: Wire Up the LED Strip
If you know your way around a soldering iron, proceed to solder the red and black wires to the positive and negative terminals, respectively, on the LED strip. Top that off by using either a lighter or heat gun to insulate the exposed solder joints with heat-shrink tubing.
If soldering isn’t your cup of tea, solderless LED strip-to-wire connectors allow you to do the same without requiring any tools. Just be sure to get the polarity of the wiring right. The red wire goes to the positive terminal and black to negative.
Step 8: Install LED Strip in 3D-Printed Housing
LED strips usually come with adhesive backing. Use that to fix the LED strip in the 3D-printed holder.
Now would be a good time to ensure that your 3D printer is powered off and disconnected from the power outlet. Remove the mains cable from the power inlet socket on the printer to be absolutely sure.
Step 9: Mount Housing to 3D Printer
Unless you fancy taking your 3D printer apart, it is recommended to use drop-in M3 T-slot nuts to install the LED strip assembly onto the printer. Depending on the type of T-slot nuts chosen, they can either be dropped straight into the aluminum extrusion, or dropped and then turned clockwise to lock them in place.
Once the T-slot nuts are in place, align the corresponding holes on the LED strip holder and secure them into the T-slot nuts using M3 button-head cap screws.
Step 10: Crimp Remaining Ends of Wires
Use the wire strippers to expose the remaining free ends of the red and black wires. The insulated terminal crimping tool will come in handy to crimp either ring or fork terminals onto the wires.
Although it is tempting to shove the stranded wires into the screw terminals without crimping insulated terminals onto their ends, doing so introduces the risk of loose connections and shorting.
Related: Stunning DIY LED Projects To Try This Summer
Step 11: Connect LED Strip to PSU
Refer to your 3D printer’s manual to locate the PSU and expose the terminal block. It bears screw terminals for AC input and DC output. The AC input terminals (marked by symbols L, N, and G) should already be populated with the mains input wires. These shouldn’t be tinkered with at any cost.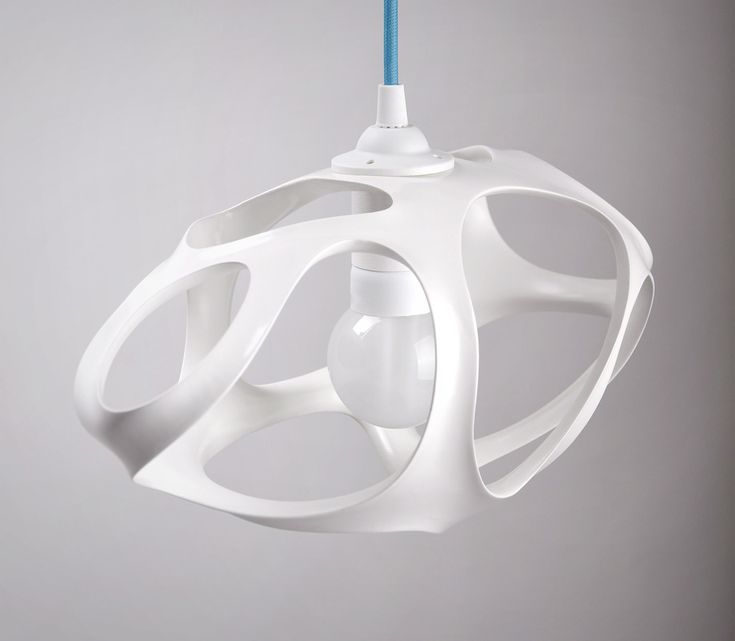
The DC side of the terminal blocks is marked by + and - symbols signifying the positive and negative terminals. Hook up the red wire to the positive terminal and the black wire to the negative terminal. Reinstall the PSU in its correct place.
Step 12: Cable Management
Route the wires into the aluminum extrusion channels in such a way that they don’t interfere with the V-slot wheels, linear rails, or any other motion system components. Use the 3D-printed cable covers to secure the wiring into place.
Move all printer axes from end to end a few times to ensure that everything moves freely without hitting the LED strip, wires, or the cable covers.
Do a Test Run
With one hand on the power switch, and ready to kill the mains power supply at a moment’s notice, switch on the 3D printer. Your LED strip should light up the build surface if everything went according to plan.
Add LED Lights to Your 3D Printer: Success!
By following the step-by-step instructions, you will have now added an LED strip to your 3D printer to light up the build surface so you can achieve a perfect first layer.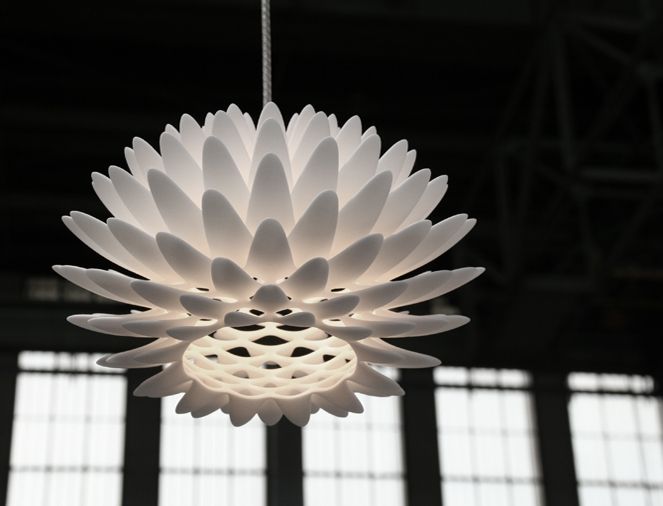
3D printer backlight. Variants and implementation
3DPrintStory Reviews 3D printer backlight. Variants and implementation
Have you ever got up in the middle of the night to check on the progress of 3D printing and frantically illuminated with a flashlight from your mobile? Or do you want your 3D printer to look cooler in the dark? The backlight can illuminate the entire 3D printer, workspace, or even the printhead, so there's room for your creative choices.
In addition to aesthetics and better visibility, another benefit of proper lighting is the accuracy when using a webcam, which is essential for programs like The Spaghetti Detective to track 3D print failures.
In this article, we'll look at several different lighting options for your 3D printer, print head, or entire desktop. However, before we present these options, let's discuss some of the specifics of your lighting setup.
What to look for when choosing a 3D printer light
There are several factors to consider when deciding which 3D printer light is best for you.
- Placement and Orientation: If you direct the light towards the center of the 3D printer, it will illuminate the area of the printed model. If you place the backlight outward, then this illumination will be enough not only for your part, but for the entire 3D printer.
- Power supply: you can implement a backlight for a 3D printer through the printer's power supply or take a separate power source. If your printer uses a motherboard that supports backlighting, such as the SKR Mini E3 V2 or MKS Robin E3D, you can connect a compatible light source (same voltage) directly to the printer.
 However, if your motherboard does not have this feature, you can power the lighting from an external source, such as a computer or wall socket.
 - Color: If you need different colors, look for RGB (red, green and blue) lights that can produce any color. If you want a plain white light, we recommend that you choose a richer white color (brighter and whiter) for better illumination.
Now let's look at the options! Please note that although some of the suggested options are for the Ender 3, it is not difficult to change them for your specific 3D printer.
Illumination of the extruder zone on a 3D printer from profiles
The first option involves attaching an LED strip to your 3D printer's horizontal portal profile. Many 3D printers use aluminum V-groove profiles as part of the frame and gantry design, making them a great option for mounting LEDs. There are a huge number of options, it all depends on the number of tapes and your desires.
In essence, this lighting option for a 3D printer comes down to mounting an LED strip on a V-groove profile.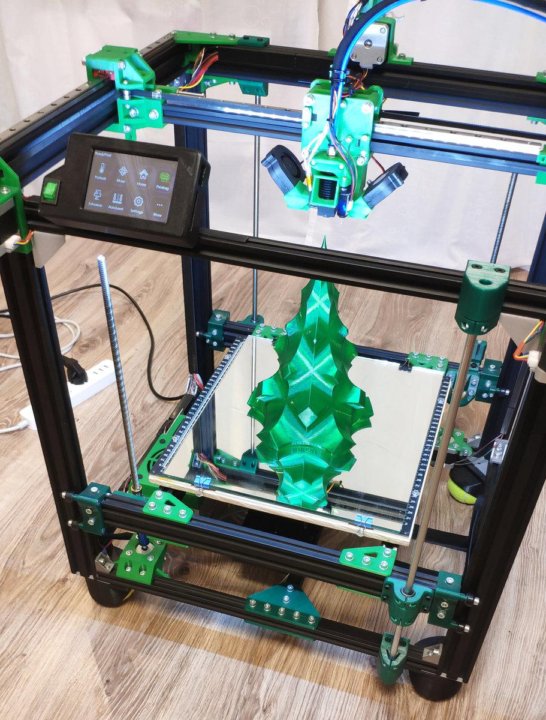 Implementation may vary, there are many mounting options. For example, you can use mounting strips printed on a 3D printer and attach the LED strip to them already. Or mount the tape directly on the profile without using additional parts.
There is an interesting way to illuminate the extrusion zone with a flashlight. The Thingiverse link below will have a fastener that you can print and mount to your frame if you are using an Ender 3 3D printer. to the body, you can do it in other ways. There are many standard fixtures for lighting fixtures, so there are many options. As a general rule, these mounts are fine if you have a closed-case 3D printer.
You can 3D print fasteners yourself. For example, here is a variant of fixtures for LED strips. You can use screws or glue for fastening. The fasteners are pretty versatile.
There are options for more specialized LED strip fixtures for a specific 3D printer. For example, here is a mount for mounting on the body of a Prusa 3D printer. For example, these 3D printable models are designed to fit on the frame of a Prusa 3D printer.
3D Printer Arch Light
Another cool option that requires a bit more effort but works great for lighting your 3D printer is the arch. After installing this arch with LEDs on your 3D printer table, you will be able to monitor both the 3D printing process and, in principle, use the large illuminated area for soldering and repairing small parts and assemblies. To make an arch, you will need a lot of 3D printed models and a rather large piece of LED strip, but the result is worth it.
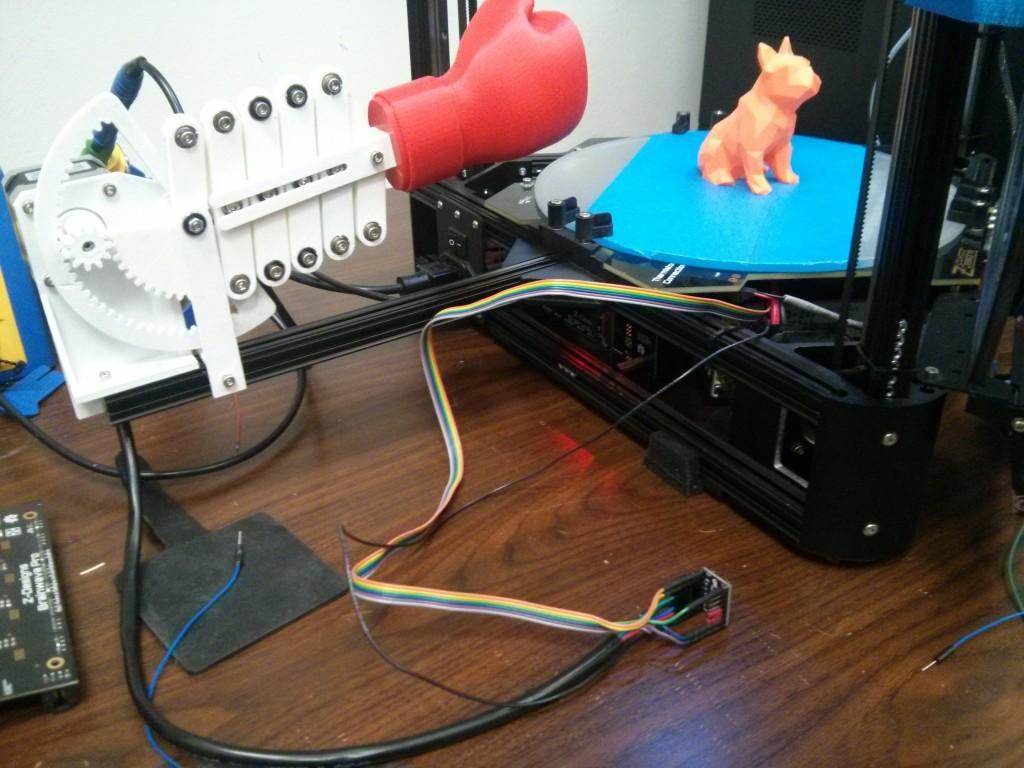
3D printer light on print head
If you want to light the 3D print area directly, you can add light on the print head. This performance will help you directly illuminate the area of the current 3D print, as the source itself will move with the print head. Please note that due to the increased weight of the print head, additional noise and vibration may be generated, which may adversely affect the quality of 3D printing. As a rule, direct illumination of the 3D printing area is implemented using an LED strip, but there are other options. One of the easiest alternative options is to print a mount and hook up a flashlight. The choice is yours.
For mount options for 3D printer lights directly on the printhead, you can consider these options that are designed for Ender 3:
- First light mount for Ender 3
- Second light mount for Ender 3
25 stylish lights for 3D printing
In this selection, we have collected 25 options for the original design of the lamps. The main advantage of the products is that you can make them yourself using a 3D printer.
#1: Blooming Bud
The flower-shaped lamp opens before the light comes on. But that's not all! By turning the switch, you can change the spectrum of warm, soothing colors.
#2: Almost the Eiffel Tower
This beautiful 3D printed lamp is inspired by the most famous building in Paris.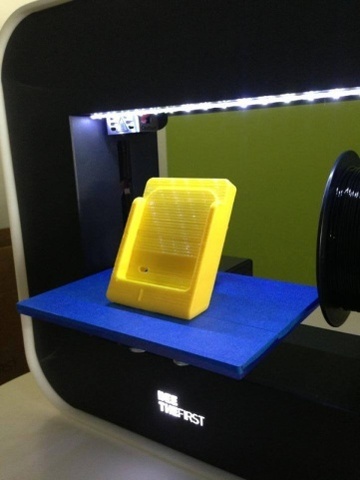 It needs to be printed piece by piece, so assembly will then be required.
#3: Tear lamp
The lamp is an example of a mixed media technique that looks absolutely amazing. The product has a solid base, on top of which a printed ring with a wooden lining is attached. Already a printed ceiling is connected to it. Despite the abundance of materials, this lamp is not that difficult to make using a 3D printer.
#4: Quirky Lamp
A minimalist lamp design that's incredibly easy to 3D print. It doesn't need any supports or many different materials, so you don't have to fuss. Just print the product in the color you like and you can update the lighting in the room.
#5: Death Star
The Force Awakens with this 3D printable lamp. How can this not happen if the Imperial Death Star appears on the wall in the living room? The lamp is easy to print and assemble.
No. 6: Lamp Zuzanna
The design of the lamp resembles thin folds of paper. It can be used as both a chandelier and a table lamp. The model has been specifically designed to be printed on the Zortrax M200, in ABS plastic and with a build volume of 200 x 200 x 185mm, but you can try making the lamp on any equivalent 3D printer.
#7: Futuristic Lamp
This lamp looks like it comes from a sci-fi epic. It is a ball of two halves, with a smooth base and an upper part consisting of concentric circles.
No. 8: Lampion for lamps LampiON
Consists of two separate parts, modeled from a grid that consists of regular hexagons. You can use one or both parts at once in one design, arranging them at your discretion.
#9: LED lamp
This is a durable and comfortable lamp that is assembled from several parts. The height of the product is 440mm, so be aware that any resizing of parts while printing will affect the wires and LED placement.
No. 10: Luminaire with cross design
Look how stylish the intersecting lines on the ceiling look! Combine this 3D print product with a dimmer switch and when you turn on the light, it will create a beautiful optical illusion.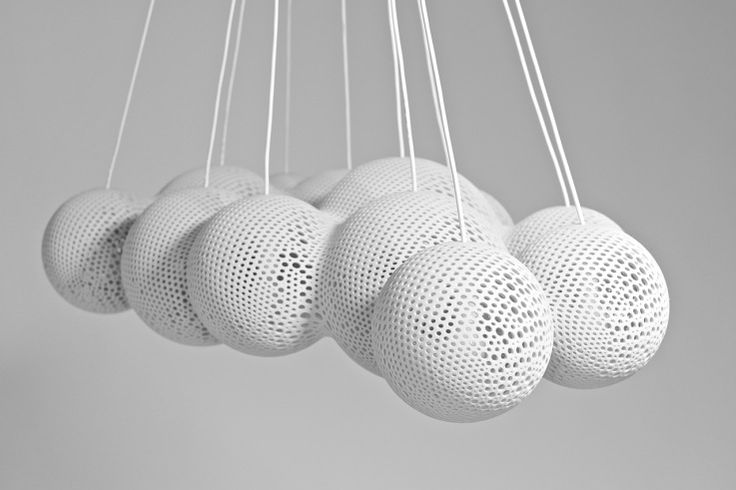
#11: Man figurine
High five this little man and he will glow on your table. This 3D printable lamp is a bit more complex than the others on this list, but well worth the effort. The model is hollow to make room for the Arduino, touch sensor, LEDs and wires.
#12: Pumpkin
The pumpkin lantern is a device that will come in handy for Halloween. Print several at once, connect to green cables, and enjoy original products that will serve as the perfect decoration for the holiday.
#13: Artichoke
This lamp is inspired by another vegetable - the artichoke. This lamp will be a nice addition to your home or office.
#14: SMF.01
SMF.01 is an elegant model of a floor lamp that is assembled from printed parts, wooden elements and a light cable. This is an original idea that will appeal to those who like to create an apartment design with their own hands. The name SMF comes from Self Made Furniture.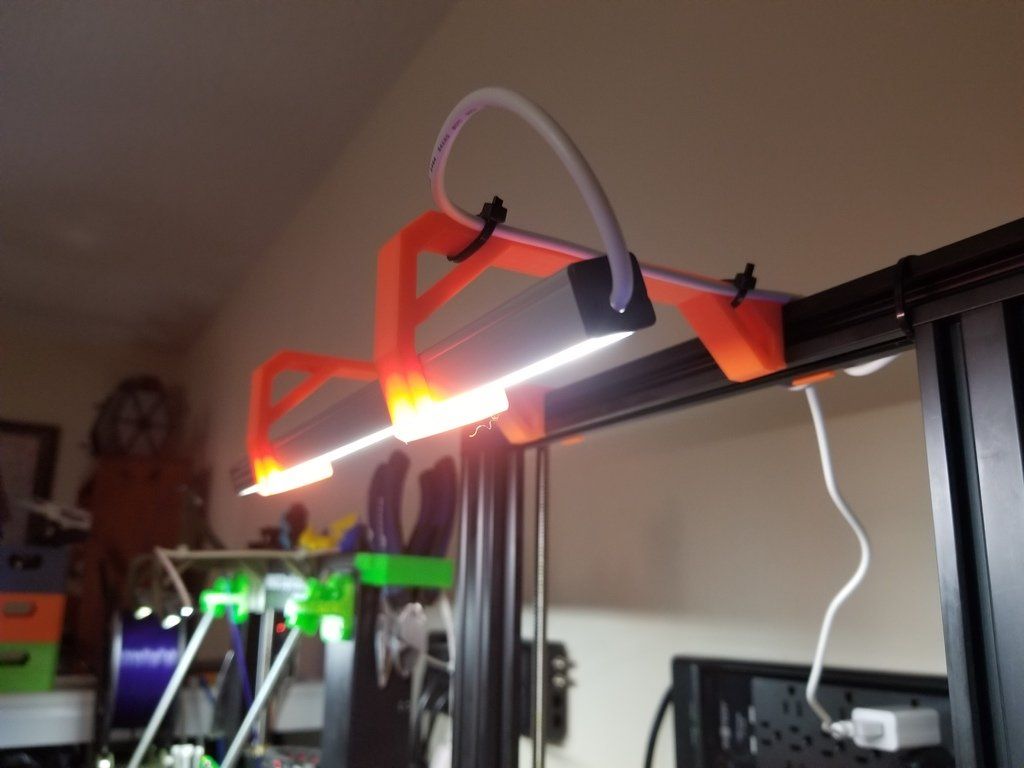
#15: Valeria
This is a truly sophisticated product. The small dimensions of the Valeria lamp allow it to be used as a table lamp. Such a device is easy to print and assemble.
#16: Night light
The luminaire emits a warm, soothing glow, perfect for avoiding any of your nightmares.
#17: Iceberg
Do you remember the fancy lamp from the list we talked about above? So imagine that its corners have grown to a frightening size, and you get the Iceberg design.
#18: Flower Anna
This is an incredibly beautiful flower-shaped pendant lamp that distributes light evenly throughout the room.
#19: Z-Lamp
If you are a fan of 80s movies, then this lamp is not enough for you to create a stylish themed atmosphere in your apartment!
#20: Ribone
The creators of the lamp were inspired by the visual aesthetics of industrial facilities and LED lamps.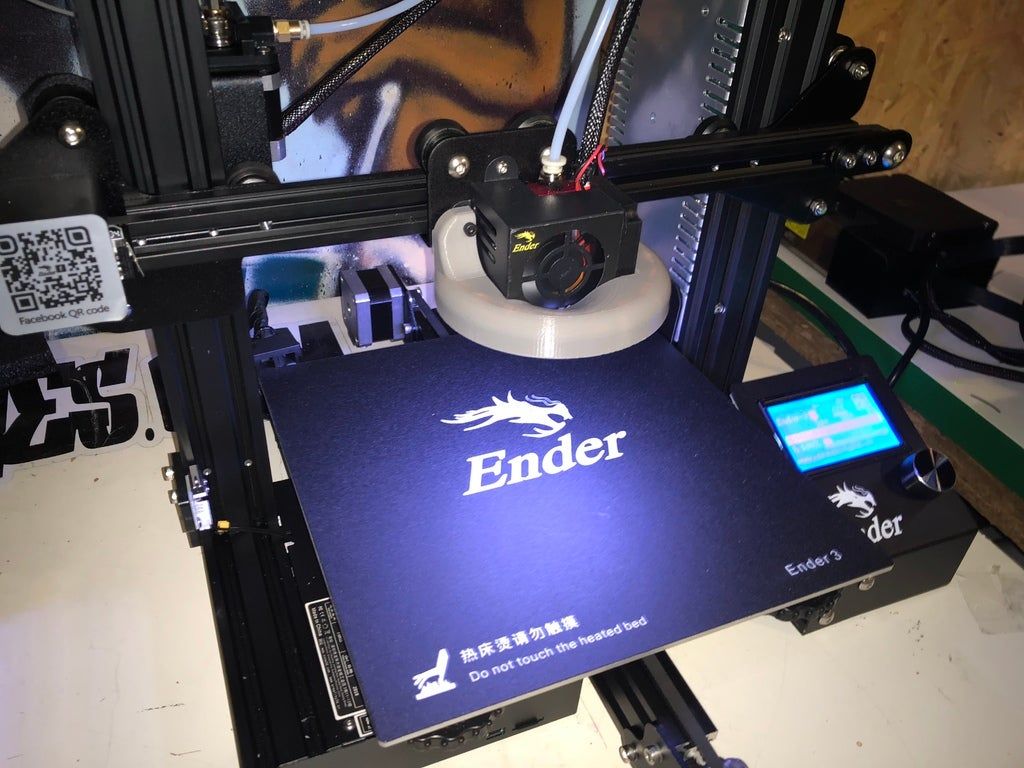 The result is a stylish little thing that will decorate your home or office.
No. 21: Luminaire LUX
If you want warm light from a beautiful lamp to "warm" your home, print this exquisite model.
#22: Hand Lamp
You won't get much light from this device, but it will definitely become a landmark in your apartment. The hand wraps around the light bulb, the power cord and switch exit just below the wrist.
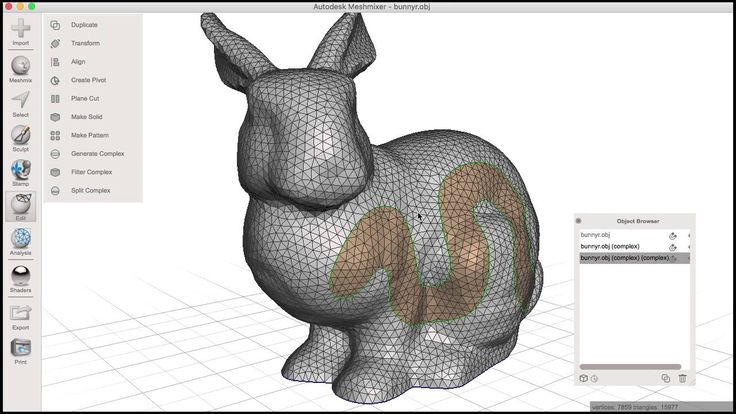
#23: Monkey and Rabbit
These lamps are designed to cast amazing shadows on walls when in use.
#24: Geometric lamp
This is a functional compact device. It requires no screws or glue to assemble, and can be made on any printer with a 120 x 120 x 120mm printable surface (no heated pad required when using PLA).
#25: Square LED Lamp
This is a simple retro futuristic LED lamp. The product is equipped with a battery compartment, so it can be installed without plugging into a power outlet.