Anycubic photon mono x sla resin 3d printer
Anycubic Photon Mono X - Larger & Faster LCD/SLA 3D Printer
Skip to content- 8.9" 4K Monochrome LCD
- 4K resolution at 8.9 inch size, allows larger prints, more detail and accuracy.
- Fast Printing Speed
- Making printing speed 3X faster than the Photon.
- Large Build Volume
- A large build area for your 3D-printed creations : 192mm (L) * 120mm (W) * 245mm (H).
- APP Remote Control
- Remote control of print operations.
- Technical Specifications
- ● System : ANYCUBIC Photon Mono X
- ● Operation : 3.5 inch Touch Screen
- ● Build Volume: 192mm(L)*120mm(W)*245mm(H)
- ● Light-source: high-quality filament(wavelength 405nm)
- ● XY Res.: 0.050mm 3840*2400(4K)
- ● Z Axis Res.
: 0.01mm
- ● Layer Res.: 0.01-0.15mm
- ● Printing Speed: MAX 60mm/h
- ● Rated Power: 120W
- ● Material: 405nm UV Resin
- ● Software : ANYCUBIC Photon workshop
- ● Connectivity : USB
- ● Technology: LCD-based SLA
- ● Printer Size : 270mm(L)*290mm(W)*475mm(H)
- ● Net Weight: ~10.75kg
- Safe Design
- Printer will be immediately shut off if the top cover has been removed. This feature is turned off by default
- Anycubic Slicer Software
- New features are added to the software. Supports up to 8x anti-aliasing: Fast slicing, Hollowing, Split Model, Text Paste
- Fast Printing Speed
- The time of exposure is as low as 1.5-2 seconds, and the max print speed is 60mm/h, making printing speed 3X faster than the Photon.
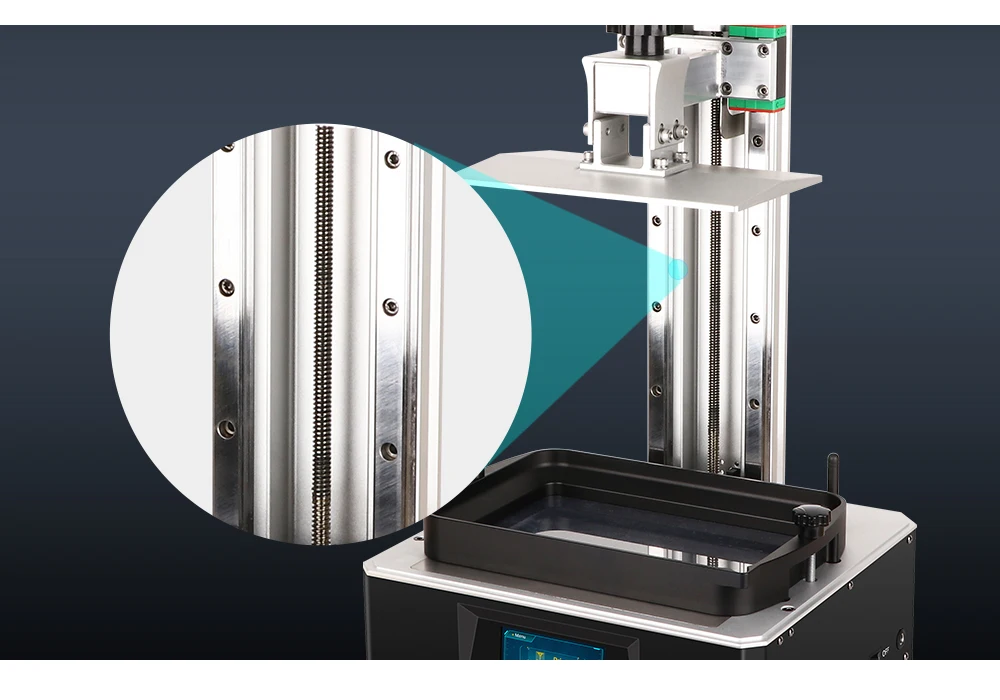
- High Performance Z-axis
- The Z-axis is supported by dual linear rails,stepper motor and clearance nut combination which dramatically improves stability while in motion and reduces the risk of layer shifting.
- New Matrix UV Light Source
- High quality quartz lamp bead and new matrix design for uniform UV light energy. 4K monochrome LCD delivers high-quality prints
- Anycubic APP Remote Control
- Remote control of print operations,monitor printing progress,adjust the print settings, you could download it from HERE.
- UV Cooling System
- Cooling device for stable printing performance and longer service life.
- Large Build Volume
- A large build area for your 3D-printed creations :192mm(L)*120mm(W)*245mm(H)
- 8.9″ 4K Monochrome LCD
- Monochrome screens can last several thousand hours. Monochrome screens allow for very short layer exposure times for faster print times.
Parts List
User Manual
SD-Card
Tool set
SD-Card Reader
Scraper
Resin Vat
Platform
Power Cord
Service Card
Wifi Antenna
Glove
|
|
| |
| Machine Weight | 10. 8kg 8kg | 4.3kg | 11kg |
| Machine Size | 475x290x270mm | 383x227x222mm | 475x290x270mm |
| LCD Resolution | 3840x2400px(4k) | 3840x2400px(4k) | 5760x3600px(6k) |
| LCD Size | 8.9’’ monochrome | 6.23’’ monochrome | 9.25’’ monochrome |
| XY Resolution | 50 microns | 35 microns | 34 microns |
| Z axis Accuracy | 10 microns | 10 microns | 10 microns |
| Build volume | 245xx192x120mm(5. 6L) 6L) | 165x132x80mm(1.74L) | 245x197x122mm(5.89L) |
| Max.Printing Speed | 60mm/h | 50mm/h | 80mm/h |
-
- Photon
- LCD-based SLA
- Build Area: 115x65x155mm
- Filament:405nm UV Resin
- Diffusion Illuminant
- Single Z-axis
-
- Photon S
- LCD-based SLA
- Build Area: 115x65x165mm
- Filament:405nm UV Resin
- Matrix Illuminant
- Double Z-axis
-
- 4Max Pro
- FDM (Fused Deposition Modeling)
- Build Area: 270x205x205mm
- Filament: PLA, ABS, HIPS, PETG,
Wood and TPU - Titan Extruder
Suspended Filament Rack - Single Z-axis
Anycubic Care
Firmware
MONO X 3. 5.4
5.4
Driver
/
Slicer
V2.1.29-Mac
V2.1.29-Win X86
V2.1.29-Win X64
Manual
Test model
Test_model_1
R_E_R_F.pwmx
Manual
Anycubic App Manual
please click on it to download.
Anycubic Photon Mono X 3D Printer Review: Great Quality, Large Volume
Tom's Hardware Verdict
The large build volume and fast print speed of the Anycubic Photon Mono impressed us, but our issues with the built-in WiFi and the slicer app kept this printer from rising to the top.
Pros
- +
+ Large build volume (almost 10 inches on the Z)
- +
+ Rigid dual-Z gantry and hefty metal frame
- +
+ Photon Workshop software is easy to use
Why you can trust Tom's Hardware Our expert reviewers spend hours testing and comparing products and services so you can choose the best for you. Find out more about how we test.
Today's best AnyCubic Photon Mono X deals
$374
View
$449.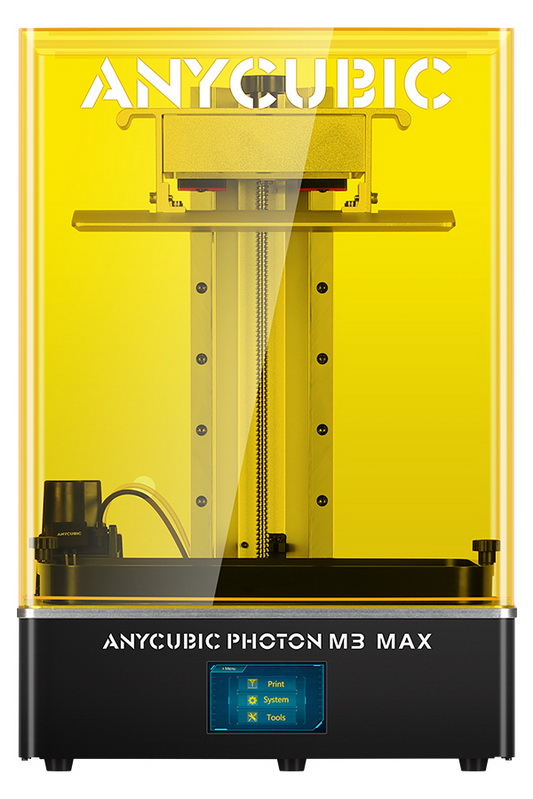 99
99
View
$537.99
View
Show More Deals
The Anycubic Photon Mono X is the largest printer in the Photon family of printers and offers a lightning-fast, 2-second per-layer cure time thanks to the included 4K Mono LCD used for masking. An impressive printer that doesn’t compromise between speed and size, the Photon Mono X offers the best of both worlds while remaining at the sub-$600 price point. The XY resolution of .05mm is comparable to smaller 3D printers that use lower-resolution screens such as the Anycubic Photon Mono or the Elegoo Mars 2 Pro. Despite a few quirks that require some attention to get the most out of the Photon Mono X, the included Photon Workshop software is relatively easy to use.
Anycubic Photon Mono X Specifications
Swipe to scroll horizontally
| Machine Footprint | 10. 63" x 11.42" x 18.7" (27cm x 29cm x 47.5cm) 63" x 11.42" x 18.7" (27cm x 29cm x 47.5cm) |
| Build Volume | 7.55" x 4.72" x 9.84" (192mm x 120mm x 245mm) |
| Resin | DLP Photopolymer Resin |
| UV Light | 405nm UV LED |
| Masking LCD Resolution | 3840 x 2400 px |
| Masking LCD Size | 8.9-inch |
| Interface | 3.5-inch LCD Touchscreen |
| XY Axis Resolution | .05mm |
Included in the Box of Anycubic Photon Mono X
(Image credit: Tom's Hardware)The Anycubic Photon Mono X ships in a reinforced box with all of the included accessories nested inside the printer. All of the accessories required to use the printer as well as enough consumables to get you through a couple of prints are included in the box. This includes a bag with several rubber gloves for handling the resin, a hospital-style fabric mask, a plastic scraper for stirring resin, a metal scraper for removing parts from the build platform, a few paper funnels for recycling the resin after printing and a few extra screws. I appreciate that Anycubic includes a paper copy of the assembly instructions with the printer, which is always a nice touch when first getting the print up and running.
- AnyCubic Photon Mono X (Black) at Walmart for $537.99
The Anycubic Photon Mono X looks like a standard resin 3D printer from a distance, but take a closer look and you’ll see a machine that is built with high-throughput in mind. A bright and distinct yellow color, the UV-resistant lid feels solid but not brittle, and the base of the machine has a groove that runs along the edge which mates up perfectly with the lid. The metal base of the machine feels sturdy and bottom-heavy, which inspired confidence that this machine was made with high-performance components.
The large build platform of the Photon Mono X means that the amount of force required to pull the build platform up will be higher than machines that cure smaller cross-sections of material. To avoid bending or any wobbling in the Z axis, Anycubic has built a rigid Z-stage that uses a threaded rod and a pair of linear rails to move the build platform up and down between layers. This is a solid mechanical system, and I was impressed with the overall fit and feel of the all-metal gantry.
(Image credit: Tom's Hardware)The build platform has a taper on two sides which is designed to allow resin to drip back into the vat after it has lifted clear of the resin. It works reasonably well, but the resin has a tendency to pool around the edges and has to be scraped back into the vat manually with the plastic scraper between prints. The surface of the build platform has a brushed aluminum surface which has a high level of adhesion and is easy to clean.
Image 1 of 2
(Image credit: Tom's Hardware)(Image credit: Tom's Hardware)Unfortunately, the design of the build platform includes four upward-facing bolts which can submerge into the resin vat during printing. The build platform bracket also has a slot cut in the center which fills with resin during printing and is difficult to clean. This is a poor design choice, as the flooded area drips uncured resin into the groove cut between the bracket and the platform. This build platform design is difficult to fully clean manually, and requires a lot of scrubbing to get into the various nooks and crannies to remove uncured resin when switching materials or colors.
(Image credit: Tom's Hardware)The Photon Mono X uses a resin vat with a removable FEP film liner on the bottom, unlike the proprietary FEP assembly found on the Photon Mono. This means you can replace the FEP film (a consumable) with either a direct replacement from Anycubic or any number of aftermarket replacements. The FEP film is held in place with 14 rear-mounted bolts and 22 smaller bolts that keep tension on the film after mounting. My favorite feature of the resin vat on the Photon Mono X is the four small studs at the corners of the vat which elevate the FEP film above whatever surface it’s sitting on. Puncturing the vat can be a messy experience, so keeping it suspended above a flat surface will keep it above anything that might make an indentation.
The base of the Photon Mono X has four locating holes which the vat uses to click into place. This means the vat is held in place while it’s being tightened down with the two included thumbscrews. The vat also has a pour spout integrated into one of the corners, so draining resin back into a bottle doesn’t result in a mess.
(Image credit: Tom's Hardware)Included with the Photon Mono X is a small antenna to enable the built-in WiFi capability, which attaches to the base of the printer on the upward-facing surface directly behind the resin vat. The WiFi on the Photon Mono X was a disappointing experience since the connection isn’t actually used by the Photon Workshop app. Using the WiFi requires a complicated set-up that involves putting your password into a .txt file and manually uploading it to the printer. The WiFi is only used to communicate with a mobile app that lets you monitor the print, view the printer history, and adjust a few parameters while printing.
I was able to get the mobile app working, which felt like a major victory after the half hour I spent fiddling with the .txt file to get the printer to recognize my network. The Anycubic 3D iOS app currently has a 2.5/5 rating on the iOS App Store and multiple complaints from users who weren’t able to get it working with the Photon Mono X.
Despite getting it working, I had a hard time finding any real reason to use this app instead of just checking on the printer directly. Without a webcam, a progress bar doesn’t actually inform you how much of the print has finished, only how much of the print should have finished.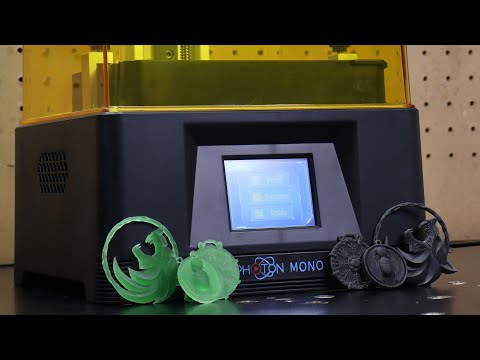 In addition, the lack of an ability to upload, process, and send a file to the printer means that this app isn’t likely to see a lot of use.
The Photon Mono X uses a 3.5-inch color LCD touchscreen as a primary interface. The UI feels a little dated (it reminds me of the default WinAmp skin), but it contains all of the functionality required to calibrate the printer and start a print. You can also use the LCD touchscreen to pause, stop, and monitor the parameters of the print during a print job. The printer has the USB input, power switch, and power input located on the side of the machine which makes it easier to access than reaching behind the machine to turn it on and off between jobs.
Leveling the Build Platform on Anycubic Photon Mono X
(Image credit: Anycubic)Like most resin 3D printers, the Anycubic Photon Mono X requires a manual calibration process to ensure the build platform is perfectly level with the masking LCD.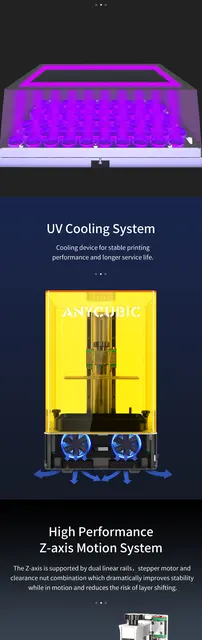 This allows each layer to cure evenly between the build platform and masking LCD while only adhering to the platform. The included printed user manual and the digital .PDF included with the USB drive cover this process in detail, and also include pictures to show the calibration process step-by-step.
This calibration process is the same as the process used by the smaller Anycubic Photon Mono, and it works about as well. I’m not a fan of the four bolt process, as over-tightening the bolts can cause the build platform to shift slightly during leveling. The two bolt ball-and-socket build platform leveling used by the Elegoo Mars 2 Pro and Elegoo Saturn is easier to use, and provides a very consistent leveling experience with less manual input required.
Printing Safety with Anycubic Photon Mono X
(Image credit: Tom's Hardware)The Anycubic Photon Mono X uses 405nm UV resin, a material that you need to handle safely when in an uncured state to avoid injury.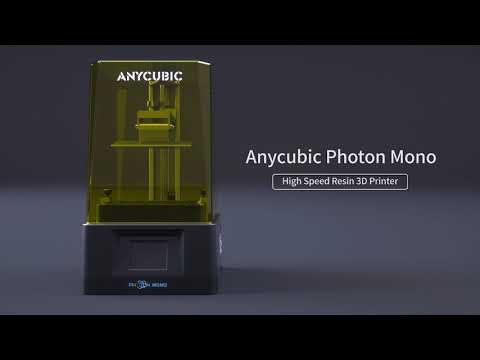 The resin can be harmful when making contact with skin, so make sure to wear gloves when pouring, cleaning up, or handling uncured resin. I also make sure I’m wearing gloves when removing the build platform after a print, as the resin tends to pool on top of the platform and can drip off while the platform is being removed.
Make sure you use the Photon Mono X in a well-ventilated room to minimize the danger from inhaling fumes. Any spills or uncured resin stuck to a surface should be cleaned using 99% Isopropyl Alcohol and the container for the resin should be kept closed and secured when not actively pouring material.
(Image credit: Tom's Hardware)Anycubic sent a bottle of their Plant-Based Eco Resin for testing this printer. This material is advertised as being made from soybean oil and is a biodegradable eco-friendly alternative to other thermoset resins. The exposure times for this resin are similar to standard photopolymer resins, so I didn’t make any modifications to print settings for this material.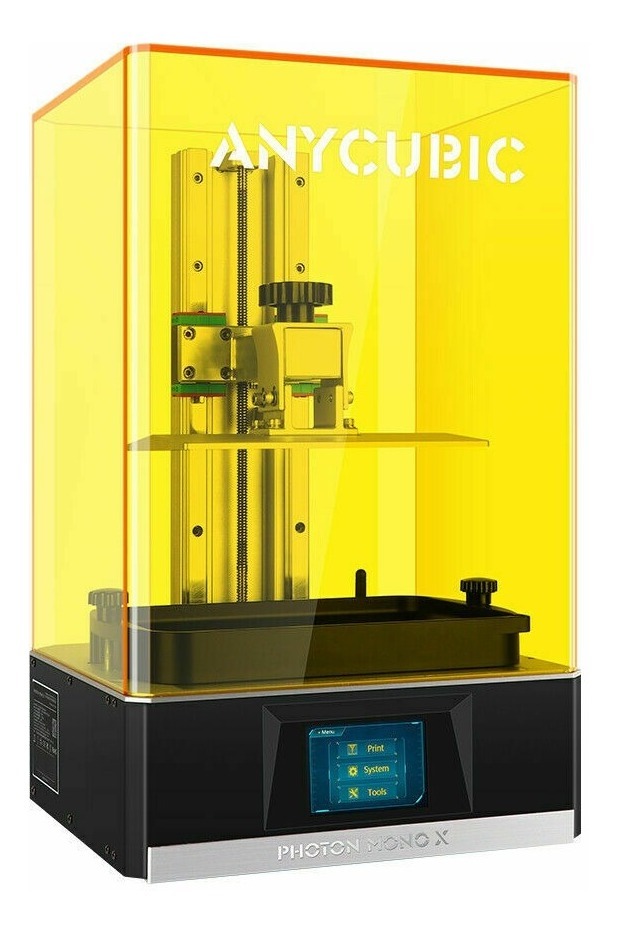 Another advertised feature of this material is the low odor; something I did notice and appreciate during printing.
Printing the Included Test Print on the Anycubic Photon Mono X
(Image credit: Tom's Hardware)The Anycubic Photon Mono X includes a prepared test model on the USB thumb drive, and it’s the same model that is included with the smaller Anycubic Photon Mono. The model is a thin lattice structure in the shape of a cube with the Anycubic Photon logo suspended internally. I opened the file in Photon Workshop to see what settings were used, and I was surprised to see a 1.5-second per-layer cure time and a 45-second bottom exposure time, as opposed to the default 2 second per-layer cure time and 40 second bottom exposure used by the Photon Workshop.
(Image credit: Anycubic)(Image credit: Tom's Hardware)The leveling of the printer wasn’t dead-on for this first print, and you can see the bottom few layers of the cube have been compressed together and formed a ring around the base. Despite this slight compression, the base of the model measured 35.05mm in diameter at various points, which is within the advertised .05mm / 50 micron accuracy of the machine. Printing a lattice structure like this is always an ambitious test for most 3D printers due to the thin walls and lack of support structure, but the Photon Mono X printed the model without any defects or issues.
Preparing Files for Printing with Photon Workshop
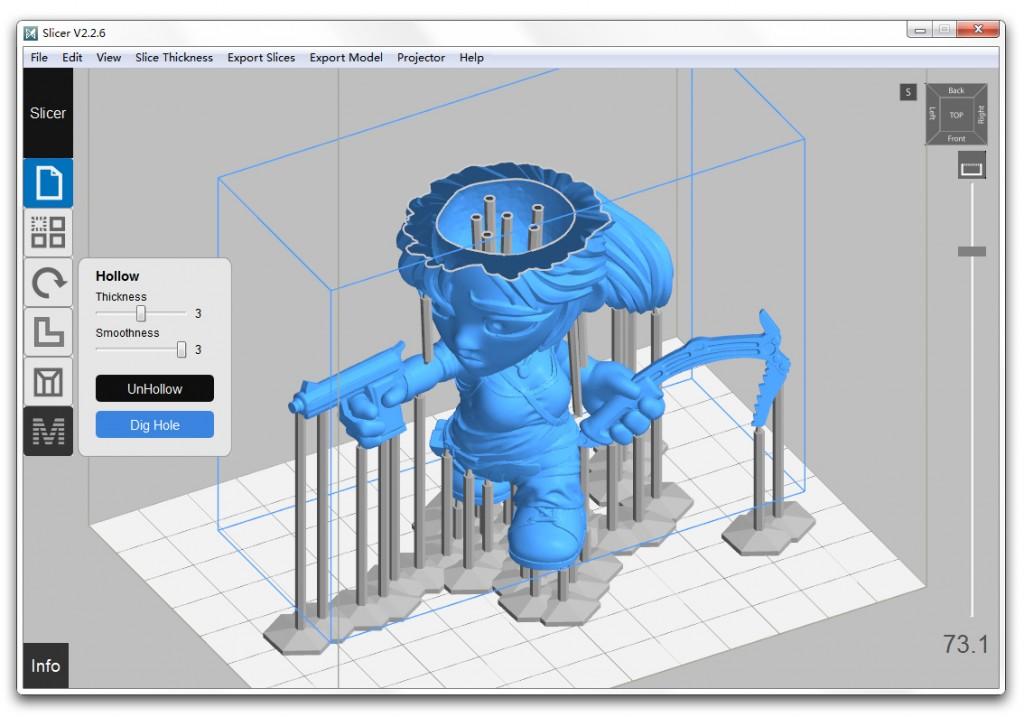
(Image credit: Anycubic)The Anycubic Photon Mono X is compatible with Anycubic’s slicer app, called Photon Workshop. Photon Workshop allows users to import 3D models, hollow them, add support structures, export 3D printable files, and more. Interestingly enough, the USB drive included with the Photon Mono X doesn’t include any software, so I downloaded the latest version (2.1.24) from the Anycubic site . While I appreciate the fact that this would encourage a user to download the latest version of the software, it might be an issue for anyone who is expecting the printer to ship with the software already loaded on the drive.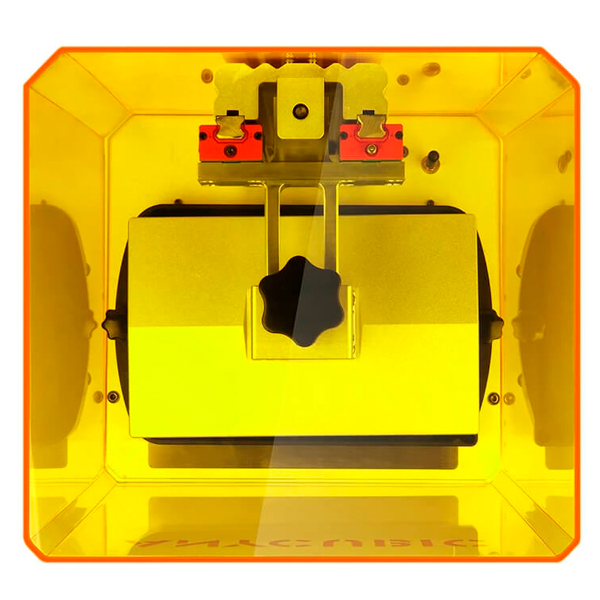
Image 1 of 2
(Image credit: Anycubic)(Image credit: Anycubic)Adding a support structure to a resin 3D print is a critical step, and the overall experience of generating support structures with Photon Workshop left me underwhelmed. Unlike the support structure on an FDM printer where the support keeps the model from collapsing, the support structure on a resin printer keeps the part suspended from the build platform without falling. Resin printers lift the part between layers, so the thicker the cross-section of the part, the more force is required to separate it from the FEP film on the bottom of the vat.
To combat these peel forces, adding a tilt of 45 degrees or so will minimize the cross-sectional width and make a part easier to print. Unfortunately, Photon Workshop doesn’t lift the part after this tilt is added, so models will typically need to be manually raised on the Z axis to add supports underneath the model. This operation is performed automatically in Chitubox, a similar slicing app used by the Elegoo resin 3D printers like the Saturn and the Mars 2 Pro.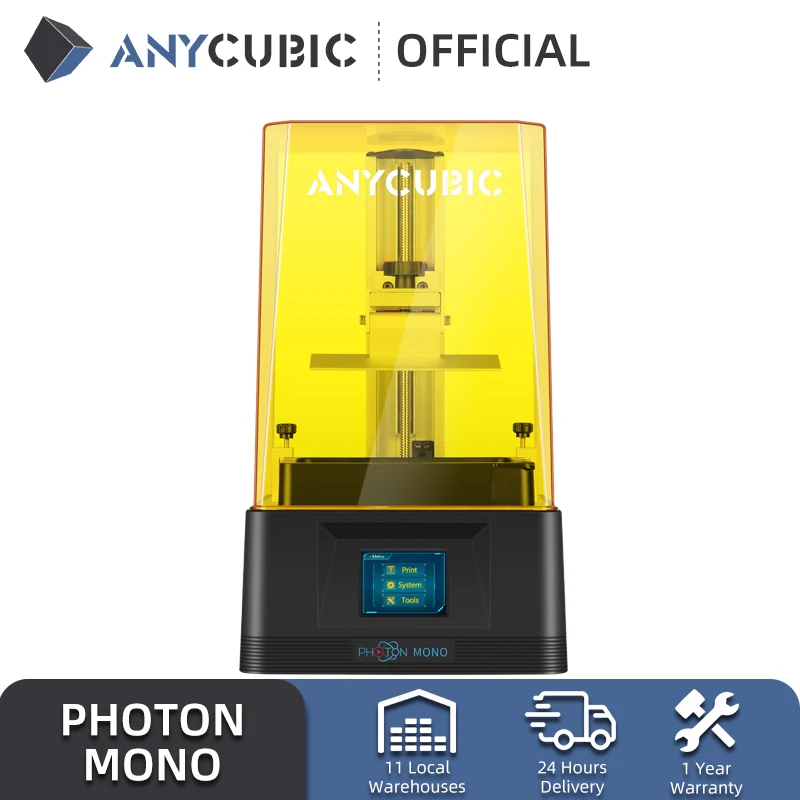 This seems like a small step, but the lack of support generated on those initial layers can be the difference between a successful print and an unsuccessful one.
I used the 32mm miniature Throne 3D model from Loot Studios as a benchmark piece for testing the latest release of Photon Workshop. I’m using the Anycubic Plant-Based Eco Resin , so I selected ‘Plant-Based’ as resin type in Photon Workshop. Changing this setting doesn’t seem to change any print settings and I’m not sure that it makes any impact in the finished print. With a per-layer cure time of 2 seconds and a bottom exposure of 40 seconds for the first 6 layers, the Throne model had an estimated print time of 3 hours and 42 minutes. After exporting the 3D model, I transferred the file via USB and started the print on the Photon Mono X.
Image 1 of 2
(Image credit: Tom's Hardware)(Image credit: Tom's Hardware)The model printed perfectly, and the hybrid automatic/manual support structure held the model firmly to the build platform.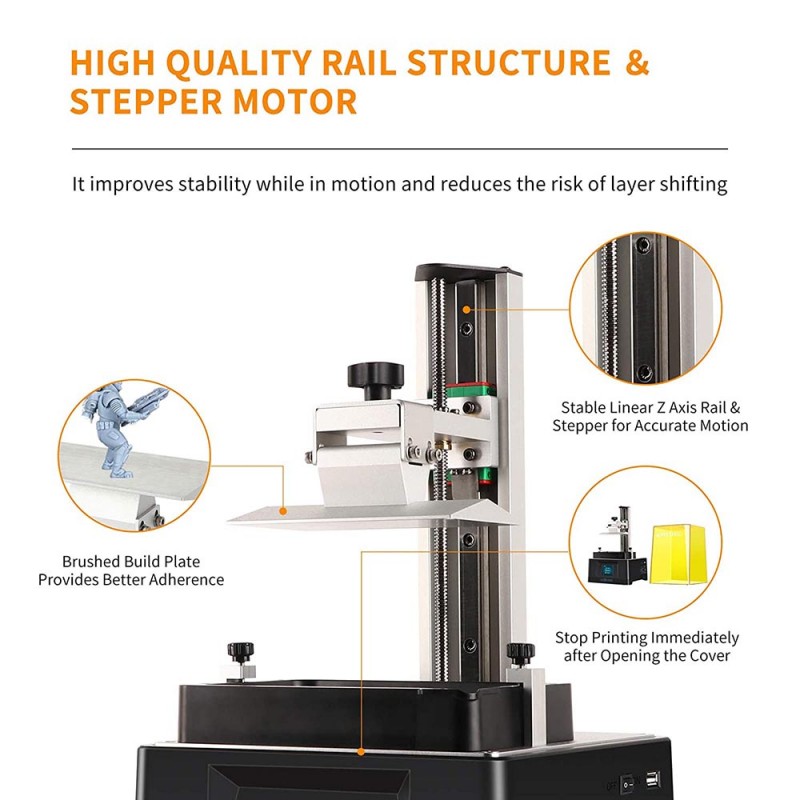 After washing the model using the Anycubic Wash and Cure Plus, I easily removed the support structure and put it back in the Wash and Cure Plus for a cure cycle. Despite the small size of the part, the fine details and thin structures were strong enough to stay attached to the model while the support structure was being removed.
The detail on the model is crisp and in-focus, and the even the fine detail on the fabric of the seat of the throne is easily visible. This level of detail is what I would expect from a printer with an XY accuracy of 50 microns, and it is equivalent to the results I’ve seen from other resin 3D printers with a similarly advertised accuracy.
Washing and Curing Models with Anycubic Wash and Cure Plus
(Image credit: Tom's Hardware)The Anycubic Wash and Cure Plus is an accessory designed to complement the Anycubic Photon Mono X and make post-processing resin 3D prints a clean and easy process. After printing a model on a resin 3D printer, there are three important follow-up steps.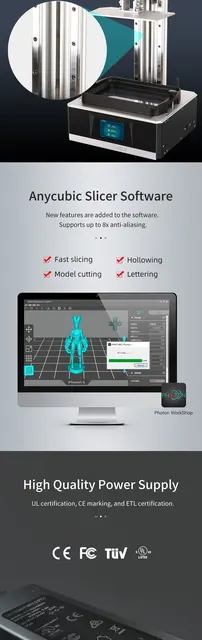 First, the part has to be rinsed of excess resin using an isopropyl alcohol solution. Second, the support structure must be manually removed from the model. Third, the model must be cured in a UV chamber to fully polymerize and solidify the resin. This can be a really messy process, and the Wash and Cure Plus provides a clever solution to this problem. Anycubic sent us the Wash and Cure Plus along with the Photon Mono X, so we could test the full workflow from liquid resin to finished part using these two machines.
After a print is finished on the Photon Mono X, the build platform will lift clear of the vat. This allows you to remove the build platform and clean the part, and also gives any accumulated resin time to drip back into the vat without spilling onto the printer. I printed the bust of Alexandra Uthgrade from Loot Studios, which prints in two pieces and is also hollow to reduce the amount of resin required for printing.
Image 1 of 2
(Image credit: Tom's Hardware)(Image credit: Tom's Hardware)The Wash and Cure Plus uses a plastic basket with a magnetically-driven impeller at the base and a metal basket that safely holds the parts above the impeller.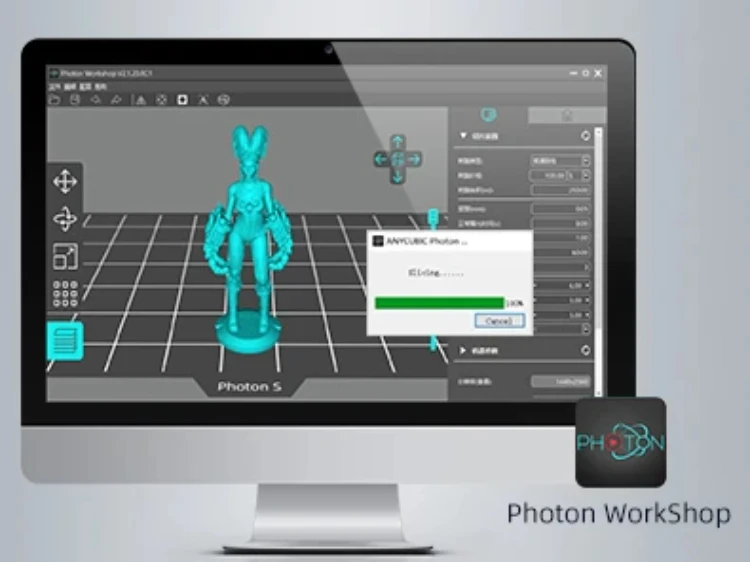 After placing the parts in the basket, I ran the wash cycle for 4 minutes, which created a vortex in the basket and did a thorough job rinsing the excess resin from the part. The magnetic impeller ramps up in speed and changes direction during the wash cycle, so the part is evenly rinsed of excess resin.
Image 1 of 2
(Image credit: Tom's Hardware)(Image credit: Tom's Hardware)The basket can be lifted from the tank without touching the isopropyl alcohol, which is something that I really appreciate Anycubic designing into the machine. After letting the alcohol air-dry from the parts, I removed the support structure from the part by peeling it off. The support structure wasn’t difficult to remove in the semi-cured state, and the alcohol wash got rid of the film of resin on the part.
Image 1 of 2
(Image credit: Tom's Hardware)(Image credit: Tom's Hardware)Once the model has been rinsed and the support structure has been removed, the model needs to be cured before it can be safely handled. The Wash and Cure Plus features a strip of LED lights that fully cure the resin and the very top of the strip can be angled down to cure the top of the model as well as the sides. The Wash and Cure Plus uses a reflector strip underneath the transparent spinning base to cure the underside of the model, which means the model is being cured fully as the plate rotates.
Once the curing process is complete, the model can be painted, sanded, coated, or simply left as-is. The grey color of the Anycubic Plant-Based Eco Resin is a favorite of mine because it shows a lot of detail and contrast without being difficult to photograph. The completed bust looks impressive, with a high amount of detail visible on the armor and even individual hairs visible on the eyebrows.
Printing a Full Build Platform on the Anycubic Photon Mono X
(Image credit: Tom's Hardware)With an 8.9-inch 4K masking LCD, the Anycubic Photon Mono X has a strong advantage when compared to most resin MSLA 3D printers due to the large XY footprint of the machine.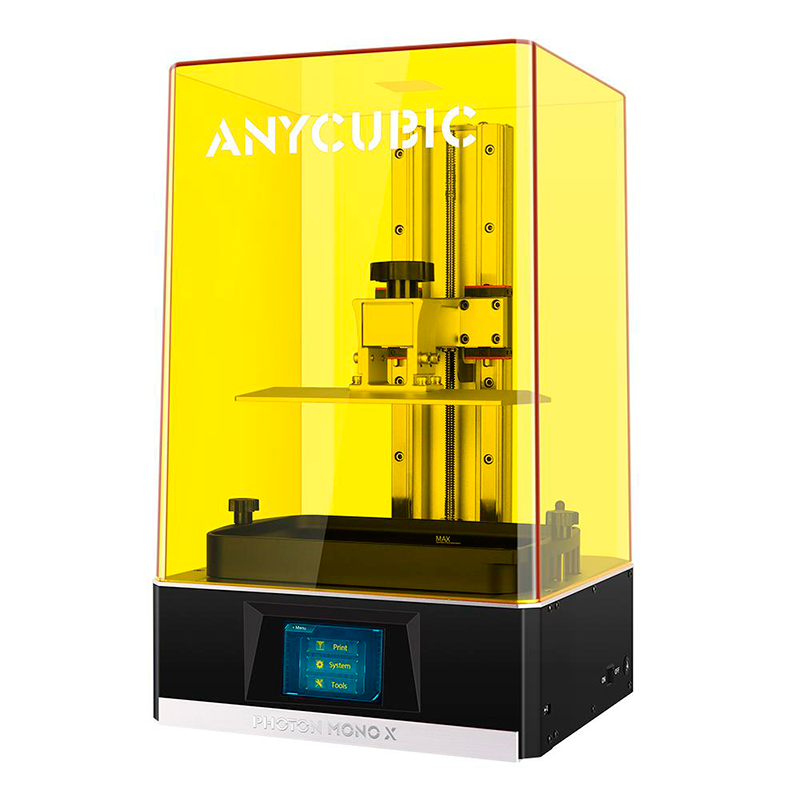 Resin MSLA 3D printers operate by curing a single layer at a time, so for the most part, printing one part or 10 parts takes about the same amount of time. The large build volume of the Photon Mono X is ideal for printing multiple parts, so I printed 11 parts simultaneously to test out the throughput of the machine.
Photon Workshop easily handled all 11 models and didn’t slow down during slicing, despite the ~20 MB file size per part. Photon Workshop gave an accurate estimate of 3 hours and 26 minutes to print all of these models simultaneously. This type of throughput is beneficial for anyone printing large quantities of parts. The Photon Mono X is capable of making lots of small parts in a short period of time, especially when compared with an FDM 3D printer like the Elegoo Neptune 2 which has a print time that is tied to the amount of material usage (doubling the number of parts roughly doubles the amount of time).
Image 1 of 2
(Image credit: Tom's Hardware)(Image credit: Tom's Hardware)Another benefit of using a post-processing station like the Anycubic Wash and Cure Plus is that the parts can be processed as a batch. I put all of these parts in the wash basket of the Wash and Cure Plus and rinsed them as a single batch, which offered substantial time savings when compared with rinsing each model individually. After removing the support structure, the parts could also be cured in a single batch, which again reduces the overall amount of time from liquid resin to finished part.
Image 1 of 2
(Image credit: Tom's Hardware)(Image credit: Tom's Hardware)Printing 32mm miniatures can be a challenge due to the amount of detail present on the models and the difficulty in removing the support material typically present. For instance, one of the models had a shovel on his back, which had a handle that was about the same thickness as a column of support. The Anycubic Plant-Based Eco Resin separated easily from the model and I didn’t have any issues with the models being too brittle or breaking during printing. There are some small marks left on the model from the support removal process, but they didn’t seem to be any better or worse than similar marks left on models printed by the Elegoo Saturn.
Comparison of the Anycubic Photon Mono X vs. Elegoo Saturn
Image 1 of 2
(Image credit: Tom's Hardware)(Image credit: Tom's Hardware)The Anycubic Photon Mono X shares enough similar features and specs with the Elegoo Saturn to make the two machines direct competitors, so it’s worth examining the two machines side-by-side. The Photon Mono X has a much larger overall build volume than the Saturn, but it’s also a physically larger machine which will take up more space on a desk or table.
Swipe to scroll horizontally
| Anycubic Photon Mono X | Elegoo Saturn | |
|---|---|---|
| Masking LCD Resolution | 3840 x 2400 | 3840 x 2400 |
| XY Resolution | .05mm | .05mm |
| Build Dimensions | 7.55 x 4.72 x 9.84 inches | 7.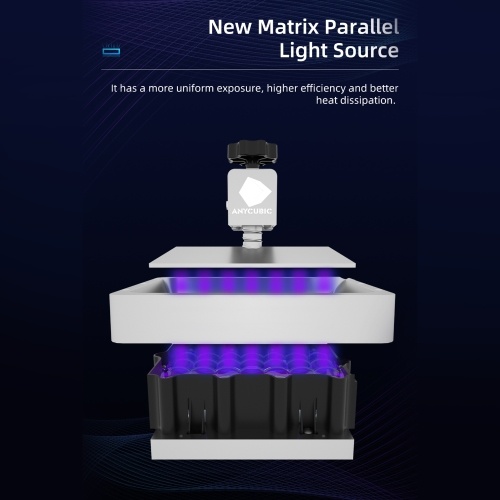 55 x 4.72 x 7.87 inches 55 x 4.72 x 7.87 inches |
| Build Volume | 350.66 cubic inches | 280.46 cubic inches |
| Printer Dimensions | 10.63 x 11.42 x 18.7 inches | 11.02 x 9.44 x 17.55 inches |
| Printer Volume | 2270.08 cubic inches | 1825.71 cubic inches |
| Build / Footprint Ratio (higher is better) | 15.40% | 15.40% |
The specs of these two printers are similar, but the numbers don’t tell the entire story. While the Elegoo Saturn uses a ball and socket leveling process for the build platform which is easier to use, the scarce availability of this machine means that it will take some luck to find for sale at the standard retail price of $499. The additional two inches of Z height on the Photon Mono X could also be a make-or-break feature for anyone interested in printing long or tall parts in a single piece.
The Photon Mono X is currently available for $529 directly from Anycubic or $599 with free shipping from Amazon . This price point and feature set is directly comparable to the Elegoo Saturn, which has a smaller build volume but similar XY resolution and per-layer cure times. The Saturn has a reputation for being difficult to find and is frequently sold out (it’s currently sold out on Amazon as of the writing of this review), so the availability of the Photon Mono X as well as the extended Z height make it an appealing option in the sub-$600 price range.
The large build volume of the Anycubic Photon Mono X makes it an easy decision for anyone interested in a high-throughput 3D printer or just a machine that is capable of making large parts in a single print. If you’re more interested in ultra-high resolution for making miniatures and a large build volume isn’t important, the Phrozen Sonic Mini 4K uses similar technology but offers higher resolution.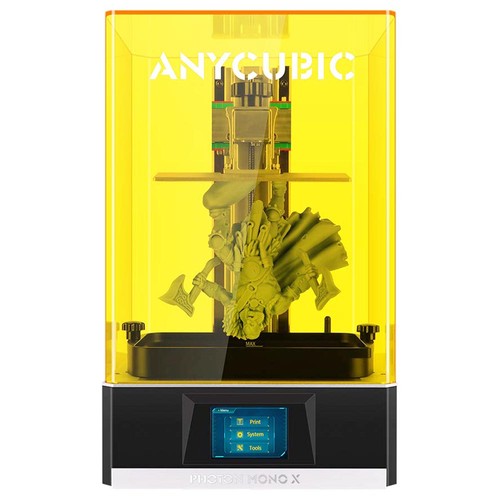
Andrew Sink first used a 3D printer in 2012, and has been enthusiastically involved in the 3D printing industry ever since. Having printed everything from a scan of his own brain to a peanut butter and jelly sandwich, he continues to dive ever more deeply into the endless applications of additive technology. He is always working on new experiments, designs, and reviews and sharing his results on Tom's Hardware, YouTube, and more.
Compatible Resin for Anycubic Photon
Series On September 2, 2020, Anycubic celebrated its 5th anniversary with new printers. Along with their offering in FDM printers, Anycubic has also launched a new line of LCD/MSLA printers. These printers are successors to the successful Anycubic Photon. With the release of these new printers, Anycubic is expanding its offering with faster, larger 3D printers, meeting an important need in today's resin printing market. The new printers are called: Anycubic Photon Mono SE, Anycubic Photon Mono and Anycubic Photon Mono X.
Original image: All3DP.com , Anycubic Photon Mono vs Mono SE vs Mono X: Differences.
What are the differences between these Anycubic Photon resin 3D printers?
There are many differences between Anycubic 3D printer offerings. The Regular Photon is probably being sold out and being replaced by new machines. Compared to Photon, all Photon mono printers have a monochrome screen, making them two to four times faster. Obvious differences in build platform size can be noticed immediately. The big difference between the Mono and Mono SE will be the power of the LED and the Z-axis guide. A single Z-axis guide is used in many entry-level printers and can cause Z-axis fluctuation or inaccuracies over time. With the change to a dual Z-track, the Mono SE and Mono X increase quality.
| Photon | Mono | Mono SE | Mono X | |
| Price * | $274 | $269 | $419 | $759 |
| Platform size (XYZ mm) | 115*65*155 | 130*80*165 | 130*78*160 | 192*120*245 |
| Monochrome | No | Yes | Yes | Yes |
| Print speed | Slow down | Quick | Quick | Quick |
| third party resins | Yes | Yes | Yes | Yes |
| Wave length | 405 nm | 405 nm | 405 nm | 405 nm |
| Power indicator | 40 W | 45 W | 55 W | 120 W |
| Z guide | One | One | double | double |
source: Anycubic .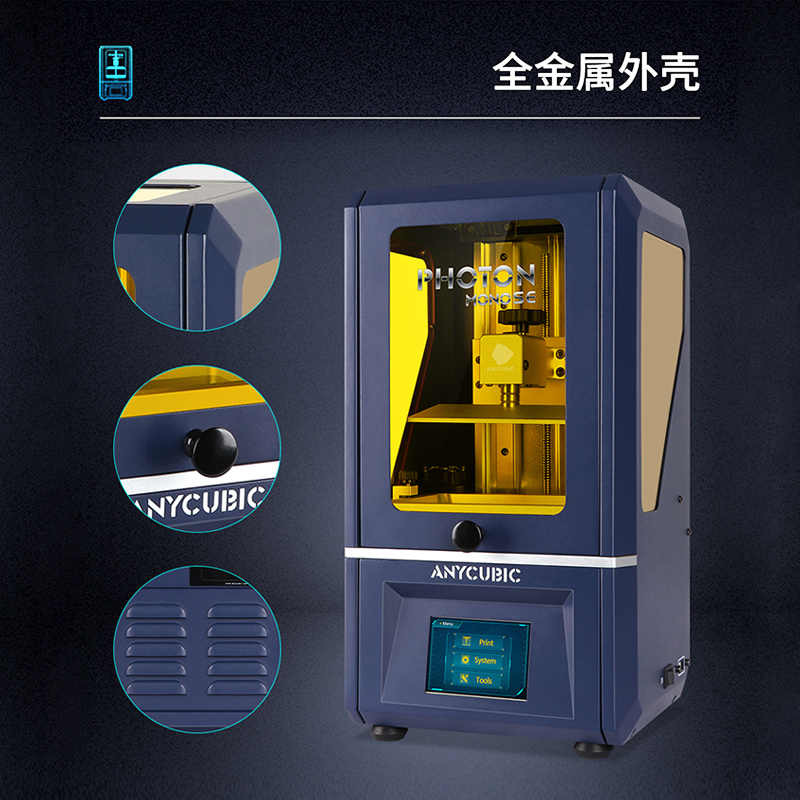 Official prices from Anycubic website in December 2020, price may change over time or in your country.
How do I choose the best resin 3D printer for my application?
Selecting a printer for your application depends on your needs and budget. If your budget is low, the entry-level $99 Photon Zero might be your best bet. A slightly higher budget might make it possible to go for the Anycubic Mono. Looking at the specs and actually testing both printers, the best buy for your money would be the Mono SE if you need a small platform size or the Mono X if you want to print large parts. When buying a new LCD / MSLA printer, we always advise buying a printer with a monochromatic screen. Immediately after longer life and shorter exposure time, our engineering grade 3D printing resins will be much easier to process. For example, on a regular RGB Strong-X LCD screen, it will take approximately 25 seconds of exposure for 0.05 mm thick layers, while this time is reduced to 5 seconds on the Anycubic Photon Mono X.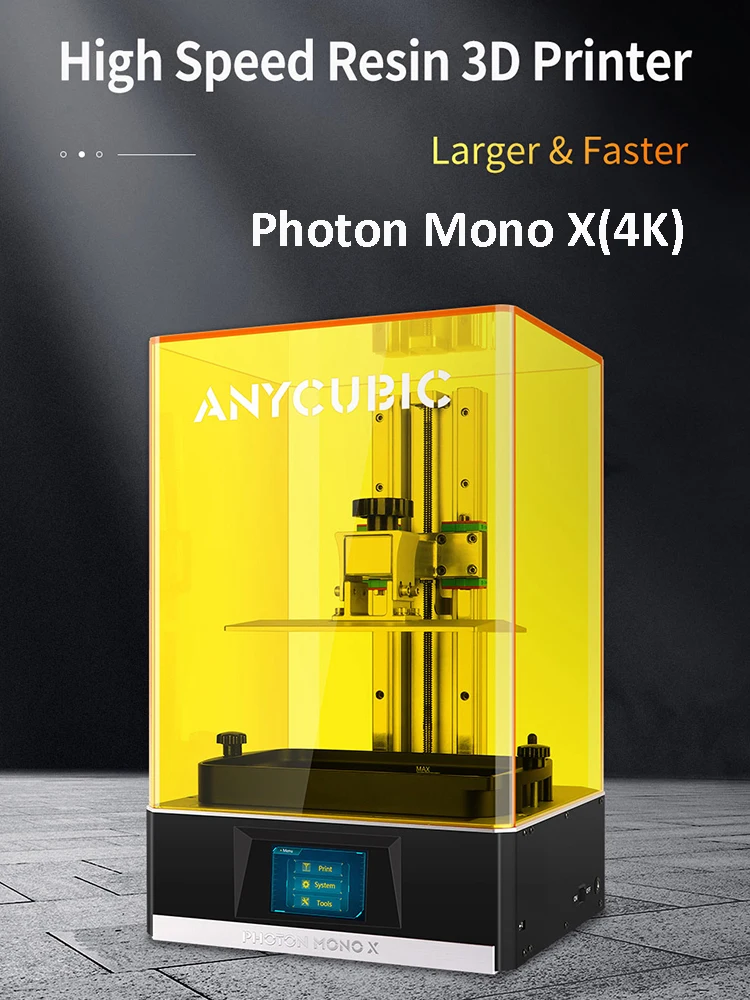
What other printers are available in the entry level MSLA LCD 3D printer field?
In recent years, many entry-level 3D printers have entered the resin printing market. There are so many brands that it is impossible to list them all. The top three competitors of Anycubic are Phrozen3D, Elegoo and EPAX3D.
Phrozen3D entered the resin 3D printing market long before Anycubic and recently launched more affordable and competitive printers with its Sonic line of 3D printers. The Phrozen Sonic Mini & Mini4K is an entry-level printer with the same specs as the Photon Mono, while its Phrozen Sonic Mighty 4K competes with the Photon Mono X.
Elegoo is more or less always a step behind Anycubic with earlier products like Mars (competing with the original Photon) and Mars Pro 2. Mars Pro 2 is comparable to the Photon Mono, with its 2K Monochrome LCD screen and one z-axis rail The Elegoo Saturn, competing with the Anycubic Photon Mono X, has just been released and is slightly cheaper.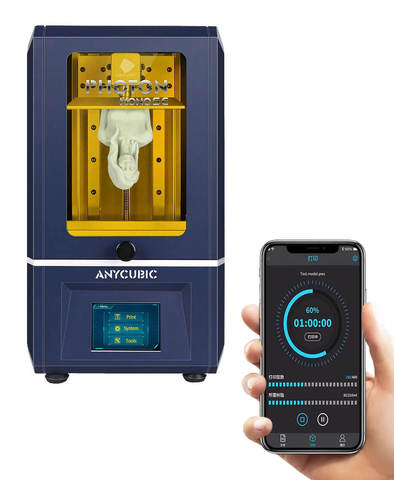
EPAX3D already offered high quality MSLA printers at slightly higher prices than the Photon series. These printers have been made from high quality materials and are more durable. Not too long ago, EPAX3D also offers the cheaper E10 printer, competing with all the printers mentioned above.
How to work with Liqcreate resins on these Anycubic Photon resin 3D printers?
At Liqcreate we try to run our resins on as many 3D printers as possible. Our engineers are working to ensure that all of our resins run smoothly as normal. Photon, Mono X, Mono SE and Mono. For more information about 3D printing options/settings on your printer, please visit our Chestny ZNAK website or send an email to [email protected]
More tips and tricks for working with Mono X.
At the time of writing - December 2020 - we have had a lot of experience with regular Photon and Mono X in our lab for about a month to optimize all of our Liqcreate resins. Mono and Mono SE have just arrived, so if you need information about it, send us an email at info@liqcreate.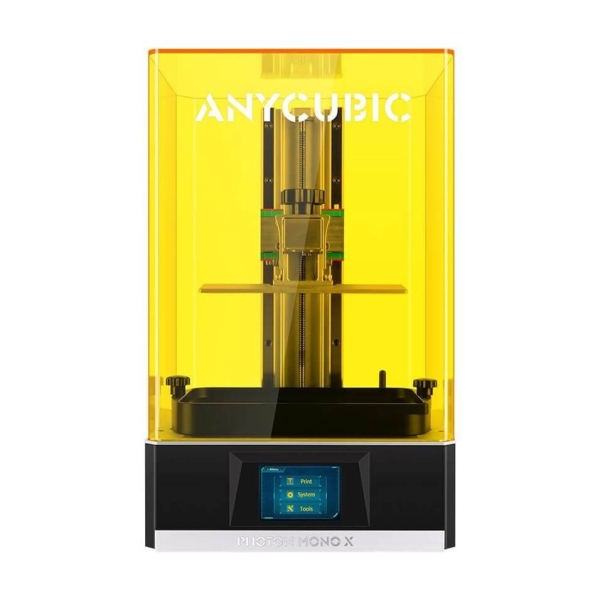 com. Right next to the settings link, it's good to know that the LCD does not have a protective screen, if there are any punctures in your resin tank or leak in some other way, you will have to replace the screen (partially). Be extra careful with this or place an extra protective clear plastic sheet under it. While our engineering resins perform well at 100% UV power, some of the more reactive resins can be co-cured. We are still optimizing resins, however our premium resins seem to perform best at 40-80% power. This / will be mentioned in the settings link above. The Mono X facebook page is a very helpful place if you are new to this machine or to resin 3D printing in general.
The Liqcreate team wishes you happy printing. If you have any questions or comments, feel free to contact us at [email protected] at any time.
Anycubic Mono X. Honest review after 2 months of stress testing.
Reviews
Follow author
Subscribe
Don't want
8
Good day to all.
In general, I will try to be short and to the point. This is already the 3rd printer from Anicubic (namely LCD), and in my opinion the 5th, in principle, from this company. I wrote only about Anycubic mega zero 2.0 and about Mono. I also had photon S and 4 max 2nd, but about it in the following articles. At the moment, I give my preference to this particular company, because after the last creality that came to me, which was defective and has already been dead weight for 4 months, I looked in the direction of this particular office and so far I am more than satisfied , but with Mono x, I was again a little disappointed ...
The price of Anycubic mono X on Ali is a little less than 46t.r. which is about $615. This printer was taken for workers needed, specifically small-scale production of figurines with further processing and painting. In my case, these figures consist of two parts. 7 pieces of one part per run and 9 pieces of the other part, again per run, fit on the platform, which generally suited me. Speaking of TX Mono X:
1. Machine dimensions 270x290x475
2. Dimensions of the printed area 192x120x245
3. Weight 11kg
4. Display 8.9 inches with a resolution of 3840x2400 (type 4k, the dot width is larger than the standard)
5. Wi-fi connectivity 6. Axis
z form two rails + screw
By and large, there is nothing more interesting in tx. Perhaps a couple of photos
The first week I was just crazy about the size. After small printers of course the size is staggering. But after a couple of weeks, it already seems small enough in the home workshop. The set is essentially classic. Resin is not included. Everything is packed perfectly and securely. Everything was just as well assembled out of the box and smeared, so to speak, "from the heart". I didn’t take a picture of the backlight, I’ll have to trust it) The backlight is uniform.
Let's run through the print examples:
The article this time turned out to be very crumpled, but I'm writing it more for future owners based on my experience of using it.
Actually pluses:
1. Patient Press area
2. Average time per layer - 2 seconds
3. accessory (almost all, but more on that in the conclusions)
5. Possibility of standard replacement of the film, rather than buying a "module"
6. Convenient platform adjustment at a time
disadvantages:
1. A terrible cap
2. Disgusting stock film
3. Lack of complete resin
4. Through the Wi-FI (this killed by the way)
5. Platform on which the resin remains
6. Screws clamping the tub
Conclusions in free form: I will say it as it is. The pros and cons are subjective in my opinion. The printer is excellent and has already worked out most of its cost, but I will separately go through the cons, since the pros are already obvious. The cap is, comrades, not for me. I have a home workshop, where there is very little space. And often it was necessary to look for a place to put it away somewhere while you were working with the machine. The stock film has worn down and turned matte in these three months. The printer prints with rare breaks of a couple of days, but this is still quite a quick wear and tear, and the price of Fep films is not conducive to buying them every month. And again. Spare parts were not included. For the resin. To the printer for almost 50 thousand, it would be possible to put at least a half-liter jar. Protruding antenna, seriously??? Budget printers are equipped with an internal module that is not visible. What the fuck is this?
And about the platform...
That's not enough that remains. In the process of use, it also dries up and then you will peel it off. And after each print, wash everything - there will not be enough alcohol. And with the screws such a story. Once falling into the resin - they begin to corrode and this is not treated with anything.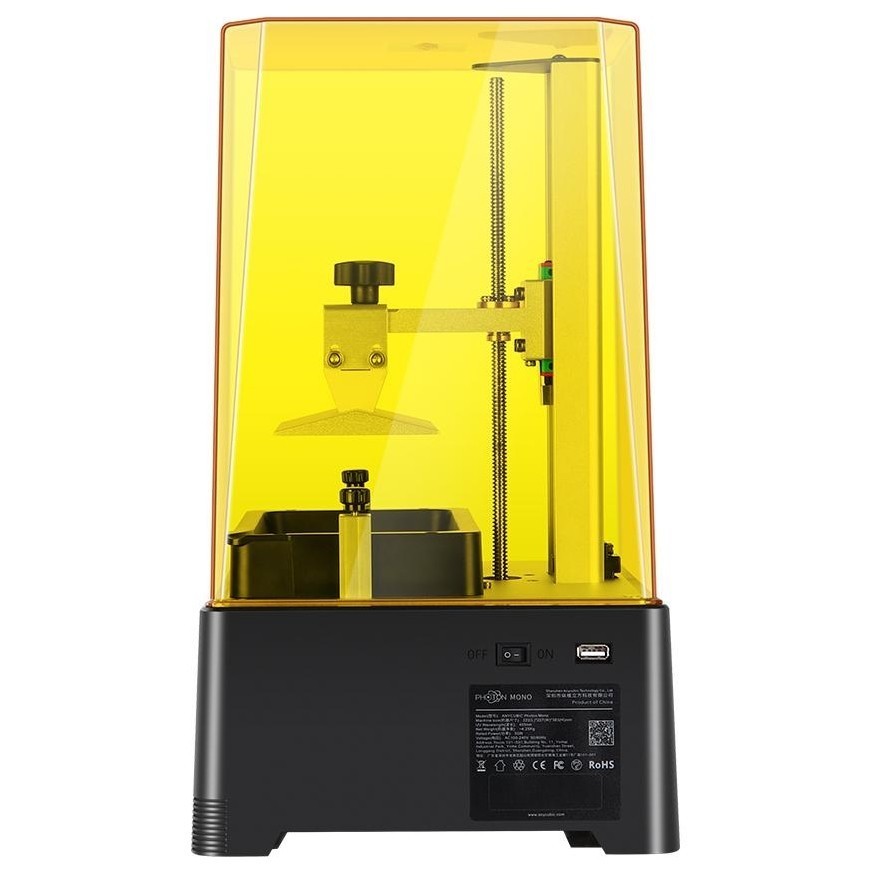 Besides. The thread for these screws is so good that at the slightest hit of small dirt, look for M6 taps, because the screws will not turn otherwise.
But even based on all the above pluses and minuses, I want to say: The printer is great! Decent workmanship, excellent components, good print quality. One word - Anycubic beauties. I am ready to forgive these disadvantages and, in fact, forget about them, since they are not critical. And from the point of view of commerce, he has already shown himself with a bang and I hope that he will not have to look for a replacement for the next year or two. In general, I strongly recommend to buy.
Thank you for your attention, good printing and stay healthy)
Even more interesting articles
Argond
Loading
24.10.2022
2114
26
Subscribe to the author
Subscribe
Don't want
I present a review of a self-made FDM printer of my own design, similar to one of the classic .