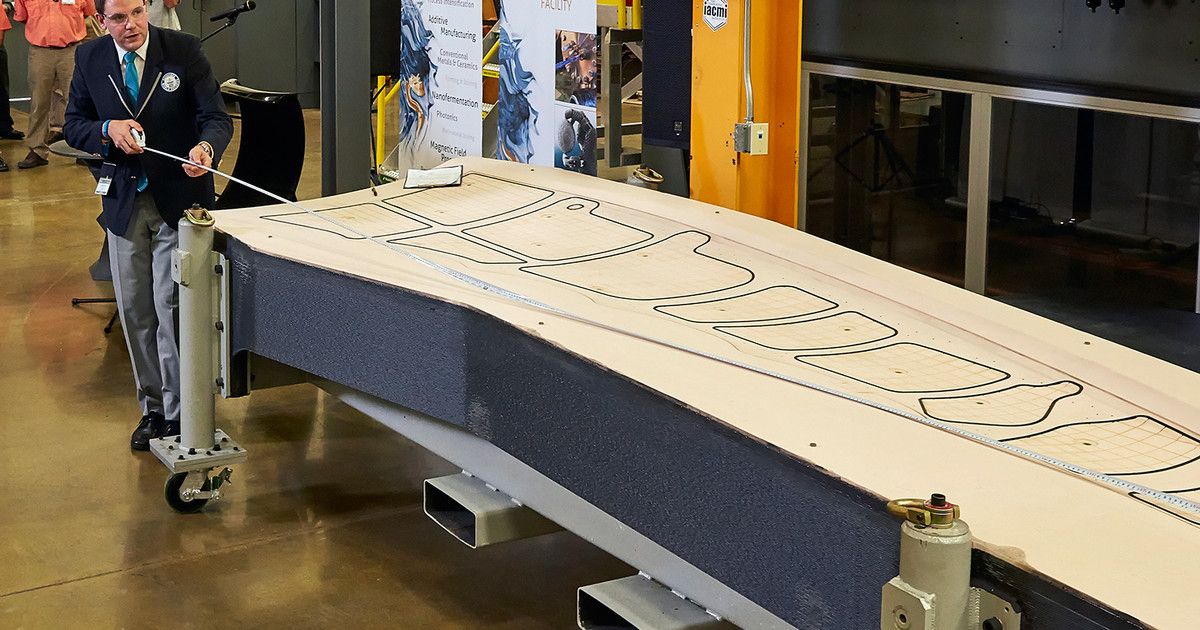
Lack table 3d printer enclosure
How to build a simple, cheap enclosure for your 3D printer
Maybe you have already seen some of those fancy enclosures people build for their printers. How do they work? And do they work? Today, we will shed some light on this matter! Plus, we are going to dive into patent wars and explain why not all printers come with an enclosure. To top things off, we will even give you a full guide with information on how to build an enclosure for your own printer. But first, let’s start with the fundamental question: what is it good for?
- Stable printing environment – Drafts can negatively impact your print. An enclosure will keep the temperature stable and high. Big differences in ambient and printing temperatures can lead to warping and shrinking of the printed object, especially when printing with ABS. Layer adhesion may also improve with higher ambient temps.
- Reduce and contain smell – Some filaments (looking at you, ABS!) can release unpleasant fumes during printing.
An enclosure will contain these fumes, and you can quickly vent them outside through an open window when the print finishes.
- Noise reduction – As if you needed the MK3 to be any quieter 🙂 But another level of sound isolation can’t hurt, especially if you place the enclosure next to your work desk or in a living room.
- Dust collection – The bearings and smooth rods will appreciate the reduced amount of dust that settles on your printer.
- It’s fun to build 🙂
However, if you’re not printing with ABS or other high-temperature filaments that suffer from warping, you won’t see much of a difference. You might actually want to keep the enclosure open with, for example, PLA to ensure there’s enough cool air around the printer for the part cooling fan.
Enclosure for the MMU2S
If you own the MMU2S, we created a modified version of the enclosure – check it out here.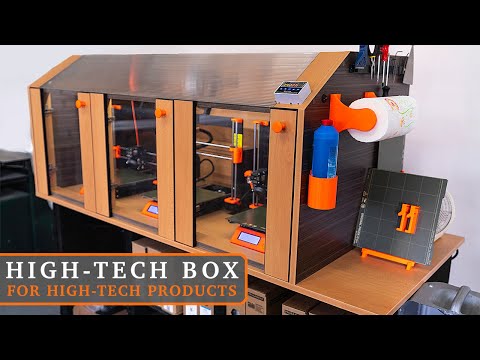
Why aren’t all the printers on the market enclosed by default?
There are two factors here – price and patents. There is no doubt that the rise of consumer 3D printers was delayed by patents. Companies like Stratasys, Zcorp or 3D Systems have patented nearly every 3D printing technology you can think of. It’s pretty crazy when you look at the sketches from 1980s-1990s and realize just how much some of the current 3D printers are similar to them.
It was only after these key patents expired in 2009 (20 years after application) that the RepRap movement started. And cheap, easy-to-build 3D printers quickly started to be developed. Even though most of these basic patents have already expired, some of them (most importantly the ones owned by Stratasys) are either still active, or have just recently expired. For example, Stratasys’s (still active) patent describes an apparatus “That builds up three-dimensional objects in a heated build chamber” (…) “The motion control components of the apparatus are external to and thermally isolated from the build chamber.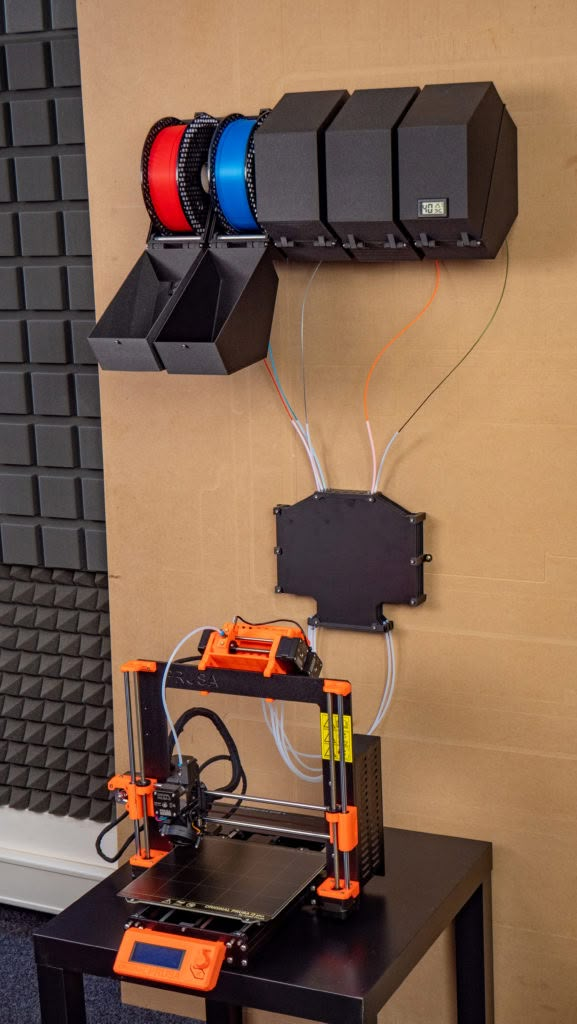 ” That means if you put the stepper motors outside of an enclosure, you can’t sell the product, as it would violate the patent.
Another obstacle is the price. We have considered and even developed a Prusa enclosure quite a while ago. It was made mostly of Plexiglass. Our target was $90 price tag and considering the packing, shipping and material cost, we just couldn’t make it work. It makes much more sense to build the enclosure yourself from locally sourced materials.
How hot should the enclosure be and can the PSU stay inside?
Let’s get something straight, we are not targeting really high temperatures inside the enclosure.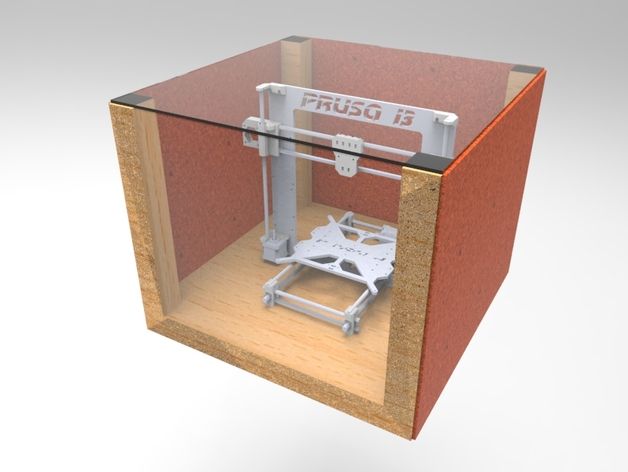 You don’t need an extra heater. The printer itself produces a lot of heat and all you have to do is to not let it escape. The goal is to achieve stable temperatures without any sudden changes from wind or draught. Even just 35°C inside the enclosure will make a massive difference, increase layer adhesion and may prevent ABS from warping.
The PSU is not made to work in extremely hot environments. By keeping the PSU in temperatures above 40-50°C can significantly shorten its lifespan. Ideally, you’d place the PSU outside the enclosure. You can even place the LCD outside to be able to control the printer without letting the hot air out.
2 simple enclosures
Photo studio tent – no work required at all
An enclosure can often be created from an object originally made for a completely different purpose. This photo (80×80) tent can be bought on eBay or Aliexpress for about $15-20. And all you have to do is place the printer inside the tent.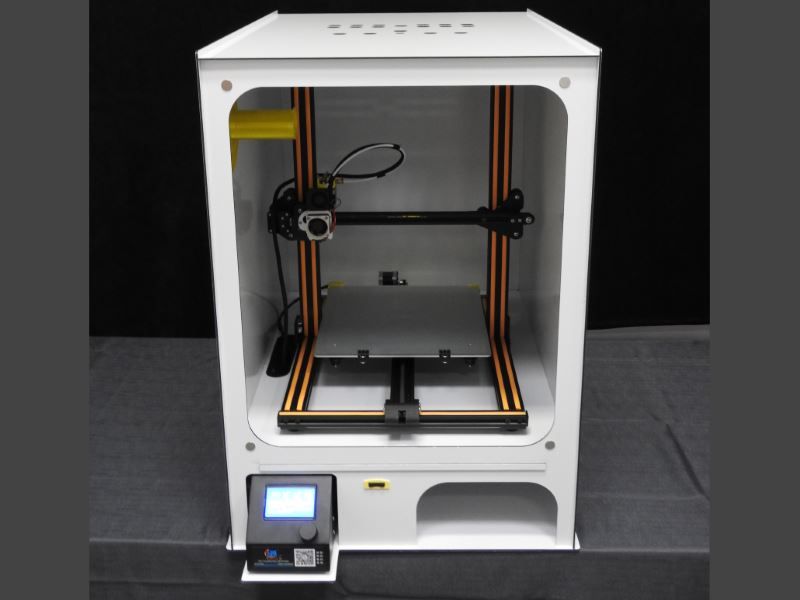 It’s made of textile material, which means it’s porous. A textile enclosure won’t let you reach crazy high temperatures, so you can even keep the PSU inside. We reached temperatures around 38°C after 10 minutes of printing inside a room with the ambient temp. of 26°C – that’s a significant improvement. And as a bonus, you have a photo tent for your prints 🙂
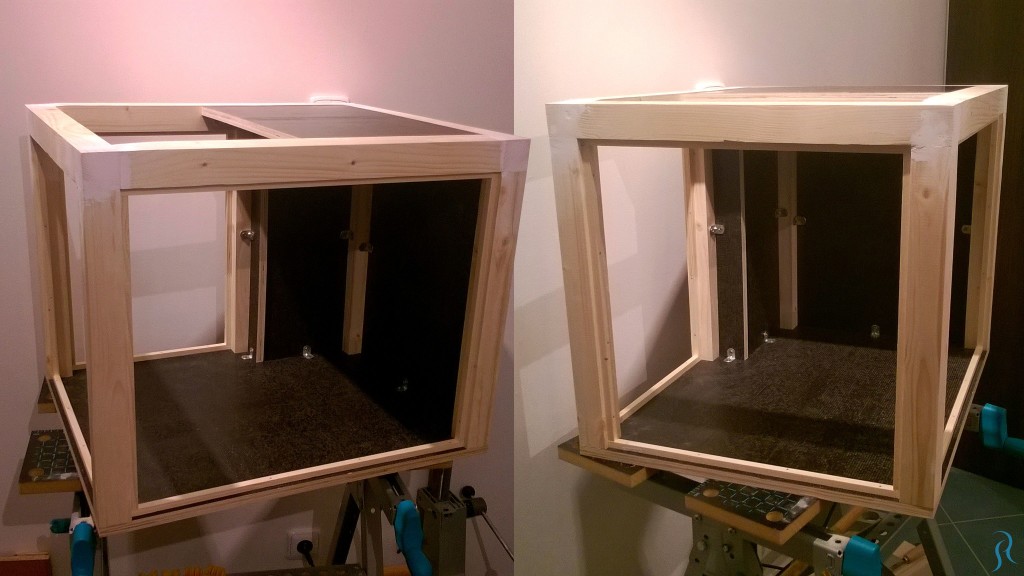
Ikea Lack – when you care about looks as well
Using Ikea Lack as an enclosure is the most popular choice among the 3D printing community. If you search online, you’ll find dozens of Ikea Lack enclosure designs. The table can be bought for under $10 and has almost the perfect size for Prusa printers. You can stack the tables on top of each other to create bays for multiple printers, or use one as filament and tools storage. Even though some of the existing enclosure designs are pretty good, we wanted to give it our own spin.
Advantages of our enclosure
- PSU placed outside in a clip-on holder, but easily placed back if you need to move the printer
- LED lighting connected to the printer’s PSU
- Hinges built into corner extensions
- Double-door opening
- Individual tables can be lifted at any time
What you’ll need
Printable parts
Ikea Lack enclosure main parts
Frame brace replacing the PSU for the MK3 (silver PSU)
Frame brace replacing the PSU for the MK3 (black PSU)
Frame brace replacing the PSU for the MK2/S (remix by Martin Schnur)
60 degree heatbed cable cover for the MK3
45 degree heatbed cable cover for the MK2/S
Construction
- 2x or 3x Ikea LACK table
- 4x Neodymium magnets 20mm x 6mm x 2mm
- 3x Plexi 440 x 440 mm, 3mm thick (if you’re in the US, try Queen City Polymers)
- 2x Plexi 220 x 440 mm, 3mm thick
Electronics
- Fire/smoke detector
- Indoor/Outdoor Thermometer
- LED stripe 24V, 30 cm
- 24V for MK3, 12V for MK2/S
- If you want to use a 12V LED strip with the MK3, use a separate power supply.
- Twin cable, 100 cm
- 2x WAGO 221 or similar compact lever connector
Screws
- 12x 6×20 mm (12 x 3/4″)
- 4x 6×50 mm (12 x 2″)
Printed parts
- Upper table (enclosure box)
- Lower table (support table)
- Spool holders
Tools
- Philips screwdriver
- Allen keys
- Super Glue
- Drill + 3 mm wood drill + 10 mm wood drill
- Measuring tape
- Marker
Enclosure (upper table) assembly
Upper corner standoffs installation
Attaching the legs
LED stripe
For about $12, you can buy an LED strip with a power supply, like this one. However, if you’re feeling a bit adventurous and have some experience with wiring up electronics, you can power the LEDs directly from the printers power supply. Remember, that the MK3 runs on 24V, whereas MK2/S runs on 12V, so make sure you buy the correct LEDs.
Spool holders
Smoke detector installation
Place the smoke detector in the rear part of the table so it will not obstruct filament insertion or won’t get in the way when you’re taking the printer out from the box.
Bottom corner standoffs installation
Before you start screwing the bottom standoffs, make sure you place the Plexiglass in first. As soon as you tighten the standoffs, the Plexiglass will be fixed in place, and you won’t be able to remove it. This means you can easily lift this section of the enclosure without worrying that the glass would fall out. Note, that one of the four standoffs has a hole for cable pass-through. Make sure you place this standoff on the left side so that the cables can be routed directly to the EINSY board.
Support table (lower table) assembly
PSU holder
Electronics do not thrive in higher temperatures inside the enclosure. To preserve PSU in good condition, it’s better to place it out of the box. It is even safer!
- Unplug the printer from the power socket. Remove zip ties on the frame to release PSU cables. (Tighten the rest of the cables with new zip ties.)
- Disconnect the cables from the EINSY board. Do not forget to unplug the Power panic sensor as well.
- Unscrew the PSU form the frame.
- Hold the PSU next to the rear left leg (the one with the cable pass-through). Tighten the PSU holder printed part with two screws and then install PSU catcher printed part.
- PSU is now fixed, but it is possible to slide it out when you need it.
- You can replace the PSU on the frame with this printed part to ensure the rigidity of the frame.
Frame brace and right-angle cable cover
After removing the power supply from the frame, it’s possible to replace it with a printed part and ensure frame stiffness. The heatbed cables may hit the plexiglass in the back of the enclosure. To prevent this from happening, print an alternative 60 degree heatbed cable cover. (EDIT: Users reported several problems with the right angle one shown in the video and on the pictures below, so we switched the suggestion to the 60 degree one).
Plugs fixing and magnetic handles
Fix the four bottom plugs. One of them has a hole for cable pass-through. Place it in the rear left corner of the enclosure. Glue two magnets to the door stopper and screw it to the front of the table. Leave enough space for the plexiglass and the handles (1 cm).
Finished enclosure
Now just stack the two tables on top of each other and the enclosure is complete. Optionally, you can add another Ikea Lack table to the bottom to raise the printer to a more comfortable height.
Universal 3D Printer Enclosure Ikea Lack Table Compatible
Ikea Lack Table Universal 3D printer enclosure
Our exclusive Lack Table compatible enclosure is perfect for fitting a variety of printers that can fit with a 21. 5 inch footprint. We de3signed this to attach onto the top of the ever popular Ikea lack table. Our enclosures area easy to assemble, affective in use, and carry a premium look to give your 3D printing station a professional look. Clearview's "infinity" 3D printer enclosure platform is an easy to setup kit that only needs a screwdriver to assemble. This works with a variety of 3D printers and is Ideal for SLA resin printers.
Our kit comes complete so you get a complete solution Other solutions always seem to be partial solutions that have confusing Bill of materials or incomplete instructions. We have crafted a super easy to understand design with photographic instructions. Clearview Infinity enclosures are designed to have a clean look, that is easy to assemble, and is easy to mod with your own ideas.
As mentioned, this enclosure fits on the top of a common Ikea Lack table or it can be mounted on top of any other table of similar size or bigger.
Main Features:
PRINTING ENVIRONMENT - A dustless, self heated chamber for better printer performance.
SIMPLE ASSEMBLY - Screw together design that assembles in minutes.
PSU Mount - Use the existing PSU relocation bracket provided by Prusa's guide here: https://blog.prusaprinters.org/cheap-simple-3d-printer-enclosure_7785/
ACCESS DOOR - A generously sized, hinged door with 3D printed magnetic door stops.
FILIMENT PORT - A wide filament feed through port for optimal performance.
CABLE MANAGEMENT - A wide rubber grommet allows wiring to pass through neatly.
STACKABLE DESIGN - Stack 2 or 3 enclosures high to give your print farm a great look.
Each print enclosure is designed and built in house in Sacramento California by people that understand 3D printing and are skilled to make your printing experience great.
We have set up a few buying options to fit your needs:
1 - Enclosure kit - Includes all the parts you need to setup your enclosure including hardware, printed parts, magnets, and commercial grade acrylic panels.
2 - Enclosure kit with Feet - Includes the enclosure kit above plus a set of 4 vibration dampening feet we developed to help dissipate vibrations that travel through floors and walls.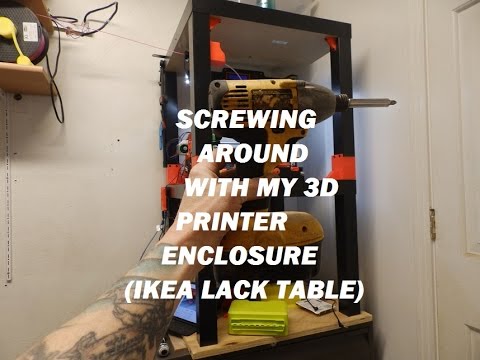
3 - Enclosure kit with Carbon Filter - Our carbon activated air filter is nearly silent, air scrubbing filter that reduces fumes and smells from printing in doors for those in sensitive environments.
4 - Panels+Hardware+STL: This option is great if you want to print in your own colorway. We'll send you the panels and hardware (screws + magnets) and STL file for you to print the parts.
More About the Clearview Infinity
Our main objective was to give your printer an unobstructed view from any angle. At the same time, our enclosures offer easy access with a magnetically latched front door and a cable port to route all your connections. Last, there is a fitted port for your power supply unit to use cool exterior air. This extends the longevity of your printer.
We also have adapted options for our Carbon Air Scrubbing filter and vibration dampening feet. Both do as they suggest. The Carbon Air Scrubbing Filter uses a silent fan to pass air through a carbon filter to reduce fumes created from the 3D printing process.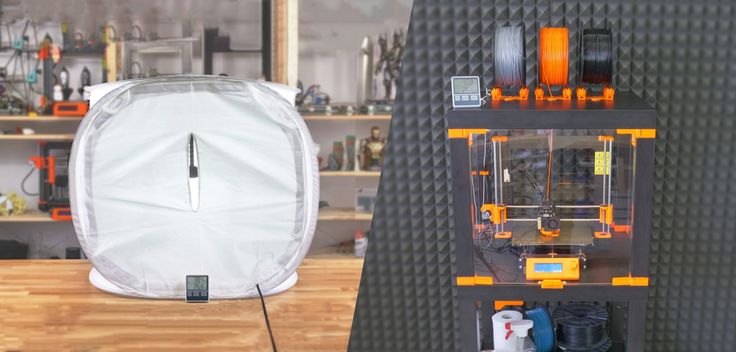 Especially if you are printing ABS, you will want to include that option. Our Vibration Dampening Feet use a multi material lamination that dissipates vibrations at 5 different levels. If you are printing in an area where printing noise needs to be reduced, this is an essential addition to your 3D printing setup.
If you are looking for the Panels only we have set up an option for the panels only. We will supply you with a printable STL file for the parts when your order is submitted. That way you can pick the color you wish.
✅ XL SIZE - 21.5" wide x 21.5" Tall x 23.5" Depth to fit a Prusa i3, Prusa mini, Ender 3, Ender Pro, Ender 3 V2, and many SLA printers. Need an enclosure for a different printer? No problem! we can customize!
✅ Standard Duty or Commercial Grade - Standard duty uses 1/8" thick panels and is ideal for a light weight economical enclosures. Commercial Grade uses heavy duty 1/4" thick panels on all sides, is strong enough to be stackable, and feels like a professional piece of lab equipment.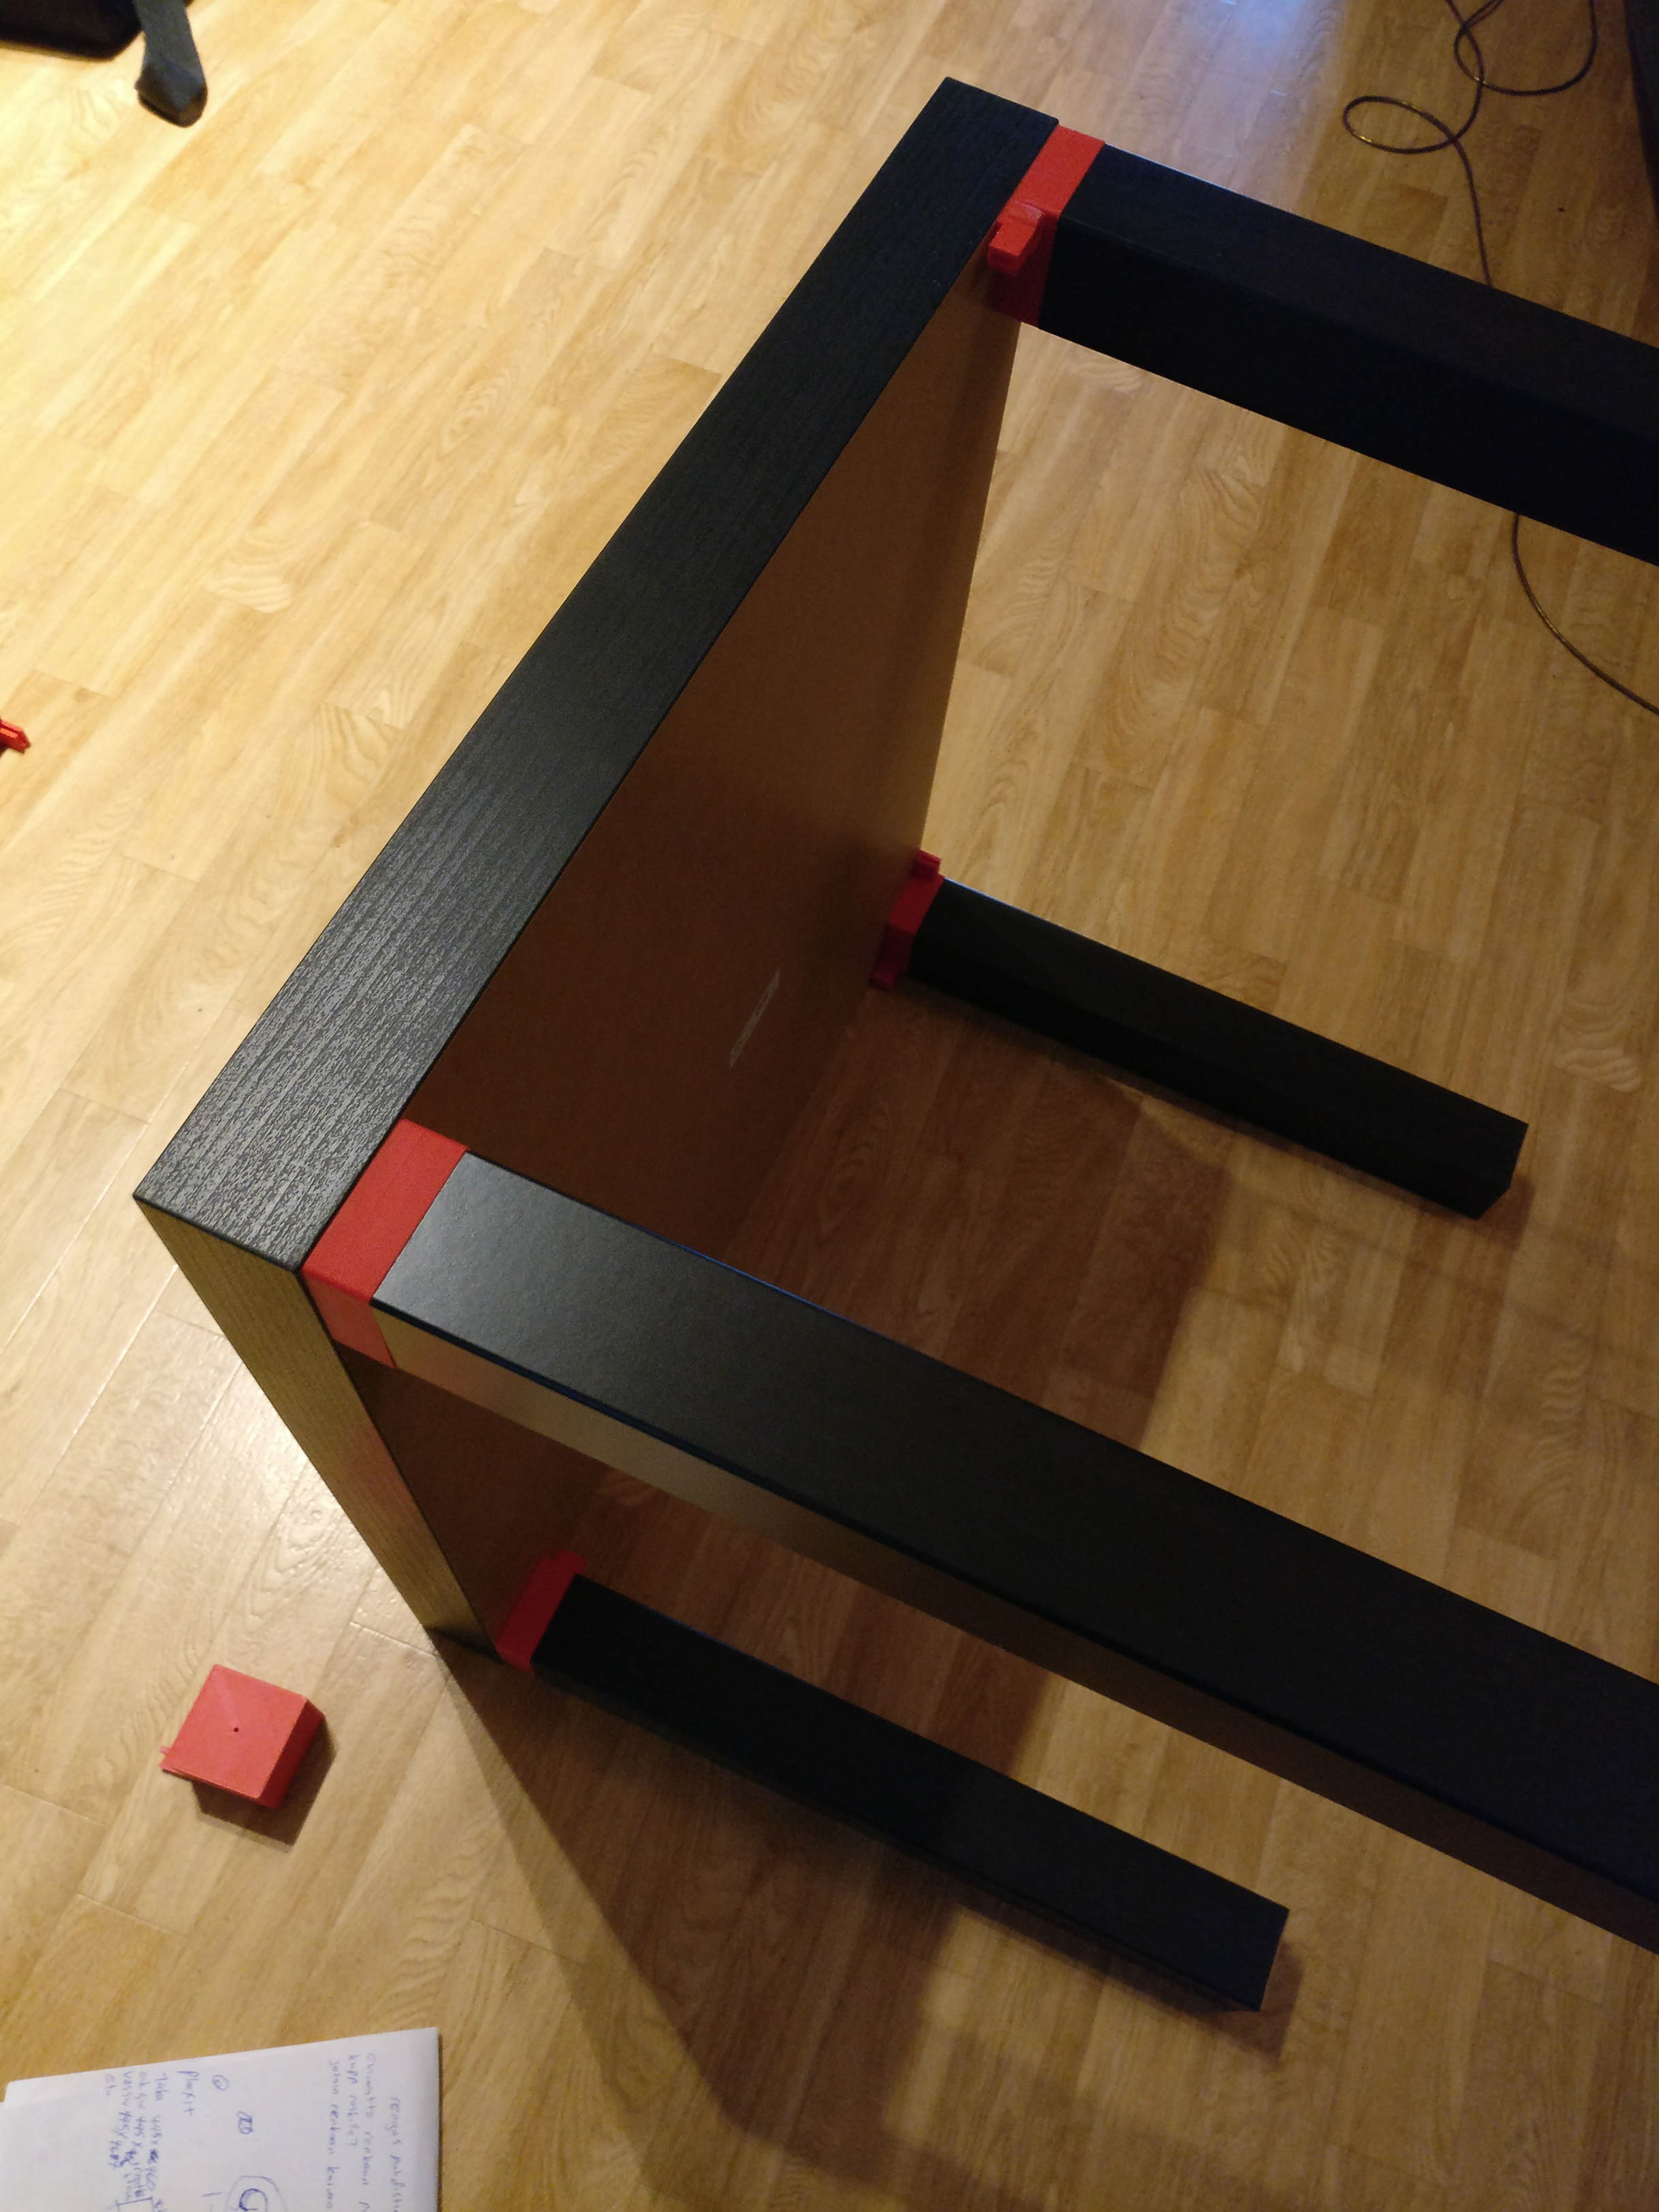
✅ Awesome Performance - Clear Plexiglass is a durable, optically clear plastic that creates the perfect printing environment for 3D printer.
✅ Reduce noise, smell, and fumes that are part of 3D printing. This creates a healthier, cleaner working environment.
✅ - SMALL BUSINESS OWNED AND MADE IN THE USA - We are an appreciative of your support and offer great service to make sure you are happy. Our enclosures come with a 100% satisfaction guarantee and a 1 year warranty against manufacturer defects. Built by 3D printer enthusiast for 3D Printer enthusiasts.
This listing is for the enclosure and does not include the Ikea Lack Table or 3D printer.
Types of tables for 3D printer
Contents
-
- Print platform materials
- Heated table
- Non-heated table.
- Table surface
- Types of calibration
- Automatic calibration
- manual calibration
- Calibration of a 3D printer table with Cartesian kinematics
- Calibration of the Delta printer 9000 9000
- Print platform materials
The correct calibration of the 3D printer bed, or as it is also called Hot Bed, is very important.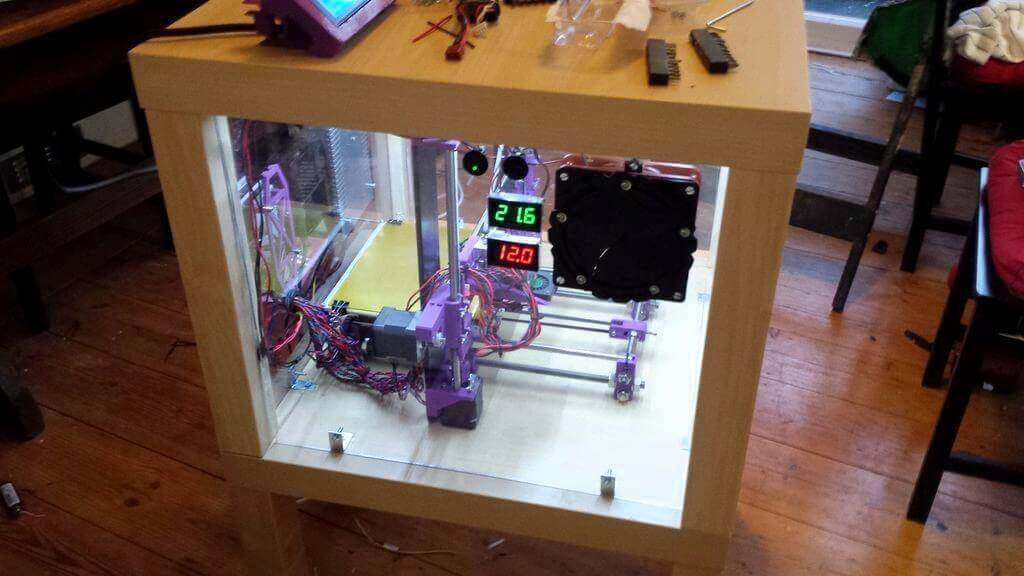 The first layer is like a foundation for a house, if the foundation is fragile, then the house will not stand for a long time.
If the plane of the printed surface is uneven, then the model may be partially peeled off or deformed. The first layer may not stick to the printing platform at all, and the result of many hours of printing will not be a neat 3D model, but plastic noodles.
Print failure example
Therefore, it is very important to properly calibrate the table. Printing platforms can be conditionally divided into two types - adjustable and not.
The adjustable table is attached to the printer with spring-loaded screws. It is not rigidly fixed in height and with the help of screws it is possible to calibrate the plane and the gap between the 3D printer table and the nozzle.
Adjusting screw
Unregulated is a printing platform that is rigidly fixed to the printer body.
This solution is used in delta printers. Calibrate them only programmatically.
Non-adjustable delta printer table
Print platform materials
The material from which the table is made may vary depending on whether the table is heated or not.
Heated table
There are several types of heating elements for a 3D printer platform - aluminum, textolite, silicone and kapton. Each of them has its pros and cons.
Textolite heater - inexpensive, but fragile and can be strongly bent when heated.
Silicone heater - can not be used alone. Usually used in conjunction with a metal base.
An aluminum table is expensive, but it heats up more evenly and is less subject to thermal deformation than other platforms.
The Kapton heater is very expensive and cannot be used on its own. Usually glued to a metal base. Can be heated up to 200 degrees.
Types of heated printing surfaces
Most often, an aluminum heating table or a silicone heating pad is used in conjunction with an aluminum plate. Low price, ease of processing and high thermal conductivity make aluminum the most popular material for the manufacture of heated printing tables.
The main advantage of heating the printed surface is to increase the adhesion (adhesion) of the first layer of plastic. If the printer is with a closed case and a heated platform, a “passive thermal chamber” is created inside. Due to this, plastics with high shrinkage do not crack in layers during printing, the adhesion of layers (interlayer adhesion) increases, and internal stress is more evenly distributed during cooling.
But there are also disadvantages - when heated, the metal table expands a little, and since it has nowhere to expand, it begins to bend. For a printing platform up to 200x200 in size, deformation will not be very critical, but for larger tables this becomes a tangible problem.
Each manufacturer of 3D printers with a large printable area solves the problem of deformation of the metal table in its own way.
For example, in Raise 3D, the table is fixed along the entire plane with pins at 13 points.
Heated table fixing Raise 3D
Table without heating.
An unheated printable surface is often used in 3D printers designed to work only with PLA and other low temperature plastics. For example - printers for children or large printers with an open case.
An unheated printable surface is often used in 3D printers designed to work only with PLA and other low temperature plastics. For example - printers for children or large printers with an open case.
Children's printer with acrylic print bed
Tables without heating are made of aluminum or acrylic. If the table is aluminum, then glass or any other coating should be used on top. Aluminum is a soft metal and even a brass nozzle can scratch or damage it if not properly adjusted.
Heating table with aluminum base and mirror
Acrylic tables are often used in inexpensive 3D printers designed for kids. Acrylic is difficult to damage or break. You can print on an acrylic table without glass or other coating.
Free Shipping
Add to compare
Product added to compare Go
| Manufacturer | Raise3D |
Add to compare
Product added to compare Go
| Manufacturer | Raise3D |
Add to compare
Product added to compare Go
| Manufacturer | Raise3D |
Free Shipping
Add to compare
Product added to compare Go
| Manufacturer | Flash Forge |
Table top
In order for the first layer to adhere to the table tightly, different surfaces are used that increase adhesion. It is more convenient to remove the model from the removable surface. If you need to immediately start printing another model, you can simply quickly change from one removable surface to another.
The most popular table surface is the regular tempered glass or mirror. It is not expensive and available. It is believed that the accuracy class of the mirror is higher, but for small working areas (up to 200x200 mm), ordinary tempered glass is enough.
Glass itself does not hold the first layer well, so various adhesives or stickers are used to increase adhesion.
Ordinary glass can burst from a temperature difference or “crumble”, then the model comes off along with pieces of glass. Good thing it's easy to replace.
A piece of glass came off with model
Sitall glass - in fact, it is ordinary glass with the addition of boron oxide. This makes it stronger than ordinary glass and resistant to temperature changes. But the cost of such glass is much higher than ordinary or tempered glass.
Sitall glass
Perforated table - mainly used for printing ABS plastic.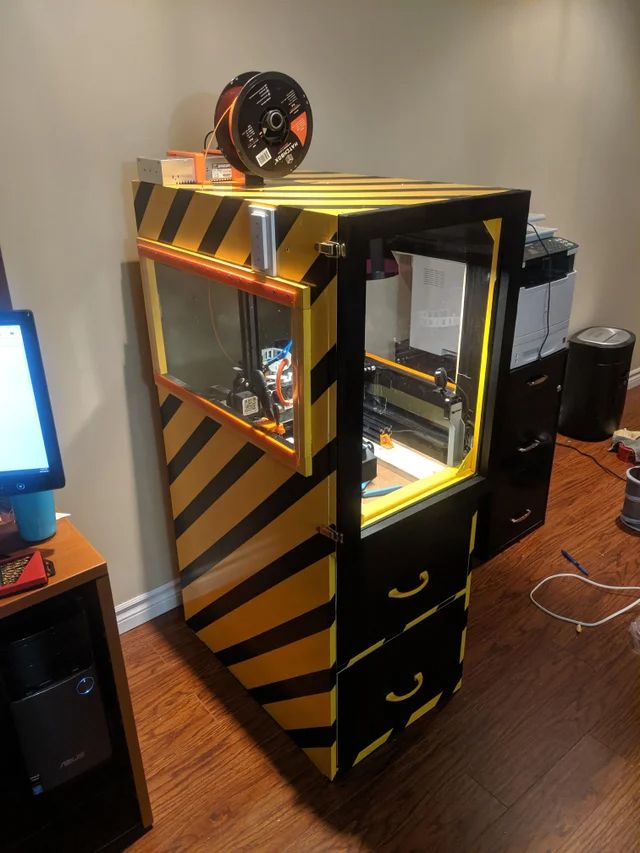 Thanks to the perforation, the plastic adheres firmly to the print platform. In order for the bottom of the model to turn out to be even in the slicer settings, you need to enable printing on a raft (substrate).
Perforated table used in UP printers!
Stickers - There is a huge variety of stickers for printing platforms. It can be either ordinary masking tape or a specialized surface (rough with an adhesive surface).
The finished model is easier to remove from a flexible substrate than, for example, from glass. With some substrates, the model can be easily removed after the printing platform has cooled down. For some, you need to heat the table and only then tear off the model.
Separately, you can select a variety of compositions that are applied to the surface of the printing platform to increase the adhesion of the first layers. 3D varnishes, 3D adhesives, etc.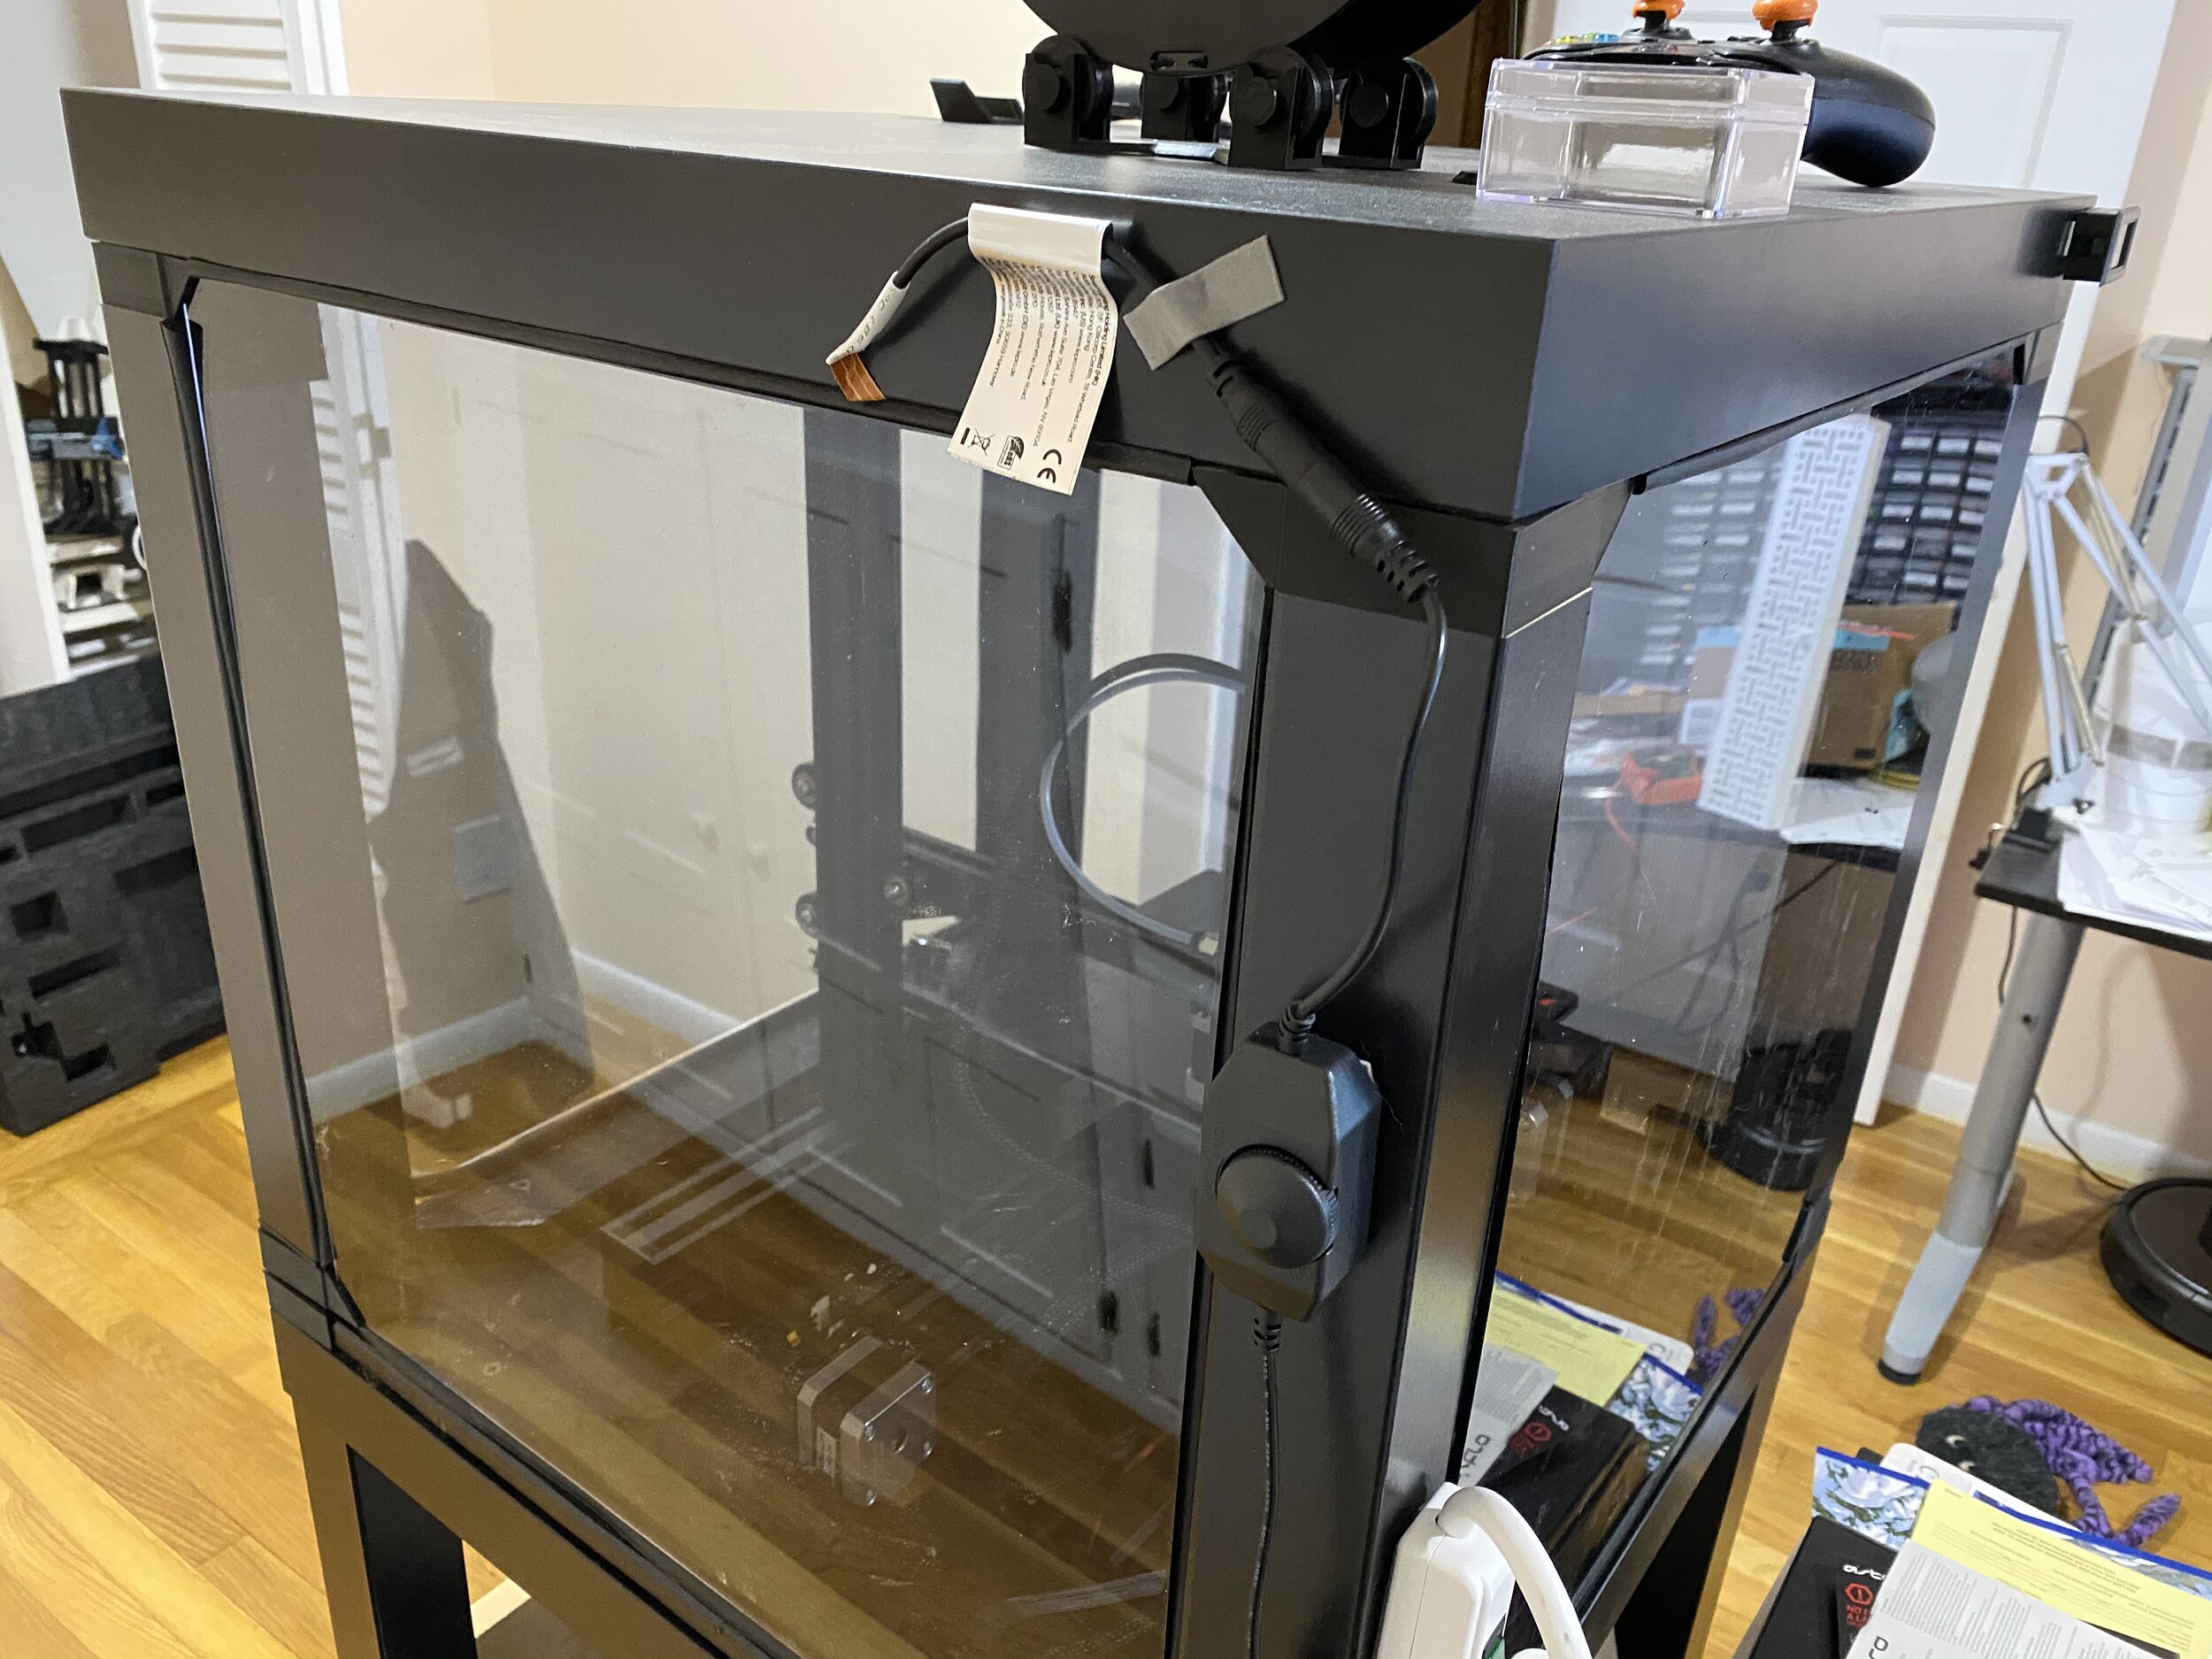 Probably every 3D maker has his own special recipe for the same composition that almost everything sticks to. It can be BF glue mixed with a solvent or alcohol, ABS diluted in acetone, kvass with sugar, glue stick, etc.
Do not spray varnish or other sprays inside the printer. Glue particles can settle on mechanisms, fans, and even get on electronics. This can lead to damage to the 3D printer. Simply remove the platen surface from the printer and apply the adhesive.
Add to compare
Product added to compare Go
| Manufacturer | Raise3D |
Add to compare
Product added to compare Go
| Manufacturer | Flash Forge |
Add to Compare
Product added to comparison Go
| Manufacturer | Flash Forge |
Calibrations
In addition to choosing the surface of the print platform, it is important to correctly level the plane of the table and set the correct gap between the table and the nozzle. Calibration can be automatic or manual.
Printers with large print surfaces, such as the Raise 3D Pro 2 and Pro 2 Plus, are calibrated at the factory. The user only needs to check the gap between the table and the nozzle, because it may go astray during transportation.
Automatic calibration
Automatic calibration is performed using a sensor (optical or contact), which is mounted next to the extruder. The printer checks several points on the print platform one by one and remembers the values. The first layer will be printed correct for the curvature of the table.
You can meet the calibration using a conductive substrate that is placed instead of the printed surface. This method is rare, but still has a place to be. It is commonly used to calibrate 3D printers with delta or delta robot kinematics.
Automatic calibration allows you to quickly and effortlessly level the table. It becomes especially indispensable for printers with delta or delta robot kinematics. Optical sensors "do not see" glass, so for printers with an optical sensor, it is better to use other surfaces of the print platform.
Some printer models have a menu with hints to help you properly set the platform plane and gap. It is enough to launch the “assistant” and follow the instructions on the screen. This is not exactly automatic calibration, but with such help it becomes much easier for a beginner to correctly calibrate the table.
An example of a 3D printer with automatic calibration is Raise E2. The Raise E2 extruder has a contact sensor to determine the distance between the nozzle and the printed surface. The resulting values help to correct the print height of the first layer. You can calibrate not the entire table, but only the area on which the model will be located.
Manual calibration
Manual calibration is when the user sets the plane of the table and the gap between the table and the nozzle himself.![]() To do this, under the printing platform there are screws or winglets with which you can adjust the height of the printing platform.
To do this, under the printing platform there are screws or winglets with which you can adjust the height of the printing platform.
Calibration screws
The standard gap between the platform and the nozzle, for most printers, should be - 0.1-0.2mm. If there is no set of probes at hand, a standard A4 sheet folded in half can replace it. Before calibration, the print surface (if it is heated) and the nozzle must be heated.
Sometimes manufacturers of 3D printers recommend a gap between the table and the nozzle - 0. Therefore, read the instructions before calibrating.
We will consider the calibration of the two most common kinematics - Cartesian and delta.
Cartesian kinematics is based on the Cartesian coordinate system and the movement of the 3D printer's head along the x, y, z axes.
Printer example with Cartesian kinematics
In deltas, the extruder moves along 3 identical axes using carriages moving along vertical guides.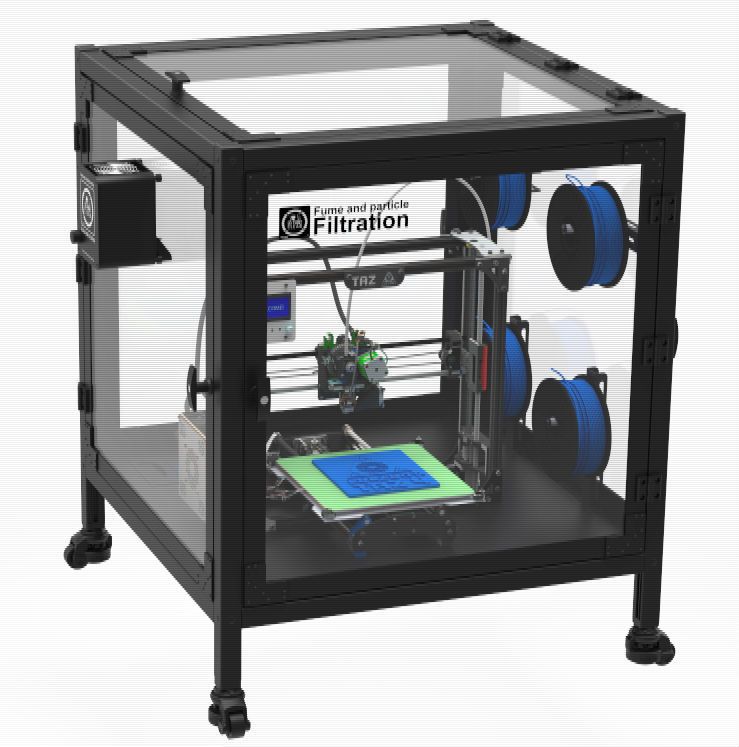 The delta printer can be called a simplified delta robot, but these are still two different kinematics.
Example of a printer with delta kinematics
3D printer table calibration with Cartesian kinematics
Different manufacturers may have slightly different calibration instructions. We will consider here the calibration of the printer with standard kinematics.
-
Heat up the table and nozzle. When heated, the metal expands slightly, so the gap between the printing platform and the nozzle may differ between the “hot” and “cold” ones.
-
Through the printer menu, send the table and extruder to the "home" or zero position in all axes. Usually the zero point is the near left corner of the extruder and the top position of the print platform. Be sure to make sure that the 3D printer does not rest the nozzle on the table and does not damage it. If this is the first calibration, use the nuts to lower the table as low as possible.
-
Through the printer menu or manually (for this you need to turn off the motors through the menu), move the extruder so that the nozzle is above the adjusting screw.
-
Use a feeler gauge and adjusting screw to set the gap between the print bed and the nozzle.
-
Repeat all steps for all calibration screws. Usually there are 3 or 4 screws.
-
After aligning the plane above the screws, move the extruder to the center and check the gap. If the gap matches the feeler gauge, then the table plane and platform distance are correctly calibrated.
Delta printer table calibration
Calibrating a delta printer is a very large topic, so here we will only describe the general principles.
The delta printer does not have the x, y and z axes we are used to. Instead, the delta printer has 3 towers - A, B, C, on which the carriages move.
Since the delta table is static, it is calibrated programmatically.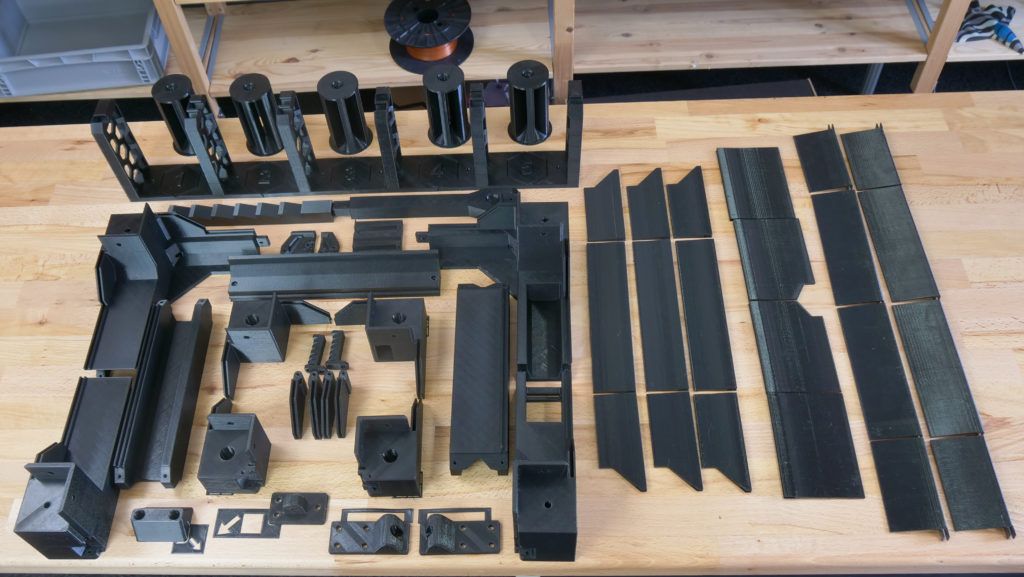 The gap is calibrated by 3 points (at the columns) and the lens (center) of the table. The lens can be concave or convex.
Before calibration, check the mechanics of the printer - the belts must be tensioned evenly, there must be no play in the carriages and the effector (the plate to which the extruder is attached). If the belts are loose or uneven, it will be problematic to calibrate the printer.
Some 3D makers check belt tension with a tuner. Evenly tensioned belts will sound the same, but the correct “note” is found empirically.
There are a huge number of programs for delta calibration, but one of two is usually used - Pronterface or Repetier-Host. Using them, you can directly access the printer using special commands and change the values in the firmware.
As auxiliary programs, you can use a virtual calculator and from there transfer the values \u200b\u200binto the firmware or download the finished GCode.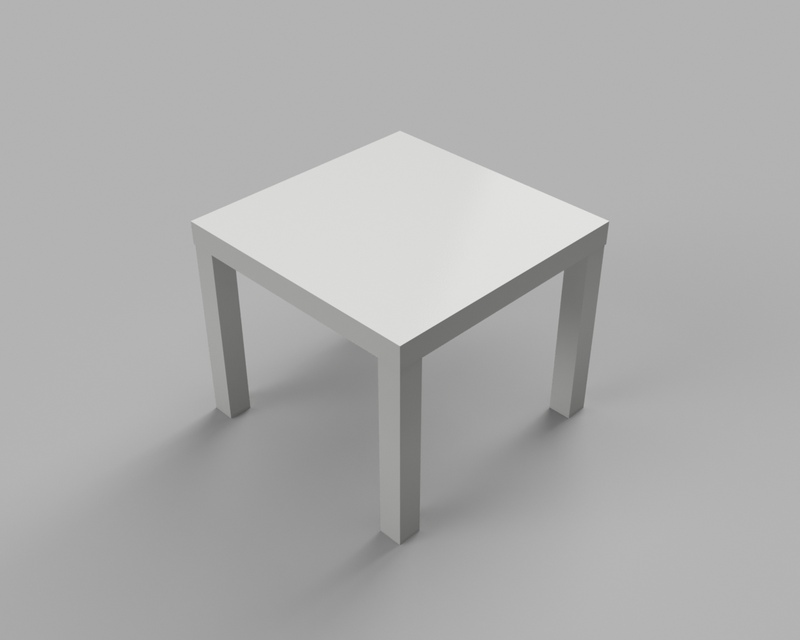 They need to specify the parameters of your printer - firmware (usually Marlin or Repetier), diagonal length, circumference, etc. These parameters can be taken from the firmware or measured with a caliper. It is important to specify all the parameters as accurately as possible, otherwise the printer will not be able to calibrate.
First, 3 points are aligned at towers A, B, C, and only then the lens in the center of the table is corrected.
Manual delta calibration is tricky, but it doesn't have to be repeated often. Typically, the printer only needs to be recalibrated after some mechanical parts, belts, or print bed cover have been replaced.
Totals
The calibration process may seem tedious and complicated, but in fact, once you do it yourself, the process will no longer seem so intimidating. In addition, most manufacturers try to help novice users and equip their printers with auto-calibration sensors or try to simplify this process as much as possible with detailed menu prompts.
And a variety of coatings for a printed table will help you find exactly the surface that suits your needs. As practice shows, every 3D maker, novice or experienced, has his own proven way to make the first layer stick tightly.
Don't be afraid to experiment and let every 3D print be successful.
How to choose a 3D printer, or why you need a heating table and a closed chamber / Sudo Null IT News In this article I will talk about the different categories of printers for this very important parameter. After all, the range of materials that the printer can print also depends on the heating of the table. I will also touch on the question of why a closed chamber is needed.
Printers without underbed heating
They are able to print only one type of plastic - PLA. This material is suitable for prototypes, souvenirs, and when heated to 60 ° C, it becomes soft and the product loses its shape. With great effort on such printers, you can try to print with other materials, but the result will not please you. Usually these are Prusa-type printers with a movable table, but there are also "cubes".
Problems occur due to shrinkage (reduction in size) of the plastic product after cooling. If the plastic shrinks (and this is almost all plastics, except for PLA), then the edges of the product begin to tear off the table on which the print is being made, the geometry of the product is irreparably damaged or it completely peels off from the table, risking damage to the print head, which continues to move.
The plus (or minus?) of such printers is that manufacturers save not only on the table heater, but on everything else. Therefore, these are cheap printers.
At the same time, in the description of such printers, the absence of table heating may not be indicated in any way (be careful!), but sometimes the possibility of printing with other plastics, except for PLA, is indicated, which misleads the buyer. And you will encounter printing problems after purchasing such a printer.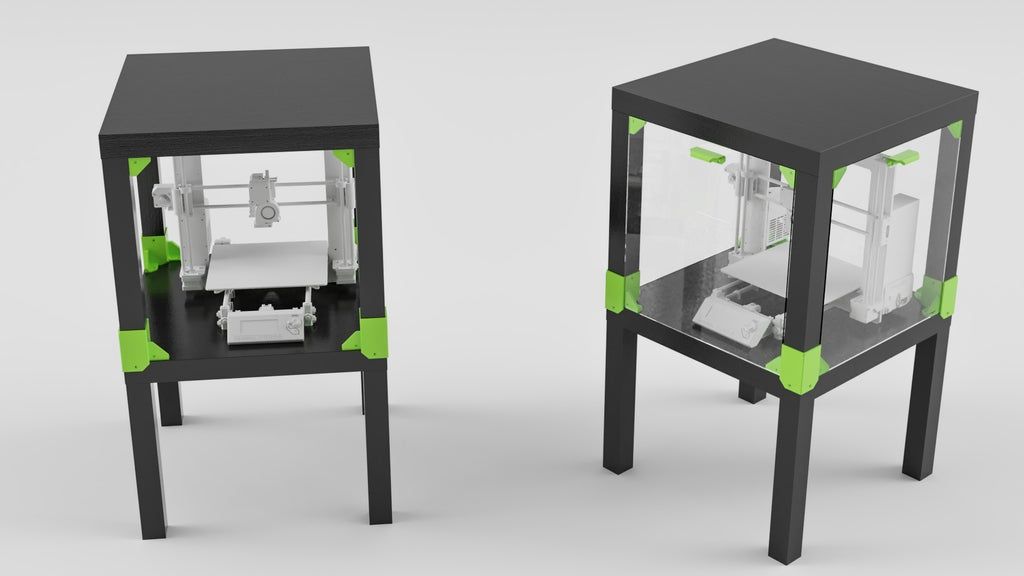
The best known non-heated printer is the Makerbot Replicator 2
From Chinese models - TEVO Michelangelo
Next, the story will go about more interesting printers with a heated table from 100 ° C to 170 ° C, which are designed for printing with plastics with shrinkage - from classic ABS to Polycarbonate. The higher the maximum temperature of the table, the more plastics you can print, because. heating of the table prevents damage to the part due to shrinkage during printing. At the same time, the higher the melting temperature of the plastic, the stronger the table should be heated.
Printers with heated table up to 100°C
Suitable for printing with many plastics, except for technical ones. At the same time, printing large products with popular ABS plastic at such a low temperature will be problematic. In reality, ABS requires from 110°C to 130°C on the table, especially for cheap brands with high shrinkage, which are very widely represented on the market. Printing with more interesting technical plastics - nylon, polypropylene, polycarbonate, on such printers will not work at all.
Chinese printers include Anycubic, various Flashforge models.
Printers with heated table up to 120°C
Perfect for ABS printing. But, if you need to print large ABS products, then such a printer also needs a closed print chamber. It is needed to maintain a high air temperature around the printed product, which reduces shrinkage during printing along the entire height of the product. The higher the chamber temperature is kept, the better for printing!
And this is where things get interesting. Those manufacturers who have conventional models with an "open chamber" cover them with a plastic transparent "aquarium" on top, and sellers offer them under the guise of printers with a closed chamber! Of course, such a solution is cheap, but the larger the volume of the chamber, the more difficult it is to maintain a high temperature in it, and in this case the volume increases significantly. This means that in such printers, the temperature in the chamber will be lower than necessary for high-quality printing.
Even more interesting is the situation when the printer is closed on the sides, but completely open on top and does not have any cover at all. At the same time, sellers pass them off as printers with a closed camera (be careful!).
The question is, why not cover any printer from above completely, without increasing the volume with an "aquarium"? Yes, because all simple models are designed so that a bundle of wires rises vertically from the extruder (print head), as well as a tube through which a thread with plastic is fed (look carefully at the photos of the printer from all sides when choosing). All this sticks out from the top of the printer and does not allow it to close normally. This is especially true for printers with remote Bowden plastic feed, where the motor pushing the plastic thread is placed on the printer body.
It would seem, so what? Well, turn the wires to the side of the extruder so that they do not stick up and do not interfere .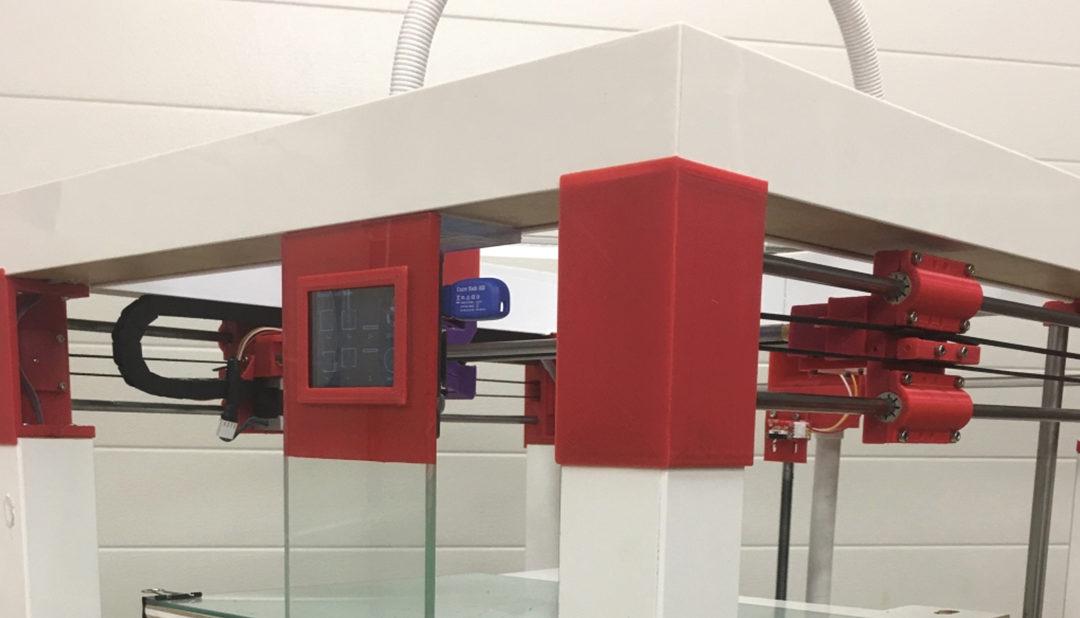 .. However, for this you need to apply design solutions with a horizontal arrangement of wires and tubes suitable for the extruder, and design the printer initially taking into account the closed chamber.
Interestingly, even some expensive closed imported printers have a large height and an increased clearance inside the chamber between the extruder and the top cover, because. in them, the designers could not (did not want to) turn the plastic supply tube horizontally. So, in them the volume of the chamber is larger than necessary.
Most of both imported and domestic printers fall into this category.
Printers with heated table from 130°C to 150°C
These printers are already quite well developed by designers. Most of these printers do have a well-heated closed chamber with side wires and extruder tubes. They can print both large products made of ABS plastic, and small products made of technical plastics - nylon, polypropylene, polycarbonate.
Of the domestic printers in this category, we note Picaso3D and PrintBox3D.
Printers with heated table up to 170°C
Here we come to closed printers with a very high table temperature. These printers have been engineered to take into account the trend in 3D printing to increase operating temperatures, which means the ability to print with increasingly durable, heat-resistant plastics. There are few such printers, they are expensive, with rare exceptions.
Why heat the table so much? The fact is that the higher the melting temperature of the plastic, the more the table and the surrounding air in the chamber must be heated, otherwise the product will peel off the table during printing and printing will be interrupted. So, for polycarbonate, the extruder print temperature can reach 310 ° C. If small details can be printed at a table temperature of 130°C, then medium ones are already from 150°C, and large ones can be kept on the table only at 170°C.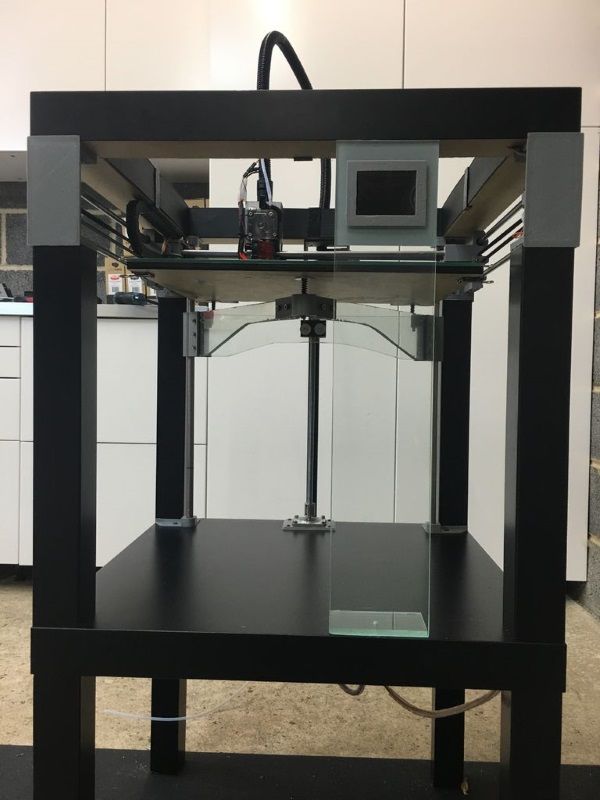
In addition, these printers have the potential to print other refractory plastics. For example, at an extruder temperature of 400°C, PEEK (polyether ether ketone) can be printed. This refractory and durable plastic is used in aviation and space technology.
In this high-temperature category, we note the Chinese Intamsys FUNMAT HT printer with an extruder temperature of up to 450°C, a bed temperature of up to 160°C.
Of the domestic ones, we cannot fail to mention the Faberant Cube
3D printer with extruder temperature up to 340°C, bed temperature up to 170°C.
Terminals
If you want to print with different plastics, and not just one PLA, then the 3D printer must have a heated bed. If you intend to print large ABS products, then you need a real closed chamber, without an "aquarium" on top. The higher the maximum table temperature, the greater the range of materials you can use in your printer.