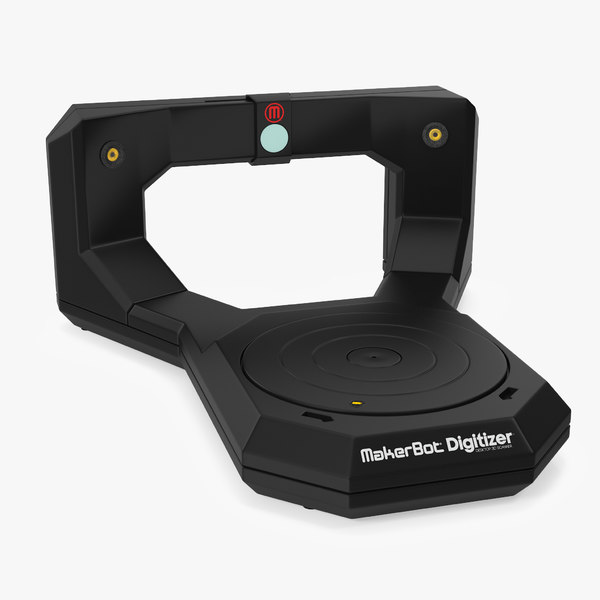
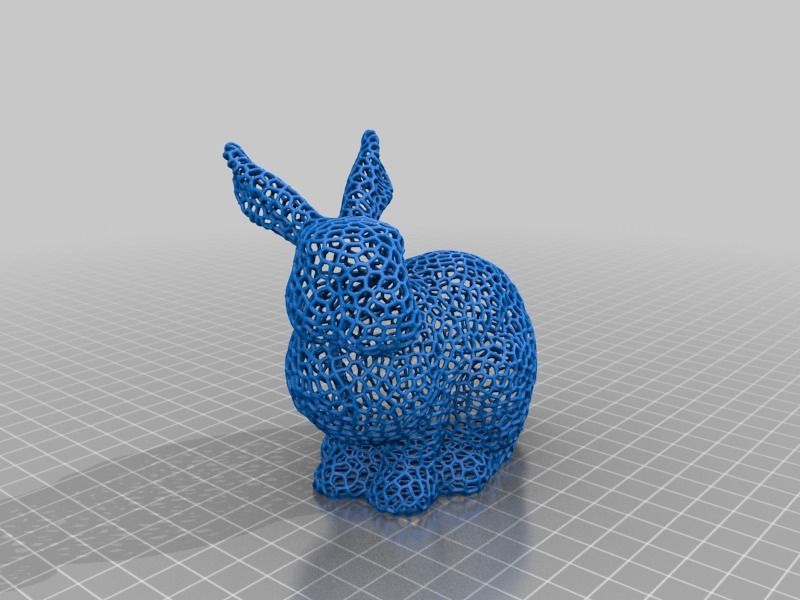
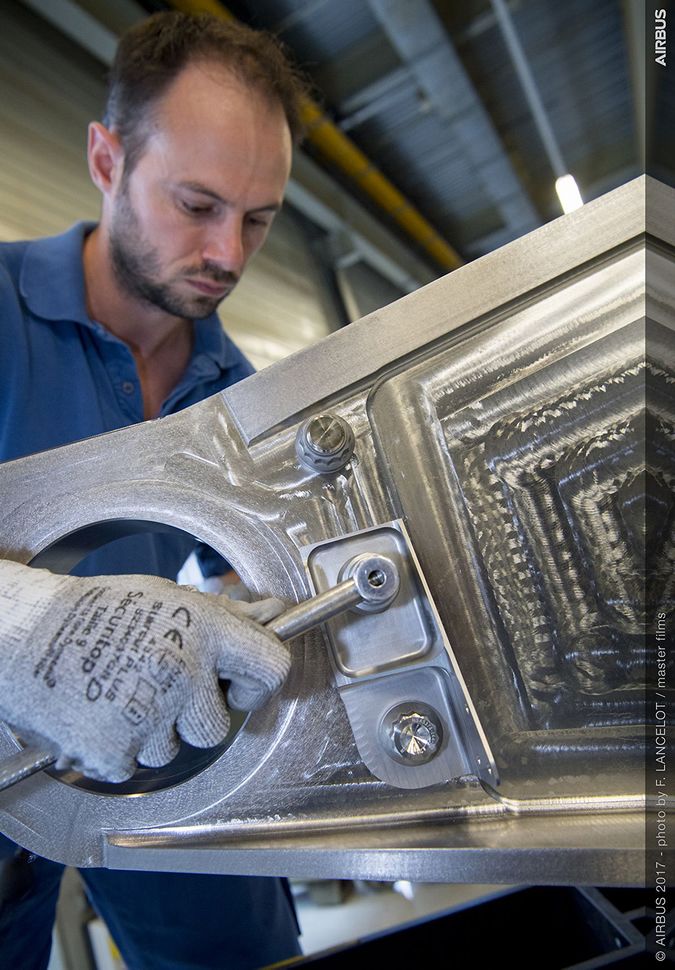
3D scanner makerbot
3Dnatives Lab: Digitizer 3D Scanner by MakerBot
Published on April 19, 2017 by Alexandrea P.
Today, the 3Dnatives lab will be analyzing the Makerbot Digitizer 3D scanner to continue our series of tests on 3D scanners and printers! Don’t forget to check out all our scanner tests here, and to give us any comments, tips or feedback that you have!
Unpacking
To start things off, we begin by unpacking the scanner. Right away, we found an array of items that it was packaged with, which are as follows:
- The digitizer tucked between two blocks of foam for protection
- A regulator for the calibration of the scanner
- A power supply (for our friends in Europe, there is no European plug. Your dealer should add the suitable cord if they are aware of where you are in the world)
- A USB connection cable (A classic USB printer cable)
- A user manual
The Digitizer’s careful packaging
Functioning
The Digitizer 3D Scanner creates a 3D model of a physical object by taking a quick sequence of photos while the object rotates on a turntable. To accomplish this:
- The scanner has two lasers that are mounted on the left and right corner of the Digitizer that allows it to perform a linear scan that determines the profile of the object. The camera will then take a series of photographs of the object
- MakerWare software for Digitizer combines the photographs and the linear scan to create a scatter plot.
- Once the scan is complete, the MakerWare software will then generate a 3D mesh from the collected data. It will then send the mesh directly to the 3D MakerBot printer via MakerWare, share it through a sharing site like Thingiverse, or can be edited with a modeling software (this scanner can be used with most modeling softwares).
- In addition, the Digitizer has a dimensional accuracy of up to 2mm.
First Steps and Calibration of the Scanner
The first thing to do once your scanner is unpacked and plugged in will be to calibrate it. It is important to follow the following 2 points:
- Brightly illuminate the scanner tray by using a light source, such as a desk lamp for example.
 The light source must not be visible to the camera in order to no disrupt it. Good brightness is paramount and is directly related to the quality of your scan.
 - Place the Digitizer at about 20 cm from a uniformly colored wall. The laser pointers will be pointed towards the wall, giving you better results.
Next, install the latest version of the MakerWare software. Once MakerWare has been launched, you will need to turn on your scanner and connect it. After, you can calibrate the horizontality of your tray, prepare your camera, and align your lasers using the template given with the guidelines in your software.
- The checkerboard gauge for calibration of the Digitizer
Scanning of an Object
As part of our test, we decided to use a model of the Sphinx that had dimensions of 15 x 5 x 10 cm. After scanning, which lasts 9 minutes regardless of the size of the object, the scatter plot was created.
Once the first scan is complete, you are able to see the imperfections that can occur when scanning objects with sharp edges or hollow parts. When this happens, you may need to do a new scan with new positioning of the object at another angle. In the MakerWare version 2.4 (which we used), it was possible to do by clicking on the “Multiscan” option.
Video of our digitization of our Sphinx model:
Thanks to this option, it was possible to generate several models that we could merge together over time. After 3 scans of our Sphinx, the space between the legs and the sharp angles were all perfectly digitize, which was not the case after just one single scan. If you want to digitize more than 5 times with one object, we would advise against it, as it will give you worse results than ones that show improvement. This is because the state of the surface will depreciate. Once your file is created, you can then save the 3D model in a .thing format for MakerBot or in STL format.
Below you can find a comparison between the digitized Sphinx after one scan and the same Sphinx digitized after our 3rd scan thanks to the “Multiscan” option.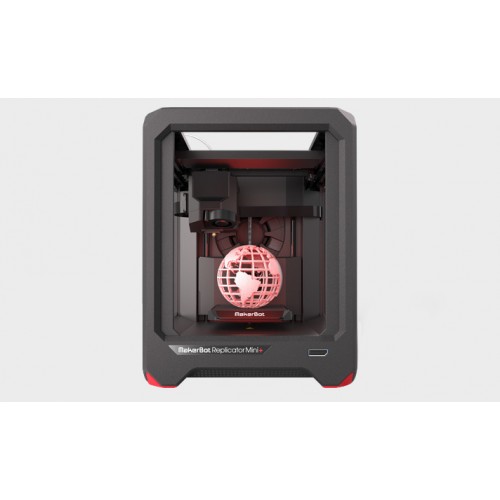 You will be able to notice the improvements between the two versions, mainly at the hollow levels and base.
Results with 1 scan:
Results with 3 scans:
Advice for Scanning
Some objects will give better scans than others, so we decided to give you some guidelines to help improve your scans. Typically, be sure to scan:
- An object whose dimensions are greater than that of a cylinder (50 x 50 mm)
- An object whose dimensions are smaller than that of a cylinder (203 x 203 mm)
- Objects who weigh less than 3 kg
- Stable objects
- Opaque objects
On the opposite side, avoid scanning:
- Transparent objects
- Shiny or reflective objects
- Very dark objects
If you still want to scan a transparent object, a tip would be to paint or powder the object to get a better capture. Also, recalibration of the Digitizer is advised after every 20 scans. In general, there is no other maintenance operation that you need to perform on this scanner.
Here you can find a preview after our rendering of our 3D printed scan (the original is on the right):
The result is far from perfect but it still was a cool experience!
MakerBot Unveils the MakerBot Digitizer Desktop 3D Scanner :: Stratasys Ltd. (SSYS)
The MakerBot Digitizer Is A Fast and Easy Way to Create 3D Models
BROOKLYN, N.Y.--(BUSINESS WIRE)-- What’s black and white and has lasers? The MakerBot® Digitizer™ Desktop 3D Scanner! The MakerBot Digitizer Desktop 3D Scanner is a fast and easy way for anyone to create 3D models. MakerBot, the leader in Desktop 3D Printing, announced the availability of the MakerBot Digitizer on its website. The MakerBot Digitizer is for sale worldwide on makerbot.com/digitizer. Pre-orders are being taken now, with shipping expected mid-October. Current price is $1,400 plus an optional $150 for MakerBot Digitizer MakerCare, a service and support program.
MakerBot introduces the MakerBot(R) Digitizer(TM) Desktop 3D Scanner, a fast and easy way to create 3D models, available for pre-orders on http://www.makerbot.com/digitizer. Photo credit: Spencer Higgins.
“Bringing the MakerBot Digitizer Desktop 3D Scanner into the world has been a big goal of ours this year,” stated MakerBot CEO Bre Pettis. “We are really excited about the MakerBot Digitizer. This is another innovative product for visionaries, early adopters, experimenters, educators, creative hobbyists, 3D sculptors, organic modelers, designers, and architects who want to be the first to become an expert in Desktop 3D Scanning.”
The MakerBot Digitizer takes a real-life object, scans it using a camera and two lasers, and creates a 3D digital file – without any need for design or 3D software experience. The MakerBot Digitizer Desktop 3D Scanner is optimized for and works seamlessly with MakerBot’s Replicator Desktop 3D Printers and MakerBot Thingiverse. The MakerBot Digitizer can be used in the office, manufacturing space, workshop, classroom, or in the home to jumpstart the modeling and prototyping process and create artworks, sculptures and figurines, as well as memorializing keepsakes and archiving. Just connect the MakerBot Digitizer to a laptop or computer and you are ready to digitize.
The MakerBot Digitizer Desktop 3D Scanner offers:
- Simple, yet sophisticated software to create clean, watertight 3D models with just two clicks
- A 3D digital design file in just minutes
- No design skills, 3D modeling or CAD expertise required to get started
- Outputs standard 3D design file formats that can be modified and improved in third-party 3D modeling programs, like Autodesk’s free software MeshMixer
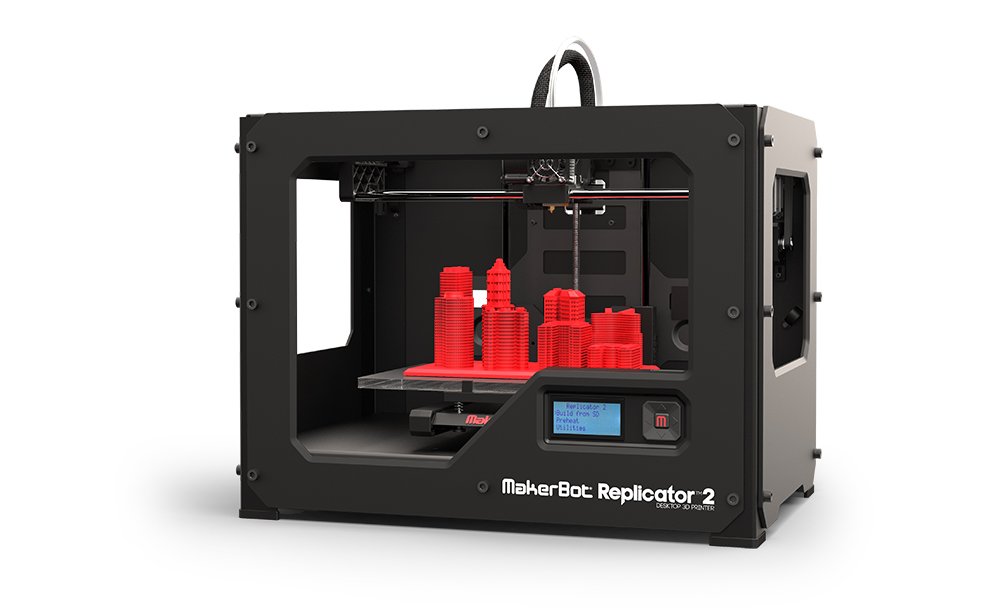
- Creates a 3D digital file to be printed on a MakerBot Replicator 2 Desktop 3D Printer and on other 3D printers
- Easily upload scans directly to MakerBot’s Thingiverse.
 com, the community for discovering and sharing 3D printable things with more than 100,000 members.
 - Ability to digitize physical objects up to 8” in diameter and 8” tall and up to 3 kg (6.6 lbs.)
“We believe that the MakerBot Digitizer Desktop 3D Scanner is an innovative technological breakthrough that sets the standard for affordable desktop 3D scanning,” noted Pettis. “We focused on making the MakerBot Digitizer super easy to use, intuitive and simple. The MakerBot Digitizer is powered by MakerBot MakerWare software, and we plan to offer in the future additional software updates that are expected to add even more features and capabilities.”
For more information on the MakerBot Digitizer Desktop 3D Scanner or to purchase one, visit makerbot.com/digitizer or call 347-334-6800.
About MakerBot
MakerBot, a subsidiary of Stratasys, Ltd.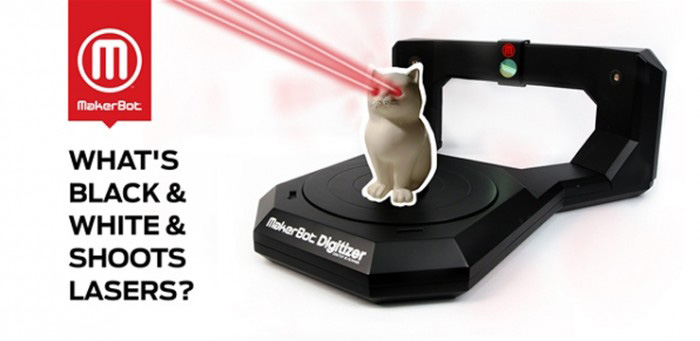 , is leading the Next Industrial Revolution by setting the standards in reliable and affordable desktop 3D printing. Founded in 2009, MakerBot has built the largest installed base of desktop 3D printers sold to innovative and industry-leading customers worldwide, including engineers, architects, designers, educators and consumers. MakerBot’s 3D Ecosystem drives accessibility and rapid adoption of 3D printing and includes: Thingiverse.com, the MakerBot Digitizer Desktop 3D Scanner, the MakerBot Replicator line of Desktop 3D Printers, MakerWare software, MakerCare, the MakerBot retail store, and strategic partnerships with top-tier brands. MakerBot has been honored with many accolades, including Popular Mechanics’ “Overall Winner” for best 3D printer, Time Magazine’s “Best Inventions of 2012,” Popular Mechanics’ “Editor’s Choice Award,” Popular Science’s “Product of the Year,” Fast Company’s “One of the World’s Top 10 Most Innovative Companies in Consumer Electronics,” and many more.
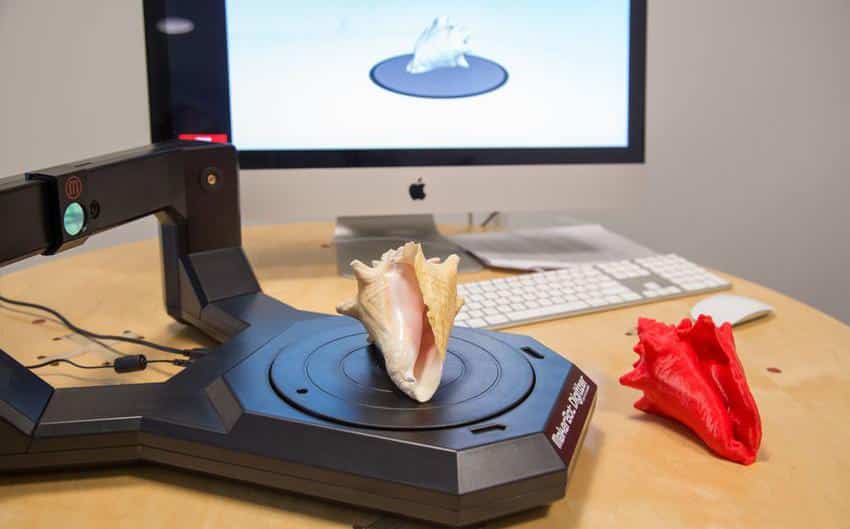 Join the Next Industrial Revolution by following MakerBot at makerbot.com.
About Stratasys
Stratasys Ltd. (Nasdaq: SSYS), headquartered in Minneapolis, Minn. and Rehovot, Israel, manufactures 3D printers and materials for prototyping and production. The company’s patented FDM® and PolyJet® processes produce prototypes and manufactured goods directly from 3D CAD files or other 3D content. Systems include 3D printers for idea development, prototyping and direct digital manufacturing. Stratasys subsidiaries include MakerBot and Solidscape and the company operates the RedEye On Demand digital-manufacturing service. Stratasys has more than 1500 employees, holds over 500 granted or pending additive manufacturing patents globally, and has received more than 20 awards for its technology and leadership. Online at: www.stratasys.com or http://blog.stratasys.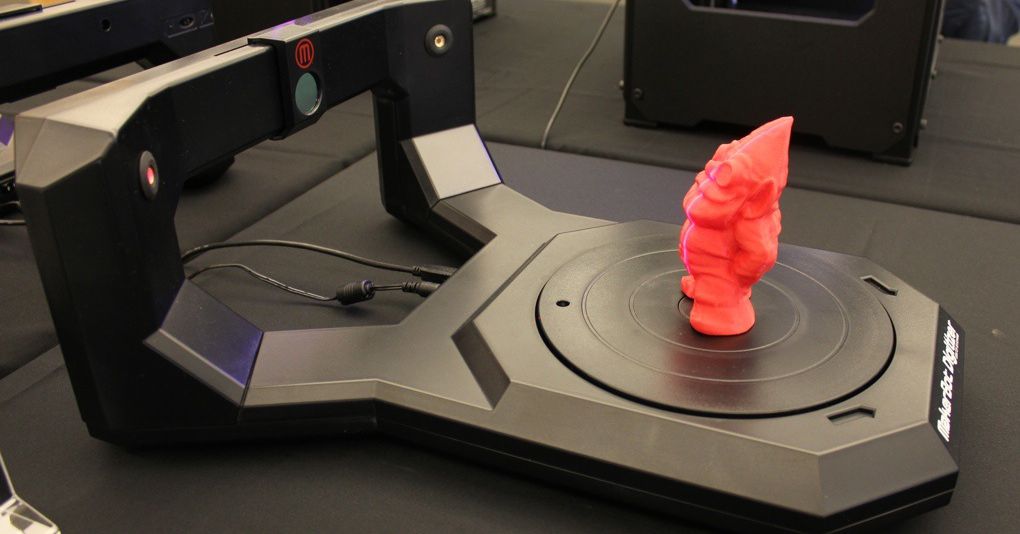 com.
com.
Cautionary Statement Regarding Forward-Looking Statements
Certain information included or incorporated by reference in this press may be deemed to be “forward-looking statements” within the meaning of the Private Securities Litigation Reform Act of 1995, Section 27A of the Securities Act of 1933, and Section 21E of the Securities Exchange Act of 1934. Forward-looking statements are often characterized by the use of forward-looking terminology such as “may,” “will,” “expect,” “anticipate,” “estimate,” “continue,” “believe,” “should,” “intend,” “project” or other similar words, but are not the only way these statements are identified. These forward-looking statements may include, but are not limited to, statements relating to the company’s objectives, plans and strategies, statements regarding the company’s products and their expected performance, statements that contain projections of results of operations or of financial condition (including, with respect to the MakerBot merger) and all statements (other than statements of historical facts) that address activities, events or developments that the company intends, expects, projects, believes or anticipates will or may occur in the future. Forward-looking statements are not guarantees of future performance and are subject to risks and uncertainties. The company has based these forward-looking statements on assumptions and assessments made by its management in light of their experience and their perception of historical trends, current conditions, expected future developments and other factors they believe to be appropriate. Important factors that could cause actual results, developments and business decisions to differ materially from those anticipated in these forward-looking statements include, among other things: the company’s ability to efficiently and successfully integrate the operations of Stratasys, Inc. and Objet Ltd. after their merger as well as the ability to successfully integrate MakerBot into Stratasys; the overall global economic environment; the impact of competition and new technologies; general market, political and economic conditions in the countries in which the company operates; projected capital expenditures and liquidity; changes in the company’s strategy; government regulations and approvals; changes in customers’ budgeting priorities; litigation and regulatory proceedings; and those factors referred to under “Risk Factors”, “Information on the Company”, “Operating and Financial Review and Prospects”, and generally in the company’s annual report on Form 20-F for the year ended December 31, 2012 filed with the U.
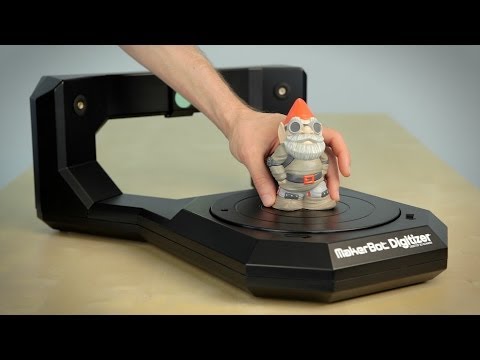 S. Securities and Exchange Commission and in other reports that the Company has filed with the SEC. Readers are urged to carefully review and consider the various disclosures made in the company’s SEC reports, which are designed to advise interested parties of the risks and factors that may affect its business, financial condition, results of operations and prospects. Any forward-looking statements in this press release are made as of the date hereof, and the company undertakes no obligation to publicly update or revise any forward-looking statements, whether as a result of new information, future events or otherwise, except as required by law.
Photos/Multimedia Gallery Available: http://www.businesswire.com/multimedia/home/20130822005827/en/
MakerBot
Jenifer Howard
+1-347-676-3932 (o)
+1-203-273-4246 (m)
[email protected]
Source: MakerBot
Released August 22, 2013
3D scanning robotic complexes — Alfa-Intech URTC
Description
3 D scanning is an analysis of real world objects in order to restore their full appearance using a digital 3D model.
Applications:
- Product quality control in production
- Reverse engineering
- Cartography and geodesy
- Archeology
- Medicine (dentistry and plastic surgery)
- Scanning of architectural structures
Request an offer
For scanning using robots, the task of quality control of products should be considered the most suitable, since it is necessary to perform repeated scanning of the same objects, whose dimensions are in most cases comparable to the working area of the robot.
Scan types:
Laser scan - the principle of operation is similar to the operation of a laser rangefinder: in three-dimensional space, the speed of the laser pulse from the point where the device is installed to the object and back is calculated. If you combine all the data obtained, you get a kind of point cloud in three-dimensional space. Another way to obtain and calculate data is triangulation.
Triangulation is used in portable 3d scanners, and the principle of operation is to record the position of an object, which is then used in the location of the object relative to the camera's field of view. To speed up the process, a laser pulse is used to calculate several points at the same time.
Features:
- are usually used for long distance scanning;
- can be used in rooms with any illumination;
- can scan parts of any material;
- large depth of field;
- laser light can be damaging to the eyes, so do not stare at the beams.
3 D scanners with LED backlit - Such scanners use stripes as a template for detecting objects, and the main methods for creating models are: creating laser noise and projections. The latter uses two flat laser beams to create two equidistant lines.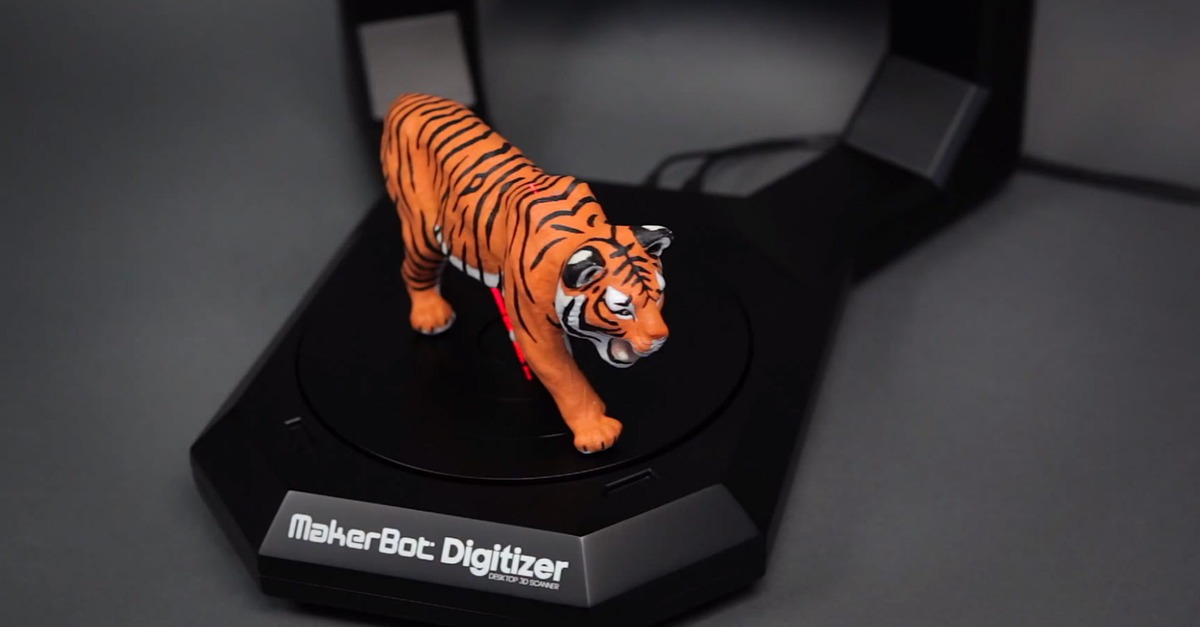 This method is useful for creating an image with a practically unlimited depth of field, that is, the object can be both far and close to the lasers, while the quality of the resulting image will not change.
Contact 3 D scanner – a probe is mounted on the robot, which, upon contact with the object, transmits movement data to the computer.
Features:
- high precision, with the possibility of subsequent export to CAD packages;
- is not applicable to fragile objects.
SL scanners and Photogrammetry - not widely used in robotics.
Features of robotic scanners
When scanning many objects of the same type (solving the problem of product quality control), it is best to entrust the process to robots and free a person from routine processes. As a rule, this does not give a significant increase in scanning speed, but it makes the result stable and repeatable.
Features of robotic scanning
With manual scanning, a person sees the object and the result in real time and can assess where there is insufficient data and where the holes are.
In robotic scanning, the robot does not have additional means of object control (for example, like human eyes), it learns the object in real time using a scanner, and it must make decisions depending on the received data or move along predetermined coordinates.
Ways to solve these features
Approach 1 - scan the object from all possible angles.
Cons are quite obvious:
- Long scanning time
- When scanning objects with cavities, holes, stiffening ribs on cast parts, gaps in the scan and "white spots" will still be observed. received data is not enough.
Approach 2 – follow a known trajectory with the object based.
This approach is the most interesting in serial and mass production, even specific areas of interest to the product can be scanned, and the rest of the data is ignored.
Approach 3 – depending on the observed object, select the minimum number of views and the optimal trajectory of the hand movement with the scanner in such a way as to achieve maximum coverage of the object.
Based on the received data, a closed surface is constructed. After that, the areas for which the lowest reliability is observed are iteratively observed (there is a surface, but there are no points confirming it). Observe the area -> recalculate the model -> observe the area. As a result, a whole series of sequential scans is obtained, as a result of which the robot “learns” the object.
There are several algorithms for constructing the missing mesh elements:
- Poisson Reconstruction (the most efficient)
- Smooth Signed Distance Surface Reconstruction (proposed by F. Calakli and G. Taubin in 2011, similar to the Poisson algorithm but easier to implement)
- Algorithm Fusion (does data averaging and position control, least efficient but easy to implement)
After applying any of the selected algorithms, a reanalysis of those areas in which the data is the least reliable (the data that was approximated) is performed, the process is repeated n times, after which the finished result is displayed in the form of a point cloud.
1 – unprocessed scan, 2 – Fusion method applied, 3 – Poisson method applied
Discuss in social networks0001
In February, a new quality control laboratory, the 3D Scan Room, was launched at the Hyundai Motor Manufacturing Rus plant (hereinafter referred to as XMMR), in the welding workshop. In this article, we will talk about how it works and how it helps to optimize the production process. Ilya Goryachev, Head of the Quality Control Department, and Roman Vinokurov, Leading Welding Quality Engineer, helped us figure out the answers to these and other questions.
We thank the PR department of Hyundai Motor Manufacturing Rus for providing this material.
3D laser scanner installed on the robot works in conjunction with a laser tracker.
All the most interesting and unique we publish in almanac "Production Management" .
300+ powerful cases, ready-to-use checklists and other useful materials are waiting for you in a complete set of numbers. Subscribe and get the best!
3D scanning technology
3D scanning technology, which is widely used in the automotive industry and many other areas, allows you to create a three-dimensional virtual copy of a real object based on the analysis of the shape of a real object. Depending on the type of interaction with the object under study, 3D scanners are divided into two types: contact, which create a 3D model by direct contact with the object, and non-contact. The latter include, for example, a laser scanner - this is the one used at our plant. With 3D laser scanning, a three-dimensional digital model consisting of many points is obtained by measuring an object by scanning the reflection of laser beams from its different parts.
In the automotive industry, 3D scanning is used for design and simulation, product quality control and reverse engineering. At our enterprise, 3D scanning technology is needed primarily to control the geometry of the body and improve product quality. How does this technology help improve quality? When we get a 3D model of a measured body or other object, we can compare it with the original designed model - that is, with the "ideal model". Thus, you can see and understand how the real object differs from the reference one, what are the deviations in size and shape, at what stage of production the equipment should be reconfigured, and so on. Such measurements are made constantly and are necessary both for launching new models and for monitoring the status of those that are already being produced. Previously, only a contact machine (Coordinate Measuring Machine, CMM) was used for this purpose at the plant, later a hand-held 3D laser scanner appeared.
Only one person is needed to manage the whole process. Currently, the training of employees of the quality control department and engineers of the welding shop continues.
How it works
In essence, the 3D Scan Room is a laboratory where measurements are made using the same scanner, only automatically, not manually. The idea of creating such a laboratory, according to Ilya Goryachev, appeared at the beginning of 2020, work on the project implementation began in April. Ilya himself oversaw the project as a key project for the division and the plant as a whole. In turn, Roman Vinokurov, according to the head of the quality control department, took upon himself "the main burden of creating the terms of reference and directly solving important work issues." “Actually, I managed this project for 90% through him, and he did an excellent job,” said Ilya Goryachev.
The project was based on the laboratory at the Hyundai plant in Turkey. The room is divided into two parts: the operator's room and the measurement area. In the measurement area, a Leica scanner is mounted on a robot that controls it using special software. The scanner works in conjunction with a laser tracker. The tracker tracks the position of the scanner in space and understands what position it is in relative to the body. Computers with software for offline programming are installed behind glass in the operator's room. Here sits an employee who controls the process. This room is spacious and comfortable, unlike the Turkish factory. “We understand that in order for a person to concentrate on such work, he needs normal conditions,” Ilya Goryachev emphasized. Soundproofing also serves this purpose - despite the work of the workshop, it is very quiet in the laboratory.
To measure the body, it is placed on a special measuring platform using a crane beam. This platform is easily customizable to measure any model that is produced in our factory. The process of installing the body is done manually, and the measurement bindings are made automatically using a pre-written measurement program. Nearby there is a separate small stand for measuring attachments..jpg) To scan the interior of the body, hinged elements are removed from it.
To scan the interior of the body, hinged elements are removed from it.
Because there is only one robot in the lab, it can only measure one side of the body, and the front and rear. To measure the second side, the platform on which the body is placed must be rotated - this is done manually. When the body is fixed, you just need to start the scanning process. As a result, you will get a detailed high-resolution three-dimensional virtual model of the object under study, which you can work with on a computer. The received image of the PSL format is processed in the PolyWorks program. While processing is in progress, the robot is ready to measure a new object.
The 3D model of the measured object obtained as a result of scanning is processed in the PolyWorks program.
Better, faster, more accurate
As already mentioned, XMMR measurements were previously carried out using a contact machine. A hand scanner appeared at the factory also quite a long time ago. All this is still used, however, both the CMM and the handheld scanner are inferior to the 3D Scan Room in a number of ways. First, it's speed. CMM analyzes the object slowly, point by point. It takes about eight hours to fully measure one body using a contact machine, that is, only three bodies can be measured per day.
Second is the ease of use. CMM requires direct contact with the surface of the object, which not only slows down, but also complicates the measurement process. The same applies to a handheld scanner: it takes a lot of time and effort to manually measure all areas of the body surface. 3D Scan Room saves these resources. The whole process of measuring the body at the start of the project should take a maximum of three hours according to the plan. At the same time, there is the potential to increase speed - this can be achieved by accelerating the work of the robot, as well as by optimizing the measurement program.
Only one person is needed to manage the entire process. Currently, the training of employees of the quality control department and engineers of the welding shop, who used to work with SMM, and now in the laboratory, including with measurement programs, continues. Training is conducted by invited Korean specialists. “This is high-level programming – you don’t just write a program for a robot, you write a measurement program, you teach a robot to measure. It's complicated. This is done by a special remote control in conjunction with the scanner control system,” explained Ilya Goryachev. According to him, the department is faced with the task of launching the 3D Scan Room in three shifts so that measurements are carried out without interruption, since the higher the number of measured objects (models), the more data for more detailed analysis and more efficient equipment settings.
The process of measuring the body at the start of the project, according to the plan, should take up to three hours.
Another advantage of 3D Scan Room is the measurement accuracy.