Kudo 3d printer
Titan 2 HR - Kudo3D
Skip to contentTitan 2 HReven2019-12-04T23:03:03-08:00
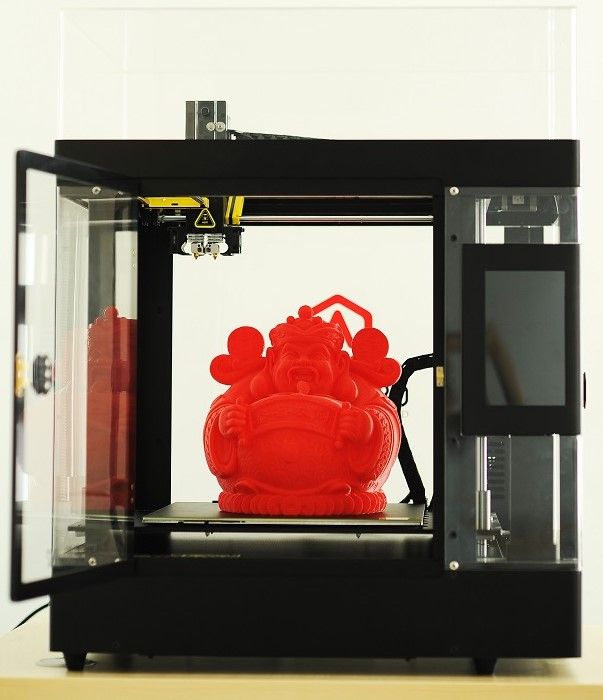
High Resolution SLA DLP 3D Printer
- Versatile, high-resolution, high-speed 3D printing between the following resolution ranges for micro applications:
>> 26 ~ 50μm
>> 23 ~ 38μm - Maximum build height up to 9.8 in
- Patented PSP (Passive Self-Peeling) technology:
>> Passive double peeling mechanism
>> Enhanced printing speed and surface quality - Web based controlling:
>> Compatible with all PCs, Macs, smartphones and tablets - One device can be used to control multiple Titan 2 HR 3D printers
- Built-in Raspberry Pi
- Shutter to reduce background exposure
- Calibrated at 23μm or 26μm XY resolutions
- Long lifetime: Mechanical structure is all-metal and designed to last for 10 years
Printing Features:
- XY resolution (HD native pixel size): 26 ~ 50μm or 23 ~ 38μm
- Z resolution: 5μm (native gear resolution)
- Build Size: 44.
16 x 24.8mm at 23 μm XY resolution
- Maximum print speed:
2.7 in / hr for XY: 50μm and Z:100μm resolution
Hardware:
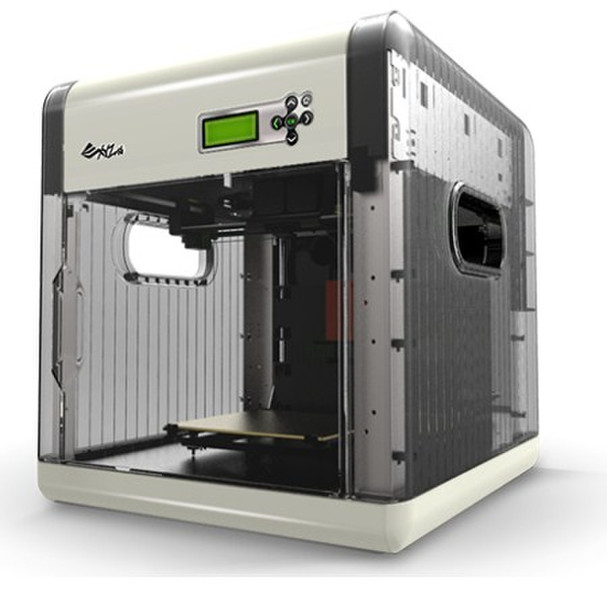
- Machine Size: 16.1″ x 13.7″ x 33.6″ / 41cm x 35cm x 85cm
- Weight: 30 lbs / 13.5 Kg
- Flexible PSP resin container
- THK’s high precision industrial grade linear stage module
- HD DLP projector with a 2cm native 1920×1080 DMD chip by Texas Instruments
- Raspberry Pi 3 with 16G memory
- Compatible with 802.11n Wifi
- Heavy duty metal frame & case
(28μm diameter needle printed at 23μm XY resolution)
A new innovation sprouts from a single idea. We, at Kudo3D, know how this works. With countless hours of design and experimentation, our SLA DLP high resolution 3D printers have been created with you in mind. We guarantee the reliability and flexibility in the creation of your project. From super detailed microfluidics designs to large engineering models, your ideas can be transformed into a reality.
 Experience the possibilities with Kudo3D’s Titan DLP 2 HR SLA high resolution 3D printers today!
| Titan 2 HR 3D Printer | Titan 2 Printer | |
|---|---|---|
Titan 2 HR 3D Printer with Green Emerald Cover | Titan 2 3D Printer with Red Ruby Cover | |
2 PSP Resin Containers (1 Soft + 1 Hard) | 2 PSP Resin Containers (1 Soft + 1 Hard) | |
Small Build Platform | Small Build Platform | |
Large Build Platform | ||
500 gram of 3DSR UHR Resin | 1 Kilogram of 3DSR DX Black Resin | |
| Price (USD) | $4,799 (23~38μm) |
I purchased a couple Titan 1s a year and half ago to replace the $100,000 3D printer I have been working with for 10 years. Performance of Titan 1 is just as good as that of the high end 3D printer.I have been printing almost every day and produced more than 4000 customized rings over the last 18 months. My customers are also very happy about the casting results. The printers are super reliable and require little maintenance and calibration after they are set up. I am very happy with my Kudo3D printers and decided to purchase another Titan 2 to increase my capacity further.
Rem3D, a jewelry designer
I’m really pleased with my purchase of the titan 2 dlp 3d printer. Sure, there is a learning curve but Kudo3D staff helped me all the way through it during my first two weeks, flawless customer support ! Great high resolution 3D Printer, high details, very fast and many different resins to choose from for every type of work since you have full control of the printing parameters. I will add that is a plus for me to have an open source 3D printer with most of the parts easily accessible. All in all I’m an happy customer who now print a lot !
Mike R. , Vertex Media, a 3D Arch Viz/Photography & Web Services Company
Pasamos mucho tiempo investigando los diferentes tipos de impresión FDM, Láser y DLP SLA. Finalmente nos decidimos por la tecnología SLA por su gran calidad. Tras ésto, escogimos la TITAN1 de Kudo 3D por su gran adaptabilidad y por ser Open Source, aunque esto no es del todo imprescindible ya que el software que incluye tiene todo lo necesario para adaptarse a cada modelo y resina y es muy configurable. Ésto ha sido fundamental ya que ningún modelo es igual y poder establecer parámetros distintos en cada impresión hace que puedas imprimir cualquier pieza.
SolidCam Estudio, VFX/ Proveedor de servicios de impresoras 3D
We spent a long time investigating the different printing options in the market; FDM, Laser and DLP SLA. Finally, we chose the SLA technology for its great quality and high resolution. After that, TITAN 1 by Kudo3D was the best option for its great adaptability, being Open Source, and low maintenance.The Open Source option was no longer an essential, because the software that comes with the TITAN 1 includes all the necessary settings to adapt to all models, different resins, and is highly configurable. This has been fundamental in our jobs, because every print is a new challenge. The tools provided by the TITAN 1 allow you to print all kinds of high resolution models.
SolidCam Estudio, VFX / 3D printing service provider
I love my Kudo3D Titan 1, it allows me to print larger and faster than the other options out there at a resolution that really shows off the details I put into my work. There’s nothing else I’d rather use to bring my digital creations to life.
Nathan Storm, a digital sculptor
Before using the Titan 1, I used another laser-based SLA desktop 3D printer for rough prototypes. I then spent $800 a month on high-end 3D prints from several different vendors printing on $35,000 machines.The Titan 1 has replaced that other SLA desktop printer and that $35,000 machine. That $800 a month now comes to me and I have enough business that I purchased a second Titan 1. Forgot to mention that the lifetime of the resin container is superior. We are able to print ultra high resolution miniatures for over 500 hours per
container.
Joshua Qualtieri, ZombieSmith, a miniatures manufacturer
For the past couple of years we have been using two other desktop DLP 3D printers and before we purchased the Titan 1, print size was limited because of a smaller build envelope. We are replacing our smaller build printers with a second Titan 1 for our projects that require 50 microns XY resolution and sub 50 microns high resolution printing – all within a larger build envelope. Printing with the Titan 1 has resulted in an overall reduction in our printing costs. With increased print speed, a lower print failure rate, and the need to use fewer supports, we realize a reduction in printing time, material use, file setup and post processing time.Above all, the resin container has a lifetime that other printers cannot match. Set supports, slice, and press run!
Craig Turley, Studioqubed, LLC, a 3D printing service provider
Page load link Go to TopSuper Precise Kudo3D Titan 1 SLA 3D Printer Hits Kickstarter on May 27 Starting at $1899 - 3DPrint.com
Kickstarter has seen its fair share of 3D printers over the past year, and we are sure to see many more before this year is over. One of the latest 3D printers to be hitting the popular crowdfunding platform is the Kudo3D Titan 1.
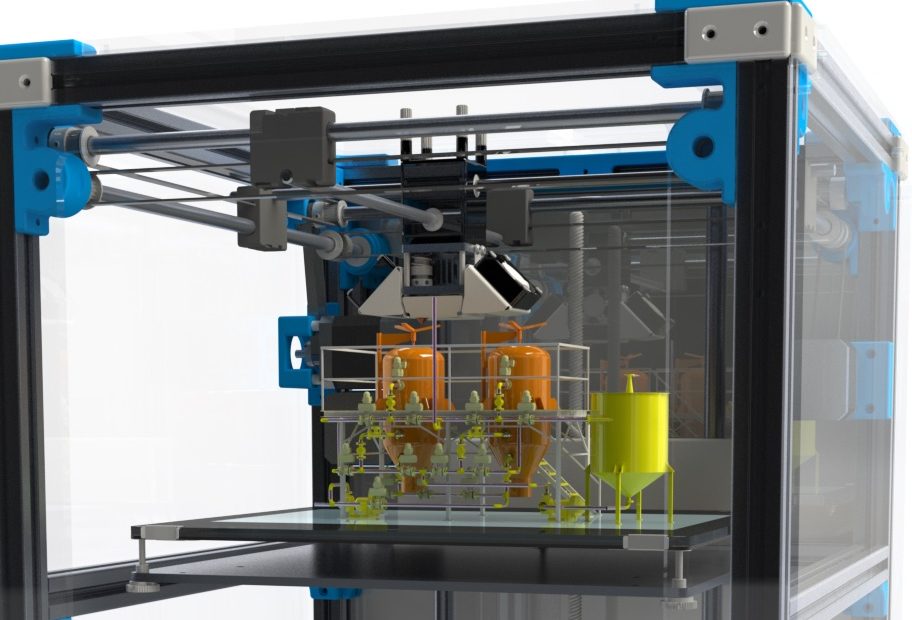
The Titan 1 uses stereolithography (SLA) to print from the bottom up, and features a patent pending ‘Passive Self-Peeling’ technology. This new technology includes a flexible resin container, enhanced printing performance/quality, and simplified printer structure. Tedd Syao, the founder of Kudo3D spent 16 full months developing and perfecting this patent-pending technology for the Titan 1.
Kudo3D explains this PSP technology in more detail:
Passive self-peeling (PSP) technology is a patent pending bottom up SLA technology created by Kudo3D to minimize the separation force between cured layers and the bottom of the resin container. PSP employs a flexible resin container consisting of 5 different materials to enable a self-peeling process that minimizes the separation force. Therefore, feature as tiny as a strand of hair or a big object as tall as 9.5 inches can be printed on the same machine. Equipped with PSP, the printer needs only one stepping motor. As a result, the printer is simpler, more reliable and easy to use. Since our PSP technology employed Teflon, our container is immune to the attack of more reactive resin that happens to most of our competitors. Users can use materials from any vendors by setting proper exposure time.
Unlike other FDM based 3D printers, that most of us are more familiar with, the Titan 1 uses SLA technology where a liquid resin is cured (hardened) using light waves.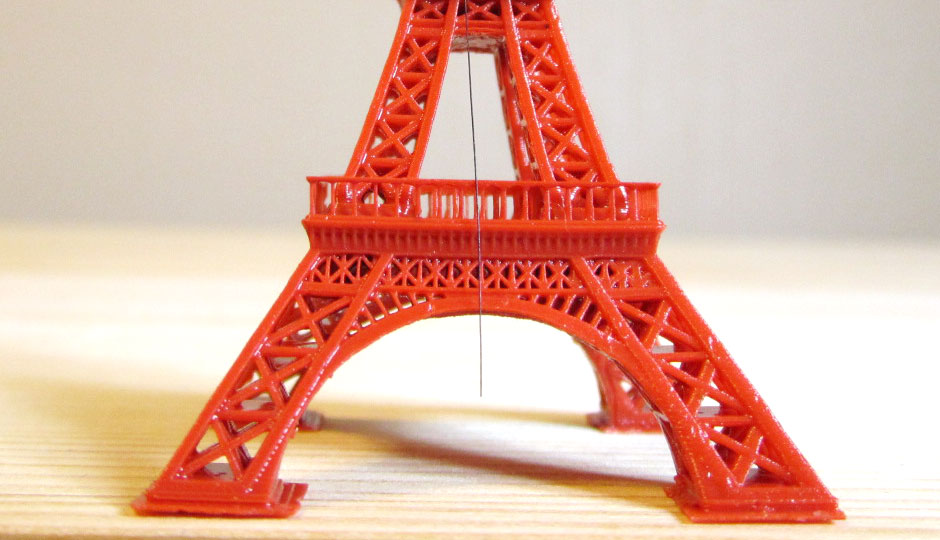 This is done, in small incremental layers. SLA 3D printers can obtain much better resolution and details because of the precision of the light beams. The Titan 1 will be compatible with all SLA photoresins that are sensitive to 400nm light.
This 3D printer compares extremely favorably to other 3D printers on the market today, including other SLA based printers (see chart below)
The resolution and layer thickness, according to Kudo3D blows away that of its competition. The Form1 3D printer is one of the more popular SLA based 3D printers on the market, and it can’t come close to the numbers that Kudo3D claims that the Titan 1 can achieve. The speed is also said to make it the fastest SLA consumer level 3D printer as well.
The hardware seems to be up to par with other 3D Printers too. Here are some of the specifications:
– Machine Size: 16.1″ x 13.7″ x 33.6″ / 41cm x 35cm x 85cm
– Weight: 13.5 Kg / 30 pounds.
– Includes flexible PSP resin container
– High precision industrial grade linear stage module
– HD 1920×1080 DLP projector
– Mega 2560 and RAMPS 1.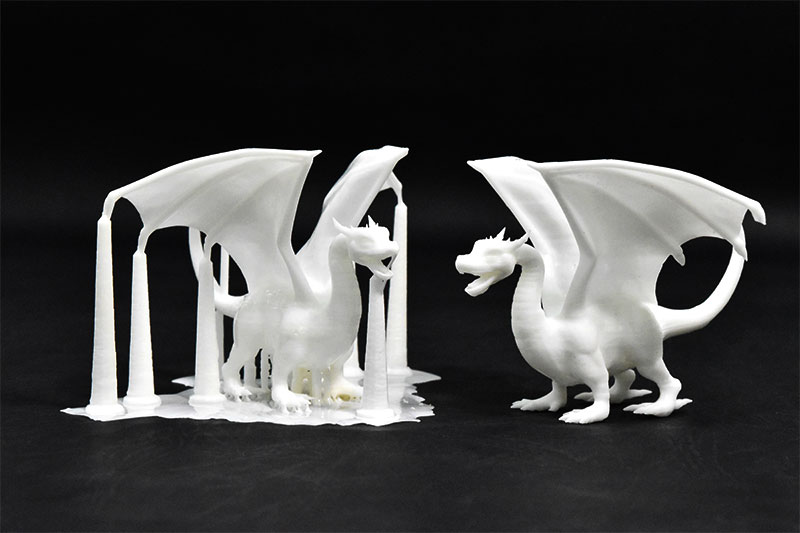 4 controlling circuit
– Nema 17 Stepping motor
– 12cm cooling fan
– Aluminum extrusion frame with steel enhancement
– Brushed aluminum case
– Fast leveling build table
The Kickstarter campaign for the Kudo3D Titan 1 3D printer will launch on May 27, and the first 10 backers will get the printer for only $1,899. Be sure to discuss your thoughts on this new 3D printer in the Titan 1 discussion thread on 3DPB.com. Check out the Kickstarter video for this project below:
Stay up-to-date on all the latest news from the 3D printing industry and receive information and offers from third party vendors.
Tagged with: crowdfunding • kickstarter • kudo3d • kudo3d titan 1 • titan 1
Please enable JavaScript to view the comments powered by Disqus.
A bit about post-processing and priming
Creativity
Subscribe to the author
Subscribe
Don't want
27
Greetings dear community.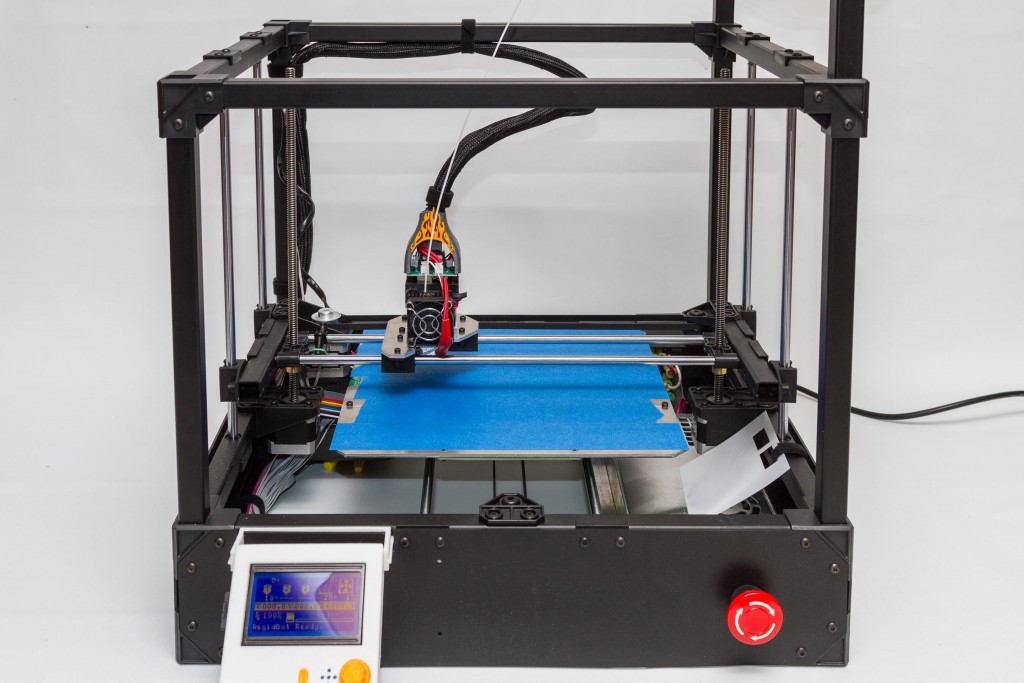 Inspired by the posts of my colleague AMFORMA, I decided to share a little the results of experiments with KUDO soils. Professionally engaged in modeling, I constantly encounter the need for priming and processing models. Of course, there are eminent primers from Tamiya or Mr,Surfacer, but with all their advantages, there is a big minus Price ..... therefore, modelers often look for an alternative. At one time, my colleagues discovered the KUDO ground for modeling purposes. Not realizing the possibility of a variety of these soils, I rushed to the store and bought the soil. As it turned out, not suitable, namely alkyd. I advise you to just forget about alkyd compounds, there are too many minuses. After receiving advice, I realized that colleagues use acrylic primers from KUDO. Having bought myself black and white acrylic primers, in principle I was satisfied with them, but there are nuances, apparently related to the pigments in the primer itself. Black lays down well, evenly and opaquely, but white or gray still give shagreen.
 Example of applying black primer
Model 120 mm high, printed on Anikubik Foton S. All but head primed with acrylic primer.
Everything would be fine, but black color is not always needed, especially important if then light colors. Admiring the work of comrade AMFORMA, I drew attention to the constant reference to the primer KUDO KU-6001. At first I thought it was an acrylic primer, but then I looked in the catalog and found out that this is a special primer for plastic. OZON store to help us and I have two cherished sprays, gray and black.
Now a little about how I use these primers. As an old modeler's habit, I blow them with an airbrush. To do this, you need to bleed the paint from the cylinder. Briefly how to do it. We shake the can according to the instructions, turn it over and begin to poison the gas from it to a safe place. A little soil will fly out, what is left in the tube, then pure air will be etched. We hold it to the limit, until it seems to us that everything . . does not hiss. Putting on gloves and goggles (for a beginner). Next, we put the lid back on and put the balloon on the table upside down, on the lid. For the first time (and you will definitely be afraid the first time), it is better to do it on the street or on the balcony, in a safe place. We take a nail (150-200), I use a trihedral awl, apply it to the bottom of the balloon and punch the balloon with a clear blow. IMPORTANT. The awl or nail should remain in the hole and it is necessary not to drive it inside, but to punch through 3-4 mm, i.e. the tip should sink a little. This is achieved by the force of impact, at first hit not hard, do not break through, add effort, I am sure that you will succeed. So the nail sticks out in the bottom of the cylinder and clearly hisses from there. hold a nail in the hole and let the air escape. There is still a lot of it out there. If the nail is pulled out, a fountain of soil may explode, so we do not relax and do not rush.
 In the end, everything fizzles out. We take out the nail and already boldly punch the second hole closer to the edge of the cylinder, loosening the nail, we expand it more, there are balls inside, we will also merge them into a new container. It is better to pick up a plastic container, there are still a lot of gases in the liquid and they will still come out. Glass can burst under pressure. We drain the soil and leave a new bottle open, the gases will come out. You can lower a plastic stick (warm) there, it will increase gas separation. In general, the primer is ready to be applied from the airbrush.
I needed a light primer, then at first I blew light gray. Preliminary priming was carried out. And to be honest, I didn't get excited.
of course, the photo does not convey, but there is shagreen after priming. In this case, it’s scary, everything will still be skinning, but for the figure, this is not ice. And then I remembered that for Tamiya soils I have a retarder . .. like this
and a thinner .. like this
without further ado, poured a little soil, diluted it and slowed it down .. and voila
there is practically no shagreen.
In general, that's all. If you have any questions, write.
priming Kudo KUDO
Follow author
Follow
Don't want
27
More interesting articles
kenst69
Loading
11/13/2022
3308
39
Subscribe to the author
Subscribe
Don't want
Good time. Article for inspiration) In the process of printing, you often have to do all kinds of processing .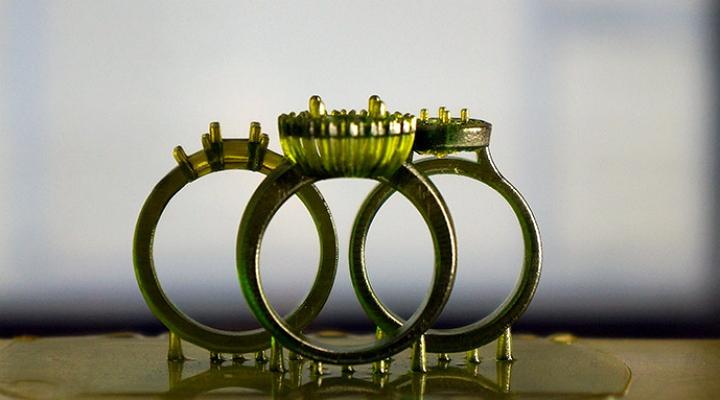 ..
..
Read more
Egen_M
Loading
11/15/2022
450
7
Follow author
Subscribe
Don't want
2023 according to the Slavic calendar is the year of the Fireman Horse (7031 summer). and not to forget and support...
Read more
NotJes
Loading
14.02.2017
39037
212
Subscribe to the author
Subscribe
Don't want
Greetings to all readers of the portal! After my article, many people asked what paintwork I used...
Read more
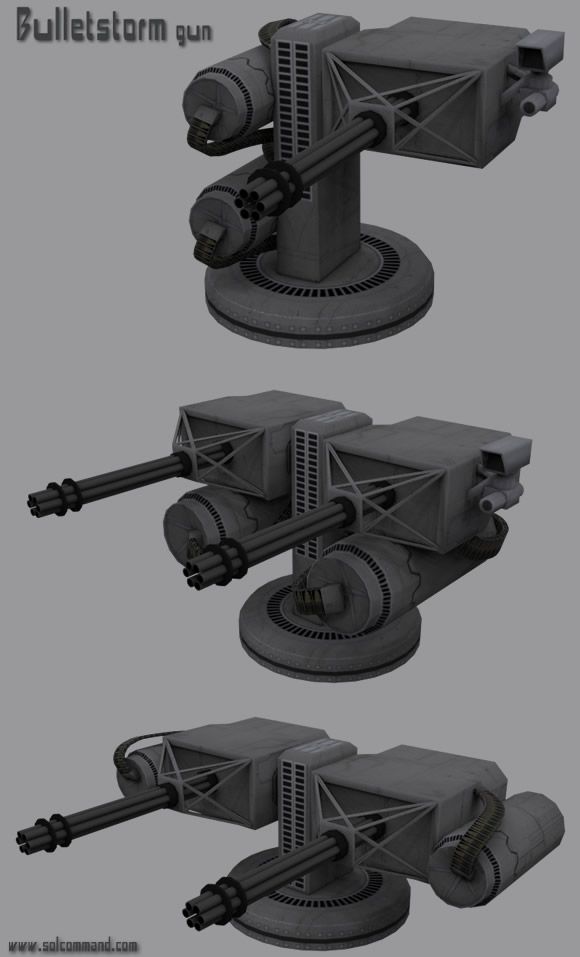
90,000 a long time ago, in a distant-dale Galaxy .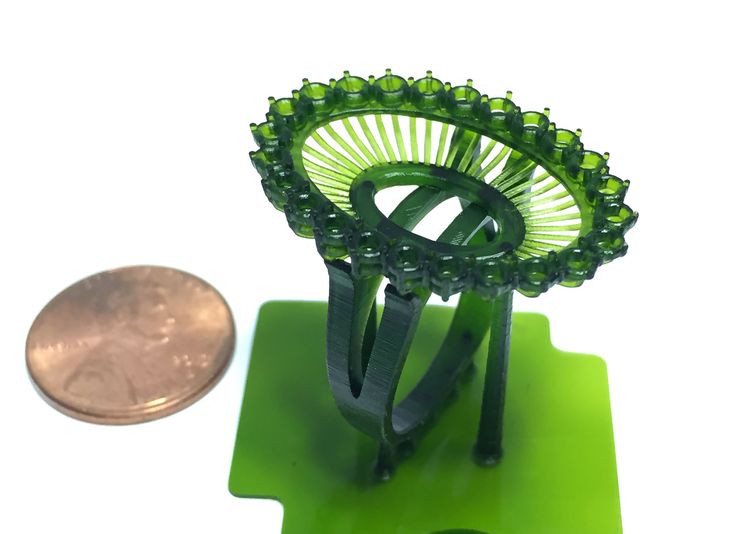 .. Boba Fett
 Creativity
Subscribe to
Subscribe
26
I purchased a new photopolymer 3D printer Anicubyc Photone mono printer X. He came to me and after a test cube I printed a figure of an imperial mercenary and bounty hunter from the Star Wars universe, Boba Fett. The article has a lot of photos with the stages of painting and the result.
I got the model here.
Scale 400%. I adjusted it to the scale of my previous figures - and this is 25-30 cm high.
Made the model hollow in the Meshmixer. Wall thickness 2mm. The drain holes were located at the joints of the parts, in the nozzles of the knapsack, in the muzzle of the rifle.
In Cheetoobox, I placed the models and exposed the supports, uploaded all this to the STL for the Photon workshop of the slicer.
The first independent (prepared by me) printing on photopolymer. The liquid from Ekubikov is transparent green.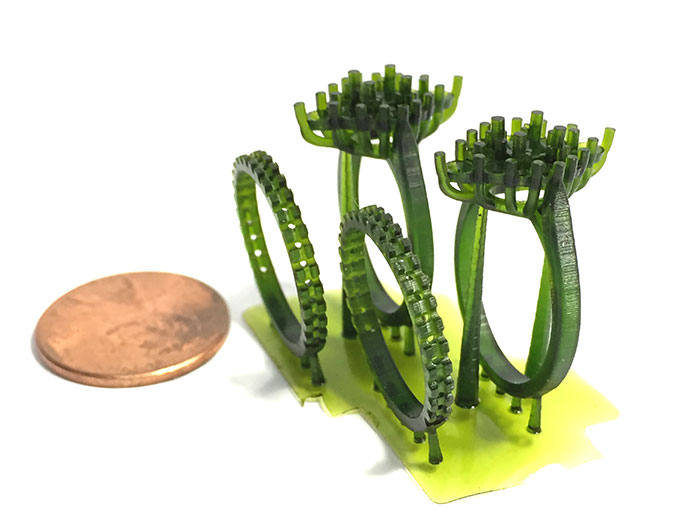
The result is not even bad. There is a small defect on the helmet, as if 1-2 layers were swallowed (a circle on the helmet) and a typical problem in photopolymer printing is an air bubble when completing spherical surfaces. You can see some pixelation (AA doesn't seem to work). But compared to FDM, it's just space. There was no wobble, uneven layers, stripes... The result was very pleasing. A knapsack was printed on the same table at the same time. But either there are not enough supports, or a suction cup, but it was torn during printing. Married...
On the second and third tables I printed the rest of the figurine. There were problems with the right hand, ate the blaster sight, retyped it. Again, not thick enough support and in small quantities.
Soap parts in acetone. Alcohol has not yet acquired at that time. Illumination in Wash and cure from enikubiks.
Files, files, knives processed the joints (immediately, the square grooves did not enter into the reciprocal recesses).
After all this, the figure is assembled (but without glue).
On Ender 3 pro I printed a base from PLA
Lightly covered the figure with white acrylic primer from KUDO. White is bad. I do not like. Gotta get the grey.
Blowed out the figurine with Tamiya gray acrylic paint. Gray color as a base, as the clothes of the mercenary are gray. From above (Blowed with an airbrush from top to bottom) on gray made the highlights light gray and a little white.
Next on the plan is armor.
I masked the details with masking tape and a little with a liquid mask so that only the armor elements remained visible.
Blowed it all out with a Tamiya Black Gloss Acrylic Hard Hat
After drying, blew it all over with Vallejo Chainmall Silver Metallic.
In theory, it was necessary to mask the visor, but I forgot to do it and then finished painting it with a brush. After drying, I already covered the visor with liquid latex. He applied blots of a liquid mask to the metallics.
Then I covered the armor with the main colors: Green, yellow, red. Such a traffic light ... And with a finger or a toothpick he cleaned off pieces of latex, leaving chipped paint on the armor.
Disguised the voluminous pockets on the pants, breathed on them with a slightly beige color. The belt was painted with a brush in red from the decal. He disguised his cloak, blew it out dirty yellow. Due to the previously made highlights and a thin layer, light and dark areas remained visible and still give texture.
Further painting with a brush of all sorts of little things. Pouches, belts, holster, blaster and pistol, wires on the arm and pigtails on the shoulder... A little fine work in the design of the emblems on the shoulder, on the chest and yellow stripes on the side of the helmet.
Very inconveniently made sight/antenna. Either you need to cut it much lower, or print entirely with it.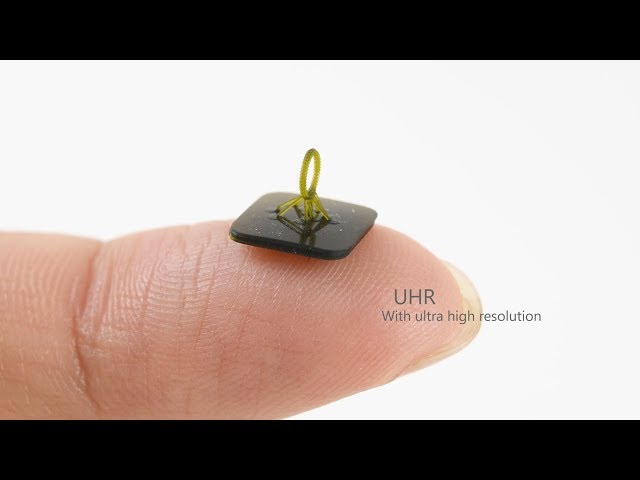 Gluing such a thin part is inconvenient and unreliable.
I painted the knapsack separately. Tamiya acrylic brushes. After the brush, it lays down in a rather thick and durable layer on the latex, and the latex is erased much more difficult.
And here is the result:
Good prints and may the force be with you.
Follow author
Follow
Don't want to
26
More interesting articles
kenst69
Loading
11/13/2022
3308
39
Subscribe to the author
Subscribe
Don't want
Good time. Article for inspiration) In the process of printing, you often have to do all kinds of processing .