Jpg to 3d print
How to Make an STL File & 3D Model From a Photo/Picture – 3D Printerly
3D printing has many amazing capabilities that people can make use of, one of them is making an STL file and 3D model from just an image or photo. If you are wondering how to make a 3D printed object from a picture, you are in the right place.
Keep reading through this article for a detailed guide on how to create your own 3D model from just a picture.
Can You Turn a Picture Into a 3D Print?
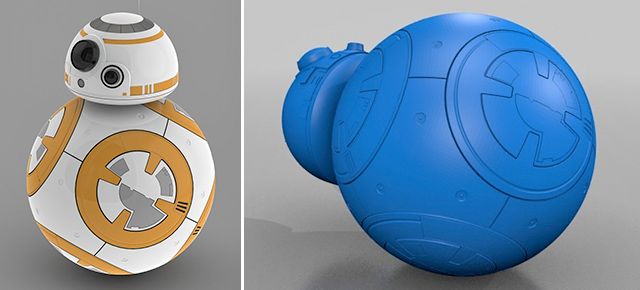
It is possible to turn a picture into a 3D print just by inserting the JPG or PNG file into your slicer like Cura and it will create a 3D printable file that you can adjust, modify, and print. It’s advisable to print these vertically standing to capture the detail, and with a raft underneath to hold it in place.
I’ll show you the very basic method to turn a picture into a 3D print, though there are more detailed methods that achieve better results which I’ll describe further in the article.
Firstly, you want to find an image which I found in Google Images.
Find the image file in the folder you placed it in then drag the file straight into Cura.
Set the relevant inputs as you wish. The defaults should work just fine but you can test these out and preview the model.
You’ll now see the 3D model of the image placed on the Cura build plate.
I’d recommend standing the model up vertically, as well as placing a raft to secure it in place as shown in the Preview mode in the picture below. When it comes to 3D printing and orientations, you get more accuracy in the Z-direction as opposed to the XY direction.
This is why it’s best to 3D print statues and busts where the details are created in line with height rather than horizontally.
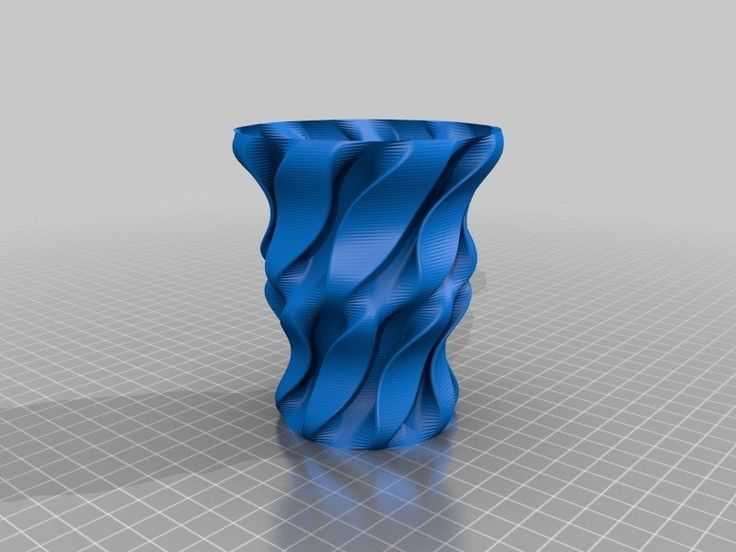
Here is the final product printed on an Ender 3 – 2 hours and 31 minutes, 19 grams of white PLA filament.
How to Make an STL File From an Image – Convert JPG to STL
To make an STL file from an image, you can use a free online tool like ImagetoSTL or AnyConv which processes JPG or PNG files to STL mesh files that can be 3D printed. Once you have the STL file, you can edit and modify the file before slicing it for your 3D printer.
Another technique you can do to make a more detailed 3D print which has the outlines of your model is to make a .svg file in the exact shape you want to create, edit the file in a design software like TinkerCAD, then save it as a .stl file which you can 3D print.
This .svg is basically a vector graphic or an outline of a picture. You can either download a common vector graphic model online or create your own model by drawing it on a piece of software like Inkscape or Illustrator.
Another cool method to turn a single image to a 3D model is to use a free online tool like convertio which processes images to an SVG format file.
Once you have the outline, you can adjust the measurements in TinkerCAD to how high you want it, to recess or extend parts and plenty more.
After you have done your modifications, safe it as an STL file and slice it as usual in your slicer. You can then transfer it to your 3D printer via SD card as usual and hit print.
The printer should then turn your picture into a 3D print. Here’s an example of a user converting SVG files to STL files with the help of TinkerCAD.
Using resources and software programs that you can find online for free, you can convert an image in JPG format to an STL file.
First, you need the image itself. You can either download one from the internet or create one yourself, e.g. creating a 2D floor plan using AutoCAD software.
Next, search for an online converter on Google, e.g. AnyConv. Upload the JPG file and press convert. After it is done converting, download the subsequent STL file.
While you can directly export this file to a suitable slicer to obtain a gcode file that you can print out, it is advisable to edit the file.
You can either use one two popular software programs, Fusion 360 or TinkerCAD to edit the STL file. If your image is less complex and has basic shapes, then I’d suggest that you go for TinkerCAD. For more complex images, Autodesk’s Fusion 360 will be more suitable.
Import the file to the relevant software and begin editing the image. This basically involves a couple of things including, removing parts of the object that you wouldn’t want to be printed out, changing the thickness of the object, and checking all the dimensions.
Next, you’ll need to scale down the object to a size that can be printed on your 3D printer. This size will depend on the dimensions of your 3D printer.
Finally, save the edited design of your object as an STL file that you can slice and print out.
I found this YouTube video which looks very useful when converting JPG images to STL files, and editing in Fusion 360 for the first time.
If you prefer using TinkerCAD instead, then this video will take you through the whole process.
How to Make a 3D Model From a Photo – Photogrammetry
To make a 3D model from a photo using photogrammetry, you’ll need a smartphone or camera, your object, some good lighting, and the relevant software to put the model together. It requires taking several pictures of the model, inputting it into a photogrammetry software, then fixing any errors.
Photogrammetry involves taking a lot of pictures of an object from all different angles and transferring them to a photogrammetry software on your computer. The software then creates a 3D image from all the images you have taken.
To start, you will need a camera. An ordinary smartphone camera will suffice, but if you have a digital camera, that will be even better.
You will also need to download a photogrammetry software. There are multiple open source software that you can download e.g. Meshroom, Autodesk Recap and Regard 3D. If you are a beginner, I’d recommend Meshroom or Autodesk ReCap which are pretty straightforward.
A powerful PC will is also be essential. These kinds of software put quite a load on your computer when creating a 3D image from photos. If you have a computer with a GPU card that supports Nvidia, it will come in handy.
After deciding on the object you want to turn into a 3D model, position it well on a level surface before you start to take photos.
Ensure that the lighting is crisp, for the results to turn out nicely. The photos should not have any shadows or reflective surfaces.
Snap photos of the object from all possible angles. You will also want to do some close up photos of the darker areas of the object to catch all the details that might not be visible.
Proceed to download the Autodesk ReCap Pro from their website or download Meshroom for free. Set up the software you have chosen to download.
After setting up the software, drag and drop the images there. The software automatically detects the type of camera you use for it to correctly carry out the right computations.
The software will take some time to create the 3D model from the pictures, so you have to be patient. After it is done, you can export the 3D model in STL format to your desired slicer.
After slicing the files, you can transfer them to a USB flash drive or SD card. Input the device used to transfer to your printer and print out the 3D model of your photo.
For a more detailed explanation of this process you can take a look at this YouTube video.
You can also look at the video below to get a more detailed explanation of using the Autodesk ReCap Pro software to create a 3D model from photos.
There are other software applications out there that do similar things:
- Agisoft Photoscan
- 3DF Zephyr
- Regard3D
How to Make a 3D Lithophane Model From a Photo
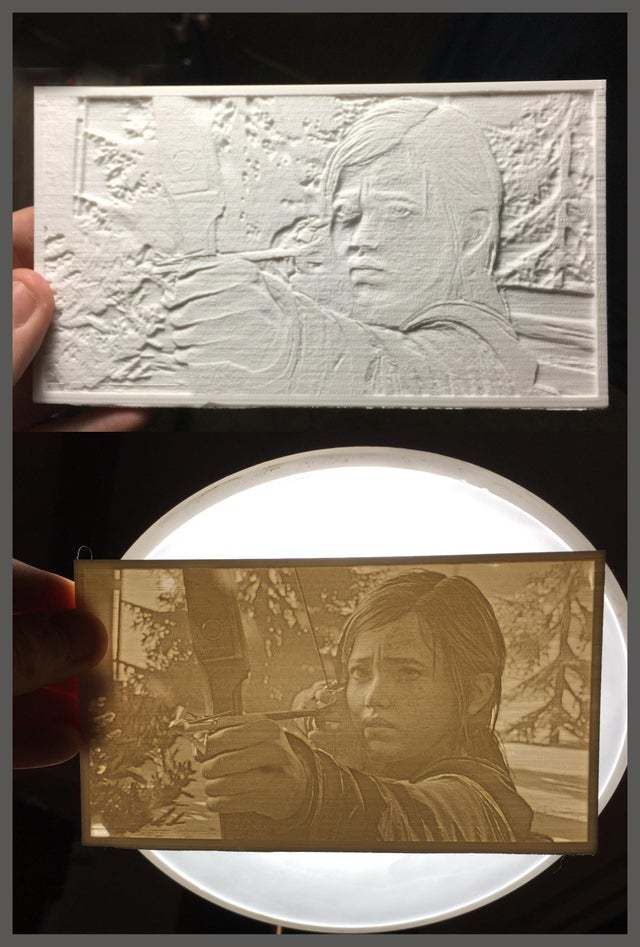
A lithophane is basically a molded photo that has been created by a 3D printer. You can only see the image that has been printed once you place it in front of a light source.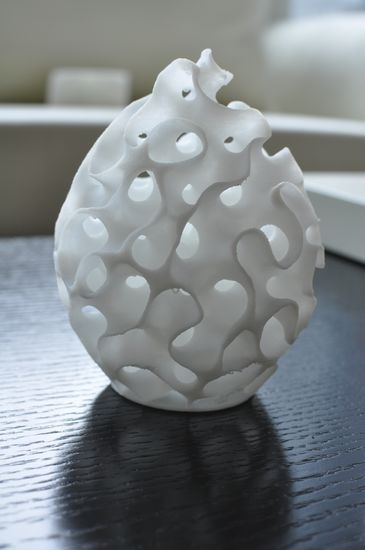
Making a 3D Model lithophane from a photo is a fairly simple procedure. First, you’ll need a photo. You can choose a family portrait you have saved on your desktop, or just download any other free-to-use photo online.
Use 3DP Rocks
Search for an image to lithophane converter online like 3DP Rocks. Upload the photo you want to convert or simply drag and drop it to the site.
Choose the type of lithophane you would like the photo to be converted to. The outer curve is mostly preferable.
Go to the settings tab of your screen and adjust accordingly for your model to turn out perfectly. The settings allow you to adjust parameters such as the size, thickness, curve vectors per pixel, borders, etc. of your 3D model.
For the image settings, the important thing is to put the first parameter to positive image. The other settings can be left as default.
Ensure that you go back to the model and hit refresh for all the settings to be saved.
Once you are done, download the STL file.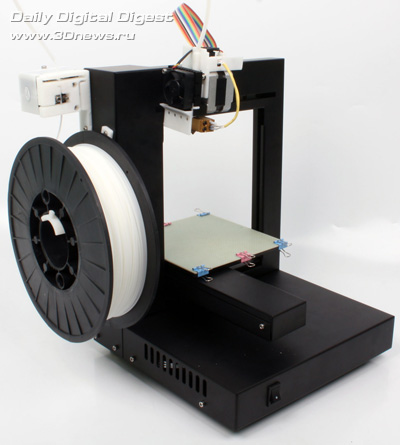 After downloading it, import it to the slicing software you are currently using, whether it’s Cura, Slic3r or KISSlicer.
Adjust your slicer settings and let it slice your file. Save the subsequent sliced file on your SD card or USB flash drive.
Plug it to your 3D printer and hit print. The result will be a nicely printed 3D lithophane model of the photo you chose.
Check out these video to get a step by step explanation of this process.
Use ItsLitho
Another popular software to use is ItsLitho which is a more modern, kept up to date, and has a lot more options.
You can even make colored lithophanes using a special method. Check out the video below by RCLifeOn for more details on how you can do this yourself.
Convert PNG, JPG 2D Images to 3D STL Mesh Model File Free Online Tool
Use our free and fast online tool to convert your PNG and JPG 2D heightmap images or logo into 3D STL (stereolithography) mesh/model files suitable for printing with a 3D printer, CNC machining or for loading into your favourite 3D editing package.
- Upload
- Library
Upload a File...
Click on the "Upload a file" button above to begin. Your PNG/JPG image/heightmap should fit within 600 x 600 pixels, if it is larger than this the image will be resized to fit within this size. Once you submit your image it will be processed as quickly as possible. More complicated images may take longer than others so please be patient. For more information about how your image is converted into the final 3D model please see the section below How Does it Work?.
Upload a JPG or PNG
Click the "Upload a File" button and select an image file (PNG or JPG) to upload. The maximum file size is 100MB.
Select your Options
Set the dimensions and other options and click the "Convert to STL" button to convert your JPG or PNG to STL.
Download your STL
Click the download link once completed to receive your STL file.
What is the maximum PNG image resolution I can upload?
The PNG image you upload can be any size, however our tool will resize it to a maximum of 600x600 pixels for normal users and for those who have paid for a premium subscription this is increased to a maximum of 1000x1000 pixels.
What STL formats can I convert to?
Our tool will save all STL files in binary format. Optionally, our tool will allow you to save to the non-standard color STL format.
How can I convert my PNG file to STL?
First click the "Upload..." button, select your PNG file to upload. Select any configuration options. When the PNG to STL conversion has completed, you can download your STL file straight away.
How long does it take to convert my PNG to STL?
We aim to process all PNG to STL conversions as quickly as possible, this usually takes around 5 seconds but can be more for larger more complex files so please be patient.
How accurate is the PNG to STL conversion?
We aim to create the most accurate conversions with our tools. Our tools are under constant development with new features and improvements being added every week.
Is it safe to convert my PNG to STL on ImageToStl.com?
Yes, of course! We do not store the PNG file you submit to us. The resulting STL file, once created is deleted 1 hour after upload and the download link will expire after this time.
Can I convert PNG to STL on Windows, Linux, Android, iOS or Mac OS?
Yes! Our PNG to STL tool will run on any system with a modern web browser. No specialist software is needed to run any of our conversion tools.
What if I am using an Ad Blocker, will that affect things?
Yes. Although you can use an Ad Blocker, if you like our PNG conversion tool please consider white-listing our site. When an Ad Blocker is enabled there are some conversion limits on some of our tools and processing/conversion times will be longer.
Standard Mode (Heightmap)
The process is simple: After converting your image to greyscale, in Standard mode, our tool examines your 2D PNG or JPG (heightmap) image and based on the brightness of each pixel, will create a corresponding "3D" pixel where the height of the pixel is determined by the pixel luminosity. A black pixel will have a height of 0mm and not be included in the final 3D generated model, however a white pixel will have a height that you specify once your image is uploaded.
When using the Extrude Color mode the tool works in the same way as the Standard Mode however the way the tool interprets the pixel color information changes and also the final generated model will contain the color data overlayed onto the model. Please see our Generate Full Color 3D Heightmap Models From Images article which explains this process in more detail.
Extrude Mode
In Extrude mode our tool traces around the edges found in your image and creates simple but clean 3D models from the image, great for simple images. The Extrude Color mode also creates clean 3D models however instead of varying the model height based on the pixel brightness, the pixel color is used directly in the final model to provide color.
Finally...
The 3D STL file created by our tool can be printed with a 3D printer or if you would like to process the model further, it can be loaded into most 3D mesh editing packages such as Blender etc. For 3D videogame/application developers this is a useful tool for creating 3D mesh files from heightmap images for use in your games and other 3D applications.
How to convert an image (JPG/PNG) to a 3D STL model
3DPrintStory 3D printing process How to convert an image (JPG/PNG) to a 3D STL model
3D modeling can be intimidating for a beginner. And this is one of those cases where creating 3D models from 2D images can be the most appropriate way to get acquainted with the world of 3D printing. Currently, there are several ways to convert JPG and PNG files to STL files in order to get a 3D model from an image.
But before we get into these methods, let's talk about what they are not. While it is true that 3D models can be created from flat images, the methods described in this article do not allow you to create complete, detailed 3D models. Instead, the proposed options are more suitable for making a flat 2D image three-dimensional, which will still require refinement.
So if you're wondering if you can immediately get a bust of Mona Lisa using her image, the answer is no (so you have to spend time and effort on further post-processing of the resulting 3D model). But this does not mean that the methods below are useless!
Option 1 - 3D Builder (Windows)
The first and probably the easiest option is to use the 3D Builder application, which is preinstalled on almost any modern Windows computer. The app has a feature that can convert an image to STL or OBJ file very easily. Please note that this option is only for Windows 10 users. Here's how to do it:
- If you don't already have the 3D Builder app on your computer, download it from the Microsoft Store.
- Once you have downloaded and installed the application, drag the image into the workspace, or click "Add" from the "Insert" menu and select an image.
- Adjust the "Levels" and "Smooth" sliders until the image is crisp and clear. You can also switch between "Contour", "Height Map", "Edge", and "Stamp" settings to add various useful effects.
- When you are happy with the 3D model, click the "Import Image" button. Here you can change the scale using the "Scale" tool at the bottom of the workspace. When scaling, it is recommended to lock the aspect ratio by clicking the lock icon in the same menu.
Option 2 - Cura
If you don't have a Windows PC, the second option is to use Ultimaker's Cura built-in feature. The tool is not as powerful as in 3D Builder, but works great. It's also a great option for those who generally use Cura for slicing because you don't have to export and import the model in different applications.
- Download the Ultimaker Cura slicer from the Ultimaker website if you are not already using it.
- Import the image into Cura by dragging it into the workspace.
- When you have imported an image, a menu with other settings will appear. Here you can change the height, width, thickness, smoothness, and more.
- Finally, you can export it as STL or OBJ by clicking "File" then "Export" or you can cut it directly for 3D printing.
Option 3 - Litophane Converter
Another way to convert an image into a file for 3D printing is to make Litophane. What is lithophane, you ask? Litophane is a three-dimensional object that, due to the difference in thickness, changes the amount of transmitted light. These differences in thickness create dark and light parts of the image that appear to be "embedded" into the object. Thus, the image is only visible when there is light from behind, and it cannot consist of more than one color.
There are many ways to make lithophane, but the easiest is to use the online image to lithophane converter, a much more powerful tool with more settings and better results than Cura's image to 3D model conversion method.
- Click on the "Images" menu and upload the image to the site.
- Select the shape of your lithophane from the "Model" menu.
- Go to "Settings" then "Model Settings". Change "Maximum Size" to the largest size you think you can scale the image to.
- Go to "Settings", "Image Settings". There are many different settings you can change here, but the only change needed is the first "Positive image" slider.
- Go back to the "Model" menu and click "Refresh" and then upload. If you are going to 3D print the resulting litophane, it is important to print it vertically with 100% infill.
3D wax printing on FDM 3D printer. Recommendations and settings on the example of 3D printer PICASO Designer X.
- 1. First a little history of
- 2. What is Filamentarno Wax Base?
- 3. Which printer is suitable for printing?
- 4. How good is Picaso Designer X for Wax Base printing?
- 5.
 Preparing Picaso Designer X before printing Wax Base
 - 6. Printing process
- 7. Result and output
Hello friends, 3DTool is with you!
Investment casting is a fairly popular method of manufacturing metal products. Most of the jewelry is produced in this way, this method is used to create parts of mechanisms, cases and other elements and assemblies that require increased strength. The starting point in the casting process is the original model or ready-made matrix, from which a copy is made from wax or other easily melted material to create shell molds into which the metal is already poured. But what if we bypass the initial model creation phase and make an immediately meltable wax model? This is where 3D printing and new material from 9 come to the rescue.0090 Filamentarno - Wax Base .
1. A little history first
The idea of printing waxes on a 3D printer is far from new, initially, the technology appeared in the camp of photopolymer 3D printers, was used, and is still used today, for example, by such giants as 3D Systems and Solidscape .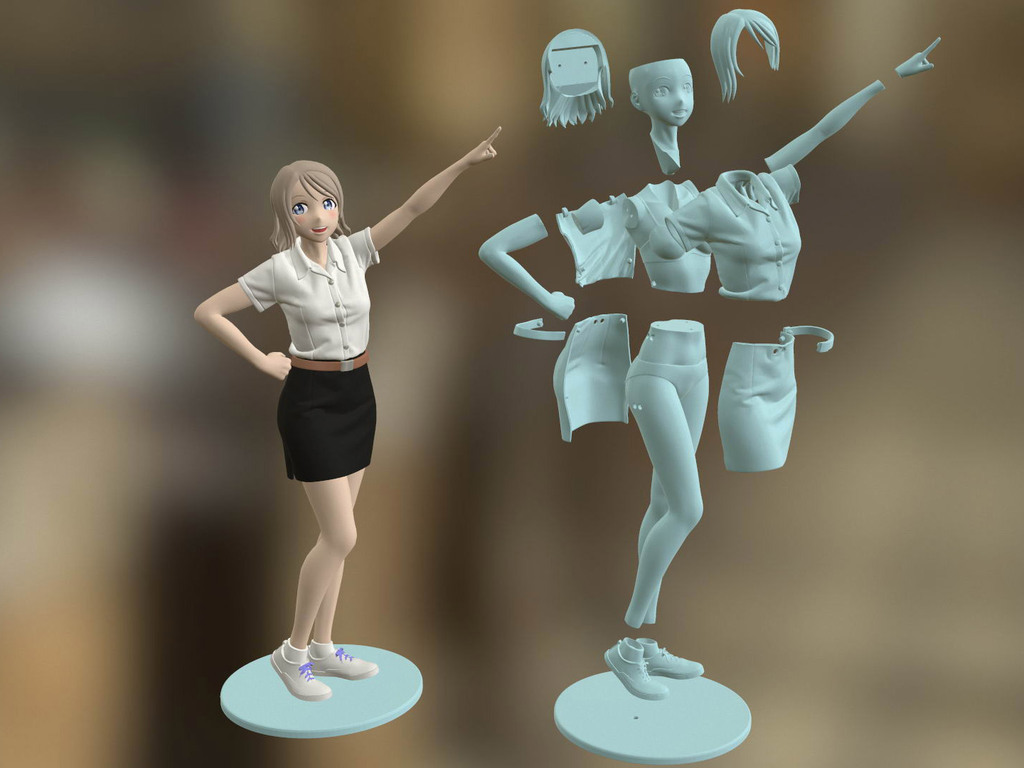 Entire lines of devices have been honed to produce high-precision lost wax printouts with a perfect surface. However, such printers had and still have one tangible minus - what if the desired object is much larger than the size of the working area of the device, and the quality of the surface, in general, does not matter much within reasonable limits? The first thing that comes to mind is to find a device with a larger working area, however, among photopolymer printers, there are negligible models that meet this requirement and, basically, they are sharpened precisely for high quality and miniaturization. Or too expensive to maintain. What to do? But what if you use FDM for these purposes?
Photo from open sources, site sapr.ru
The first experiments with FDM 3D-printed/lost-waxed models used PLA and PMMA, the relatively low ash content of which, in theory, promised to achieve good casting quality, and some enthusiasts actually achieved quite good results. Instead of smelting, however, the technique of burning the material was used. However, widespread practice has shown too high a dependence of the result on the quality of the material, the presence or absence of a dye, the correct temperature regime and a strong limitation on the equipment and materials forming the shell form, not all of which withstand subsequent annealing and do not burst. Moreover, the crust-forming compound is able to transfer even the smallest defects and artifacts on the surface and any spills, cavities and flaws immediately appear on the final result. And avoiding the formation of unwanted gases when burning PLA is very difficult.
Photo from open sources, site sapr.ru
And if large-format casting in industrial, factory conditions allows the use of PLA and PMMA, due to the complication of production technology (there is a wide practice of using such giants of the world of FDM printers as BigRep for these purposes), then medium-sized workshops and small studios equipped with conventional boilerclaves require more flexible approach.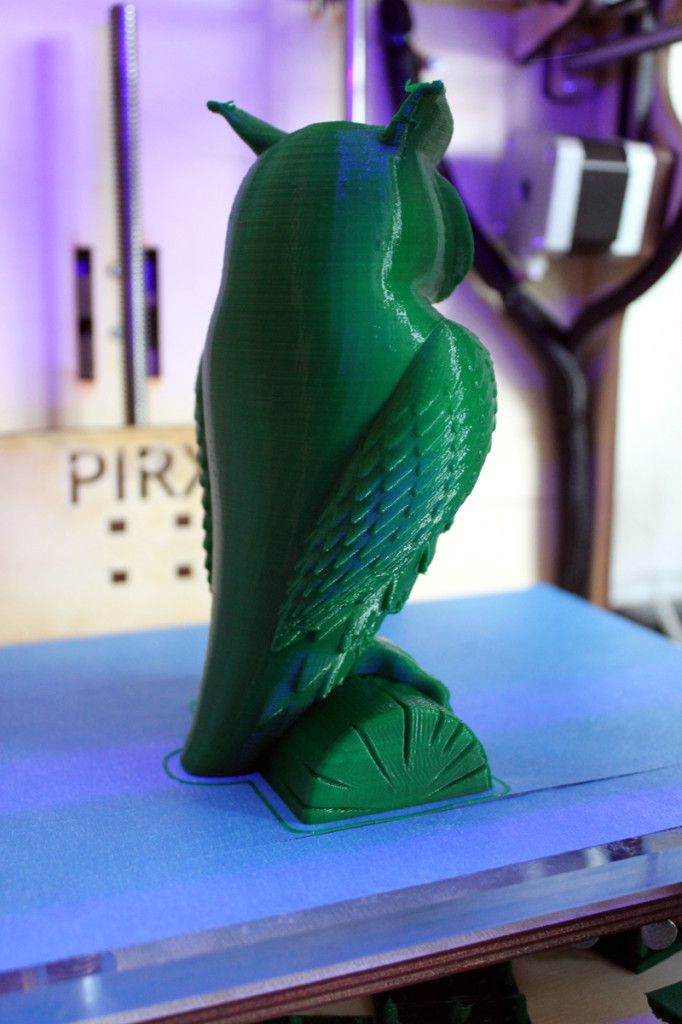 And it is in this case that the Wax Base is perfect for them.
2. What is Filamentarno Wax Base?
Filamentarno WAX Base is a filament for 3D printing using FDM technology for subsequent investment casting from metals, the bulk of which is real jewelry wax. Of course, the composition contains other impurities to stabilize the rod and meet its characteristics in accordance with the requirements of fdm 3d printing, however, the final result is fully compatible with any melting techniques of conventional wax compositions and is easily glued to them, for example, to form sprues.
The company F ilamentarno took a long time to produce this material, the idea appeared a relatively long time ago, but the results were achieved only in the last couple of years, nevertheless, the sensation was such that the company even had to open a small 3D printing studio in order to gain experience applications and respond to the market demand since there were no analogues to this material before.
The material turned out to be promising, among its advantages there is a sharp increase in the maximum possible size of wax waxes, and printing speed, as well as the ability to greatly reduce costs, because the cost of melted wax in the form of a thread turned out to be much more profitable than photopolymer, not to mention the price of photopolymer 3D printers.
This material also has certain features that can hardly be called obvious disadvantages, but they impose strict requirements on the device on which it is planned to print. More about them below.
3. Which printer is suitable for printing?
Due to the physical characteristics of the raw material, Filamentarno Wax Base is printed at significantly lower temperatures than other materials. Softening occurs already at ~ 45 degrees, and melting, from ~ 95 degrees Celsius. Because of this, it can be easily smoothed out in post-processing using hot air guns, torches or soldering stations. The recommended printing range is from 110 to 130 degrees, while most standard 3D printers do not allow the extruder temperature to drop below 190, less often 170 degrees Celsius, which is excessive in the case of Wax base .
Owners of simpler and cheaper models of 3D printers, as a rule, have the opportunity to correct the corresponding parameters in the printer's hardware firmware, or lower the temperature using special control commands. Meanwhile, expensive brands usually do not provide such opportunities and completely close both the firmware and the “console” commands from users from changes. Here is what the manufacturer writes on its website in the description of the material in this case:
“Most often printing on a 3D printer with a nozzle temperature below 170°C is prohibited by the printer firmware. To bypass this limitation, use the G-Code command: "M302 S80" - it can be inserted into the starting G-Code in the slicer settings. This command will lower the print temperature limit to 80°C."
Also, since the material is quite easily torn, soft and melts easily even at low Cold End heating temperatures, you will need to use a direct extruder drive (Direct) for printing, a remote (Bowden) broaching mechanism will not cope with the task and, at best, will “jam » material.
Nevertheless, at least one manufacturing company that took care of printing with low-temperature materials “out of the box” and has printing units equipped with direct drive, we can definitely name. Of course, we are talking about the manufacturer of 3D printers Picaso3D and line of 3D printers Designer Series X .
Let's take a look at the benefits of the Series X line for wax printing using the Picaso 3D Designer X as an example .
4. How good is Picaso Designer X for Wax Base printing?
In addition to the ability to set extremely low extruder temperatures for FDM 3D printing in material profiles, the Series X platform has a number of additional features that make working with the Wax Base easier.
First of all, it is the adjustable temperature of the cold zone (thermal barrier) of the printing unit. It has another temperature sensor that allows you to monitor and adjust peak performance by increasing and decreasing the cooling cooler speed.
This feature prevents the formation of plugs in the extruder tube above the melt zone. The special structure of the receiving "neck" in the pulling mechanism also plays into the hands, which eliminates the bending of the material during filling and printing.
In addition, the system of active “purging” of the working area, thanks to several turbine fans, allows you to quickly cool the material during printing, which also has a positive effect on the quality of the surface when printing roundings and overhanging elements.
And sensors for the presence of filament and control of the upper layer will help prevent damage to many hours of printing in the event of a break or end of the thread.
5. Preparing Picaso Designer X for printing Wax Base
To confidently print Wax Base on your device, you need to stock up on a clean, preferably new, extruder block with a new or carefully cleaned copper nozzle with a diameter of at least 0.4mm. In our case, the most suitable in the Picaso Designer X line is the 0.5 nozzle.
It is also necessary to take into account the following nuances:
-
A rubber scraper is installed on Picaso 3D printers to clean the PG - when printing WAX, it smears the material and harms rather than benefits, it must be removed.
-
For normal adhesion, the heating table on the first layer must be heated to 85-90 degrees, subsequent layers must be set to 0-30 degrees so as not to deform the wax. To do this, you need to have two different material profiles.
-
Airflow - required when printing overhanging elements, the main thing is not to overdo it, otherwise the layers will not bake well.
-
Wax, like many elastomers, does not like retracts, this parameter must be set to 0.
-
Refilling plastic takes place in two stages. The first is filling at an elevated temperature of 190-200 degrees, to eliminate a possible wax plug. The second stage is filling at the extrusion temperature - 110-130C
-
It must be remembered that plastic is very sensitive to extrusion temperature, too high clogs the nozzle, too low gives poor interlayer adhesion. The optimum temperature for picaso designer x is 115 degrees for the first layer, 120-125 degrees for subsequent ones.
-
Periodically, it is necessary to check whether the plastic thread wound on the spool does not stick to itself, this can cause material slippage, because. it pulls out easily.
-
It is very important to correctly set the height of the nozzle above the table, because if the nozzle is pinched, a plug will quickly form in the extruder, which can be eliminated only by refilling the plastic again.
Before printing for the first time, be sure to replace the entire hot end or nozzle with a new / clean one, otherwise the desired result will not be achieved.
When preparing a 3D model for printing at Polygon X , you must adhere to the following rules, try not to make the outer wall very thin, the material may burst. The ideal option is 2 perimeters, approximately 1.2 mm, with a nozzle of 0.5
Percentage of filling, not less than 15%, if the geometry of the model allows.
Otherwise, the requirements for the material are the same as for conventional plastics. It should be noted that the supports come off very easily and, if necessary, the attachment point can be treated with a burner or a building hair dryer in order to achieve a smooth surface.
We printed the current models at the following settings (pictured above).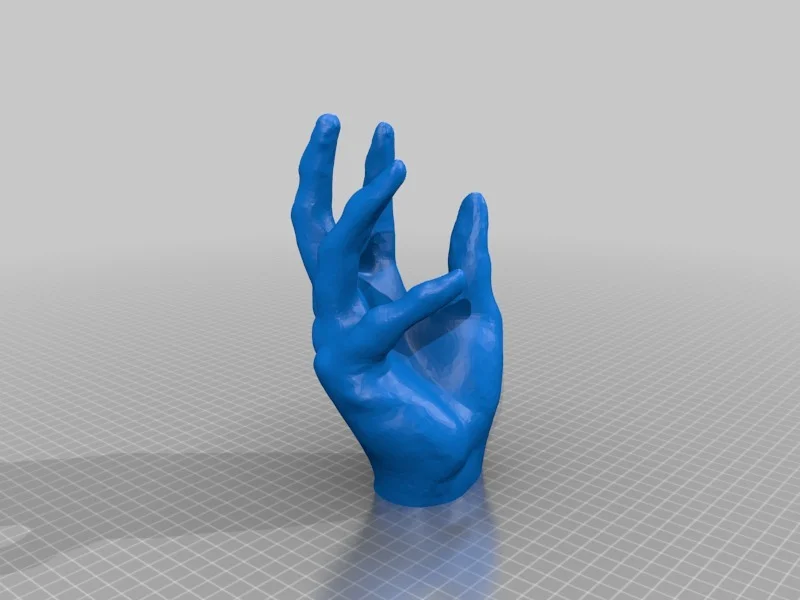
It remains to create two print profiles for printing the first and subsequent layers, send them to the printer and wait for the print results.
6. 3D printing process
Before printing, be sure to thoroughly rinse the glass stage bed and apply fresh adhesive to it. In our case, a regular spray adhesive from PICASO 3D is suitable, however, the manufacturer also offers a proprietary adhesive:
Next, you need to prepare two print profiles according to the following settings, experimentally they showed the best result when printing.
Wax3D_F - profile for subsequent layers, Wax3D(1Layer) for the first.
When rendering the model, be sure to manually set a pause after the second layer in order to have time to switch print profiles.
If you have previously printed with wax on the current printer, you need to start another profile with a higher temperature and load the material only after the old material has “melted through”.
Leaving material in the nozzle at high temperatures is not recommended. This is fraught with traffic jams.
7. Result and conclusion
When printing, we encountered several times the delamination and peeling off of the material from the heating table during the printing process and the selection of parameters.
As you can see in the photo, the material diverges in layers and it may feel that the temperature is insufficient for sintering. However, this is not the case, because when the temperature rises, the material does not extrude, but flows out of the die, which disrupts the layer structure, and the wax does not have time to cool. The difference is clearly visible in the photo below, on the left the temperature is too high.
However, after several reprints, we managed to achieve good print quality. Both with and without support.
The material withstands rather steep angles of inclination "perfectly", as can be seen from this flange in the photo.
The artistic approach is not alien to the material, we printed the head of this character for about a day and, as you can see, the result is excellent.
In general, when printing products with low detail, it is best to select a slow (quality profile) or medium (standard profile) print speed setting so that the material has time to properly form and cool during extrusion. Otherwise, sagging "pulling" of the thread may form.
Based on the results of our experiments, we confirmed the expectations regarding the ease of use of Picaso 3D Designer X for printing Wax Base , this 3D printer is ideal for this kind of tasks and in the portfolio of our customers there are already several successful examples of using this bundle in production.
If you are interested in this material, you are engaged in foundry production, or you want to open your own / modify an existing business, feel free to consider one of the Series X devices for purchase, depending on your tasks.