Ikea lack 3d print
How to build a simple, cheap enclosure for your 3D printer
Maybe you have already seen some of those fancy enclosures people build for their printers. How do they work? And do they work? Today, we will shed some light on this matter! Plus, we are going to dive into patent wars and explain why not all printers come with an enclosure. To top things off, we will even give you a full guide with information on how to build an enclosure for your own printer. But first, let’s start with the fundamental question: what is it good for?
- Stable printing environment – Drafts can negatively impact your print. An enclosure will keep the temperature stable and high. Big differences in ambient and printing temperatures can lead to warping and shrinking of the printed object, especially when printing with ABS. Layer adhesion may also improve with higher ambient temps.
- Reduce and contain smell – Some filaments (looking at you, ABS!) can release unpleasant fumes during printing.
An enclosure will contain these fumes, and you can quickly vent them outside through an open window when the print finishes.
- Noise reduction – As if you needed the MK3 to be any quieter 🙂 But another level of sound isolation can’t hurt, especially if you place the enclosure next to your work desk or in a living room.
- Dust collection – The bearings and smooth rods will appreciate the reduced amount of dust that settles on your printer.
- It’s fun to build 🙂
However, if you’re not printing with ABS or other high-temperature filaments that suffer from warping, you won’t see much of a difference. You might actually want to keep the enclosure open with, for example, PLA to ensure there’s enough cool air around the printer for the part cooling fan.
Enclosure for the MMU2S
If you own the MMU2S, we created a modified version of the enclosure – check it out here.
Why aren’t all the printers on the market enclosed by default?
There are two factors here – price and patents. There is no doubt that the rise of consumer 3D printers was delayed by patents. Companies like Stratasys, Zcorp or 3D Systems have patented nearly every 3D printing technology you can think of. It’s pretty crazy when you look at the sketches from 1980s-1990s and realize just how much some of the current 3D printers are similar to them.
It was only after these key patents expired in 2009 (20 years after application) that the RepRap movement started. And cheap, easy-to-build 3D printers quickly started to be developed. Even though most of these basic patents have already expired, some of them (most importantly the ones owned by Stratasys) are either still active, or have just recently expired. For example, Stratasys’s (still active) patent describes an apparatus “That builds up three-dimensional objects in a heated build chamber” (…) “The motion control components of the apparatus are external to and thermally isolated from the build chamber.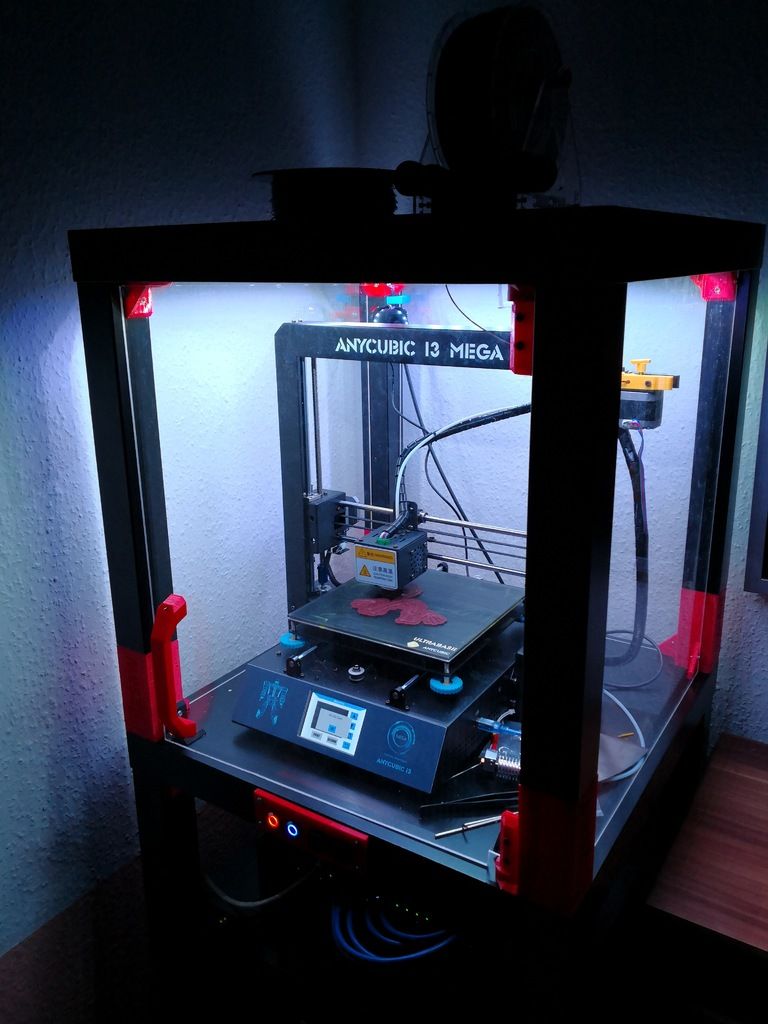 ” That means if you put the stepper motors outside of an enclosure, you can’t sell the product, as it would violate the patent.
Another obstacle is the price. We have considered and even developed a Prusa enclosure quite a while ago. It was made mostly of Plexiglass. Our target was $90 price tag and considering the packing, shipping and material cost, we just couldn’t make it work. It makes much more sense to build the enclosure yourself from locally sourced materials.
How hot should the enclosure be and can the PSU stay inside?
Let’s get something straight, we are not targeting really high temperatures inside the enclosure.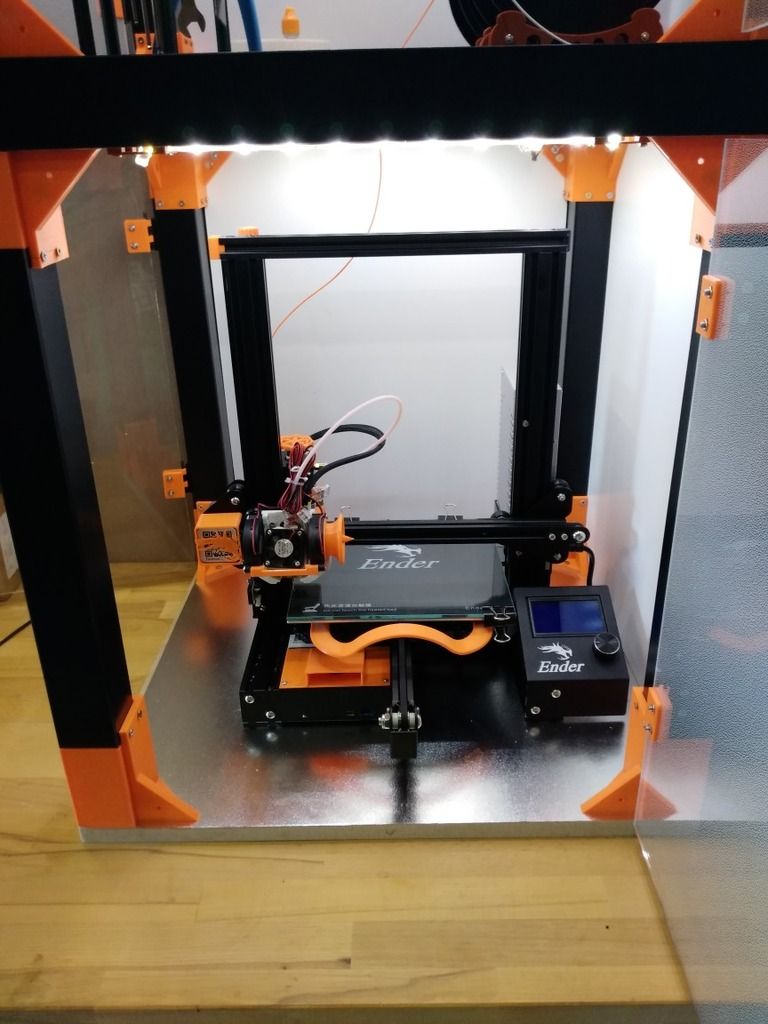 You don’t need an extra heater. The printer itself produces a lot of heat and all you have to do is to not let it escape. The goal is to achieve stable temperatures without any sudden changes from wind or draught. Even just 35°C inside the enclosure will make a massive difference, increase layer adhesion and may prevent ABS from warping.
The PSU is not made to work in extremely hot environments. By keeping the PSU in temperatures above 40-50°C can significantly shorten its lifespan. Ideally, you’d place the PSU outside the enclosure. You can even place the LCD outside to be able to control the printer without letting the hot air out.
2 simple enclosures
Photo studio tent – no work required at all
An enclosure can often be created from an object originally made for a completely different purpose. This photo (80×80) tent can be bought on eBay or Aliexpress for about $15-20. And all you have to do is place the printer inside the tent.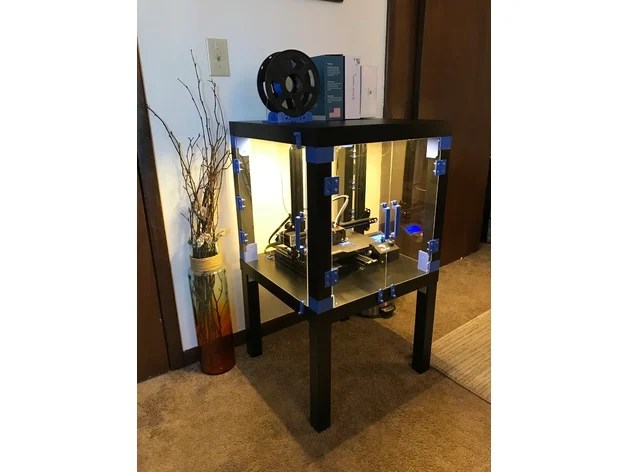 It’s made of textile material, which means it’s porous. A textile enclosure won’t let you reach crazy high temperatures, so you can even keep the PSU inside. We reached temperatures around 38°C after 10 minutes of printing inside a room with the ambient temp. of 26°C – that’s a significant improvement. And as a bonus, you have a photo tent for your prints 🙂
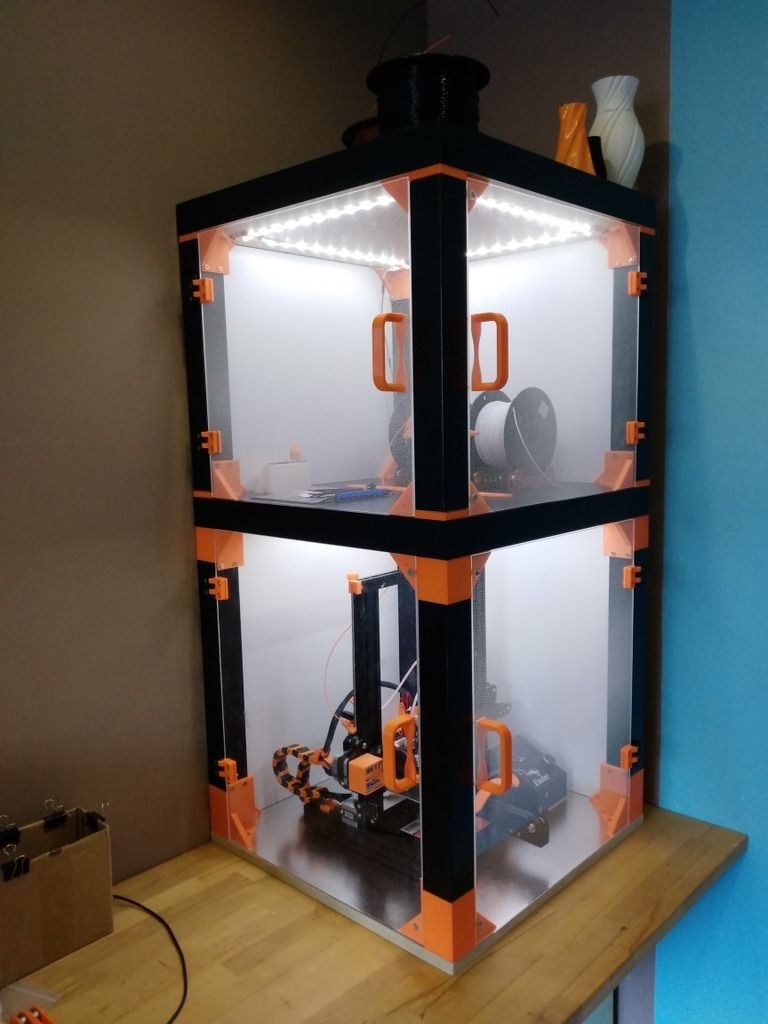
Ikea Lack – when you care about looks as well
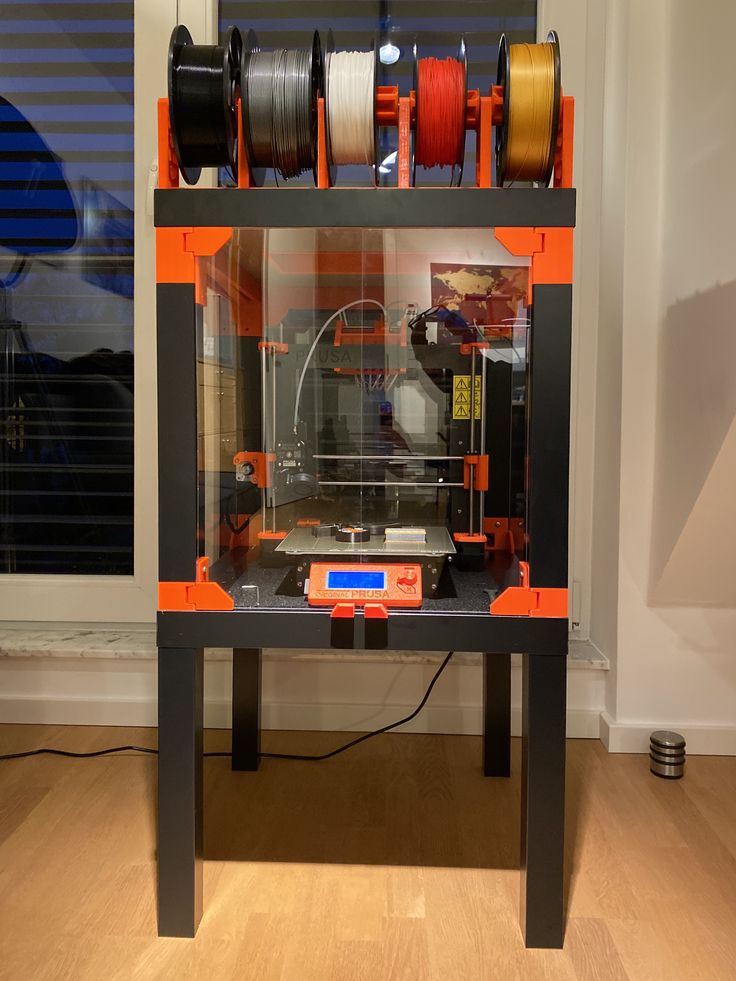
Using Ikea Lack as an enclosure is the most popular choice among the 3D printing community. If you search online, you’ll find dozens of Ikea Lack enclosure designs. The table can be bought for under $10 and has almost the perfect size for Prusa printers. You can stack the tables on top of each other to create bays for multiple printers, or use one as filament and tools storage. Even though some of the existing enclosure designs are pretty good, we wanted to give it our own spin.
Advantages of our enclosure
- PSU placed outside in a clip-on holder, but easily placed back if you need to move the printer
- LED lighting connected to the printer’s PSU
- Hinges built into corner extensions
- Double-door opening
- Individual tables can be lifted at any time
What you’ll need
Printable parts
Ikea Lack enclosure main parts
Frame brace replacing the PSU for the MK3 (silver PSU)
Frame brace replacing the PSU for the MK3 (black PSU)
Frame brace replacing the PSU for the MK2/S (remix by Martin Schnur)
60 degree heatbed cable cover for the MK3
45 degree heatbed cable cover for the MK2/S
Construction
- 2x or 3x Ikea LACK table
- 4x Neodymium magnets 20mm x 6mm x 2mm
- 3x Plexi 440 x 440 mm, 3mm thick (if you’re in the US, try Queen City Polymers)
- 2x Plexi 220 x 440 mm, 3mm thick
Electronics
- Fire/smoke detector
- Indoor/Outdoor Thermometer
- LED stripe 24V, 30 cm
- 24V for MK3, 12V for MK2/S
- If you want to use a 12V LED strip with the MK3, use a separate power supply.
- Twin cable, 100 cm
- 2x WAGO 221 or similar compact lever connector
Screws
- 12x 6×20 mm (12 x 3/4″)
- 4x 6×50 mm (12 x 2″)
Printed parts
- Upper table (enclosure box)
- Lower table (support table)
- Spool holders
Tools
- Philips screwdriver
- Allen keys
- Super Glue
- Drill + 3 mm wood drill + 10 mm wood drill
- Measuring tape
- Marker
Enclosure (upper table) assembly
Upper corner standoffs installation
Attaching the legs
LED stripe
For about $12, you can buy an LED strip with a power supply, like this one. However, if you’re feeling a bit adventurous and have some experience with wiring up electronics, you can power the LEDs directly from the printers power supply. Remember, that the MK3 runs on 24V, whereas MK2/S runs on 12V, so make sure you buy the correct LEDs.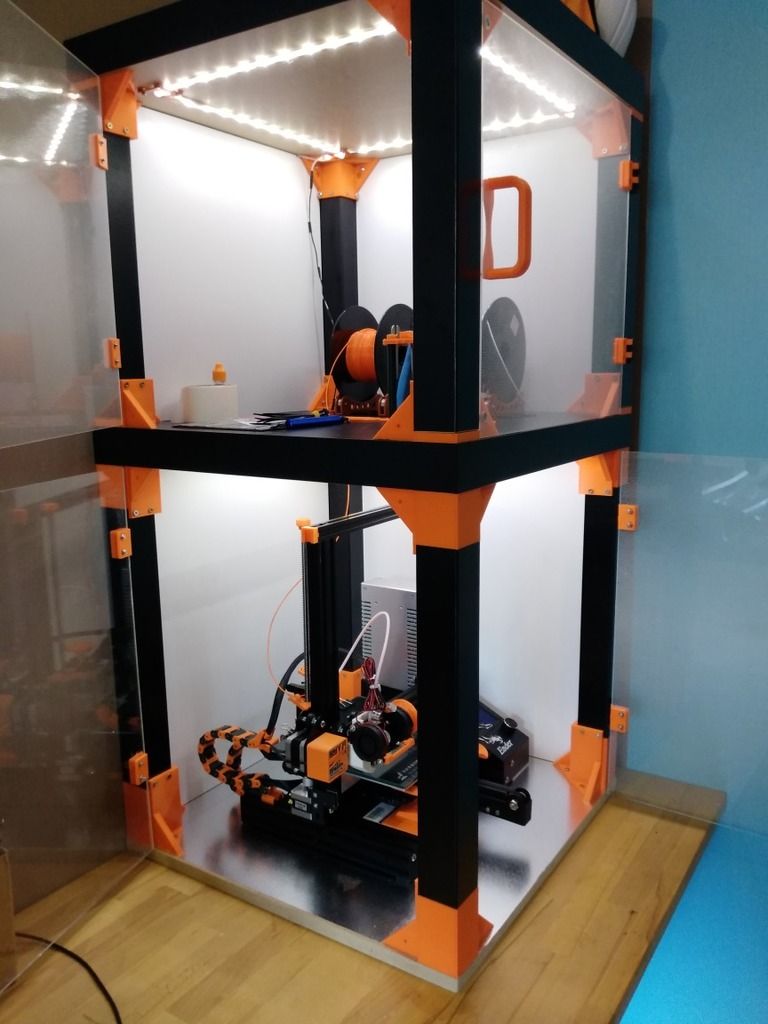
Spool holders
Smoke detector installation
Place the smoke detector in the rear part of the table so it will not obstruct filament insertion or won’t get in the way when you’re taking the printer out from the box.
Bottom corner standoffs installation
Before you start screwing the bottom standoffs, make sure you place the Plexiglass in first. As soon as you tighten the standoffs, the Plexiglass will be fixed in place, and you won’t be able to remove it. This means you can easily lift this section of the enclosure without worrying that the glass would fall out. Note, that one of the four standoffs has a hole for cable pass-through. Make sure you place this standoff on the left side so that the cables can be routed directly to the EINSY board.
Support table (lower table) assembly
PSU holder
Electronics do not thrive in higher temperatures inside the enclosure.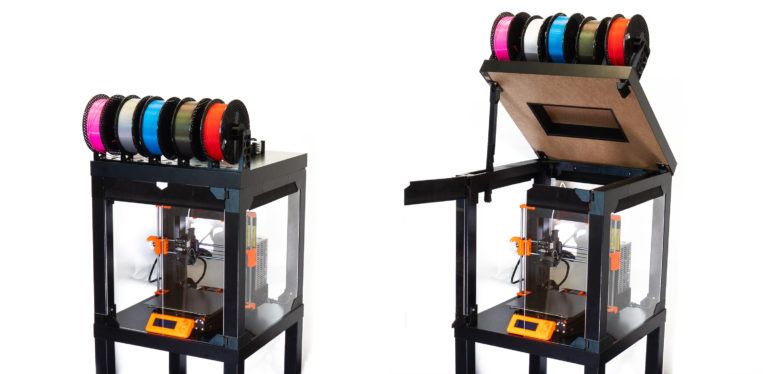 To preserve PSU in good condition, it’s better to place it out of the box. It is even safer!
- Unplug the printer from the power socket. Remove zip ties on the frame to release PSU cables. (Tighten the rest of the cables with new zip ties.)
- Disconnect the cables from the EINSY board. Do not forget to unplug the Power panic sensor as well.
- Unscrew the PSU form the frame.
- Hold the PSU next to the rear left leg (the one with the cable pass-through). Tighten the PSU holder printed part with two screws and then install PSU catcher printed part.
- PSU is now fixed, but it is possible to slide it out when you need it.
- You can replace the PSU on the frame with this printed part to ensure the rigidity of the frame.
Frame brace and right-angle cable cover
After removing the power supply from the frame, it’s possible to replace it with a printed part and ensure frame stiffness. The heatbed cables may hit the plexiglass in the back of the enclosure.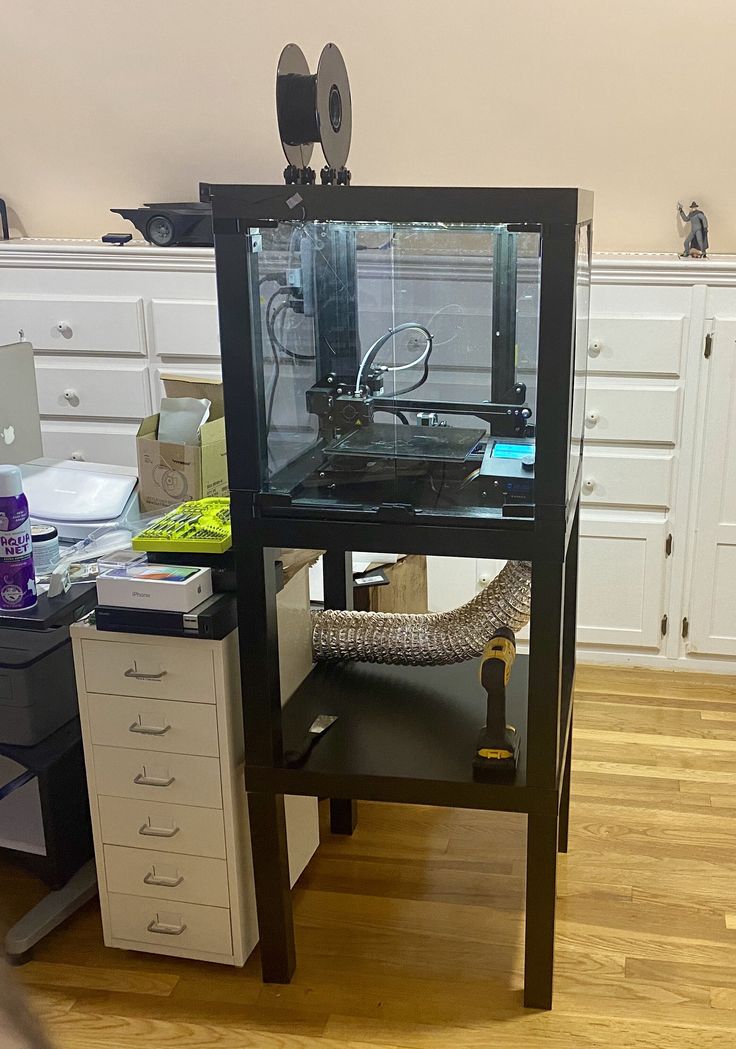 To prevent this from happening, print an alternative 60 degree heatbed cable cover. (EDIT: Users reported several problems with the right angle one shown in the video and on the pictures below, so we switched the suggestion to the 60 degree one).
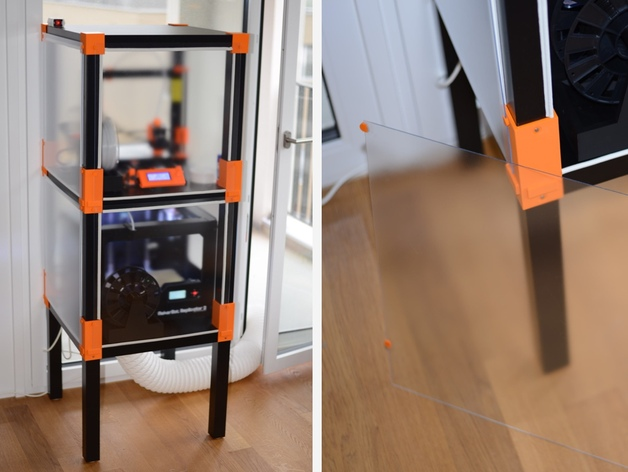
Plugs fixing and magnetic handles
Fix the four bottom plugs. One of them has a hole for cable pass-through. Place it in the rear left corner of the enclosure. Glue two magnets to the door stopper and screw it to the front of the table. Leave enough space for the plexiglass and the handles (1 cm).
Finished enclosure
Now just stack the two tables on top of each other and the enclosure is complete. Optionally, you can add another Ikea Lack table to the bottom to raise the printer to a more comfortable height.
Universal 3D Printer Enclosure Ikea Lack Table Compatible
Ikea Lack Table Universal 3D printer enclosure
Our exclusive Lack Table compatible enclosure is perfect for fitting a variety of printers that can fit with a 21.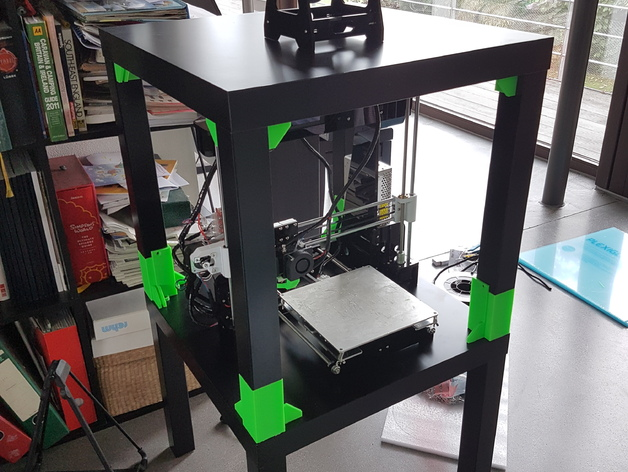 5 inch footprint. We de3signed this to attach onto the top of the ever popular Ikea lack table. Our enclosures area easy to assemble, affective in use, and carry a premium look to give your 3D printing station a professional look. Clearview's "infinity" 3D printer enclosure platform is an easy to setup kit that only needs a screwdriver to assemble. This works with a variety of 3D printers and is Ideal for SLA resin printers.
Our kit comes complete so you get a complete solution Other solutions always seem to be partial solutions that have confusing Bill of materials or incomplete instructions. We have crafted a super easy to understand design with photographic instructions. Clearview Infinity enclosures are designed to have a clean look, that is easy to assemble, and is easy to mod with your own ideas.
As mentioned, this enclosure fits on the top of a common Ikea Lack table or it can be mounted on top of any other table of similar size or bigger.
Main Features:
PRINTING ENVIRONMENT - A dustless, self heated chamber for better printer performance.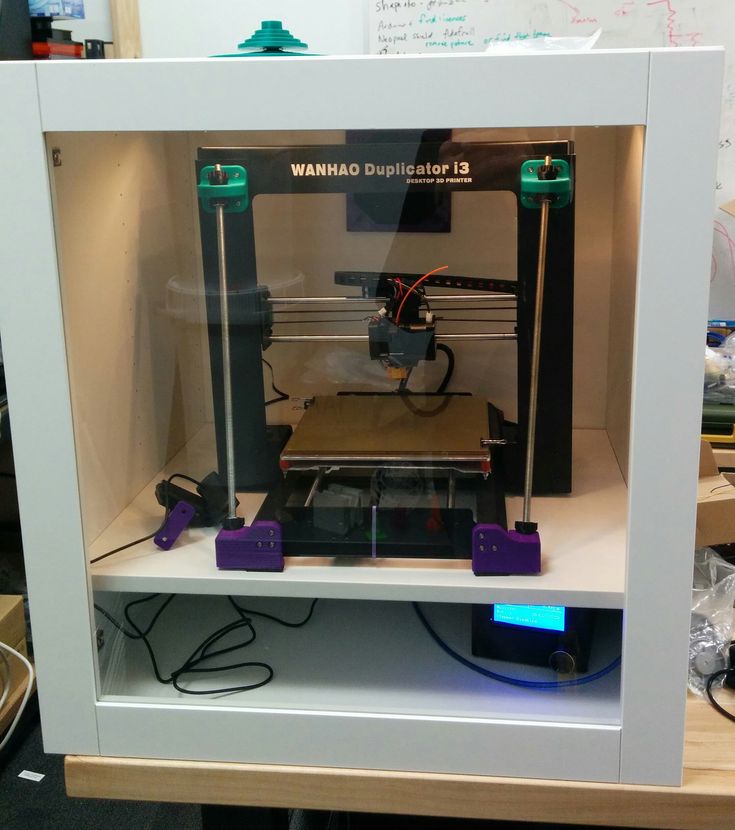
SIMPLE ASSEMBLY - Screw together design that assembles in minutes.
PSU Mount - Use the existing PSU relocation bracket provided by Prusa's guide here: https://blog.prusaprinters.org/cheap-simple-3d-printer-enclosure_7785/
ACCESS DOOR - A generously sized, hinged door with 3D printed magnetic door stops.
FILIMENT PORT - A wide filament feed through port for optimal performance.
CABLE MANAGEMENT - A wide rubber grommet allows wiring to pass through neatly.
STACKABLE DESIGN - Stack 2 or 3 enclosures high to give your print farm a great look.
Each print enclosure is designed and built in house in Sacramento California by people that understand 3D printing and are skilled to make your printing experience great.
We have set up a few buying options to fit your needs:
1 - Enclosure kit - Includes all the parts you need to setup your enclosure including hardware, printed parts, magnets, and commercial grade acrylic panels.
2 - Enclosure kit with Feet - Includes the enclosure kit above plus a set of 4 vibration dampening feet we developed to help dissipate vibrations that travel through floors and walls.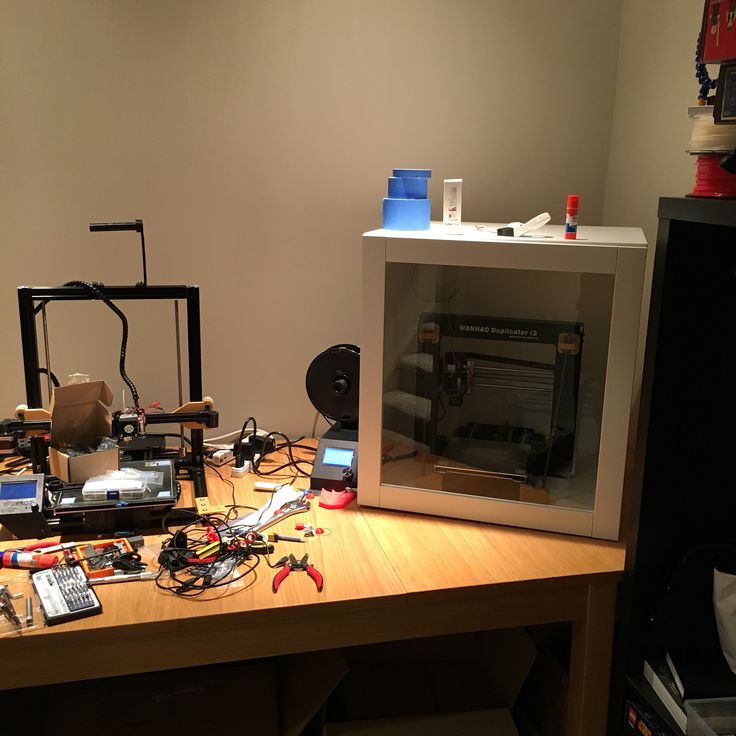
3 - Enclosure kit with Carbon Filter - Our carbon activated air filter is nearly silent, air scrubbing filter that reduces fumes and smells from printing in doors for those in sensitive environments.
4 - Panels+Hardware+STL: This option is great if you want to print in your own colorway. We'll send you the panels and hardware (screws + magnets) and STL file for you to print the parts.
More About the Clearview Infinity
Our main objective was to give your printer an unobstructed view from any angle. At the same time, our enclosures offer easy access with a magnetically latched front door and a cable port to route all your connections. Last, there is a fitted port for your power supply unit to use cool exterior air. This extends the longevity of your printer.
We also have adapted options for our Carbon Air Scrubbing filter and vibration dampening feet. Both do as they suggest. The Carbon Air Scrubbing Filter uses a silent fan to pass air through a carbon filter to reduce fumes created from the 3D printing process.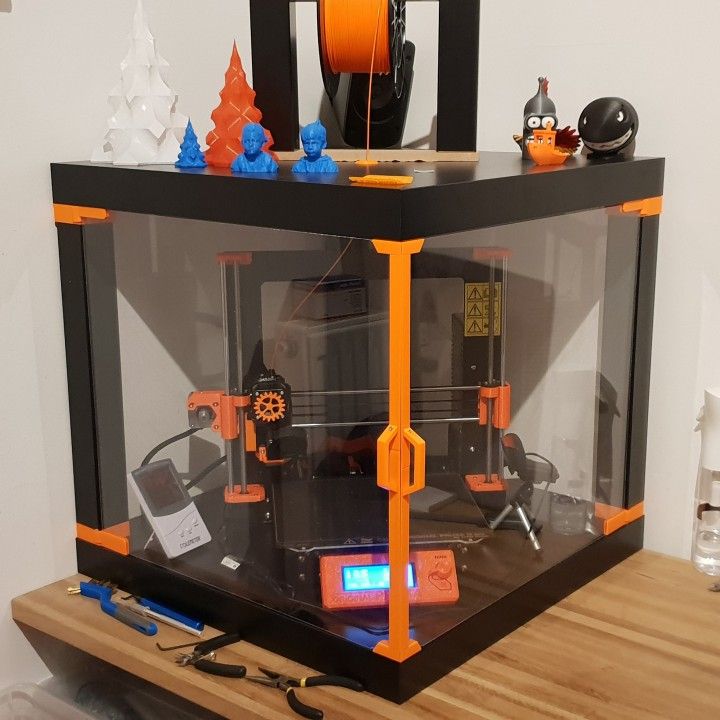 Especially if you are printing ABS, you will want to include that option. Our Vibration Dampening Feet use a multi material lamination that dissipates vibrations at 5 different levels. If you are printing in an area where printing noise needs to be reduced, this is an essential addition to your 3D printing setup.
If you are looking for the Panels only we have set up an option for the panels only. We will supply you with a printable STL file for the parts when your order is submitted. That way you can pick the color you wish.
✅ XL SIZE - 21.5" wide x 21.5" Tall x 23.5" Depth to fit a Prusa i3, Prusa mini, Ender 3, Ender Pro, Ender 3 V2, and many SLA printers. Need an enclosure for a different printer? No problem! we can customize!
✅ Standard Duty or Commercial Grade - Standard duty uses 1/8" thick panels and is ideal for a light weight economical enclosures. Commercial Grade uses heavy duty 1/4" thick panels on all sides, is strong enough to be stackable, and feels like a professional piece of lab equipment.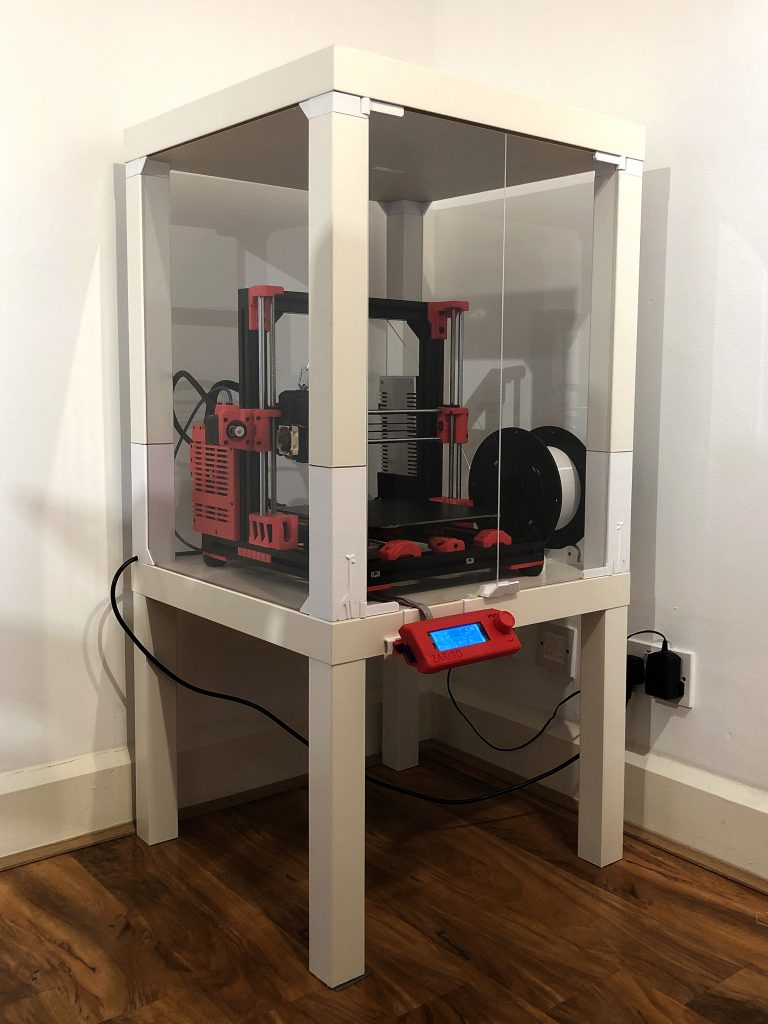
✅ Awesome Performance - Clear Plexiglass is a durable, optically clear plastic that creates the perfect printing environment for 3D printer.
✅ Reduce noise, smell, and fumes that are part of 3D printing. This creates a healthier, cleaner working environment.
✅ - SMALL BUSINESS OWNED AND MADE IN THE USA - We are an appreciative of your support and offer great service to make sure you are happy. Our enclosures come with a 100% satisfaction guarantee and a 1 year warranty against manufacturer defects. Built by 3D printer enthusiast for 3D Printer enthusiasts.
This listing is for the enclosure and does not include the Ikea Lack Table or 3D printer.
IKEA offers 3D printed upgrades to branded products for people with disabilities
News
IKEA Israel, the Middle East branch of the world's largest distributor of self-assembly nightstands and Swedish meatballs, has launched a wonderful project, ThisAbles, which brings together 3D printed models of various accessories that make IKEA products more accessible for people with disabilities.
Let's be honest: designers of furniture, and indeed of any household items, rarely think about the fact that people with disabilities will use their products. IKEA Israel decided to fill the gap in cooperation with non-profit organizations Milbat NGO and Access Israel, dealing with the problems of the elderly and people with disabilities.
The idea is surprisingly simple: if some product is inconvenient or even dangerous to use, why not print a device that makes life easier for the owner? Bad fingers? Then we print handles on the doors, which you can grab with your forearm. Worried about accidentally breaking the glass panel of a cabinet with a wheelchair? Bumpers will help. Need a convenient place to park your crutch or cane while you sleep? So let's add a couple of simple mounts right to the bed!
The project is still at an early stage of development, and there are only thirteen fixtures in the catalog, but the range will be expanded.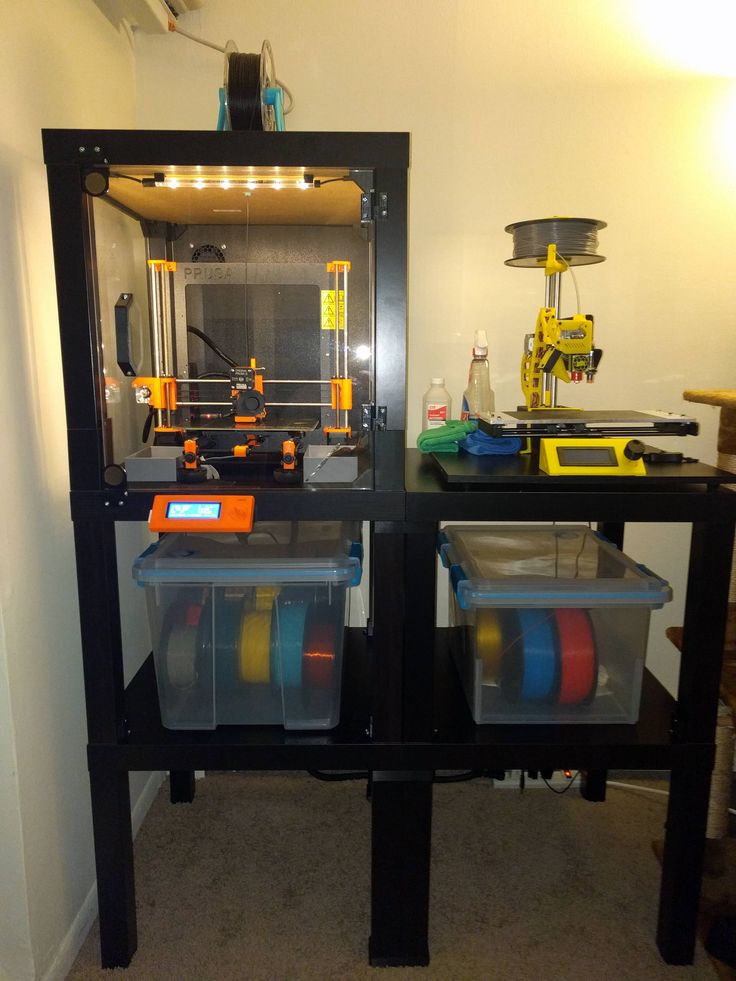 In addition, the creators invite everyone to share their ideas. The 3D models are free to download, each upgrade is product-specific, and comes with 3D printing and operation instructions and videos explaining the idea. Detailed information is available on the official website at this link.
P.S. If you also asked this question, then we clarify: in Israeli IKEA, it is customary to offer falafel and hummus instead of meatballs.
Do you have interesting news? Share your developments with us, and we will tell the whole world about them! We are waiting for your ideas at news@3Dtoday. ru
ru
ten
Subscribe to the author
Subscribe
Don't want to
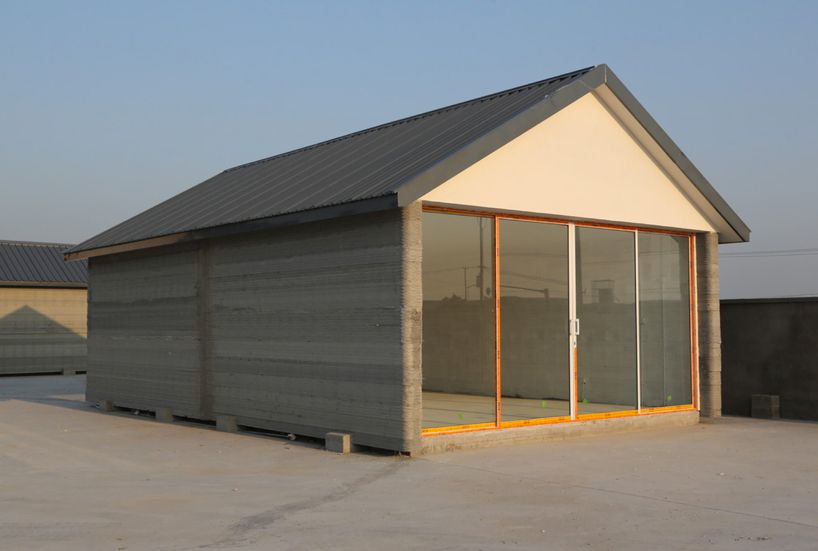
In the village of Aisha, Zelenodolsky district of Tatarstan, work is underway to build thirty-four houses with the use of...
Read more
5
Subscribe to the author
Subscribe to the author
Don't want to
Stamping is widely used in a variety of industries - from the production of consumer goods and auto ...
Read more
sarkazm
Loading
04/01/2016
39786
68
Subscribe to the author
Subscribe
Don't want
News from the world of printing in a short line
FDplast announced the release of a free. .. 3D Printing
On his blog, Josef Prusa shares assembly instructions and drawings of the original thermal box.
Some high temperature plastics (such as ABS) shrink when printed, causing cracks and curled edges to form on the part.
A closed chamber is recommended for printing with these plastics. As a solution, it is popular to use improvised materials. For example, you can use a photo box for $ 15
But if you decide to assemble a really aesthetic thermal box as in the first photo, then here's what you need:
Printed parts 2 or 3 IKEA LACK table
4 Neodimal magnets 20x6x2mm
3 ORGGCHALA 440x440mm in size, 3 mm
2 ORGECHLA 220x440mm, 3 mm
TERMOTROMENARY TO THE ADITIONAL DEMOMITIONA tapes
1 meter cable
WAGO connectors - 2 pcs.
Bolts:
12x 6x20mm
4x 6x50mm
Screwdriver
Hex keys
Superglue
Drill and 3mm and 10mm bits
Tape measure
Marker or pencil.
everything is described in detail in the video
Several photos:
Subscribe to the author
Subscribe
I do not want
17
even more interesting articles
BRTV
Loading
10/16/2022
2351
9
Subscribe to the author
Subscribe
Don't want
Hello my friend! Today I decided to assemble a simple pneumohydraulic generator or Generator...
Read more
0
Subscribe to the author
Subscribe
Don't want
Ones Technology is a research and development center under the Ministry of Industry of Turkey.