How to smoothen pla 3d print
Smoothing PLA 3D prints with sandpaper, solvents, and more
Using PLA with an FDM 3D printer can lead to excellent results. The process is fast and affordable, and PLA filament can produce functional printed parts with a good level of strength and stiffness.
But FDM has its drawbacks too. For instance, it produces visible layer lines, which can compromise the appearance and function of printed parts. Furthermore, PLA can be more difficult to work with than other 3D printing materials, as it can’t be smoothed with acetone.
Fortunately, there are several ways to smooth PLA 3D prints, ranging from beginner-friendly techniques like sanding to advanced methods like solvent application. This article looks at the best ways to smooth PLA prints, showing you which technique will work best in a given situation.
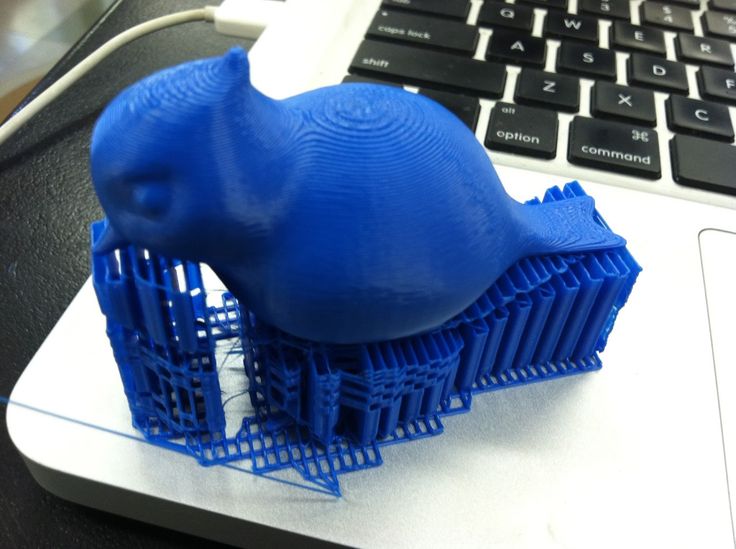
Untreated FDM parts have visible layer lines
Although FDM parts can’t easily attain the smoothness of, for instance, SLA parts, there are a number of post-processing techniques that can transform bumpy prints into smooth, rounded, and glossy parts. Some of these options involve adding material to the print (primer spray, epoxy resin), while others involve removing material (sanding, chemical smoothing).
Of course, adding a smooth surface to PLA printed parts will add time and cost to a project, but the results are often worth it. Not only does smoothing improve the appearance of the prints, it allows for less strict printing parameters — greater layer height, for instance — which in turn leads to faster printing.
Below are some of the most common methods for smoothing PLA prints. They should be carried out after preliminary post-processing steps, i.e. the manual removal of supports and large sections of excess material.
Sanding
The most common method for smoothing PLA prints is sanding. This method is highly practical, as it is inexpensive and poses no health risks. However, it is also one of the most time-consuming ways to smooth a print and is not especially suitable for fine features or reaching into deep crevices.
Sanding can be approached in different ways depending on the purpose of the parts and the desired level of smoothness. Large parts may require a sanding block (a piece of wood with sandpaper wrapped around it), while small parts and fine features may be suited to nail files. Though highly efficient, electric sanders are not recommended for PLA parts, as the heat they generate can melt the PLA and warp the part.
Sanding PLA parts requires sandpaper in different grit sizes
For most prints, sanding begins with coarse 200 or 400 grit sandpaper — either loose or wrapped around a sanding block — worked in circular motions over the surface of the part to remove the most extreme protrusions. After the whole part has been sanded, a slightly finer sandpaper is used, working up in increments to 3,000 grit.
Although it may seem like a big undertaking, it is worth obtaining sandpaper in the following grit sizes and sanding for a few minutes with each size:
200
400
600
800
1,000
1,500
2,000
2,500
3,000
With the finest grit sandpaper, a small amount of water can be applied to produce an even smoother finish.
Polishing
For high-shine PLA parts, the sanding stage (which gives a smooth but matte finish) can be followed by a polishing stage, using a cotton cloth and liquid plastic polish.
The technique for polishing 3D printed parts is similar to sanding: with polish applied, the wet cloth should be moved in even circular motions over the surface of the part until it is smooth and shiny.
Priming
Sanding alone can reduce the appearance of layer lines by shaving off the raised “steps,” but another approach is to fill in the crevices with primer spray then sand down the excess primer afterwards. This method works well because primer is easier to sand than PLA itself.
Priming is the most time-consuming way to smooth PLA parts, because primer must be applied in between each round of sanding then left to dry. However, it produces better results than sanding alone.
When priming a PLA print, the part is placed in a well-ventilated area and sprayed evenly with a very thin coat of the primer. One or two more coatings can be added before the first round of sanding. Alternate priming and sanding is then carried out, finishing with 3,000 grit sandpaper.
Priming and sanding is usually followed by spray painting, as uncoated primer will be susceptible to impact and environmental damage. Also note that very deep cavities should be filled with plastic filler rather than primer.
Epoxy resin
A different type of coating for smoothing PLA parts is epoxy resin, which comes in two parts (resin and hardener) that must be mixed together before use. Unlike primer, which comes in a spray can, epoxy resin can be applied to parts using a paintbrush and is suitable for filling even the deepest holes.
To ensure good adhesion of the epoxy, it is recommended to first carry out wet sanding on the PLA parts with fine-grit sandpaper. Once the part is dry, the epoxy can be applied in generous amounts and spread evenly across the part surface. Further layers of epoxy can be added until the desired level of smoothness is reached.
Note that the epoxy resin coating may be weaker than the PLA underneath, and bits of the coating may flake or chip off over time.
Generic epoxy resins can be used, but there are also mixtures designed specifically for smoothing 3D prints, such as Smooth-On XTC-3D.
Solvents
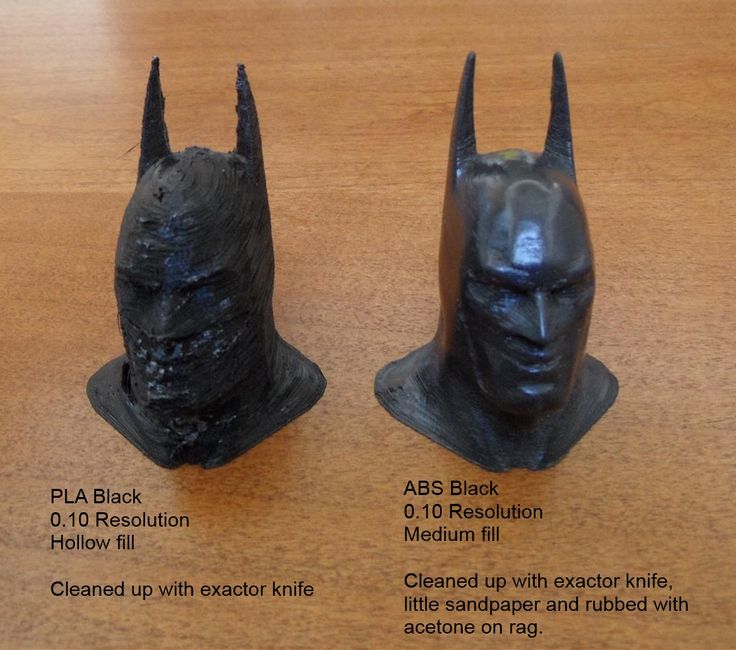
One of the big disadvantages of PLA is its resistance to acetone smoothing, a relatively safe-to-use chemical smoothing process suitable for materials like ABS.[1]
PLA prints can only be chemically smoothed using stronger chemicals that require laboratory equipment like nitrile gloves, protective eyewear, fume hoods, and a well-ventilated environment. These chemicals dissolve the top layer of material, resulting in a smooth finish — but they can dissolve other things too, such as plastic containers, work surfaces, and human skin.
Experienced users may smooth PLA parts with chemicals like tetrahydrofuran, dichloromethane, or chloroform. [2] However, these substances are difficult to obtain and can be dangerous to use.
A safer option is ethyl acetate, a solvent found in ordinary nail polish remover. Nail polish remover can be applied to PLA parts using a cloth or cotton swab, though it is limited in its effectiveness. In general, PLA is not highly suited to chemical smoothing.
Vapor smoothing
A safe and effective method of chemical smoothing PLA parts is to use an automated vapor smoothing machine such as the Polymaker Polysher, which creates a mist of alcohol to gently remove the top layer of a printed part.[3]
Unfortunately, the Polysher is only compatible with Polymaker’s modified PLA products, PolySmooth and PolyCast, which dissolve in alcohol.
Heat gun smoothing
Though not the most precise method of smoothing printed objects, using a heat gun to melt the outer surface of a part is a fast and easy way to remove layer lines. A heat gun is a device that resembles a hairdryer but is capable of reaching much higher temperatures.
When using a heat gun to smooth PLA parts, it is important to move the gun evenly to ensure consistent heating across the part surface (or place the part on a revolving platter and keep the heat gun steady).
This technique only works on medium-size or large parts that do not have fine features or hollow sections.
As we have seen, there are several ways to smooth PLA prints and reduce the appearance of layer lines. Choosing the right smoothing method (or methods) depends on the nature of the 3D printing project and your priorities. In general, we would recommend:
Priming and sanding for most PLA parts - effective, safe, cheap
Epoxy resin or polishing for cosmetic parts - high-shine finish
Vapor or heat gun smoothing for rapid parts - fast, least labor-intensive
Alternatively, resin 3D printing technologies like SLA and DLP, though more expensive than FDM, are much better at producing smooth parts without layer lines.
[1] Tuazon BJ, Espino MT, Dizon JR. Investigation on the effects of acetone vapor-polishing to fracture behavior of ABS printed materials at different operating temperature. In Materials Science Forum 2020 (Vol. 1005, pp. 141-149). Trans Tech Publications Ltd.
[2] Zhang B. Does Acetone Dissolve PLA? [Internet]. EcoReprap. 2021 [cited 2022Mar1]. Available from: https://ecoreprap.com/dissolve-pla/
[3] Kočí J. Improve your 3D prints with chemical smoothing [Internet]. PrusaPrinters Blog. 2020 [cited 2022Mar1]. Available from: https://blog.prusaprinters.org/improve-your-3d-prints-with-chemical-smoothing_36268/
How To: Smooth and Finish Your PLA Prints - Part 1
Making your 3D prints look fresh off the assembly line isn't as hard as you think. Follow these simple techniques to finish your 3D prints and make them shine.
Updated on November 14, 2022
by
Alec Richter
PLA (Polylactic Acid) filament is one of the two most commonly used desktop 3D printing materials (with the other being ABS filament). It is the ‘default’ recommended material for many desktop 3D printers, and with good reason - PLA is useful in a broad range of printing applications and can be produced in a variety of colors. It has the virtue of being both an odorless and low-warp material, and does not require a heated bed. PLA plastic is also one of the more eco-friendly 3D printer materials available; it is made from renewable resources (corn-starch) and requires less energy to process compared to traditional (petroleum-based) plastics. Cool, but what do you do to finish a PLA print to make it truly good?
Yes, this Halo helmet is 3D printed!
There are several techniques to remove or diminish the striations or layer lines of a 3D print. Some of the different processes that can be applied to PLA can be applied to ABS, but not vice versa. Generally, for PLA filament, the methods you can use involve the continual adding and subtracting of different materials back and forth until it is as smooth as you want it.
What do I mean by finishing?
Think of your 3D prints as the Great Pyramids of Giza. They used to be totally smooth down the side, but age has revealed the layered and rough base built underneath. To make the pyramids smooth, Ancient Egyptians added limestone over the top, since it was a much softer material than the base stone. If they had the technology, they also could have cut away the jagged levels to make smooth, flat faces. This is what finishing consists of; a fine balance between adding and subtracting material to achieve the desired surface finish. The key is to remove enough material to hide some striations (layer lines) and adding just as much to fill in the gaps.
To help showcase the benefits and problems that can arise with each technique, I’ve designed a “Finishing Torture Test.” This simple model has sharp corners on the outside of the cube and the inside of the hole, along chamfers, and the edges of the pyramid. It also has round faces, fillets, and a cylinder. I chose to include all these in the model as they are different examples of some common features you might find in the various models you can print, and to show how some of the features can be lost or diminished.
If you'd like to put your finishing skills to the test, you can download this model from our Thingiverse or from the Design Store
Finishing Torture Test
I started by printing out the model in MatterHackers Silver PRO Series PLA. This will serve as the control print. I then repeated the print eight more times. The eight prints will be used to demonstrate four different techniques, each with two different finishes.
The control print.
As this in an introduction to finishing PLA, this list is non-exhaustive of the techniques you can learn to clean up your 3D prints. More tools can be used, small tips can be learned, and starting with a good model are all techniques you can use to produce finished prints, but the ones I will be going over are:
- Painting alone
- Sanding and painting
- Sanding, filler primer, and painting
- Sanding, filler primer, spot putty, and painting
Note:
If I were doing this with the intent to mold these or use these as a finished product, I would have gone through each step half a dozen times over, moving from low to high grits, priming, more sanding, priming, sanding, spot putty, sanding again, etc.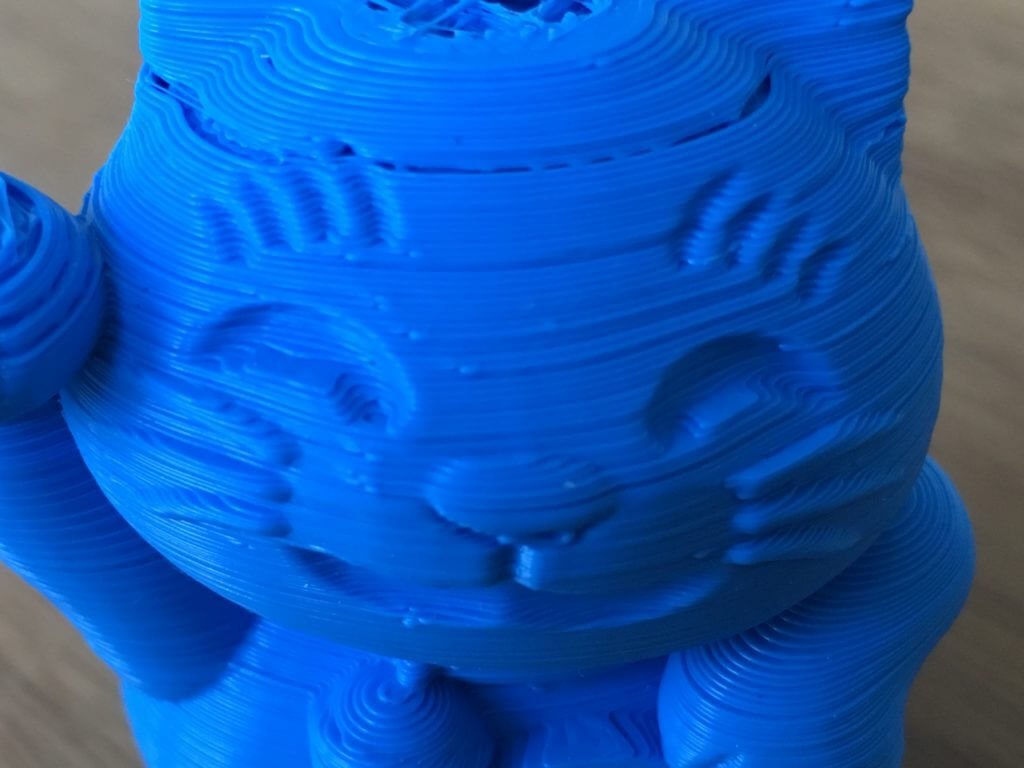 Since the purpose of this article is to show the difference each material introduces to the finish of your part, only one pass of sanding and finishing is done to each part.
Painting
Painting is the least involved of any of the techniques; all you need is a rattle can and some open air and you can paint your 3D print.
Materials:
- Spray Paint
Some recommendations to follow when spray painting:
- Don't spray right up against your print: if you spray too close to your print, you risk getting noticeable drips in the paint job.
- Spray in a back and forth motion, overlapping each pass.
- Multiple coats will fill in the striations better than one coat alone, but keep each coat light.
Total Time: 1 minute (not including drying times)
Here you can see that there are still a lot of striations visible even after the paint, but it's less than if it was unpainted.
Left: Control, Right: Spray Paint
Sanding and Painting
Sanding is going to be the most common finishing technique, with any 3D printing filament. It’s easy, and it’s cheap, but that doesn’t make it any less tedious. The lower the grit, the coarser the sandpaper is, and the quicker it’ll remove material. I use 3M Pro Grade Precision because its backing is a little sturdier so it doesn't rip as easily and it lasts a while longer because the grit doesn't gum up as quickly as normal sandpaper.
Materials:
- Sandpaper
- 120 grit
- 200 grit
- 400 grit
- Water
- Paper towels
- Spray Paint
Start with the 120 grit and focus on the sides of the print. 120 grit will tear away material pretty quickly, so avoid sanding corners, edges, and any fine details.
Sanded using 120 grit
Continue to progress through the grits as you need to remove less and less of your print. Once you’ve finished with 200, start using water as you sand. 400 grit and above is going to remove very little material, any major blemishes or layer lines in the model will be mostly unaffected at this point, and will more or less be polishing what you have.
Dip your piece of 400 grit sandpaper into some water and continue sanding your print. The water helps keep the paper from clogging and gets a much finer finish than dry sanding with the same grit. As you sand, run your fingers over the print to get a feel for how smooth it is. When you think it’s pretty smooth, you're ready for paint.
Here is what the 3D print looks like after two matte gray coats of paint or two gloss gray coats. Keep in mind these are cheap Rustoleum rattle cans, but these prints do look better after having been sanded and painted.
8 minutes using 120 grit
6 minutes using 220 grit
5 minutes using 400 grit
1 minute spray painting
Total time: 20 minutes (not including drying time).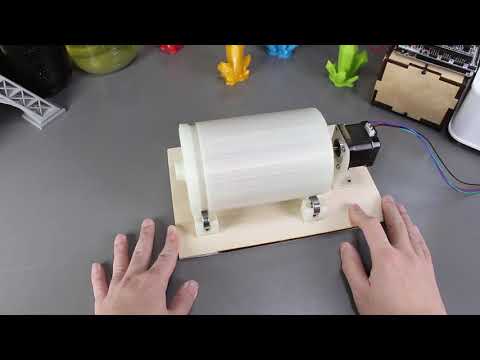
Left: sanded, matte paint; Right: sanded, gloss paint
Filler Primer
Once you’ve given it a quick sanding, spray on some filler primer to coat the entire 3D print. Keep alternating through sanding with 120 and spraying filler primer until things like the dome on top are filled in enough to make one smooth surface, rather than the clear layer lines on top. Once it’s filled in enough, repeat the steps listed in Sanding and Painting.
Materials:
- Filler Primer
- 120 grit
- 200 grit
- 400 grit
- Water
- Paper towels
- Spray Paint
Start by sanding with 120 grit sandpaper to bring down some of the surface texture. Before adding more material on top, it’s always better to remove some material first.
8 minutes using 120 grit
1 minute spraying the filler primer
7 minutes using 120 grit
10 minutes using 220 and 440 grit
Total time: 26 minutes (not including drying time).
Left: sanded, filler primer, sanded, matte paint; Right: sanded, filler primer, sanded, gloss paint.
Spot Putty
Spot putty is a great material and like any great material, slightly toxic. Gloves are a must as spot putty is basically dye, resin, and talcum powder, and a mask is based on personal preference but always encouraged. The label does list the vapor as harmful, but it's in such small quantities I usually ignore it, although it has given me headaches on several occasions.
Materials:
- Filler Primer
- Bondo Glazing and Spot Putty
- 120 grit
- 200 grit
- 400 grit
- Water
- Paper towels
- Spray Paint
- Gloves
- PPE
This is basically the same as the last process, except you will be using the spot putty to fill in any low spots to fill in some of the major layer lines, or rebuild minor blemishes like the top of round surface.
First, you're going to want to follow the steps I've given for filler primer, up to the point of switching to 220 grit. Instead of changing grits, you're going to do the following steps instead.
To apply spot putty, either use your gloved finger, a small paddle, scrapers, the side of a plastic scrap, a popsicle stick, it doesn't really matter. My personal preference is to use my finger for most and a small spreader for the tight spaces. Using a pea sized amount of putty, I smear it across the surfaces of the print and try to spread it thick enough to fill gaps but thin enough to not lose the details I'm trying to preserve. Either way, it's really easy to sand off so don't worry about overdoing it.
Once you've covered the entire 3D print with spot putty, wait 15 minutes or so until it has cured. After it has cured and is no longer gummy, start sanding again at 120 very briefly. Like I said, it's mostly talcum powder so it's going to be really easy to sand, you're basically wiping it off. When your 3D print looks like you initially did only a light coating, with pink spots of putty all over, you're ready to bump it up to 220 grit. At that point, follow the previously listed directions for sanding.
8 minutes with 120 grit
1 minute spraying filler primer
5 minutes applying spot putty
3 minutes with 120 grit
10 minutes with 220 and 400 grit
1 minute spray painting
Total time: 29 minutes (not including drying time).
Left: sanded, filler primer, sanded, spot putty, sanded, matte paint; Right: sanded, filler primer, sanded, spot putty, sanded, gloss paint.
Comparisons and Final Thoughts
From left to right: Control, Painted Matte, Painted Gloss, Sanded with Matte, Sanded with Gloss, Filler with Matte, Filler with Gloss, Spot Putty with Matte, Spot Putty with Gloss
Each technique took more time than the last, but you also get much better results - after all, it is a craft. Keep in mind that only one coat of filler primer and spot putty was used during the process (for the sake of time), but you can use as many coats as you'd like to eliminate layering. As you can see in the picture above, the results are still pretty stellar for only half an hour of work. For reference, the picture below is the 3D printed Torture Test before they were spray painted.
From left to right: control, sanded, sanded with filler primer, sanded with spot putty.
For part two in this series, read the sequel article, How To: Smooth and Finish Your PLA Prints - Part 2
Article Tags
- 3D Printing
- Firmware
- 3D Design
- MatterControl
- Press Releases
- Small Business
- Automotive
- E3D
- Jewelry Making
- Engineering
- Entertainment Industry
- MatterControl Touch
- ESD Materials
- NylonX
- BCN3D
- Open Source
- Crafty Pen
- Digital Fabrication Anatomy
- How To
- Hardware and Upgrades
- Tips and Tricks
- Weekend Builds
- Top Ten
- Education
- Tech Breakdown
- Women in 3D Printing
- Project Ideas
- Advanced Materials
- Reference
- Pulse Dual Extrusion
- Product Spotlight
- Aerospace
- Jobs
- Military & Government
- Multi-Tool Machines
- Getting Started
- Healthcare
- How To Succeed With Any 3D Printing Material
- Creality3D
- Architecture
- 3D Printer Reviews
- Hacker of the Month
Related Products
View all related productsHow to smooth 3D printing?・Cults
Objects created with a 3D printer don't always look as good as they should. Even if visualization of 3D printed parts is usually acceptable, this may not be enough if the object is for sale or display. Some people just want a perfectly smooth and shiny surface for 3D printing. Fortunately, it is possible to achieve this level of perfection with the help of some suitable tools. This guide will show you how to smooth out ABS and PLA 3D prints for the best results. nine0003
The FDM 3D printer opens up endless possibilities for creating PLA 3D prints. However, parts may be printed with bad layers that need to be removed. If you want to give your 3D printed parts a shinier look, there are some easy ways to align your 3D printed PLA.
Use spray paint and polyurethane
The sanding method used to be the most common technique for leveling 3D printed PLA. Today there are new alternatives. You can use spray paint mixed with polyurethane to line up 3D printed PLA parts. To do this, you need to purchase the right tools:
- spray paint,
- polyurethane,
- fan for drying parts.

The smoothing process is one of the simplest. First of all, it is necessary to clean the product so that dust or other dirt does not linger on the surface of the object. Use a spray can to cover the 3D print with a layer of paint. Then a layer of polyurethane can be applied to the part. Be very careful and place the freshly coated 3D print under a fan to speed up the drying process .
After a few minutes, you will find that the mixture of polyurethane and paint starts to fill in unwanted holes and imperfections on your PLA 3D print. Once completely dry, the part can be recoated with the mix to remove any remaining surface defects . This method is less tiring than sanding.
Opt for XTC-3D Clear Epoxy
Although highly effective, using a mixture of paint and polyurethane to line a room can be too messy for some people. There are other alternative methods for anti-aliasing PLA 3D printing. Transparent epoxy resin XTC-3D has been specifically designed to align PLA 3D parts for an optimal finish .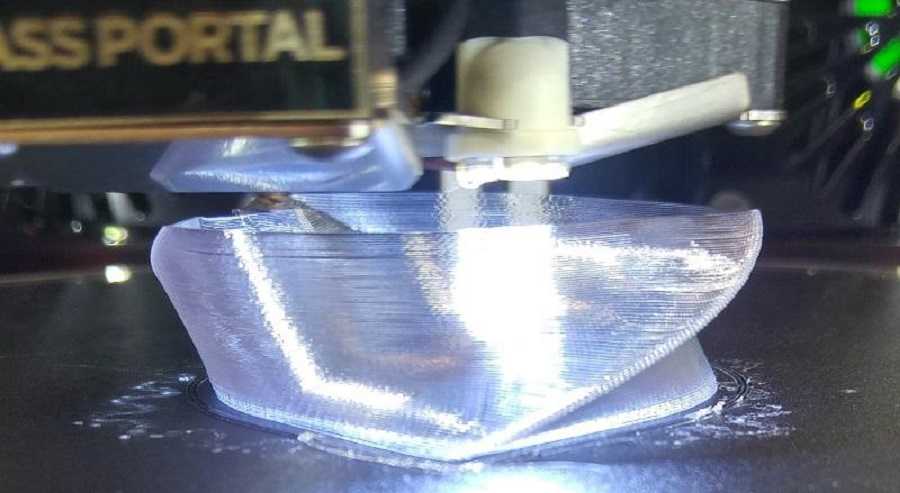 The product consists of two bottles that need to be mixed for 3D printing.
Remember to mix the product well and follow the instructions correctly. Using a brush, apply the resin to the printed parts. The dried product will harden into a smooth transparent layer. PLA 3D printing becomes smoother and shinier. XTC-3D can also be mixed with dyes and stains if you wish to color your parts. You can also add effects such as metallic highlights or palettes. nine0003
Use 3D Gloop
This adhesive has been specially developed for smoothing PLA 3D prints. 3D Gloop can be used for various purposes. To smooth out a 3D print with this product, simply apply it to the printed part with a brush. It works like the XTC-3D, except it only has one bottle. This is a great advantage if you only want to use a small amount of glue. However, 3D Gloop is not without flaws. The product contains a number of toxic components. It should be used in a well ventilated area. nine0003
Acetone is a chemical stripper used by professionals to sand and clean certain materials. Due to its high toxicity, it should be handled with care in a well-ventilated area. Acetone can be used to level ABS 3D printing. The process does not require a lot of equipment. All that is required is metal or glass container .
Also add a few millimeters of acetone. In supermarkets, this product can be purchased for less than 2 euros. You will also need a stand to hold the part to be smoothed and a heating plate. To smooth the ABS 3D print, add 2-4 millimeters of acetone to the container. Place it on a hot stove and boil acetone at 90 to 120°C. At this temperature, the product releases the steam needed to begin flattening the ABS 3D print.
When the acetone has boiled off sufficiently, place the substrate in the container. Make sure the acetone is not touching the part that will be in contact with the 3D print. After the holder is correctly installed, place the printed part on it and close the container. Wait a few minutes for the acetone to take effect.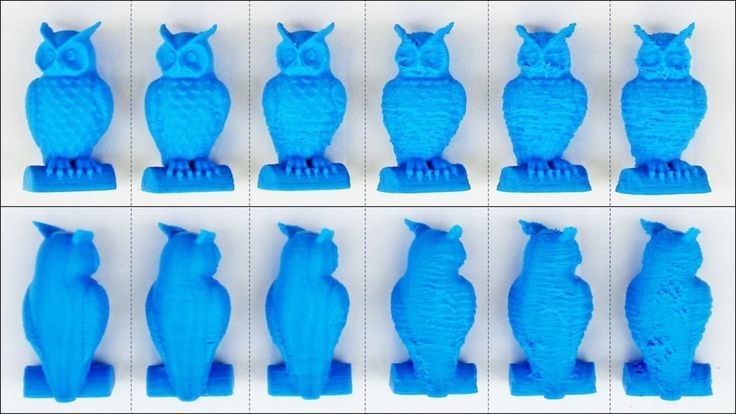 The amount of time depends on the shape and size of the part, the desired level of smoothness, and steam output . The result is simply amazing. At the end of the process, your piece is completely smooth and looks like a piece of hand-sculpted art.
Beginner's Guide to Smoothing 3D Models
3DPrintStory 3D printing process Anti-Aliasing PLA: A Beginner's Guide to Anti-Aliasing 3D Models
Sooner or later, all owners of 3D printers think about smoothing the surface of printed 3D models. In this article, we will look at how to achieve a smooth surface of the printed model if you are using PLA plastic for 3D printing.
Sanding the printed model
Almost any model will require sanding to smooth it out.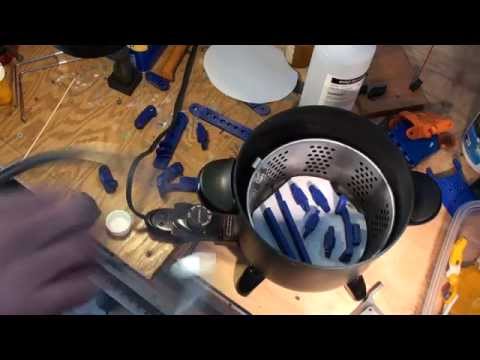 It is best to use sandpaper with different levels of grit. You can start with a grit of 200, and continue to increase the grit up to 4000. It is best to sand in a circular motion against the fibers of the layer lines. nine0003
Resist the urge to use a power tool because the strong vibrations generated by power tools will easily melt plastic, deforming the surface. Even when sanding by hand, remember that friction generates heat that can damage the 3D model by melting the plastic.
The best sandpaper is waterproof or wet/dry because you can wet it to cool the plastic. You should also constantly rinse the 3D model to remove any particles that form during the sanding process. An added benefit is that the water prevents small plastic particles from getting into the air and being inhaled. Wet/dry sandpaper can be distinguished by color. Its grains are black, not brown or beige. nine0003
Polishing options with pastes and special coatings
With PLA smoothing, sanding will never completely eliminate layer lines. One effective method is to apply polishing paste to the remaining lines of the layer. Polishing pastes have varying degrees of quality, following the example of sandpaper. These compounds are usually designed for use with metals, but work quite well with plastics. Simply apply the compound to a sanding wheel or similar rotary tool attachment, then apply it to the plastic for a smooth and shiny finish. As with sanding, remember that polishing creates friction and therefore heat. When smoothing PLA with a grinding wheel, it is better to use a lower speed. nine0003
Another method for smoothing PLA is to use a sandable primer with a high filler content. Thin, even coats dry quickly, after which the primer can be sanded down to plastic so that it remains only in the recesses of the layer lines. Repeat the process until all 3D printing flaws are gone.
For both procedures, always use primer and paint from the same manufacturer and never mix acrylic and enamel. This can crack the paint and put an end to all the hard work you've done before.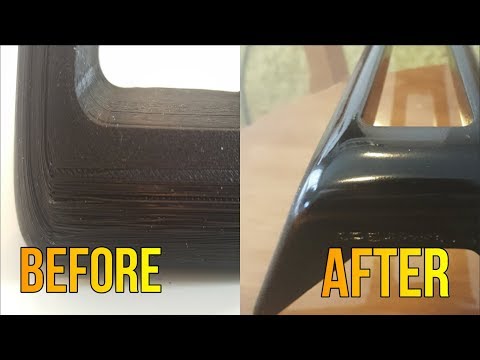 nine0003
Another product worth mentioning is Smooth-On's XTC3D Finish Coat. It uses two liquids, one of which catalyzes the other, to create a resin-like material that can be brushed onto a 3D model. The coating is evenly leveled, leaving no brush strokes. Although Smooth-On claims that XTC3D does not melt plastic, the resin definitely gets hot as the mixture begins to set. The end result is a smooth and hard appearance that can be painted over or used as a final coat. nine0003
Heat gun
A less popular option for smoothing PLA plastic is to use a heat gun. This method requires some practice because the tool obviously generates a lot of heat which can destroy your 3D model. Pre-sanding the model helps to expose the plastic, making the final effect much more effective. The key is to keep the gun moving across the surface of the model, never letting the gun linger on one area that could easily melt the plastic. nine0003
Although PLA does not generally emit odors when extruded, heat will certainly produce fumes as the plastic softens. Regardless of which PLA flattening method you choose, always try to work in a well-ventilated area because heated plastic, resins, and spray paint release potentially harmful fumes.
Using Polymaker's Polisher
A well-known method to get smooth 3D models out of ABS is to place the model in a sealed container filled with acetone mist. The acetone interacts with the ABS and slowly melts the plastic, creating a super smooth model. nine0095 Note : be sure to read the necessary precautions if you decide to try this method.
Unfortunately, you cannot perform the same procedure with PLA because it does not react in the same way with acetone. Some other chemicals will do the same but are difficult to obtain and very dangerous and toxic to use.
Polymaker, best known for its 3D printing materials, has introduced its own anti-aliasing agent called Polysher. Using a proprietary PLA-like filament formula, the 3D model is lowered into a sealed chamber where isopropyl alcohol is sprayed, creating a mist around the object to be smoothed out.