How to copy a part for 3d printing
Can a 3D Printer Scan, Copy or Duplicate an Object? A How-to Guide – 3D Printerly
People who think about 3D printing wonder whether a 3D printer can copy or duplicate an object then create it right in front of you. This article is going to give you some insight into how the pros can scan and duplicate objects that can be 3D printed.
Keep on reading for some simple instructions on how to scan objects for 3D printing and more.
Can 3D Printers Copy & Scan an Object?
3D printers themselves cannot copy and scan an object, but once you scan an object using other tools like a 3D scanner or simple scanner app on your phone, you can process it to 3D print on your printer.
There are many techniques people use to create 3D printer files but generally speaking, you either download the STL model files from an online archive, or create the file yourself.
I’ve seen all types of objects be 3D scanned successfully. The accuracy of the object depends on many factors such as the scanning technique being used, the complexity of the object you are scanning, the lighting, and more.
With the right method of 3D scanning, you can scan objects of almost any size, detail, shape, and so on ranging from a container, to a ring, to even your own face and body.
The technology and accuracy of 3D scanners are definitely improving, so you should be excited at the future possibilities of cheap and accurate scanning of objects.
One user who shared his experience on a forum said he saw a charming statue that was supporting the foundation of a staircase, in an artistic manner. What he did was take 20 photos around the statue with his Nikon Coolpix, then meshed the photos together.
With some processing and filling in gaps or missing spaces, he managed to create a 3D printable file.
Some people have scanned famous buildings using a drone, as well as statues, museum pieces, or even just something at home that you want to replicate.
Another user scanned and 3D printed an anvil by taking 74 pictures using his Samsung Galaxy S5. Some of the other models scanned by him include a carved panel of Buddha’s statue, a home, needle, shoes, and his face as well.
The video below by Thomas Sanladerer compares photogrammetry (creating scans with images) vs a professional 3D scanner solution.
If you happen to have a dual extruder 3D printer, you can even activate a “mirror printing” feature that allows you to print two of the same objects using each extruder independently at the same time.
You can really speed up your printing with this cool feature.
This means you can make even make a mirrored version of an object in the X, Y, and Z directions. It can be useful if you want to, for example, make a left-handed and right-handed version of your model, or two attaching pieces.
Some dual extruder 3D printers that are popular are the Qidi Tech X-Pro, Bibo 2 3D Printer, Flashforge Dreamer and Flashforge Creator Pro. Check out my article on Best Dual Extruder 3D Printers Under $500 & $1,000.
How Do You 3D Scan Objects for 3D Printing?
When it comes to figuring out how to scan objects for 3D printing, there are some techniques that can work really well:
- Scanning with a professional 3D scanner
- Using your phone (iPhone or Android) and a scanner app
- Use a good quality camera to capture multiple images
There are many budget options that people have designed for you to actually 3D print, such as Arduino controlled turntables and other creative designs.
Below are some great 3D scanner designs from Thingiverse:
- Ciclop 3D Scanner
- The $30 3D Scanner V7
- The $3.47 3D Scanner
This great innovation actually was inspired from the $30 scanner but because of some issues, a user decided to make their own version for a much cheaper price. When you have a 1Kg spool of filament at $25, this whole scanner costs just $3.47.
It’s a pretty popular model with around 70,000 downloads at time of writing, so join in on the fun with this cheap 3D scanner that works with your phone.
- Arduino-Controlled Photogrammetry 3D Scanner
- OpenScan 3D Scanner V2
When you are preparing your object to be sca
Below is the step by step procedure from preparing the object to starting the printing process.
- Get your Object Ready
- Scan your Object
- Simplify the Mesh
- Import to CAD Software
- Print your New 3D Model
Get your Object Ready
Prepare your object to be scanned by making sure you have a good stand or turntable for your object to sit on and get a good scan.
One of the most important things is to get some good lighting from all angles so the mesh that comes out at the end is of good quality. Your 3D model is only going to be as good as your initial scanning.
Some people advise to even use a coat of 3D Scan Spray on the object to improve the accuracy of the scan.
It will highlight each minor detail and is essential if you are scanning a transparent or reflective object. It’s not a necessary step, but it can help out with the overall results.
Scan your Object
Use a high-precision 3D scanner, camera or your phone to capture each key part of the object. I’d recommend checking out how other users take their pictures before you get into the process of scanning an object yourself.
The angles you take are going to give your 3D model that “complete” look, so you don’t have to use too much processing to fill in the gaps in the mesh.
The distance at which you are scanning makes a big difference, and the more pictures you take, the better. A good amount of photos to take usually ranges anywhere from 50-200 to capture every detail.
Make sure you don’t move the object while you are taking these pictures.
If your print has too many minor details, you may need to scan your object several times by changing its directions.
Simplify the Mesh
Scanners may produce some extremely complex and tricky meshes that may be difficult for you to modify for further usage.
Use scanner software that can refine your complex meshes and simplify the model mesh as much as possible while ensuring the perfect details.
Refining the mesh will allow you to easily modify and manage your model in CAD. Meshmixer software can be a great choice for this purpose, or AliceVision.
A full reconstruction of your mesh from all the pictures you took can take several hours to compute, so be patient when trying to get the best results.
Import to CAD Software
Now it’s time to import your scanned mesh design into CAD software for further modification and editing.
You want to do some basic clean up of your model before trying to print it, even though you can usually export the resulting mesh file straight to your slicer.
Print your New 3D Model
Once the mesh has been converted into a solid body, its original structure can be separated and can be used with the other objects to form new designs.
The design will have all the curves and dimensions that will provide you with that good quality print.
Now it’s time to finally start your printing process and get the results from all your efforts. Print on a high quality 3D printer that ensures high precision and uses strong resins to get perfect models.
Adjusting your printer settings and calibrating different aspects of the 3D printer is necessary so that you can have a perfect result without any hassle.
Can You 3D Scan Objects With Your iPhone or Android for 3D Printing?
Scanning with your phone has been made a lot easier to due to advances in technology and software alike. Josef Prusa did this great video describing the process from start to finish on how to scan objects with your phone.
He uses AliceVision, formerly known as Meshroom to create these amazing detailed 3D scans.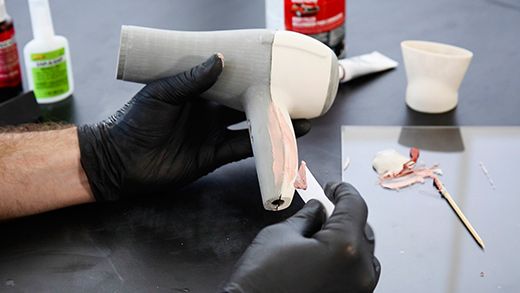 Feel free to check out the video below for the step-by-step process!
There are many phone applications that you can also put to use to achieve similar results.
ItSeez3D is an application that lets you easily capture, scan, share and implement your 3D models. You can perform all these functions just on your mobile phone. Using this application is easy as the app will guide you through all the process by displaying instructions.
You can perform the complete process in just three simple steps.
- Scan: Just follow the app’s instructions and scan the object from all possible angles.
- View and Edit: View your raw scanned object on your mobile screen and send it to the cloud for further processing.

- Download and Share: Download your high quality 3D model from the cloud and edit it if necessary in your slicer or other software. You can also share the model to other people for 3D printing purposes.
One user shared his experience stating that he used the application for the first time and had a simple, straightforward experience due to the easy instructions and guide.
If you have a compatible mobile phone, this app is one of the best ways to scan objects.
There are many paid applications that can help you in the scanning process, but you can use several free scanning applications as well.
Some of the best scanning applications that are widely used for the 3D scanning process using mobile phones include:
- Trnio Scanning Software
- Scann3d
- itSeez3D
- Qlone
- Bevel
How to Clone a Physical Object
TriMech Blog, 3D Printing, 3D Scanning
By Andrew Sink on
One of the most exciting aspects of 3D printing in full color is the ability to take a 3D scan and a copy of the model in full color! Using the Artec Space Spider 3D scanner and the Stratasys J55 full color PolyJet 3D printer, this task can be accomplished easily in under a day. This efficiency empowers you and your team to make prototypes and replicas of just about anything quicker than ever before, and faster than many people realize. In this blog post, I will be summarizing the work we did to clone a regular household banana, from a 3D scan to a full color 3D print.
>> Skip ahead to the video we made
Creating the 3D Scan
The first step in this process is creating a 3D scan which we will use as our model. We chose a banana for this workflow because the matte texture and sporadic coloration gives us the perfect model for 3D scanning. The banana was scanned with the Artec Space Spider, a professional handheld 3D scanner that offers sub-millimeter accuracy as well as the ability to capture full color. This process is as simple as placing the banana on a turntable and rotating it while the Space Spider captures information with no color calibration or target stickers required. To fully scan the model, we scanned the top, flipped it over and scanned the bottom to fully capture the geometry of the banana.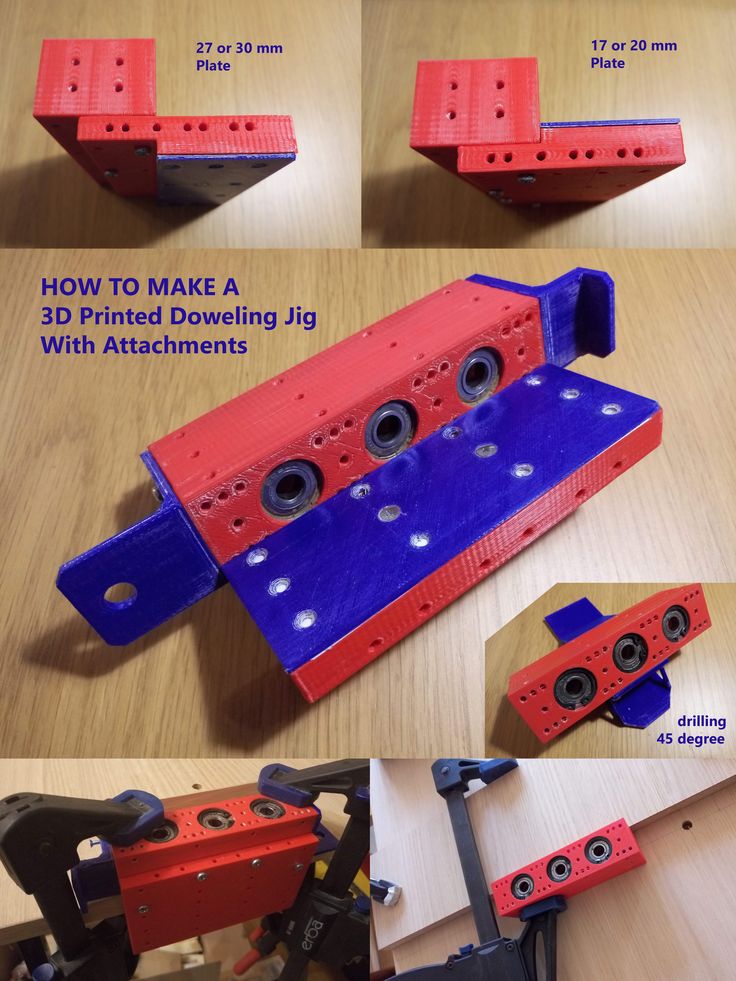 This resulted in a dense point cloud which we converted to a 3D model using Artec Studio.
Processing the Scan in Artec Studio
Once both halves of the scan have been completed, they can be processed in the Artec Studio app. This is a powerful software package that offers clean-up tools to help create a watertight textured mesh that can be exported for a variety of uses. For this project, the clean-up process was as simple as aligning the two halves of the scan, removing extraneous scan data and converting the point cloud to a mesh body. The mesh body is manifold (also know as watertight), which means it is a single solid body with no holes and can be easily processed by 3D printer slicing software. It also has an associated texture file which gives it a full-color appearance. Once completed, the model is exported as an .OBJ file with an associated .MTL (material library) and .JPG (full color texture).
>> Learn More About Using 3D Scanning for Reverse Engineering
Prepare the Model for 3D Printing
The full color textured 3D model can be opened directly in GrabCAD Print without any plugins, drivers or adjustments required. It also allows you to view print time estimates, material usage, and can automatically arrange the part to reduce the overall build time. In addition, you can select from various color profiles (absolute, relative, etc.) to get a 3D model that is an accurate representation of the original scan. After arranging the banana on the build platform, GrabCAD Print returned an estimate of three hours and one minute to print the model, with a total model material usage of 251 grams and support material usage of 103 grams.
Print It!
Once prepared, the model is sent to the Stratasys J55 full color PolyJet 3D printer. The J55 uses a unique rotating build platform and a moving bar to quickly and efficiently create models using the PolyJet process. The J55 has the ability to load five separate model materials as well as support, allowing for full color mixing to create Pantone validated colors and vibrant details. For this print, we loaded VeroCyan-V, VeroMagenta-C, VeroYellow-V, VeroPureWhite, and VeroClear into the printer. This combination approximates the most commonly found color combination in print (CMYK) and also allows us to add clear to create a polishing layer if needed.
>> Read More About PANTONE Validated 3D Printing with PolyJet Technology
See the below final product mixed with a few real-life versions, can you spot the 3D printed one?This process is a perfect example of how 3D scanning and 3D printing can go hand-in-hand to create full color prototypes and replicas in a fraction of the time used by traditional methods. By creating a full-color 3D print the typical steps of priming, painting and clear-coating can be skipped. This saves you and your team valuable time and money.
Check out the video below with the full process demonstrating how an Artec 3D Scanner and a Stratasys 3D printer can bridge the gap between these two technologies for a scanned and printed object in less than a day!
If you’re interested in exploring how 3D scanning is being used in various industries, watch our on-demand webinar “The Advances of 3D Scanning in Industrial Applications. ”
”
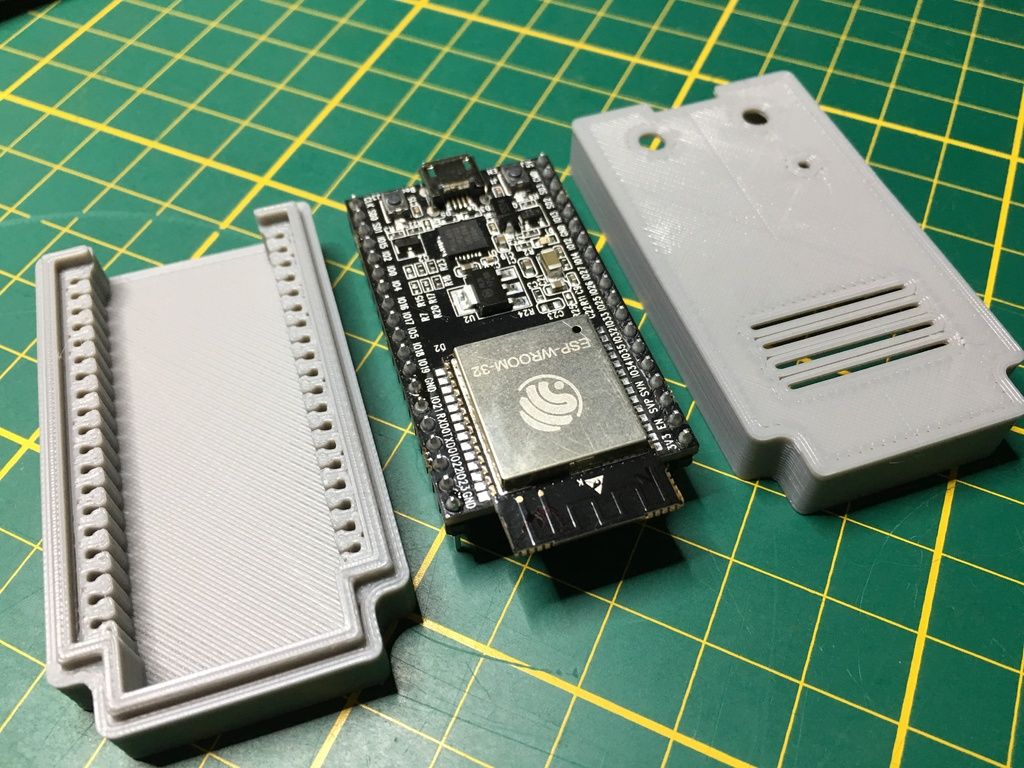
How to make a 3D printed part more durable
As we are all well aware, parts printed on a regular home 3D printer are not as strong and last as long as the original ones. We thought it would be great to learn how to somehow strengthen the printed parts, and worked on this idea a bit.
Such stronger parts will allow us to use them in real work, under high load. Then, instead of looking for original replacement parts for broken ones in gadgets, robots, cars, mechanical toys, or for any project in development, we can simply print them. nine0003
The need for this guide came to the author when he bought bike bags on eBay. One for a friend, one for myself. The attachment of the bags meant that the handlebars were one inch (2.54 cm) thick and barely fit a women's bike. The handlebar of the men's bicycle had a diameter of 3.15 mm, and the mount did not fit on it.
Therefore, the idea came up to make a part according to the size of the corresponding fastener by printing it on a 3D printer.
Step 1 Required part
Here is the node to be reproduced on the 3D printer.
To print something, you first need 3D model files. They, respectively, need to be found and downloaded on the Internet or developed independently. The second option seemed to be the only one possible, since it was impossible to find ready-made 3D models for such a specific part, and it was necessary to modify the one that was available so that it fit on the steering wheel.
However, everyone knows that 3D printed parts are not durable. Normally printed, this knot would not be strong enough to securely hold a heavy bag on a bumpy road. Then the idea arose to somehow strengthen this part, giving it enough strength. nine0003
The author has been involved in ship modeling for several years and had the opportunity to see how layers of fiberglass and epoxy make even thin plywood parts stronger, as a result of which they can withstand high loads without problems.
Therefore, in this work, it was decided to use fiberglass and epoxy adhesive-resin.
The original plan was to take a drawing of the part, make the necessary dimensional changes, and cover everything with fiberglass cloth and epoxy. So, let's start modeling. nine0003
Step 2. First draft
The part should look like this. All sizes are adjusted, everything as a whole is enlarged and thickened. The surfaces have also been enlarged so that fiberglass can be glued on them.
In addition, grooves are provided on each side to fill them with epoxy for extra strength. Through holes are also modeled to make it easier for the assembly parts to connect to each other and to allow fiberglass and resin to connect them from the inside.
Part printed on the Up printer and checked to see if it fits. nine0003
The type of filling was chosen as lattice, which made it possible to leave enough empty space inside the part. In a normal situation, this reduces strength, but this was done deliberately. A few more holes were drilled into the piece to allow the epoxy to penetrate and reinforce it.
Step 3 Apply fiberglass and epoxy to the first project
This is the messiest part of the job. Epoxy and fiberglass are difficult to work with. Everything sticks everywhere so that you can hardly wash it off later. nine0003
First, strips of fiberglass fabric were glued to both halves of the part to make them stick together better.
Then everything was laid out on a piece of nylon, since epoxy, fortunately, does not stick to nylon so fatally. After that, the epoxy was applied to the surface of the part, a piece of fiberglass cloth was cut to the appropriate shape and size, on top of which the epoxy glue was again applied. There was so much glue that the fiberglass became transparent.
This whole procedure was repeated for the other side of the part, after which the resin cured for a day. Even a little more, so that everything is held together tightly. nine0003
Step 4. More epoxy for additional reinforcement on the sides
It was also decided to add more epoxy to the end grooves specially provided for this.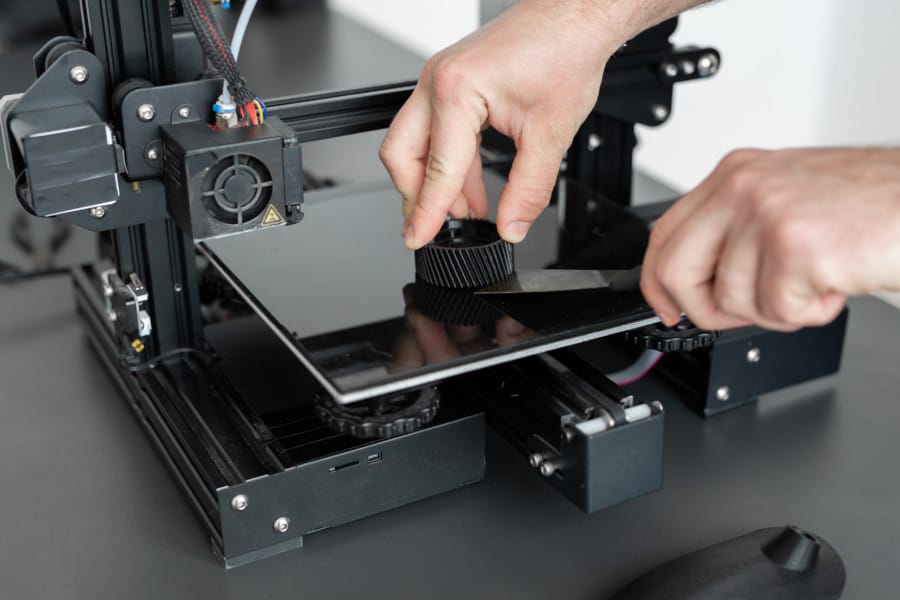
Step 5. Project Two
During the development of the first project, it was understood that the part would be partially filled with epoxy through additional holes drilled in it, and fiberglass impregnated with epoxy would hold it on the outside. In the process of printing the first part, the idea was born to model only its shell, and inside everything in general to make only epoxy glue and fiberglass. nine0003
And so, while the first project was freezing, it was decided to start modeling the second one. I wanted to compare both options in terms of strength and ease of manufacture. In the second project, a different approach was used to fill in two fragments of a part (two parts are needed for fastening).
The photo shows that the second project is an empty shell with walls 1 mm thick. The rounded fragment is separated from the larger one to simplify the filling process. It must then, when the epoxy hardens, be fixed with screws. nine0003
Step 6. Filling the second project with epoxy and fiber
To begin with, fiberglass was cut into small pieces, and the resulting shreds filled both parts of the part a little more than half.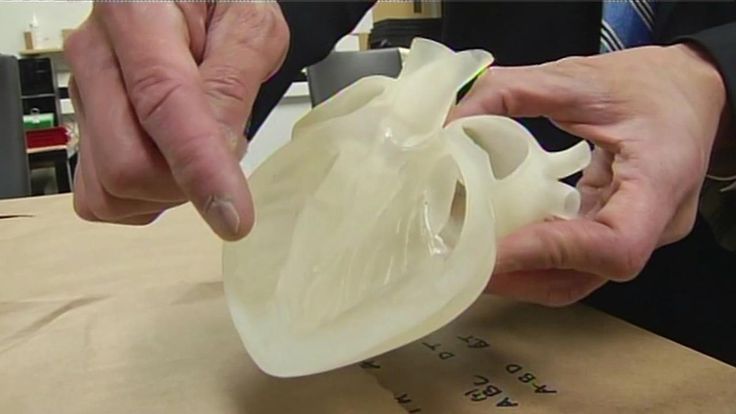 Then you need to add epoxy glue drop by drop and press the trim a little so that they are well saturated.
Step 7. Filling in further project 2. Fragment 1
Continue to drip and trample until all the fiberglass is saturated, after which we add more pieces of fiberglass, repeating this step until the final filling of the part. Now we fix the second fragment of the part with screws. In the end, the level of the mixture of epoxy and fiberglass should be up to the brim. nine0003
Almost the same for the smaller, rounded fragment.
Step 8. Filling in the project 2. Fragment 2
For this fragment, a slightly different approach was used: the part was not filled halfway from the very beginning. Only one layer of fiberglass was laid on the bottom, then another one - with an overlap on the edges. These layers were impregnated with epoxy until they became completely transparent, after which the following layers were laid one by one and pressed down to absorb the glue. A little epoxy was added every 2-3 coats. nine0003
The first method gave us a part with more epoxy and a little less fiberglass inside. With the second method, there is more fiberglass in the part and less epoxy between layers.
Step 9. Everything should now be cured
The parts were periodically checked, more resin was added to the voids formed when the resin was absorbed. Where necessary, fiberglass was added. It took about a day to fully dry. There are epoxy adhesives on the market that cure faster, you can also add more hardener to speed up the process. However, we do not recommend this, because it will only complicate the work and prevent the glue from penetrating into all corners. nine0003
Step 10. Assembling the finished assembly
The parts turned out pretty good, especially on the second project. Attaching them to the bag went without problems. They fit great. Now you need to attach the bag to the bike.
Step 11 Remove the plastic parts
This step was not really intended. It was supposed to simply use 3D printed and reinforced parts. But when it came to sanding, the printed "skin" simply began to break off at the corners, the rest was also removed without problems. This “skin” did not give any additional strength, therefore it was almost completely removed, and the part became a composite epoxy-fiberglass. nine0003
Step 12. Summary
The part held up without problems during a 20-day trip to Sweden, Poland, Germany and Denmark. The front bag was always filled to overflowing with food, a lot of bumpy roads were passed. The parts have served perfectly and are still stronger than stone.
Here are some more useful notes.
- Interestingly, epoxy does not adhere very well to ABS. That is why additional holes through which it will penetrate inside and fasten the structure are simply required. nine0096
- Reinforcing a part from the outside is much more difficult than filling it. The first option takes a lot of time, but the completed part is easier.
 Undoubtedly, a reinforced part is much stronger than a simply printed and unreinforced part. This is easy to check if you test the reinforced and non-reinforced parts for twisting. Fortified like a stone, the usual easily changes shape.
 - The second hardening method is much simpler and produces a much neater result. After the resin has cured, almost nothing needs to be cleaned. And what happened has the strength of granite! nine0096
- Both fillings with different amounts of fiberglass give the same feeling of solidity and solidity. However, the one with more fibers, theoretically and almost without a doubt, should withstand more weight.
- In the second project, the assembly is heavier, since the inside is completely made of fiberglass and epoxy resin. The weight is slightly reduced after removing the surrounding plastic. In this case, however, the dimensions of the part will also change. Therefore, the dimensions need to be thought about in advance and take into account the removal of plastic when modeling.
 nine0096
 - In the second project, it is also possible to provide grooves, grooves and voids, then the weight can be reduced.
Strengthening a 3D Printed Part from Instructables.com
Thingiverse Service - Universe for 3D Printing / Habr
When it comes to 3D printers and 3D printing, the following questions usually arise: Where to download 3d printable model for free?
These questions can be answered using the 3D models catalog service - Thingiverse .
This post will do a small review of 3d models from Thingiverse (grouped by the programs with which they were created). As an example, the header provides a constructor from 3D printed parts, created using 123D Design . More details about this constructor, and other examples of 3d models from Sketchup , OpenSCAD , Blender3d , FreeCAD - under the cut.
At the beginning, a little about the service itself, and the specifics associated with 3D printing.
Thingiverse is a free service opened in 2008, developed and maintained by MakerBot (which in turn creates and sells well-known 3D printers), anyone can register on this service and upload a 3D model for download. A key feature of the service is that all uploaded models are published under a Creative Commons license, which means that you can freely and freely download and just as freely modify. nine0003
The generally recognized format for 3D printing is STL (short for STereoLithography), this format contains only the shape of the object, without color, texture information, in fact it is a surface made up of triangles. It is in this format that you need to export 3D models if you plan to print them on a 3D printer.
Let's start the review of 3D programs.
123D Design
AutoDesk is seriously entering the 3D printing market - it provides a good service for preparing 3D models, in particular, you can download the 123D Design program for free.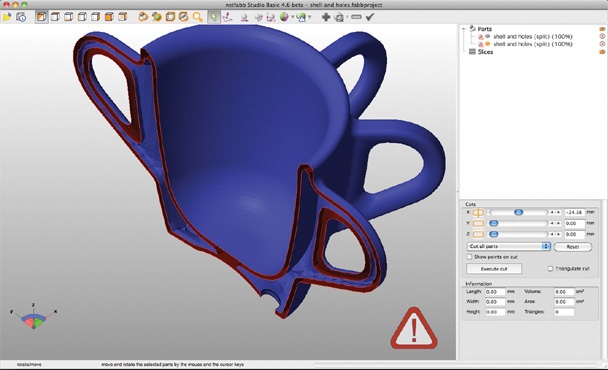 Available for PC and Mac. nine0003
Pixil Bits
The 3D printed Pixil Bits constructor consists of several elements, on the basis of which you can assemble a variety of shapes:
All files can be downloaded here, source code is also provided for editing in 123D Designer.
Birds mobile
Want to make sitting and spinning birds? (good example for basic math :))
Here is Joseph's "Birds Mobile" project.
The assembly process and final result can be viewed here.
Here's what you need to print:
Hidden text
And of course different layouts are possible:
Hidden text
The original 123D Design files can be downloaded from the project page.
Sketchup3d
Perhaps one of the most famous programs will be Sketchup3d, originally developed under the wing of Google, but later transferred by the search giant to Trimpble. nine0003
Pluses — user-friendly interface for work, scripting in Ruby. Cons - not open-source, version only for Windows and Mac.
Mini Sumo Robot
3d printed platform for mini sumo robot, includes frame and
blade.
Assembly process
Files for 3D printing and original Sketchup files can be downloaded here.
3D Logo or name
Want to print a logo or name? nine0003
Here's the How To Make A 3D Logo Or Name project, where you can download instructions on how to do it in Sketchup.
Marblevator
The Marblevator project is an example of a "railway" using 3D printed rails and an iron ball.
Assembly instructions, and here you can download all the elements and original files in Sketchup.
OpenSCAD
OpenSCAD is a free open-source, cross-platform program for creating 3D models using a special modeling language. nine0003
You can create graphics primitives, merge, subtract, clone, and so on. To get the object you want. And after - export it to STL (recently there was a small tutorial on OpenSCAD on Habré)
Case for glasses
Need a glasses case? You can download and print from here.
The original format in OpenSCAD - that is, you can edit it to fit your glasses.
Animal bowl
Is your cat's bowl still unsigned?
This is easy to fix with 3D printing. In the files section, the original OpenSCAD file for customization (scad extension) is provided.
Reducer
Want to print mechanics? Please - Tiny Planetary Gears Set project.
All parts of the mechanism can be downloaded here, and here is a link to the archive with all OpenSCAD original files.
Gears
If you need to print a variety of gears, you can look at this project: Public Domain Involute Parameterized Gears, which contains OpenSCAD files for creating 3d models of various gears. nine0003
Blender
Blender3d is a free open source 3D modeling program (supports Python scripting)
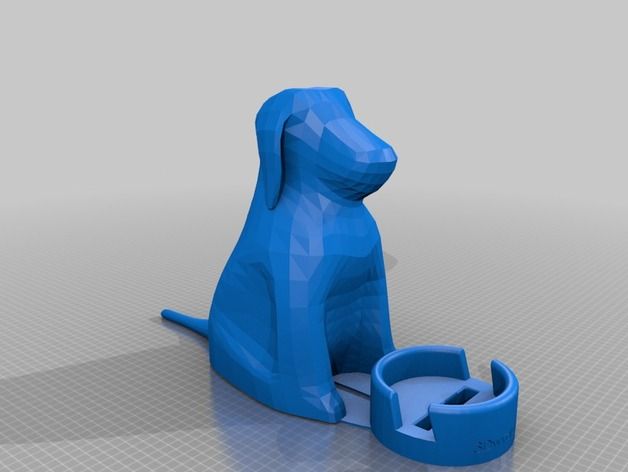
Singing Dragon
One of the popular models on Thingiverse, the Adalinda: The Singing Serpent project, is made with Blender3d.
The author who created the model - specially optimized it for 3D printing - there is no need for "support" supporting elements, the whole model is printed as is. nine0003
Master Yoda
The fairly popular Yoda Figure model was created using Blender, or rather “assembled” from several models.
Based on the information from the original article, for its "preparation" were taken:
1. Yoda's head bust (from thingiverse)
Hidden text
2. Yoda's body from google sketchup gallery.
Hidden text
Airplane
Skewer Fighter Jet (F-86 Saber) aircraft model project, with the ability to download the Blender source file. nine0003
The author macouno can see many other models created based on Blender3d, in particular:
Keyboard support
Sometimes the keyboard lifters break, you can download and print: Computer Keyboard Riser
FreeCAD
FreeCAD is a lesser known program, but quite interesting as it is positioned as a professional CAD system, completely free and open-source. Full Python scripting is supported. nine0003
Bike phone holder
Want to mount your smartphone on the handlebars of your bike? Then see this project: Bike phone holder .