First time 3d printing
How to 3D Print for First Timers and Beginners
3D printing is a great new hobby to pick up, but how exactly do you start? How do you make your shiny new printer convert all that plastic spaghetti to something you can use? How do you 3D print anything? Here are the basics you need to know to begin 3D printing right now.
How to Use a 3D Printer
3D printing an object is simpler than it sounds. Once your printer is ready to go, there's a simple process to follow:
- Download or design a 3D model
- Convert this model into printer instructions
- Send these instructions to your printer
- Begin printing
If you're using a central library or other on-demand 3D printing services, this process is even easier. You deliver your 3D file to the technician or librarian, and they will handle the rest of the printing process for you.
Many popular 3D printers come with several designs ready to print. These are often included as a set of instructions for your printer to follow and can be the quickest way to get a print going on your machine.
What Is an STL File?
STL is an abbreviation of "stereolithography". An STL file (files ending with ".stl") is a 3D model ready for 3D printing. This common file format works with a huge variety of 3D modeling tools and is a great way to share 3D models for printing.
STL files describe the surface geometry of a 3D model. There's no color, material, or texture information, as 3D printing doesn't need any of this information. STL file sizes vary depending on the complexity of the model and the level of detail contained. STL files for large models may be upwards of 200MB, whereas smaller files can range from 500KB to 5MB.
Where to Get STL Files for 3D Printing
There are two ways to get STL files. You can design your own 3D models, or you can download models designed by other people.
As STL files are basic 3D models, almost any 3D modeling package can produce models for printing. Our beginner's guide to OpenSCAD is a good place to start designing your own models. The vast majority of design packages can save your design as an STL file.
If you don't want to design your own models yet, then there is a huge variety of free and premium model websites hosting thousands of different designs from people all over the world. Thingiverse is one of the most well known websites, and it's 100% free to use.
Once you have a file you are almost ready to begin printing. As mentioned above, if you're using a friend's printer, central library, or other 3D printing services, you don't need to perform any more work. Share your STL file with the printer operator and they will handle the rest.
3D Printing Basics: Slicing and G-Code
Once you have a suitable STL file, you need to convert it into instructions for your printer. These instructions vary between different printers and materials. You may want an ultra high-quality print or a fast but low-quality print. If you're using a new material you may need a very low temperature or your filament starts to burn. For these reasons, it's almost always best to slice your own model.
G-code is the name for the instructions your printer follows. This has been around for a long time, before 3D printers. G-code consists of a series of step-by-step instructions like a recipe. It contains details on speed, direction, temperature, flow rate and more. Once you have the G-code for your printer and model, you do not need to keep the STL file (although it's often a good idea, in case you need to make any changes).
"Slicing" is the name given to the process of converting STL files into 3D printer G-code. This is because 3D printers deposit plastic in many layers, so your 3D model needs cutting up into specific steps for every layer.
Many free slicing tools exist to convert your model into G-code. Some of the popular packages are:
- Slicer
- Slic3r
- Cura
- Repetier-Host
Slicers usually come with presets for popular printer models. If not, you may need to enter some basic information about your printer.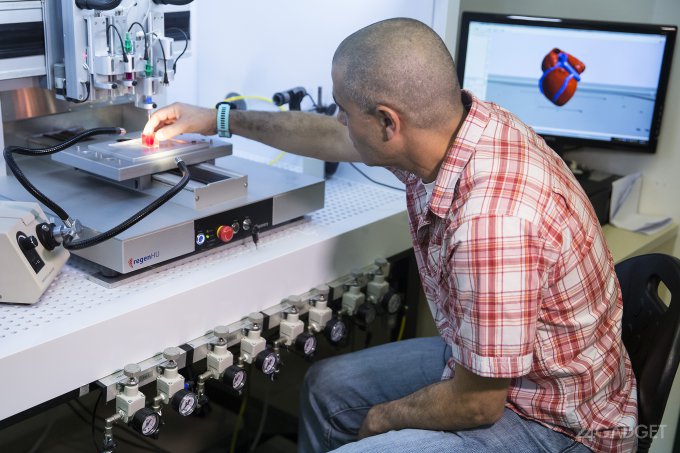 This may be the print bed size, preferred speeds, type of plastic filament you are using and more. Once configured, you can begin slicing.
Our ultimate 3D printing guide covers slicing in greater detail, but generally speaking, you import your STL file and export the G-code. Large complex designs may take several minutes to slice. Once you have the G-code for your machine, it's a good idea to label it with the model, any dimensions, estimated print time, or any other information you need. Over time you can build a collection of G-code files ready to print.
How to 3D Print for the First Time
You've chosen a model, sliced it into G-code, and now you're ready to print. To start printing, your machine needs to know the G-code instructions required for every step. Sending your G-code to your printer varies by model, but there are several common methods:
- Save the files to an SD card
- Control the printer with your computer
- Use a 3D printer control system such as a Raspberry Pi
If your printer supports it, saving G-code to an SD card is often the simplest way to print things.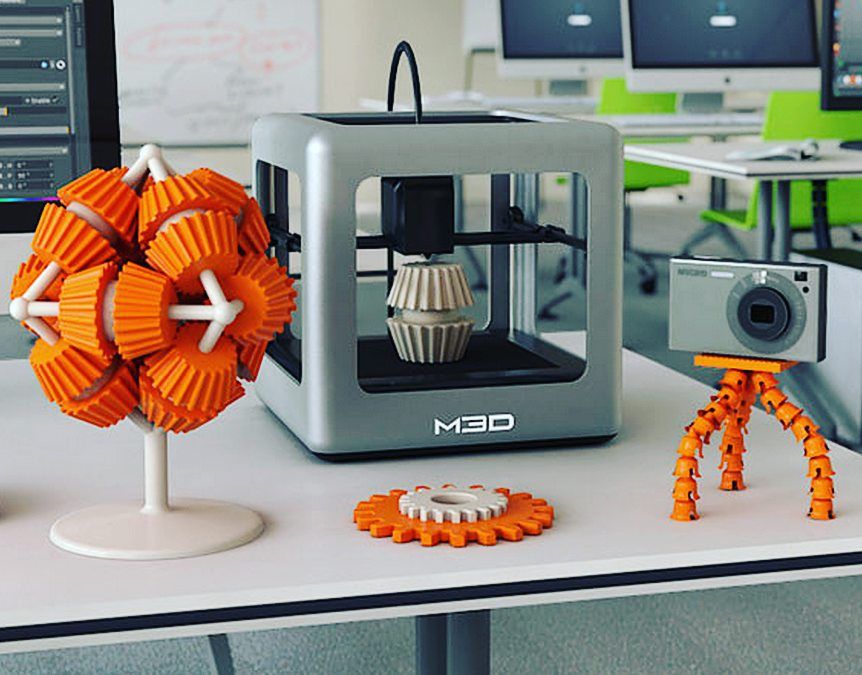 Printers with SD card support almost always have display and control buttons. Navigate to your G-code file and choose the print option. Insert the plastic filament and ensure the printer is set up following the manufacturer's instructions.
Connecting a 3D printer to your computer over USB lets you control it using the slicing tool of your choice. This option works well but requires your computer to remain on and connected to the printer for the duration of the printing.
Finally, OctoPi is a Raspberry Pi based 3D printer controller. This is a good way to control your printer over the network but requires some initial configuration.
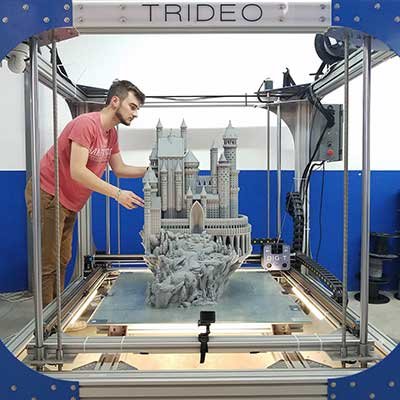
Whatever option you choose, you should soon hear the robotic sounds of your 3D printer producing your first print! This is an exciting time, and it is tempting to watch the whole process. 3D printers are sometimes fickle machines and minor draughts can impact the print in undesirable ways. Try to observe from a distance if possible, or position your machine somewhere it won't encounter regular draughts.
The Basics of 3D Printing
It's a great feeling when your first 3D print finishes and some printers often emit a special sound to let you know it's ready. Don't worry if something went wrong, or the quality isn't what you expected---3D printing is a complex process. Often, several rounds of trial-and-error happen, with each step refining the process and improving the quality.
If you're stuck, you can share details with the Reddit FixMyPrint community, where knowledgeable experts can share their thoughts on what went wrong.
If you don't yet own a 3D printer, then these best websites to order 3D prints from are excellent resources to use for on-demand 3D printing.
Image Credit: tinx/Depositphotos
How to Set up a 3D Printer for the First Time
Revolutionized is reader-supported. When you buy through links on our site, we may earn an affiliate commision. Learn more here.
Whether you just brought home your first 3D printer or received one as a long-awaited birthday gift, you’re probably wondering how to set it up. If this is your first time playing with a 3D printer, don’t worry — we’ve got you covered. Here are some tips and tricks to help you learn how to set up a 3D printer the first time. Plus, we’ve included a few ideas of printing projects to try out once you get everything up and running.
What Type of Kit Do You Have?
First, what type of 3D printing kit do you have? Most kits come in one of three styles — pre-assembled, partially assembled or DIY. The type of printing kit you have will determine how much work it will take to set it up. Pre-assembled kits are ready to use right out of the box. While they might need a little bit of setup before you can start printing — which we’ll talk about more in a minute — they’re generally plug-and-play ready.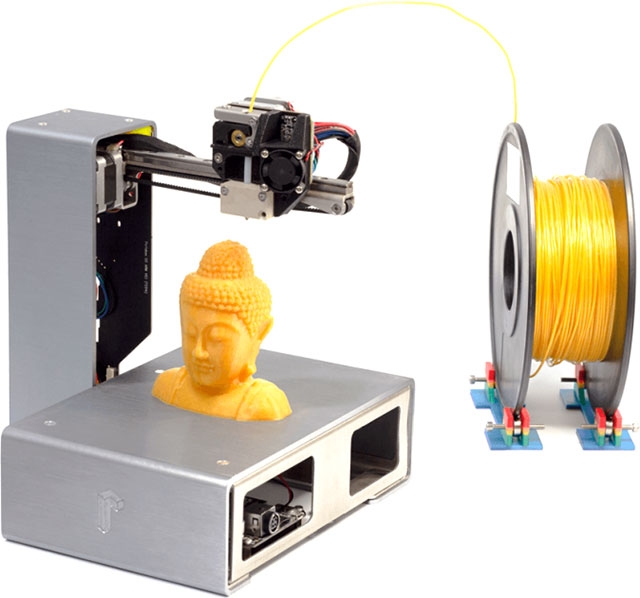
Partially assembled kits are usually split right down the middle and packaged to save space. You’ll typically need to bolt them together and make a few electrical connections before your new printer is ready to use. DIY kits take quite a bit more assembly and will likely take you longer. Once you know what type of kit you have, move on to the next step of how to set up a 3D printer.
Follow the Instructions
This step might seem like common sense, but it bears repeating: Make sure you read the assembly and setup instructions. Take the time to read through them thoroughly before you start making connections or putting things together. Don’t try to set up anything or start playing with the printer until you have all the information possible. Right out of the box, it’s essential to read the instructions. Once you have everything assembled and calibrated, you won’t have to do a lot of tweaking.
This advice is especially crucial if you’ve got a partially assembled or DIY kit. Part of knowing how to set up a 3D printer is making sure to connect all your wires, balance the device and secure it before you try to print anything.
Don’t Assume It’s Already Calibrated
If you have a fully or partially assembled 3D printer, you might feel tempted to start printing as soon as you hook it up to your computer. However, you might end up wasting a lot of filament by assuming your printer is already fully calibrated. Even if it’s supposed to come calibrated and ready to use, things can get knocked out of alignment during shipping. If you’re too rough with it when you take it out of the box things can also get misaligned.
Luckily, calibration instructions should be a section in your instruction manual. Go over them and make sure to properly calibrate everything before you click that print button. Mild calibration errors might not cause problems, but significant errors could damage your equipment. Don’t print with an uncalibrated machine.
Make Sure Everything Is Square and Level
For this step, you’ll want to break out a level and T-square or other similar tools. If the frame isn’t square and the printing bed isn’t level, everything will end up crooked and lopsided. Unlevel machines could also lead to the hot print head, the thing that melts the plastic filament, melting into the print bed. Any way you look at it, printing without a square and level printer will be a giant mess.
You don’t need a lot of extra tools to ensure everything is squared away, but if the print bed isn’t level, there aren’t a lot of ways to fix it, short of ordering a new printing bed and starting from scratch. Some printers will come with an option to adjust the level of the print bed, so again — check your instructions.
If the printer does not have an auto-leveling feature, you’ll need to adjust the screws found at each corner of the print area. The goal is to make the surface and print area a uniform distance from the extruder. Your printing manual should have more specifics about the optimal measurement between the printing surface and extruder.
It may also include tips on how to get the right distance. One possibility suggested by at least one printer manufacturer is slipping a piece of paper between the printing surface and extruder. Encountering slight resistance when sliding it is a good sign. However, since printer models vary, always prioritize what the printer’s manufacturer suggests over more generalized guidance.
Lubricate Everything Sufficiently
3D printers have so many moving parts that adequate lubrication is essential for regular operation.
A good rule of thumb is that a component needs lubrication if it moves against another surface. However, the part receiving lubrication determines the best product to use on it.
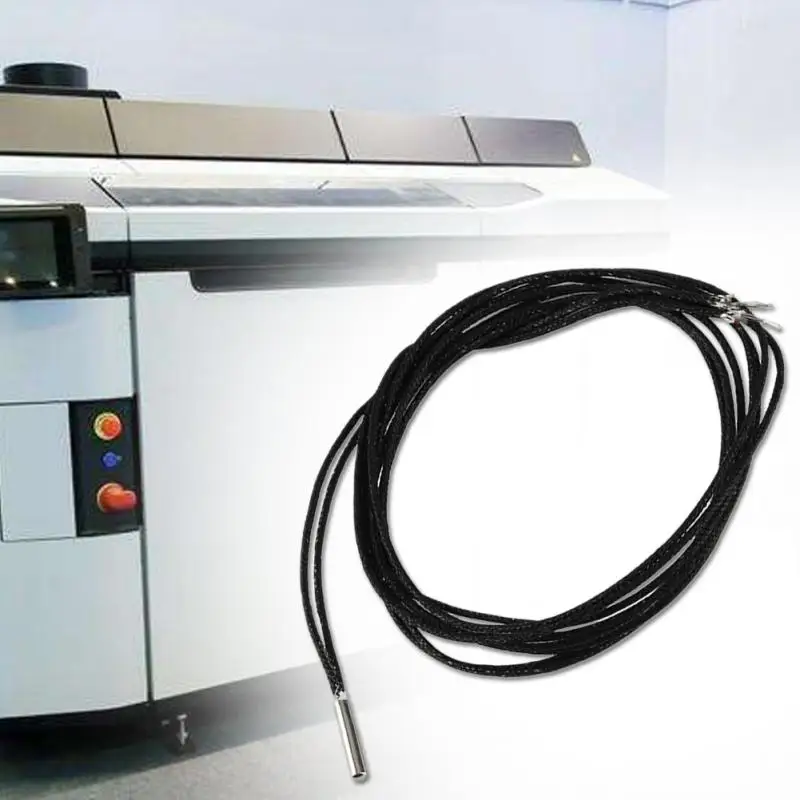
One of the parts requiring lubrication is the threaded rod and nut along the Z-axis that change the printer nozzle’s height. The X and Y-axis guiderails along the print head and print bed also need lubrication. Besides promoting a hassle-free printing process, proper lubrication helps prevent the premature breakdown of parts.
A lubricant’s suitability for a 3D printer depends on how well it protects against the adverse effects of materials rubbing together and whether it helps the printer components move smoothly during operation. Because it’s so popular and widely available, some people wonder if they can use WD-40 as a lubricant. However, it’s not a suitable option, regardless of the brand of printer you have. Ongoing and excessive use of the product could even damage the printer.
Check your owner’s manual or setup instructions to find out what kind of lubricant you should be using, as well as your maintenance schedule. It’s one of those questions that if you ask 10 different people, you’ll get 10 different answers. Therefore, it’s always best to refer to your owner’s manual.
Before you start printing, slide the print head along the axles and manipulate the other moving parts to ensure that everything moves smoothly. There shouldn’t be any grinding. You’ll notice if there’s a problem, and it’s always better to find out before you’ve started printing.
Set the Desired Print Speed
One of the main advantages of 3D printing is that it is much faster than many other production methods. So, many people understandably wonder how the print speed affects the print quality.![]() Generally, slower print speeds result in better-quality results. However, the specifics vary depending on the types of materials used and what the printing project involves.
Generally, slower print speeds result in better-quality results. However, the specifics vary depending on the types of materials used and what the printing project involves.
As the extruder moves progressively faster, it vibrates more. That effect causes a reduction in the overall print quality. Many people find it particularly noticeable on consumer-grade printers. Manufacturers typically don’t make those with the expectation that people will be trying to print at very high speeds.
Whether a printer can handle a certain speed is not the only consideration. Limitations also exist regarding how fast the printing filament melts, impacting the maximum extruder flow speed. Different filaments have various physical and chemical properties. So, just setting the same print speed with two types of filament is not necessarily enough to get a similar outcome with each attempt.
Feed Filament Into the Extruder
The filament has a significant impact on the printing process. Check the instructions associated with the printer and filament before proceeding. Some people recommend making a sharp, angled cut at the end you feed into the printer so it’s easier to load. Some printer models come with a cutting tool. Filaments may also have circular ends, and people sometimes find them harder to load. Bending and twisting the end before feeding it through can help.
Push the filament through the extruder’s entrance and keep going until you feel a bit of resistance. Then, the filament has likely reached the nozzle.
Choose a Design
Setup is complete and you have everything ready to print. The next thing you need to do is choose and create a design. You can make nearly anything with a 3D printer — from a tripod for your phone to a bag hook so you can carry in all your groceries in one trip. There are plenty of options available for free online for you to choose from, or you can create designs in a CAD program.
It might be easier to ask what you can’t make with a 3D printer than to list what you can create with these devices.![]() You can make everything from guitars and camera lenses to 3D printed models of anything you can scan. This could even include a working gun if you’ve got the right supplies. Even NASA uses 3D printers to send patterns for specialized tools to astronauts on the International Space Station.
You can make everything from guitars and camera lenses to 3D printed models of anything you can scan. This could even include a working gun if you’ve got the right supplies. Even NASA uses 3D printers to send patterns for specialized tools to astronauts on the International Space Station.
Go From Learning How to Set Up a 3D Printer to Your First Project
Finally, once you’ve got everything set up and chosen your design, all that’s left to do is click print! 3D printing projects can take anywhere from a few hours to a few days to complete, so be patient. All your hard work will be worth it.
Editor’s note: This article was originally published on January 21, 2020 and was updated August 26, 2022 to provide readers with more updated information.
Revolutionized is reader-supported. When you buy through links on our site, we may earn an affiliate commision. Learn more here.
History of 3D printing
In this section, we wanted to trace the history of 3D printing from its inception to the present day, as well as give a forecast regarding the future development of technology.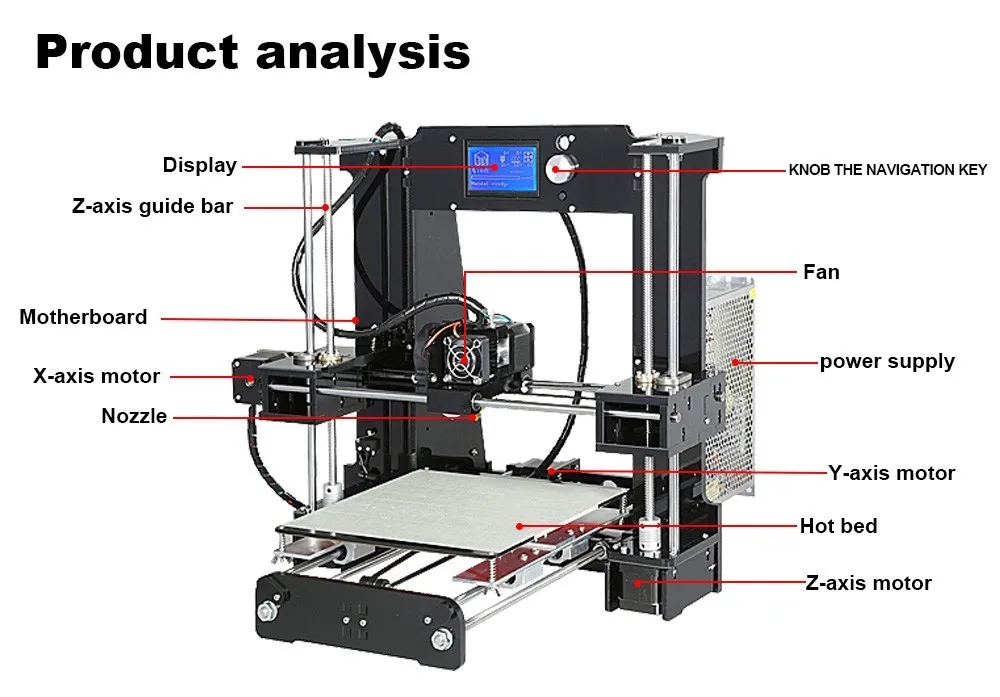
The first 3d printer was invented by the American Charles Hull, he worked on the technology of stereolithography (SLA), a patent for the technology was issued in 1986. The printer was a fairly large industrial installation. The installation "grew" a three-dimensional model by applying a photopolymerizable material to a moving platform. The basis was a digital model pre-modeled on a computer (3D model). This 3d printer created three-dimensional objects, rising by 0.1-0.2 mm - the height of the layer. Despite the fact that the first device had many disadvantages, the technology has received its application. Charles Hull is also the co-founder of 3dsystems, one of the world's leading manufacturers of industrial 3D printers. nine0003
Charles Hull was not the only one to experiment with 3D printing technology, as in 1986 Carl Deckard invented Selective Laser Sintering (SLS). You can learn more about the method in another article, briefly: a laser beam sinters a powder (plastic, metal, etc.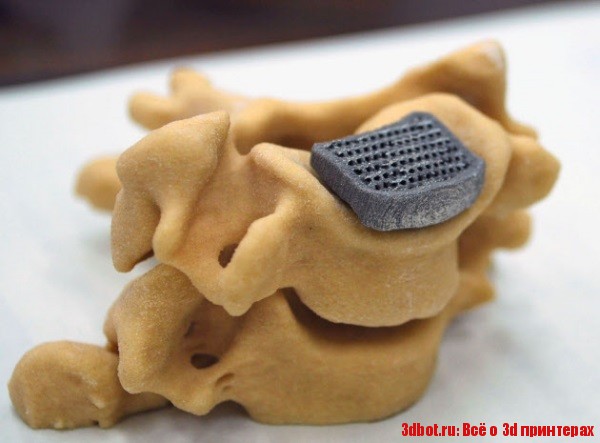 ), while the mass of the powder is heated in the working chamber to a temperature close to the melting point. The basis is also a digital model pre-modeled on a computer (3D model). After the laser passes through the horizontal layer, the chamber is lowered to the layer height (usually 0.1-0.2 mm), the powder mass is leveled with a special device and a new layer is applied. nine0003
However, the most famous and widespread 3D printing method today is layer-by-layer direction (FDM). The idea of technology belongs to Scott Crump (Scott Crump), the patent dates back to 1988. You can learn more about the method in another article, in short: material (usually plastic) is fed from the heated nozzle of the print head using a stepper motor, the print head moves on linear guides along 1 or two axes, and the platform moves along 1 or 2 axes . The basis of the movement is also a 3D model. The molten plastic is laid on the platform along the established contour, after which the head or platform is moved and a new layer is applied on top of the old one.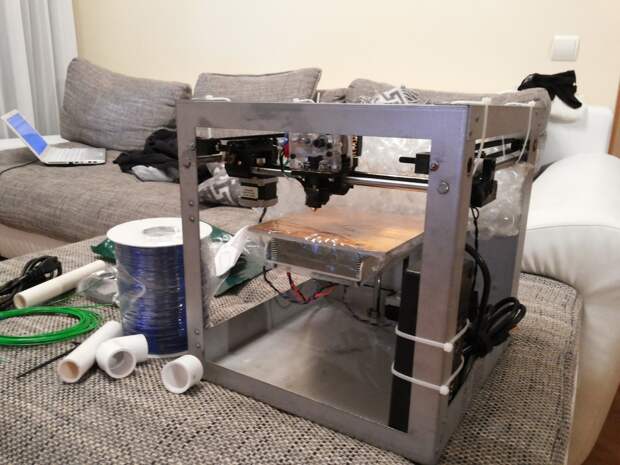 Scott Crump is one of the founders of Stratasys, which is also one of the leaders in the production of industrial 3D printers. nine0003
All the devices described above belonged to the class of industrial devices and were quite expensive, so one of the first 3d Dimension printers from Stratasys in 1991 cost from 50 to 220 thousand US dollars (depending on the model and configuration). Printers based on the technologies described above cost even more and until very recently, only a narrow circle of interested specialists knew about these devices.
Everything began to change since 2006, when the RepRap project (from the English Replicating Rapid Prototyper - a self-replicating mechanism for rapid prototyping) was founded, with the goal of creating a self-copying device, which was a 3D printer working on technology FDM (layer by layer deposition). Only, unlike expensive industrial devices, it looked like a clumsy invention made from improvised means. Metal shafts serve as a frame, they also serve as guides for the print head. driven by simple stepper motors. The software is open source. Almost all connecting parts are printed from plastic on the 3D printer itself. This idea originated among English scientists and aimed at spreading available additive technologies so that users can download 3D models on the Internet and create the necessary products, thus minimizing the production chain. nine0003
Leaving aside the ideological component, the community (which exists and develops to this day) managed to create a 3d printer accessible to the "ordinary person". So a set of unprinted parts can cost around a couple of hundred US dollars and a finished device from $500. And even though these devices looked unsightly and were significantly inferior in quality to their industrial counterparts, all this was an incredible impetus for the development of 3D printing technology.
As the RepRap project developed, 3D printers began to appear, taking as a basis the base laid down by the movement in technical and, sometimes, ideological terms (for example, commitment to the concept of open source - OpenSource).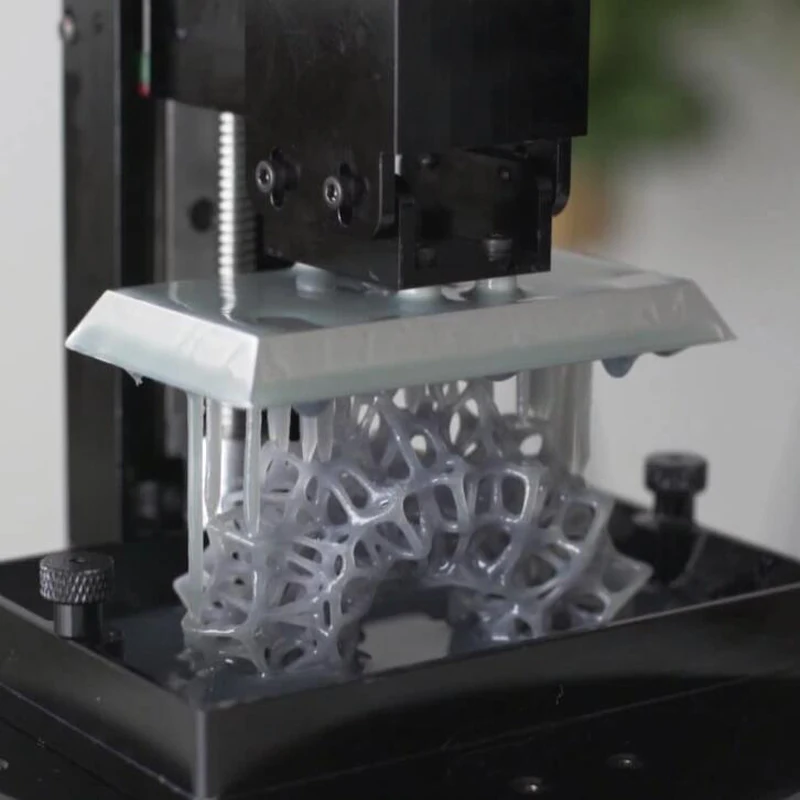 The companies that made printers tried to make them better both in terms of performance, design and user experience. The first RepRap printers cannot be called a commercial product, since it is not so easy to manage (and even more so to assemble) and it is not always possible to achieve stable work results. Nevertheless, companies tried to close the more than significant gap in quality, leaving a significant gap in cost whenever possible. nine0003
First of all, it is worth mentioning the MakerBot company, which started as a startup, took RepRap ideas as a basis and gradually turned them into a product of a new quality.
Their flagship product (and in our opinion the best to this day) remains the MakerBot Replicator 2 3D printer. The model was released in 2012 and later discontinued, but remains one of the most popular 3D printer models to this day " personal" segment (according to 3dhubs). The word "personal" is in brackets because this printer, which cost $2,200 at the time of release, was (and is) primarily used for business purposes, but falls into the personal segment due to its cost.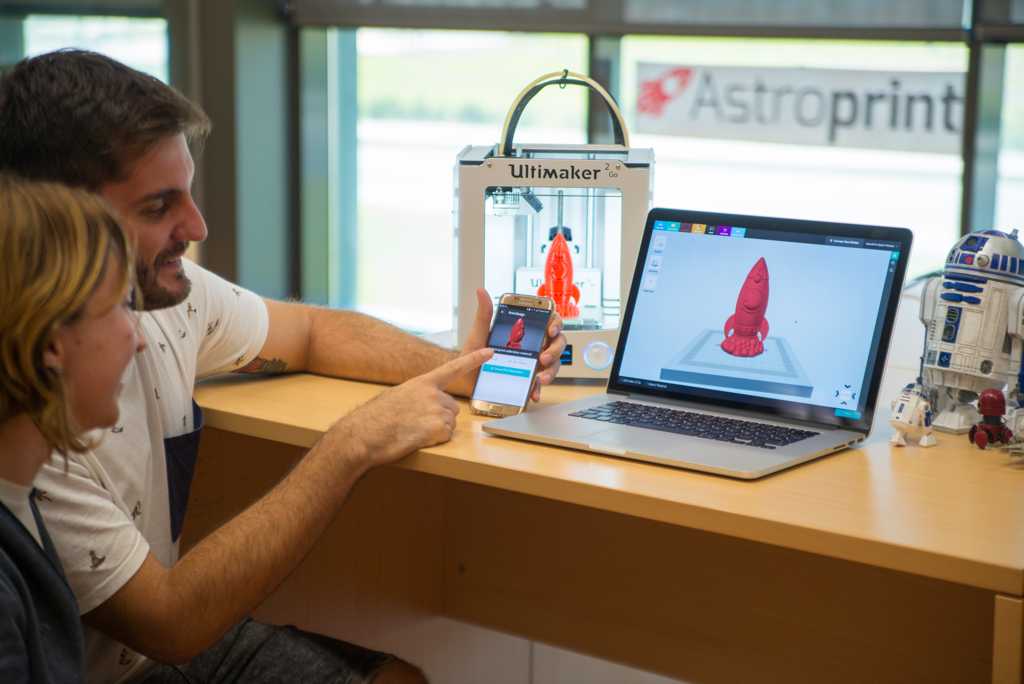 This model differs from its progenitors (RepRap), being, in fact, a finished commercial product. Manufacturers abandoned the concept of OpenSource, closing all sources and software codes. nine0003
In parallel with the release of equipment, the company actively developed the Thingiverse resource, which contains many models for 3d printing, available for download for free. During the development of the first printer and beyond, the community has helped the company a lot, testing the product and offering various upgrades. After the release of the Replicator 2 (and the closure of development), the situation has changed. You can learn more about the history of MakerBot and other companies and people associated with 3d printing by watching the film Print the legend. nine0003
This film also highlights the history of Formlabs, one of the first companies to launch an affordable 3D printer based on SLA (Strereolithography) technology. The company raised funds for the first FORM 1 model through crowdfunding, encountered production difficulties, but eventually released an affordable and productive 3D printer, closing the quality gap described above.
And although the 3D printers described above were far from perfect, they laid the foundation for the development of affordable 3D printing technology, which continues to this day. At the moment, the quality of FDM and SLA printers is increasing, but there is no significant price reduction, rather, on the contrary, it is growing slightly. Along with FDM and SLA, many companies are developing in the field of powder sintering (SLS), as well as metal printing. Despite the fact that such printers cannot be called affordable, their price is much lower in comparison with analogues from the professional segment. It is also worth noting the development of the line of materials, in addition to the standard ABS and PLA plastics, today many different materials are used, including nylon, carbon fiber and other durable and refractory materials. nine0003
Personal 3d printers of today are very close to professional devices, the development of which also does not stop. In addition to the "founders" of the technology (Stratasys, 3dsystems), many small companies specializing in industrial 3D printing technologies (metal in particular) have emerged.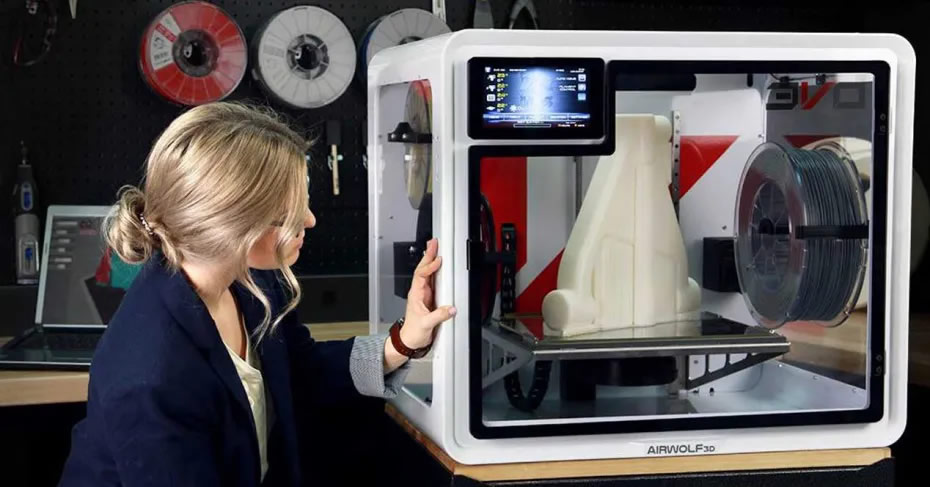 3D printing is also attracting the attention of large corporations, which, with varying degrees of success, are striving to take their place in a growing market. Here it is worth highlighting HP, which recently released the HP Jet Fusion 3D 4200 model, which has gained popularity among 3d printing professionals (as of 2018, it is at the top of the ranking of professional 3D printers in the quarterly reports of the 3dhubs portal). nine0003
However, 3D printing technologies are developing not only in breadth, but also in depth. One of the main disadvantages of 3D printing, compared to other production methods, is the low speed of creating models. A significant advance in terms of accelerating 3D printing was the invention of CLIP technology by CARBON, printers operating on this technology can produce models 100 times faster than classic SLA technology.
There is also a constant expansion of the range, properties and quality of materials and post-processing of products.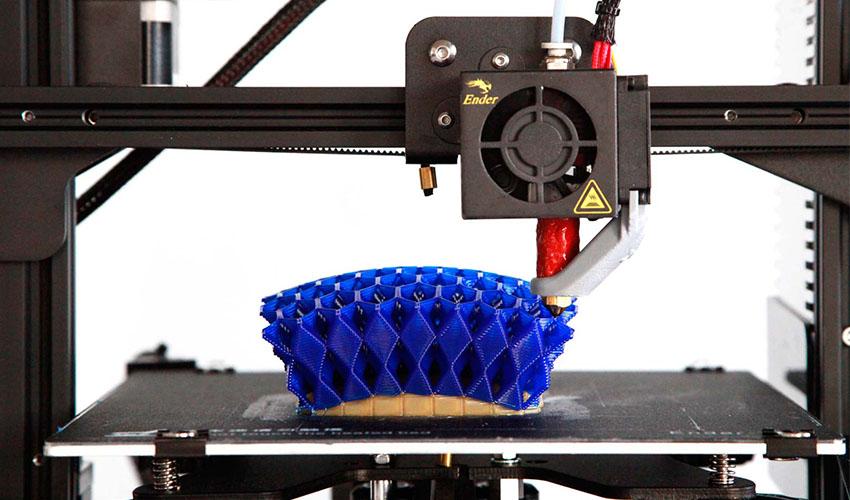 All this accelerates the transition to the use of 3d printers in production, and not just as prototyping devices. Today, many large and not only companies and organizations are closely using a 3D printer in their production chain: from consumer goods manufacturers NIKE and PUMA to BOEING and SPACE X (the latter prints engine parts for its rockets that could not be made in any other way) . nine0003
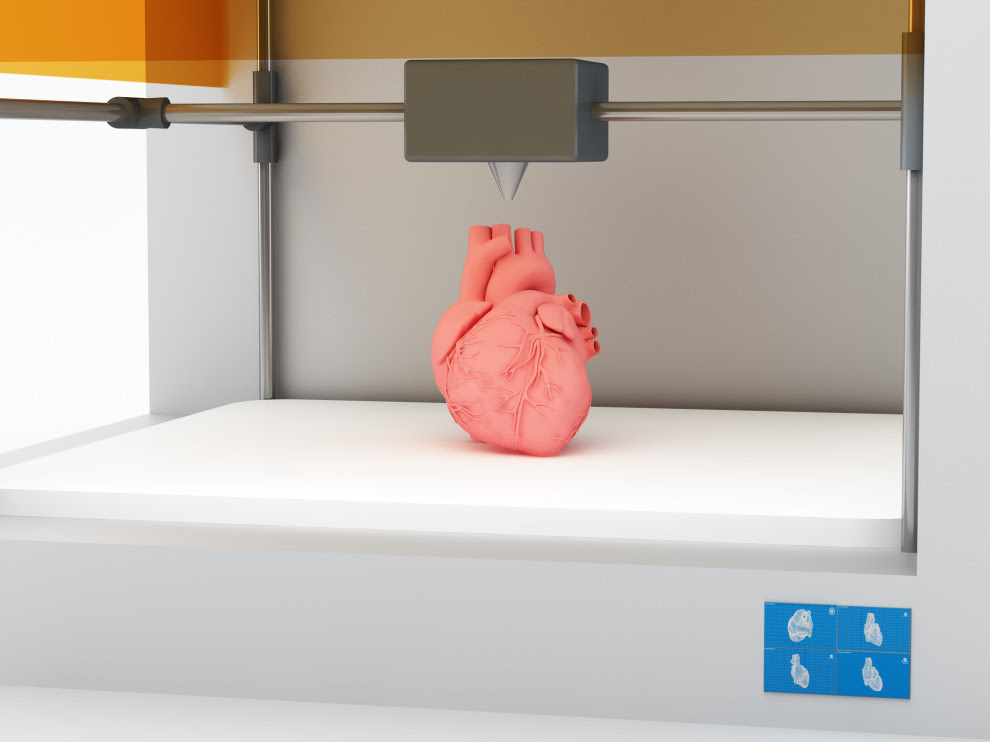
In addition to the "classic" scope of 3D printing, today more and more often you can see news about how a house or some organ (or rather, a small part of it) was printed on a 3D printer from bio-material. And this is true, several companies around the world are testing or already partially using 3D printing in the construction of buildings and structures. This mainly concerns the contour pouring of walls (similar to the FDM method) with a special composite concrete mixture. And in Amsterdam there is a 3D printed bridge project and this list will only expand over time, since the use of 3D printing in construction can significantly reduce costs and increase the speed of work at certain stages.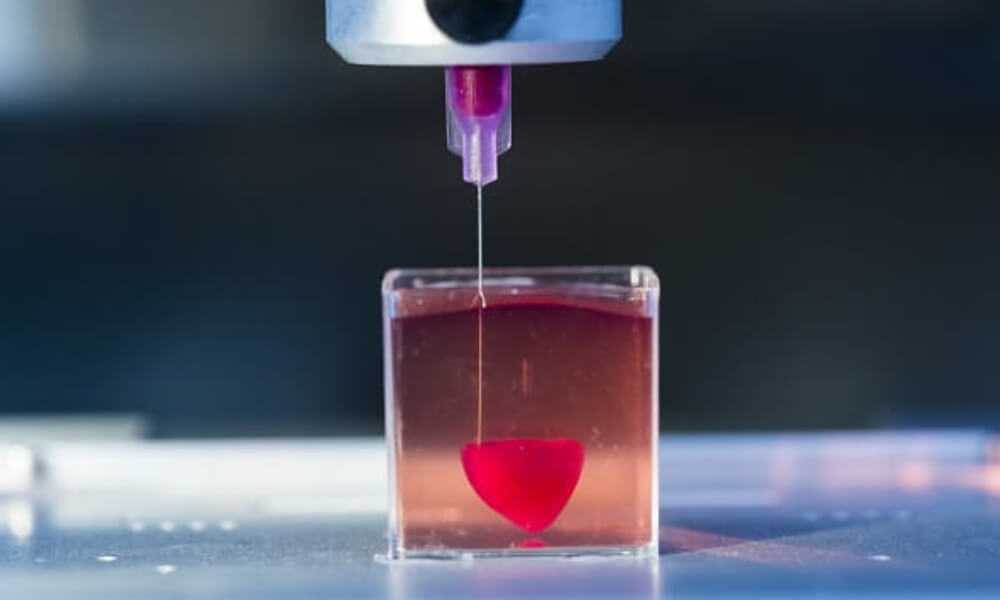 nine0005 With regards to medicine, here 3D printing also finds application, but at the moment it is not printing organs, but rather the use of technology in prosthetics (of various kinds) and bone replacement. Also, 3D printing technology is widely used in dentistry (SLA technology). Regarding the printing of organs, this is still far in the future, at the moment bio-3D printers are experimental facilities in the early stages, the success of which is limited to printing a few limited-viable cells. nine0003
Looking to the future, it is safe to say that 3D printing technology will expand both in breadth and depth, improving technology, speeding up processes, improving quality and improving material properties. 3D printers will increasingly replace old methods in production chains of various scales, and world production, due to this, will move towards the “on demand” scheme of work, increasing the degree of product customization. Perhaps someday, 3D printers will be widely used at the household level for the production of necessary things (the dream and goal of the RepRap movement), but this requires not only the development of technology, but also a paradigm shift in social thinking, as well as the development of a powerful design ecosystem ( 3d modeling) products (which is often forgotten).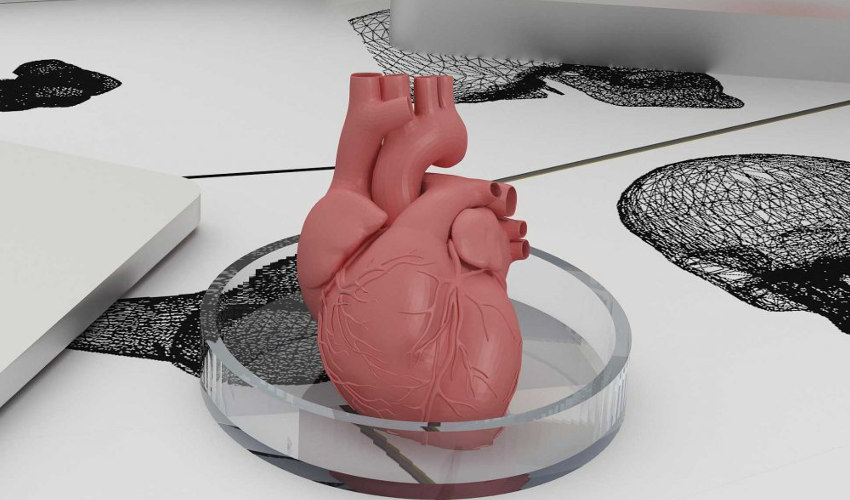 nine0003
3d printing of houses (and other structures) will no doubt also develop, reducing costs and production time, which, together with the development of new approaches in architecture and urban planning (such as modular construction and the prefabricated method), will give a tangible impetus to development the industry as a whole.
Biological 3D printers will be an important tool in scientific research. However, before they appear in hospitals and clinics, where they will print new organs, it is still very, very far away (in fact, this is science fiction). nine0003
For the little ones: how to start printing
3D printing
How to start typing? Here's about it in a nutshell. I assume that you have at least some workable printer in front of you, you assembled it yourself, bought it, or someone dragged it and put it before the fact.
- Do it once - find out how to set up the table. nine0081
- Do two - thread the bar.
- Do three - prepare the model.
- We print.
Do it right Calibration. The minimum program is to make the simplest PLA filament stick to the table. If the plastic does not stick to the table, then there will be no printing. And, yes, you do NOT have a delta printer. Because the deltas are according to separate shamanistic Talmuds. Yes, it is possible that the printer is equipped with an auto level - table sensor. But for now, imagine life without him. We rub the table In general, PLA can be printed on a heated bed without additional coating. But it's easier to smear something. Unless you have a special coating that Wanhao and a number of other manufacturers boast about. I’ll just list the options: glue stick (necessarily the legendary “Kalyaka-Malyaka”), liquid diluted PVA glue, sugar syrup, beer, hairspray ... You can also stick blue masking tape. It is necessary to smear all this on glass, which, in which case, can be replaced. And now calibrate
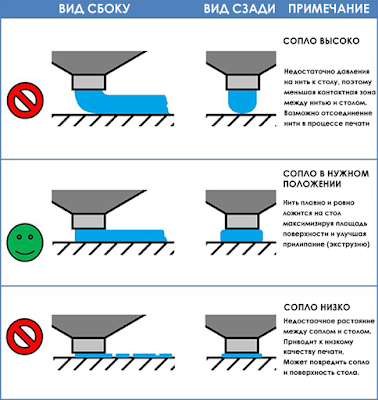
Starting position - parking. 'House' on all three axes in the control program. If everything works correctly, the nozzle will almost meet the table in one of the corners. It happens differently - for example, on Ultimaker 'home' is when the table is at the maximum distance from the nozzle. And now we warm everything up to operating temperature, if the table is heated. We lower the table with screws to the lower position, the springs are compressed - otherwise we risk crawling on it with a nozzle. And we move through the control program or with the help of a twist head. We moved it to a corner - we twisted the adjusting screw under the table so that a piece of paper could hardly pass between the nozzle and the table. Moved to the opposite, diagonally, corner - repeated. And so in several visits, until everywhere it becomes even. If the table is on three screws, then two corners and the middle of the opposite side. nine0003
Then, if necessary, give up the paper and use something more technological. At the initial stage - an obvious and affordable option. Do two Insert bar. Decide where you have the feed, on the print head or somewhere on the body. In short, somewhere there must be a node with a motor, a spring and a lever. If without a lever, the bar is not loaded manually, we study the instructions on how to load and unload through the printer menu.
Warm up the hot end to operating temperature (depending on the plastic), depress the lever and push the plastic until it comes out of the nozzle. nine0090 Do three Preparing the model. We have a model in STL format, it needs to be translated into a control code (G-code). Yes, if you write the STL onto a card and insert it into the printer, it will NOT print with rare exceptions. To form a G-code, you need a program called 'slicer'. They are different. There are combines that combine a slicer with a control program (you can prepare a model and control a printer), there are pure slicers.