How to clean 3d printer plate
the correct way! – 3D Solved
It happened to me when I got started in 3D printing, so it may as well be happening to you. You think you found those golden settings on your slicer that just output nice-looking prints and you get the feeling that you may be a printing genius.
Perhaps, you think, you should buy twenty more printers and start your own printing farm. In your mind, you are already thinking about the size of your future yacht and its amenities.
Suddenly, your objects detach from the build plate in mid-print. It may be time for a new series of tutorials before we can go back to our 3D printing empire.
If what happened above is word for word what happened to you, it may be time to learn how to keep a clean printer bed (and lower your overall expectations).
A clean printing bed is especially important for improving layer adhesion to the build plate and yields a better looking first layer. Isopropyl Alcohol (IPA) in graduations ranging from 70% up to 99. 99% is appropriate for this task.
Soak the IPA in paper towels, microfiber cloth, or cotton and clean the bed surface in a circular motion. Rinse and repeat until the build plate is free of leftover filament, fingerprints, oils, and other imperfections that affect printing quality. Depending on the build plate type, you can also use acetone, but only use it as a last resort and on the specific parts where you could not clean it using alcohol.
If you do not know if your build plate is dirty or clean, assume that it needs some cleaning. It never hurts!
Look at the picture below. If your surface looks like the left-hand side, you clearly do not suffer from dirty-build-plate syndrome (or DBPS). On the other hand, if you identify with the right side of the picture, it does not take a germaphobe (nor a tutorial) to infer that some cleaning may be necessary.
Source: Prusa Knowledge BaseTable Of Contents
- Why is 3D Printer Bed Cleaning Important?
- Advantages of a Clean 3D Printer Bed
- Maintaining Your 3D Printing Bed
- Polyetherimide (PEI) Printing Beds
- Glass
- Adhesive Tape
- Conclusion
Why is 3D Printer Bed Cleaning Important?
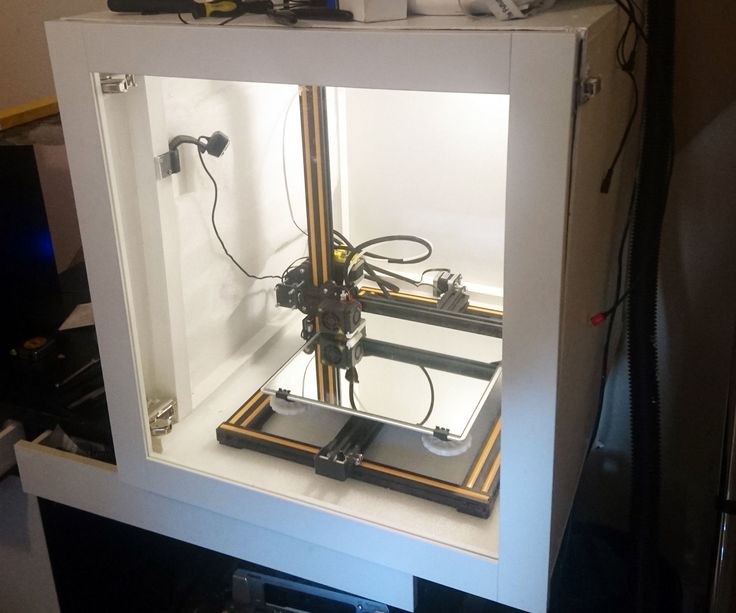
The 3D printer bed serves as the base on which your model is printed on. The printing process can leave residual filament after the process is completed.
The bed also becomes dirty by general handling (skin oil, fingerprints, dirt, etc.) and materials from its surroundings. These contaminants affect the quality of your future prints and damage the printing bed over time.
Skipping maintenance can ultimately cause irreversible damage that can only be resolved by replacing the printing bed.
Advantages of a Clean 3D Printer Bed
Having a clean 3D printer bed is essential for achieving perfect results. Unclean beds have recurring issues with layer adhesion that compromise the quality of your prints.
Keeping the 3D printing bed in an acceptable state prolongs its serviceable life and can save you from spending a few extra bucks on somewhat expensive replacements.
A key issue with printing is the quality of the first layer and its adhesion to the build plate.
A clean 3D printer bed ensures your models print properly without any issues. Remember to follow the recommended care for your printing bed as it varies according to models and their materials.
Maintaining Your 3D Printing Bed
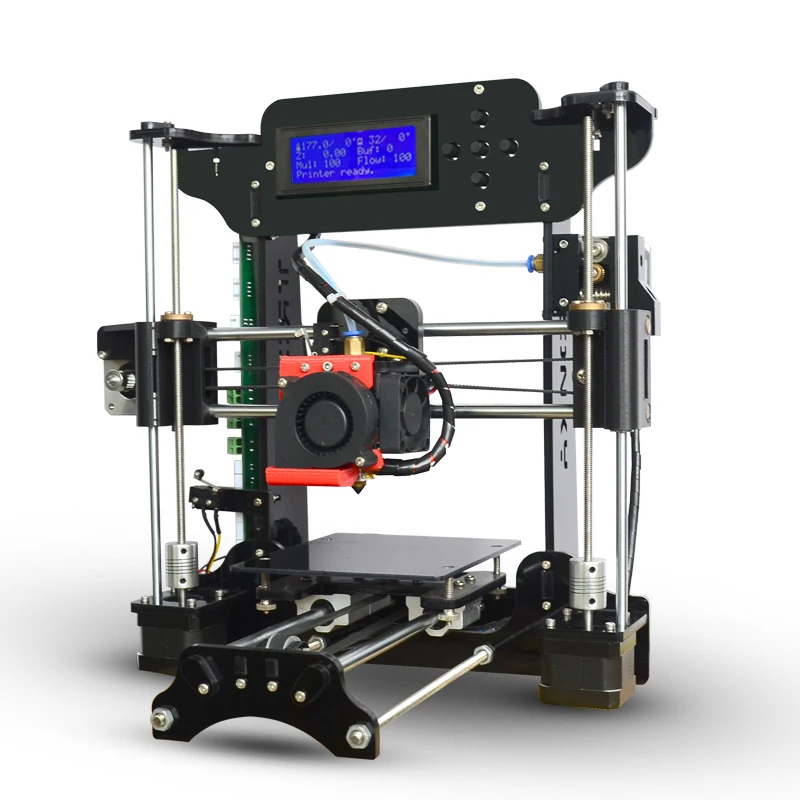
Most printer beds are made of glass Polyetherimide (also known as PEI) or covered in tape. At 3DSolved we leave (almost) no rock unturned, so we will cover those types!
Polyetherimide (PEI) Printing Beds
PEI sheets are being actively used as 3D printer bedding since they require little maintenance and are suitable for the process. They are also resistant to wear under extreme temperature and radiation that are a regular feature in 3D printing.
PEI sheets have good bed adhesion and don’t normally get stuck with the model if maintained properly. Consequently, there are few instances where adhesives and tapes are needed when using them.
However, PEI sheets do need maintenance to keep up the quality of their prints. Their adhesion becomes weaker over time as the bed is repeatedly subjected to printing radiation, temperatures, 3D printing inks, environmental contaminants, and general handling.
This leaves glue, printing ink, and filaments as well as oils and dirt on the surface. Simple cleaning procedures such as scratching, scraping, and wiping with any cleaner can damage the bed.
How to clean a PEI Printing Bed
The following is the recommended way to clean a PEI 3D printing bed:
What You NeedYou will need the following materials for cleaning the PEI 3D printing bed:
- Isopropyl Alcohol (IPA) at 70% to 99.99% concentration (depends on cleaning)
- Acetone/Propanone
- Paper towels, microfiber cloth, or cotton
- Sandpaper (+1,500 grit)
Using unscented IPA at ~70% concentration is a safe standard to clean PEI 3D printing beds. It is volatile (it evaporates), which means you don’t have to worry about a liquid mess. Higher purity of IPA can be used in cases where oils, dirt, and grease have been layered considerably.
As a safety precaution, be sure to always use it in a well-ventilated area.
Let the 3D printing bed cool down before starting maintenance. Apply IPA and wipe it well with a dry microfiber cloth, paper towel, or cotton. The higher concentration of IPA completely breaks down organic oils and makes them easier to remove.
Use acetone for removing 3D ink and plastics that are stubbornly bonded with the bed. Pour the acetone on the cloth (not directly on the bed) to dampen it.
While PEI is not soluble in acetone, pouring too much on one area for prolonged periods can still damage it. Wipe the bed in circular strokes to remove the plastic compounds. You may pour some of it directly on tough stains to soften them for removal.
Remember to use acetone only when alcohol is no longer completely cleaning the surface.
In case of very stubborn stains or uneven surface, use fine-grit sandpaper (+1,500 grit) to scrub off the buildup or simply smoothen the surface for even traction after cleaning it. Remember to clean again as sandpapering produces very fine dust from grinding the surface.
The time between maintenance is variable for different brands of PEI sheets and how often they are used. It also decides their serviceable life. Using glue and hair spray has also become a common hack to prevent the model from sticking to the bed. While the technique has proven effective, cleaning up can become problematic without proper guidelines.
To avoid damage, follow the instructions, though wiping is a standard after a few prints. Depending on the usage (a month on average), you may have to use acetone and sandpaper for restoration.
Glass
Glass is a very common material for 3D printing. It has a longer serviceable life than PEI. It also facilitates the usage of hairspray and adhesives for the 3D printing process because the surface does not react with any material. Glass 3D printing beds have an even surface that is also relatively easy to clean.
Glass by itself does not have a good surface adhesion. It is normally used with adhesives such as glue sticks and hairsprays. They increase surface adhesion for the first layer of print that sets a stable base for the rest of the model.
Cleaning Glass 3D Printing Beds
The following is the recommended way to clean a glass 3D printing bed:
What You Need- Scraper
- Dishwashing soap
- Sponge
- Isopropyl Alcohol (IPA) at 70% to 99.99% concentration (depends on cleaning)
- Paper towels, microfiber cloth, or cotton
Working with a heated glass 3D printing bed is easy as the surface does not become sensitive after getting warm. The heat makes the residual materials easier to scrape off. Be careful when scraping as glass is prone to scratches from sharp objects.
For starters, you should remove any traces of glue and hairspray on your glass 3D printing bed. This can easily be done with smooth, leveled objects such as a plastic ruler or metal spatula.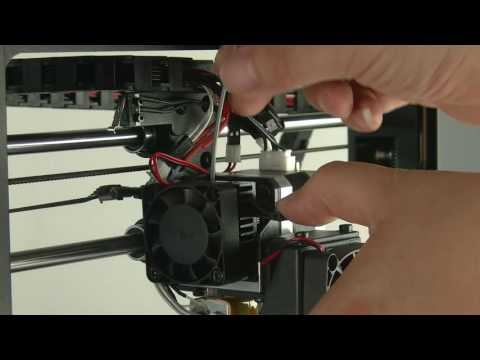 Apply only the necessary force when using metal as it can scratch the glass. After removing glue, you can move on to removing the printing material stuck from the bed.
The blade on a scraper is extremely sharp. Exert a downward force with one hand and get a good grip at the edge or in the middle of the glass bed with the other. This will help remove the leftover material properly and prevent your hand from slipping. Remember that you will have to clean the bed later when you touch it with your hands, as it will leave residual oils and dirt.
Soap and water are perfect for removing glue and hairspray. Check the composition of your product to find out its solubility in water. In some cases, acetone and alcohol are better solvents for removing them. Wipe with disposable paper cloths or cotton because cleaning a microfiber cloth is difficult once used for this purpose.
Note: Be careful when using liquids because they can damage the nearby electronic equipment.
The time between maintenance of your 3D printing bed will vary depending on the usage and materials used to print the models. Scraping after every print removes any printing material stuck to the bed and prevents buildup which becomes harder to clean. It also keeps the next model’s base clean and easy to detach.
Use soap and water every week if the bed is being used every day. Otherwise, monthly maintenance is good enough to keep the prints well adhered. Use IPA and acetone only when the buildup has become very tough to remove.
Adhesive Tape
Adhesive tape is easy to use and cheap to replace. This makes it a reliable choice for anyone getting into 3D printing or looking for a cheap yet reliable 3D printing bed. It is mostly used with non-heated beds because it is sensitive to heat. Masking and painter’s tape are among the top choices for making an adhesive tape 3D printing bed.
Cleaning Adhesive Tape 3D Printing Bed
The following is the recommended way to clean an adhesive tape 3D printing bed:
What You Need- More tape of the same kind
- Scraper, plastic ruler, or metal spatula
- Isopropyl Alcohol (IPA) at 70% to 99.
 99% concentration (depends on cleaning)
 - Dishwashing soap
- Sponge
- Paper towels, microfiber cloth, or cotton
While adhesive tape is easy to use, it is equally hard to clean up. Scraping with a metal spatula is good enough to clean residual filament. Patch any area that is showing signs of wear. Be careful to maintain the level of your 3D printing bed (link to Ender 3 bed leveling guide) to ensure the model is printed without defects.
At times your bed will either be simply too used or will not have an even level. This is an indication to replace it. Remove all of the tapes and clean the base of the bed with IPA or soap and water. Let it dry completely, and then apply a fresh layer.
Time for MaintenanceAdhesive tape 3D printing beds have a short lifespan and need to be repaired and replaced often. Lightly scrape the surface after every print and replace the entire tape after a week or biweekly basis, depending on the frequency of usage.
Conclusion
By now, you should have no excuse for having a dirty printing bed on your machine. I should mention that I am not the most methodic person in the 3D printing world, so I tend to clean it when I start to see a higher failure rate. In short, my strategy can be described as reactive instead of preemptive.
If you do not want to get frustrated from time to time, waste filament, and get poor quality prints, you should always thrive to do preemptive maintenance to your 3D printer, and a clean printing surface is certainly not the exception!
We created a recommended products section that will allow you to remove the guesswork and reduce the time spent researching what printer, filament, or upgrades to get, since we know that this can be a very daunting task and which generally leads to a lot of confusion.
We have selected just a handful of 3D printers that we consider to be good for beginners as well as intermediates, and even experts, making the decision easier, and the filaments, as well as the upgrades listed, were all tested by us and carefully selected, so you know that whichever one you choose will work as intended.
How do I clean the 3D printer bed?・Cults
The bed is one of the most important parts of a 3D printer. For optimal printing performance, it must be properly cleaned after each printing session. Traces of filament are deposited on it over time. Although cleaning the 3D printer's printing plate is not a complicated task, it can quickly become one if you do not have an effective method or the right cleaning product. So how do you go about cleaning this essential part of your 3D printer? We suggest you discover the most effective methods.
Do you own a 3D printer? So, how to properly maintain my 3D printer is probably a question you often ask yourself, the first element of the answer lies essentially in the quality of the material you use. When it comes to the printing plate, with the right cleaning tools, the various parts of your 3D printer will have good adhesion.
When cleaning the printing plate of your 3D printer, you will need the following tools, among others: sandpaper, a scraper blade, a sponge, paper, cotton or microfiber towels and cleaning products such as acetone or propanone, isopropyl alcohol (IPA) with a minimum concentration of 70%, dish soap. .. The ideal for an effective cleaning of your 3D printer.
The cleaning of the printing plate of your 3D printer depends mainly on its base material, but also on the product used for printing. Most of the time, the printing plate is made of glass, polyetherimide (EPI) or covered with adhesive tape. The printing plate of the printer can also be made of plastic, garolite, ceramic, granite, aluminum, but this is much more rare. The use of surface treatments to promote the adhesion of parts to the 3D printer's printing plate must also be taken into account when cleaning it.
Cleaning the 3D printer's glass printing plate
Glass is a material that is commonly used for 3D printing. And for good reason, its lifespan is much longer than that of PEI. In addition, a glass printing plate facilitates the use of adhesives and lacquer in the 3D printing process. This is because its surface does not react with any material. It is also relatively easy to clean. The glass printing plate of the 3D printer is usually used with glue stick and hair spray adhesives. These increase the surface adhesion for the first print layer, which is essential for the stability of the rest of the model.
To remove residual material from your glass printing plate, you can heat it. The heat makes these materials easier to scrape off. Care must be taken when scraping, however, as glass is easily scratched by sharp objects. It is best to use level objects such as a metal spatula or a plastic ruler. If you choose to use metal, we recommend that you apply only as much force as is necessary to avoid scratching the glass printing plate. The metal scraper or spatula is also very useful for cleaning the print tray if you are using ABS, PLA or nylon filament.
In addition, you can use a scraper blade to clean the glass printing plate of your 3D printer. This tool is very sharp. To do this, apply downward force with one hand while holding the edge of the print tray with the other. This will allow you to effectively remove any remaining material embedded in the 3D printer's print tray. Next, be sure to clean the part of the tray that comes in contact with your hands. It very often leaves oil and dirt residue.
Cleaning the PEI printing plate
PEI sheets are also used as printing trays for 3D printers. Their resistance to wear under extreme temperatures and radiation levels is well appreciated. Regular maintenance of a PEI printing plate allows it to maintain its quality. Over time, the adhesion of PEI sheets will weaken due to temperature, printing radiation or inks. Traces of dirt, oil, and glue will eventually deposit on the surface of your 3D printer's PEI printing plate. However, physical cleaning procedures such as scraping and scraping are not the most effective and can actually damage the print tray.
The best solution for cleaning a PEI print tray is to use a cleaning agent like unscented IPA with a concentration of 70%. For a platen surface that is more exposed to dirt and oil, you can use a purer form of IPA. However, wait until the PEI printing plate of your 3D printer has cooled down before you start cleaning. For your protection, be sure to use this cleaner in a well-ventilated environment.
In addition, acetone may be used to remove traces of ink and plastic stuck to your 3D printer's PEI printing plate. This cleaner should not be poured directly onto the printing plate. Even though PEI is not soluble in acetone, acetone can damage the PEI if you pour a large amount of it on the printing plate. To do this, we recommend that you pour the acetone onto the cloth, then wipe the print tray with circular motions.
Cleaning the tape printing plate
Tape is an inexpensive and easily replaceable product. As a result, it is widely used by people who are new to 3D printing. Tape is mainly used with non-heated printing plates because of its thermal sensitivity. To effectively clean filament residue from the 3D printer's print plate, scrape it off with a metal spatula. Sometimes your printing plate no longer has a uniform level. In this case, it is too worn and it is best to replace it. However, before applying a new layer, remove any stripes that are present with a cleaning agent such as IPA.
How to clean the 3D printer tray?・Cults
The plate is one of the most important parts of a 3D printer. For optimal printer performance, it must be properly cleaned after each print session. Traces of the thread are deposited on it over time. While cleaning a 3D printer plate is not a difficult task, it can quickly become one if you don't have an effective method or the right cleaner. How to clean this important part of the 3D printer? We invite you to identify the most effective methods.
Do you have a 3D printer? So how do I properly maintain my 3D printer is probably a question you often ask yourself, the first element of which lies, in fact, in the quality of the material you are using. As far as the print plate is concerned, when using the correct cleaning tools, the various parts of your 3D printer will have good adhesion of .
To clean the plate of your 3D printer, you will need the following tools: sandpaper, scraper, sponge, paper, cotton or microfiber towels and cleaners such as acetone or propanone, isopropyl alcohol (IPA) with a minimum concentration of 70%, soap for dishes... Ideal for effective cleaning of your 3D printer .
Cleaning your 3D printer's plate depends mainly on the plate material, as well as the product used for printing. Most often the printing plate is made of glass, polyesterimide (EPI) or is covered with adhesive tape. The printing plate of the printer can also be made of plastic, garolite, ceramics, granite, aluminum, but this is much less common.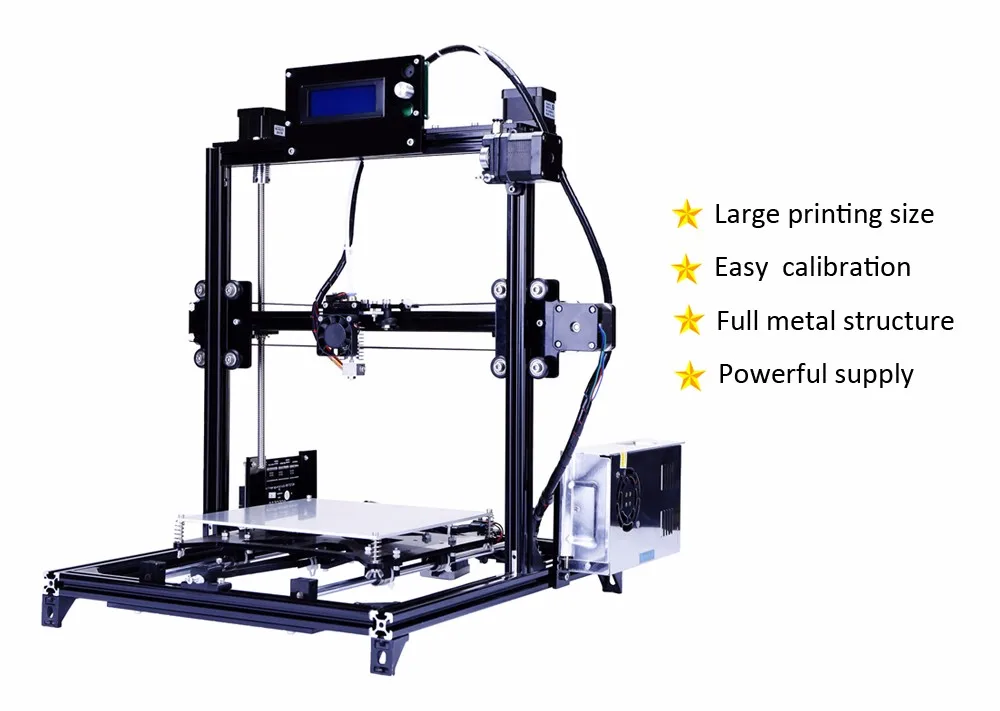 When cleaning the 3D printer plate, you must also consider the use of surface treatments that promote adhesion of parts to the plate.
Cleaning the glass 3D printing plate
Glass is a common material used for 3D printing. It has a much longer lifespan than PEI. In addition, the glass plate makes it easier to use the adhesive and varnish in the 3D printing process. This is because its surface does not react with any material. It is also relatively easy to clean. The 3D printer's glass printing plate is commonly used with adhesives such as glue stick and hair sprays. They increase the adhesion of the surface for the first print layer, which is necessary to ensure the stability of the rest of the model.
The glass plate can be heated to remove material residue. Heat makes it easier to scrape off these materials. However, care must be taken when scraping, as the glass is easily scratched by sharp objects. It is best to use aligned objects such as a metal spatula or plastic ruler. If you choose to use metal, we recommend applying only as much pressure as is necessary to avoid scratching the glass plate. A metal scraper or spatula is also very useful for cleaning the print tray if you are using ABS, PLA, or nylon filament.
Alternatively, you can use the scraper blade to clean the glass plate of your 3D printer. This tool is very sharp. To do this, press down with one hand while holding the edge of the print tray with the other. This will allow you to effectively remove the remaining material from the 3D printer's print tray. Then make sure you clean the part of the plate that is in contact with your hands. It very often leaves residues of oil and dirt.
Plate cleaning PEI
PEI sheets are also used as printing plates for 3D printers. Their resistance to wear under extreme temperatures and radiation levels is well rated. Regular maintenance of the PEI printing plate allows the plate to maintain its quality. Over time, the adhesion of PEI sheets weakens under the influence of temperature, printing radiation or inks. Traces of dirt, oil, glue, etc. eventually settle on the surface of your 3D printer's PEI plate. However, physical cleaning procedures such as scraping and scraping are not the most effective and may even damage the print plate.
The best solution for cleaning the EPI print tray is to use a cleaner such as unflavored IPA at 70% strength. In the case of a plate surface that is more exposed to dirt and oil, purer IPA can be used. However, before you start cleaning, wait for your 3D printer's PEI plate to cool down. For your protection, make sure you use this cleaner in a well ventilated area.
You can also use acetone to remove ink and plastic residue stuck to your 3D printer's PEI plate. This cleaner should not be poured directly onto the plate. Although PEI does not dissolve in acetone, acetone can damage PEI if you pour a large amount of it onto the plate. To do this, it is recommended to pour acetone on the fabric, and then wipe the print tray in a circular motion.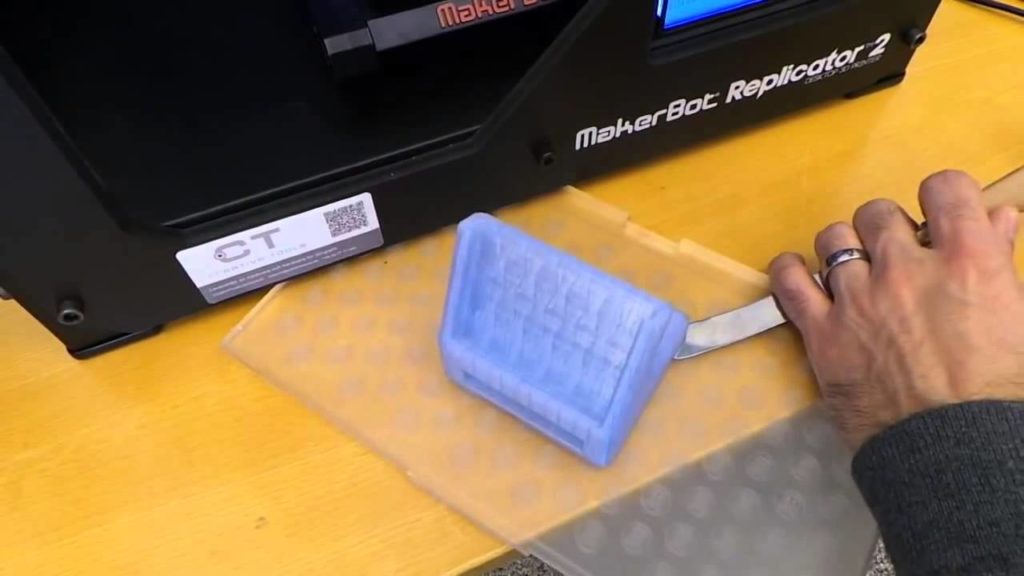
Ribbon plate cleaning
Adhesive tape is inexpensive and easy to replace product. Therefore, it is widely used by people who are just starting to master 3D printing. Ribbon is mainly used with non-heated printing plates due to its thermal sensitivity. To effectively clean the remaining filament from the 3D printer's print plate, scrape it off with a metal spatula. Sometimes the printed form stops being even. In this case, it is too worn out and it is better to replace it. However, before applying a new coat, remove any streaks with a cleaner such as IPA.
Cleaning the 3D printer table. Tips and Tricks.
3D printing is a very unstable process, I think everyone who is at least slightly familiar with plastic filament printing technology will agree with this. Unpleasant crashes in the 3D printer can occur for various reasons, and one of the most common reasons is the detachment of the model being grown from the desktop surface. And as a rule, this happens in the middle of printing, when you are already convinced of the stability of the press and are distracted by another activity. It is precisely for this reason that ensuring good adhesion of the first layer to the platform is very important for the successful completion of 3D printing.
Today there are many ways to improve the adhesion of the first layer to the bed. A lot of articles and recommendations have been written about this, so we will not talk about them. It is worth noting one of the simplest methods - is keeping the desktop of a 3D printer clean . Regular and thorough cleaning of the platform will not only improve adhesion, but will make printed models more beautiful and smooth.
In this article we will look at the best way to clean the 3D printer table, using the example of popular coatings:
Remember to be careful when using the methods below, as spilled liquid may damage the 3D printer. We recommend removing the bed from the printer before cleaning (if possible).
PEI sheet surface cleaning
Recently, PEI sheet has become a very popular material for improving adhesion in 3D printers. It provides excellent adhesion to various materials, and when it cools down, the printed model lags behind it very easily. The sheets are very simple and not fussy to use, and most often it does not require additional application of glue or adhesive tape.
Unfortunately, in order to achieve maximum efficiency, the PEI surface also requires regular and high-quality cleaning. If PEI is touched frequently, it can develop greasy spots that reduce adhesion to the material. Rough cleaning can also damage the surface and reduce sticking. Regular cleaning and maintenance of PEI will ensure that your models do not come off.
How to clean PEI surfaces
To clean such surfaces, we recommend using isopropyl alcohol (chemically pure, odorless) with a concentration of more than 70%. You can use it with a smell, but it is very caustic and unpleasant, the room will need to be ventilated.
Wait for the platform to cool, then liberally soak a dry cloth or paper towel with alcohol and wipe the surface. This will remove a significant portion of the fats and oils from the bed.
Acetone is also good at dissolving plastic residues on the surface. In the same way, liberally moisten the cloth with liquid, then gently wipe the surface of the 3D printer desktop. We strongly recommend doing this work in a well-ventilated area, as acetone is highly flammable and its vapors can penetrate the electronics of the device
If you have been using PEI sheet for quite a long time, and its resource is visually exhausted, then we recommend using fine grit sandpaper (1500+). With gentle, circular motions, sand the surface until light scratches and depressions are removed.
When should I clean?
Most manufacturers recommend cleaning the surface with isopropyl alcohol every 2 to 3 prints.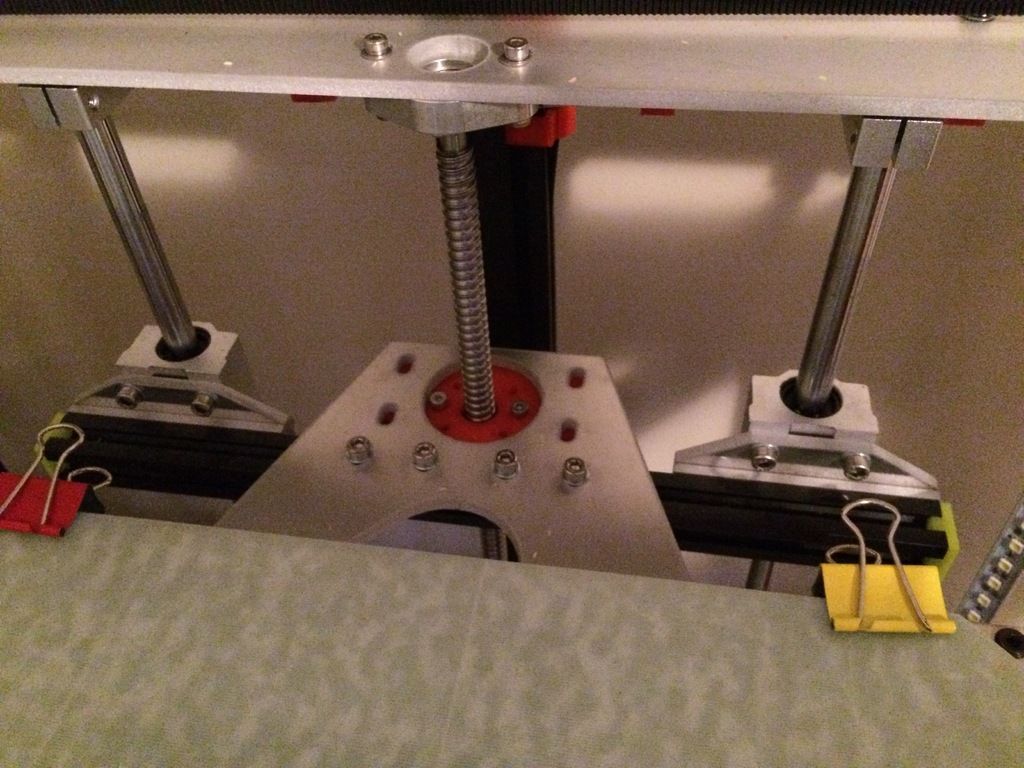 After a few months of use, sand the surface and wipe thoroughly with acetone. If it is no longer possible to restore the surface by the listed methods, then replace it with a new sheet from PEI. The lifespan of such material varies depending on the brand and frequency of use of the 3D printer.
Glass Surface Cleaning
Glass is another very common 3D printer desktop material. Much more durable than PEI and similar surfaces. The glass plates provide a smooth and level surface at the bottom of the model.
This surface is usually used in combination with other aids (eg glue stick or hairspray) to improve the adhesion of the first layer. Such products are especially popular on tables that are not equipped with heating. Therefore, regular cleaning of the glass is necessary to prevent adhesive or varnish from sticking.
How to clean the glass platform
The easiest way to clean a glass plate is to use a scraper or a non-metal spatula. If the table is heated, then heat it until the material remains soft, after which they should be easily removed with a scraper.
Be careful when scraping. Depending on the scraper, the blade can be very sharp, so be careful not to scratch the surface. We recommend that you put your hand on the handle of the scraper, and with the other hand press down on its middle, so that the greatest force is directed downwards.
If this does not work, try wiping the glass with warm soapy water. Although simple, this method is very effective for removing hairspray, glue, and other adhesives. Keep in mind that this method is only recommended if the 3D printer allows you to remove the platform. Spilled water can seriously damage the heating element, power supply or other electronics of the device.
Dirt can also be removed with specialized cleaning products. For example, wet alcohol wipes, window cleaner, isopropyl alcohol will also effectively wash away adhesive residue and restore the glass surface. However, do not take too strong cleaners. Such substances can severely damage the surface or even the 3D printer. In order to be sure to select a cleaning agent for your particular 3D printer, it is best to contact its manufacturer. Most often, they willingly make contact with users and willingly give advice.
When to clean the glass surface
Again, this will depend on how often you use the printer. We recommend cleaning the surface after each print to prevent buildup of glue or varnish. Such a procedure will not take much time, but the print will be more stable, and the resulting prints will have a beautiful and even surface. Once the models stop sticking (usually after a month), try washing the surface with soap and water. After about two to four months, you will have to resort to isopropyl alcohol or other specialty drugs. substances.
Cleaning adhesive tapes
Adhesive tape is another proven way to increase adhesion to the print platform. Today, this method is more common on 3D printers without the function of heating the desktop. Masking tape is the most common remedy, but so are Kapton and others.
One of the reasons for the popularity of such linens is their ease of use and relatively inexpensive cost. They are easy to stick to the surface and are available at almost any hardware store. However, there are also disadvantages: the tape quite often peels off when the printed model is removed, so it must be reapplied regularly.
How to clean?
Unfortunately masking tape is one of the most difficult to clean due to its fragility. however, we have found that gentle scraping is one of the most effective ways to clean it. With light pressure, evenly scrape off the remaining plastic thread from the surface, being careful not to tear it.
If the tape does break during cleaning, replace this area with a new strip. The main thing is not to overdo it and do not apply a thick layer, this can adversely affect the quality of the print.