How much filament 3d printer
3 ways to estimate how much filament you will need for 3D printing
The question of how much filament to keep on-hand is one that bugs every FDM 3D printer user at one point or another. Most of us usually just limit our prints to how much filament we have. Or we reschedule any bigger project based on when we would buy a new spool.
There is a better way to go about this though. And that is what we will discuss here today.
While both weight and length are useful ways to gauge filament consumption, the simple fact that 99% of filament purchases are in terms of weight of the filament means that it is a better ballpark to use when estimating 3D printer filament usage.
Most slicers automatically calculate an estimated weight of the 3D print on the basis of the type of material (PLA, ABS, HIPS, PETG etc.) upon slicing an STL file into G-Code. Look for “sliced information” or some similar information dialog within the slicer.
For simplicity, we’ll be talking about the weight of 3D prints in PLA. If you use another type of filament as a daily driver, then simply adjust the weights given in this article according to the difference in density between your type of filament with the density of PLA.
By “general use” we mean 3D printing parts, tools and thingamabobs every now and again, but not too often, nor on a daily basis. Basically, anything short of a full-blown project.
In this case, most 3D prints would not exceed 50 grams of filament (PLA). You can easily get away with keeping 2 or 3 spools of 1KG filament on-hand. If you use a 3D printer capable of printing with 2 or 3 filaments at the same time, then your requirement would also increase accordingly.
At the very least, every user should have 1 spare spool – recommended to be a neutral color – as a fail-safe reserve.
If you routinely take up entire 3D printing projects, then you would go through filament much quicker than the general user. You would also probably need different materials or at least different colors on-hand to ease out your post-processing.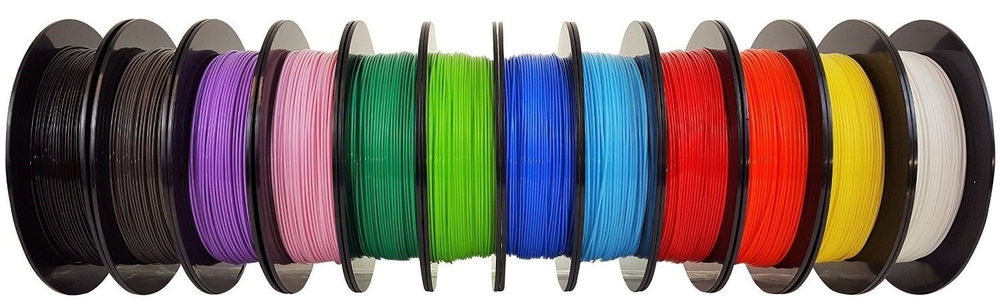
In this case, it is much better to stock your filaments on the basis of your running project needs.
But how exactly does one go about accounting for all the filament that a particular project would use? If you had a final STL file ready to go, then of course you could simply slice it to find out the estimated weight of the filament.
Speaking for the broad majority of tinkerers and 3D printing enthusiasts, however, reaching a final STL file isn’t something that one does on the first day of the project and is only near the final stretch that the STL is also set in stone. Of course, the answer to this problem is, we estimate!
Estimate based on prior experienceOne of the easiest ways to go about estimating the amount of filament you would need is to compare it to previous projects already completed.
For example, your current project requires you to 3D print a hexagonal container of some sort. By prior experience you know that a similar sized round container would use up 76 grams of PLA filament when printed with 20% infill.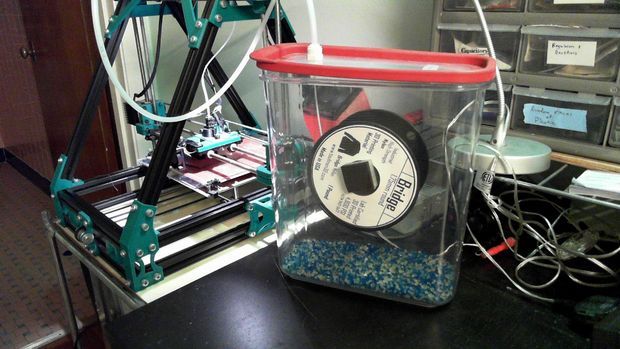
Now a hexagon has more defined edges than a round container and perhaps you’d like to use 40% infill to make it extra sturdy, so as a rough estimate we increase the expected weight of the hexagonal container by 20% and add an extra 5% to account for the difference in shape.
Increasing the 76 grams by a total of 25%, we’d get a ball-park estimate of around 95 grams. Since this 95-grams is estimated from the consumed material of the prior project, this method has the added advantage of accounting for things such as failed prints, support structures, varying levels of in-fill as well.
Approximation (order of magnitude estimation)The more mathematically inclined readers would be familiar with this concept named after famed physicist Enrico Fermi.
A fermi approximation only considers the order of magnitude or for our purposes, weight in grams rounded to 1, 10, 100 and so on to reach a close enough estimate of the weight of the filament.
Say, for example you want to 3D print a cosplay helmet for your own head size, but are unsure exactly how much filament it would take.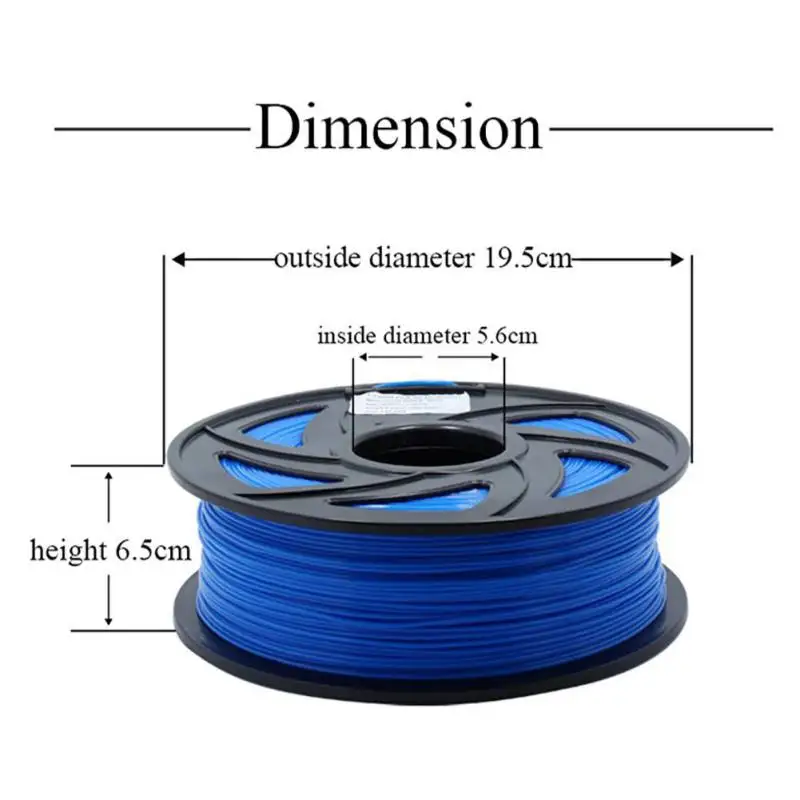 A good starting point would be to consider the size of the helmet in comparison to say a 10 cm3 3D printed cube at 100% in-fill with PLA.
Surely the helmet would not be only 10 cm3 or 100 cm3, and it cannot possibly be a 1000 (10,000 cm3) times the size of the cube as well. So as the only reasonable selection, we will say that the helmet would be around 100 times the size of the cube.
Since the density of PLA is 1.25 grams per cubic centimeter, our 100% in-fill cube would weigh exactly 12.5 grams. So, our helmet at an order of magnitude of 100 times more should be around the ballpark of 1250 grams at 100% in-fill. If we are printing at 20% in-fill, then it would reduce that weight to 250 grams.
Now you may be thinking; “surely such a simple guess couldn’t be accurate?”. And you’d be right. But as an estimate goes, the Fermi approximation is a great way to reach an accuracy of within one order of magnitude or one power of 10 of the actual answer.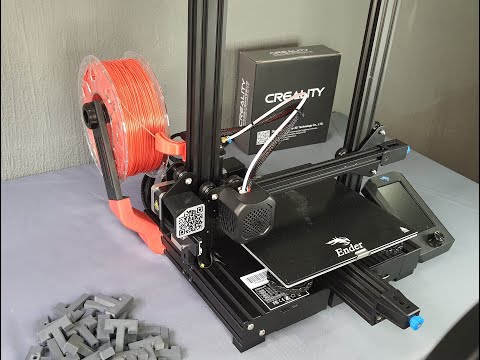 So, the actual helmet could only be 100 grams, or it could be 400 grams, but you can be sure that you wouldn’t needmore than one 1 kg spool of filament for it. And that is what we needed to estimate: How many spools of filament you would need for the project.
As a pro-tip, we would recommend you steer clear of using a geometric volume as fine way to calculate weight of the 3D print.
Firstly, most 3D prints are of a unique shape and unless you are brilliant at math, their volumes would need to be estimated by simplifying the design to Minecraft-style cuboids.
You are already uncertain of the final details of the 3D print, so you’d be making multiple guesses as to the volume of the resultant cuboids. This increases the uncertainty as the complexity of the 3D print increases.
Secondly, a volumetric approach usually would fail to account for the support structures, failed prints and other technical losses that you may face, so more often than not, you would wind up under-estimating your project requirements.
Lastly, it is human nature to make conservative guesses when faced with the unknown. In terms of estimating the required filament, this would invariably mean that the person guessing the volumes of the various parts would also under-estimate.
Since not running out of filament for the duration of the project is the entire goal of the estimation, the end-result of the geometric volume approach is time spent doing nothing worthwhile in most cases. However doing so may give a better estimate on how many spools of filament to inventory over time.
Since 3D printing is an additive manufacturing process there is very limited material waste involved. With a 1 KG spool of filament, you would probably 3D print ~990 grams or so of the material.
Factors that affect this of course, is the quality of the filament. If the filament keeps breaking or keeps getting jammed, this would reduce the effective amount of filament you could 3D print with.
The other factor is the age and degradation of the 3D printer itself which would lead to increased jams, more failed prints, and more process loss at the hot end.
The biggest contributor to wasted filaments is not the hardware nor the filament, but complex 3D print design, improper filament storage or incorrect 3D printer settings is what lead to excessive waste of material.
Support structures are arguably the bigger contributors to willful wastage of materials when it comes to complex 3D prints. Support structures can be avoided by either breaking the complex design into multiple simpler units and then attaching them in post-processing, or by incorporating the support structure into the 3D print itself; grids, interlocks, beams and scaffoldings have been a part of architecture for centuries, so consider incorporating one or more of them in your next project.
Improper filament storage is perhaps one of the biggest reasons that leads newcomers to have to buy new spools frequently. Remember, proper storage of 3D printer filaments is somewhere dry, away from sunlight, properly spooled (not tangled), and preferably in an airtight container.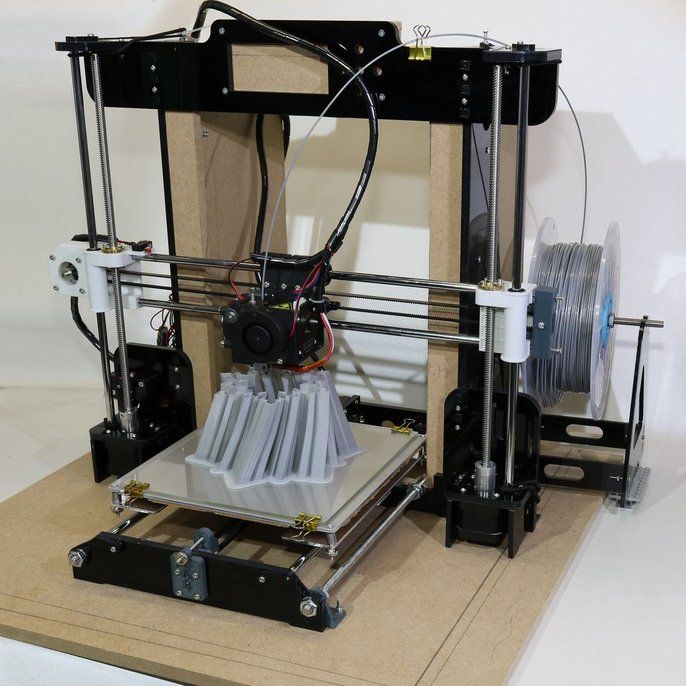
Failed prints are another major culprit that waste precious filament. The best way to minimize the risk of failed prints is to learn about your material and the optimal 3D printer settings with a few test prints before doing any actual 3D printing. Learning from others’ mistakes is the best way to avoid making those same mistakes yourself.
Tags: 3D printingFilamentMaterialsPLA
This Is How Much 3d Printer Filament You Really Need! – 3dprintscape.com
If you’re new to 3d printing, you may be asking yourself how much filament gets used to print something, and how much do I really need to have at home? I can tell you that I have been in the hobby for years and still ask myself these questions sometimes. In this article, I’m going to go over the average cost of filament, the amount of filament used to print 3d objects (with examples), and how much filament I recommend you keep at home.
The amount of filament you need to keep at home can vary drastically by how much you print and how long it takes you to get new spools of filament.
I recommend you keep 3-4 spools of different color filament on hand. I tend to keep a spool of the three colors I commonly use or know I will be using soon, and an extra one of the most common colors I have been using recently (can vary based on what I have been printing).
If you only print with a couple of colors, you will be fine with keeping 2-3 spools of filament on hand.
Keep reading to see why this is my recommendation and to see examples of things I printed and how much filament it took to print them.
Overview of Filament Sizes and Weight
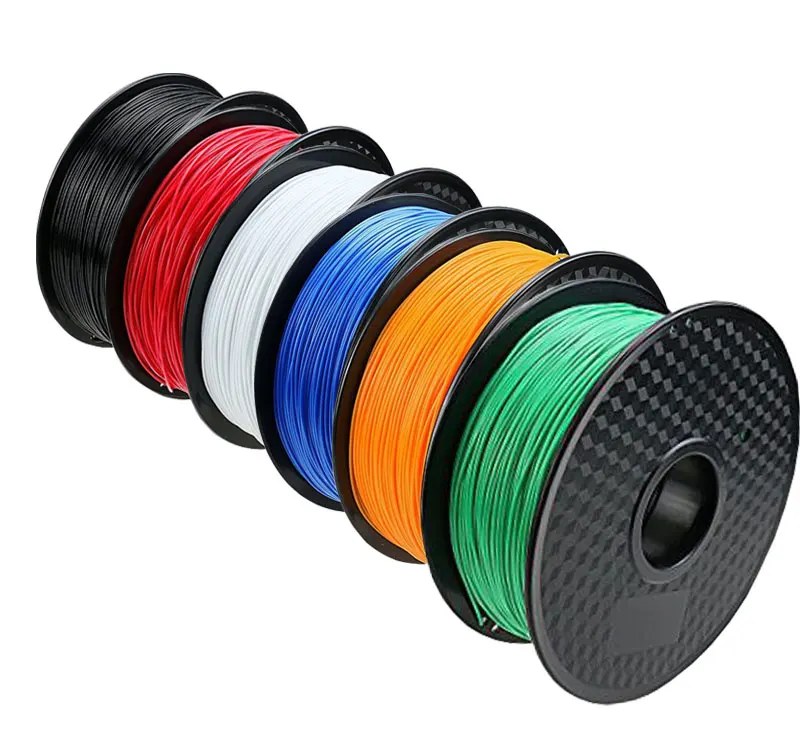
Filament Spool Options
Filament spools come in two standard sizes, 1kg and 3kg, with the most common one being the 1kg spool. Actually, most filament makers only have 1kg options, but if you use that brand and color often, the 3kg roll may be the right choice as it can save you some money in some cases. Just make sure you do the math before buying a 3kg roll as there may be no savings at all (see table below).
| 1 KG Spool | 3 KG Spool | Savings | |
|---|---|---|---|
| LulzBot PolyLite PLA | $24.99 | $69.99 | $4.98 |
| PrimaCreator PLA | $29.90 | $69.90 | $19.80 |
| Proto-Pasta Matte Fiber HTPLA | $39.99 (.5kg) | $239.94 | $0 |
Filament Diameters Options
Filament can have a diameter of either 1.75mm or 2.85mm. While there are advantages/disadvantages of each, I’m not going to get into them in this article because it isn’t related to how much filament you need. Just know that the two options exist and that you should be buying the one that is compatible with your printer/extruder.
It’s easy to accidentally order the wrong one when you are buying filament online. About a year ago, I made the mistake of not paying attention to what I was buying and accidentally purchased three 2.85mm spools that would not work with my old printer. Fortunately, I was able to return them, but it still cost me time.
Average cost of Filament
I’m going to calculate the cost of 1g of filament for three of the common brands I tend to use (see table below). The calculations in the table are based on the price of the 1kg spool and don’t take into account the cost of shipping or tax.
| Price Per 1KG Spool | Price per Gram | |
|---|---|---|
| HATCHBOX PLA | $22.99 | $0.03 |
| Proto-Pasta HTPLA | $39.99 | $0.04 |
| OVERTURE PLA | $21.99 | $0.022 |
As you can see, the price of HATCHBOX’s and OVERTURE’s filament are close. Still, HATCHBOX offers better dimensional accuracy, so I tend to use HATCHBOX’s filament the most, so the rest of this article will use their 1g cost. That said, Proto-Pasta makes exceptional filament, and I do use it if I’m making something as a gift or need a specialty filament.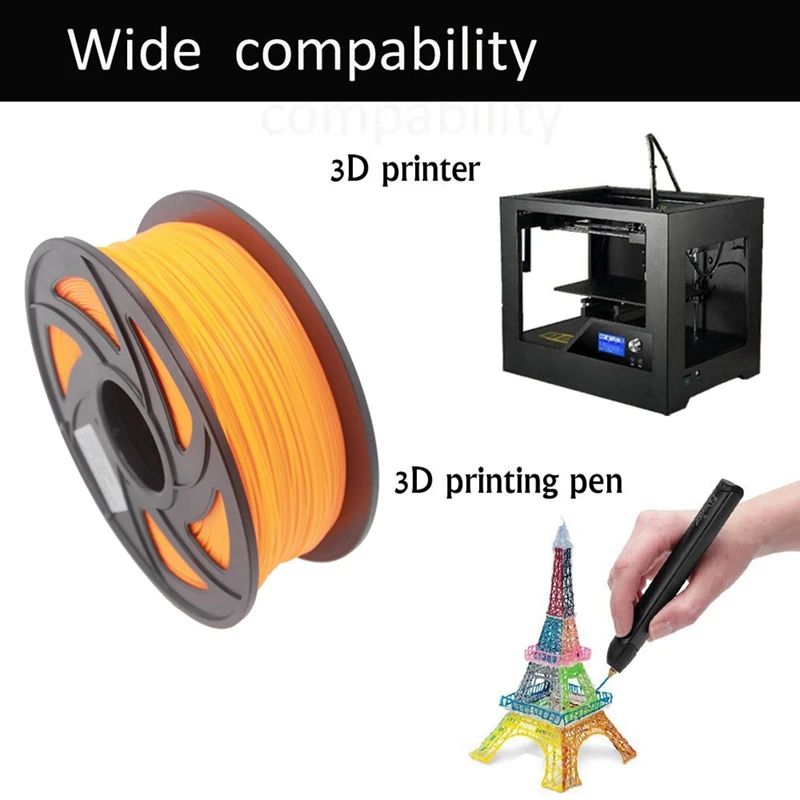
Amount of Filament Used to Print 3d Objects (With 11 Examples)
Headphone Stand
Headphone Stand- Filament Used: 138.91g
- Cost of filament: $3.05
- Amount per 1kg spool: 7.20
SD/USB Holder
- Filament Used: 61.68g
- Cost of filament: $1.36
- Amount per 1kg spool: 16.21
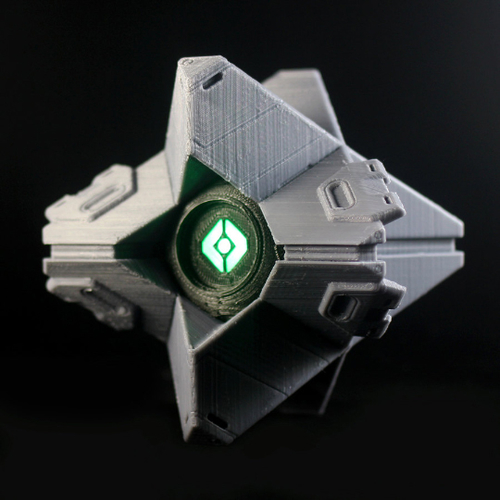
Destiny Gambit Coin
- Filament Used: 2.32g *Per coin
- Cost of filament: $0.05
- Amount per 1kg spool: 431.03
Benchy
- Filament Used: 12.71g
- Cost of filament: $0.28
- Amount per 1kg spool: 78.68
Mini Octopus
- Filament Used: 6.10g
- Cost of filament: $0.13
- Amount per 1kg spool: 163.93
Calibration Square (505020)
- Filament Used: 15.72
- Cost of filament: $0.35
- Amount per 1kg spool: 63.61
Marvin Keychain
- Filament Used: 3.01g
- Cost of filament: $0.07
- Amount per 1kg spool: 332.
 23
23
Bracelet Bead Holder
- Filament Used: 17.74g
- Cost of filament: $0.39
- Amount per 1kg spool: 56.37
Plier Stand
- Filament Used: 232.47
- Cost of filament: $5.11
- Amount per 1kg spool: 4.30
Cricut Tool Holder
- Filament Used: 204.11
- Cost of filament: $4.49
- Amount per 1kg spool: 4.90
The results above can vary based on the infill percentage, but as you can see, a $23 spool of filament can go a long way.
Amount of filament used to purge extruder or to change filament
When you change your filament or just run a purge, you wast a small amount of material 0.35g to be exact(based on purge from my Taz 6 printer). What that means is it will cost you a dollar to run a purge 129 times. So don’t be afraid to change your filament out, remove it for storage when not in use, or run a purge to clean out the extruder.
Amount of filament used for build plate adhesion
The most common build plate adhesion method is the skirt (a line printed around the object that is not connected to it), so I’m going to use that for this calculation. I just finished printing a camera arm for my printer and used a skirt on it. The skirt on this print used 0.10g of material, which cost me $0.002.
I included this section in this article because I wanted to show you that the extra cost to add a built plate adhesion to the print is a non-issue. This cost can go up a little if you make a large brim or raft, but it still won’t be enough to make an impact on anything.
How Much Filament Should I Stock at Home
The amount of filament you should store at home depends on how much you print and how long it will take you to get another spool of filament if needed. I recommend you keep 3-4 spools of different color filament on hand. I tend to keep a spool of the three colors I commonly use or know I will be using soon, and an extra one of the most common color I have been using recently. If you run your printer 24/7 and live in a remote area that Amazon doesn’t offer two-day delivery to, you may want to consider stocking up more than my recommendation. Now let’s talk about why.
Why keep more than just the spool I’m using?
I like to keep a couple of colors around to give me options when I want to print something. If I’m printing something that I don’t plan on sanding and printing (which is most of what I print), I care about the color I will be printing it in. For example, if I were printing an Iron Man mask for my son (I know this is a very specific example, but I just finished printing one), I would not want to print it in red and gold, not some other ransom color I may have laying around.
On the other hand, if I was just printing a tool holder or something similar, I wouldn’t care about the color and would just use what I have the most of. Now you may ask why I don’t just stock up and keep a bunch of colors/spools at home, and for me, it comes down to two main reasons. The first one being the cost of filament just sitting around not getting used, and the second on being filament has a shelf life, which we will discuss in the next section.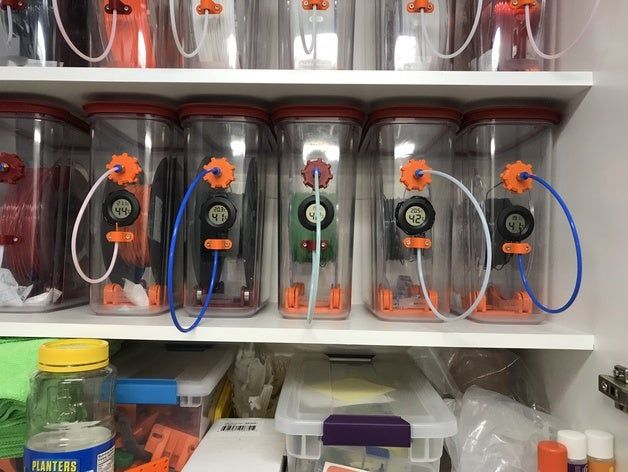
When it comes down to it, there is no one size fits all here. It takes some people 2-3 months to use a 1kg roll of filament, and others who have multiple printers can chew through that in a day (I’ve seen examples of both).
Filament life span
On average, PLA filament can last 2-3 years in the original vacuum-sealed package and about a year or so once opened if stored correctly. If you don’t store the filament correctly, the humidity will get to it and significantly reduce the lifespan. In a high humidity area, its possible for high-quality PLA filament to go bad in less than a month, and some specialty filaments, like nylon, may not even last a week.
Why is this? Most of the commonly used filaments are hygroscopic, meaning they absorb moisture from the air. What that means is it can cause the filament thickness to be inconsistent, affecting the quality of your prints.
Other potential problems include:
Weakened Filament: The excessive moisture has been known to cause micro-breaks that can cause breaks or weaken the final print.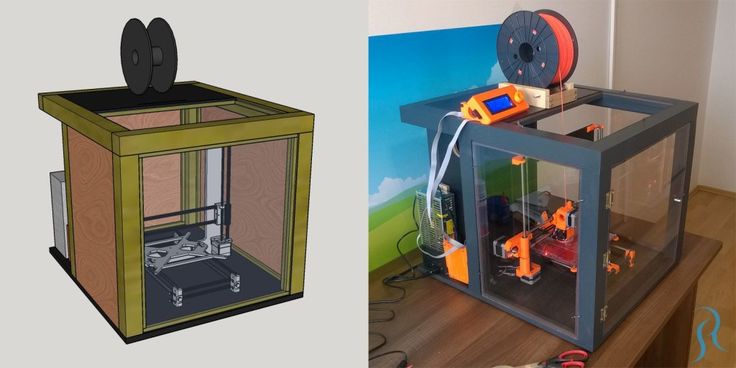
Jammed Print Heads: The moisture can cause the filament to swell in size and can potentially jam the print head. When this happens, you will need to clean or replace the print head.
*Note: Not all filament is made equally, and results will vary.
How to store the filament
Properly storing unused filament can significantly extend its lifespan. We are talking about going from around a month to potentially a year. So if you keep partially used spool around, you want to make sure they are stored correctly.
As I mentioned above, the main issue you need to overcome is humidity, and you have many options available to do so.
Here is a list of common storage options.
Generic Watertight Containers: Larger watertight container, like this one I purchased on Amazon, are great for storing 4-5 spools of filament. You will need to keep a desiccant of some sort in the container as well. I’m using this rechargeable mini dehumidifier, which has been working well.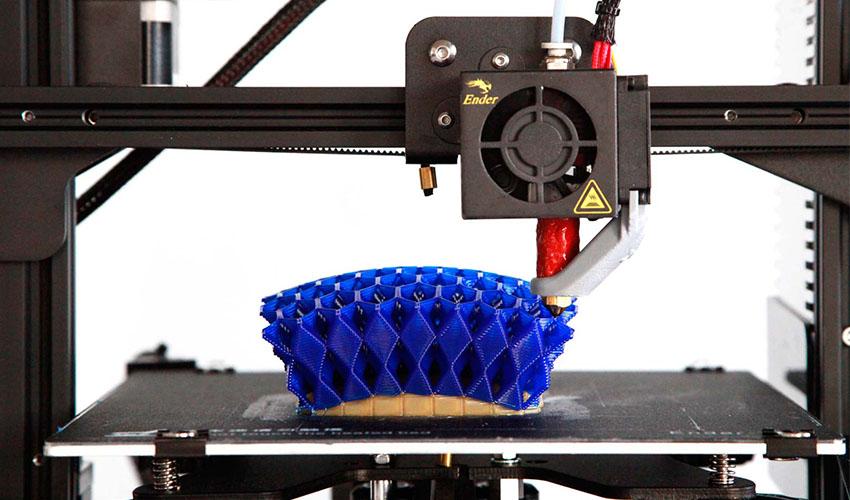
Filament Storage Box: Filament storage boxes are great to store one or two spools you are actively using. I have a Polymkaer Polybox which can store two 1kg or one 3kg spool of filament and provides you a digital readout of the current humidity level in the box.
Filament Storage Bags: Filament storage bags are similar to large Ziplock bags but are more rigid and design to store filament. Most of them come with silica gel and a holder for it. Here is my favorite filament storage bag currently available on Amazon.
Vacuum Bags: Vacuum bags are an excellent option for long term storage of open filament rolls. Just put the roll in the bag with some silica gel and vacuum all the air out. I would not recommend using them as an everyday storage option because of the amount of time required to do it right, though if you get a small hand pump, it may save you time. These are the vacuum bags I recommend, they are relatively cheap and come with the hand pump.
Ziplock Bags: Ziplock bags are similar to filament storage bags, but they are not made explicitly for filament, though they are cheaper. You can get a 1kg spool of filament in most 1gallon bags. You also want to make sure you are using a desiccant, like silica gel, to absorb the moisture in the storage option of your choice. You can pick up one-gallon ziplock bags from pretty much any local retailer, or you can check these out on Amazon.
Silica Gel: You will need silica gel to absorb the moisture in the storage option you are using. You can get them in premade bags or larger quantity tubs like this. If you decide to go with the tub option, you will need to have some sort of container for them. Keep in mind that silica gel can only absorb so much moisture before they need replacing, or recharged.
Mini Dehumidifier: Most of the mini dehumidifiers that don’t use power have rechargeable silica gel in them. They tend to have a small footprint and are an excellent option for larger storage boxes. They are cheap and can be recharged in 8-10 hours. I have purchased this one multiple times in the past and have had great success with them. I still using the first one I bought (it was for a fire-resistant safe) five years ago.
You can read the full article I wrote on storage options here.
How Much Resin Should I Stock at Home
So far, this article has been focused on filament that is used in fused deposition modeling (FDM) printers, but I think its also worth covering stereolithography (SLA) printers. If you have an SLA printer, you know its an entirely different world. SLA printers use resin instead of filament, and many times the resin is not interchangeable between printers.
Resin options are extremely limited compared to the options available for filament, but there are still multiple colors and variances available. I’m not going to dig too deep into the options available, but if you are interested, you can read the article I wrote on choosing SLA printer resins.
Now let’s talk about how much resin we should be kept at home. I personally only stock what I know I’m going to be using in the next month. This is typically only 1-2 bottles. I don’t see the value in keeping more than that because I’m not using the printer every day and changing the resin can be a messy job. I would be interested in hearing how many bottles you guys tend to keep at home, so please leave a comment with your thoughts.
Here is a list (in my opinion) of the top 10 resigns available today. You can read more about choosing SLA printer resins in the article I wrote here.
- Siraya Tech Fast
- AnyCubic 3D Printer Resin
- eSun bio Resin
- Monoprice Rapid UV Printer Resin
- NOVA3D 3D Printer Resin
- ELEGOO 3D Rapid Resin
- Siraya Tech Tenacious
- Sparkmarker 3D Printer SLA Resin
- Monocure 3D Rapid Resin
- SainSmart Rapid UV
- Blu – Siraya’s Strong and Precise High-Res Resin
If you have had a good experience with other resins, please leave a comment below. I’m always interested in trying out new ones.
Recap of What We Learned
In this article, we discussed why the amount of filament you need to keep at home could vary drastically, went over examples of how much filament different prints I did use, and that I recommend you keep 3-4 spools of different color filament on hand. We also discussed why I tend to keep a spool of the three colors I commonly use or know I will be using soon, and an extra one of the most common color I have been using recently. In addition to that, we covered the basics around SLA printers and how much resin you should be kept at home.
Make sure you check out our YouTube channel, and if you would like any additional details or have any questions, please leave a comment below. If you liked this article and want to read others click here.
All filament spools. Weight, size, 3D model
MirFDM
Loading
10/19/2020
13842
Consumables
Experienced 3D printers probably determine by eye whether there is enough filament for this part or not) Of course, it is better to know exactly how much filament is left on the coil, but for this you need to know how much each coil weighs.
Or you are modeling your 3D printer and so that the plastic absorbs less moisture, of course, you decided to place the coil mount inside the printer. It remains to understand what width and height the coils are, and ideally it is better to have a 3D model in general in order to lay the optimal mount.
Wow... this is where the fun begins) There are a lot of types of coils, they all weigh differently, have different diameters, widths, and even a mounting hole. And how is it to be here?
I didn’t think of anything better than how to assemble all the coils of Russian filament manufacturers. Weigh them, measure them, make a 3D model and write it all down in a table:
More details about each coil, and about the table as a whole, I tell here:
I tried to combine all the coils known to me into one table. Most likely, I forgot about some Russian manufacturer or did not add some kind of coil.
I would like to sincerely believe that experienced 3D printers will correct me and tell me. And together we will finish this Table to the end)
P.S. Link to the Table with all the characteristics and 3D models in the description on YouTube
Article comments
More interesting articles
mixdell
Loading
14.02.2023
1536
5
Subscribe to the author
Subscribe
Don't want
Hello, dear users of the portal. I want to understand some problems with polyamide from ...
Read more
0
Subscribe to the author
Subscribe
Don't want
Meet the review of the best photopolymers for printing on SLA, LCD and DLP printers! In this article you will find. ..
..
Read more
137
Subscribe to the author
Subscribe
Don't want
Foreword (which you don't have to read)
Despite the KDPV, this article does not put its ...
Read more
Read blogs
How to calculate the cost of printing on a 3D printer
For some ideas, 3D printing is the fastest and easiest solution. In some situations, purchasing your own 3D printer can be a good solution, but sometimes it is much more profitable and faster to order the necessary product from a company specializing in 3D printing. Yes, and many owners of a 3D printer are thinking about how to “monetize” their hobby, but how to correctly calculate their costs?
Despite the fact that it is customary to indicate the price per gram of working material, simply multiplying the weight of the model by the cost of 1 gram will be wrong. In addition to the cost of consumables, many more, at first glance, non-obvious costs are added to the price of the product.
Each 3D printing technology uses its own consumables. Let's analyze the most popular and affordable of them.
Available technologies and key differences
Currently, a huge number of 3D devices have appeared, from small desktop ones that fit on the desktop to huge industrial machines. Among the most affordable, 2 technologies can be distinguished - FDM and photopolymer printers (LCD / DLP / SLA).
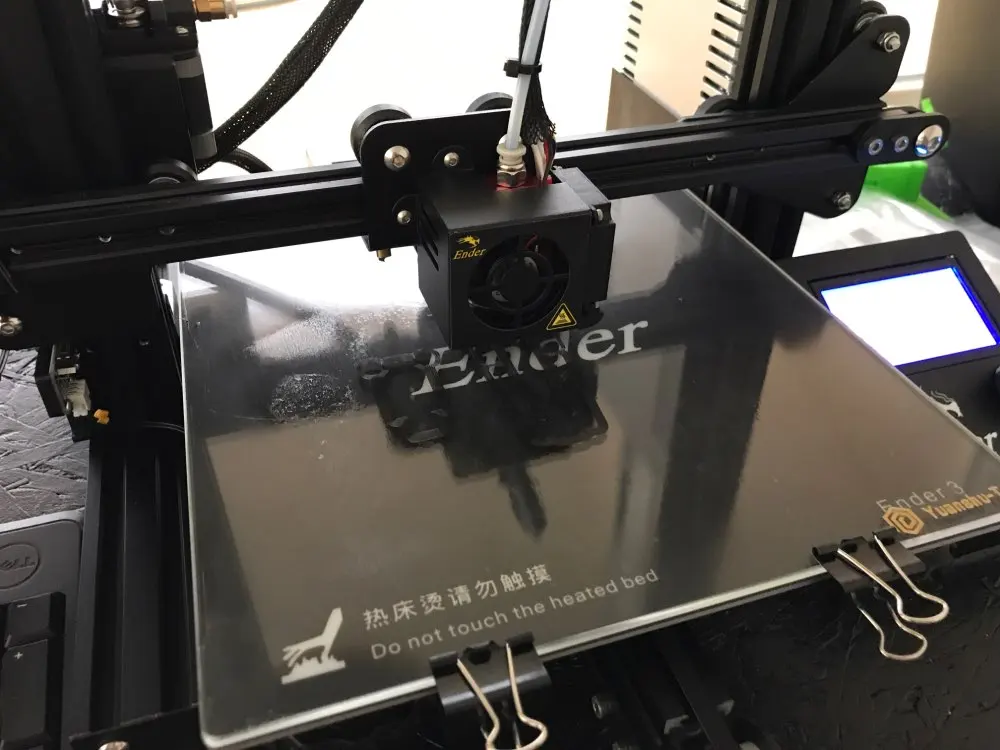
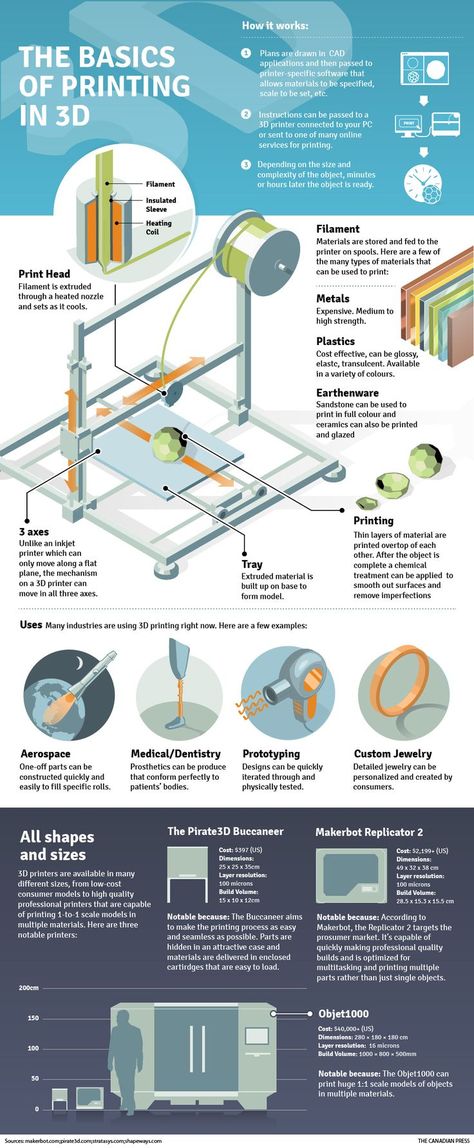
FDM 3D printing
Today, the most affordable 3D printing technology is FDM. A variety of materials and 3D printers allow FDM to be applied to a wide range of applications.
Schematic operation of FDM printer
A large selection makes it easy to choose a 3D printer for a specific task or find a universal device.
The material for printing is a plastic thread - filament. On the market you can find filament for various tasks, for every “taste” and budget. These can be very inexpensive ABS and PLA plastics or specific ones - conductive, burnable, etc.
Pros:
Cons:
Despite the fact that FDM allows you to print a wide range of plastics with different properties, the technology has some limitations. For example, it is impossible to obtain a perfectly smooth surface, to produce miniature and very thin elements, or to produce parts with very complex internal geometry with high accuracy.
Photopolymer printing
Photopolymer printers can work on one of 3 technologies - SLA, DLP or LCD. These devices will come to the rescue if you need to make a small but very detailed model with many small details.
How photopolymer printers work
As a consumable material, a photopolymer resin hardened by UV radiation is used. Now there is a wide variety of photopolymer resins for every taste. From particularly strong and precise engineering or jewelry resins to soft flexes.
Pros:
-
High print precision
-
Good surface quality
-
A wide variety of printers and consumables
Minuses:
Photopolymer printers have shown themselves well in a variety of industries that require a perfectly smooth surface and high accuracy. They are used in dentistry, the jewelry industry, for making miniature master models for casting, and much more.
Industrial printers
These are already industrial machines, which require a separate room and sometimes certain requirements for ventilation, etc. In this article, we will not analyze these devices in detail, but briefly consider the most popular technologies.
FDM
In addition to desktop devices using FDM technology, industrial printers that work on the same principle are common.
This category includes devices with a large print area (from 30x30x30 cm and more). For example, Raise Pro2 with a print area of 30x30x30 cm.
Raise Pro2
Or machines designed for printing with refractory materials (eg PEEK). Such 3D printers usually have an active thermal chamber, and the extruder can be heated above 400 degrees.
CreatBot F160-PEEK for use with refractory plastics
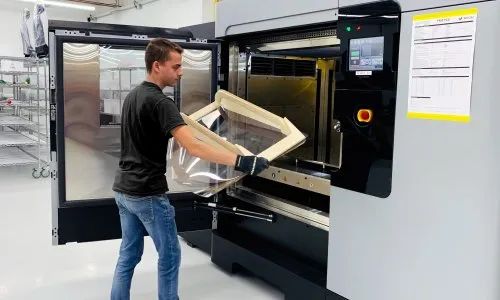
Photopolymer printers
Industrial photopolymer devices usually have a much larger working area, compared to their "home" brothers. In addition, many processes have been optimized and automated for faster operation. On such printers, you can quickly and accurately produce a small batch of models, a large prototype or a master model.
Large Area Prismlab Industrial Resin Printer Family
3DP
3DP - Three-Dimensional Printing (translated as three-dimensional printing) is a logical continuation of conventional two-dimensional printers. Printing is done using nozzles that selectively apply a binder to the material (usually gypsum). A dye can be added to the binder and the model will be colored.
Colored plaster model
Since the plaster model is fragile, a similar principle is used for printing with metals. Only the finished product needs to be treated in an oven to remove the binder and improve strength. But despite the processing, such metal prints will still be inferior in strength to cast products.
MJM
This is a proprietary technology of 3D Systems. MJM is a mix of FDM, 3DP and sometimes SLA (depending on material chosen). Printing is done using a variety of small nozzles (from 96 to 488) located on the head of the machine. The accuracy and quality of the surface of models made in this way is in no way inferior to photopolymer printers.
Models made with MJM technology
Such devices can work with photopolymer resins, wax or thermoplastics. You can combine several materials at once - for example, for complex models, you can use wax as a support.
SLM
SLM is the layer-by-layer sintering of metal powder using a powerful laser. There are several similar technologies - SHS/SLS. The principle of operation is the same, only a thermal print head is used instead of a laser beam.
SLM Turbine
As a material for printing, you can use powders of various metals - gold, stainless steel, aluminum, various alloys, etc.
During printing, the working chamber is filled with an inert gas to prevent oxidation of metals. This allows printing even with titanium powder.
Models made by this method are in no way inferior, and sometimes even superior, to cast products. SLM allows you to produce models with complex internal geometry that cannot be produced by another method (casting or milling).
Cost of 3D printing
The cost of a model usually consists of several factors.
-
Equipment depreciation. The printer, like any machine, requires maintenance and periodic replacement of some parts. During operation, belts gradually stretch, bushings or linear bearings wear out. For example, when bushings or linear bearings are worn; shafts may wear out and need to be replaced.
Cost of materials
The main cost item for a 3D printer is, of course, the printed material.;
FDM (plastic filament)
Since FDM technology is by far the most common, the choice of filaments is very diverse.
-
Engineering plastics are usually nylon with various fillers added to improve the physical characteristics of the finished model. Special cost. plastics starts from 2000r per coil and above. It all depends on the manufacturer and filler (carbon fiber, fiberglass, etc.).
-
Decorative plastics are used to imitate various materials. Plastic can simply be unusually colored (luminous, transparent plastics) or a special filler is added to it (plastics with metal powder).
 The cost of decorative plastics starts from 1500 rubles per coil and more, depending on the filler.
A big advantage of FDM is the diverse choice of materials to work with. This allows, having one printer, to produce almost any product - from a child's toy to a complex engineering prototype.
Photopolymers (resin)
Photopolymer resin printing technology is becoming more and more accessible. There are many different resins.
-
The cost of ordinary colored resin starts from 2500 rubles per 0.5 kg (volume +/- 0.5 l). You can find a smaller volume of resin (250 gr) on sale. You can buy several different resins in small containers and find out in practice which one is best for a particular model.
-
Engineering resins are resins with increased strength. They can be used not only for printing decorative items, but also for making functional prototypes and models. The cost for 0.5 kg starts from 5900r and above.
-
Special resins - burnable, dental, soft flexes, etc. Depending on the resin, the price for 0.5 kg can start from 4800 rubles and more. It all depends on the characteristics of the resin.
Photopolymer resins have not yet reached such a variety as FDM filaments, but they are surely catching up. Although due to the fact that a liter of resin costs significantly more than a spool of filament, the cost of the product is much higher.
Print examples
FDM
Mag Pull for G3 magazines.
The model was downloaded for free from an open source (the file can be downloaded here). Printing with engineering carbon-filled plastic (price per spool from 4700 rubles). The weight of the model with support is about 25 grams. Post-processing was not needed. The cost of the finished model is 250 rubles.
Plastic fastener
The file was downloaded from an open source (can be downloaded here). Plastic - carbon-filled nylon (price per coil from 4700r). The weight of the finished product is about 20 grams. Print without post-processing. The total cost is 200 rubles.
Model watch
The model is modeled to order (the cost of modeling is from 1000 rubles). The product is printed on an industrial printer using soluble support. Print without post-processing. The cost of the finished product - from 700 rubles per piece (depends on the number of required products).
Traction prosthesis
The model is taken from an open source (you can download the modified version of the prosthesis here). The weight of the used material is about 600 gr, printed with ABS plastic (the cost of the coil is from 800 r). After printing, post-processing and assembly took place. The total cost of the product - from 3000 r (depends on the print material, support material, filling, etc.).
Pedal layout
Production of a 3D model according to the drawing (from 1000 r). The weight of the finished model is about 200 gr. The product was printed with engineering carbon-filled plastic (the cost of the coil is from 4700 r). Post-processing was not needed. The cost of the finished product is about 3000 rubles.
Photopolymer printers
Model jaws for crowns
Files for printing were obtained using a 3D scanner and finalized in a 3D editor (the cost of scanning is from 3000 r, the cost of manual revision is from 1000 r). Printing on an industrial photopolymer printer. Post-processing is not needed. The cost of the finished product is from 80 r per gram.
Burnout resin rings
The model is made to order. Printing on a desktop SLA printer with a burnable polymer. Post-processing is not needed. The cost of the finished product is 200 rubles per product.
Miniatures
The models were bought on the myminifactory website (the cost of the model is from $2). Made with a desktop DLP printer. Post-processing was not required. The cost of the finished figurine is from 70 r per gram.
Custom 3D printing
Many owners of 3D printers are thinking about monetizing their hobby. But you should understand that the price of 3D printing “for yourself” and the price of commercial printing are very different.
When starting to print to order, it is better to have several printers working on different technologies.
Cost of commercial 3D printing
In addition to the cost of the model, to the commercial production of products, you can add:
-
Modeling. Often the client needs not only to make a part, but to pre-model it. It can be a simple cogwheel that doesn't take long to model, or it can be a complex sculpture that takes more time to model than it does to make.
-
Model post-processing. This can be simply the removal of supports, with cleaning of the place of their contact with the product, or a complete processing cycle (puttying, surface grinding, painting, etc.
 ).
).
It should be borne in mind that it is not always possible to print the model the first time. Sometimes it may take several attempts. And these are additional costs.
What is unprofitable to print
Despite the wide possibilities of 3D printing, there are models that are unprofitable to make on a 3D printer. For such models, it is better to use other manufacturing methods.
Commercial print examples
Jewelry for further casting
Manufacture of promotional items and souvenirs
Piece miniatures or master model for further casting
3D printed model
Profitable to print on a 3D printer:
-
If the item is only sold as an assembly. For example, a small gear broke in the mechanism, but the mechanism is sold only “assembly”.
Learn more