
Hot glue gun 3d printing
3D Printering: Printing Sticks For A PLA Hot Glue Gun
When is a hot glue stick not a hot glue stick? When it’s PLA, of course! A glue gun that dispenses molten PLA instead of hot glue turned out to be a handy tool for joining 3D-printed objects together, once I had figured out how to print my own “glue” sticks out of PLA. The result is a bit like a plus-sized 3D-printing pen, but much simpler and capable of much heavier extrusion. But it wasn’t quite as simple as shoving scrap PLA into a hot glue gun and mashing the trigger; a few glitches needed to be ironed out.
Why Use a Glue Gun for PLA?
Some solutions come from no more than looking at two dissimilar things while in the right mindset, and realizing they can be mashed together. In this case I had recently segmented a large, hollow, 3D model into smaller 3D-printer-sized pieces and printed them all out, but found myself with a problem. I now had a large number of curved, thin-walled pieces that needed to be connected flush with one another. These were essentially butt joints on all sides — the weakest kind of joint — offering very little surface for gluing. On top of it all, the curved surfaces meant clamping was impractical, and any movement of the pieces while gluing would result in other pieces not lining up.
An advantage was that only the outside of my hollow model was a presentation surface; the inside could be ugly. A hot glue gun is worth considering for a job like this. The idea would be to hold two pieces with the presentation sides lined up properly with each other, then anchor the seams together by applying melted glue on the inside (non-presentation) side of the joint. Let the hot glue cool and harden, and repeat. It’s a workable process, but I felt that hot glue just wasn’t the right thing to use in this case. Hot glue can be slow to cool completely, and will always have a bit of flexibility to it. I wanted to work fast, and I wanted the joints to be hard and stiff. What I really wanted was melted PLA instead of glue, but I had no way to do it.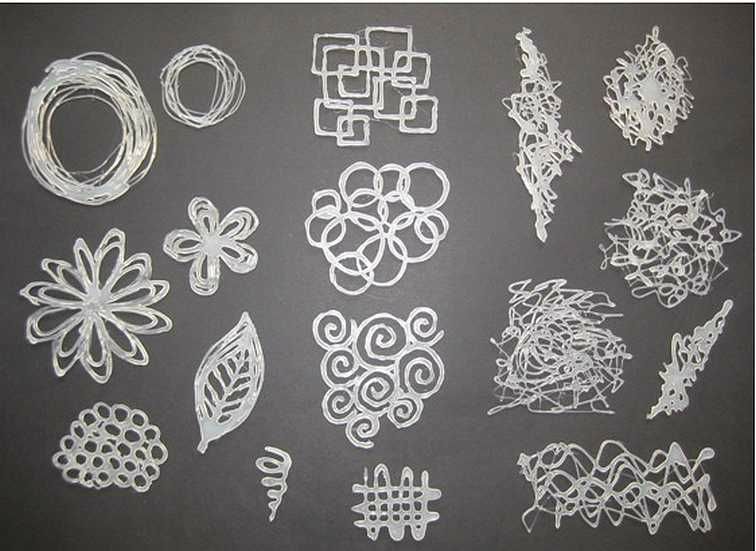 Friction welding the 3D-printed pieces was a possibility but I doubted how maneuverable my rotary tool would be in awkward orientations. I was considering ordering a 3D-printing pen to use as a small PLA spot welder when I laid eyes on my cheap desktop glue gun.
A glue gun had everything I needed: good ergonomics, good tip visibility and tactical tactile feedback, and simple mechanical operation. If it could be made to extrude melted PLA instead of hot glue, it would be the ideal tool for the job. After some initial tests and a discussion with colleagues, it was clear that trying to make this happen was worth possibly wrecking a cheap glue gun.
Will a Glue Gun Melt PLA?
According to the RepRap Wiki entry for PLA, it softens around 60 °C to 65 °C and melts around 180 °C to 220 °C. Will a glue gun do the job? To find the answer to this question, I manually pushed a bundle of scrap PLA filament through a small desktop glue gun that I didn’t mind ruining. The glue gun was a hobby unit made for lower-temperature glue sticks.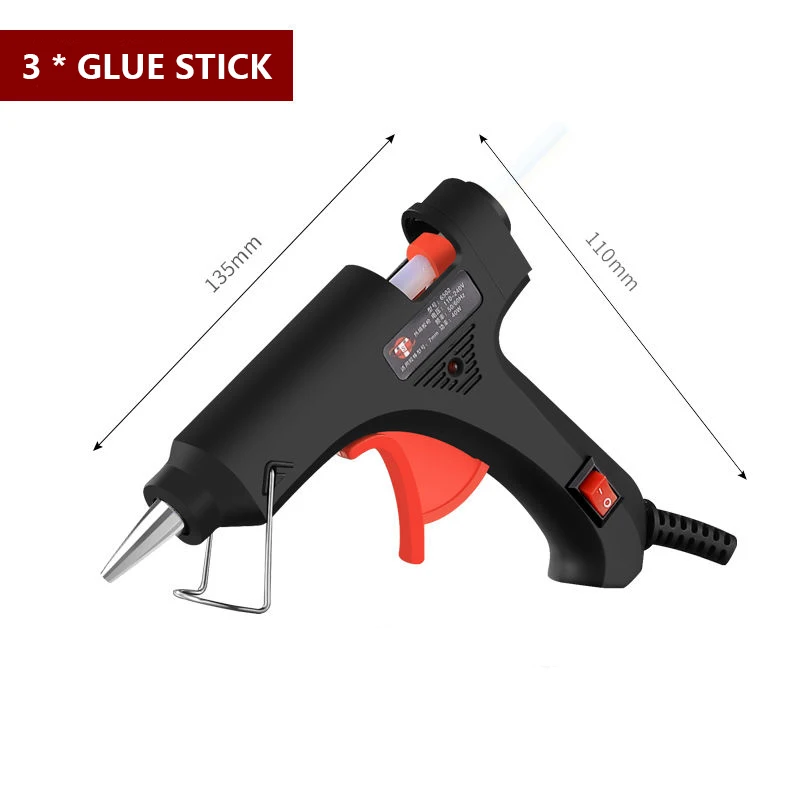 The small hobby unit eventually melted the PLA but only barely; the PLA came out more like softened putty. Based on this teardown of a cheap hobby glue gun the operating temperature is expected to be around 150 °C, which isn’t enough to really melt PLA properly.
Another thing that became clear during this process was that the glue gun had special needs for extrusion and feeding. To feed properly, the trigger mechanism needed to be able to grip and push on a solid cylinder, not a bundle of filaments. In addition, proper extrusion required a solid shape that filled the opening of the melting chamber completely to prevent backflow. Otherwise, molten plastic prefers to spill out the back instead of being forced through the nozzle. In other words, I needed:
- A higher-temperature glue gun, and
- A “glue stick” of the correct size and shape made from PLA instead of hot glue
After a bit of research, I purchased an economical high-temperature glue gun that claimed 80 W and an operating temperature of up to 208 °C.
Testing PLA “Glue Sticks”
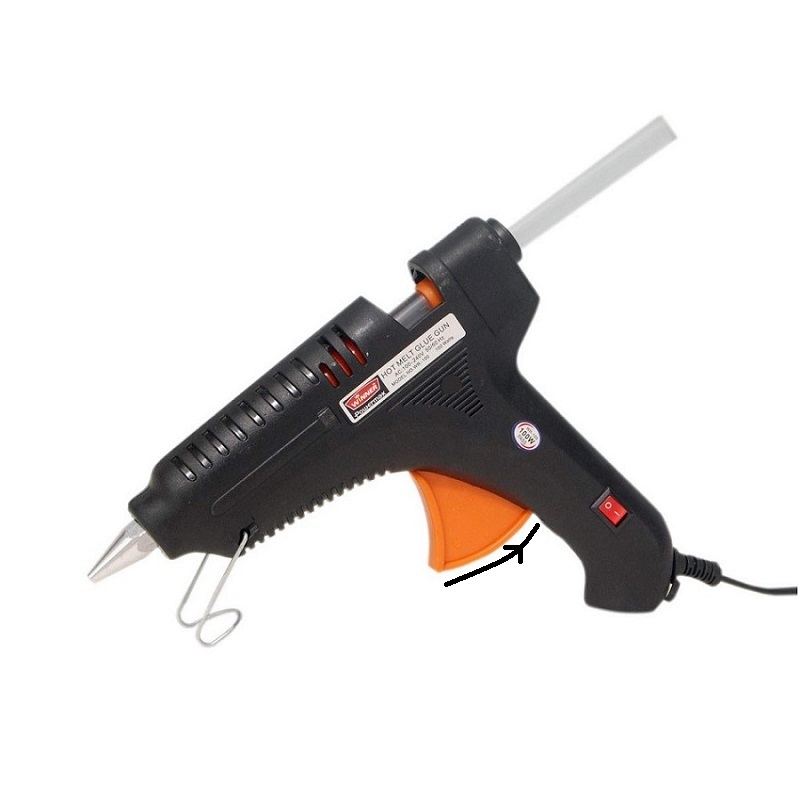
Test with straight-walled plain cylinder of PLA. The back of the stick was printed with black so I could get an idea of where the stick ended when extruding.To feed my new glue gun I needed a cylinder 11 mm in diameter and at least 5 in long. Happily, 3D printers exist for the sole purpose of turning 1.75 mm filament into other shapes and sizes. It felt a little strange to use a 3D printer simply to turn 1.75 mm diameter plastic into 11 mm diameter plastic, but in about an hour I had printed a high (75%) infill 11 mm x 150 mm cylinder of PLA for testing.
That first stick of PLA was enough to show that the 80 W glue gun was able to melt and extrude PLA acceptably; the only hitch was a ten to fifteen minute warmup in my cool workshop, compared to only five minutes or less for hot glue.
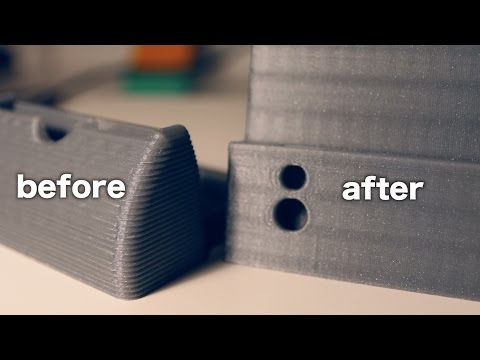
However, a problem was revealed. The feed mechanism for the glue gun has a small levered arm that bites into a glue stick and pushes it forward when the trigger is pulled.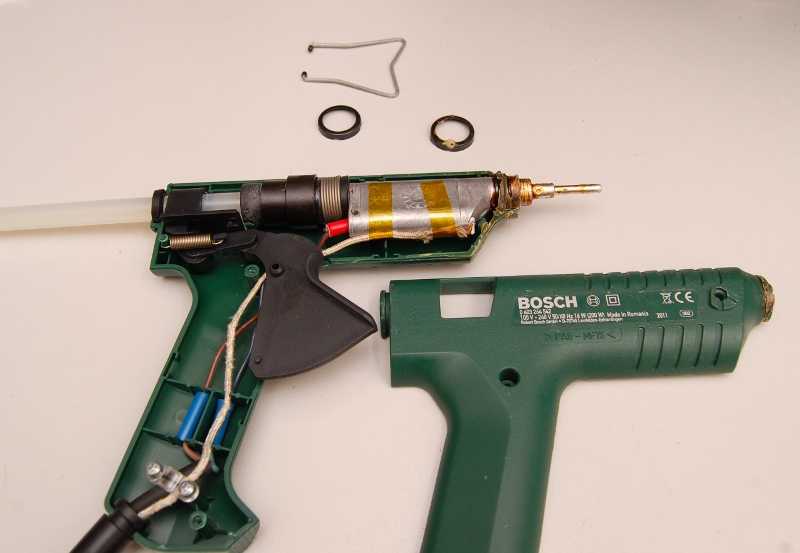 However, the PLA “glue stick” was smooth and hard, and the feed system could not properly bite into it. In fact, the ridged surface of the PLA cylinder quickly wore away the teeth in the little arm as it tried in vain to find something to grab onto.
Feeding Problem Solved by Adding Notches to the PLA Sticks
The solution was a small change to the 3D model for the glue stick. Adding a series of angled notches to the cylinder model allowed the raised arm to latch and push perfectly.
This little lever rises when the trigger is pulled. Showing wear on arm that rises to grip the glue stick. Teeth are notched from rubbing on PLA. Notched PLA “glue stick” engages properly to the feed system.Testing The Bonds
With an 80 W glue gun doing the melting, and the notches in the cylinder of PLA allowing the feed system do its job when the trigger was pulled, molten PLA flowed easily and with excellent control. I performed some simple tests:
- Using PLA like glue by depositing a molten blob, then mashing a part down on top of it.
 Results were good, but the PLA blob adds some bulk because it doesn’t smear out fully before it starts to cool and harden.
 - Joining seams: the molten PLA melts only slightly to the surface being joined, but still ends up surprisingly strong. I was able to pull the seam apart but in the process always broke one or the other of the surfaces, or broke the seam itself in two (leaving the remains stuck to the parts I had joined).
Is There Really Any Welding Happening?
A true weld results when the material of the joint and both pieces meld together to become one. That clearly isn’t the case. There is some melting together happening, but it’s superficial at best. Nevertheless, the result easily passes a “tug test”. The cut-away test joint shows the red PLA has flowed into and filled every nook and cranny, which probably accounts for most of the strength.
Lessons Learned
- A small hobby glue gun reliably softened but did not melt PLA. A glue gun made for higher-temperature hot glue melted PLA acceptably.
- The test glue gun was an economical dual-heater 80 W unit that did the job, but takes a good ten minutes or more to warm up and melt the plastic filling the chamber (compared to five minutes or less for hot glue.)
- Aside from heat, the biggest issue keeping PLA from being used in a glue gun is that glue gun feed mechanisms are not made to grip and push on smooth, hard PLA.
 They expect a much softer hot glue stick. The test gun functioned well with PLA sticks that had notches in the side, but this will vary depending on the design of the specific glue gun being used.
 - The STL file for my simple notched glue stick is available on GitHub. It may or may not be compatible with other glue gun feed systems.
- It’s not much of a weld since it’s superficial only, but it still takes more than casual effort to pull pieces apart.
- Experimenting is fun.
Does The PLA Glue Gun Do the Job?
My large multi-piece 3D print was a big hollow object with thin pieces fitting together like a jigsaw puzzle, and using the PLA glue gun to quickly and efficiently stick those 3D-printed pieces together with no need for clamping was better than expected.
For situations where a PLA glue gun may not do the job, check out this method to ease printing and assembly of multi-part models with a bit of help from OpenSCAD. But for my big hollow model, manually aligning the surfaces and bonding the inside seams was quick, easy, sturdy, and absolutely worth repurposing a $30 glue gun and giving it a place in the tool drawer.
print material - Is hot glue suitable for FDM printing?
Ask Question
Asked
Modified 4 years, 4 months ago
Viewed 1k times
$\begingroup$
Is hot glue suitable for FDM printing, or some process similar to it?
I think it has all of the required properties, and could produce a flexible transluscent print. It's cheap, hotends are cheap, and the technology has been around for a while.
I couldn't find any examples or anyone talking about such a material for use, on here or the general Internet. I wonder if there are tradeoffs or challenges that make it not worth pursuing.
- print-material
$\endgroup$
3
$\begingroup$
You could mount a hot glue gun to a 3D positioning frame, but you would immediately notice the following:
- Hot glue sticks are fat, so you lose a lot of precision for each feed/retract increment. I.e., it's a lot harder to get precise feeds with a fat stick because the stick size is so much larger than the nozzle.
- Hot glue sticks are short, so you would to create a filament to spool the stuff or come up with a glue stick feeder.
- Hot glue melts at 120 °C and common plastics such as nylon melt at much higher temperatures. So hot glue would make an AWFUL structural part like a stepper mount. Even PLA barely deals with stepper temperatures. Note that temperature tolerance is irrelevant for costume parts.
- Hot glue is soft, which makes it a great glue, but not very stiff for, say, making parts for a 3D printer. However, the parts might be fine for use only in costumes, etc.
But, if you then used your 3D glue printer to dispense glue for gluing stuff together, well...that might be valuable. :D
$\endgroup$
2
$\begingroup$
Yes, we have Hyrel users who print with Hot Melt Adhesive 3796 from 3M (essentially a high performance hot glue) with our Krakatoa series print heads.
These heads don't print with filament; the user fills a metal reservoir with paste, gel, or even powder or granules, loads the reservoir onto the head, loads the head onto the printer, applies heat if necessary (some models up to 250C), and then prints the gcode with positive displacement. The KR2 is like the KRA above, but it is made specifically for higher temperature, higher viscosity materials, with tighter tolerances and multiple gaskets.
I have used this model head to print materials including hot glue, polycaprolactone, porcelain, vasoline, toothpaste, plasticine, and metal clays.
See https://www.youtube.com/watch?v=QD2FrZ4kg1g for an overview of this head.
Note: I sell this equipment, and have used it since 2012.
$\endgroup$
4
$\begingroup$
I think not. Unless you intend to make a very special printer that feeds on glue stick, you must make filament from it. Should be doable.
But my experience with cold hot glue, is that it is not very durable. It's a bit elastic but nothing like elastic filament. It breaks instead. So when you have your filament, I think you will have a bit of trouble handling it, feeding it into the printer etc. If you, for instance, clog the nozzle the slightest, the extruder will tear the filament to shreds very quickly.
$\endgroup$
Free STL file of PARKSIDE Hot Glue Gun PHP 500 E3 Mains Dock・3D Printer Model Download・Cults
Bodden rescue boat DGZRS
10 €
LIDL Glider 2022
Free
Lidl Battery to Bosch
Free
DJI FPV HD Pan Tilt V2
Free
Deluxe Servo Tester
Free
TX16s Underbody
Free
Disc grinder PARKSIDE PTSG 140 B2 MOD
Free
Resin pipette for Anycube Photon S
Free
The best files for 3D printers in the Tools category
M2 Mask
Free
PyPortal Wall Mount
Free
Cartesian Printer Test Piece
Free
CAN HANDLE (STANDARD AND TALL BOY)
Free
Palette 2 Ball Stand
4 €
Screwdriver holder (pegboard or wall mounted)
2,39 €
Deactivated
Twist_Test_172mm
Free
Bestsellers in the Tools category
209 Flash Bang / Ukrainian Hot Potato
0,96 €
Armadillo - flexible wire conduit
€1. -thirty% 1.20 €  72
72
3D printed wave transmission (harmonic drive)
€4.99
Ender 3 S1 Air duct for stock fan
1,20 €
Bambu AMS Stand for placement raised 2nd block behind
1.15 €
Bit holder Spartan 4 mm Hex
1,80 €
Quick Print Stackable Parts Containers / Storage Boxes
2.91 €
Printer boxes for Ikea Lack Table
1,99 €
ENDER 3 S1/PRO SPRITE, V3 AIR DUCT 5015 OR 4020
€2.70 -twenty% 2. 16 €
16 €
phone ring holder
0.90 €
INDICATOR FOR BETTER BED LEVELING FOR ENDER 3 V2
2.87 €
Ender 3 Briss fang Gen2, red lizard, spider, nf crazy, dragonfly, etc.
€1.80
well designed: Hemera fan duct
2.50 €
ARTEMIS -> Shop for Alligator 2 || 6.5" Arrows || Repeating Crossbow
6.25 €
Display holder FLSUN v400
€4.99
Paint stand with scissors
5,30 €
Do you want to support Cults?
Do you like Cults and want to help us continue our journey on our own ? Please note that we are a small team of 3 people , so support us at maintaining the activities of and creating future developments of is very simple.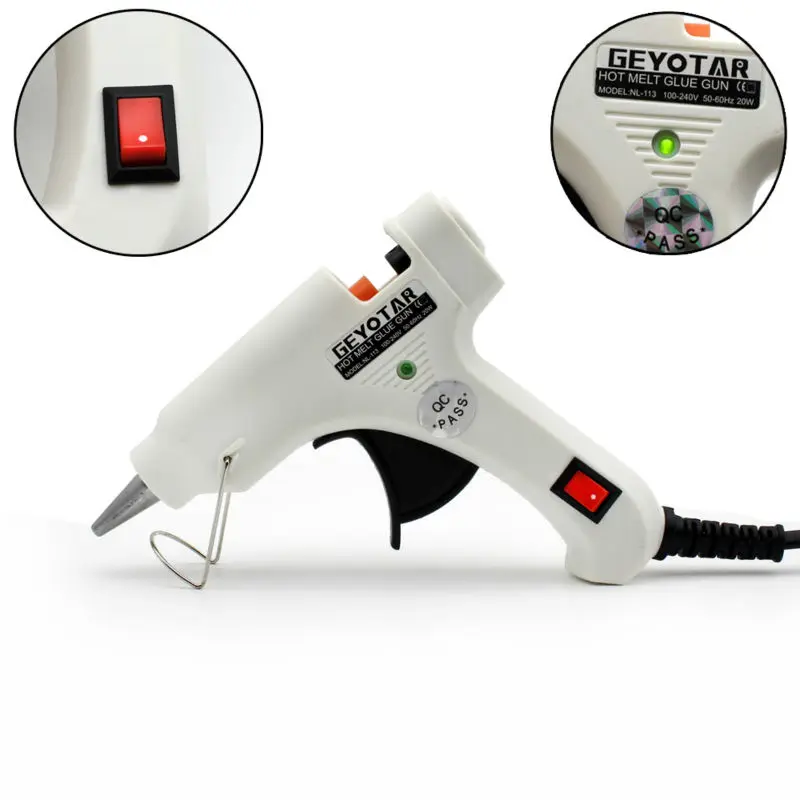 Here are 4 solutions available to everyone:
-
AD: Disable your AdBlock banner blocker and click on our banner ads.
-
AFFILIATION: Shop online with our affiliate links here Amazon.
-
DONATIONS: If you want, you can donate via PayPal here.
-
* INVITE FRIENDS: * Invite your friends, discover the platform and great 3D files shared by the community!
A Brief History of 3D Printing
3D printing was born 40 years ago and opened up amazing possibilities for creating various models in prototyping, dentistry, small-scale production, customized products, miniatures, sculptures, mock-ups and much more.
Who invented the 3D printer? What was the first 3D printing technology? And what was the first thing they printed on a 3D printer? Let's open the veil of secrecy over a huge number of interesting facts and stories about the emergence of technology.
So, how it all began…
Stage 1: The birth of an idea
Dr. Hideo Kodama, creator of the rapid prototyping system (1980)
Dr. Hideo Kodama, Nagoya Municipal Industrial Research Institute, applied for a patent for the device , which layer-by-layer formed a rigid object from a photopolymer resin with the help of UV illumination.
In fact, he described a modern photopolymer printer, but failed to provide the necessary data for patent registration within a year, as required by patent law, and abandoned the idea. However, in many sources it is he who is called the inventor of 3D printing technology.
In 1983, three engineers - Alain Le Meho, Olivier de Witt and Jean-Claude André from the French National Center for Scientific Research, in an attempt to create what they called a "fractal object", came up with the idea of using a laser and a monomer, which under turned into a polymer under the influence of a laser. They applied for a patent 3 weeks before the American Chuck Hal. The first object created on the apparatus was a spiral staircase. Engineers called the technology stereolithography, and the patent was approved only in 1986 year. Thanks to them, the most famous file format for 3D printing is called STL (from the English stereolithography). Unfortunately, the institute did not see any prospects in the invention and its commercialization, and the patent was not used to create the final product.
Chuck Hull, creator of SLA laser stereolithography (1984)
At the same time, Chuck Hull was working for a company that made countertop and furniture coatings using UV lamps. The production of small plastic parts for prototyping new product designs took up to two months. Chuck came up with the idea to speed up this process by combining UV technology and layering thin plastic. The company gave him a small laboratory for experiments, where he worked in the evenings and weekends. As a material, Chuck used acrylic-based photopolymers that harden under the influence of ultraviolet radiation. One night, after months of experimentation, he was finally able to print a sample and was so elated by luck that he walked home. Chuck showed his invention to his wife. It was an eyewash cup, more like a communion cup, according to the wife. It is considered officially the first 3D printed model in the world and is still kept by the Hull family, and after their death will be transferred to the Smithsonian Research Institute in Washington.
Chuck Hull filed a patent on August 8, 1984 and was approved on March 11, 1986. The invention was called "Apparatus for creating three-dimensional objects using stereolithography." Chuck founded his own company - 3D Systems, and in 1988 launched the first commercial 3D printer - the SL1 model.
Carl Deckard and Joe Beeman (right), inventors of SLS 3D printing (1987)
Another new 3D printing method appeared around the same time as SLA printing. This is selective laser sintering (SLS), which uses a laser to turn a free-flowing powder (instead of resin) into a solid material. It was developed by Carl Deckard, a young undergraduate student at the University of Texas at Austin, and his teacher, Prof. Dr. Joe Beeman. And the idea belonged to Karl. At 19In 87, they together founded Desk Top Manufacturing (DTM) Corp. However, it will take at least another 20 years for SLS 3D printing to become commercially available to the consumer. In 2001, the company was bought out by Chaka Hull, 3D Systems.
Scott Crump, developer of FDM 3D printing (1988)
Surprisingly, a simpler and cheaper 3D printing method - FDM (Fused Deposition Modeling) was created after SLA and SLS, in 1988. Its author was the aeronautical engineer Scott Crump. Crump was looking for an easy way to make a toy frog for his daughter and used a hot glue gun to melt the plastic and pour it into layers. Thus, the idea of FDM 3D printing was born, a technology for layer-by-layer deposition of a plastic thread. Crump patented a new idea and co-founded Stratasys with his wife Lisa Crump at 1989 year. In 1992, they launched their first production product, the Stratasys 3D Modeler, on the market.
Milestone 2: 3D printing becomes available
The first machines built by 3D Systems and Stratasys were bulky and expensive. The cost of one was hundreds of thousands of dollars, and only the largest companies in the automotive and aerospace industries could use them. Printers had a lot of limitations and could not be widely used. The development of technology has been very slow. 20 years later, in 2005, the RepRap project (Replicating Rapid Prototyper) appeared - a self-replicating mechanism for rapid prototyping.
It was inspired by Dr. Adrian Bauer of the University of Bath in the UK. The goal of the project was to "self-copy", replicate the components of the 3D printers themselves. In the photo, all the plastic parts of the "child" are printed on the "parent". But in fact, a group of enthusiasts led by Adrian were finally able to create a budget 3D printer for home or office use.
The idea was quickly taken up by three New York technologists and started a desktop FDM printer company, MakerBot. This was the second turning point in the modern history of 3D printing.
Other technologies were being developed in parallel. One of them is bioprinting. Thomas Boland of Clemson University has patented the use of inkjet printing to 3D print living cells, making it possible to print human organs in the future. Dozens of companies around the world conduct research in this area.
Another important application of the new technology was the creation of prostheses, first conventional, and then bionic. In 2008, the first printed prosthesis was successfully transplanted into a patient and allowed him to return to a normal lifestyle.
Another milestone has been the arrival of open source print files on the Internet. Websites www.thingiverse.com, www.myminifactory.com and many others contain both free and paid files for 3D printing. Users share models online and print them themselves.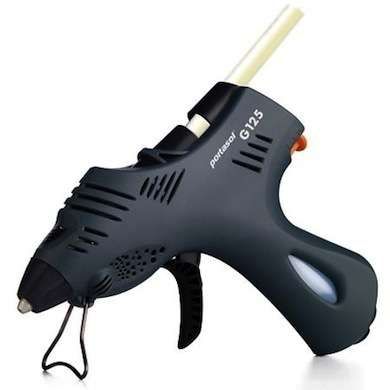
Stage 3: 3D printing today
In recent years, 3D printing has become available to the mass consumer: the price of printers has dropped significantly, and their use has become more convenient. Photopolymer 3D printers print detailed models with high precision and resolution. The number of users is growing, including due to the huge community of enthusiasts who are ready to help beginners. This is facilitated by the availability of ready-made files for 3D printing and the availability of software for creating models.
3D printing is already becoming a standard solution in industries such as dentistry, jewelry, orthopedics, and in other industries the implementation is in full swing. The possibilities are endless - from building houses to neurosurgery, from chocolate printing to metal printing.
Alexander Kornveits,
Expert in the field of additive technologies, founder and CEO of Tsvetnoy Mir
Source: vc.


_RlfzhrZzWj.jpg?auto=compress&w=900&h=675&fit=min&fm=jpg)
