3D printer bom
3D Printing Bill of Materials
We previously talked about Getting Started with 3D Printing, and Finding the Right Modeling Program, but what if you’re ready to get serious about 3D printing? Well, we’ve compiled a basic shopping list to get you started. This is by no means a complete or comprehensive list, but rather, an overview to help you understand the building blocks of becoming a 3D printing hobbyist.
To Buy a Printer, or Build a Printer?
Getting serious about 3D printing means that you probably want your own printer, rather than buying one-off objects through ShapeWorks. When determining if you’re going to build your own, or purchase an out-of-the-box machine, there are a few pros and cons to consider:
Buying an out-of-the-box 3D Printer
- More expensive
- Works out of the box (less time investing in building)
- Customer support is available
- You can print replacement parts, but it’s going to be more challenging
Build your own 3D Printer
- More time and trouble shooting to get it to work
- More economical
- Total Customization
- Print replacement parts more easily, and you’re familiar with the inner workings of the machine so you can replace them with confidence
Purchasing a Printer
By and far the most important purchase, the actual 3D printing machine is the basis on which your system will be built. It is important to do your research and get one that suits your needs and price range.
If you are looking for a simple, out of the box solution, look no farther than the da Vinci 2.0 Duo from XYZ Printing. Based on the Fused Filament Fabrication “FFF” technology, they offer twelve different filament colors for use in either a single color (da Vinci 1.0 for $499) or dual color (da Vinci 2.0 duo for $649) printer.
If you need a slightly larger build size, the Leapfrog Creatr 3D printer starter package from USCutter retails for $2600, and includes everything you need to get started. The starter kit includes the printer, filament, tools to refine your model and maintain your printer, and training guides. Note that a dual color model is also available for $2900.
For those with industrial size printing needs, the Replicator Z18 from MakerBot offers a 12 in x 12 in x 18 in build size that retails for $6499.
All three models offer similar printing resolutions and speeds, so the decision lies in the size of your models and the price point when choosing the right 3D printer for you.
Building Your Own Printer
Even though the technology has been around for decades, it has only been in the last couple years that building your own 3D printer has become practical and economical. The reason for this change is a large, open source movement for 3D printing. One of the largest groups is the RepRap Project. Touted as the “3D printer that prints itself”, there are several models from which to choose, and a large online community for support. Complete kits are available for assembly, or you can source each of the required parts yourself, which is cheaper and often times, more fulfilling.
Here is a basic list of the required parts for building your own 3D printer:
- RP (plastic parts)
- Can be printed by anyone with a 3D printer, many community based suppliers
- Cost $50 – $100
- Electronics
- The brains of the machine, several models and options available
- Buy preassembled, or etch your own boards
- Cost $140 – $370
- Stepper motors
- NEMA 17 rated, 1-2 Amp with 40 N-cm torque
- Cost $150
- Hardware
- Threaded rod
- Smooth shaft
- 608 bearings
- T5 timing belt
- Extruder hardware
- Cost ~$75
More information on sourcing your own 3D printer can be found on the RepRap site, and to read posts from other people who are building their own printers, check out this forum.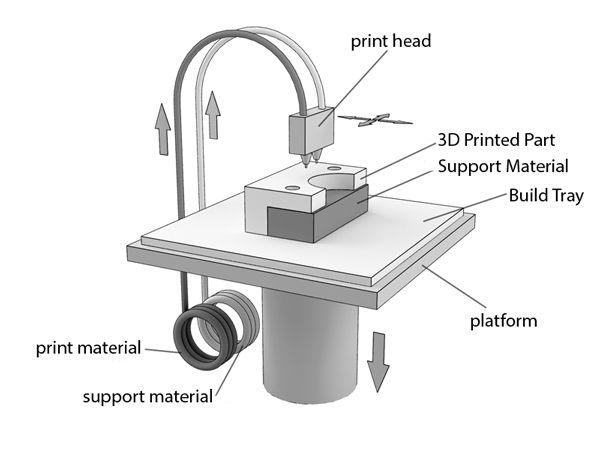 In our next 3D printing article, we are going to give you a step-by-step guide of how to build your own printer! Be on the lookout for that article soon.
Consumables
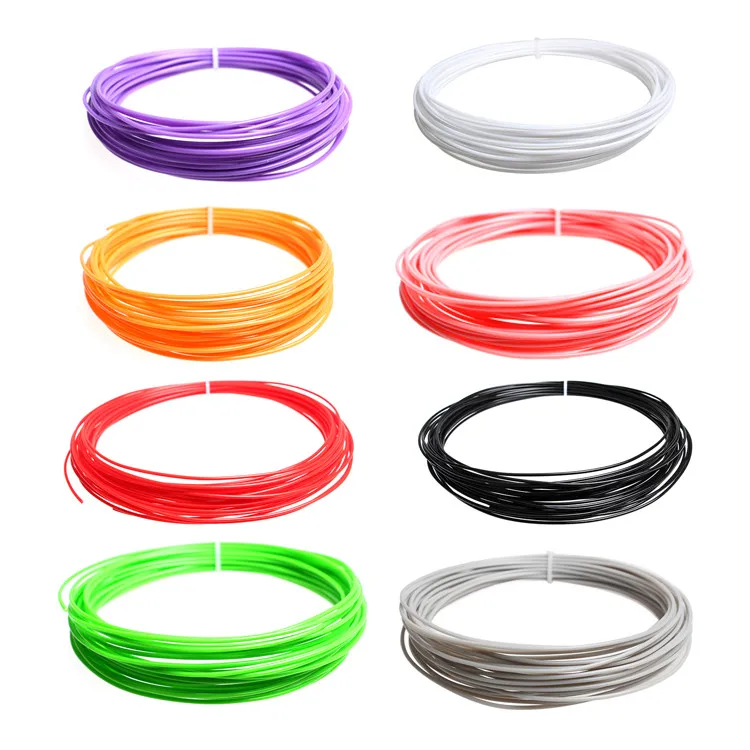
The three printers mentioned above use the FFF technology, so you will need to purchase filament to print with. Each manufacturer offers a selection of different colors and material types that is compatible with their printer. Filament cartridges typically cost $28 – $85, depending on size and type. Note that most printers also use glue or a thin layer of tape on the printing bed to prevent sticking that must be applied each time an object is printed.
Software
Every 3D printing manufacturer will supply you with free control software upon purchase. This software needs to be installed on a computer that will be connected to the printer (this is typically done via USB). The software will import a 3D model and use it to create the printer-specific machine code needed to produce the object. If any special build requirements such as rafts or supports are needed, they will be automatically created by the software.
The 3D Model
Of course, you must also have the 3D model of the object that you would like to print. Many manufacturers have free online libraries of objects for public download, such as MakerBot’s Thingiverse, or you can search 3D Printing marketplaces such as GrabCad or Threeding. If you need to print custom parts, or want to design your own model, you will need to use a 3D modeling program capable of saving an STL file (.stl is the industry standard for 3D printing). Many examples and options can be found in our article about Finding the Right Modeling Program
Time
One more thing that you will need that goes without saying – time. Not only is 3D printing exciting and addictive, the actual process can take multiple hours depending on the object size.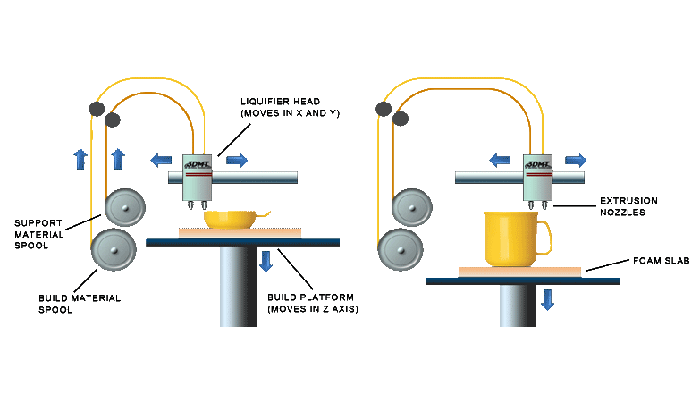 The exciting part is that companies like Makerbot and XYZ are starting to cater to the hobbyist, so most printers are ready to go out-of-the-box and don’t require a lot of setup, extensive configuration, or complex assembly etc.
Once you’ve picked out your 3D printer, the hardest choices could honestly be which color of filament to buy, and what to print first!
Looking for more 3D printing tips and information? Reply below in the “Comments” section, and we’ll do our best to answer your questions in our next 3D printing blog post!
Hero Image source: XYZ Printing.com
4 Comments on 3D Printing Bill of MaterialsMechanical Design
Tags 3D printer, 3D printing guide, 608 bearings, Bill of Materials, Build your own printer, Configurable Parts, extruder hardware, Shapeworks, smooth shaft, software, T5 Timing Belt, Threaded rod
Bill of Materials (BOM) for DIY 3D Printers
Blessed are those who can give without remembering and take without forgetting. |
| Phone Orders or Help: 800-734-3588, 206-458-7550 (Pacific Time) | |||||
|
Home > BOM
Home > BOM |
|||||
Home
3D Printer Basics
Build Instructions
3D Printer Models
Filament Basics
Compare Filaments
Fun Reading
3D Printer Patents
BOM (Parts List)Kossel Mini BOM (Parts List) Kossel Legacy BOM (Parts List) Prusa i3 Rework BOM (Parts List) Electronics Stepper Motors Power Supplies Stepper Motor Dampers Kapton Heaters Azteeg X5 Instructions USBtinyISP FSR/Endstop Controller Limit Switches End Stops Wiring, Connectors, Crimps Power Connector Plastic Parts Mechanical Parts Belts & Gears Bearings Coupling Kossel Nuts Bolts, Screw Rods (Arms) Rod Ends Rod Set Screws Hobbed Drive Gear Spool Fan Kapton Heater Heat Spreader Borosilicate Glass Hot Ends E3D HotEnds E3D HotEnd Volcano E3D HotEnd Nozzles J Head HotEnds Resistors 5.  6, 6.8 Ohm
Thermistors
Push Fit
Teflon Tube, PTFE 6, 6.8 Ohm
Thermistors
Push Fit
Teflon Tube, PTFE
Printing Supplies Kapton Tape Blue Tape Misc Thermal Fuse Heatbed Extrusions Silica Gel Comm Cable Spectra Line Techflex Split Loom T-Slot Aluminum Extrusions Bulk Nuts, Bolts, Screws  
Send Us Your Comments Share Site With A Friend Go To Our Site Map Link To Us Related Links Report A Broken Link Contact Information |
|
||||
TriDPrinting. com com |
Site Map |
Terms of Use |
Privacy & Security |
Contact Us |
Purchase Agreement |
Send Feedback |
Instructions for BOM - K3D
What is BOM
BOM is B ill O f M aterials i.e. parts list i.e. specification. This is the LibreOffice table that calculates:
- How many and which parts to buy
- How many and which parts to print
- Lengths and number of aluminum profiles
- Some features of the printer
- (Planned) Lengths and types of wires and connectors
In other words, this is the main tool for calculating your VOSTOK printer.
Setting sheet
On this sheet you can enter some parameters that will determine the calculation.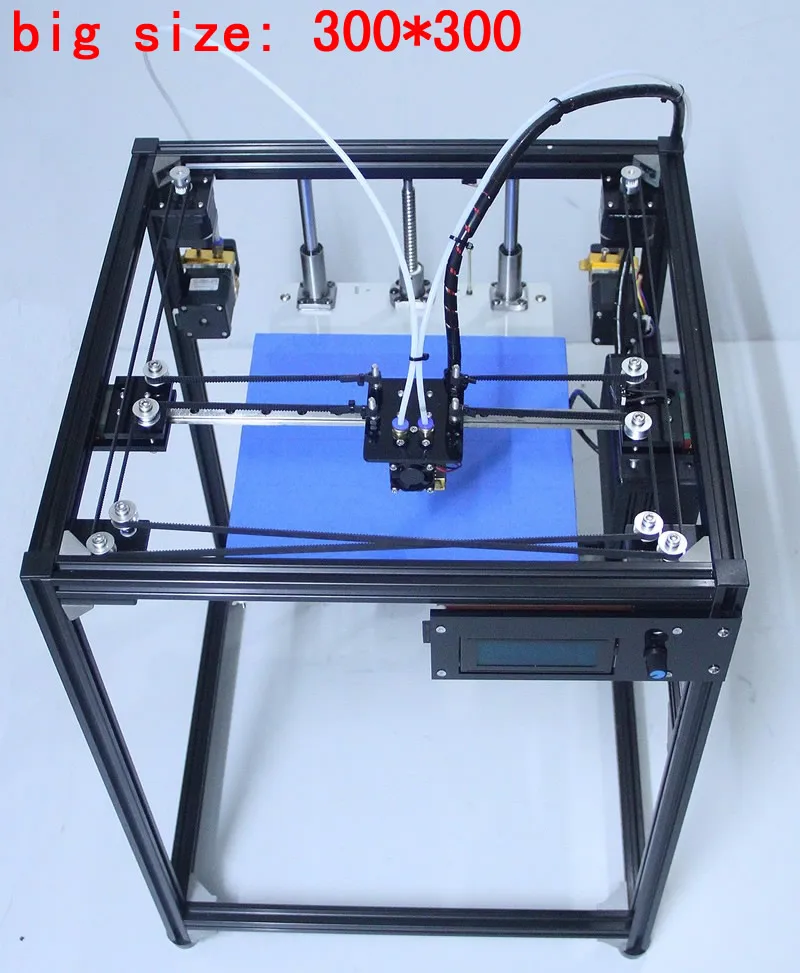 Editable fields are located in column
 Value and highlighted in white. In most cases, parameters cannot be entered, but you can select from the list (arrow to the right of the selected cell).
In column Note there are comments that either immediately suggest what to choose in which case, or dynamically change depending on the already selected value.
Sheet Purchased items
This sheet calculates the number and types of purchased items. In the general case, nothing needs to be changed here, you can just use this as a list of parts for purchase.
-
Column
Itemis the name of the part. Please note that in the name of some parts, for example, heating pads, there are dynamically changing elements; -
In column
Unit costis the cost of either a unit of goods or one unit of length/area (millimeter or meter squared). If the goods are sold in packages, then the price is indicated not for the package, but for one unit; -
Column
Length / Areaindicates the length of one item . In this case, the lengths are considered without a margin at all. If for rails, glasses, etc. this is correct, then for belts and tubes it is necessary to add a margin of 10-20% when buying;
 -
Column
Unitindicates the number of parts to be purchased; -
Column
Total costcalculates the cost of all units of goods of the specified length / area. Using this column, it is convenient to monitor which parts are the most expensive and what you can save on; -
Columns
Linkshave links to verified products from Aliexpress and other stores. Often, not the same product as on the first one, but a slightly different one, is offered as an alternative link. For example, if the main link leads to a brass nozzle, then the alternative one can lead to a hardened steel nozzle; -
Column
of Notecontains additional information on the relevant parts.
Please note that some positions may be duplicated in another section. In this case, you need to buy the total number of these parts.
Sheet Standard products
This sheet calculates the number and types of standard items - screws, washers, nuts, bearings, etc.
Contents left
-
Column
Designationcontains the alphanumeric assembly ID. It is needed to find the desired subassembly in the general assembly of the printer; -
Column
Namecontains the name of the assembly; -
Column
Unitsindicates the number of assemblies in the printer.
Contents top
-
In strings
Type,ThreadandLengthindicate the parameters of the screws for purchase. At the same time, some screws can be replaced, for example, a cylindrical head with a semicircular one can almost always be changed painlessly. Also, nothing prevents rare screws from being cut off longer ones; -
Line
Unit pricecontains the price of one unit of normal quality goods; -
Line
Total unitsindicates the total number of parts for the entire printer. Please note that this quantity is calculated without a margin. Buying costs 10-20% more;
 -
Line
Total pricecontains the total cost of all units of this part. Serves in order to navigate which parts are the most expensive; -
Line
Linkcontains a link to the checked item. The price may differ as the prices in the table are rarely updated.
Aluminum profile sheet
This sheet calculates how many and which profiles you need to buy to assemble the frame. The position of the holes is not calculated in this case, since they are not required for assembly.
If you have already purchased parts for the printer, but want to upgrade to a new version, then the values on sheet Settings must be set in such a way that the set and length of profiles match those already purchased. In this case, the firmware will also fit from the old version to the new one.
Sheet Printed products
This sheet calculates how many and what parts to print, in what form and from what type of plastic. In the general case, you don’t need to touch anything here, just use it as a reminder when preparing for assembly.
-
Column
Designationcontains an alphanumeric part number. Serves to make it easier to find it in the general assembly of the printer or in the folder with files for printing; -
Column
Nameindicates the name of the part; -
Column
Plasticindicates which filament it is desirable to print this part. There are three options: -
Plain - some easy-to-print, but strong filament with a heat resistance of 80 degrees. Good fit
PETG, but nothing prevents the use of composites likePP GF, etc. The use ofABSand the like is undesirable as the parts may not be strong enough; -
Advanced -
PP GF30,PA12 GF30,PA6 GF30and similar well caking, tough and heat resistant materials. In extreme cases, you can replace it with
 PETG, but then you need to closely monitor that the motors and other contacting parts do not heat up above 70 degrees; -
Elastomer is some kind of grippy elastomer for leg printing.
-
Column
of Imprintindicates the preferred weight ratio of the printed part to the weight of the part at 100% coverage. In other words, if there is 100% here, then you need to set the filling to 100%. But, if it costs less, then it is not necessary to set the percentage of filling equal to this percentage of sealing. It should be set lower. perimeters and lid/bottom further increase the seal. For more information on printing, please refer to the assembly instructions for the respective units; -
Column
Quantityindicates the number of parts to be printed. Whether or not they are reflected, see columnNote; -
Column
Total massindicates the total mass of all units of the corresponding part. It serves to determine where the largest amount of plastic goes and whether there is enough leftover to print certain parts in the right amount;
 -
The Total cost column shows the total cost of all instances of the relevant part;
-
The Note column provides additional information about printing. Most often, how to print parts - whether to mirror the second copy, whether the part is optional, etc.
Sheet Calculations
This sheet contains some calculations from other sheets.
Power supply calculation
The power consumption of the printer units is calculated here. If you are going to put some additional equipment on your printer, for example, a backlight or an active thermal camera, then the power here must be adjusted to the power of your additional equipment.
Calculate printable areas
Since VOSTOK supports several print heads, and the IDEX version can work in several modes (mirror, repeat, etc. ), calculation of print areas for different cases has been added. Based on these data, you can navigate which print area will be available to you when replacing the print head.
Date: 04/25/2022 Author: Dmitry Sorkin Telegram: @dmitry_sorkin E-mail: [email protected]
uni-3d.ru
3D printers
Sets
Accessories
Filament for 3D printer
Information
All news
June 25, 2022, 15:55
My new printer UNI 250
April 27, 2022, 17:05
Price reduction for UNI250 printer
April 22, 2022, 11:29 am
Price increase for
setsMay 16, 2022, 18:27
More about UNI 2.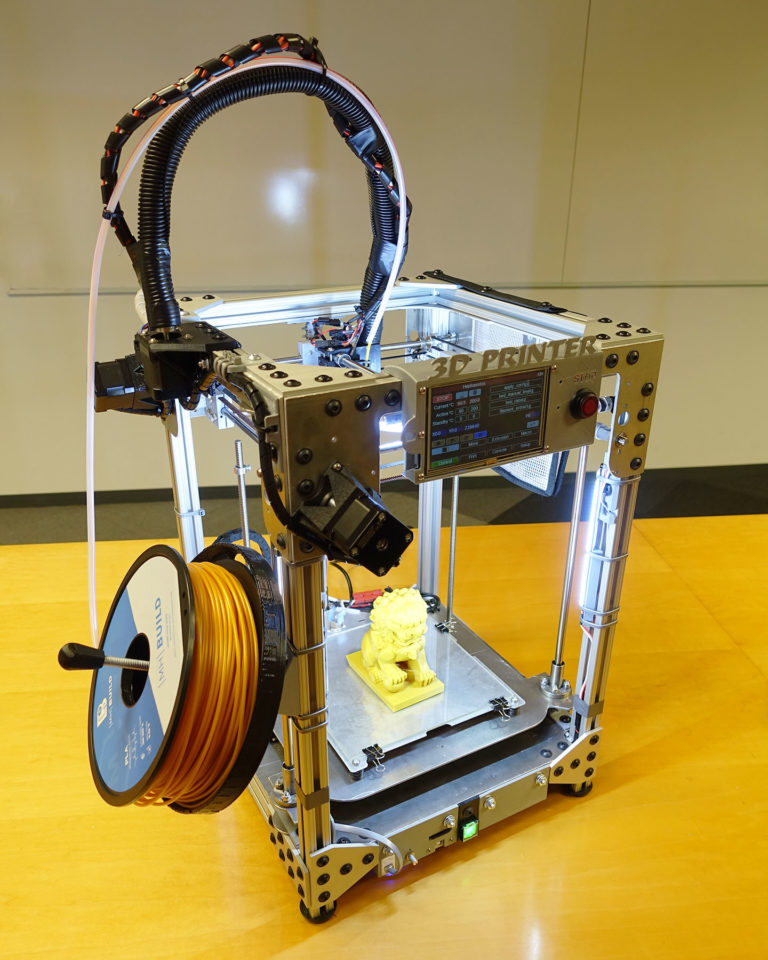 4.1
4.1
All news
Popular items
UNI 250
116 000 rub.
RUB 120,000
OrderOut of stock
Dome for UNI 2.4.1
2 600 rub.
OrderOut of stock
Acrylic panel set for UNI 2.4.1
RUB 4,900
OrderOut of stock
Table plate 320x220
760 р.
900 rubles
OrderOut of stock
Nozzle
$100
OrderOut of stock
Radiator UNI with sleeve
RUB 1,510
OrderOut of stock
Control board SKR V1. 4
4
1 500 rub.
RUB 4,800
OrderOut of stock
Control board SKR MINI E3 V1.2
1 300 rub.
RUB 3,900
OrderOut of stock
Fitting QS-1/8-4
$100
OrderOut of stock
Fitting for Bowden
550 р.
OrderOut of stock
Table plate 270x220
690 р.
800 rubles
OrderOut of stock
Lerdge table module
500 rub.
600 rubles
OrderOut of stock
Heating element 12V 50W
180 rub.


_RlfzhrZzWj.jpg?auto=compress&w=900&h=675&fit=min&fm=jpg)

