Hand held 3d printer
About - 3Doodler
The story of 3Doodler started out with a good dose of imagination, endless hours of engineering, and a sprinkling of luck and good timing.
From a handmade prototype in a Massachusetts maker space, to one of the most successful Kickstarter projects of all time, 3Doodler is now the best-selling 3D printing product out there. Along the way our community of creatives and educators has grown, using the 3Doodler in ways we never imagined, and changing the lives of those around them.
As our team has grown from two to two dozen, we’ve kept creativity and our customer at our core.
Now with over 2.5 million 3Doodlers shipped, and our pens making an impact in over 8,000 classrooms worldwide, the next chapter of our story is in your hands.
Where will your imagination and creativity take you today?
Check out the new 3Doodler App for downloadable stencils, support, and more!
3D Pen Basics
What is a 3D Pen?
How to Use a 3D Pen
How to Draw with a 3D Pen
What to Make With a 3D Pen
Supporting Blind and Partially Sighted People
RNIB approval signifies an official endorsement and recommendation for product that are easy to use for blind and partially sighted people. Learn More >
Our Purpose is to inspire and enable everyone to create.
Our Plastics Promise
We want you to trust every Doodle you or your children create! That’s why we partner with the best engineers and factories around the world, and source only the highest quality plastics.
All 3Doodler plastic strands are made from the highest quality materials, at factories in the US, UK and Spain, and they have all been subjected to the strictest standards of safety testing. This includes passing RoHS testing, Toxological Risk Assessments, LHAMA compliance testing, and heavy metal testing by labs including Intertek and Bureau Vertias (two of the world’s most reputable testing labs).
Our 3Doodler Start plastics melt at low temperatures so that they are completely safe for kids, and they are also certified as compostable, meaning they will break down over time under typical household compost conditions. Something we are all pretty excited about is that ALL of our plastics are certified as recyclable.
We are proud to work with many trusted retailers, such as Michaels and Target, who value (and also insist on) high standards of quality and safety testing. Unfortunately, there are an increasing number of plastics available through online marketplaces which claim to be compatible with the 3Doodler, but are not. In addition to damaging your 3Doodler pen, the third party plastics are often sized wrong, low grade (resulting in poor quality output, including bubbling), and come from questionable sources, or have certifications from unknown labs where safety cannot be verified.
We promise to uphold only the highest standards when it comes to our plastics, and in doing so, we hope to make your choice as easy as… Doodling a pyramid!
Compare ABS, PLA, and FLEXY >
People sometimes say cool things about us
This is what you’ll buy your kid next Christmas
Time
The 3Doodler Start — is nothing short of amazing
Digital Trends
This thing is awesome.
 It’s wireless. It’s low temperature. It’s got a single button. It couldn’t be any easier to use
Make Anything
The Best 3D Pen
Wirecutter, A New York Times Company (2018)
10 Great 3D Printers for Beginners
Mashable (2018)
Five Stars *****
Stuff
It has been used by Prince Harry and David Cameron. I use mine to draw dinosaurs
The Huffington Post
(A) mind blowing tech gift that proves it’s never too early to start holiday shopping.
BuzzFeed
Simple and ingenious
Engadget
3Doodler Create+ | The World's First 3D Printing Pen
Start Shopping
Shop Pens Shop Plastics Shop Accessories Shop EducationPens
Plastics
Accessories
3Doodler Create+ Essentials 3D Printing Pen Set
$79.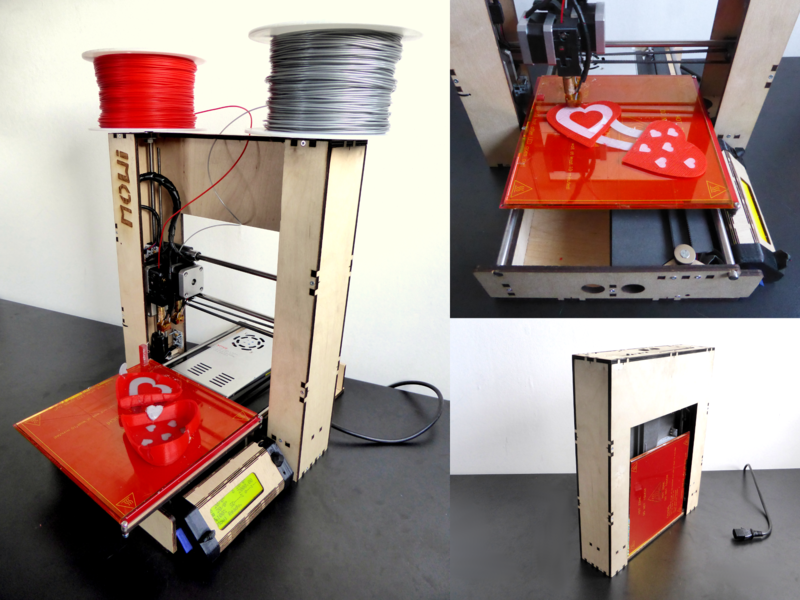 99
99
3Doodler Create+ "Learn From Home" Set
$99.99
3Doodler EDU Create+ Learning Pack (6 Pens)
$699.00
3Doodler EDU Create+ Learning Pack (12 Pens)
$1,199.00
3Doodler Create DoodlePad®
$9.99
Sold Out
More Info
3Doodler Create+ Challenge Cards
$9.99
3Doodler EDU STEM Accessory Kit
$12.99
Sold Out
More Info
3Doodler "What Will You Create?®" Project Book
Regular price
$19.99
3Doodler Create+ Nozzle Set
$19. 99
99
Sold Out
New for 2022!
More Info
PLA Plastic - Night Sky Regular price
$12.99 1299
Select Your Color:
75 Strands 75
PLA Plastic - Citrus Glow Regular price
$12.99 1299
Select Your Color:
75 Strands 75
PLA Plastic - RGB Regular price
$12. 99 1299
Select Your Color:
75 Strands 75
PLA Plastic - Tie Dye Regular price
$12.99 1299
Select Your Color:
75 Strands 75
PLA Plastic - Polar Ice Regular price
$12.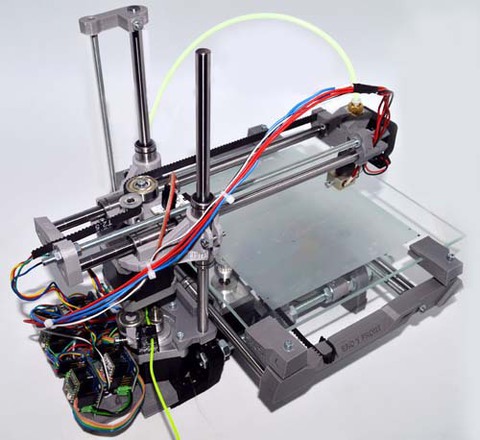 99 1299
Select Your Color:
75 Strands 75
ABS Plastic - Greyscale Regular price
$12.99 1299
Select Your Color:
75 Strands 75
3Doodler EDU Create+ Learning Pack Plastic Kit, 1200 Strands
$249.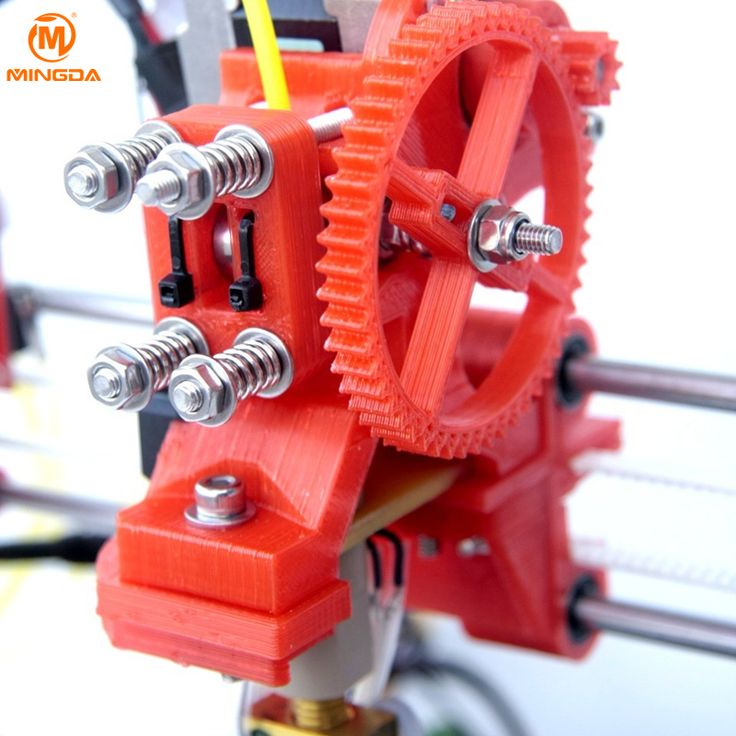 00
00
Setting up and maintaining FDM 3D printers for long life. Instruction for users.
Contents:
- Which 3D printer parts require regular maintenance?
- What are the features of caring for FDM 3D printers?
- Calibration and maintenance of the heating table.
- Cleaning and maintenance of the print unit.
- Cleaning and maintenance of 3D printer kinematics.
- Cleaning and maintenance of the hull.
- Electronics compartment, how to care?
- Output
Hello everyone, friends, 3DTool is with you!
Modern 3D printers have advanced systems for controlling the printing process, material supply, auto-calibration and many other useful, automated functions, and have gone quite far from their predecessors, where all manipulations, up to adjusting the current on the stepper motor drivers and programming the firmware for your version of the device, were necessary. do it manually. However, most modern devices also require constant care and maintenance. Let's try to summarize the most necessary and common operations and describe them in our article as a kind of guide for new users.
Which parts of the 3D printer require regular maintenance?
To begin with, let's decide what large nodes can any 3D printer be divided into?
- Housing
- Kinematics
- Print unit
- Printing table
- Motherboard / electronics
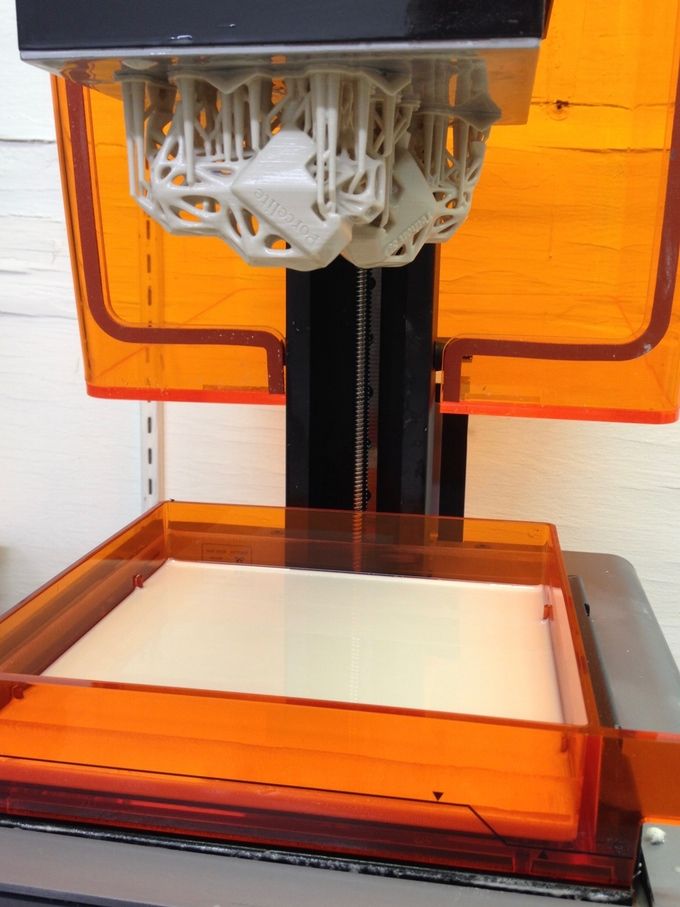
Regardless of the 3D printing technology, any 3D printer can be broken down into these components. For example, the case requires cleaning from adhering dust outside or inside in order not to create a risk of a short circuit from static electricity, kinematics requires cleaning from adhering dirt, regular lubrication and, if necessary, replacing belts (not in the case of rigid kinematics on a ball screw), the printing unit must be cleaned of adhering material, and in the case of photopolymer printers, do not allow any contamination at all, especially if it is a DLP or SLA 3D printer.
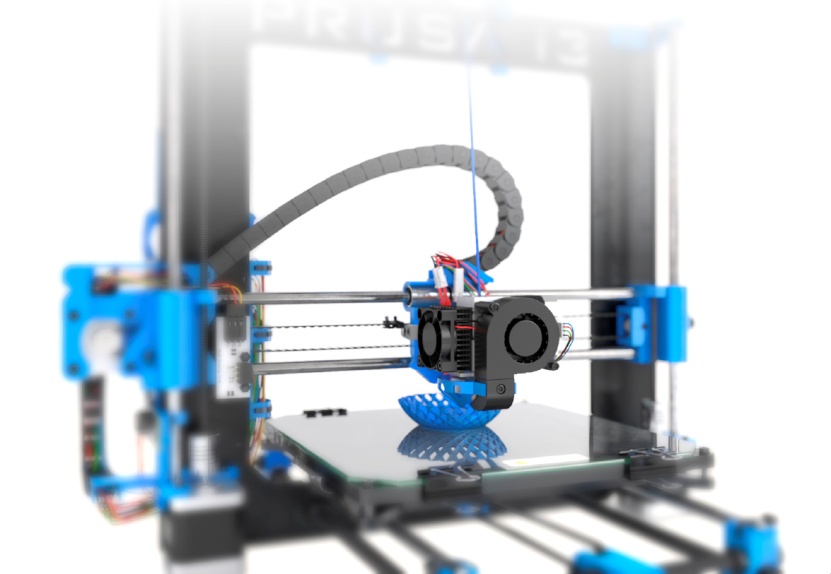
However, let's concretize our guide and take as a basis a certain standard FDM 3D printer, as the most common on the market, and based on it we will describe the processes in detail.
Catalog of FDM 3D printers
How to care for FDM 3D printers?
What the technology itself is and on what principle it works, you can find out from our article HERE. In this material, we mean that the reader is already familiar with the basic concepts and terms and understands the subject being described.
So. We know that thermopolymer 3D printers work with filament as a consumable, and the printing process itself is associated with heating the working elements of the device to fairly high temperatures. The molten material itself is deposited on the desktop either on a special adhesive surface (BuildTak), or on glass with glue applied to it, or on any other type of this element. For example, in the past, there were often just aluminum tables that required kapton tape or masking tape.
A good, even surface with adhesive applied is a 90% chance of a successfully completed print. The first layer always determines whether the product will turn out at all, or after a certain amount of printing time, if the first layer is peeled off or not printed, instead of the model you will see a characteristic "vermicelli".
Thus, the most important and first point of maintenance and adjustment of a 3D printer is the adjustment or calibration of the heating table.
Calibration and maintenance of the heating table.
There are 3 options for calibrating the heating tables - Manual, Semi-automatic and automatic. Most often in modern printers there is a semi-automatic option, we will now consider it.
With the semi-automatic option for calibrating the horizon of your work area, the printer runs a special motion program that facilitates the process. For example, in PICASO3D 3D printers on the X platform, the user needs to level the glass platform in its slots, start the calibration process and follow the device's on-screen instructions. It is important to visually control the actions of the device and avoid strong distortions or gaps in the table and glass surface. This calibration should be done as often as artifacts appear on the first layer, or the filament does not stick to the table at all / is pressed into it too much.
In the case of manual calibration, for example, on Zenit 3D 3D printers, the printer also controls the process by moving the printing unit along the calibration points, but the operator himself must raise or lower the table at the corresponding point.
In the zenith 3D printers mentioned above, this allows you to make 3 special adjustment screws under the table console (pictured), which must be tightened until the distance from the table to the tip of the nozzle is +/- 100 microns. It is best to measure this distance with a special automotive probe (for adjusting valves), or using plain white A4 paper.
The essence of calibration is to adjust the height so that a sheet of paper or probe moves between the table and the nozzle with little effort, but still easily passes this gap. It will be necessary to do this in the case of a zenith at 3 points, however, as a rule, in such devices, calibration is performed at 4 points.
!Note!
When applying adhesive varnish/spray to the glass tabletop, always calibrate _after_ application, otherwise the level may “escape” during the glass change. For the best adhesion to printers with a glass table, we can recommend the adhesive adhesive proven over the years - Picaso3D Spray.
The next node that requires frequent attention and care is the printing block. Let's talk about it next.
Cleaning and maintenance of the print unit.
The design of this assembly is such that the lowest point, the tip of the nozzle, is always in contact with the material. On many configurations of its shape, the lower edge, as it were, "smoothes" the layer of material emerging from it. In view of this, it is almost impossible to avoid plastic sticking to the surface of the nozzle, which over time will lead to its contamination, because the nozzle goes through heating / cooling cycles and the adhered plastic caramelizes, forming a kind of "plaque". Also, in case of rare, but inevitable printing defects, or an incorrectly calculated job, large amounts of material can stick to the nozzle, which eventually gets onto the surface of the product during the next prints and spoils it.
To ensure that the nozzle is always clean, after every two or three successful prints, try to wipe the nozzle with non-woven wipes, or a flame-retardant cloth at a time when the nozzle is still hot.
If this is not possible, or the contamination is too great, there is a more radical method that requires removing the nozzle.
There are quite a few ways to clean the removed nozzle and there is no need to describe them all in this material. It is enough to list two main ones: dissolving plastic in a solvent, or burning it with a gas burner.
!ATTENTION!
Any method indicated below requires you to have a prepared room with an exhaust hood and equipped with a fire system. In no case do not carry out these procedures at home. It may be dangerous!
In the first case, the nozzle is lowered into acetone and kept in it for several hours, after which the remaining plastic is manually cleaned off with a stiff brush.
In the second case, you need a gas burner and long thick tweezers / tongs with which you will hold the nozzle. It is necessary to heat it to a slightly reddish state so that all the plastic burns out and cool in warm water. After that, it can be installed back into the printer after drying.
Catalog of FDM 3D printers
Cleaning and maintenance of 3D printer kinematics
The kinematic system of your 3D printer is the most important node that provides most of the print quality of the device. The execution of kinematics, the quality of its units and conditions affect the product no less than the filament itself or the printing unit. Of course, one cannot work without the other, but if you encounter "artifacts" that suddenly appear on the surface of your printouts and are sure that this is not the fault of the print unit or electronics, pay attention to your kinematics.
Different 3D printers are built on different kinematic schemes. They use belts of different lengths, different types of guides and brackets, different types of bearings and spools. However, they have one important thing in common - all of them require cleanliness and timely lubrication. How to lubricate one or another type of guides and their carriages, as a rule, can most often be found in the printer manual, and the procedure itself must be performed when the printer is heavily loaded at least once a month. In addition, the more often the device works, the slower the lubricant becomes unusable, and the more the device is “idle”, the more likely it is that the guides are clogged with dust and the lubricant has lost its properties.
To reapply it, unplug the printer from the mains and manually move the print unit, successively clean the guides from old grease and adhering dirt with a rag or non-woven cloth soaked in gasoline / alcohol. Then wipe dry and apply a little lubricant evenly along the entire length of the guides.
Note that rail guides most often have breathers to inject grease into the body of the bottom bracket, and cylindrical bearings get clogged with grease inside. Of course, it will be best to change the lubricant on the elements with a complete analysis of the kinematics, but for inexperienced users we will not advise this. Just contact the nearest service and trust the professionals.
Catalog of FDM 3D printers
Cleaning and care of the hull.
Depending on the material that the body of your 3D printer is made of, you can choose different cleaning scenarios. For example, if the case is made of dibond, as in PICASO 3D printers, it is enough to use a furniture cleaner and an ordinary antistatic spray. The same should be done with elements made of acrylic / plexiglass.
If your case is plastic or metal, before cleaning you need to make sure that the products you use will not damage the paint and / or plastic, this can be checked by the markings on the bottles of such products.
Why do you need to clean the case at all? A rare reader will ask. And we will answer: for the simple reason that even grounded 3D printers with numerous protection against static and filters on the power cord are not immune from the discharge of accumulated energy through the motherboard or other electronic components, which can disable them. In addition, a dirty case inside and out is simply dangerous from the point of view of spontaneous combustion and not aesthetically pleasing.
And yet, what about electronics?
Electronics compartment, how to maintain?
Through numerous slots in the case and ventilation holes, dust and other debris can enter the electronics compartment. As you might guess, electronics are the brains and nervous system of your device. Without it, your 3D printer is nothing more than a bunch of gears and plastic. By itself, the electronic filling of the device is usually protected from various misfortunes with the help of grounding, various filters, meshes and active blowing, but over time it is still covered with a layer of fine dust or dirt and requires periodic attention.
If your device's electronics bay is difficult to access and requires the floor of the printer to be disassembled for inspection/cleaning, we do not recommend this. If the case requires unscrewing one / two covers, regularly check the condition of the system and, if necessary, blow it with compressed air. But never vacuum! Ordinary household vacuum cleaners can be compared to huge magnets that accumulate static on their bodies, with direct contact with which a spark can run through your electronic components and boards in an unplanned scenario and simply damage them.
The best way to clean the dust compartment is to manually clean the fan blades and blow out the components with compressed air. In this case, it is desirable to do the whole process under a good hood or in the open air.
Conclusion.
Like any other complex technical device, a 3D printer requires regular care and maintenance. It may include both periodic full inspections, analysis with the elimination of minor problems, as well as simple cleaning of rubbing / heating elements and caring for the appearance of the device.
In our article, we did not address issues related to the replacement of consumable spare parts and cases of device breakdowns. Here are basic tips for beginners on how to use a 3D printer correctly and what you need to do to ensure that it serves you for a long time.
More substantive issues regarding maintenance and replacement of consumables, we will discuss in future articles, if your response is positive.
And that's all we have! We hope the article was useful for you!
To purchase an FDM 3D printer from popular manufacturers, ask a question, or make an offer, you can contact us:
- Email: [email protected]
- Phone: 8(800)775-86-69
- Or on our website: https://3dtool.ru
Don't forget to subscribe to our YouTube channel:
Join our groups in social networks:
In contact with
How to calibrate a 3D printer?・Cults
Since their invention, 3D printers have proven that printing many objects is much more efficient than conventional manufacturing techniques. However, calibration is required for optimal performance when printing 3D parts. Many 3D printer owners find this procedure tedious and time-consuming. However, it is much easier than it seems if you know the right tips on how to do it. Cults3D presents the various steps you need to follow in order to successfully calibrate your printer.
To ensure that the odds are in your favor when calibrating your 3D printer, certain precautions must be taken beforehand. Printer calibration is indeed an operation that requires rigor, but not only. You also need to make sure that your 3D printer is perfectly clean.
To easily calibrate your 3D printer, it is important to take the necessary time to clean the printer tray and existing nozzles. Calibration may be distorted if there is filament residue or print marks on the plate or nozzle. Cleaning the 3D printer nozzle allows to limit the effect of underextrusion and recurring problems when changing materials.
In addition to ensuring that the 3D printer calibration runs smoothly, be sure to check that the mounting screws are properly tightened. It happens that on some models of 3D printers, the screws loosen. So it's important to take a few minutes to check the for any play between the various parts of your 3D printer. By doing so, you give yourself the best chance of getting your future prints right. If so, feel free to visit our website. You will find the best printable STL files to get started with your 3D printer in complete peace of mind.
Calibrating the 3D printer plate is the first step in this maintenance procedure. To ensure excellent print quality on a 3D printer, it must, like the following steps, be performed correctly. Plate calibration guarantees the success of the first print layer. To do this, you need to perfectly align the plane. In other words, the printer plate must be flat with respect to nozzle movements. It is also important to adjust the distance between the roller and the nozzle .
Calibration of the plate that supports the 3D printer can be manual or automatic. This procedure is slightly different depending on the printer model. Manual printer calibration is carried out using 4 screws located at the four corners of your machine's plate. The challenge is to find the optimal height ratio between these four screws for 3D printer plate alignment. To achieve this, make sure you repeat the following steps at least once in the center and four corners of the 3D printer tray.
First place a piece of paper between the nozzle and printer plate. Then move the tray up and down, being careful not to get paper stuck under the nozzle. Once the paper can be moved by light friction on the nozzle, you can move on to the next checkpoint . Some 3D printers, such as the Raise3D E2, have built-in automatic tray alignment systems.
The printing temperature of a 3D printer is of great importance for the manufacture of your parts. However, it is relatively complex and depends on the material you want to print. This is because the print temperature of standard PLA filament varies between different brands of 3D printers. The temperature range for printing is usually specified by each manufacturer on spools of filament. The temperature of the 3D printer plate is also an important parameter to consider. This allows eliminate the risk of re-peeling on some technical materials such as ABS thread.
The 3D printer's extruder is the part that spits out the hot filament. This may be due to two main problems. Over extrusion when the filament is used a lot, and under extrusion when the filament is used little. It is also necessary to take into account the thickness of the filament passing through the nozzle of the 3D printer. However, it is relatively easy to fix if it is out of order. To find out if your 3D printer is under or over extruding, you'll need a ruler, tape measure, or compass. Start by doing two marks 100 mm apart on the filament, then align the bottom mark with the top of the extruder. Then set the extrusion length to 100 in the 3D printer software and run the extrusion command.
Calibrating 3D printers also requires checking the accuracy of their measurements . To do this, you can use a piece of tape to mark two areas 100mm apart on the printer's base plate. On one of them, install the nozzle and ask the printer to move 100 mm in the desired direction. Then check that your device is exactly on the tape.
Measurements are rarely correct on the first try. Even a difference of tenths of a millimeter can greatly affect the quality of subsequent prints. 3D printers are precision machines and their motors must be calibrated to ensure accuracy. For the X and Y axes , adjust the values of M92 until you fix the offset at exactly 100mm.
A ruler must be used to calibrate the Z motor of 3D printers. Place the ruler vertically on the printing plate and move the Z axis by 100mm. Then, as in the case of engines X and Y, , change the values of M92 so that the travel is always 100 mm.