3D print finishing kit
MODIFI3D PRO | 3D Print Finishing Tool
MODIFI3D PRO
3D FilaPrint
Unit 1 Carlton Court, Grainger Road
Southend On Sea
Essex - S2 5BZ
United Kingdom
www.3dfilaprint.com
Phone: 01702 611027
MODIFI3D PRO
Daemon 3D Print
Unit 19
Barnwell Business Park
Cambridge - CB5 8UZ
United Kingdom
www.daemon3dprint.com
Phone: 01223 213756
MODIFI3D PRO
ooznest
The Yard, Old Crown Lane
Brentwood
Essex - CM14 5TA
United Kingdom
www.ooznest.co.uk
Phone: 01277 523171
STOCKISTS COMING SOON
Can't find a stockist in your area? Tell your local 3D Printing Store about MODIFI3D PRO.
If you are interested in stocking MODIFI3D PRO please email [email protected].
MODIFI3D PRO
3D Jake
niceshops GmbH
Lugitschstrasse 4
8330 Feldbach
Austria
www.3djake.com
Phone: -
MODIFI3D PRO
3dprinthings / MUYLLE
Nieuwstraat 8
9840 De Pinte
Belgium
www. 3dprinthings.eu
Phone: +32 471 83 05 53
MODIFI3D PRO
3Dwiser s.r.o.
Podebradska 58/186
198 00 Praha 9
Czech Republic
www.3dwiser.com
Phone: +420 778 530 800
MODIFI3D PRO
Imprimante 3D France
22 bis rue de la voie des bans
95100 ARGENTEUIL
France
www.imprimante3dfrance.com
Phone: (33) 1 40 85 02 28
MODIFI3D PRO
TIPS
3Dmensionals
Kleiststrasse 7
50859 Koln
Germany
www.3dmensionals.de
Phone: 02234-27660-11
MODIFI3D PRO
DHM projects
handicraft area
via sixth street 6 Compass
30010 Campolongo Maggiore
Venice, Italy
www.dhm-online.com
Phone: 0492701149
MODIFI3D PRO
123-3D.nl
Nieuw Walden 56
1394 PC Nederhorst den Berg
Netherlands
www.123-3d.nl
Phone: +31 (0) 294-787127
MODIFI3D PRO
Ponto Z
Rua 21 de Agosto, 199
3510-120 Viseu
Portugal
www. ponto-z.pt
Phone: +351 232 405 565
MODIFI3D PRO
RepRap PT
Praça dos Açores n1
Loja 2.02
2735-470 Cacém
Portugal
www.reprap.pt
Phone: +351 963 885 566
MODIFI3D PRO
TIPS
FILAMENT2PRINT
Poligono Porto Do Molle
Nave 7A
36350-Nigran (Pontevedra)
Spain
www.filament2print.com
Phone: 881 981 562
MODIFI3D PRO
TRESDENOU
Pujades, 184
08005 Barcelona
Spain
www.tresdenou.com
Phone: +34 932 696 961
MODIFI3D PRO
3D-Printerstore.ch
except gmbh
Weststr. 15
CH-8570 Weinfelden
Switzerland
www.3d-printerstore.ch
Phone: +41 (0) 71 620 32 38
MODIFI3D PRO
TIPS
3DWare
TGS Trading GmbH
Kreuzstrasse 10
CH-8635 Durnten
Switzerland
www.3dware.ch
Phone: +41 43 501 11 33
STOCKISTS COMING SOON
Can't find a stockist in your area? Tell your local 3D Printing Store about MODIFI3D PRO.
If you are interested in stocking MODIFI3D PRO please email [email protected].
MODIFI3D PRO
TIPS
Printed Solid
2850 Ogletown Rd
Newark
Delaware 19713
USA
www.printedsolid.com
Phone: 302-439-0098
MODIFI3D PRO
TIPS
3D Universe
2833 Waterfront Ave.
Algonquin
Illinois 60102
USA
www.shop3duniverse.com
Phone: (800) 689-4344
MODIFI3D PRO
TIPS
3DMAKERWORLD INC
11306 Strang Line Rd
Lenexa
Kansas 66215
USA
www.3dmakerworld.com
Phone: (913) 897-8359
MODIFI3D PRO
Digit Makers
555 Edward Ave
Unit 12 Richmond Hill
Ontario L4C5K6
Canada
www.digitmakers.ca
Phone: +1(888) 635-7113
STOCKISTS COMING SOON
Can't find a stockist in your area? Tell your local 3D Printing Store about MODIFI3D PRO.
If you are interested in stocking MODIFI3D PRO please email modifi3dpro@steelmans3d. com.
com.
MODIFI3D PRO
TIPS
eBay
stores.ebay.co.uk
STOCKISTS COMING SOON
Can't find a stockist in your area? Tell your local 3D Printing Store about MODIFI3D PRO.
If you are interested in stocking MODIFI3D PRO please email [email protected].
MODIFI3D PRO
TIPS
Bilby 3D - Sydney Store
Unit 25, 566 Gardeners Rd
Alexandria
NSW 2015
Australia
www.bilby3d.com.au
Phone: 02 8197 3928 (Sydney)
MODIFI3D PRO
TIPS
Bilby 3D - Brisbane Store
Shop 2, 474 Upper Edward St
Spring Hill
QLD 4000
Australia
www.bilby3d.com.au
Phone: 07 3135 9810 (Brisbane)
MODIFI3D PRO
TIPS
Bilby 3D - Melbourne
Factory A5, 2 Westall Rd
Clayton
VIC 3168
Australia
www.bilby3d.com.au
Phone: 03 8080 1200 (Melbourne)
STOCKISTS COMING SOON
Can't find a stockist in your area? Tell your local 3D Printing Store about MODIFI3D PRO.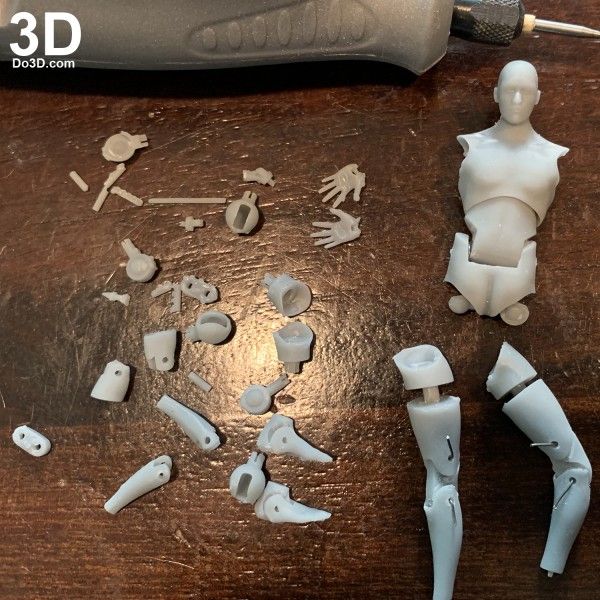
If you are interested in stocking MODIFI3D PRO please email [email protected].
MODIFI3D PRO
TIPS
eBay
stores.ebay.co.uk
STOCKISTS COMING SOON
Can't find a stockist in your area? Tell your local 3D Printing Store about MODIFI3D PRO.
If you are interested in stocking MODIFI3D PRO please email [email protected].
MODIFI3D PRO
TIPS
Spatial Dynamics
Block 912 Tampines Street 91
#02-121
Singapore 520912
Republic of Singapore
www.spatial-dynamics.co
Phone: (+65) 9 682 0581
MODIFI3D PRO
TIPS
Le3B (my3dp)
7F. No.685 Zhongzheng Rd.
Taoyuan Dist.
Taoyuan City 33047
Taiwan
www.my3dp.xyz
Phone: +886-918-494-343
STOCKISTS COMING SOON
Can't find a stockist in your area? Tell your local 3D Printing Store about MODIFI3D PRO.
If you are interested in stocking MODIFI3D PRO please email modifi3dpro@steelmans3d. com.
com.
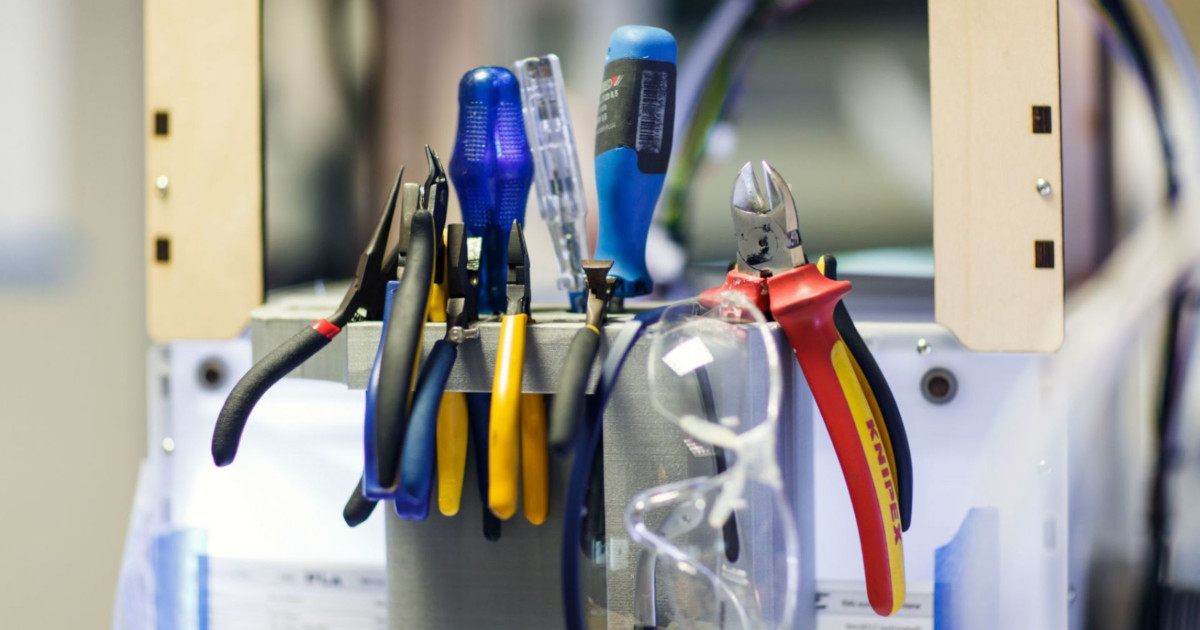
Essential tools for every 3D printing professional
Lana Lozova15 December 2020
News
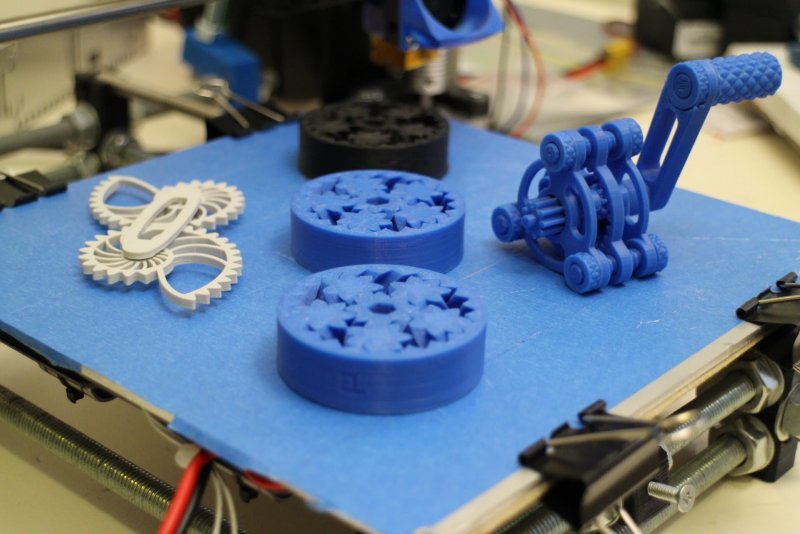
To get the best from your 3D printer, you need to be armed with the right tools for the job. From removing support material to improving build plate adhesion, here’s a list of must-have tools, all designed to make your life easier.
The essential 3D printer owner’s toolkit
There are certain tools that most 3D printer users possess. These vital pieces of equipment ensure that your prints run smoothly, and that you get the best results possible. You don’t necessarily need to invest in them all at once – but over time, it’s likely you’ll end up adding them all to your tool collection.
Glue stick
Build plate adhesion is an important part of creating great 3D prints. Glue sticks come in particularly handy when you’re trying to get your print to stick – simply cover your print bed with soluble glue, and the adhesion will improve immediately. Some people favor hair spray, but we’d personally recommend glue, as you can be more precise with the application, plus there’s less risk of accidentally spraying the gantry or moving parts. For material-specific adhesion guidelines, check out this support article.
Spatula or palette knife
On occasion, you might find that your 3D print has stuck a bit too well to your build plate. When this happens, a spatula or palette knife normally solves the problem. All you’ll need to do is ease it gently under the print and carefully lift it up.
Over time, you’ll probably get a collection of different palette knives. To start with, we’d recommend getting a palette knife that’s stiff, and one that’s flexible. Titan’s stainless steel scrapers have a tapered tip, which we find works particularly well.
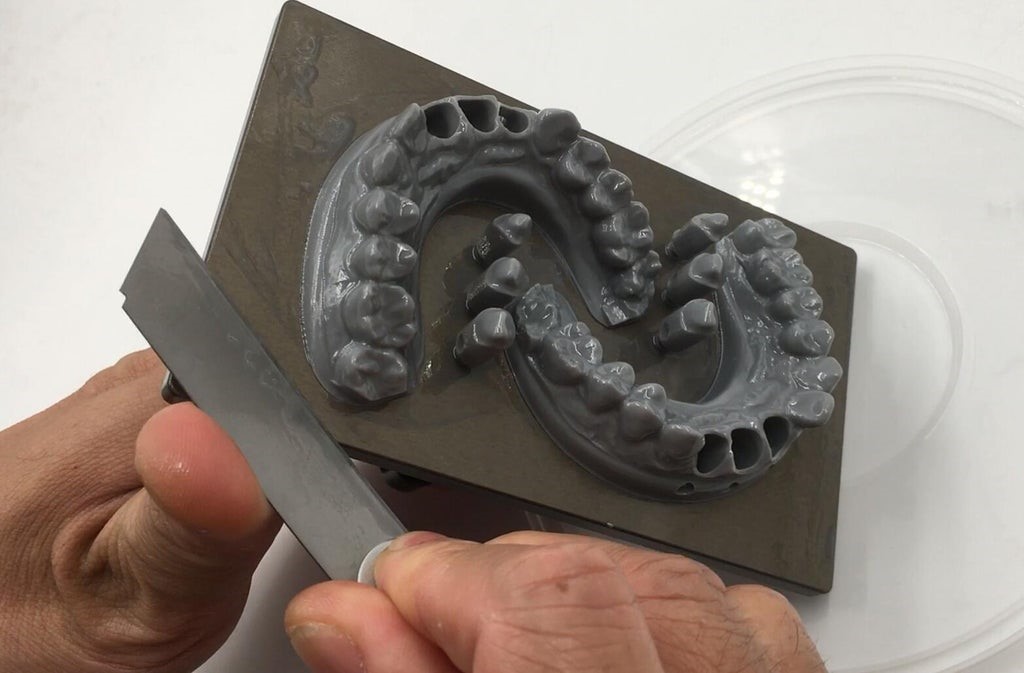
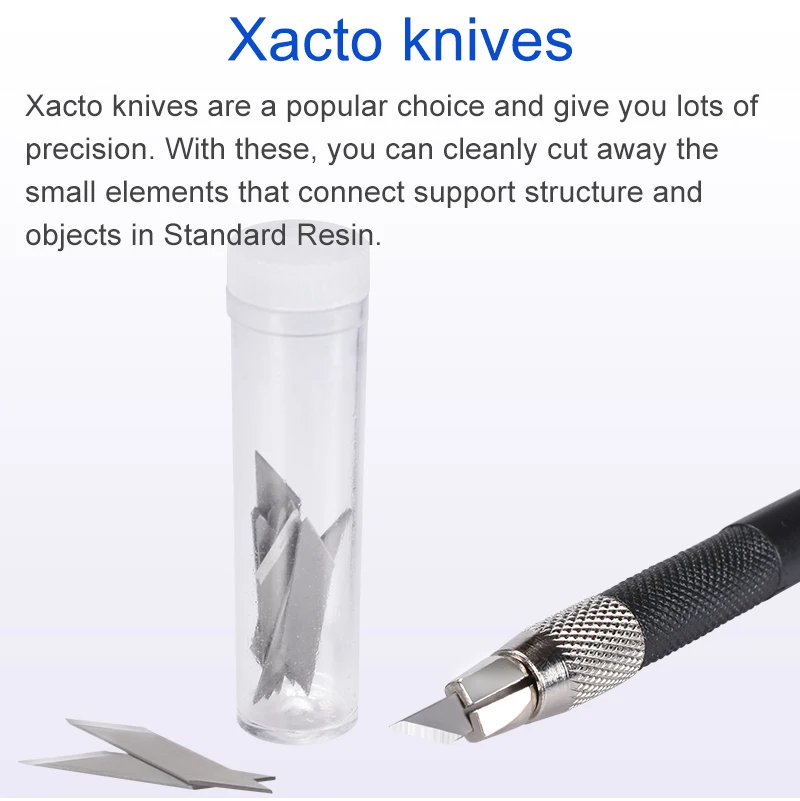
Deburring tool / knife and cutting mat
A deburring tool is great for cleaning up modeled holes, and for removing small pieces of plastic from your printed parts, especially brim. You’ll also need knives to tidy up your prints, as they seldom turn out completely perfect. A deft flick of the knife can remove unsightly plastic blobs or filament strings, making the end result look smoother and cleaner. We recommend investing in a knife with exchangeable blades (such as an X-Acto knife), and a cutting mat too.
Pliers
Pliers have a variety of uses, from print core maintenance to fixing your 3D printer. Look for a good quality pair of pliers with a rubberized, slip-resistant grip. You’re likely to need more than one type – we’d recommend needle nose and wire-cutting pliers (which are particularly useful for snipping away support material or trimming filament).
Blue tape
Masking tape is one of the most basic tools you’re likely to own, and also one of the most widely used. Adding masking tape to the print bed is a simple, effective way to help your 3D printed object adhere to the print bed. It also makes removing the finished print far easier, and it protects your print bed from scratches.
Make sure you choose masking tape with a width of at least 50mm (2 inches). When the tape’s wide, it means you’ll need fewer strips to cover your print bed – something you’ll be grateful for if you need to resurface your print bed on a regular basis!
Magnalube and Unilube
Sometimes, you’ll need to lubricate the X and Y axles, just to ensure they keep running smoothly. The best lubricant to use is Unilube, and all it takes is a single drop to resolve any issues with dryness. For the Z trapezoidal leadscrew, use Magnalube.
It’s important not to use WD40, as this affects the axle coating and can cause damage to your printer. Read more about it here.
Digital caliper
A digital caliper has many applications in 3D printing. It’s useful for checking the precision of your prints, and you can also use it to dimension parts to replicate in CAD software. Calipers are also handy for checking filament measurements – as filaments aren’t often manufactured to exact measurements. Simply measure it at a few different positions, average the readings, then adjust the filament diameter in your slicing software if necessary.
Analogue calipers work too, but don’t offer the same precision.
Tweezers
Tweezers are useful to have to hand whenever you’re printing. They’re great for plucking oozing filament from the extruder nozzle before it starts printing (which means no more burnt fingers). They’re also handy for cleaning up your print afterwards. We’d recommend purchasing a set of tweezers in various shapes and sizes, to ensure you’re covered for every eventuality.
Sandpaper
It’s a good idea to have a selection of sandpaper in a variety of different grits. These will all prove useful when you’re post-processing your 3D prints. Our recommendation? Have a selection from coarse (220 grit) to fine (1000 grit), and invest in well-known brands such as 3M, as they’re likely to last you longer than cheaper, inferior types.
Screwdrivers / hex key screwdrivers
Most people already own a good selection of screwdrivers and hex keys. If you don’t, it’s worthwhile getting some, as you’ll periodically need to re-tighten the gantry screws and the stepper motors of your 3D printer. Hex nuts and bolts are widely used in 3D printer assembly, so it’s also a wise idea to have a set of hex key screwdrivers and wrenches.
Adhesion sheets
Adhesion sheets are compatible with most materials, and boost adhesion to the build plate. They’re a good replacement for a glue stick, as they’re easy to remove and can be used multiple times. Another advantage is that they’ve been specially developed to cope with high temperatures, unlike masking tape. However, it’s important to check that the sheet is applied correctly, as air bubbles mean you won’t have a flat printing surface. You can find out how to apply the sheet here.
Desiccant and re-sealable bags
3D printer filament absorbs water over time. This causes degradation, that eventually leads to complications during printing. To avoid water absorption, simply store your filament in a sealed container or plastic bag, and add some desiccant to ensure all moisture is removed from the environment. Silica gel works perfectly. Here are some more storage recommendations to help you. For a more automated solution, the Ultimaker S5 Material Station was developed to store and deliver material in optimal conditions for 3D printing.
Permanent marker
Permanent markers (such as Sharpies) are useful for marking 3D prints, especially when you’re running multiple prints of the same model, but with different slicer settings. Simply note down the sequence and settings for each print on the finished objects, and you’ll be able to tell them apart later on. Even leading architects do this: The team at Killa Design draw on their models to note where their design can be improved.
Advanced 3D Printing Kit
The Advanced 3D Printing Kit for Ultimaker 2+ contains two 0.4mm nozzles, two TFM couplers, 25 adhesion sheets and a door. These keep your 3D printer running smoothly for longer. The nozzles and TFM couplers are convenient replacements, the adhesion sheets are great for keeping your models in position, and the door keeps warmth inside the printer, which prevents certain materials from warping and delaminating. Find out more here.
Other useful tools
The following tools might not be as essential as the list above, but they’re certainly useful to have around. Obviously, it depends on what you’ll be using your 3D printer for, as some are more suited to particular jobs than others.
Flashlight.
 If your 3D printer already has integrated lighting, you won’t need this. Otherwise, it’s a useful tool to have, even in well-lit areas. The inside of an enclosed 3D printer can be dark, which makes it different to judge print quality on detailed models. A compact LED light works perfectly.
Paper towels. Paper towels are always useful for cleaning and drying your build plate, and best of all, they’re cheap too!
Pencils and paper. You’ll inevitably need to jot down dimensions and make sketches while printing, so it’s a good idea to have paper and pencils to hand at all times.
Wire cutter. Wire cutters are excellent for removing support and creating a cleaner, neater finish.
Dremel. A Dremel is a handheld, high-speed rotary tool, which features a range of accessories. These accessories let you undertake a variety of applications, including cutting, sanding, carving and grinding. When you’re 3D printing, it can be used to remove support material, sand down rough edges, or polish 3D prints made from metal-containing filaments.
Extra filament. It’s always useful to have an additional filament spool to hand. A spool lasts a while, but won’t keep you printing forever! Also, it’s nice to have a variety to choose from, depending on your requirements.
Extra glass plate. If you are printing 24/7, having a spare glass plate could really speed up your workflow. It allows you to quickly swap glass plates when starting a new print, instead of having to wait until the build plate has cooled down to remove the print.
Dissolving kit (bucket of water and pump). You’ll need to be able to remove your water-soluble PVA after printing – and a bucket of water does the job nicely! A pump ensures PVA supports dissolve faster.
With the right tools, the chances of producing a flawless 3D print are greatly increased. A 3D printer and a computer do most of the hard work, but it’s the tools that polish and perfect the models afterwards!
Show off just how powerful 3D printing is at work with this expert guide. Insights include:
• How to get buy-in from everyone in the office
• Important and practical setup considerations
• 3 workflow options that will save development time
• And lots more handy tips and tricks!
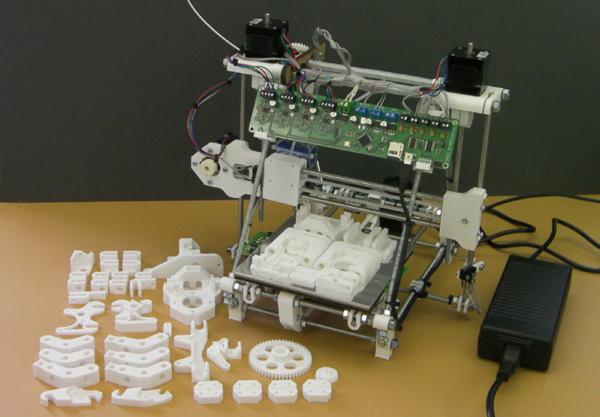
Post-processing of 3D models
Hello everyone, friends! 3DTool is with you!
In this article, we will tell you about post-processing of products printed on FDM 3D printer . Basically, the article is designed for beginners and does not contain any revolutionary revelations. However, we tried to convey our experience in the most accessible way and we hope it will be useful to you.
We will talk about the tools, methods and techniques that we ourselves use when fulfilling orders and in general practice. An example would be a project to print a fake spear of a character from a computer game for a costume for a cosplay festival. We will follow the whole path from the selection of print parameters to the final painting of the elements of the spear and along the way we will analyze several related issues.
Well, let's go!
Types and types of processing of printed products.
To begin with, let's go through the main known types of post-processing of printed products available at the moment.
- Hand processed.
A type of treatment that uses some kind of abrasive material to level the surface. For example, sandpaper and its derivatives.
- Automated machining. (Tumbling)
A type of processing that uses special devices. The most common type of this type of treatment is tumbling, which is based on surface treatment by friction with abrasive granules, the so-called. "bodies". This type of processing is mainly used for metal products, but it is also suitable for plastic.
- Manual chemical treatment.
Manual surface treatment of an object with a suitable solvent, until a smooth and uniform surface is obtained, in which the reagent is applied by brush, spray, or as steam using a cold or hot "steam bath".
- Automatic chemical treatment.
Automatic vaporization of the solvent in accordance with the product material in special plants that precisely control the process.
- Manual and automated temperature treatment.
Types of processing that use the boundary, or melting temperature of the material to smooth the surface. Usually it uses building hair dryers or stoves. In this article, we will not touch on this type of processing.
In our practice, we most often use a combination of manual mechanical and manual chemical processing, which will be discussed further.
Necessary tools.
To achieve the best result, we have compiled our own list of necessary tools, the presence of which makes the process more convenient and faster.
For high-quality post-processing, we need the following tools and materials.
(The list is advisory and for "home" use, much of this equipment can be skipped. For example, a compressor and a spray gun.)
- - Belt sander.
- - Dremel with attachments (drill) and flexible supply.
- - Compressor with blow gun and spray gun.
- - Building dryer.
- - Medium to fine grit sandpaper. 250-400.
- - Solvent resistant brush.
- - Acetone resistant spray gun.
- - Acetone or other solvent (more on this later)
- - Solvent resistant container.
- - Covering primer/primer for plastic (Kudo, Motip, Maxi Color cans)
- - Car putty, for plastic. (Duocomponent will do, you can use epoxy if you have a good one)
- - Gloves and respirator.
Safety
Be aware that fine dust from plastic, acetone and other solvent fumes, paint, and sharp objects such as spatulas and knives are potentially hazardous tools and must be handled safely.
These are not empty words. Even in our practice (mine specifically, approx. Ed) there were poisonings and unpleasant consequences of neglecting the rules. And repeating them (the rules) again will not be superfluous.
To begin with, carry out all processing work in a spacious, ventilated area. If the room is not equipped with a separate hood, open windows or doors and ensure free air flow. A high concentration of acetone vapor can cause dizziness and poisoning.
Leave paint and solvent cans out of direct sunlight. When heating paint cans, keep an eye on the temperature and the time the can is in the water. Do not heat cans or keep solvents near open flames. A lighter and a soldering torch are also such sources.
Wear a respirator and goggles before working with abrasives and applying paint. The respirator should not allow small particles to pass through and cover at least half of the face.
And remember that any tool requires respect and attention.
A selection of print options and media.
So, back to the beginning.
You have an idea to print and process a certain item. Let's agree that this item also requires subsequent assembly with seam processing. As a rule, this is the most frequent case for small workshops and home 3D print . What do we need to do first?
To begin with, let's divide our 3D model into segments that fit in the printer's working area and determine how our object will be assembled after printing.
The illustration clearly shows the stages of working with 3D model . Retopology, simplification of overly complex elements and placement of assembly locks.
Next, let's define the surface roughness. Tobish with layer thickness (height). It will directly affect the printing time and subsequent surface treatment. For example, we found out experimentally that 200 - 250 micron , the most optimal size when considering the use of sandpaper of the appropriate grit. Movements across the layer arrangement make deep grooves and actively level the surface.
Since the processing will be carried out by grinding, the walls of the product must be sufficiently thick and strong. Usually, the parameter in 1 - 1.2 mm is enough. We printed our lance on 15% infill and 1mm wall thickness on 0.4 nozzle.
An important stage on which all subsequent work depends is the choice of material for 3D printing .
Because We use Raise 3D and Picaso Designer X 3D printers, it is more convenient for us to print from ABS plastic. Of all the existing filaments at the moment, it is the most understandable and simplest to process. PLA is also suitable, but there is not much desire to mess with more toxic than Acetone - Dichloromethane. However, even with it, our method of working does not change much, except that applying a solvent to the surface will be a little more difficult, because. it evaporates faster.
Surface preparation.
So. Trial and error has shown that for large surfaces, the combined method works best.
To begin with, we soak the brush in the solvent, lightly wipe off the excess liquid on the walls of the container and with a slightly damp brush pass quickly across the layers over the entire surface of the model.
This will smooth out especially strong differences and fuse the upper layers together, which will have a good effect on painting in the future, because. excess pores will be closed. The movements should be even, with an overlap of about 10% determined by eye. The main thing is that there are no gaps between the strips of the applied solvent.
Try not to touch the freshly treated surface with body parts and third-party objects, softened plastic gets dirty very well and forms cavities when touched.
Immediately after applying the thinner, we need a compressor, or a strong current of cool air. The task is to dry the molten layer of the product. This should only be done with cold or cool air so that the acetone leaves the surface of the object faster and does not swell with bubbles. If you use a hair dryer or hot air, the acetone will evaporate too quickly and the surface will swell and the effect will be lost.
If done correctly, the surface should look something like this.
Now let's take a coarser sandpaper and cut it, achieving a comfortable grip with the hand. Next, we'll start sanding across the layers.
It is necessary to roughly equalize the depth of the relief of the layers with the grooves left by the sandpaper.
After rough sanding, take a smaller grit paper and sand in circular motions where possible to pre-finish the surface.
If the parts are very large, a belt sander is suitable, which allows you to process large surfaces several times faster. Luckily, the spear project didn't need it.
In total, about 100 - 200 microns of surface should be removed, which forms a sufficiently even surface that allows you to proceed to the next step.
Do not forget to assemble and glue the object before applying the primer. For ABS plastic we use two-component epoxy adhesive Bison Epoxy 5 minutes . He showed himself the best.
In our project, we used grooves to center and fasten objects together, manually laying them into the geometry. And the whole spear was assembled on two aluminum pipes of different diameters, in some places
Ground application and development.
The next step after surface preparation is priming and development.
Developing means the application of one or two layers of primer so that all scratches and flaws invisible on the plastic appear against the matte background of the primer.
The photo clearly shows how the soil has opened a seemingly even surface of the seam. There is still work to be done with her. We take our two-component putty and carefully remove the surface by grinding after drying.
After that, apply the primer again and make sure that the surface is even and ready for painting.
Final painting.
It is carried out in two or three stages. First you need to put the first coat of paint, the color of which will be dominant. If you are using kudo sprays, it is best to apply 3-4 coats with a drying period of about 15 minutes between coats. Further, the parts should stand for at least 4 - 5 hours until completely dry. At a temperature of about 20 - 24 degrees.
After that, you can mask the elements that require painting with a different color and apply it already.
It is also recommended to apply at least 4 layers with the same drying time and complete drying.
The final stage of painting will be the application of varnish in 4 - 5 layers. We use regular Kudo clear polish. It is resistant to abrasion and smoothes the surface well.
As a result, after applying “combat scratches” with a brush to make the spear look more natural, this beauty is obtained.
And that's all we have. 3DTool was with you, see you in the next articles!
Buy Raylogic 1610 V 12 Lite 9 laser engraver0006, or any other CNC machine, or 3D printer , you can right now on our website: https://3dtool.ru/product/lazernyy_graver_raylogic_v12_1610_layt/?utm_source=3dtoday
If you need help, purchase advice, or other questions, you can contact our managers:
By mail: [email protected]
Or by phone: 8(800) 775-86-69
Do not forget to subscribe to our YouTube channel:
And to our groups in social networks:
Our website
INSTAGRAM
VKontakte
Facebook
Post-processing of 3D printed parts (PLA, ABS, SBS, PETG)
Table of Contents
- Remove Supports
- Removing Soluble Supports
- Sanding
- Cold welding
- Filling voids
- Polishing
- Priming and painting
- Pair smoothing
- Epoxy coating
- Metallization
Introduction
FDM technology is best suited for fast, low-budget prototyping. Layer lines are usually visible in FDM prints, so post-processing is essential if a smooth surface is to be achieved. Some post-processing techniques can also make a print more durable by changing the degree of its elastic properties, density, structural and textural features.
In this article, we will discuss the most common post-processing techniques in FDM.
Post-processed FDM prints (left to right): cold welded, void filled, raw, sanded, polished, painted and epoxy coated. Photo 3dhubs.com
Removing Supports
Removing supports is usually the first step in post-processing for any 3D printing technology that uses them. In general, props can be divided into two categories: standard and soluble. Unlike other post-processing methods discussed in this article, the removal of props is mandatory and does not result in improved surface quality.
Initial printout with props, poor prop removal, good prop removal. photo 3dhubs.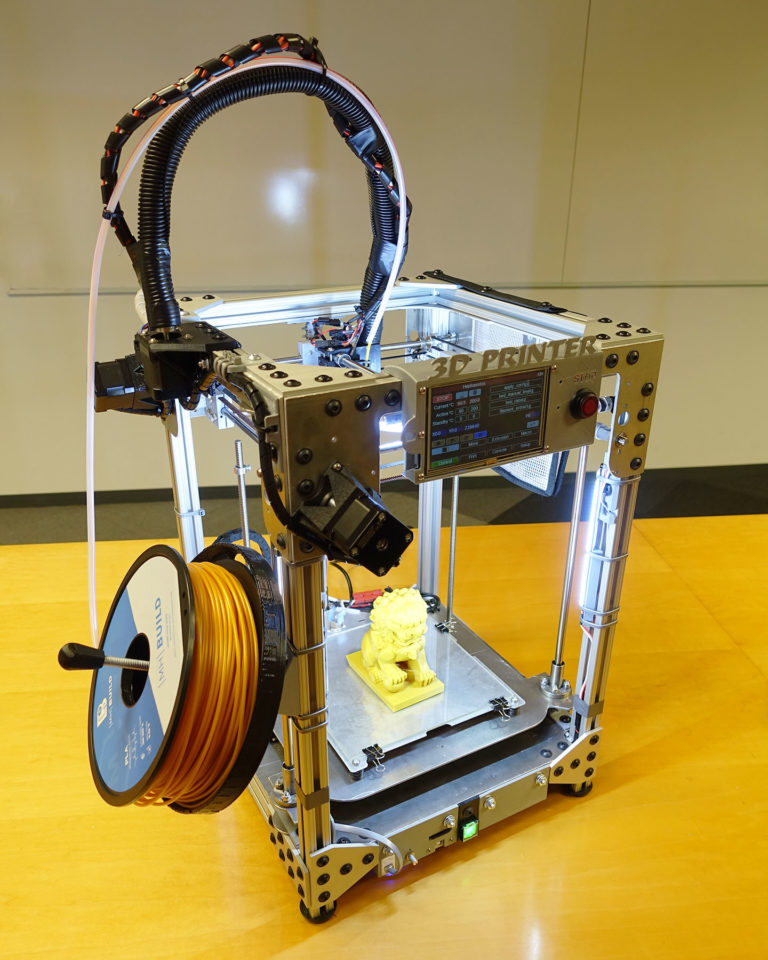 com
com
Removal of standard props
Tools
- Wire cutters, needle nose pliers, tongs
- Toothbrush, brush
| Finishing | ★ ☆ ☆ ☆ ☆ |
| Approvals | ★ ★ ☆ ☆ ☆ |
| Speed | ★ ★ ★ ★ ☆ |
| Suitable for | all thermoplastics FDM |
Process
Normally, backups come off the printout without problems, and hard-to-reach places (such as holes or cavities) can be cleaned of backup material with an old toothbrush. Proper placement of support structures and correct print orientation can significantly reduce the negative impact of supports on how the final printout will look.
Pluses
- Does not change the overall geometry of the part.
- The process is very fast.
Cons
- Does not remove layer lines, scratches or other surface defects.
- If excess material or marks remain from the support structure, print accuracy and appearance suffer.
Soluble Support Removal
Instrumentation
- Solvent resistant container
- Thinner
- Ultrasonic cleaner (optional)
| Finishing | ★ ★ ★ ☆ ☆ |
| Approvals | ★ ★ ☆ ☆ ☆ |
| Speed | ★ ★ ★ ★ ☆ |
| Suitable for | all thermoplastics FDM |
Process
Soluble support standard materials are removed from the printout by immersing it in a reservoir of the appropriate solvent. Supports are usually printed:
- HIPS (usually with ABS)
- PVA (usually with PLA)
A glass container like a preservation jar is fine. Any non-porous vessel is suitable for water treatment. To quickly remove props from HIPS/ABS printouts, you will need a solution of equal parts D-limonene and isopropyl alcohol. Many other support structure materials such as PVA (with PLA) dissolve in normal water.
Pro Tips
Use an ultrasonic cleaner to shorten the solution time and change the solvent as it becomes saturated. A warm (not hot) solution works faster - heating is useful if there is no cleaner.
Pluses
- Complex geometry is allowed for which the standard method of removing supports is not possible.
- Smooth surface at the support points.
Cons
- Improper dissolution of the props can cause discoloration and skewed printouts.
- Does not remove layer lines, scratches or other surface imperfections.
- May cause small holes or holes if soluble material seeps into the object during printing.
Skok
SHIKS SHIP SHIP ABS ABS ABS PROBECTION
Instrumentation
- E END1 with grain
on 150, 220, 400, 1000, 1000 and 2000 - Cleaning cloth
- Toothbrush
- Soap
- Face mask
| Finishing | ★ ★ ★ ★ ☆ |
| Approvals | ★ ★ ★ ☆ ☆ |
| Speed | ★ ★ ☆ ☆ ☆ |
| Suitable for | all thermoplastics FDM |
Process
After the props have been removed or dissolved, sanding can be done to smooth the part and remove any obvious defects such as blots or marks from the props. Which sandpaper to start with depends on the thickness of the layer and the quality of the print: for layers of 200 microns or less, or for prints without blotches, you can start with sandpaper at P150. If there are blobs visible to the naked eye, or the object is printed with a layer thickness of 300 microns or more, stripping should begin with P100.
The process can be continued up to P2000 grit (one approach is to go to 220, then 400, 600, 1000 and finally 2000). Wet sanding is recommended from the very beginning to the very end - this will avoid excessive friction, which can lead to an increase in temperature and damage the object, as well as contaminate the sandpaper itself. Between sanding, the printout should be cleaned with a toothbrush and washed with soapy water, then wiped with a cloth to remove dust and prevent it from sticking together. Even P5000 can be sanded to achieve a smooth, shiny FDM part.
Pro Tricks
Always sand in small circular motions - evenly over the entire surface of the part. It may be tempting to sand perpendicular to the layers, or even parallel, but this can lead to gouges. If the part is discolored or has a lot of scratches after sanding, it can be heated a little to soften the surface and allow some defects to smooth out.
Pros
- An exceptionally smooth surface is obtained.
- Further post-processing (painting, polishing, smoothing and epoxy coating) is greatly facilitated.
Cons
- Not recommended for double or single shell parts as sanding may damage the printout.
- The process is difficult in the case of sophisticated surfaces and the presence of small details in the object.
- If the grinding is done too aggressively and too much material is removed, the appearance of the part can be affected. Acetone for ABS. Dichloromethane for PLA, ABS
- Sponge Applicator
| Finishing | ★ ★ ☆ ☆ ☆ |
| Approvals | ★ ★ ☆ ☆ ☆ |
| Speed | ★ ★ ★ ★ ★ |
| Suitable for | all thermoplastics FDM |
Process
If the size of the object exceeds the capacity of the printer, the object is printed in parts and then assembled. In the case of PLA and some other materials, assembly can be done with Dichloromethane or a suitable adhesive (the choice of adhesive depends on the plastic). In the case of ABS, it is possible to "weld" with acetone. The mating surfaces should be slightly moistened with acetone and squeezed tightly or clamped and held until most of the acetone has evaporated. So the parts will be held together by chemical bonds.
Pro Tricks
Increasing the surface area of the acetone contact increases bond strength. Tongue-and-groove to help.
Pros
- Acetone does not change surface color as much as most adhesives.
- After drying, the compound acquires the properties of ABS, which makes further processing easier and more uniform.
Cons
- The bonding of ABS parts by cold "welding" with acetone is not as strong as if the part were printed as a whole.
- Excessive use of acetone can dissolve the part and affect final appearance and tolerances.
Void Fill
Black ABS Print, Filled and Sanded
Tool Kit
- Epoxy (for small voids only)
- Automotive body filler (for large voids and joints)
- ABS filament and acetone (only for small voids in ABS printouts)
| Finishing | ★ ★ ☆ ☆ ☆ |
| Approvals | ★ ★ ★ ☆ ☆ |
| Speed | ★ ★ ★ ☆ ☆ |
| Suitable for | all thermoplastics FDM |
Process
Unusual voids may come out after the part has been ground or the soluble props have been dissolved. These voids are formed during printing when the layers are incomplete due to any restrictions on the trajectory of the print head, which is often inevitable. Small gaps and voids can be easily filled with epoxy and no additional treatment is required in this case. Larger gaps or voids left by assembling a multi-part object can be filled with automotive bodywork filler, but the printout will then need to be re-sanded. Putty works great, is easy to process with sandpaper and can be painted. Moreover, the parts connected by such a filler, or voids filled with it, turn out to be stronger than the original plastic.
Cracks in ABS printouts can also be filled with ABS thinned with acetone, which reacts chemically with the ABS object and seeps into existing voids. It is recommended to make such a putty from 1 part ABS and 2 parts acetone, then it will not spoil the surface if used correctly.
Dichloromethane works on all plastics: ABS, PLA, HIPS, SBS, etc.
Epoxy is also useful if you want to make your 3D printed part more durable
Pros
- Epoxy filler is easy to sand and prime, resulting in an excellent surface for painting.
- An ABS solution of the same filament will give the same color so nothing will be visible on the surface.
Cons
- Auto body filler or other polyester epoxy adhesive is opaque when dry and will leave discolored areas on the printout.
- Additional processing required to achieve a uniform surface.
- If the grinding is done too aggressively and too much material is removed, the appearance of the part can be affected.
Polished
PLA model, polished. Photo rigid.ink
Tools
- Plastic Polishing Compound
- Sandpaper for P2000
- Cleaning cloth
- Toothbrush
- Polishing pad or microfibre cloth
| Finishing | ★ ★ ★ ★ ★ |
| Approvals | ★ ★ ★ ☆ ☆ |
| Speed | ★ ★ ☆ ☆ ☆ |
| Suitable for | all thermoplastics FDM |
Process
Once the part has been sanded, a plastic polish can be applied to the part to give a standard ABS or PLA object a mirror finish. After the part has been sanded for 2000, it is necessary to remove dust from the printout with a cloth and rinse the printout under warm water using a toothbrush. When the object is completely dry, buff it on a buffing pad or microfiber cloth, adding a polishing compound as you go, such as polishing jewelry. They are designed specifically for plastics and synthetics and give a long-lasting shine. Other plastic polishes, such as those used to polish car headlights, also work well, but some of them contain chemicals that can damage the printout.
Pro Tricks
To polish small parts, place the polishing wheel on your Dremel (or other rotary tool such as a power drill). For larger and stronger parts, you can use a grinder, just make sure that the part does not stay in one place for too long, otherwise the plastic may melt from friction.
Pros
- The part is polished without solvents that can warp it or change its tolerances.
- When properly ground and polished, a mirror-smooth surface is obtained, very similar to cast.
- Polishing and deburring plastics is extremely economical, making this a very cost-effective method of achieving a quality finish.
Cons
- If you want to achieve a mirror-smooth surface, the part must be carefully ground before polishing, which may affect tolerances.
- After polishing, the primer or paint no longer sticks.
Primer and paint
Gray PLA FDM print spray painted black. 3dhubs.com
Tools
- Cleaning cloth
- Toothbrush
- 150, 220, 400 and 600 grit sandpaper
- Aerosol primer for plastics
- Finish paint
- Polishing sticks
- Polishing paper
- Masking tape (only if multiple colors are expected)
- Nitrile gloves and matching face mask
| Finishing | ★ ★ ★ ★ ★ |
| Approvals | ★ ★ ★ ☆ ☆ |
| Speed | ★ ☆ ☆ ☆ ☆ |
| Suitable for | all thermoplastics FDM |
Process
After the printout has been properly sanded (it is sufficient to reach P600 when painting), it can be primed. Aerosol plastic primer should be applied in two coats. This primer is intended for subsequent painting of models, provides an even coating and at the same time thin enough not to hide small elements. Thick primer, which is sold in hardware stores, can clump, and then you have to seriously work with sandpaper. Apply the first spray coat with short pressures from a distance of 15-20 cm from the object, trying to do it evenly. Let the primer dry and smooth out the unevenness with 600 grit sandpaper. Apply a second coat of spray with light, quick pressures, also very gently and evenly.
When the priming is completed, you can start painting. You can paint with artistic acrylic paints and brushes, but a spray gun will provide a smoother surface. Hardware store spray paints are thick and viscous and difficult to control, so use paints that are designed specifically for modeling. The primed surface must be sanded and polished (sanding and polishing sticks, which are used in nail salons, can be purchased online, they are great for our task), and then wiped with a cloth.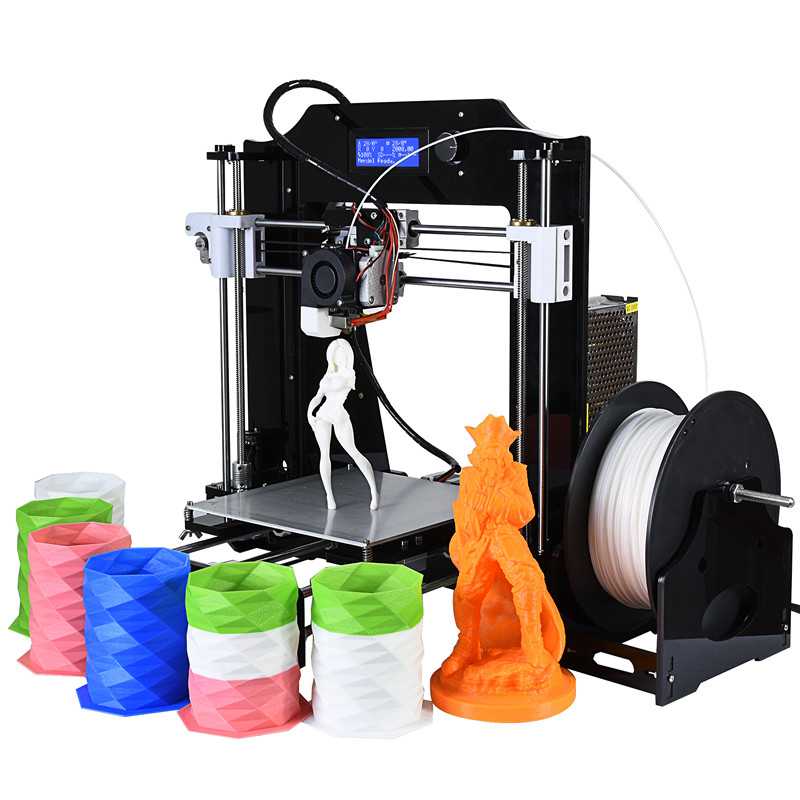 The paint should be applied to the model in very thin layers, the first layers should be transparent. When the paint finish becomes opaque (usually 2-4 coats), let the model rest for 30 minutes to allow the paint to dry completely. Carefully polish the paint layer with manicure sticks, repeat the procedure for each of the colors (between each applied paint).
Separate parts of the model can be covered with masking tape so that the colors, if there are several, do not mix. When painting is complete, remove the masking tape and polish the object with polishing paper. Polishing paper, such as 3M or Zona, comes in a variety of grits and is a relatively new product. It is sold in packs in various online stores, and after processing with this paper, the ink layer or topcoat will literally shine - and nothing else can achieve this effect. Apply 1-2 coats of top coat to protect the paint and let it dry completely. The top coat is selected in accordance with the recommendations of the paint manufacturer. If the topcoat and paint are incompatible, it can render your entire painting job meaningless, so compatibility is very important here.
Pro Tips
Don't shake the can when spraying! It is important not to mix the pigment or primer with the propellant (propellant gas), which will cause bubbles to form in the spray. Instead, the can must be rotated for 2-3 minutes so that the mixing ball rolls like a pearl, and does not strum.
Pros
- Excellent result, if you take into account all the nuances of the process and practice.
- With the final appearance of the object, you can do anything, no matter what material it is printed on.
Cons
- Primer and paint increase the volume of the model, which affects tolerances and can be a problem when it comes to a part of a larger object.
- High quality spray paint or spray gun increases costs.
Vapor smoothed
Vapor smoothed black ABS printed hemisphere
Tools
- Cleaning cloth
- Solvent resistant sealed container
- Thinner
- Paper towels
- Aluminum foil (or other solvent resistant material)
- Face mask and chemical resistant gloves
| Finishing | ★ ★ ★ ★ ☆ |
| Approvals | ★ ★ ☆ ☆ ☆ |
| Speed | ★ ★ ★ ☆ ☆ |
| Suitable for | all thermoplastics FDM |
Process
Line the bottom of the container with paper towels, if possible along the sides. It is critical that the vapors cannot damage the container and that the container itself is sealed. It is recommended to use a glass or metal container. Apply enough thinner to the paper towels so that they are wet but not soaked - this will also help them adhere better to the walls. Acetone is famous for its ability to smooth out ABS. PLA can be smoothed with a variety of other solvents (dichloromethane works well), but this plastic tends to be much harder to smooth than ABS. When working with any solvents, please follow the safety precautions for handling chemicals and always take appropriate precautions. Place a small "raft" of aluminum foil or other solvent-resistant material in the center of the paper towel-lined container. Place the printout on the "raft" (either side of your choice) and close the lid of the container. Steam polishing can take varying amounts of time, so check your printout periodically. To increase the speed of polishing, the container can be heated, but this must be done carefully so as not to cause an explosion.
When removing the printout from the container, try not to touch it in any way, leave it on the “raft”, take them out together. In all those places where the printout has come into contact with something, there will be defects, since the outer layer will be under-dissolved. Before working with it, let the printout completely “breathe” so that all solvent vapors have evaporated.
Many aerosols and/or solvent sprays are flammable or explosive and their vapors can be harmful to humans. Be extremely careful when heating solvents, always handle them and store them in a well ventilated area.
Pluses
- Many small blotches, as well as many layer lines, are smoothed out without additional processing.
- The print surface becomes extremely smooth.
- The procedure is very fast and can be performed using widely available materials.
Cons
- Doesn't "heal" gaps, doesn't completely hide layer lines.
- During the smoothing process, the outer layer of the printout dissolves, which greatly affects the tolerances.
- Negatively affects the strength of the printout due to changes in the properties of its material.
Immersion
PLA model immersed in dichloromethane. Photo 3dpt.ru
Tools
- Solvent resistant container
- Thinner
- Eye hook or cog
- Heavy wire for sculpture or landscaping
- Dryer or drying frame
- Face mask and chemical resistant gloves
| Finishing | ★ ★ ★ ★ ☆ |
| Approvals | ★ ☆ ☆ ☆ ☆ |
| Speed | ★ ★ ★ ★ ☆ |
| Suitable for | all thermoplastics FDM |
Process
Make sure the container you are using is wide and deep enough to completely submerge the printout in the solution.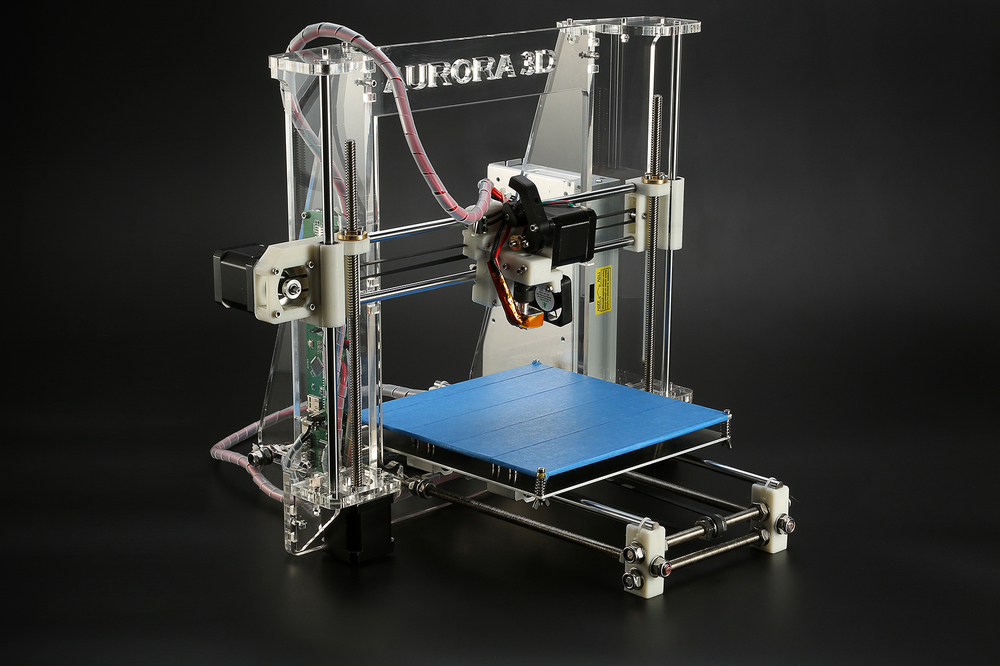 Fill the container with the appropriate amount of solvent - be careful not to splash. As with vapor smoothing, ABS dip smoothing can be done with acetone, which is easy to find in the store, and for PLA, dichloromethane can also work well with ABS, HIPS, SBS, PETG, and many other materials. PLA is quite resistant to solvent smoothing, so it may take several passes to achieve the desired result. Prepare the printout for dipping by screwing a hook or eye screw into it in an inconspicuous place. Pass the wire through the eyelet or wrap the wire around the screw so that the printout can be immersed in the solvent. If the wire is too thin, it will not be able to withstand the buoyant force on the printout, and it will be difficult to sink the object.
Once the printout is ready, use a wire to completely immerse it in the solvent for a few seconds. Remove the printout and hang it by the wire in a dryer or on a drying frame to allow the solvent to completely evaporate from the surface. After ejection, the printout can be gently shaken to facilitate the drying process and ensure that no solvent has accumulated in the depressions.
Pro Tricks
If an opaque whitish coating appears on the print after drying, this can be corrected by holding the object over a solvent bath for a while so that its vapor slightly dissolves the surface. This restores the original color of the printout and achieves a shiny outer layer.
Pros
- The surface of the print is smoothed much faster than steam polishing.
- Significantly less fumes are generated than other solvent polishing methods, so this method is less hazardous.
Cons
- The surface is smoothed very aggressively, so you can forget about tolerances.
- Too long immersion can lead to complete deformation of the object and a significant change in material properties.
Epoxy
Black ABS printout, half epoxy coated, half uncoated
Toolbox
- two-component epoxy resin05
- Sponge Applicator
- Mixing container
- Sandpaper P1000 or finer
| Finishing | ★ ★ ★ ★ ☆ |
| Approvals | ★ ☆ ☆ ☆ ☆ |
| Speed | ★ ★ ★ ★ ☆ |
| Suitable for | all thermoplastics FDM |
Process
After the printout has been cleaned (preliminary cleaning gives the best end result), wipe it thoroughly with a cloth. Mix the resin and hardener in the proportion indicated in the instructions, accurately measuring all volumes. The curing process of epoxy resin is exothermic, so glass containers and containers made of materials with a low melting point should be avoided. It is recommended to use containers that are specifically designed for mixing epoxy resins. Incorrect ratio of resin and hardener can result in longer curing time or no curing at all and result in a permanently sticky substance. Mix the resin and thinner as directed in the instructions - carefully, in smooth movements to minimize the amount of air bubbles remaining inside the mixture. Very little epoxy is needed, and most of these resins only work for 10-15 minutes, so plan accordingly.
Apply the first coat of epoxy with sponge applicator, being careful not to build up in crevices and small parts. When the printout is sufficiently coated, allow the resin to fully cure - as described in the instructions that came with it. One coat may be sufficient, but for optimum results it is best to lightly sand the printout with fine sandpaper (on P1000 and above) to eliminate any imperfections. Wipe off the dust with a cloth and, in the same way as before, apply a second layer of epoxy.
Pros
- A very thin layer of epoxy won't affect tolerance too much (unless the printout has been sanded too hard beforehand).
- A protective shell is formed around the object.
Cons
- The layer lines will remain visible, they will only be covered by a smooth shell.
- If too much epoxy is used, it can flood parts and edges, and the surface can appear greasy.
Plating
FDM-printed structural element nickel plated with Repliform using RepliKote technology
Tools (for home work)
3
-
- Electroplating solution can be obtained by mixing metal salt, acid and water, but if the proportions are inaccurate and the substances are of insufficient quality, you cannot count on a professional result.
 If you buy a ready-made solution (as in Midas kits), you can be sure that the problems with plating are not caused by the solution.
 - Sacrificial anode. The anode material must match the metal of the solution: for example, if copper sulfate is used in the solution (with water it is copper sulfate), then the anode must also be copper. Any object made of the appropriate metal will do (for example, copper wire for copper plating), or you can buy special strips of metal for galvanization.
- Conductive paint or acetone with graphite. Electroplating requires the surface of the printout to be electrically conductive, and this can be achieved with a conductive ink or a solution of equal parts graphite and acetone. Conductive paint will work with any material, but acetone with graphite will only work with ABS.
- Power rectifier. A simple battery can be used as this element, only it will not be as effective and will not give a fast enough result than the rectifier itself (household current).
 The rectifier is safer in the sense that it can simply be turned off and thus cut off the current during the galvanization process.
 - Conductive screw or eye hook
- Non-conductive container
- Contacts
- Non-conductive gloves and goggles. Galvanizing solutions are acidic and can cause injury if splashed into the eyes, so wearing goggles is very important. Solutions also irritate the skin and conduct electricity, so insulating gloves are needed.
| Finishing | ★ ★ ★ ★ ☆ |
| Approvals | ★ ★ ★ ☆ ☆ |
| Speed | ★ ★ ★ ★ ☆ |
| Suitable for | all thermoplastics FDM |
Process
Electroplating can be carried out at home or in a professional workshop. To do everything right, you need to be well versed in the materials, in what is actually happening - and at home these opportunities are usually limited. In order to achieve excellent surface quality and to have more plating options, including chrome plating, it is best to use the services of professional workshops. The copper galvanization process will be described below as an example.
At home, you can galvanize with copper or nickel, and this coating will then serve as the basis for galvanizing with other metals. It is critically important that the printout surface be as smooth as possible before it is galvanized. Any bumps and lines in the layers will be enhanced as a result of the process. Prepare the sanded and cleaned object for plating by coating the plastic with a thin coat of high quality conductive paint, or with a graphite and acetone solution for ABS printouts. Allow the conductive coating to dry completely, sand if necessary to ensure a smooth surface. At this stage, it is extremely important not to touch the printout with bare hands or to wear gloves, because sweat marks on the object will certainly affect the quality of the galvanization.
Insert a screw or eyelet in an inconspicuous place on the printout and connect it to the negative terminal of the rectifier. This will be the cathode. Connect the copper anode to the positive contact of the rectifier. Fill the container with enough copper plating solution so that the printout is completely covered with it. Immerse the anode in the container and turn on the power. After the rectifier is turned on, immerse the printout in the container, making sure that it does not touch the anode anywhere. Beware! When the object is already in the bath, the galvanization system is active, and contact with the solution, cathode or anode can be traumatic. Set the voltage on the rectifier to 1-3 Volts, and the process will go to full metallization. To speed things up, the voltage can be increased, but not more than 5 volts. When enough metal has deposited on the printout, simply turn off the power and dry the object with microfiber towels. When it's dry, varnish the object to protect it from corrosion.

.jpg?x-oss-process=image/resize,p_100/format,webp)