Flexible 3d print
Ultimate Materials Guide - 3D Printing Flexible Filament
Overview
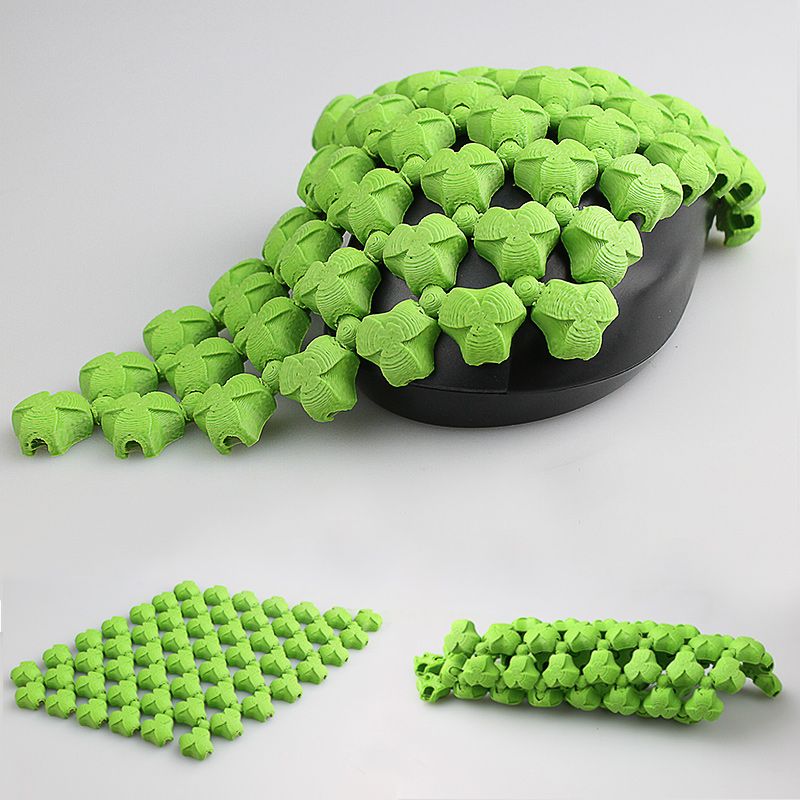
Flexible filaments are made of Thermoplastic Elastomers (TPE) which are a blend of hard plastic and rubber. As the name suggests, this material is elastic in nature allowing the plastic to be stretched and flexed easily. There are several types of TPE, with Thermoplastic polyurethane (TPU) being the most commonly used among 3D printing filaments. In many cases, these terms are used interchangeably, along with popular brand names such as Ninjaflex. The degree of elasticity in the plastic depends on the type of TPE and the chemical formulation used by the manufacturer. For example, some filaments can be partially flexible like a car tire but others can be elastic and fully flexible like a rubber band. This guide will cover tips to help you with both of these variations of flexible filaments.
- Flexible and soft
- Excellent vibration dampening
- Long shelf life
- Good impact resistance
- Difficult to print
- Poor bridging characteristics
- Possibility of blobs and stringing
- May not work well on Bowden extruders
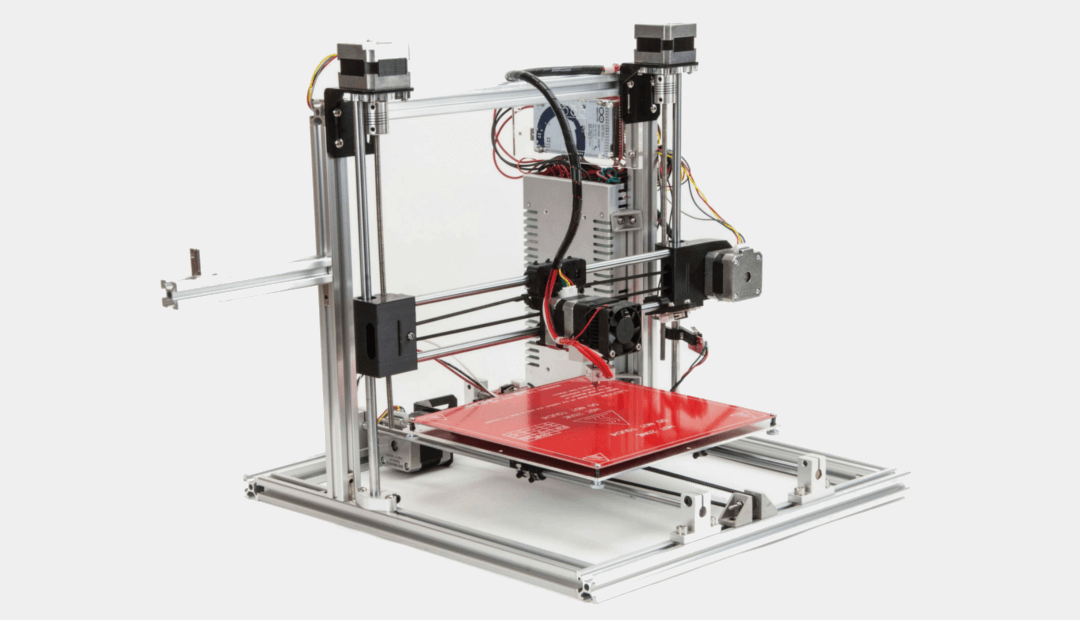
Hardware Requirements
Before 3D printing with flexible filaments, make sure your 3D printer meets the hardware requirements listed below to ensure the best print quality.
Bed
Temperature: 45-60 °C
Heated Bed Optional
Enclosure Not Required
Build Surface
PEI
Painter’s Tape
Extruder
Temperature: 225-245 °C
Direct Drive Extruder Recommended
Cooling
Part Cooling Fan Required
Best Practices
Flexible filaments come with many unique challenges that you want to be aware of. These tips will help you reduce the chances of common 3D printing issues such as clogging, kinking, and stringing.
Use Direct Drive Extruders
While some partially flexible filaments work fine with Bowden Extruders, most fully flexible filaments require a Direct Drive extruder for best results. The distance between the drive gear and the melt zone of the hot-end needs to be as short as possible to efficiently feed the filament into the nozzle. Additionally, the pathway through which the filament travels into the melt zone should have tight tolerances to prevent the filament from kinking or coiling inside.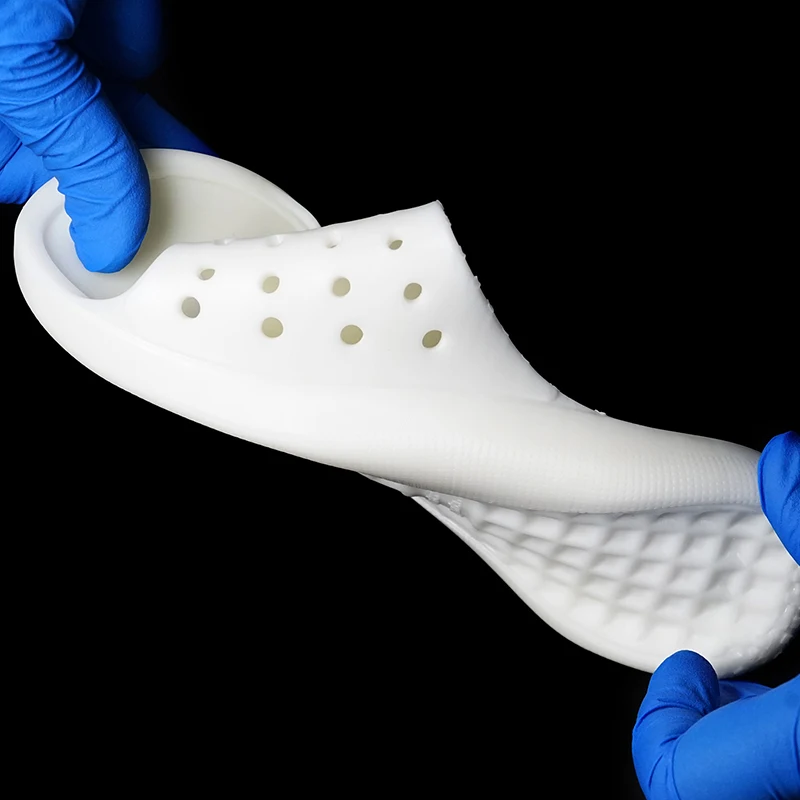 For these reasons, it is typically much easier to print flexible filaments with a Direct Drive extruder versus a Bowden extruder. If you are unsure about your 3D printer’s capabilities, you may want to check with the manufacturer to see if the extruder has been approved for use with flexible filaments.
Use Slow and Consistent Feed Rates
Flexible filaments typically print best using a slow and consistent feed rate. Because the material is elastic, it can be very difficult to control sudden changes in the print speed. Higher print speeds can cause the filament to compress and will most likely result in a jam. Slow and steady is the best approach. Simplify3D provides all of your feed rate settings on the Speeds tab of your process settings so that you can easily configure these values. Finding the optimal print speed for your material can take several attempts based on trial and error. We have seen that speeds of 1200 mm/min (20 mm/s) can be a good starting point for most materials.
Reduce Resistance from the Filament Spool
A few tweaks to your material spool can also make a big difference with flexible materials. Typically, your extruder will pull the filament into the nozzle, forcing the filament spool mounted on your printer to unwind a bit of plastic in the process. However, because flexible materials are elastic, this will stretch the filament out as it is being pulled in and can actually result in under-extrusion. Try mounting the spool above your printer so that the filament unwinds in a downward direction which can reduce the resistance. It can also be incredibly helpful to mount the spool’s hub on a bearing to allow the spool to spin as freely as possible.
Tune Your Retraction Settings
The elastic nature of flexible filament makes it sensitive to quick movements such as retractions. In order to successfully print the filament, you will need to optimize your retraction settings to reduce these movements. While you are first starting with this material, we would recommend disabling retraction completely. You can make this change in Simplify3D on the Extruders tab of your process settings. With retraction disabled, you can focus on finding the perfect speed and extrusion rates that allow you to reliably print your models. After you are more confident in these settings, you may wish to add a very small amount of retraction with a slower retraction speed to help with any potential oozing from the hot-end. Simplify3D also includes a unique option called Coasting, which will automatically help lower the pressure in the nozzle when you approach the end of a segment, which can significantly reduce blobs and stringing with these materials. If you want more information about other options that can help reduce hairs and stringing on your prints, we have an entire section on our Print Quality Guide dedicated to that issue: How to Reduce Stringing and Oozing.
Optimize Your Travel Movements
Retractions can be particularly troublesome for flexible materials, so it is typically best to minimize the number of retractions required for your print. Simplify3D has a great feature that was built specifically for this situation. Instead of moving in a straight line from point A to B, the software will actually choose a completely new path when moving between these points, with the goal of staying within the interior of your object so that there won’t be any oozing or stringing. With this unique feature enabled, you can greatly reduce the amount of retractions required for your print and significantly improve your print quality. To use this feature, click on the Advanced tab of your process settings, and enable the “Avoid crossing outline for travel movement” option.
Pro-Tips
- Optimize the feed rate by printing at lower layer heights in the 0.1mm – 0.2mm range. The lower layer height requires less plastic, so it allows your extruder to use a lower feed-rate, relieving the burden on the filament.
- Try to avoid using rafts with flexible materials, as the base layers of the raft have higher extrusion rates which may create issues.
- If you are designing a flexible part that needs to fit on top of another object, try using a negative tolerance between the parts so that the flexible part will need to stretch to fit over the other object snugly.
Get Started with Flexible Filaments
Now that you’re ready to start printing with flexible materials, we have a few tips to help you get started. View some typical applications below, try out a few of our sample projects, or choose a popular filament brand to purchase for your next project.
Common Applications
- Vibration dampening
- Grip Sleeves
- Phone cases
Sample Projects
- RC Car Tire
- Phone case
- Bike Handle
Popular Brands
- NinjaTek Ninjaflex, Armadillo, Cheetah
- Polymaker PolyFlex
- eSun TPE
- Sainsmart Flexible TPU
Flex 3D Printing Guide | Top 3D Shop
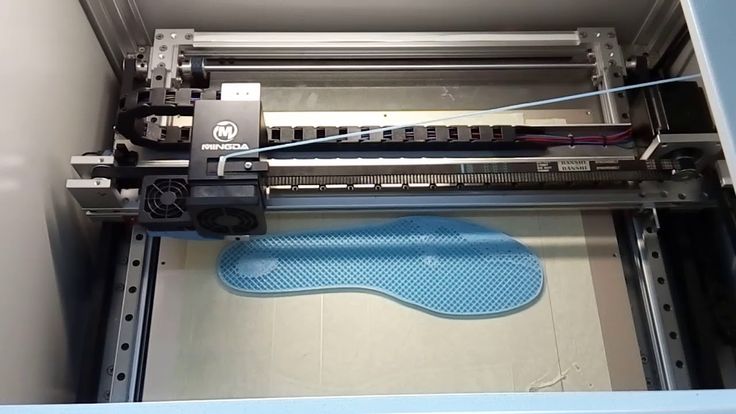
Flexible plastics are among the most popular 3D printing materials that boast a wide array of applications.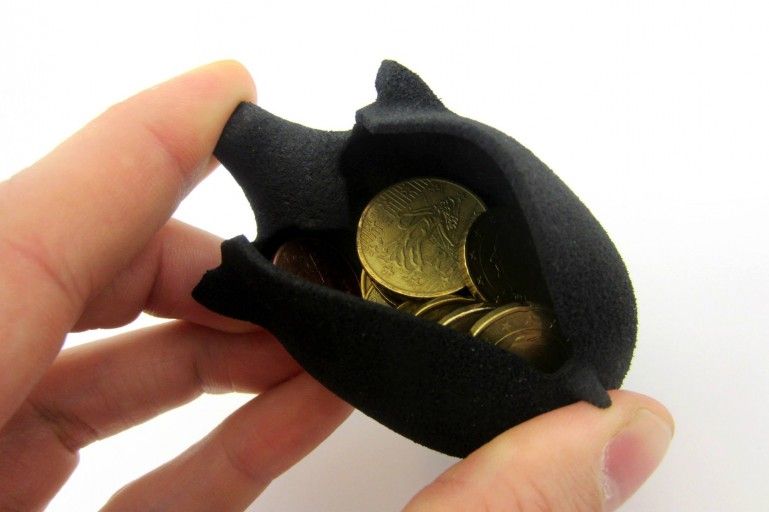 As a rule, these flexible polymers are employed to create elastic shock-absorbing parts like gadget cases and sports shoe soles.
Due to their physical properties, however, there are several important storage and printing rules that must be followed to uncover their full potential. Read the article to find out how to reliably print with flexible filaments and organize your workflow in a streamlined fashion.
About Flexible Plastics
Source: aerospace.basf.com
Flexible plastics come from a common category of elastic filaments and are called thermoplastic polyurethane (TPU). Since TPU belongs to the category of thermoplastic elastomers (TPE), there may be some confusion involving these terms. As for this particular article, we will be using "printing with flexible materials" as an equivalent of "printing with TPU".
Source: felfil.com
Brief History
Source: en.wikipedia.org
Thermoplastic polyurethane was first created in 1959 by Lubrizol Engineered Polymers, a Berkshire Hathaway company.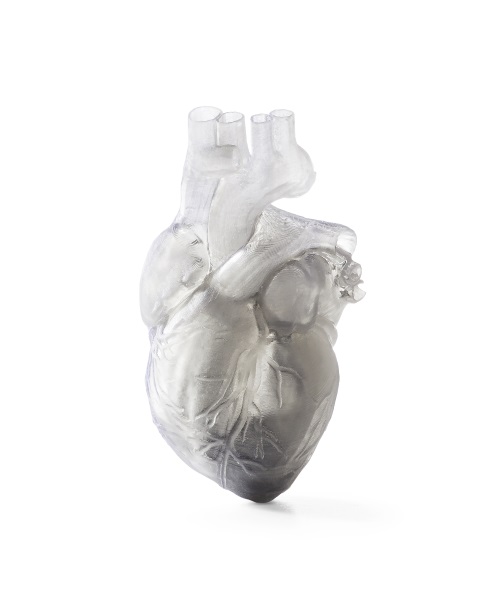 The thing that determined the physical properties of TPU was the decision to unite the features of copolymers with rigid and elastic structures in one. To be more precise, the rigid blocks of copolymers included in the formula consisted of isocyanate, while the elastic ones consisted of polyol. By mixing the polymers in various proportions, the company has been able to create different kinds of TPU. Some of the created materials were elastic like rubber, and are now widely used in 3D printing, while the other ones were incredibly tough and hard to break.
Specifications
Flexible plastics are light-colored elastic materials that, compared with their ABS-based counterparts, can withstand higher torsional and tensile stress. The main features of such polymers are:
- Density: 1.18-1.25 g/cm³;
- Strength and flexibility;
- Resistant to dilute acids and alkali solutions at room temperature;
- Melting temperature: 200—225 °C;
- Glass transition temperature: -10 — -50 °C;
- Heat resistance: up to 125 °C (up to 140 °C for some filament brands).
Source: beeverycreative.com
Touching upon post-processing capabilities, TPU-based models can be easily sterilized, welded, machined, dyed, printed, and cut. The material offers outstanding temperature resistance and good corrosion resistance at room temperature. TPU-based products are resistant to engine oils and lubricants, even at high temperatures. Moreover, TPU is soluble in aromatic hydrocarbons such as benzene and toluene at room temperature. Besides, TPU-based products dissolve in acetone, methyl ethyl ketone, cyclohexanone, methyl pyrrolidine, and tetrahydrofuran.
To test out the capabilities of TPU, six identical models printed with different filaments were partially immersed in a particularly strong Nitro-P solvent. The TPU-based part absorbed the liquid, resulting in a 50% increase in volume. However, after the evaporation of the solvent, the model assumed its original volume without losing any of its physical properties.
Pros and Cons
Source: 3dprintingmedia.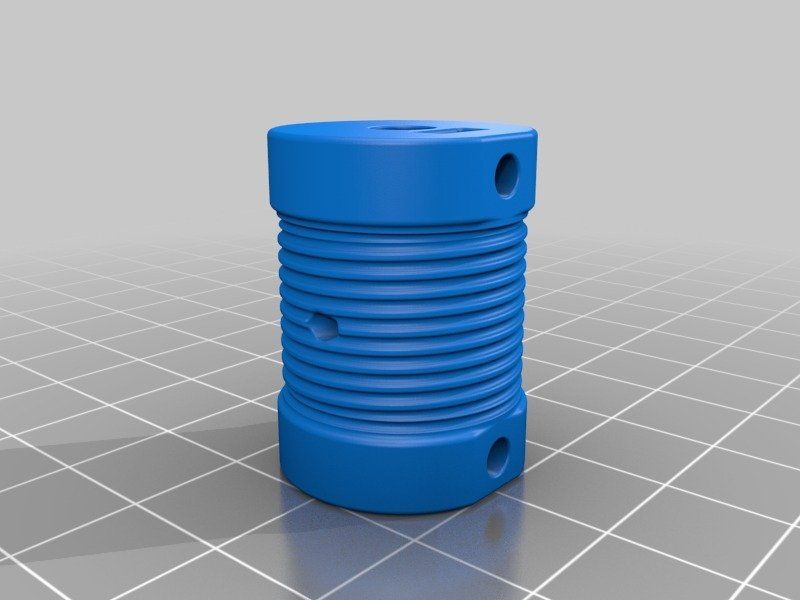 network
Pros:
- Astonishing temperature resistance;
- High tensile, torsional, and compressive strength;
- Easy to paint;
- Budget-friendly;
- Recyclable.
Cons:
- Hygroscopic material;
- Challenging to print;
- Not recommended to be used with Bowden extruders;
- Not suitable for food storage.
Safety Rules
Source: extrudr.com
Just like the case with other filaments, there is a set of safety rules that must be followed when printing with flexible materials to ensure a secure and hassle-free workflow. Make sure to wear gloves to protect yourself from thermal burns. Use respirators and print in well-ventilated premises. If possible, print on a fully enclosed device that features a reliable and effective ventilation system. In case the molten polymer comes into contact with human skin, pour some cold water over the place and follow the standard thermal burn treatment rules. After hardening, the polymer will fall off on its own.
Moreover, make sure to organize the disposal of flexible plastics correctly. Burning them would not be a good idea since the polymer releases toxic fumes of carbon monoxide, nitric oxide, hydrogen cyanide, and isocyanate when burned.
3D Printing with Flexible Filaments: A Closer Look
Flexible plastics are used to create durable yet resilient parts like dampers, shock absorbers, and flexible connection elements. Along with the creation of such supporting elements, flexibles are employed in unique large-scale projects. For instance, XEV Limited, a Chinese startup, developed an electrical car prototype with body parts 3D printed with Nylon, PA, and TPU. The price for a two-seater city car the size of a Smart City Coupe was supposed to be $10,000. Sadly enough, the inventors could not find investors to start mass production.
Source: amfg.ai
On the other hand, New Balance, a well-known US-based manufacturer of athletic shoes, created a series of running shoes with elastic soles 3D printed with flexible materials. According to the company’s statement, the solution united the benefits of 3D printing and advances in materials science to achieve the optimal balance of flexibility, strength, weight, and durability. The sole has been designed in a particularly efficient way to ensure even distribution of heel-caused pressure over the whole sole, making for a comfortable and convenient solution.
Filament Storage
Since flexible filaments are hygroscopic, they are prone to absorbing moisture when left open in rooms with high humidity. To ensure reliable long-term storage, the filaments should be vacuum-sealed together with a desiccant. If you are unsure whether the filament was properly stored before the printing session, make sure to process it in a filament dryer (e. g. Wanhao Box 2) before proceeding to the actual production.
Heated Bed Temperature
Source: reddit.com
To achieve optimal first layer adhesion when printing with TPU, keep the heated bed temperature at around 45—60 °C. Besides, covering the print bed with masking tape or using a sheet of polyetherimide (PEI) as a base would also be a good idea.
Printing Speed and Other Settings
3D printing with flexible filaments may become challenging due to the material properties. The polymer becomes extremely viscous when heated, which may lead to clogging when printing too fast. However, there’s always a recommended printing speed proposed by manufacturers that depends on the filament brand. The recommended value usually lies within the range of 10 to 30 mm/s, meaning that the correct printing speed can be found after making a couple of test prints and seeing what suits your particular filament better.
Filament Cooling
To reliably print with flexible plastics, make sure to turn on all the ventilation systems offered by your machine during printing.
Post-Processing
Heat Treatment
After a TPU-based part has been printed, you can provide it with an even smoother and glossier appearance. Place it in a special oven (front side up), set the temperature to 200°C, and wait from two to three minutes. The top layer will melt just enough to improve the model’s outlook without deforming it.
Machining and Smoothing
Due to the physical properties of flexible filaments, it is particularly challenging to polish TPU-based parts manually. This can be very time-consuming, therefore, we recommend using a CNC machine to polish such prints.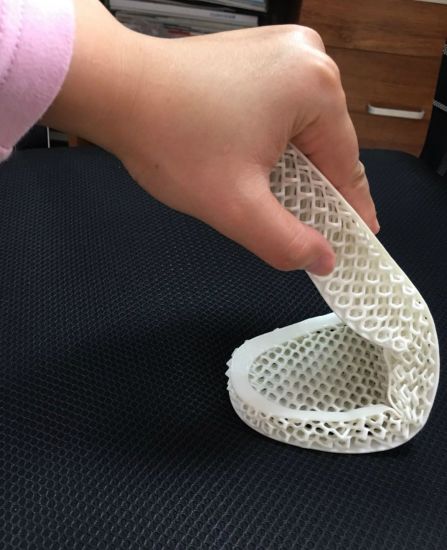 The supports of TPU-made parts, however, are incredibly easy to remove and can be detached even with a box cutter.
Spackling your Prints
Another way to post-process a print made from flexible materials would be to cover it with a flexible filler. This approach is especially useful in case you are working with large models and don’t require millimeter-precise dimensional accuracy.
Gluing
TPU-based parts can be glued together just like all other plastic-made parts. To do this, you can use special rubber-to-rubber adhesives. Moreover, you can employ aprotic solvents like tetrahydrofuran, dimethyl sulfoxide, and dimethylformamide.
Just like the case with parts made from ordinary FDM 3D printing materials that are similar to the conventional thermoplastics, models printed with TPU must be cleaned and dried.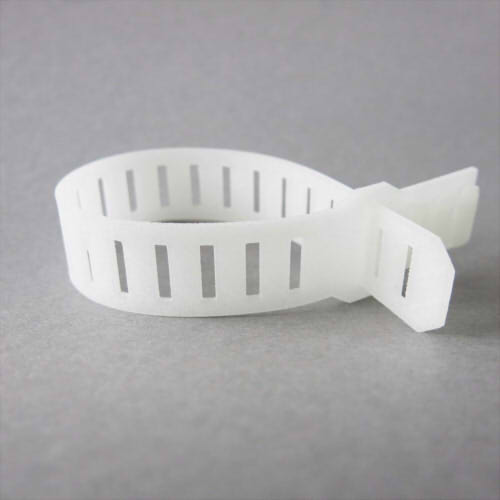 After adding a small layer of adhesive, firmly press the two parts that need to be glued together against each other and allow the adhesive to dry.
Affordable 3D Printers that Print with TPU
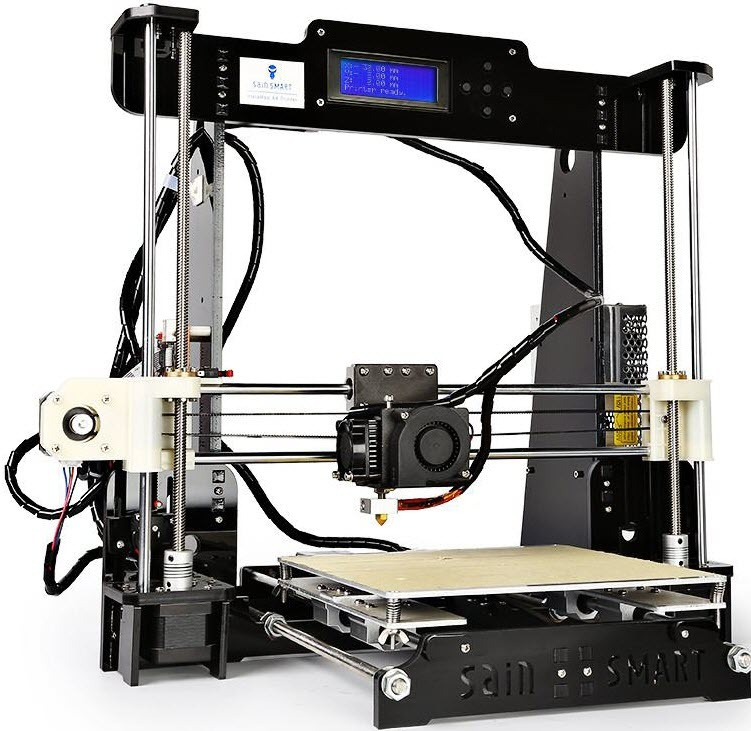
Anet A8
Recommended settings:
- Heated bed temperature: 60 °C
- Extruder temperature: 225 °C
- Layer height: 0.1 mm
It is extremely important to minimize nozzle clogging when printing with flexible materials by providing vertical filament-to-nozzle feeding. Luckily, the Anet A8 3D printer’s extruder can be installed with a guide that should be placed between two gears for a streamlined printing experience. Please check the video above for a detailed installation process.
Creality Ender 3
Recommended settings:
- Heated bed temperature: 60 °C
- Extruder temperature: 225 °C
- Layer height: 0.1 mm
Just like the deal with the Anet A8, it is important to ensure optimal filament feeding before printing with flexible materials on the Creality Ender 3 too. There’s a special nozzle cap that can be installed onto the extruder to prevent clogging and other related issues like gears-induced filament chewing.
Troubleshooting
One of the most common issues that goes hand in hand with TPU 3D printing is stringing. The problem manifests itself by creating thin threads between the walls of a printed model. Some users resolve the issue by burning string with a gas burner. This may sound effective, but there is a high risk of damaging the printed model during the process. Obviously, the best way to fix stringing is to prevent it from happening by turning on the retraction and adjusting the nozzle temperature along with printing speed.
Wall delamination is yet another common problem that occurs due to improper filament storage. The issue can be solved by drying the filament before printing. As you can see, unlike stringing, delamination is much easier to fix.
Source: print.theporto.com
To get rid of stringing once and for all, consider doing the following:
- Turn on the ‘retraction’ feature in your slicer.
- Decrease the printing speed. In most cases, going as low as 20 mm/s will be more than enough.
- Make sure that you use dry filament that was stored properly. If you don’t have enough information about the matter, use a filament dryer before printing.
- Check whether the nozzle is clear from filament leftovers that could be left there during the previous printing session.
 The easiest way to do this is to create a small test print that will be finished in several minutes. You can determine the presence of leftover filament by checking the color of the test print. The leftover filament will be of a different color.
Use Cases
Source: reprap.me
Source: simplify3d.com
Source: gizmodo.com
Source: blog.prusaprinters.org
Bottom Line
Elastic flexible plastics are used to create resilient yet durable parts on FDM 3D printers. Parts printed with TPU will feature astonishing temperature resistance, high tensile, torsional, and compressive strength. That’s why this material can be used to create anything: a smartphone case, a cosplay costume, or even car body parts. Due to the physical properties of the material, however, TPU may be challenging to print with for entry-level makers. Nevertheless, the challenges are incredibly easy to overcome if one adjusts the print setting before printing as well as stores the filament properly. Consider following the guidelines presented in this article to ensure yourself with a hassle-free and streamlined printing experience.
How to print flexible materials on a conventional FDM printer? Likbez from the company REK.
Along with beautiful photos and interesting videos, where someone prints high-quality models with flexible material on a regular FDM printer without any problems, there are many questions and messages on the Internet, such as “How to print with flex?”, “I generally have flex doesn’t work, what should I do?” and so on.
In short, the average picture looks something like this:
Time to end this. Likbez from the company "REK".
Foreword.
For flex printing, it is important to observe some points. Alas, not all 3D printer manufacturers create their product with the ability to print with flexible materials. But after all, you already have such a powerful tool as a 3D printer, on which you can print any desired part, so it's time to put the old joke “buy a 3D printer - print a 3D printer” into practice. The entire printer will most likely not need to be printed, but a quick and easy tuning will be needed. 9).
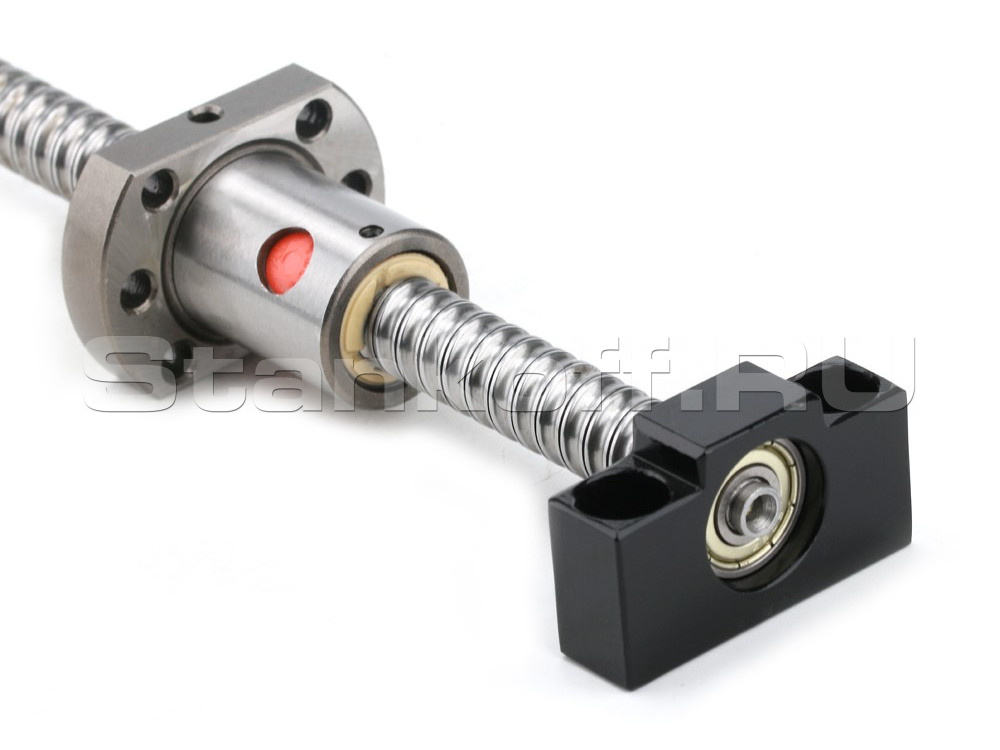
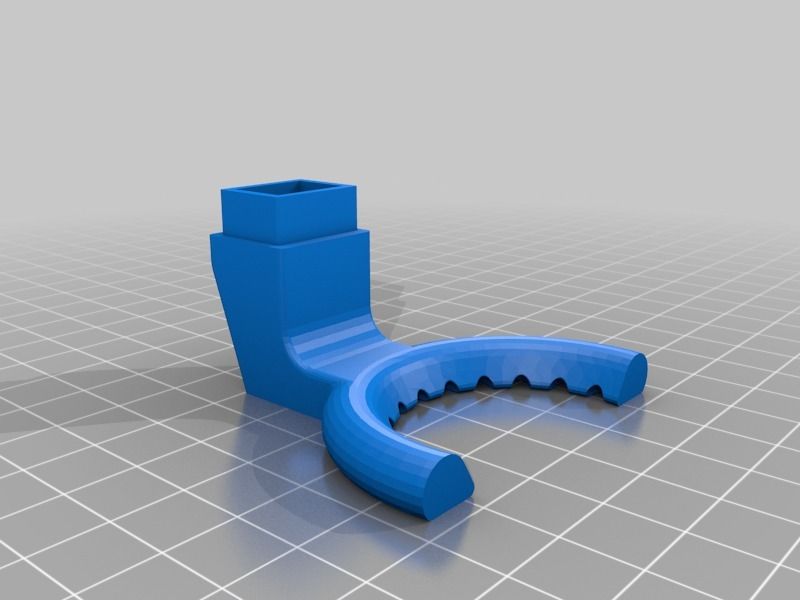
Hardware. extruder. The most common problem is that the extruder chews up the rod and it looks something like this (the problem area is circled):
No matter how carefully and accurately you push the flex into the extruder, after 5 seconds or after 5 minutes, it still chews up. This happens because there is a gap between the feed rollers and the entrance to the hot end or tube (bowden) channel in which the flexible rod will jam (YES, even if it is a very small gap. YES, even if there is only a couple of mm).
Familiar ABS and PLA are quite hard, they are difficult to crumple even in a centimeter gap. Flexible plastic should not be left even the slightest opportunity to go somewhere “not there”, so this gap in the extruder must be removed. For RepRap owners, this will not be difficult at all, because. they probably already have tuning experience; in free catalogs of 3D models (such as thingiverse or youmagine or myminifactory) everything has already been invented before us and there are already ready-made models of modified extruders or parts for tuning existing ones. In general, the new extruder will be different in this:
Here are some examples of tuning extruders for different printers:
http://www.thingiverse.com/thing:247024 - Solid Dulls and analogues
http://www.thingiverse.com/thing:191503 - Printbots (masterkits)
http://www.thingiverse.com/thing:16319 - MK9 Extruders
http://www.thingiverse.com/thing:231310 - Replicator 1, Duplicator 4
http://www.thingiverse.com /thing:18875 - Makerbot variant
http://www.thingiverse.com/thing:553917 - DaVinci
http://www.thingiverse.com/thing:391803 - 3DRag
http://www.thingiverse.com/thing:550788 - Robo3D
https://www.youmagine. com/designs /um2-feeder-sp3d-version - Ultimeker 2
http://www.thingiverse.com/thing:99395 - Orca 0.43
Add to the list in the comments :) Hardware #2. Hot end. (Let's come up with a normal Russian name for this thing). Not all “hot ends” (hot ends) are equally useful and this needs to be corrected.
This moment, by the way, concerns not only flexible rods, but also often causes difficulties when printing PLA.
The essence of the problem lies in the fact that the bar, getting into the hot end, begins to melt even before it reaches the nozzle, and a so-called “plug” from the material melt appears, which is not easy to push through. If a rigid PLA rod can still push through the melt due to the power of the extruder, then such a trick will not work with a flexible material - it will wrinkle, bend and curl even in those places where it seemed impossible. Very often, owners of 3D printers in frustration call such a situation “nozzle clogged”, although this is not entirely true.
The picture below shows a schematic of a hot end. Where the color indicates the normal state of the bar during the printing process. (blue indicates where the rod is still hard, red indicates where it begins to melt)
In this state, the plastic will exit the nozzle quite calmly without any difficulty, but if the heat goes higher, the rod will begin to melt earlier (in the cold zone) and will create additional resistance for the extruder. Solution: cool the top of the hot end by any means. Put the fan on the hot end, smear the heatsink (if any) with thermal paste at the junction with the hot parts, make the air flow directed (to the hot end), etc. and so on.
Once you've got a sharp enough transition from cold to hot, you won't have any problems with hot-end 'plugs' anymore.
For lovers of a thorough approach, I can recommend the article http://3dtoday.ru/blogs/akdzg/struggling-with-obstruction-of-steel-channel-gotanda/ as an addition to the above recommendations.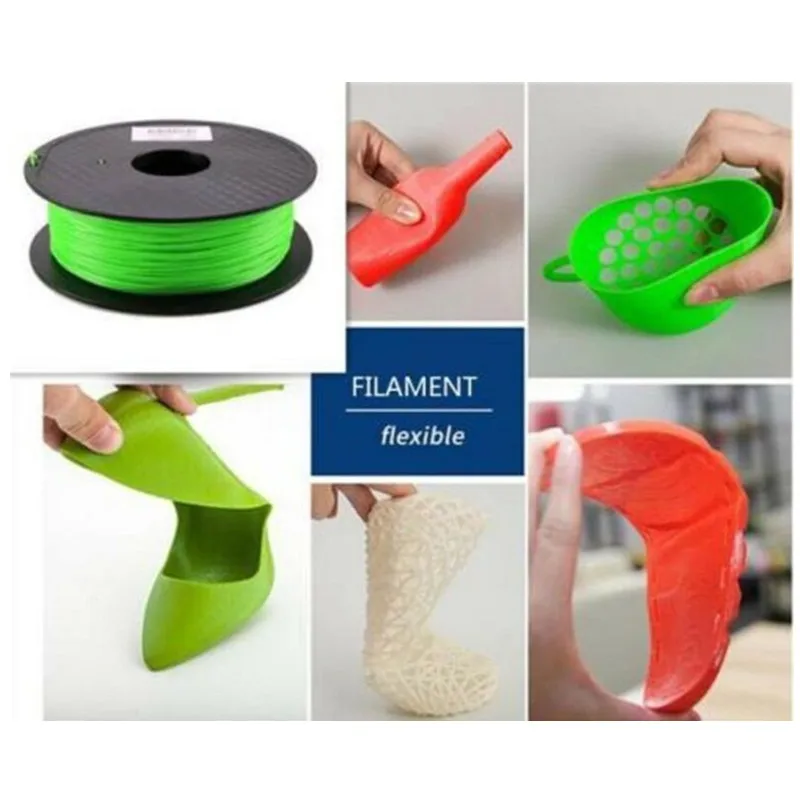
Software.
In addition to the “iron” nuances of working with flexible materials, there are also software ones. All printers are different and the “slicer” programs are also different, but the general principles work the same everywhere, the main thing is to understand them.
So, after successfully tuning your 3D printer, you need to choose the optimal print speed settings, and there is only one method - trial and error. From experience, you can designate the operating range of print speeds for flexible materials:
REC RUBBER - from 5 to 20 mm / s
REC FLEX - from 10 to 40 mm / s
If you get it faster - you are a real Jedi! 8)
As for temperature settings, here they are:
REC RUBBER
Nozzle temperature 210 - 240°C
Table temperature 100 - 120°C
Requires an adhesive film or varnish on the table.
REC FLEX
Nozzle temperature 220 - 240°C
Table temperature 80 - 110°C
Printed on glass, any film will be permanently welded to the model.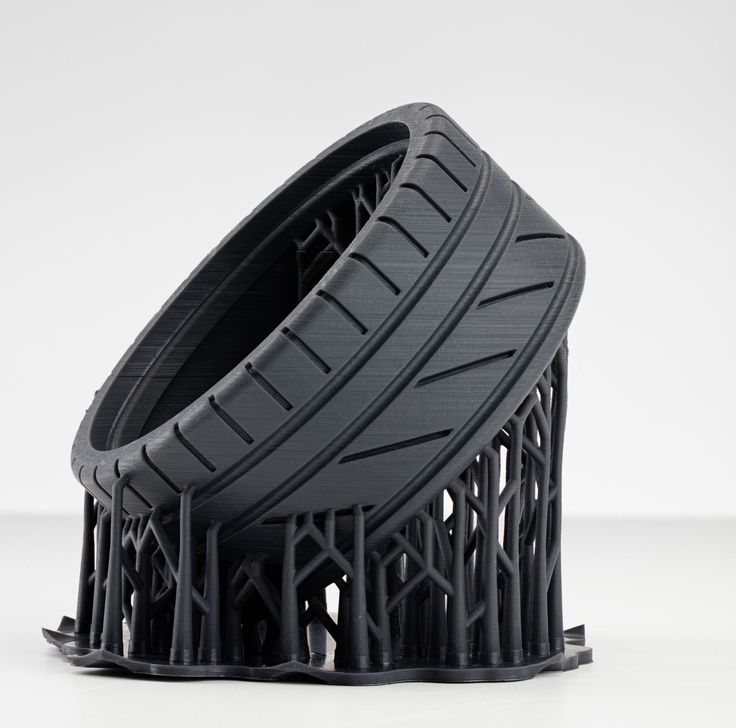
If you are not confident in your abilities, but you really want to try flexible materials, welcome to the office of the REK company - we will give you a free material sample.
Best flexible 3D printing materials: FLEX, TPU, eLastik and more
There are many applications that require parts printed from flexible, elastic, and soft materials.
Flexible materials can have a wide variety of properties: elasticity, durability, strength, fire resistance, chemical resistance (oil, gasoline, alkali), biocompatibility, which also makes them ideal for industrial applications. Today, flexible filaments approved for long-term skin contact are becoming increasingly common, making them ideal for prosthetics and wearable electronics. There are also flexible plastics made from 100% recycled material.
There are many manufacturers of flexible filaments for 3D printing on the market today. In this article, we will look at material options for high-quality printing of flexible wide-profile parts: from auto parts to smartphone cases.
Esun eTPU-95A
Esun eTPU-95A is the most widely used flexible 3D printing filament and is highly resistant to various types of loading. The high coefficient of elasticity provides a stable shape and long-term resistance of products to physical deformations. The material is resistant to industrial oils and chemicals, and also has moisture resistance, so that the resulting products can constantly come into contact with water. Esun eTPU-95A is perfect for printing sanitary napkins and seals, industrial dampers, and orthopedic insoles. Shore hardness is 95A, so thick-walled parts resemble hard rubber.
Esun eLastic
Esun eLastic is another common flexible material from Esun that is much softer than Esun eTPU-95A. Esun eLastic belongs to the category of TPE filaments, and its hardness is only 85A Shore. Given its high wear resistance, resistance to mechanical damage and low temperatures, this material is also suitable for use in industry, printing dampers and gaskets, especially in cases where the softness of thick-walled parts is important.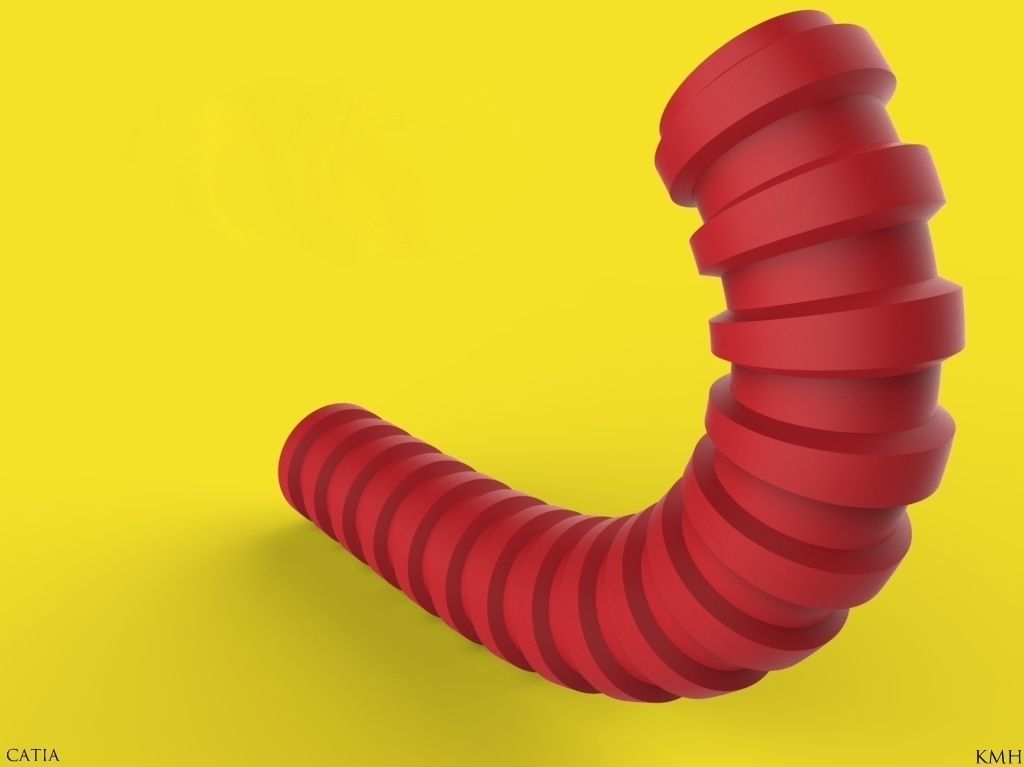 Products made from Esun eLastic have a pleasant tactile properties, which is great for printing covers for portable electronics, shoes, medical devices, vehicle steering pads. Esun eLastic is considered a difficult material to print due to the high elongation of the rod, so a direct feed extruder must be used for printing.
Raise3D TPU-95A Premium
Raise3D TPU-95A Premium is a flexible filament from professional FDM printer manufacturer Raise3D. This material is designed specifically for industrial use and has the appropriate quality certificates. Raise3D TPU-95A Premium has a 95A Shore hardness, ideal for printing seals, bushings, gaskets, tubes, protective covers, shoes and insoles, etc.
BFlex Bestfilament
BFlex Bestfilament is an analogue of TPU-95A from a domestic manufacturer, so a printer with an extruder of the Bowden system can easily handle printing with this material. Claimed hardness is 40 Shore D, which is equivalent to 95A on the more common hardness scale for flexible materials.
BFlex Bestfilament is designed for industrial applications, as it is highly resistant to physical stress and mechanical damage, as well as to chemically aggressive media: oils, gasoline, alcohol and solvents. However, this filament is not resistant to UV rays, so it is not recommended to print parts that are intended to be exposed to sunlight for a long time.
TPU Soft Bestfilament
TPU Soft Bestfilament is much softer than BFlex Bestfilament and is closer in properties to Esun eLastic, so a direct extruder is recommended for printing with this material. Despite being noticeably soft, the material has excellent compressive strength, abrasion strength, and greater tensile strength than the harder BFlex Bestfilament. TPU Soft Bestfilament is resistant to oils and gasoline, and is suitable for printing dampers, gaskets and rubber rollers.
BFGummy Bestfilament
BFGummy Bestfilament is a filament that is comparable in softness to TPU Soft Bestfilament, which also makes it necessary to use a direct extruder for printing.