3D printing worksheet
7 Fun & Easy 3D Printing Lesson Plans
Are you ready to take on a learning journey that keeps students motivated and engaged from start to finish? The MakerBot Learning Team’s got a great collection of 3D printing lesson plans to help get you started. You’ll reinforce complex STEAM concepts with Thingiverse projects that encourage experimentation and innovation. You’ll give your students the freedom to explore, design, and create new things, all in one lesson.
Many Thingiverse lesson plans come with step by step instructions, downloadable activity sheets, photos, and more. You’ll keep them engaged with interactive activities like building bridges, designing artifacts, making 3D-printed games, and more. Read on to check out some lesson plans that are sure to excite the innovators in your classroom.
Science
With the Cutaway Earth Model project, your class can expand on Earth Science concepts by exploring the various layers of the Earth. Elementary school students can reinforce their comprehension of the Earth’s layers by printing and coloring individual 3D printed pieces. They’ll enjoy piecing together its layers to make their own world.
Explore meteorology in the Hurricane Patricia lesson. Grades 3 through 5 will learn to analyze the atmospheric conditions of a storm from the perspective of space. In just seven steps, they’ll use embossify to create physical models of storms from satellite images, and then use those models to order them by their intensity.
Technology
There’s a rewarding sense of pride that students feel after they’ve created a complex 3D print. One such project is the K-12 Design Project: Freight Car & Train lesson. All it takes is five classroom sessions for students to create their very own freight cars and trains. They’ll learn to identify and model basic CAD designs, duplicate them, and assemble those designs into larger recognizable structures. Complete with Prezi presentations, worksheets, and step by step guides for each learning session, this lesson plan can be easily integrated into a larger curriculum. The lesson could also be adapted for other grade levels and class sizes by modifying the design or the project complexity. The Freight Car & Train lesson shows students that their ideas are just 3D models and structures waiting to happen.
Engineering
Empower students by giving them the freedom to engineer and build their own structures. In the Bridge Building lesson, students have the chance to design, create, and build bridges. In this lesson, each student must design and print structures that can fit together to make a 25 cm long bridge capable of holding at least 5 kg of mass. Once the 3D pieces are printed, they’ll assemble the pieces and prepare their bridges for weight testing.
As Thingiverse designer 2teacher4u suggests, you might want to ask student to complete a quick report that analyzes and compares their bridge to others in the class. This report will help students look back on the engineering process and talk about what they’ve learned. The Bridge Building Lesson, originally created for third graders, is a simple engineering adventure that can be easily adapted for younger or older students.
Art
Your students have wild, vivid imaginations. With the Snowflake Machine project, your students can create their own unique 3D printed snowflakes. Using Thingiverse’s Customizer app, the snowflake machine uses random numbers, mathematical algorithms, computer code, and more to mirror the way that snowflakes structures are created in real life. This lesson plan comes complete with tips and tricks and demo models to help you get started.
In the Aztec and Mayan Structures lesson, sixth graders design and print an artifact or structure based on Mayan or Aztec aesthetics. To prepare for this lesson, students research the two cultures, and use what they learn to create a design that’s historically accurate. To finish the lesson, students present the function or cultural significance of their print to the class.
Math
The best teaching moments happen when you blur the lines between learning and fun. In the Beast Belly: Fraction Game, grades K through 8 are challenged to fill a 3D printed beast’s belly up with tokens to make a whole number. They’ve got to see how many different fraction combinations they can use to fill the beast’s belly. The game helps students add and subtract fractions, express whole numbers, and recognize fractions that are equal to whole numbers.
This lesson plan comes with helpful print directions and worksheets. The game gives students a fun way to memorize fractions. You might even hear them challenging their friends, well after the lesson is over.
To get started in your classroom or for more lesson plans, explore the MakerBot Learning Collection!
Introduction to 3D Printing - 3D Printing in Education
Introduction to3D Printing
Learning Outcomes
Students will be able to:
1. Explain what 3D printing is;
2. Critique the need and opportunities for designing with this technology;
3. Develop a graphical representation of a 3D object using design software;
4. Safely print an object using a 3D printer.
Assessment
•Contributions to group and class discussion activities
•Graphical representation and 3D print of a key chain/pendant
- Manipulation and placement of at least 2 separate shapes to create a single 3D solid
•Completed Worksheet
Preparation
•Print some 3D printed objects to be handed around
•Index Cards for student groups to write questions
•Maker’s Empire app installed on tablets (iPad/Android) for students and teachers
•Wireless internet
•Overhead projector to connect to teacher iPad for software demonstration
•Print Worksheet - 1 per a student
•Print Worksheet answer sheet - 1 per teacher
•Print Lesson Plan to follow - 1 per teacher
•Working 3D printer
•Laptop connected to 3D printer
Lesson Plan | Year 7 | 2 hours | ~25 students
4 | LESSON PLAN
Plan
TIME
STUDENT TASKS
RESOURCES / SUPPORTS
Setup:
Students are shown the 3D printerand some 3D printed objects are passed around,
DO NOT give a detailed explanation of 3D printing, the idea is for students to discover this in the next task.
Teacher
Selection of printed objects
QandA:
In groups of 4 come up with a questions about 3D printing
Organise into groups
Index cards and pencil for studentsto write questions
Collect student questions written on index cards.
Ask students if they can answer the questions.
Teacher answers questions that they can, unanswered questions to be used in
Worksheet.
Software Demonstration:
Demonstrate the Maker’s Empire app usingan overhead projector.
Show very basic overview of ‘Shaper’module:
a) how to create new object
b) move shapes etc
c) ask questions to encourage thinking:
- what happens if you put a shape in the air?
- how can you create a circle for your pendant?
Projector and iPad to showhands-on demo
LESSON PLAN | 5
TIME
STUDENT TASKS
RESOURCES / SUPPORTS
0:40 - 1:30
Create:
Develop a keychain/pendant design using tablets. Create two or more designs
Student tablets (iPad/Android) with app installed and working
Observe 3D Printer:
A design is sent to the printer.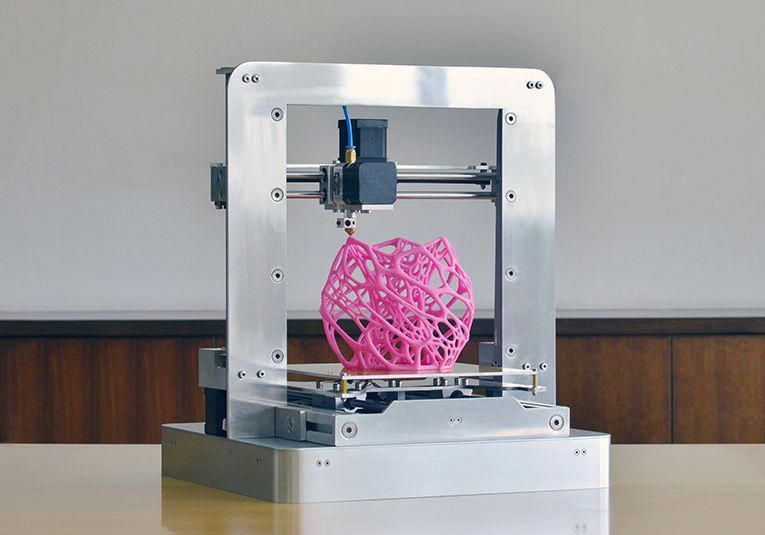 Students come up in groups for 3-5min to get a closer look at the printer in action.
Watch the 3D printing process and identify health and safety, environmental and sustainability considerations.
Working 3D printer
(could also have a camera feed to project this for better view)
Worksheet Activities:
Student complete Worksheet
•Add unanswered questions from earlier in the lesson
• Search online to find images and videos about 3D printing - list the URL of 2 good resources
•What could this printer make?
•What couldn’t this printer make?
•How are most plastic things made at the moment?
•How could 3D printing change manufacturing, our lives and the environment?
• Terminology find-a-word
Printed copies of the Worksheet
Student access to the internet.
1
6 | LESSON PLAN
Introduction to
3D Printing
•How else could you make this keychain?
•Ask students about their designs and reflect each other’s design?
•How and where are keychains you buy at a shop manufactured?
•What impact could 3D printing have on the manufacturing industry locally, nationally and globally?
•What materials (plastic, wood, metal etc) could be printed? Why?
•What social impact could this technology have? (copyright, IP, weapons, jobs)
Extension Discussion Points
Design and Technology (Level 7/8)
•Examine and prioritise competing factors including social, ethical and sustainability considerations in the devel-
opment of technologies and designed solutions to meet community needs for preferred futures (ACTDEK029)
•Investigate the ways in which products, services and environments evolve locally, regionally and globally
through the creativity, innovation and enterprise of individuals and groups (ACTDEK030)Analyse ways to produce
designed solutions through selecting and combining characteristics and properties of materials, systems,
components, tools and equipment (ACTDEK034)
•Critique needs or opportunities for designing and investigate, analyse and select from a range of materials,
components, tools, equipment and processes to develop design ideas (ACTDEP035)
•Generate, develop, test and communicate design ideas, plans and processes for various audiences using
appropriate technical terms and technologies including graphical representation techniques (ACTDEP036)
•Effectively and safely use a broad range of materials, components, tools, equipment and techniques to make
designed solutions (ACTDEP037)
Applicable Australian Curriculum Content Descriptions
LESSON PLAN | 7
ICT capability (Level 5)
Identify the impacts of ICT in society
•explain the benefits and risks of the use of ICT for particular people in work and home environments
Locate, generate and access data and information
•locate, retrieve or generate information using search facilities and organise information in meaningful ways
Select and evaluate data and information
•assess the suitability of data or information using appropriate own criteria
Generate solutions to challenges and learning area tasks
•design and modify simple digital solutions, or multimodal creative outputs or data transformations for particular
audiences and purposes following recognised conventions
Select and use hardware and software
•independently select and operate a range of devices by adjusting relevant software functions to suit specific tasks,
and independently use common troubleshooting procedures to solve routine malfunctions
materials, equipment and technologies for advertising production
- Product catalog
Product catalog
Go to expanded catalog
PDF catalogs
CONSUMABLES
- Silk-screen materials
- Advertising and decorative lighting
- Chemistry (adhesives, paints, varnishes, special chemicals, cleaners)
- Mounting and packaging materials
- Aluminum and plastic profiles
- Materials and equipment DTF
- Digital printing ink
- POS materials and equipment, Joker, Uno and Tritix systems
- Mobile stands, Flagpoles, Pavement signs, Fencing posts
- Rigid sheet materials
- Colored self-adhesive films
- Materials for printing and lamination
- Reflective materials
- Thermal transfer materials
- Souvenir and premium products
- Clothes and accessories for labeling
- CRAFT materials and equipment
EQUIPMENT AND TOOLS
- Printers for advertising production
- 3D printers
- Equipment for nesting and cutting
- Milling and engraving equipment and laser engravers
- Fabric printing equipment
- T-shirt printers
- Laminators
- power tool
- Printers for printing and transfer printing
- Aluminum ladders and ladders
- Thermopresses
- Equipment for the production of liquid acrylic letters
- Trimmers, abrasives, film tools
- Eyelets and tools for their installation
- Knives, blades, scissors, mats
- Silk-screen equipment
- Spare parts, add.
 hardware and software
Sale
- Zenon Academy
- Video
- Articles
- Webinar Schedule
- About Us
- About company
- Our staff
- News
- News
- Stock
- New
- Developments
- Seminars
- Exhibitions
- Congratulations
- Webinars
- Service
- Signboard calculation
- Service
- Working conditions
- Delivery
- Payment
- Contacts
You are using an outdated browser
In order to use all the features of the site,
download and install one of the following browsers:
Google Chrome
download the latest version
Opera
download the latest version
Mozilla
download the latest version
Yandex Browser
0 download the latest version 9005
article
Subscribing to the newsletter
A confirmation email has been sent to the email you specified.
Please follow the instructions in the letter.
Sorry, an error has occurred, please try the service later.
To subscribe to the newsletter, please fill in ALL fields of the form
Subscription regions
- Moscow - Golyanovo
- Moscow - Losiny Ostrov
- Moscow region - Odintsovo
- Moscow region - Podolsk
- Arkhangelsk
- Barnaul
- Belgorod
- Vladivostok
- Vladimir
- Volgograd
- Voronezh
- Yekaterinburg
- Izhevsk
- Irkutsk
- Kazan
- Kaliningrad
- Krasnodar
- Krasnoyarsk
- Kursk
- Lipetsk
- Nizhny Novgorod
- Novosibirsk
- Omsk
- Orenburg
- Penza
- Permian
- Pyatigorsk
- Rostov-on-Don
- Ryazan
- Samara
- St.
 Petersburg
 - Saransk
- Saratov
- Simferopol
- Smolensk
- Sochi
- Stavropol
- Tambov
- Tolyatti
- Tomsk
- Tula
- Tyumen
- Ulyanovsk
- Ufa
- Khabarovsk
- Cheboksary
- Chelyabinsk
- Yakutsk
- Yaroslavl
I agree for the processing of personal data
Product request:
You can submit this product request form, or contact us by phone or by email , informing the manager of the article
I agree for the processing of personal data
Comments and suggestions
If you are faced with a situation in which you could not get an answer or the help you need from our employees, were dissatisfied with the service or did not find a solution to your question, you can directly contact the company's management with your problem.
I agree to the processing of personal data.
Types of tables for a 3D printer
Home / Blog / Useful / Choosing a table for a 3D printer. Calibration and adjustment
04/21/2021
Contents
-
- Print platform materials
- Heated table
- Non-heated table.
- Tabletop
- Types of calibration
- Automatic calibration
- manual calibration
- Calibration of a 3D printer table with Cartesian kinematics
- Calibration of the printer Delta 9000 9000
- Print platform materials
000400040004000 The correct calibration of the 3D printer bed, or as it is also called Hot Bed, is very important. The first layer is like a foundation for a house, if the foundation is fragile, then the house will not stand for a long time.
If the plane of the printed surface is uneven, then the model may be partially peeled off or deformed.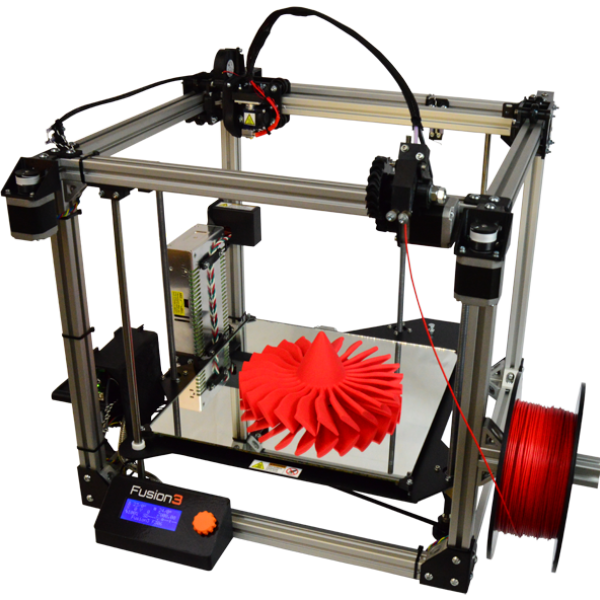 The first layer may not stick to the printing platform at all, and the result of many hours of printing will not be a neat 3D model, but plastic noodles.
Print failure example
Therefore, it is very important to properly calibrate the table. Printing platforms can be conditionally divided into two types - adjustable and not.
The adjustable table is attached to the printer with spring-loaded screws. It is not rigidly fixed in height and with the help of screws it is possible to calibrate the plane and the gap between the 3D printer table and the nozzle.
Adjusting screw
Unregulated is a printing platform that is rigidly fixed to the printer body. This solution is used in delta printers. Calibrate them only programmatically.
Non-adjustable delta printer table
Print platform materials
The material from which the table is made may vary depending on whether the table is heated or not.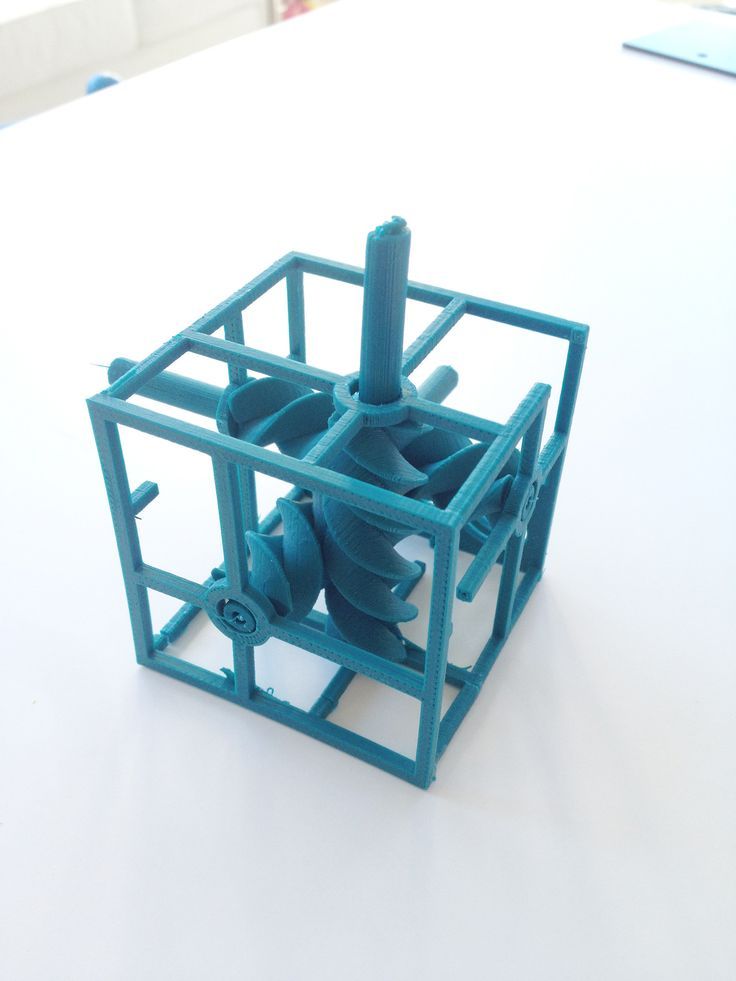
Heated table
There are several types of heating elements for a 3D printer platform - aluminum, textolite, silicone and kapton. Each of them has its pros and cons.
Textolite heater - inexpensive, but fragile and can be strongly bent when heated.
Silicone heater - can not be used alone. Usually used in conjunction with a metal base.
An aluminum table is expensive, but it heats up more evenly and is less subject to thermal deformation than other platforms.
The Kapton heater is very expensive and cannot be used on its own. Usually glued to a metal base. Can be heated up to 200 degrees.
Types of heated printing surfaces
Most often, an aluminum heating table or a silicone heating pad is used in conjunction with an aluminum plate. Low price, ease of processing and high thermal conductivity make aluminum the most popular material for the manufacture of heated printing tables.
The main advantage of heating the printed surface is to increase the adhesion (adhesion) of the first layer of plastic. If the printer is with a closed case and a heated platform, a “passive thermal chamber” is created inside. Due to this, plastics with high shrinkage do not crack in layers during printing, the adhesion of layers (interlayer adhesion) increases, and internal stress is more evenly distributed during cooling.
But there are also disadvantages - when heated, the metal table expands a little, and since it has nowhere to expand, it begins to bend. For a printing platform up to 200x200 in size, deformation will not be very critical, but for larger tables this becomes a tangible problem.
Each manufacturer of 3D printers with a large printable area solves the problem of deformation of the metal table in its own way. For example, in Raise 3D, the table is fixed along the entire plane with pins at 13 points.
Heated table fixing Raise 3D
Table without heating.
An unheated printable surface is often used in 3D printers designed to work only with PLA and other low temperature plastics. For example - printers for children or large printers with an open case.
An unheated printable surface is often used in 3D printers designed to work only with PLA and other low temperature plastics. For example - printers for children or large printers with an open case.
Children's printer with acrylic print bed
Tables without heating are made of aluminum or acrylic. If the table is aluminum, then glass or any other coating should be used on top. Aluminum is a soft metal and even a brass nozzle can scratch or damage it if not properly adjusted.
Heating table with aluminum base and mirror
Acrylic tables are often used in inexpensive 3D printers designed for kids. Acrylic is difficult to damage or break. You can print on an acrylic table without glass or other coating.
Free Shipping
Add to compare
Product added to compare Go
| Manufacturer | Raise3D |
Add to compare
Product added to compare Go
| Manufacturer | Raise3D |
Add to compare
Product added to compare Go
| Manufacturer | Raise3D |
Free Shipping
Add to compare
Product added to compare Go
| Manufacturer | FlashForge |
Table top
In order for the first layer to adhere to the table tightly, different surfaces are used that increase adhesion. It is more convenient to remove the model from the removable surface. If you need to immediately start printing another model, you can simply quickly change from one removable surface to another.
The most popular table surface is the regular tempered glass or mirror. It is not expensive and available. It is believed that the accuracy class of the mirror is higher, but for small working areas (up to 200x200 mm), ordinary tempered glass is enough.
Glass itself does not hold the first layer well, so various adhesives or stickers are used to increase adhesion.
Ordinary glass can burst from a temperature difference or “crumble”, then the model comes off along with pieces of glass. Good thing it's easy to replace.
A piece of glass came off with model
Sitall glass - in fact, it is ordinary glass with the addition of boron oxide. This makes it stronger than ordinary glass and resistant to temperature changes. But the cost of such glass is much higher than ordinary or tempered glass.
Sitall glass
Perforated table - mainly used for printing ABS plastic. Thanks to the perforation, the plastic adheres firmly to the print platform. In order for the bottom of the model to turn out to be even in the slicer settings, you need to enable printing on a raft (substrate).
Perforated table used in UP printers!
Stickers - There is a huge variety of stickers for printing platforms. It can be either ordinary masking tape or a specialized surface (rough with an adhesive surface).
The finished model is easier to remove from a flexible substrate than, for example, from glass. With some substrates, the model can be easily removed after the printing platform has cooled down. For some, you need to heat the table and only then tear off the model.
Separately, you can select a variety of compositions that are applied to the surface of the printing platform to increase the adhesion of the first layers. 3D varnishes, 3D adhesives, etc. Probably every 3D maker has his own special recipe for the same composition that almost everything sticks to. It can be BF glue mixed with a solvent or alcohol, ABS diluted in acetone, kvass with sugar, glue stick, etc.
Do not spray varnish or other sprays inside the printer. Glue particles can settle on mechanisms, fans, and even get on electronics. This can lead to damage to the 3D printer. Simply remove the platen surface from the printer and apply the adhesive.
Add to compare
Product added to compare Go
| Manufacturer | Raise3D |
Add to compare
Product added to compare Go
| Manufacturer | FlashForge |
Add to Compare
Product added to comparison Go
| Manufacturer | FlashForge |
Calibrations
In addition to choosing the surface of the print platform, it is important to correctly level the plane of the table and set the correct gap between the table and the nozzle. Calibration can be automatic or manual.
Printers with large print surfaces, such as the Raise 3D Pro 2 and Pro 2 Plus, are calibrated at the factory. The user only needs to check the gap between the table and the nozzle, because it may go astray during transportation.
Automatic calibration
Automatic calibration is performed using a sensor (optical or contact), which is mounted next to the extruder. The printer checks several points on the print platform one by one and remembers the values. The first layer will be printed correct for the curvature of the table.
You can meet the calibration using a conductive substrate that is placed instead of the printed surface. This method is rare, but still has a place to be. It is commonly used to calibrate 3D printers with delta or delta robot kinematics.
Automatic calibration allows you to quickly and effortlessly level the table. It becomes especially indispensable for printers with delta or delta robot kinematics. Optical sensors "do not see" glass, so for printers with an optical sensor, it is better to use other surfaces of the print platform.
Some printer models have a menu with hints to help you properly set the platform plane and gap. It is enough to launch the “assistant” and follow the instructions on the screen. This is not exactly automatic calibration, but with such help it becomes much easier for a beginner to correctly calibrate the table.
An example of a 3D printer with automatic calibration is Raise E2. The Raise E2 extruder has a contact sensor to determine the distance between the nozzle and the printed surface. The resulting values help to correct the print height of the first layer. You can calibrate not the entire table, but only the area on which the model will be located.
Manual calibration
Manual calibration is when the user sets the plane of the table and the gap between the table and the nozzle himself. To do this, under the printing platform there are screws or winglets with which you can adjust the height of the printing platform.
Calibration screws
The standard gap between the platform and the nozzle, for most printers, should be - 0.1-0.2mm. If there is no set of probes at hand, a standard A4 sheet folded in half can replace it. Before calibration, the print surface (if it is heated) and the nozzle must be heated.
Sometimes manufacturers of 3D printers recommend a gap between the table and the nozzle - 0. Therefore, read the instructions before calibrating.
We will consider the calibration of the two most common kinematics - Cartesian and delta.
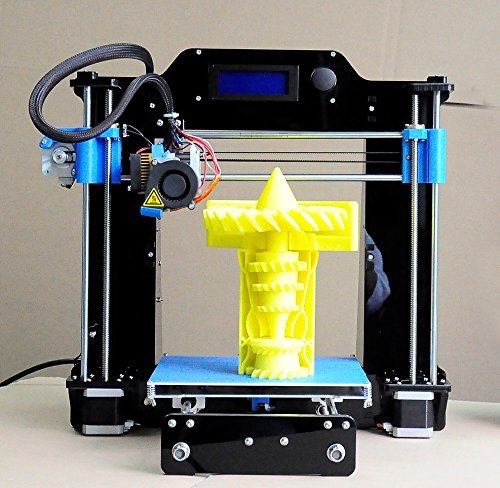
Cartesian kinematics is based on the Cartesian coordinate system and the movement of the 3D printer's head along the x, y, z axes.
Printer example with Cartesian kinematics
In deltas, the extruder moves along 3 identical axes using carriages moving along vertical guides. The delta printer can be called a simplified delta robot, but these are still two different kinematics.
Example of a printer with delta kinematics
3D printer table calibration with Cartesian kinematics
Different manufacturers may have slightly different calibration instructions. We will consider here the calibration of the printer with standard kinematics.
-
Heat up the table and nozzle. When heated, the metal expands slightly, so the gap between the printing platform and the nozzle may differ between the “hot” and “cold” ones.
-
Through the printer menu, send the table and extruder to the "home" or zero position in all axes. Usually the zero point is the near left corner of the extruder and the top position of the print platform. Be sure to make sure that the 3D printer does not rest the nozzle on the table and does not damage it. If this is the first calibration, use the nuts to lower the table as low as possible.

-
Through the printer menu or manually (for this you need to turn off the motors through the menu), move the extruder so that the nozzle is above the adjusting screw.
-
Use a feeler gauge and adjusting screw to set the gap between the print bed and the nozzle.
-
Repeat all steps for all calibration screws. Usually there are 3 or 4 screws.
-
After aligning the plane above the screws, move the extruder to the center and check the gap. If the gap matches the feeler gauge, then the table plane and platform distance are correctly calibrated.
Delta printer table calibration
Calibrating a delta printer is a very large topic, so here we will only describe the general principles.
The delta printer does not have the x, y and z axes we are used to. Instead, the delta printer has 3 towers - A, B, C, on which the carriages move.
Since the delta table is static, it is calibrated programmatically. The gap is calibrated by 3 points (at the columns) and the lens (center) of the table. The lens can be concave or convex.
Before calibration, check the mechanics of the printer - the belts must be tensioned evenly, there must be no play in the carriages and the effector (the plate to which the extruder is attached). If the belts are loose or uneven, it will be problematic to calibrate the printer.
Some 3D makers check belt tension with a tuner. Evenly tensioned belts will sound the same, but the correct “note” is found empirically.
There are a huge number of programs for delta calibration, but one of two is usually used - Pronterface or Repetier-Host. Using them, you can directly access the printer using special commands and change the values in the firmware.
As auxiliary programs, you can use a virtual calculator and from there transfer the values \u200b\u200binto the firmware or download the finished GCode. They need to specify the parameters of your printer - firmware (usually Marlin or Repetier), diagonal length, circumference, etc. These parameters can be taken from the firmware or measured with a caliper. It is important to specify all the parameters as accurately as possible, otherwise the printer will not be able to calibrate.
First, 3 points are aligned at towers A, B, C, and only then the lens in the center of the table is corrected.
Manual delta calibration is tricky, but it doesn't have to be repeated often. Typically, the printer only needs to be recalibrated after some mechanical parts, belts, or print bed cover have been replaced.
Totals
The calibration process may seem tedious and complicated, but in fact, once you do it yourself, the process will no longer seem so intimidating. In addition, most manufacturers try to help novice users and equip their printers with auto-calibration sensors or try to simplify this process as much as possible with detailed menu prompts.