Ender 3 3d printer enclosure
3D Printer Enclosure,Creality 3D Printing Enclosure,Ender 3/Ender 5 plus
Home Collections 3D Printer Enclosure: Safe, Quick and Easy installationBUY ANY 2, GET 10% OFF: "Sprite Extruder",High-Temp Hotend, Enclosure, Laser Head, PLA, BL Touch, Build Surface etc
$ USD
$ USD
21 Reviews Buy Any 2, Get 10% OFF Pricing Not Include Tax
Ship From
United StatesChinaUnited KingdomCzechAustraliaCanada
Apply to
For Ender 3 /3 Pro/3 V2For CR-10 Series/Ender 3 Max/Ender 5 Plus
Ship to
It is expected to arrive within and will cost $ USD to ship
This item can't be shipped to this Country/Region
Bundles
Quantity
28 Available
Add To Cart Buy It Now
Continue To Shopping View Cart
People who bought this item also bought
Worried that print quality coming from the open-framed Ender 3(Pro) or Ender 3 V2 and Ender 5 will be negatively affected by the external environment?
No need to fear, the 3D printer enclosure is here!
- Improve the overall printing experience - both for you and the machine itself.
- Easy to install, can be folded for efficient storage.
- Equipped with pockets to hold the necessary tools.
- You can easily access the printer by unzipping the front of the enclosure, which features a seethrough screen for full-time monitoring.
3D Printer Enclosure Advantage:
- Quick and easy installation: Folding storage, easy to carry, multi-faceted observation, reserved tool pockets. Economical 3D printing room!
- Constant Temperature: Keep a constant temperature printing environment, reduce the impact of printed products when low-- temperature weather, improve printing stability.
- Dustproof and good noise reduction: The interior uses Pure aluminum film and flame retardant appearance material. Technically, if in a fire, it will melt and not fire itself of the enclosure, and will not spread.
- Stable Structure: Equipped with a selection of Iron pipes, stable structure, and abundant space.
Constant Temperature
3D printer keeps a constant temperature printing environment, allowing for much more stable temperatures once the printer is operating.
Quick and Simple Installation
Quick and easy installation, folding storage, with reserved tool pockets, easy to carry(6.08lb), and multifaceted observation.
Safe to Use & Stable Structure
The interior uses pure aluminum film and flame retardant appearance material and will not fire itself of the enclosure and will not spread as well.
Customer Reviews
Customer Reviews
Based on 21 reviews
67%
(14)
19%
(4)
14%
(3)
Write A Review
Ask A Question
Reviews (21) Questions (0)$ USD
$ USD
Buy Any 2, Get 10% OFF
ADD TO CART BUY IT NOW
Write a review
Ask a Question
The Best Ender 3 Enclosures (Pro/V2): Buyable & DIY Options
Easy on the wallet and capable of quality prints, the Ender 3 and successor models, the Pro, V2 and S1, are also ripe for DIY upgrades.
Dauntless - How to Craft and Upgrad...
Please enable JavaScript
Dauntless - How to Craft and Upgrade Repeaters
Today’s guide focuses on one of the most popular Ender 3 add-ons – rounding up the best Ender 3 enclosures.
From pre-made, buyable enclosures to creative DIY options you can fashion from various easily obtainable materials, there are plenty of options you can pick.
We’ll highlight the best among them and also provide a few top Ender 3 enclosure buying tips to keep in mind.
Buyable Ender 3 Enclosures
3DSourced is reader-supported. When you buy through links on our site, we may earn an affiliate commission. Learn more
Official Creality Ender 3 Enclosure
- Price: Check price at Creality store / Check here on Amazon
- Assembly: Easy-to-assemble iron pipe/three-way connector frame
- Printer Access: Large front door with zip
- Print Visibility: See-through front screen with zip, velcroed side and top opening
Although Creality opted not to equip the Ender 3 with an enclosure, the company offers its very own official-vetted enclosure for the Ender 3 in all its incarnations.
The enclosure’s biggest strength is that it’s designed specifically for the Ender 3, so no faffing around checking dimensions – the Ender 3 just fits, with room to spare.
It also offers sufficient top space to squeeze in a spool of 1kg filament.
With toolless, easy assembly, the official Creality enclosure consists of a rigid iron pipe frame held together by three-way connectors, on top of which sits a heat-containing cover to prevent drafts.
The inner layer is made of an aluminum film, while a flame retardant fabric coats the outer layer.
The official Creality Ender 3 enclosure can maintain temperatures far better, ideal for printing with ABS, ASA, PC, and other heat-sensitive materials. Creality says the enclosure helps muffle printing sounds and has also thrown in a handy side-mounted tool pouch.
A zipped window that runs almost the front and top of the enclosure offers easy access to the printer and a good-sized viewing window.
Smaller right side and top openings with velcro covers grant two additional angles to access the printer without removing the entire enclosure.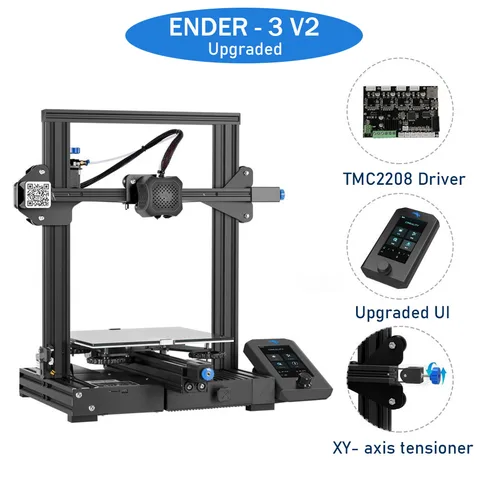
3D UpFitters Ender 3 Enclosure
- Price: Starting at $200.00
- Assembly: Fairly involved, comes with high-quality, well-guided assembly instructions
- Printer Access: Hinged front door with magnetic latch and left-side door
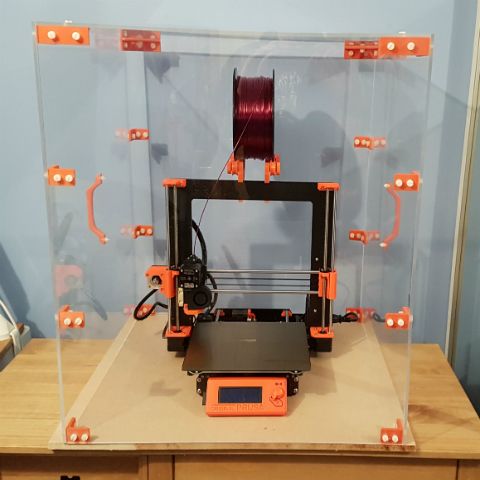
- Print Visibility: Acrylic see-through panels on all sides
If you’re looking for a sturdier alternative to Creality’s tent-style enclosure above, 3D UpFitters’ Ender 3 kit is a solid option.
The company specializes in 3D printer enclosures and levies that expertise to offer some of the best options on the market.
The enclosure is made of high-quality acrylic panels held together by ABS connector brackets. This means complete visibility of the printing process from all angles and the ability to maintain internal temperature above 30°C.
A hinged front door with magnetic latches and a side-mounted two-panel swing door means easy access to the printer.
The kit even comes with a custom mount and extender cable to position the Ender 3’s power supply outside the enclosure.
It also features cable routing holes to position the printer’s display outside the enclosure for easy print control. 3D UpFitters’ Ender 3 enclosure starts at around $200.00.
The company offers a range of add-ons, including a carbon air filter, temperature gauge, spool holder, vent system with fan/dryer hose adapter, interior LEDs, etc.
You can shave off a few dollars by opting to print the connectors yourself using ABS, something the company facilitates by providing STL files.
Assembly is reasonably involved and takes some time, but 3D UpFitters’ high-quality instructions are good enough for those usually daunted by DIY assembly to follow.
Wham Bam HotBox V2 Enclosure
- Price: Starting at $120.00
- Assembly: Pre-assembled, effortless two-minute set-up
- Printer Access: Large zipped front/top door
- Print Visibility: See-through front panel
Wham Bam’s HotBox V2 enclosure is a solid option if you want to transform the Ender 3 into an ABS-ready printer with as little hassle as possible.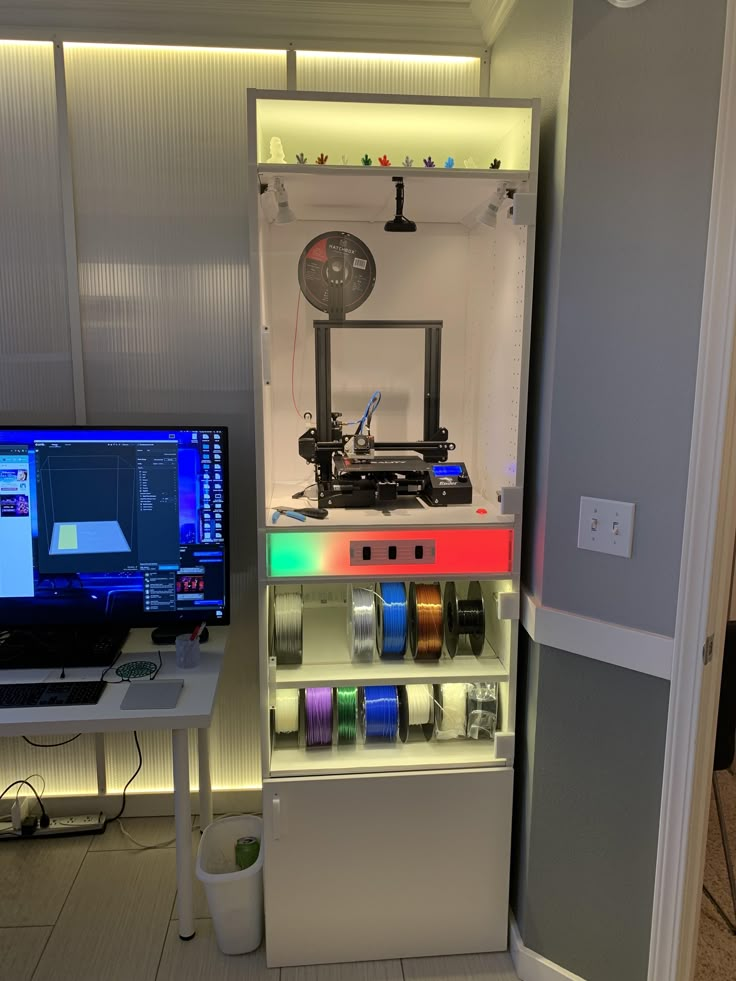
It comes fully assembled with a setup involving no more than two zippers.
The HotBox V2 is made up of a semi-rigid, lightweight polymer honeycomb insulating structure with a high-grade Nylon 600D outer layer and metallic heat-containing internal lining.
These materials keep out drafts and maintain a steady internal temperature.
A large front-facing velcro panel allows you to view and access the printer, while dual side-mounted zippers see the front and cover open up completely for even easier access to the printer.
There are metal-lined filament passages mounted throughout, with plugs to seal them when not in use.
Cable passages and velcro retainers feature on all sides, along with an air vent port, and even an in-built thermometer for monitoring. The top panel features a velcro panel for the Ender 3’s spool holder to sit outside the enclosure.
Other notable features include loops for a pair of LED light bars on the front panel should you fancy the upgrade along with a useful tool pouch on the enclosure’s side.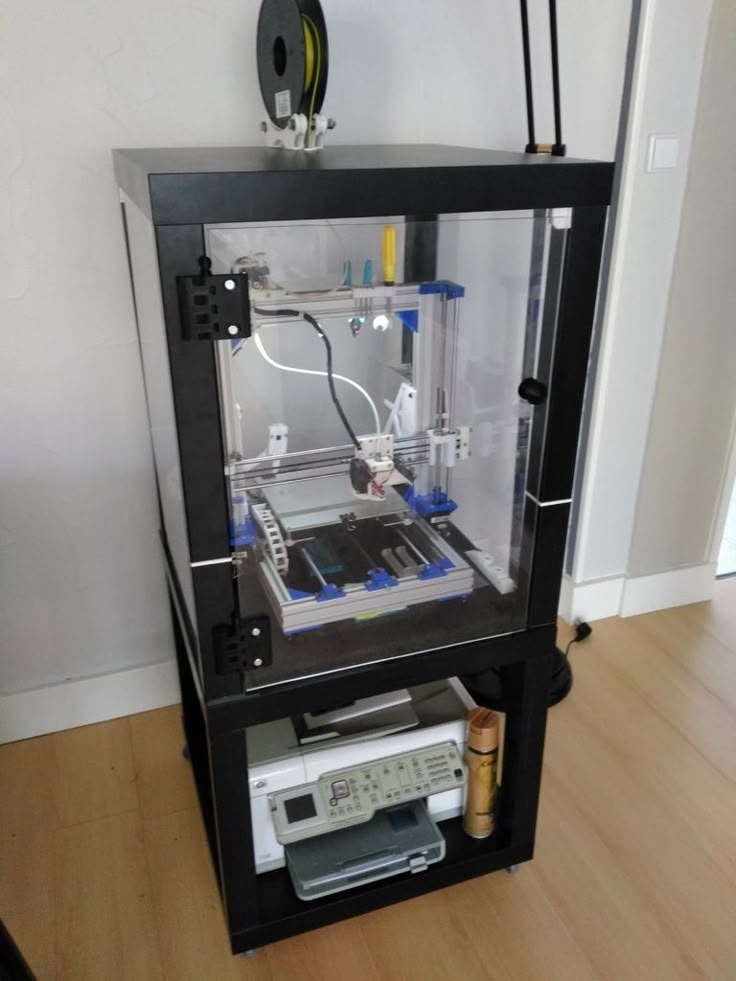
It folds up flat for easy transportation and storage.
DIY Ender 3 Enclosures
Exercise and Kids Mats
- Price: $20.00-$30.00
- Assembly: Very easy, interlocking puzzle teeth
- Printer Access: Easily remove one of the mats to access the printer
- Print Visibility: Poor
Although not the first thing that comes to mind, foam exercise and kid’s play mats constitute a viable DIY option for an Ender 3 enclosure.
In particular, mats that have interlocking puzzle teeth on the sides can be combined easily and quickly to create a cube large enough to house an Ender 3.
No need for tools or screws – simply push them together.
While their material (usually ethylene vinyl acetate) may not be known for its insulative properties, and the imprecise, toothy cuts may be prone to letting through small drafts, these mats prove surprisingly competent at maintaining a steady temperature.
Due to manufacturers having to stick to rigid standards, they are generally non-flammable.
They are also comparatively cheap when stacked up against pre-made enclosures. Expect to pay as little as $20.00 to $30.00 for the six panels required for a six-sided cube enclosure.
There are, of course, downsides.
Unless you carve out an opening and install an acrylic panel, there’s no way to monitor a print without removing one of the mats. Depending on the mat’s thickness, fitting in an opening for the filament spool might be troublesome, too.
IKEA LACK Table
- Price: $13.00 IKEA LACK table, $60.00 panel kit, cost of filament to 3D print brackets
- Assembly: Complex
- Printer Access: Hinged front door
- Print Visibility: Excellent, see-through front, back, and side panels
A favorite among seasoned makers, the IKEA LACK table enclosure is a classic DIY option.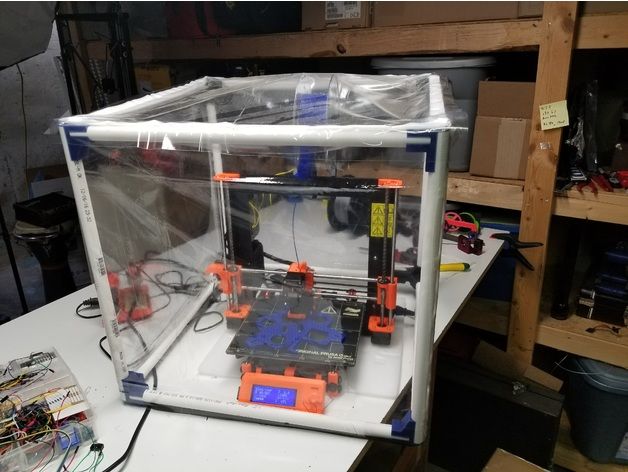
Though not initially conceived for the Ender 3, it works a treat to transform any small-ish open-design printer into a machine capable of handling even the most temperamental filament types.
The basic idea is to take a cheap, sturdy, and readily available IKEA LACK side table, then mount acrylic panels on the front, back, and sides with 3D printed brackets to create a toasty thermal environment for ABS, Nylon, PC, and more to thrive.
You won’t need custom-cut acrylic panels as you can buy kits from Amazon and the like.
These include cut-to-size acrylic panels with cabling holes, magnets, and hardware. STL files for the 3D printed parts are also available on sites like Thingiverse.
Visibility is unsurprisingly excellent, with views of the printer from the front, back, and sides.
Kits also generally include a hinged door or a removable front panel for printer access.
You can even stack multiple LACK tables to create storage space or fashion and attach all manner of creative add-ons like lights, a thermometer, or an external spool holder to the side table’s wooden frame.
Whatever way you look at it, this is a DIY project, so assembly is very much hands-on with a good dose of problem-solving if you don’t go down the kit route – one for the experienced DIYers or motivated beginners out there.
Wood Enclosure
- Price: $100.00-$200.00 depending on the cost of wood
- Assembly: Medium-hard difficulty
- Printer Access: Optional hinged front door or removable panel
- Print Visibility: Potentially excellent if using four acrylic panels
Similar to the IKEA LACK build, a wooden enclosure is a viable alternative to a pre-made option, especially if you’re good with your hands and have some woodworking experience.
Generally, those who’ve gone down this route build a wood frame and then attach wood panels and one acrylic panel on the front for visibility to create an enclosed space for the Ender 3.
Assembly can vary in complexity depending on your plans.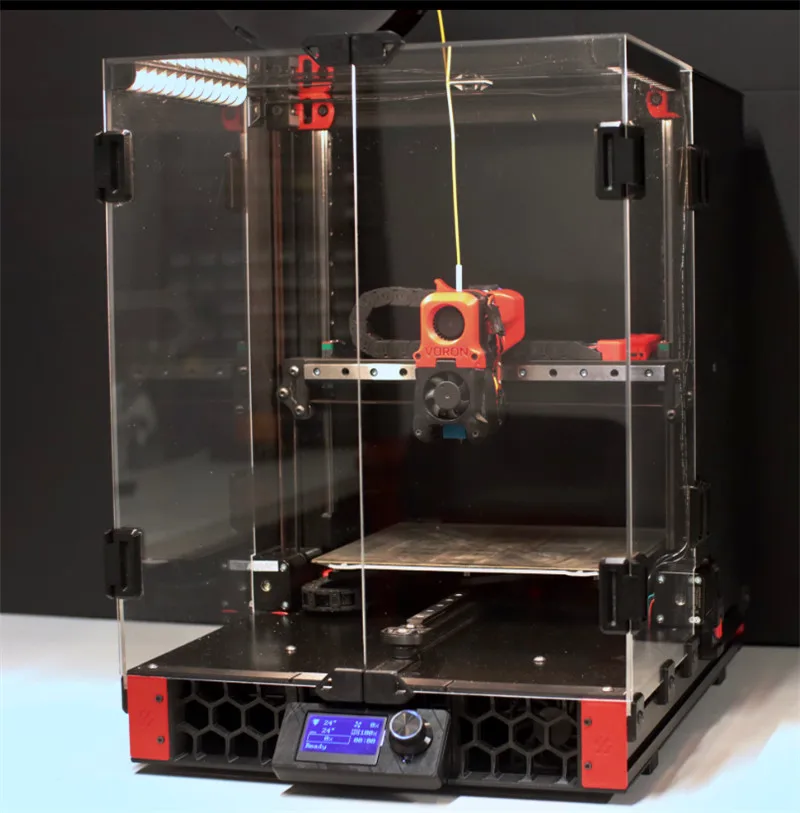
Wood is one of the more workable materials, but you need the right tools – a circular saw, drill, etc. The lack of precise guides means you’ll need to measure the correct dimensions yourself.
The whole project could cost next to nothing if you can gather up any spare wood lying around and 3D print the brackets for the acrylic panels.
Otherwise, expect to pay anywhere from $100.00 to $200.00, depending on the cost of wood in your area.
Plastic Sheets and PVC Frame
- Price: $20-$40
- Assembly: Medium complexity
- Printer Access: Door cut into sheet with velcro holds or removable sheet
- Print Visibility: Poor, unless you use see-through material
It’s possible to piece together an inexpensive, rudimentary Ender 3 enclosure with no more than a sheet of plastic, a basic frame made of PVC, for example, and strong adhesive like duct tape.
The process is pretty intuitive.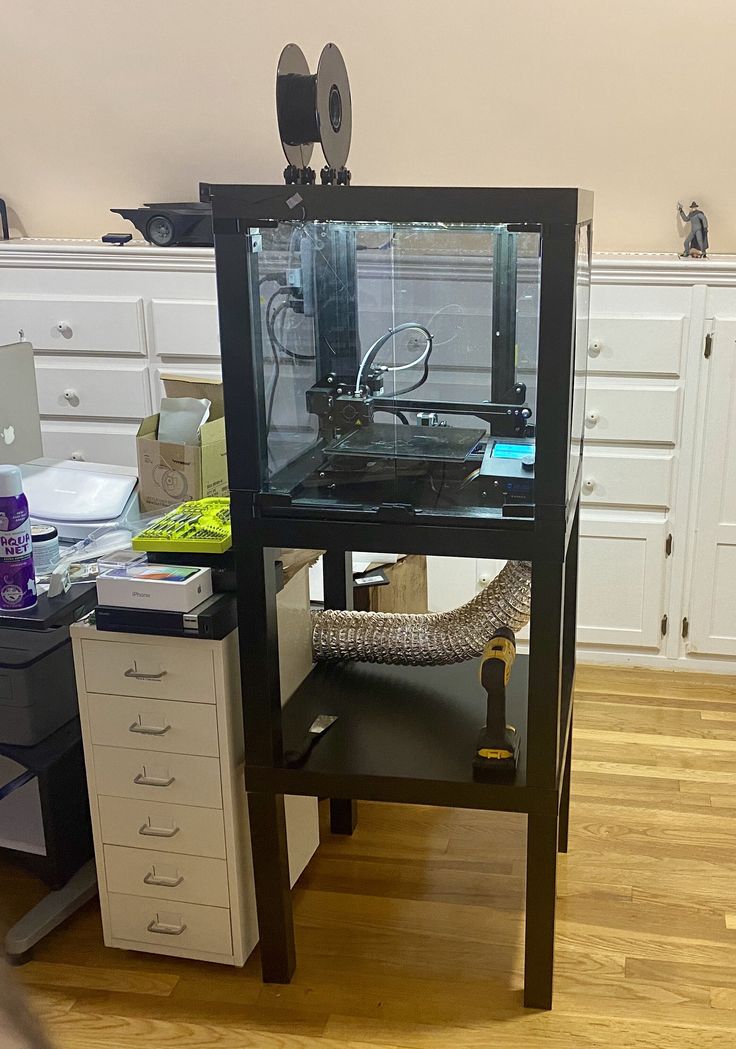
It involves assembling a frame, draping the sheet over and holding it down with tape. The printer then sits underneath, benefiting from the right controlled thermal environment to handle heat-sensitive filament.
In terms of equipment, we recommend any non-flammable and heat-resistant plastic sheet; the thicker, the better, as extra width generally pumps up the insulative properties.
Depending on your visibility preference, you may also want to go for see-through sheets.
As for the frame, a popular option is PVC, as it can be combined without tools, relying instead on friction to hold it together. This makes it easier to build and disassemble for transportation or storage.
Another popular alternative is to 3D print the frame yourself, further reducing costs.
Assembly shouldn’t be too taxing but could vary depending on the frame material you go for.
For printer access, you can either remove a section of the sheet as needed or cut out a door and attach velcro dots to the frame to keep it closed during printing.
Advantages of an Enclosure for Your Ender 3
Temperature Control
An enclosure creates a stable thermal environment.
Without an enclosure, the Ender 3 is subject to ambient temperature fluctuation caused by natural shifts and factors like drafts.
An enclosure allows for a consistent environment, essential if you need consistent and reliable results when reproducing the same model and part.
Fumes, Odors, Noise Reduction
An Ender 3 enclosure contains the fumes created when melting certain filament types.
These fumes can have hazardous consequences when breathed in. Similarly, many heat-sensitive filament types produce unpleasant odors, which an enclosure can help reduce, which is useful if you can’t set up the printer in a well-ventilated area.
A further benefit is noise reduction. An enclosure can help muffle stepper motor and fan noise.
Safety
An enclosure offers a protective cocoon around the Ender 3 to shield it from accidental knocks and bumps, and also protect users, children, and others from injuring themselves on the hot nozzle or heated bed.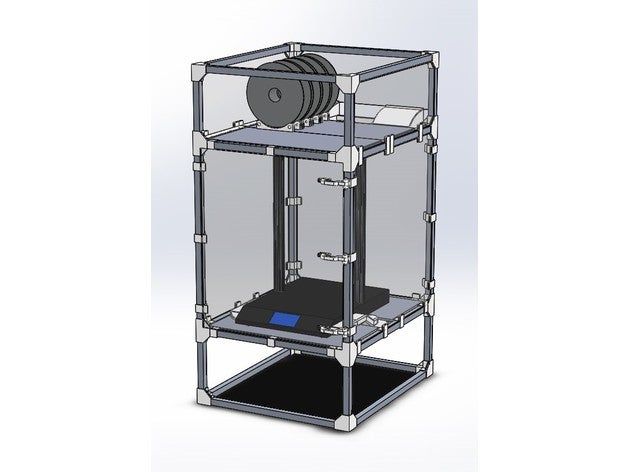
Storage
An enclosure protects a printer from dust and debris when not in use, extending its lifespan and minimizing the need for regular cleaning.
Buyer’s Guide – Things to Consider When Choosing an Enclosure For Your Creality Ender 3
Material Choice and Potential Issues
Pay close attention to the properties of the material used to make an enclosure.
Non-flammable and heat-resistant materials are a must-have as they drastically reduce the potential for fires. You’ll also want to consider their insulative properties, favoring those that naturally trap heat, such as acrylic.
For parts like brackets that you can 3D print yourself, we suggest avoiding PLA due to its low melting point in favor of ABS, which can withstand the higher temperatures created by an enclosure.
Exhaust Stem
Although not essential, you may want to consider an enclosure, whether DIY or pre-made, fitted with a vent/exhaust and air filtration system.
These can help filter out toxic fumes and funnel hot air away from the Ender 3’s more sensitive components, such as the power supply and other electronic parts.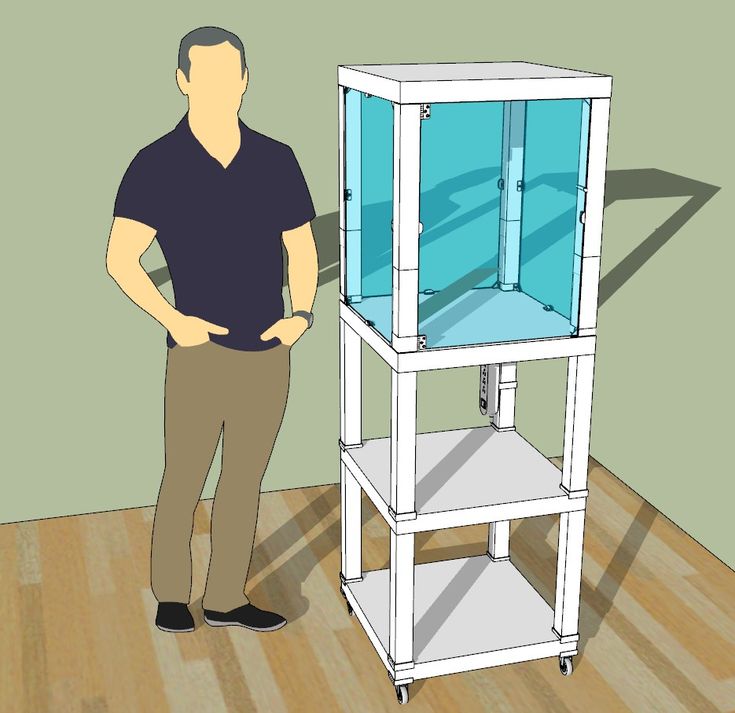
Effects of Temperature of the Ender 3’s Hardware
Although trapping in heat does wonders for 3D printing ABS and other filaments, it can wreak havoc on the Ender 3’s components.
In particular, too much heat can affect the lifespan and performance of electronic parts such as the power supply, display, and mainboard.
We recommend enclosures that offer well-placed vents to move air away from these components like on the 3D UpFitters enclosure or allow you to house them outside the enclosure or away from the heat sources (nozzle and bed).
Assembly and Storage
Consider how easy an enclosure is to assemble and disassemble, especially if you don’t plan on having a permanent setup.
For example, an IKEA LACK Table enclosure is more or less impossible to disassemble quickly. On the other hand, a tent-style option like the HotBox V2 folds away for storage in seconds.
FAQs
Should I enclose my Ender 3?
The answer depends on the filament type you’re hoping to use.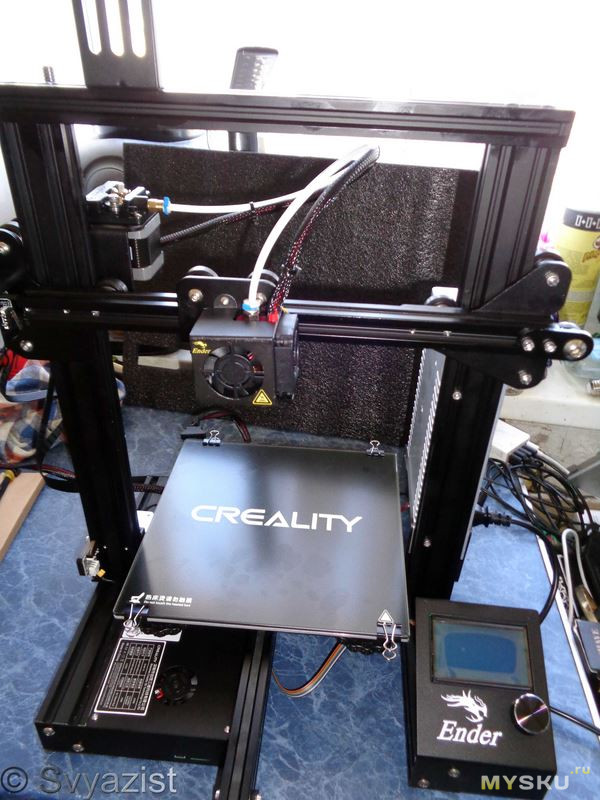
For non-heat sensitive filaments like PLA, an enclosure isn’t required as the filament performs well at lower ambient temperatures. For more heat-sensitive materials like ABS, PC, and Nylon, we recommend enclosing your Ender 3 for the best results.
Doing so reduces warping, splits, cracking, and other problems caused by fluctuating or low ambient temperatures.
How do you make an Ender 3 enclosure?
You can use a broad range of materials to make an Ender 3 enclosure.
Popular options include:
– Wood
– Furniture
– Acrylic
– Foam mats
– Plastic sheets
– PVC
– and more…
Your main aim is to trap heat and prevent drafts to ensure a consistent temperature.
Does the Ender 3 need ventilation?
We always recommend ventilation when 3D printing, whether placing the printer in a well-ventilated area, cracking open a window in proximity to the printer during printing, or installing a comprehensive air filter/duct system.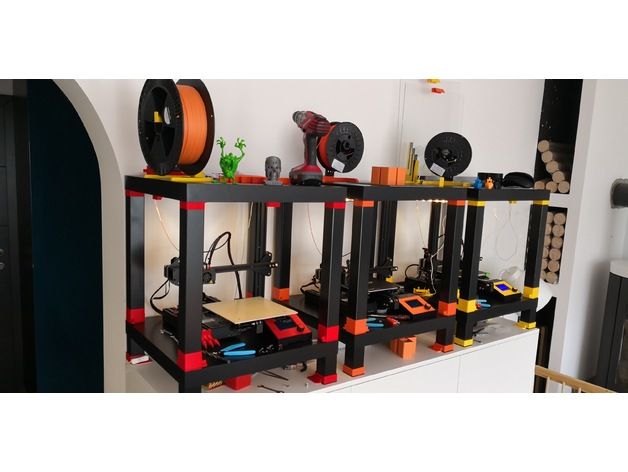
The need for ventilation varies depending on the filament, though.
For basic, non-toxic material like PLA, an open window does the job, but when working filament like ABS, which produces smelly, potentially harmful fumes, you’ll want a more elaborate ventilation setup.
Articles we recommend:
- Ender 3 vs Ender 5
- Ender 3 vs Ender 3 Pro, V2 and Max
- Ender 5 vs Ender 5 Pro vs Ender 5 Plus
- Ender 5 (Pro/Plus) enclosures
- The best Ender 3 software
- Guide to heated beds for your 3D printer
- The best slicer for Ender 3
- The best Ender 3 firmware (Pro/V2)
Ender 3 ABS 3D Printing Tips
3DPrintStory 3D printing process Tips for 3D Printing ABS on Ender 3
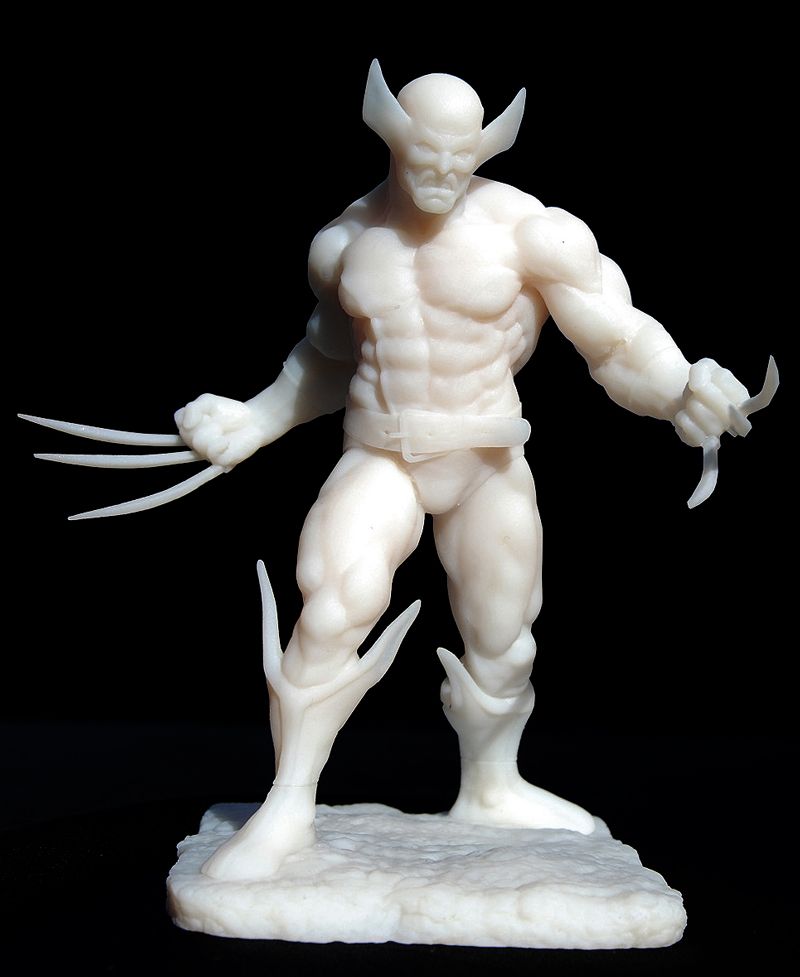
Acrylonitrile butadiene styrene (ABS, ABS) is an industrial thermoplastic that finds applications in a wide variety of applications. If you are familiar with LEGO bricks, you are already using ABS. It is especially known for its high impact resistance and is one of the most popular materials for 3D printing.
While printing with ABS plastics is notoriously difficult, after a few tries and getting your 3D printer set up correctly, you will definitely end up with some great 3D models. Products made of ABS plastic after treatment with acetone have a smooth and glossy surface, which makes them aesthetically similar to parts obtained by injection molding.
In this article, we'll look at tips to help you get great ABS 3D printing results on the popular, inexpensive Ender 3 3D printer.
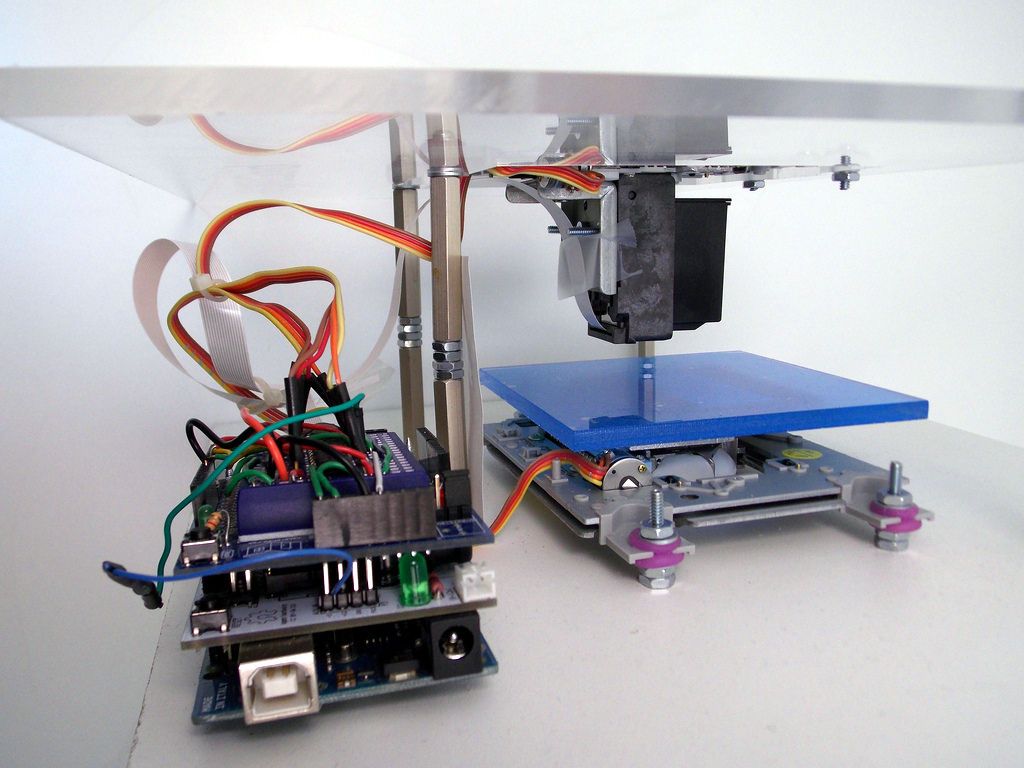
Ender 3 motherboard cooling
Make sure the motherboard fan is on by default. If not, then read on.
At first glance it may seem that motherboard cooling and 3D print quality are completely unrelated things, but when it comes to ABS with Ender 3, this is the first thing to check and fix.
The default installation for some reason turns on the electronics cooling fan only when the partial cooling fan near the hotend is turned on.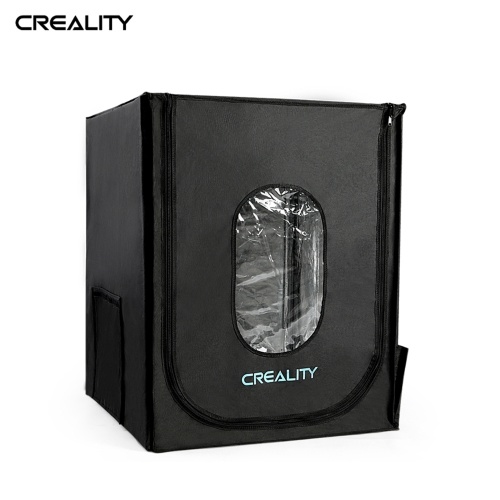 The fact is that when 3D printing ABS, the cooling fan of the part must be turned off. We will discuss why this is so. And this, in turn, means that the board fan will also be turned OFF. This causes the electronics to heat up, affecting the performance of the 3D printer.
The fix is very simple. You just need to connect the part cooling fan wires and the hot end wires as shown in the picture above.
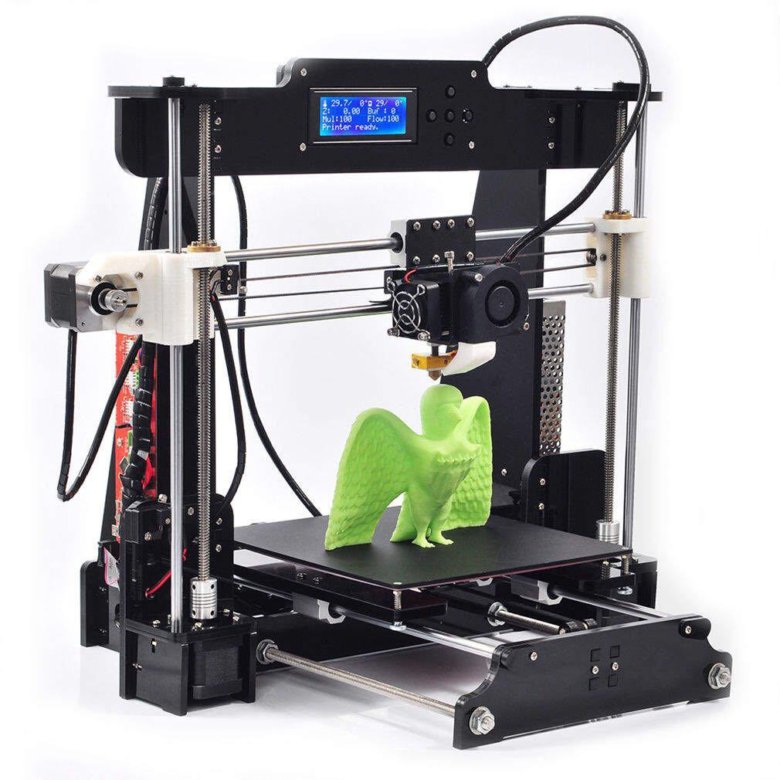
Ender 3 Quality Print Table Surface
Ender 3 comes standard with a heated print bed. This is important for 3D printing with ABS plastic. The heated bed promotes good adhesion of the first layer and maintains an elevated temperature in the 3D printing area, which significantly reduces the likelihood of deformation when printing parts from ABS plastic.
Standard Ender 3 has a surface similar to Buildtak. Thanks to this coating, the first layers of ABS at the end of 3D printing can be easily removed even without the use of an additional layer of glue or hairspray.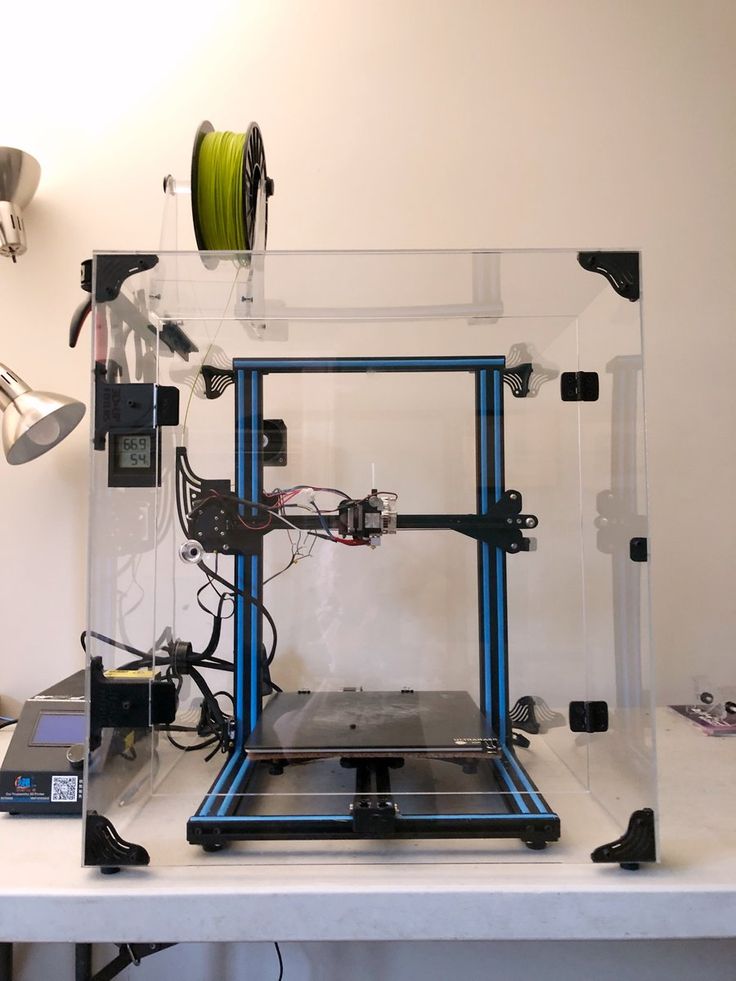 You can also look into using PEI-coated sheets, which also work well for good surface adhesion.
If you are using Creality Glass or any other glass surface, hairspray or glue will greatly improve the adhesion of the first layer.
As with the Ender 3 Pro, the default table cover is a flexible magnetic surface. This is a great option for 3D printing PLA plastics, but be aware that these coatings lose their magnetic properties at temperatures above 80° C. For greater safety, glass is recommended.
If you've tried everything and still can't get good first coat adhesion, your table may be damaged. But this is not a cause for concern. You can always just switch to Creality Glass or any other glass surface. Also, consider upgrading the table adjustment springs. You can also consider the option of automatically correcting the position of the extruder, but this is already a more complicated way.
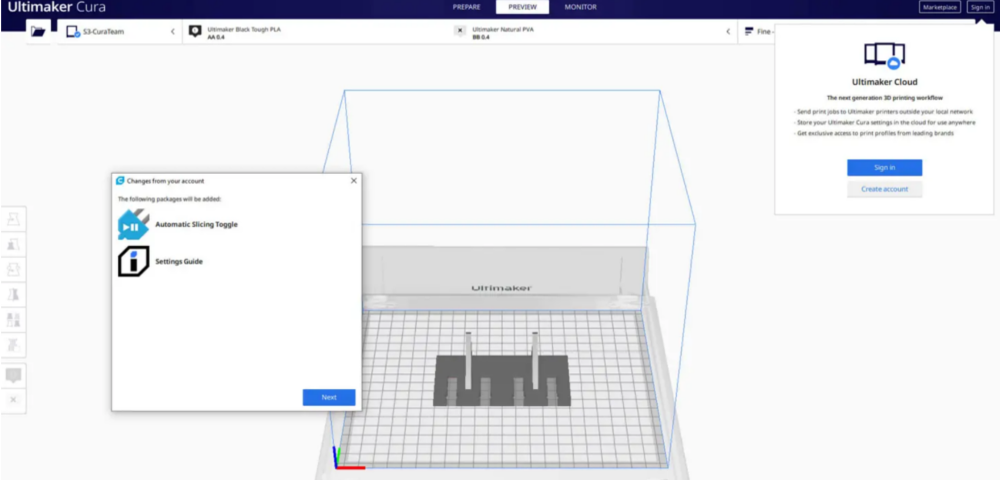
Suitable slicing settings for 3D models
If you're already printing with PLA, you're already halfway there. ABS printing is very similar to PLA, only a few settings need to be changed for optimal results.
- Nozzle temperature: ABS material melts at temperatures between 220 and 240°C. The higher temperature allows the part to cool gradually, reducing the chance of any defects. It is recommended to set the table temperature of the Ender 3 3D Printer between 100 and 110°C.
- Cooling Fan 3D models: ABS tends to deform when cooled quickly. For this reason, it is necessary to turn off the partial cooling fan near the hot end. This allows the ABS to cool gradually, reducing the chance of warping.
- Brim or raft: The use of additional bases of the first layers helps to mitigate the effects caused by thermal contraction and will also provide better adhesion of the first layer in the table.
To check the quality of the slicer settings, we recommend choosing one of the test 3D models for printing.
Enclosure for Ender 3
And finally, for high-quality 3D printing with ABS plastics, you should think about an enclosure or, at least, isolated corners, in which there will be no drafts.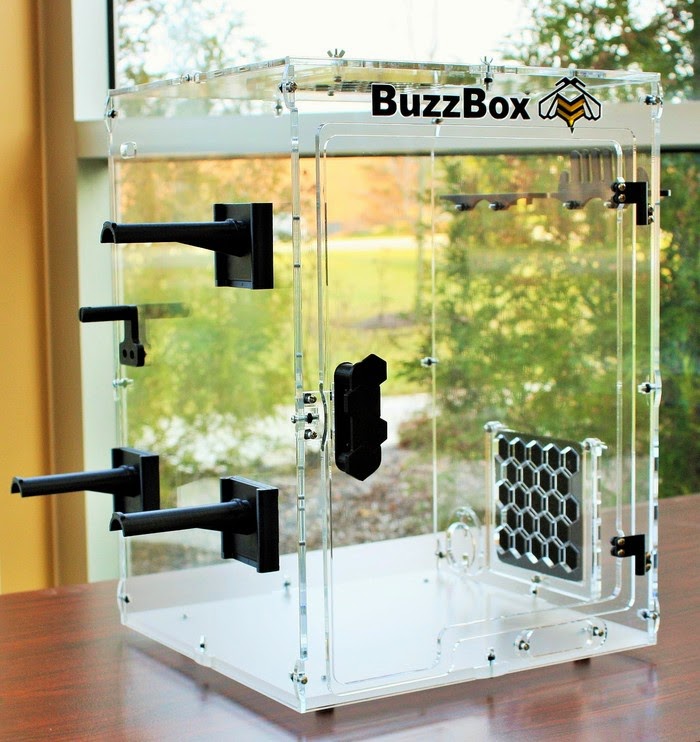
Ender 3 is an open frame 3D printer and is not ideal for printing ABS plastics, because during 3D printing, the model is affected by all sorts of external factors, such as wind and overly curious pets.
But most importantly, the housing helps keep the ambient temperature high enough to prevent warping and delamination of the layers by reducing the effects of thermal contraction. It retains the heat from the heated table and also prevents any external influences.
Even a cardboard box can be used as an enclosure (not recommended due to safety and flammability, but even this option will help). The main job of the case is to maintain a uniform, high ambient temperature so that the ABS cools down naturally.
We hope that the features of 3D printing ABS plastics on the Ender 3 mentioned above will help you. Good luck in the world of 3D printing and DIY experiments!
3d printer housing in the category "Technology and electronics"
Children's 3D handle Marker Printer with electronic pen-2 tablet with stencils and a set of plastic 79M PRK
in a warehouse in Kyiv
Delivery in Ukraine
811 UAH
PersikShop online store
PLA (PLA) plastic 3Dplast filament for 3D printer 1. 75 mm
75 mm
In stock
Delivery across Ukraine
416 UAH
386.88 UAH
Buy
3D plastic for printingD
005
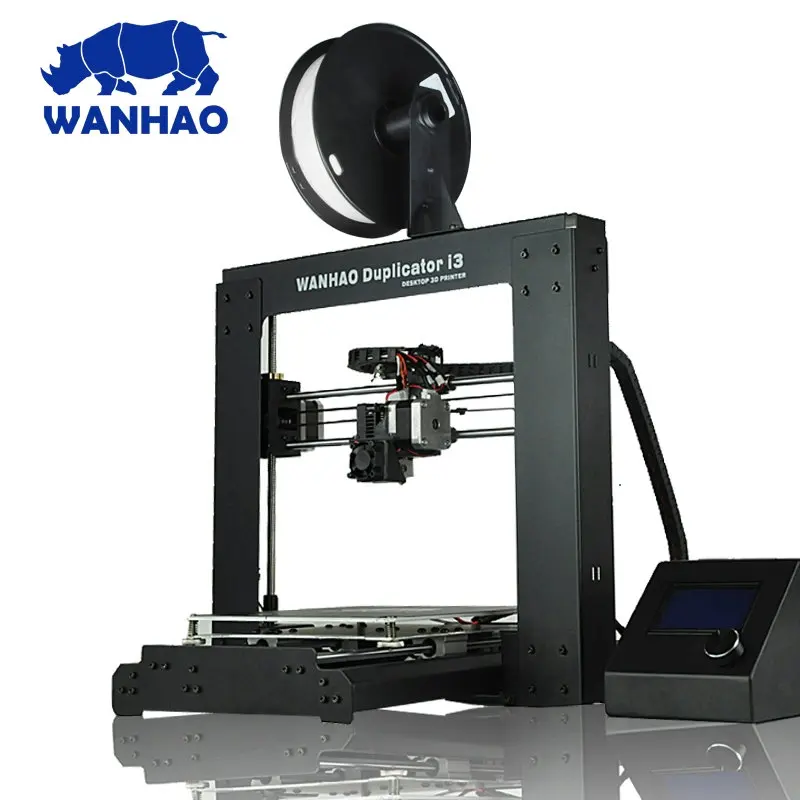
3D printer Crealy Ender-3 V2 CRL-17315
in warehouse
Delivery in Ukraine
13 800 UAH
Buy
Internet-store Domtehno Nizzhdi Tsіnyi
Copet (Petg) PETPET (PetG For a 3D printer 1.75 mm
in warehouse
Delivery in Ukraine
from 408 UAH
from 379.44 UAH
Buy
3DPLAST - Plastic manufacturer for 3D Press
ABS (ABS) Plastic for 3D printer, 1.75 mm mm mm , brown
In stock in Vyshgorod
Delivery across Ukraine
360 UAH
Buy
3Dplast - manufacturer of plastic for 3D printing Vyshgorod
Delivery across Ukraine
360 UAH
Buy
3Dplast - manufacturer of plastic for 3D printing
ABS filament (ABS) plastic for 3D printer, 1. 75 mm, white
In stock
Delivery in Ukraine
360 UAH
Buy
3DPLAST - Producer of Plastic Plastic 3D
WILL E3D 0.3mm thread for 3D printer DB
Delivery
125.93 GRN
62.9000 GRN 9000 GRN 9000
Buy
Domebuys
nozzle MK8 MK9 0.2mm under 1.75mm thread for 3D printer DB
Delivery in Ukraine
125.93 UAH
62.96 UAH
Domebuys
nozzle MK8 MK9 0.3mm under 1.75mm thread for the 3D printer DB
Delivery in Ukraine
125.93 UAH
62.96 UAH
Domebuys
Flexible clutture 5x5mm 3D printer DB 9000 9000 9000 9000 9000 Ukraine
195.89 UAH
97.94 UAH
Buy
DomeBuys
Angle bracket, NEMA17 42mm stepper motor mount DB
0 Delivery across Ukraine
370.79 UAH
185.39 UAH
Buy
Domebuys
Children's 3D handle Printer with electronic pen-2 tablet with stencils and a set of plastic 79m GR
in Kyiv
Delivery
9000 921 GRNN821 UAH
Buy
Greyshop
Shall E3D 0.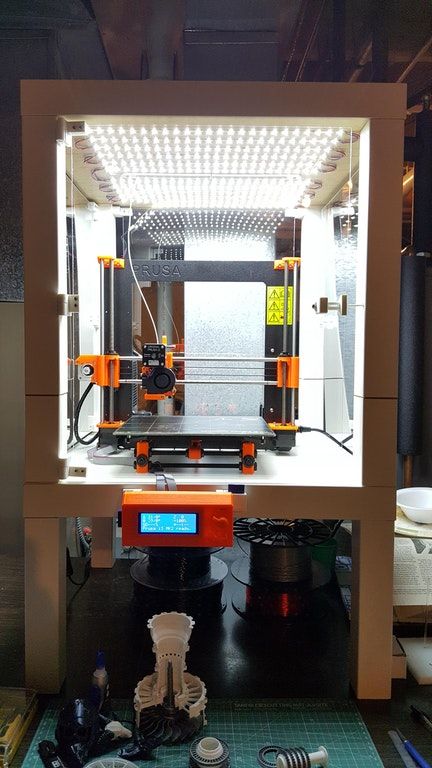 3mm under 1.75mm thread for 3D printer HS
Delivery in Ukraine
902 140.40 UAH 9000.20 UAHBuy
005
HOT Shopping
Nozzle MK8 MK9 0.2mm under 1.75mm thread for 3D printer HS
Delivery in Ukraine
9000.40 UAH70.20 UAH
Hot Shopping
mm under 1.75mm filament for HS 3D printer
Delivery across Ukraine
140.40 UAH
70.20 UAH
Buy
Hot Shopping
0005
Delivery in Ukraine
210.60 UAH
105.30 GRN
Buy
Hot Shopping
Crynetrot Crynet, NEMA17 42mm 3D printer HS
Buy
9000.02 386.10 GRN 9000 9000 GRN 9000 1902 19000 9000 GRNHot Shopping
Children's 3D pen marker printer with electronic tablet PEN-2 with Stencils and a set of plastic 79m MND
In a warehouse in Vinnitsa
Delivery in Ukraine
901 UAH
801 UAH
Buy
Mandarin Shop
Children's 3D handle Printer with electronic pen-2 tablet and set 79M APL
in Kyiv
Delivery
931 UAH
831 UAH
Buy
APELSIN-SHOP Online store
Nozzle E3D 0.