Diy 3d printer parts list
3D Printer Parts: Complete List of 3D Printing Components
ADVERTISEMENT
3D printers are becoming popular with time. Some prefer to buy the fully assembled machines while few like to explore a little more with DIY 3D printers.
While working with DIY machines, the most exciting part is exploring the different 3D printer parts that make it such a powerful technology. Though it is difficult at times to complete the assembly in few hours, the experience does provide a lot of know-how about the 3D printer anatomy.
By learning about the parts, one gets better understanding of the working of 3D printers. Hence, can utilize the knowledge later when actually printing with the machine.
One can even solve minor to major problems such a nozzle jam and many others, when familiar with the inside out of these 3D printers.
In short, if users are looking forward to a strong career in 3D printing, the right way would be start with the different parts that make up for the most revolutionary technology.
List of Major 3D Printer Parts
3D printers are complex, however, when examined closely, they can be made super easy to understand and work with. The first step must be to check out the 3D printer parts list.
These components of 3D printers help accomplish tasks from printing smaller to larger parts with ease. The list here contains the component of cartesian printers which are recommended for beginners.
ADVERTISEMENT
MotherBoard or Controller Board
The motherboard which is also known as mainboard or control board. As the name suggests, this component is responsible for maintaining the smooth processing of the machine.
Being responsible for all the fundamental operations, motherboard works as the brain of the 3D printers.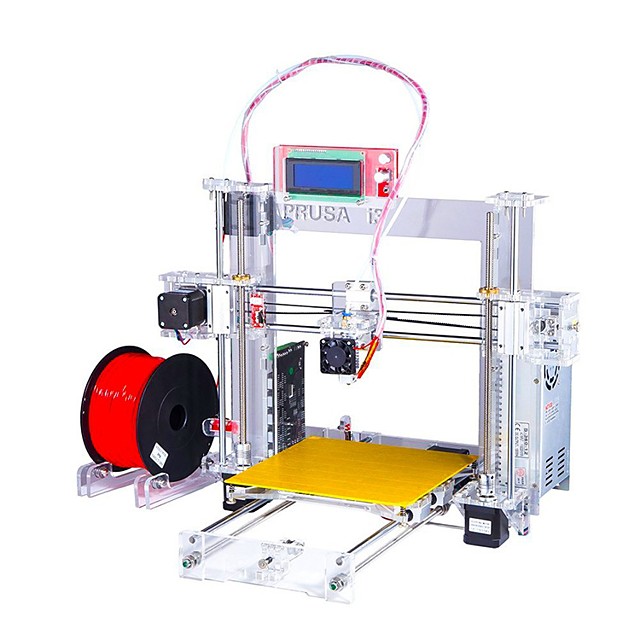 It directs the motion components as per the instructions sent from a computer and at the same time, interprets signals from the sensors.
You must have guessed how crucial it is to have a great quality controller board for achieving high performance from a 3D printer. Even if you put every best part in your machine, while ignoring the controller board, your 3D printer would be worthless.
Frame
Frame helps keep all the other components of your 3D printer together at one place. It also maintains the stability of the entire machine. If your frame is robust, you will have a more durable 3D printer.
Companies use different materials and the most common ones are the metal and acrylic. In old days, wood was used for the frame of the consumer 3D printers.
However, to maintain the highest stability, one must choose the metal body. These printers aren’t always expensive as well.
For example, Monoprice offers budget 3D printers under $300 with aluminium frame.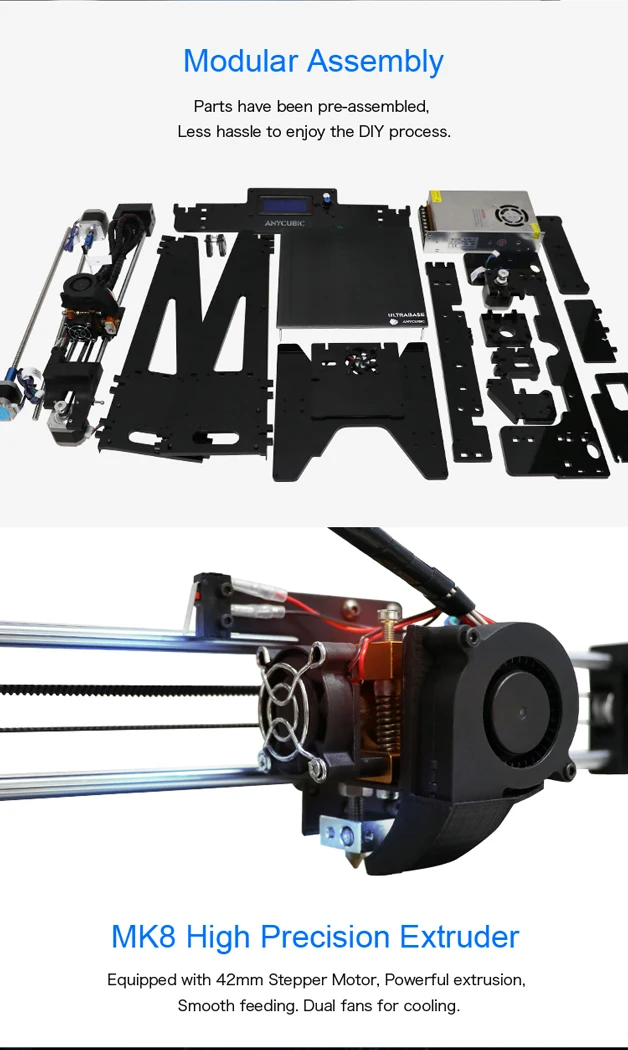 Yes, you heard it right. With limited budget, you can still own a metal frame 3D printer.
When talking about frames, the open and closed frame designs also make a difference. A closed frame offers better results by maintaining consistent temperature around the print space. There are few printers that also offer semi-enclosed frames.
ADVERTISEMENT
Print Material
Filament is used for the FDM 3D printers. Filaments are available in spools. These are heated to certain temperature and are liquified to be deposited on the print bed.
This happens in layers. The objects created by 3D printers are made of these filaments. There are many types of filaments used for 3D printing. And, each one of them have different properties. They have their own advantages and limitations.
When getting a printer, one must take care of the compatibility with different filaments. Not all printers allow multiple filament compatibility.
Some can process only one kind of filaments, mostly PLA.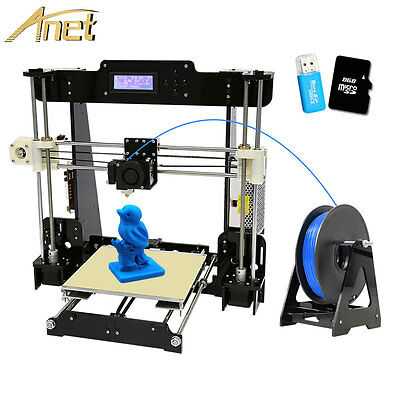 And, others can work with multiple choices of filaments including PLA, ABS and many others.
There are other 3D printers that only accept the proprietary filaments. Hence, you must be aware of your 3D printing needs before opting for a 3D Printer and the filaments it supports.
Motion Controllers
You must know that the 3D printers, as the name suggests works along the three axes. Motion controllers receive instructions from the mother board about the movement they must make, while they are the ones who perform the actual movements.
- Belts: The belts connected to motors are responsible for moving X-axis and Y-axis. The movement happens from side to side. This movement does affect the print speed and precision, hence are very crucial for the attaining best results. One must ensure that the belts aren’t loose or the print may ruin. For this, one can use tensioners.
- Stepper Motors: These are responsible for the mechanical movement of the device and are controlled by Stepper driver.
 These motors connect with X, Y as well as Z axis. These motors help in driving the print head, print bed, along with the leadscrews. Because the rotations are made in steps, they are called Stepper motors.
 - Threaded rods: Threaded rods are connected to the stepper motors. With the movement of threaded rods, the print head moves in upward and downward directions. In few 3D printers, the print bed movement also relies on threaded rods. So, the Z axis movement is dependent on Threaded rods. Although these could be used for the movement along the X and Y axis, being expensive, majority of the printers use belts. Belts are faster and lighter alongside being cheap.
- End Stops: End stops ensure that the end points are marked along the three axes when the movement of components take place. It identifies the range of movement of each component.
ADVERTISEMENT
PSU
PSU, abbreviated as Power Supply Unit helps in supplying power for a smooth operation of 3D printer. You can find the PSU mounted on the frame. Or, it can also be available separately along with another controller box. However, mounted one provides compact look and occupies less space.
PSU strength would decide what temperature your 3D printer is capable of working with. For advanced materials, one must choose the one with higher temperature range allowance.
Print Bed
Mostly, anyone who has worked with 3D printer would know what a print bed is. This is the component where the models are created.
The filaments are deposited on the print bed, one layer at a time for building the entire object. One of the major 3D printer parts that does decide the quality and surface finish of the printed object.
Different 3D Printers boasts different kinds of print bed. You can find heated as well as non-heated print beds. A non heated print bed may be enough for PLA, however, for advanced filaments, heated beds are recommended. These helps in enhancing adhesion and stability for first layer of the print.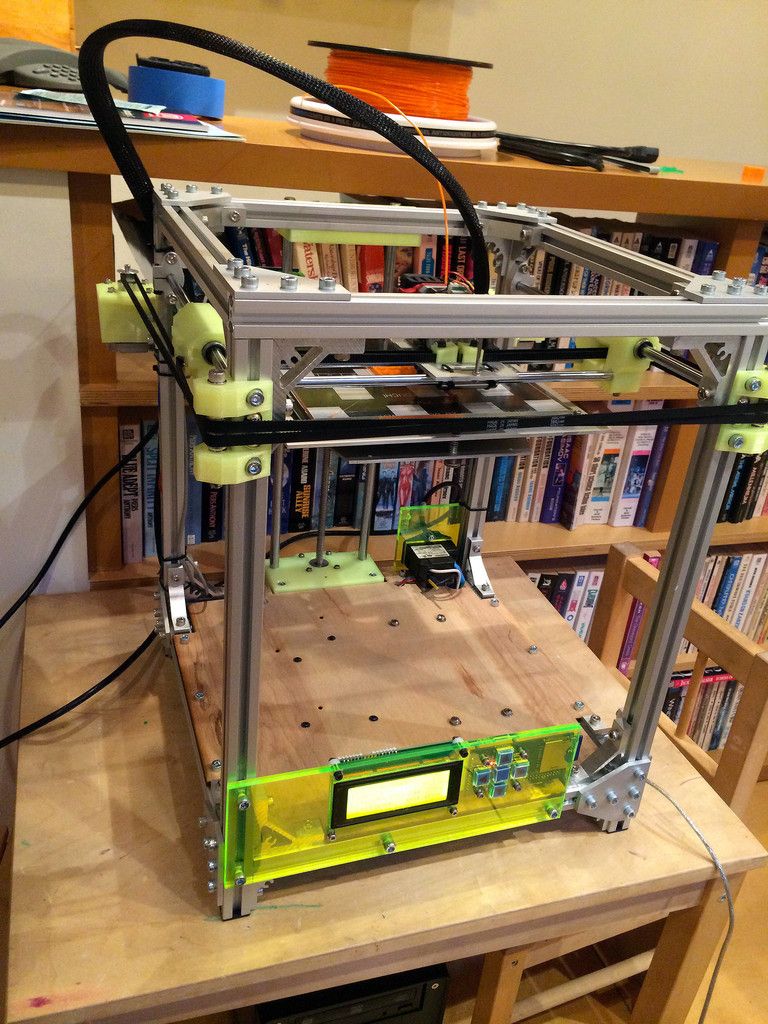
Also, the print beds are designed using different materials. For example, aluminium and glass print beds. Both have its own benefits and limitations. Aluminium print beds heat up faster and glass print beds, being flatter, provides better finish and are easy to maintain as well.
Some 3D printers offer automatic calibration of print beds. However, users need to level the bed manually in some.
ADVERTISEMENT
Extruder
The extruder, also known as print head extrudes the filament and deposit it on the print bed. The extruder can be categorized in two sections. One is called the cold end while the other is known as the hot end.
The job of the cold end is to lock the filament while pushing it gradually downwards to the hot end.
The hot end that has a nozzle attached to it at the end, maintains a high temperature greater than the melting point of the filament. The hot end melts the filament which is further deposited on the print bed.
The extruder itself is made of different parts.
- The Filament Drive Gear: Also known as extruder drive gear is responsible for pushing the filament into the hot end.
- The Heat Sink: The heat sink along with the heat Sink Fan ensures that the material is still in solid state until it reaches the nozzle.
- The Heater Cartridge: This is the component that works to heat up the filament.
- The Thermocouple: To maintain the right temperature, the extruder uses a temperature sensor. This is used for the hot end.
- The Cooling Fan: Once the melted filament is deposited, it must be cooled down for setting before the next layer gets deposited. The job of the cooling fan is to ensure the same.
- Nozzle: This forms the tip of the extruder. The filament is melted and it comes out of the nozzle for deposition. There are different sizes of nozzles that the printers use. 0.4 mm is the most common one. By keeping the smaller diameter of nozzle, one can achieve finer details with greater accuracy.
 And, larger nozzle helps in printing at a higher speed.
Some 3D printers are equipped with dual extruders as well. With a dual extruder, one can print simultaneously with two different filaments. Dual extruders have two kinds of setup. Either both the nozzles are included in one print head or connected with two different print heads.
ADVERTISEMENT
Feeder System
There are two most common feeder system used in 3D printers: Bowden feeder system and Direct feeder system. In a Bowden setup, there are different locations for cold and hot ends.
While a filament tube is used to direct the filament towards the hot end. This setup can dramatically increase the print speed as the extruder becomes lighter.
When talking about the direct setup, the cold end and the hot end are directly connected. The direct feeder system is most common among the users who work with flexible filaments.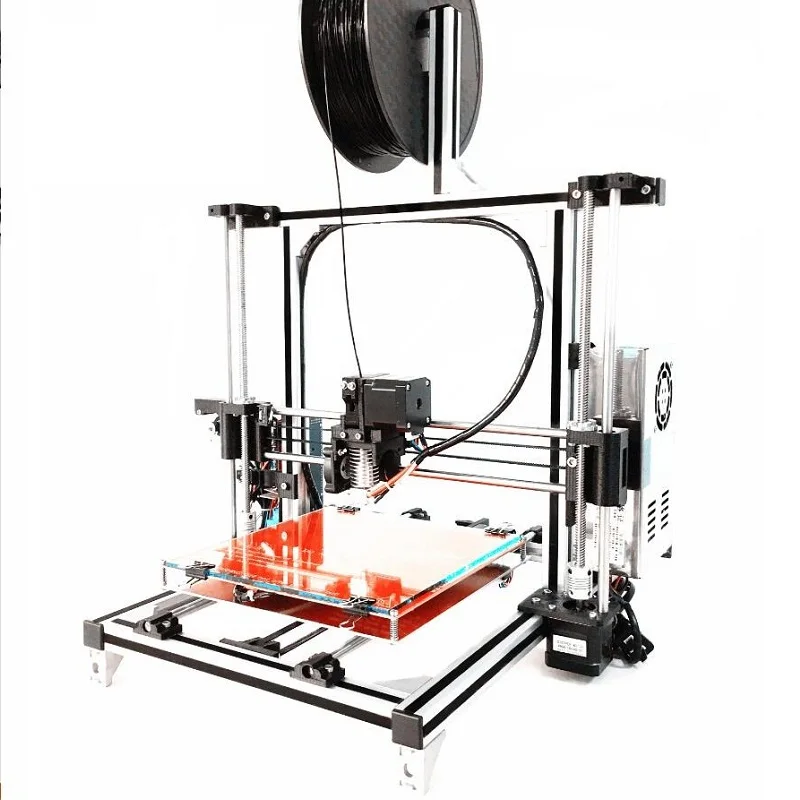
Connectivity
When it comes to connectivity with other device, 3D printers differ a lot. Some provide only the ethernet or USB port for connection. However, many new 3D printers are now available with Wi-Fi setup as well.
The interface can also help connect the mobile phone or laptop through Wi-Fi connection to your 3D printer. The file transfer can also be done using any of the three options.
For a standalone experience, many 3D printers also come with SD card slots. These slots are used for file transfer while the printer works without a need for any other device.
User Interface
These days, most of the 3D printers, even the budget ones, comes with an LCD user interface. With the help of this interface, one can control the printer settings without a need for computer.
Hence, these machines can work as standalone machines. The majority of the 3D printer has a mounted interface. However, you may find some models with separate controller box including the LCD interface.
This interface can help check and set the machine parameters. You can also use this interface to initiate the loading or unloading of filament. Moreover, an auto-leveling system can be initialized with the help of this small screen on the 3D printer.
The Conclusion
The 3D printing technology is growing with leaps and bounds. Doesn’t matter if are from a technical background or a non-technical one. Users can definitely learn to operate 3D printers because of all the help available online.
And, to know a little more than what others know, would certainly put you in a better place. So, why not start with the components of 3D printers?
3D printers are housed with many smaller and larger parts. Every part has their own role to play. Some tackles the movement while some work for accuracy various other important jobs.
These parts work in conjugation to provide a stable and uniform precision. The objects printed with a 3D printer bear varying properties and quality, depending on the difference in these parts and components.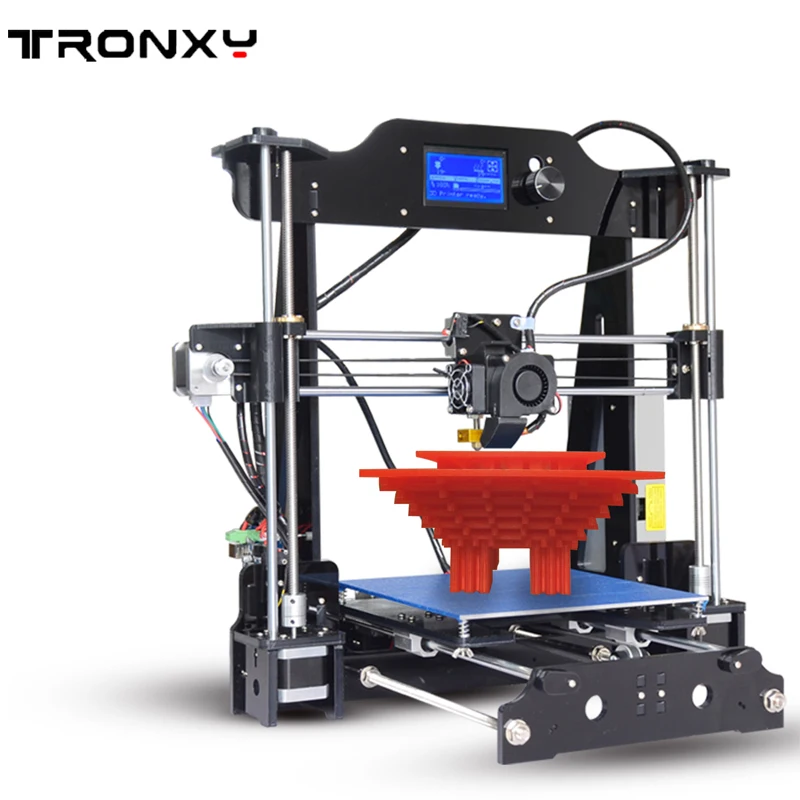
However, all of these components have equal share when it comes to the operation of the 3D printers. Knowing about these 3D printer parts is a great way to start the journey towards 3D printing.
Who knows, you can someday, be able to create your own 3D printer. Possibilities are endless and when basics are strong, one can dream for higher goals.
How to Build a 3D Printer: Parts list and Basic Steps
3D Insider is ad supported and earns money from clicks, commissions from sales, and other ways.
The best way to learn about 3D printing is to build a 3D printer from scratch. It’ll make you more familiar with the components, from the electronics to the motion controls, and how they work together. Having an intimate knowledge of the ins and outs of a 3D printer will also make troubleshooting relatively easier.
The costs and time required to build a 3D printer depend on your starting point as the process can mean two things. It can mean assembling a DIY 3D printer kit or building a 3D printer using individually sourced parts.
- With the former path, you assemble a 3D printer from a kit that contains everything you need, including spare parts and some tools. An assembly manual is also included in the package, although the level of documentation varies from product to product. Some kits come with a comprehensive build manual while others include a build manual that’s more confusing than helpful. On average, a kit can be assembled in 4-8 hours, but some require more than 10 hours.
- With the latter path, you need to obtain the components individually. There are different ways to get the components you need. You can buy brand-new or second-hand parts from hardware stores and online outlets such as eBay and Amazon, as well as use parts from unused devices in your house. If you already own a 3D printer – presumably bought as pre-assembled, hence your interest in a DIY 3D printer – or know someone who has one and is willing to help you out, you can also print some of the parts.
This guide is about the latter.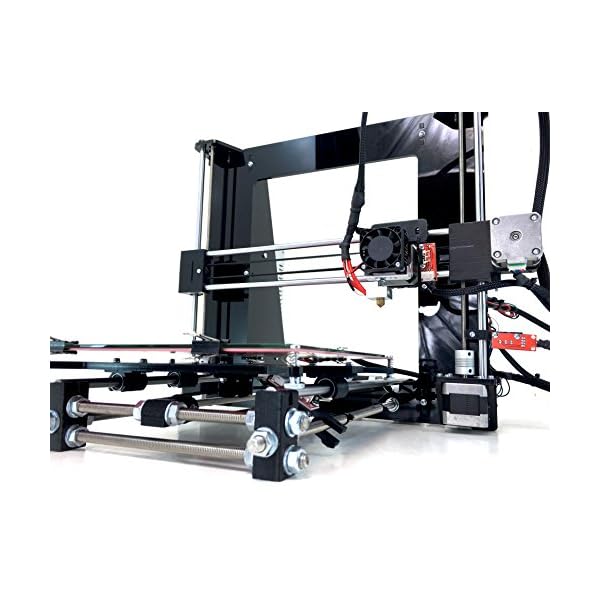 If you need help assembling a 3D printer kit, this guide isn’t for you; for help on that front, you can check out online resources specifically related to your kit.
It’s a lot more difficult and time-consuming to build a 3D printer completely from scratch, considering you need to obtain each and every component on your own and the lack of an instruction manual to guide you step by step. In addition, it requires good technical skills and a good understanding of electronics and machines in general, which isn’t a strict requirement when assembling a kit. Including the time spent obtaining the components, the full DIY route can take anywhere from a few weeks to several months, with the biggest variable in the equation being your available free time.
Choosing the parts for your custom DIY 3D printer is a daunting task, taking into account the number of options on the market. In this guide, we’ll help you get started on your project and list down the main components you need to build your own 3D printer.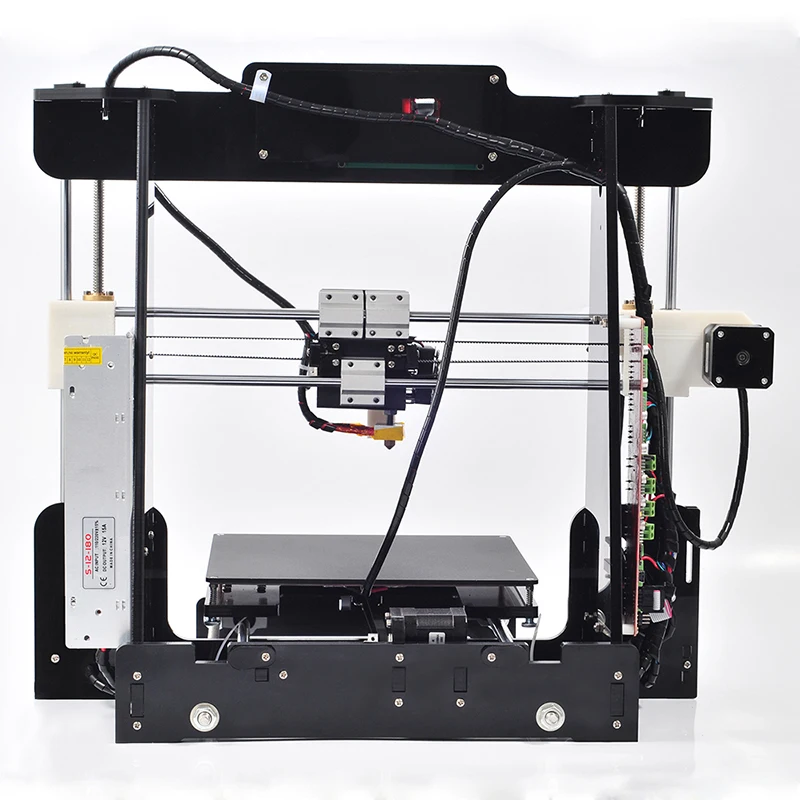 Just to be clear, this guide is about FFF/FDM 3D printers, the most common type of consumer-level 3D printer on the market.
Choosing the Motion Structure and Frame
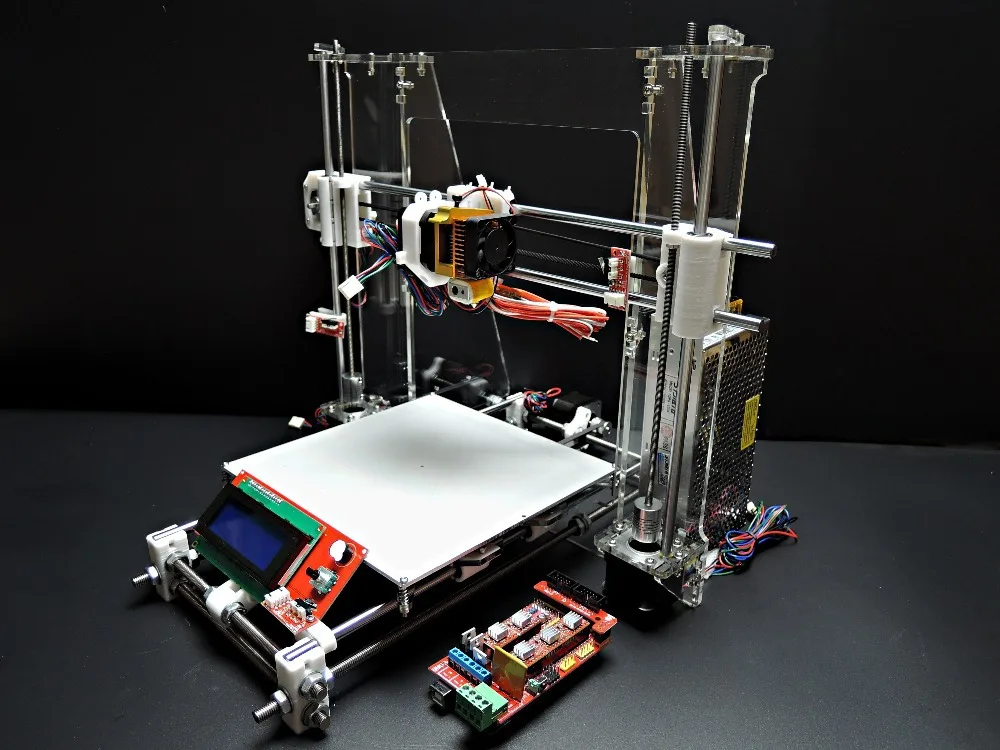
Before you even worry about the other components, you need to think about the mechanical arrangement and frame material of the 3D printer. There are different kinds of FFF/FDM 3D printers, the most popular and the most recommended for a DIY beginner is a Cartesian 3D printer.
In a Cartesian XZ Head setup, the 3D printer has a gantry structure with an extruder mount that moves up and down on the Z-axis and side to side along the X-axis. Meanwhile, the print bed moves on the Y-axis, perpendicular to the X-axis. While relatively easy to build, a Cartesian XZ Head mechanical arrangement is prone to stability issues due in part to the constant lateral movement of the print bed, so a robust frame is a must.
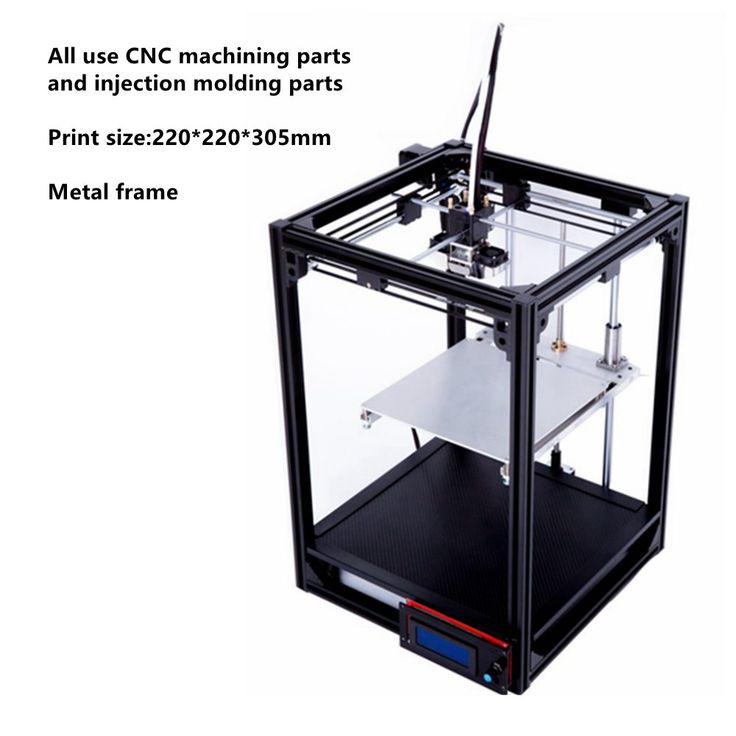
In a Cartesian XY Head setup, the hotend is fixed at the top of the 3D printer and moves on the X-axis and the Y-axis while the print bed moves up and down on the Z-axis.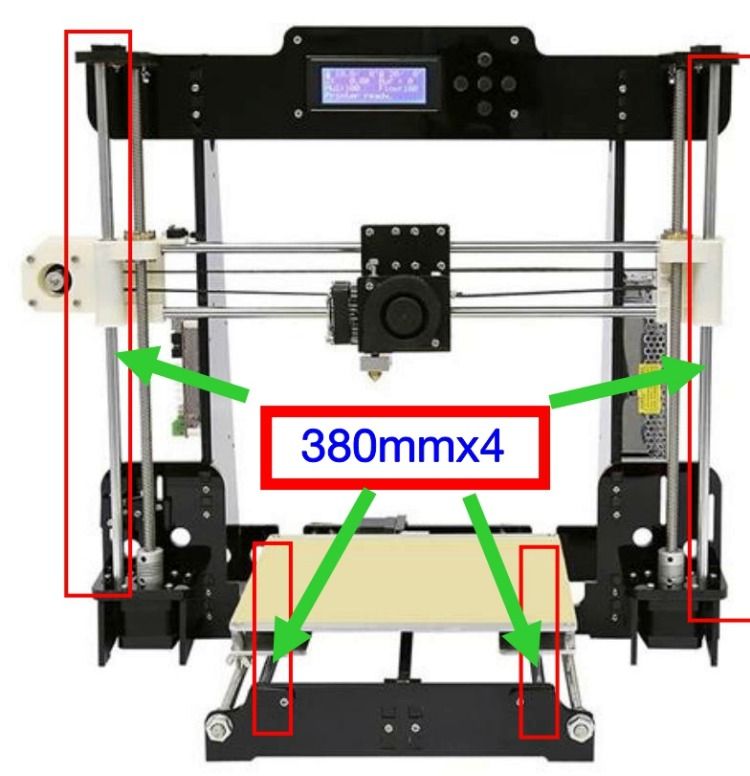 This particular mechanical arrangement has a more complicated structure and requires a cube or rectangular frame. On the bright side, a Cartesian XY mechanical arrangement can print faster on average and has better stability.
The Original Prusa i3 MK3 is an example of a 3D printer with a Cartesian XZ Head structure while the Ultimaker 3 is an example of a 3D printer with a Cartesian XY Head structure.
If you’re up for a challenge or want a 3D printer that prints really fast and looks extremely cool while printing, you can build a delta 3D printer instead. In a delta mechanical arrangement, the 3D printer has a tower-like structure with three pillars arranged in a triangular position and a circular print area. Each pillar has an arm connected to a belt-driven system, moving up and down on the Z-axis. The hotend is connected to the arms and is suspended in the middle of the 3D printer while the print bed is completely unmoving at the base.
While a delta 3D printer can achieve fast print speeds and has a stationary print bed, it can be a pain to calibrate and troubleshoot, regardless of your technical skills and experience with 3D printers. In addition, the machine size to print size ratio is not good.
The parts you need to obtain depend on the mechanical arrangement you want for your DIY 3D printer, so make sure you decide on one before you go shopping. Of the three options mentioned above, the Cartesian XZ Head, which has a straightforward structure, is the most recommended for those who are building a 3D printer for the first time.
Frame Material
The frame holds the other components together and includes a number of bolts, nuts, rods, and bearings. It’s the biggest variable in determining the overall stability and durability of the 3D printer. The primary frame material depends on your budget and the tools you have. Acrylic is cheap and can be easily manipulated but is prone to cracking as well as wobbling due to the lightweight nature of the material. Wood is also easy to manipulate but is similarly not ideal for high-temperature and high-speed performance.
Of the most commonly used frame materials, aluminum and steel are considered the best.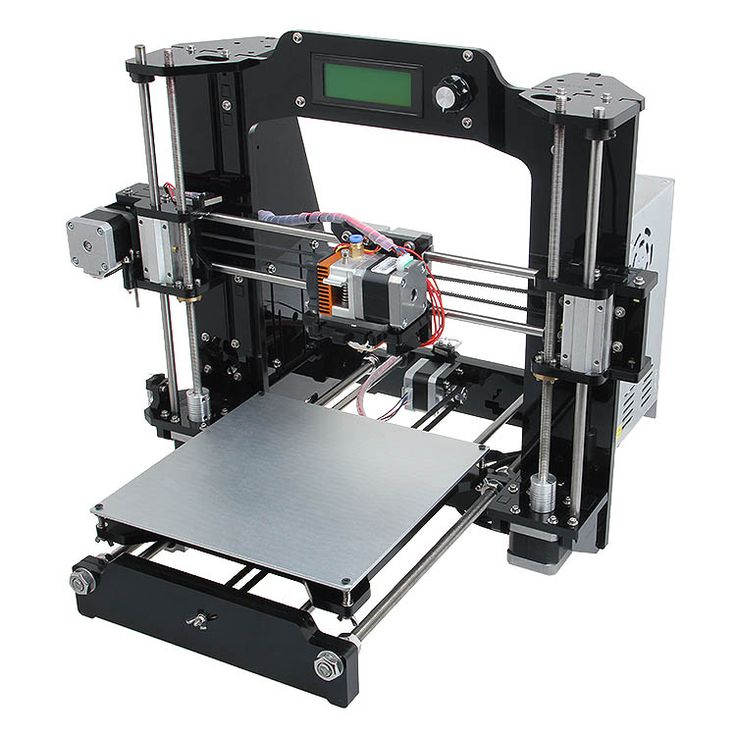 A 3D printer with an aluminum or steel frame is significantly more durable and more stable, not to mention more ideal for high-temperature prints, than a 3D printer with a wood or acrylic frame. Even though aluminum and steel are more expensive on average compared to acrylic and wood, they offer more long-term value.
We definitely recommend that you go for a metal frame. Forget about acrylic. Sure, the material is cheap, but the acrylic-related issues you’ll encounter in the future, such as warping, are not worth the low price.
Choosing the Parts
In this section, we’ll list down the parts you need to build a 3D printer, from the electronics to the extruder to the print bed. When shopping, be wary of cheap knock-offs of popular products, as they often have serious quality issues and don’t tend to last very long.
Controller Board
The controller board (also called the motherboard or mainboard) is the 3D printer’s brain. It tells the motion components how to move and processes input from the sensors, among other functions.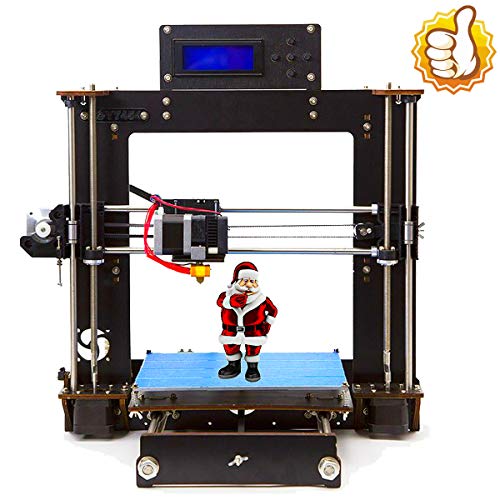 There are a number of controller boards on the market, with SmoothieBoard, RAMBo, and RAMPS being the most popular of the bunch, all of which offer excellent long-term value and can accommodate a dual extruder setup. If you want Wi-Fi connectivity out of the box, you can also check out Duet Wi-Fi.
Some controller boards are not built for high-temperature prints and get overwhelmed by the amount of power a heated print bed requires. If you go for a cheap controller board, presumably a knock-off of a well-established product, we recommend that you get a MOSFET as well. The MOSFET will handle the power draw of the heated print bed, relieving the controller board of pressure.
Power Supply Unit (PSU)
Obviously, a 3D printer won’t be able to run without a power source. But don’t just buy the first PSU you run into; consider the product’s characteristics first. Consider the form factor, the input/output, and whether it has an actual physical switch. If you plan to print with high-temperature materials like ABS, Nylon, and TPU, get a PSU that will allow the heated print bed to easily reach the required temperature for those materials.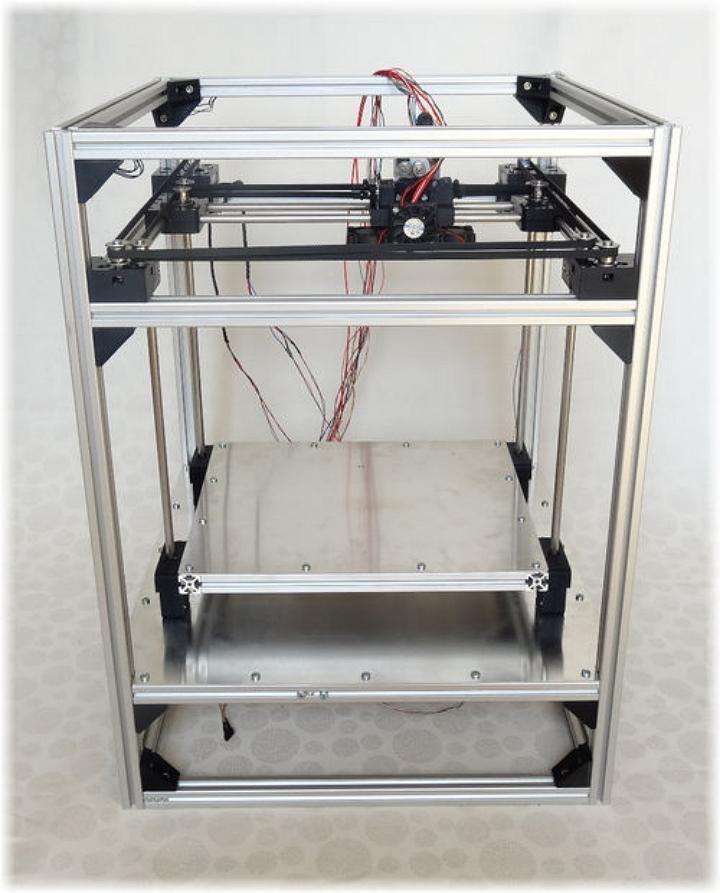
Print Bed
The print bed is the platform where the 3D model is formed. Its movement depends on the mechanical arrangement of the 3D printer. In a Cartesian XZ Head setup, it moves along the Y-axis while in a Cartesian XY Head setup, it moves along the Z-axis. In a delta setup, the print bed is stationary at the base of the machine.
We recommend that you go for a heated print bed since it will allow you to print with more advanced materials in the future. A non-heated print bed is limited to PLA, the most common material used in 3D printing. There are two commonly used types of print beds: aluminum and glass. An aluminum print bed heats up faster and distributes the heat more evenly and is not prone to breaking. A glass print bed is easy to clean and has a flatter surface. In addition, a glass print bed is not prone to warping.
The print bed comes in different sizes. If you’re building a Prusa-style 3D printer, the most popular print bed size is around 7.9 x 7.9 inches. That’s approximately 200 x 200 millimeters. If you’re building a delta 3D printer, keep in mind that the print bed on that one is circular.
A print bed also needs a print surface, which helps the 3D model stick on the platform. In a Cartesian XZ Head mechanical arrangement, it’s crucial for the print bed to have optimum adhesion, considering the print bed’s constant lateral movement on the Y-axis. The most common print surfaces are BuildTak and PEI. A lot of people also use other materials to add more adhesion to the print surface – like glue, painter’s tape, and hairspray.
Print Head
The print head, also called the extruder, is the heart of the 3D printer. It’s responsible for melting the filament and depositing it onto the print bed. The print head is composed of two sections: the cold end and the hotend, both of which have very specific functions. The cold end pulls and clamps the filament and pushes it toward the hotend. The hotend, as the name suggests, melts the filament and deposits it onto the print bed via a small opening at the tip, called the nozzle, which varies in size.
Both the cold end and the hotend affect the overall print quality, the print speed, and the materials you can print with. An E3D Titan extruder combined with an E3D V6 hotend is one of the most popular extruder setups due to its customizability, durability, and ability to handle different types of materials, including advanced high-temperature materials. The Bondtech QR Universal Extruder and the DisTech Automation Prometheus V2 are also excellent options for the cold end and the hotend, respectively.
All of the aforementioned products are not budget-friendly, though. You can go for cheaper options, but don’t expect them to perform as well as the genuine products. The E3D V6 hotend, in particular, has dozens of knock-offs on the market, the majority of which are not worth the money.
When building a 3D printer, you also have to consider the filament feeding system of the machine. You have to choose between a Bowden setup and a direct drive setup. Both configurations have pros and cons. The good news is that you’re not forever locked into whatever configuration you choose initially. You can always tinker with your 3D printer and switch to a different setup.
In a Bowden setup, the cold end and the hotend are physically separated from each other. The cold end is located somewhere on the frame, glued in place, while the hotend is connected to the motion components. In this setup, you get faster print speeds since the weight of the cold end is not a variable.
In a direct drive setup, the cold end and the hotend are directly connected to each other, which means more weight to carry around. This feeder system has a more straightforward structure and is often the recommended setup for flexible filaments. In a delta mechanical arrangement, a direct drive setup is not usually suggested since you need the hotend to be as light as possible.
It’s a lot better to invest in a high-quality print head setup than a cheap low-end setup. You get more long-term value and encounter fewer issues down the road. If you can’t afford the genuine items, make sure the cheaper alternatives you’re considering have a solid reputation.
Fans
A 3D printer has a pair of fans on the print head, one as a heat sink fan and one as a nozzle cooling fan. The former is responsible for making sure the filament from the cold end doesn’t melt prematurely before reaching the nozzle while the latter cools the filament as soon as it is deposited on the print bed. Some users also add a fan for the controller board. If you already have a MOSFET for the heated print bed, a motherboard fan is not strictly necessary.
For the heatsink fan, a box-style fan is often used. For the cooling fan near the nozzle, it’s often a blower-style fan. You can also print an air duct extension for the nozzle cooling fan to give the nozzle a more focused and more effective cooling system.
Stepper Motors
A 3D printer’s mechanical movement relies on a series of stepper motors. Compared to a regular DC motor, a stepper motor moves in increments or steps, making it more ideal for precise movements.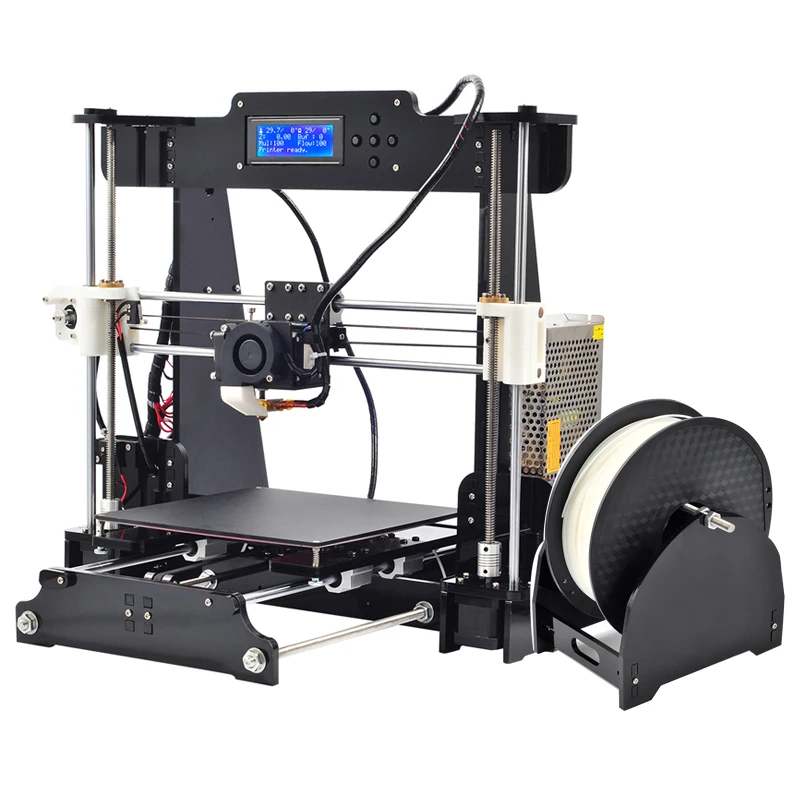 Stepper motors are connected to the three axes, driving the belts and the threaded rods or leadscrews. The extruder also comes with a stepper motor, which is what drives the filament movement in the cold end. In a delta setup, the print bed is not driven by a stepper motor, unlike in a Cartesian 3D printer.
The most commonly used motors on 3D printers, especially DIY RepRap 3D printers, are NEMA 17 stepper motors. The number in the model name refers to the faceplate’s size. In the NEMA 17’s case, the number refers to the 1.7 x 1.7 inches faceplate. As with the extruder and the controller board, you can find cheap stepper motors on the market, some of which are second-hand.
Threaded Rods / Leadscrews
In a Cartesian 3D printer, stepper motor-connected threaded rods or leadscrews drive the movement along the Z-axis. Some also use them on the X-axis and the Y-axis, resulting in a smoother and more precise movement, but at the expense of speed, not to mention that kind of setup is more expensive. The threaded rods or leadscrews on the Z-axis also add to the overall stability of the 3D printer.
Although they look similar, threaded rods and leadscrews are different from each other. Threaded rods are cheaper and are widely available. Leadscrews, on the other hand, are more expensive but offer a much smoother performance. Go for the setup that best suits your budget.
Belts
GT2 belts are the most commonly used belts on 3D printers. Belts usually drive the movement on the X and Y axes and affect the noise level and the accuracy of the 3D printer. We recommended that you don’t go dirt-cheap on this component as extremely cheap belts stretch out easily, affecting the overall precision of the machine. If you can afford it, you can also use threaded rods or leadscrews on the X and Y axes, but while that setup offers more precision, it affects the print speed in a negative way.
Once your 3D printer is ready to print, you should build tensioners for the belts as soon as possible. They keep the belt in optimum tightness and make it easier to adjust the belt tension. You shouldn’t have issues finding designs for belt tensioners for both the X and Y axes on Thingiverse.
End Stops
End stops prevent the 3D printer from moving past its range and act as position references for the controller board. Mechanical end stops are the most common. They are cheaper and have a more straightforward setup than optical end stops. If you want to be a bit fancy, you can use a probe as an end stop on the Z-axis. Such a setup requires the probe to be attached to the print head.
Spool Holder
The spool holder is exactly what it sounds like. You’ll want a spool holder that can fit almost any spool – a universal spool holder, in other words. It’s fine to just use a makeshift spool holder in the beginning to cut costs, and then once your 3D printer is up and running, you can print a universal spool holder based on Thingiverse designs. Where the spool holder is mounted on the frame often depends on the mechanical arrangement and whether the feeder system is in a Bowden setup or a direct drive setup.
User Interface / Connectivity
Some 3D printers can only be controlled when connected to a computer. Others can start prints while untethered, which is convenient. Ideally, you’ll want a 3D printer that can connect via USB and has an onboard interface with SD card connectivity for standalone prints. For the onboard interface, you can go for a standard LCD interface operated by either a dial, a knob or a set of buttons. A touch-based interface is also on the table, but we only recommend it as a future upgrade.
Once you’re all set with the components you need to build a 3D printer, the next step is to put everything together, obviously. It’s not going to be easy, especially considering you don’t have an instruction manual to walk you through the entire process. It’s best to take it slowly and be extremely meticulous in each step. If you’re not sure about a specific step, don’t hesitate to ask for help at online forums.
General Tips
There is no shortcut when building a 3D printer completely from scratch.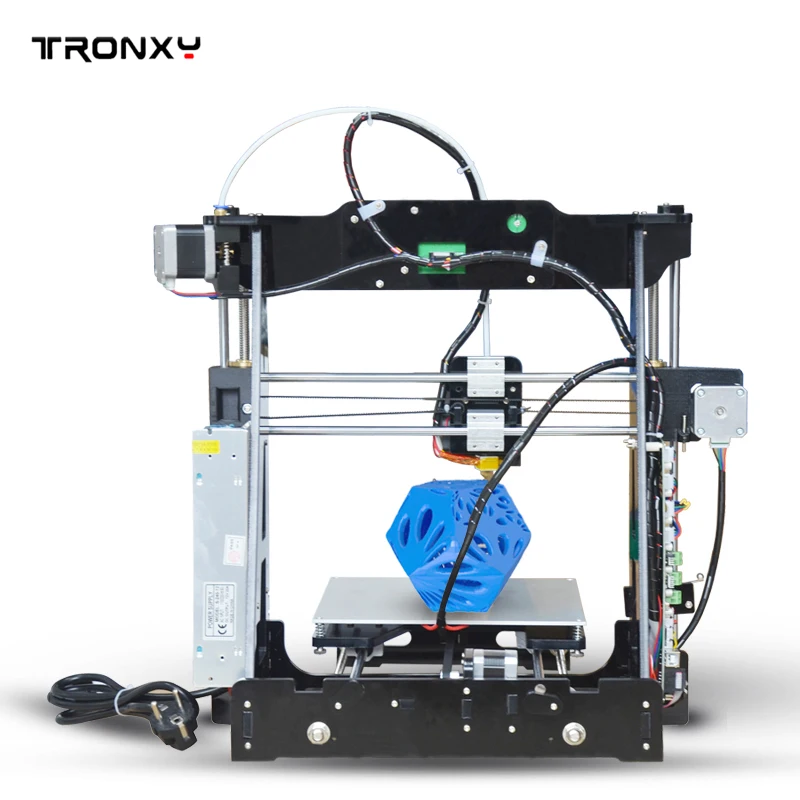 You have to do it the hard way and take the entire process one step at a time. Here are a few general tips:
- Decide on the 3D printer’s mechanical arrangement before you start listing down the components you need to buy. You can’t start on a Cartesian 3D printer and then suddenly decide to switch to a delta 3D printer halfway through the assembly – unless you have the time and money for it, of course.
- Make a list of the exact specifications you want. List down your target print size, print speed, material compatibility, layer resolution, and connectivity options, among others. Your target specs will dictate the structure and components of your 3D printer as well as your costs.
- If you’re new to building 3D printers from scratch, it’s best to stay away from a dual extruder setup. It’s more complicated to build, not to mention more expensive. You can always add a second extruder in the future.
- Don’t worry too much about the cosmetics of your 3D printer when putting it together.
 It’s common for a 3D printer created from scratch to look unappealing, complete with spaghetti wires that can make an electrician cringe. Just focus on building a machine that will actually work as intended and worry about the cosmetics later. Once your 3D printer is up and running, you can always add modifications to make it more attractive – like cable chains and covers for the electronics.
 - You don’t have to go for fancy features right out of the gate. Stuff like an automatic bed leveling system and a touchscreen interface with Wi-Fi connectivity can be added later on. Again, just focus on creating a machine that works.
- In case we didn’t make it clear enough earlier in the guide, you should stay away from acrylic when considering the frame material. It’s not built for high-temperature prints. Even if you only plan to print with PLA, an acrylic-framed 3D printer is still not a good idea due to the material’s fragility. You can use plastic for some components of the 3D printer, but not for the main structure.
- When building a 3D printer, it’s important to be organized about everything. For example, you can create your own checklist or instruction manual so you always know the last step you did when resuming work after a pause.
- Be patient. Building a 3D printer from scratch is not something that can be done in just one or two days, unlike when assembling a DIY kit. Shopping for the components alone can take more than a week, and before you even reach that point, you need to spend a lot of time planning the 3D printer’s design. Again, you have to take the entire process one step at a time. If you can’t do that, then you’re better off buying a pre-assembled 3D printer.
Warning; 3D printers should never be left unattended. They can pose a firesafety hazard.
Building a home 3D printer with your own hands: recommendations from personal experience
3D printing and assembly of 3D printers is my hobby and passion. Here I will not share detailed diagrams and drawings, there are more than enough of them on specialized resources. The main goal of this material is to tell you where to start, where to dig and how to avoid mistakes in the process of assembling a home 3D printer. Perhaps one of the readers will be inspired by applied engineering achievements.
Why do you need a 3D printer? Use cases
I first came across the idea of 3D printing back in the 90s when I was watching the Star Trek series. I remember how impressed I was by the moment when the heroes of the cult series printed the things they needed during their journey right on board their starship. They printed anything: from shoes to tools. I thought it would be great someday to have such a thing too. Then it all seemed something incredible. Outside the window are the gloomy 90s, and the Nokia with a monochrome screen was the pinnacle of progress, accessible only to a select few.
Years passed, everything changed. Around 2010, the first working models of 3D printers began to appear on sale. Yesterday's fantasy has become a reality.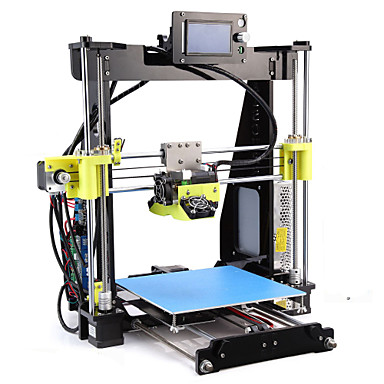 However, the cost of such solutions, to put it mildly, discouraged. But the IT industry would not be itself without an inquisitive community, where there is an active exchange of knowledge and experience and who just let them dig into the brains and giblets of new hardware and software. So, drawings and diagrams of printers began to surface more and more often on the Web. Today, the most informative and voluminous resource on the topic of assembling 3D printers is RepRap - this is a huge knowledge base that contains detailed guides for creating a wide variety of models of these machines.
I assembled the first printer about five years ago. My personal motivation to build my own device is quite prosaic and based on several factors. Firstly, there was an opportunity to try to realize the old dream of having your own device, inspired by a fantasy series. The second factor is that sometimes it was necessary to repair some household items (for example, a baby stroller, car elements, household appliances and other small things), but the necessary parts could not be found.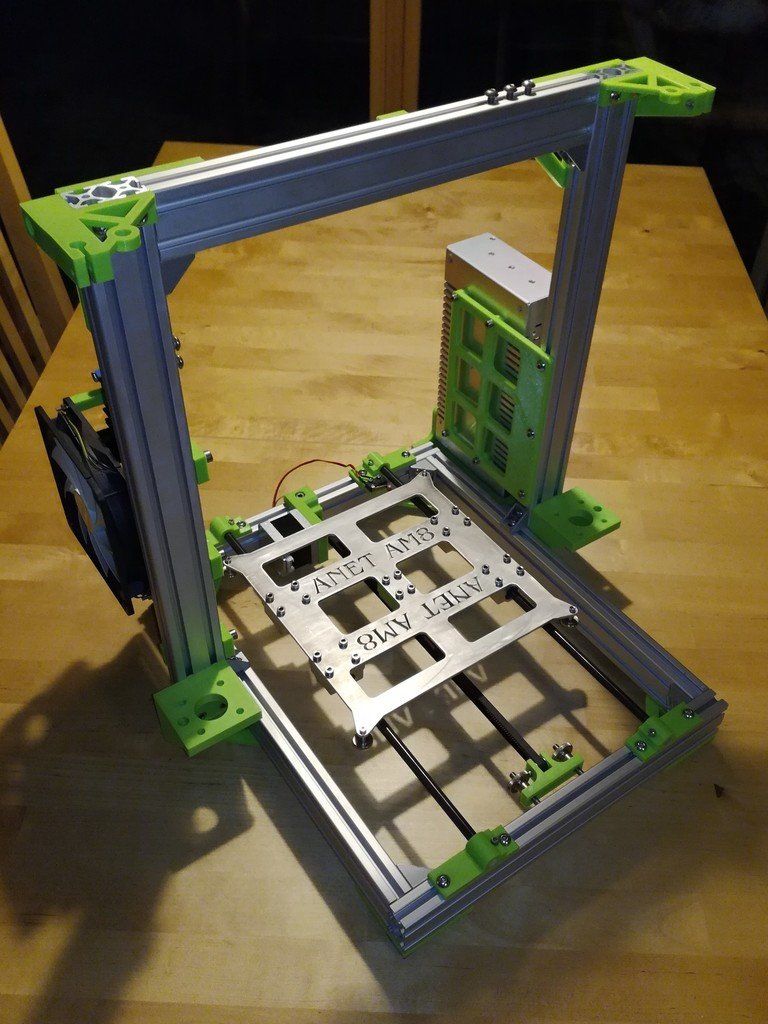 Well, the third aspect of the application is "near-working". On the printer, I make cases for various IoT devices that I assemble at home.
Agree, it is better to place your device based on Raspberry Pi or Arduino in an aesthetically pleasing "body", which is not a shame to put in an apartment or take to the office, than to organize components, for example, in a plastic bowl for food. And yes, you can print parts to build other printers :)
There are a lot of scenarios for using 3D printers. I think everyone can find something of their own.
A complex part in terms of drawing that I printed on my printer. Yes, it's just a figurine, but it has many small elements
Ready solution vs custom assembly
When a technology has been tested, its value in the market decreases markedly. The same thing happened in the world of 3D printers.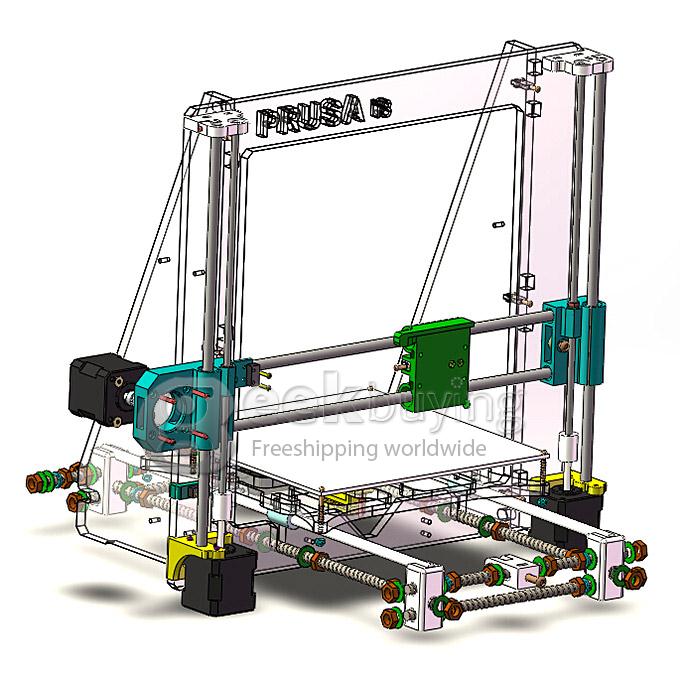 If earlier a ready-made solution cost simply sky-high money, then today acquiring such a machine is more humane for the wallet, but nevertheless not the most affordable for an enthusiast. There are a number of solutions already assembled and ready for home use on the market, their price range ranges from $500-700 (not the best options) to infinity (adequate solutions start from a price tag of about $1000). Yes, there are options for $150, but we, for understandable, I hope, reasons, will not dwell on them.
In short, there are three cases to consider a finished assembly:
- when you plan to print not much and rarely;
- when print accuracy is critical;
- you need to print molds for mass production of parts.
There are several obvious advantages to self-assembly. The first and most important is cost. Buying all the necessary components will cost you a maximum of a couple of hundred dollars. In return, you will receive a complete 3D printing solution with the quality of manufactured products acceptable for domestic needs. The second advantage is that by assembling the printer yourself, you will understand the principles of its design and operation. Believe me, this knowledge will be useful to you during the operation of even an expensive ready-made solution - any 3D printer needs to be serviced regularly, and it can be difficult to do this without understanding the basics.
The main disadvantage of assembly is the need for a large amount of time. I spent about 150 hours on my first build.
What you need to assemble the printer yourself
The most important thing here is the presence of desire. As for any special skills, then, by and large, in order to assemble your first printer, the ability to solder or write code is not critical. Of course, understanding the basics of radio electronics and basic skills in the field of mechanics (that is, "straight hands") will greatly simplify the task and reduce the amount of time that needs to be spent on assembly.
Also, to start we need a mandatory set of parts:
- Extruder is the element that is directly responsible for printing, the print head.
 There are many options on the market, but for a budget build, I recommend the MK8. Of the minuses: it will not be possible to print with plastics that require high temperatures, there is noticeable overheating during intensive work, which can damage the element. If the budget allows, then you can look at MK10 - all the minuses are taken into account there.
 - Processor board. The familiar Arduino Mega is well suited. I didn't notice any downsides to this solution, but you can spend a couple of dollars more and get something more powerful, with a reserve for the future.
- Control board. I'm using RAMPS 1.4 which works great with the Arduino Mega. A more expensive but more reliable board is Shield, which already combines a processor board and a control board. In modern realities, I recommend paying attention to it. In addition to it, you need to purchase at least 5 microstep stepper motor controllers, for example - A4988. And it's better to have a couple of these in stock for replacement.

- Heated table. This is the part where the printed element will be located. Heating is necessary due to the fact that most plastics will not adhere to a cold surface. For example, for printing with PLA plastic, the required surface temperature of the table is 60-80°C, for ABS - 110-130°C, and for polycarbonate it will be even higher
There are also two options for choosing a table - cheaper and more expensive. Cheaper options are essentially printed circuit boards with preheated wiring. To operate on this type of table, you will need to put borosilicate glass, which will scratch and crack during operation. Therefore, the best solution is an aluminum table. - Stepper motors. Most models, including the i2 and i3, use NEMA 17 size motors, two for the Z axis and one each for the X and Y axes. Finished extruders usually come with their own stepper motor. It is better to take powerful motors with a current in the motor winding of 1A or more, so that there is enough power to lift the extruder and print without skipping steps at high speed.
- Basic set of plastic fasteners.
- Belt and gears to drive it.
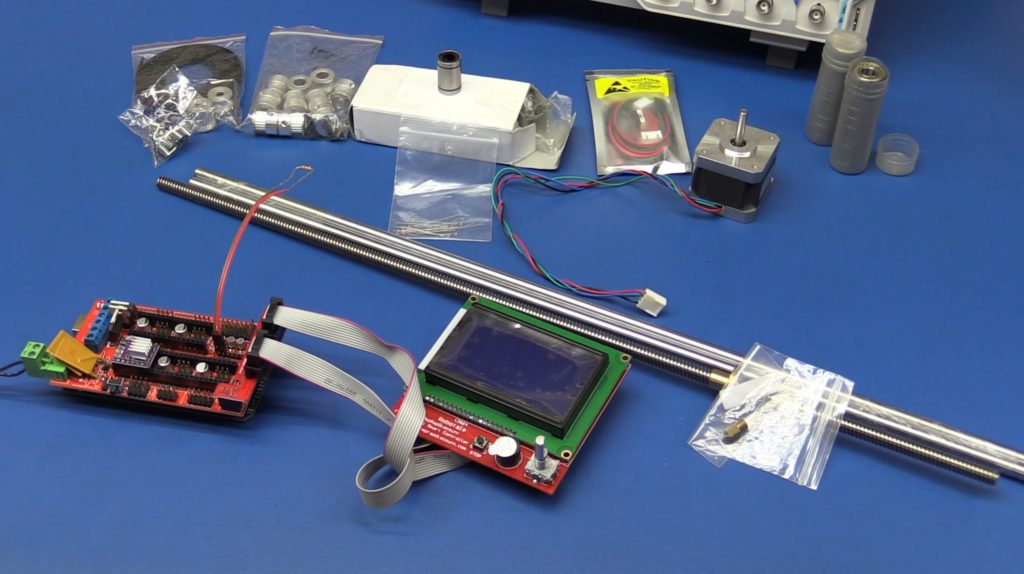
Examples of elements appearance: 1) MK8 extruder; 2) Arduino processor board; 3) RAMPS control board; 4) motor controllers; 5) aluminum heated table; 6) NEMA 17 stepper motor; 7) a set of plastic fasteners; 8) drive gears; 9) drive belt
This is a list of items to be purchased. Hardcore users can assemble some of them themselves, but for beginners, I strongly recommend purchasing ready-made solutions.
Yes, you will also need various small things (studs, bearings, nuts, bolts, washers ...) to assemble the case. In practice, it turned out that using a standard m8 stud leads to low printing accuracy on the Z axis. I would recommend immediately replacing it with a trapezoid of the same size.
M8 trapezoid stud for Z axis, which will save you a lot of time and nerves. Available for order on all major online platforms
You also need to purchase customized plastic parts for the X axis, such as these from the MendelMax retrofit kit.
Most parts available at your local hardware store. On RepRap you can find a complete list of necessary little things with all sizes and patterns. The kit you need will depend on the choice of platform (we'll talk about platforms later).
What's the price
Before delving into some aspects of the assembly, let's figure out how much such entertainment will cost for your wallet. Below is a list of parts required for purchase with an average price.
Platform selection
The community has already developed a number of different platforms for assembling printers - the most optimal case designs and the location of the main elements, so you do not have to reinvent the wheel.
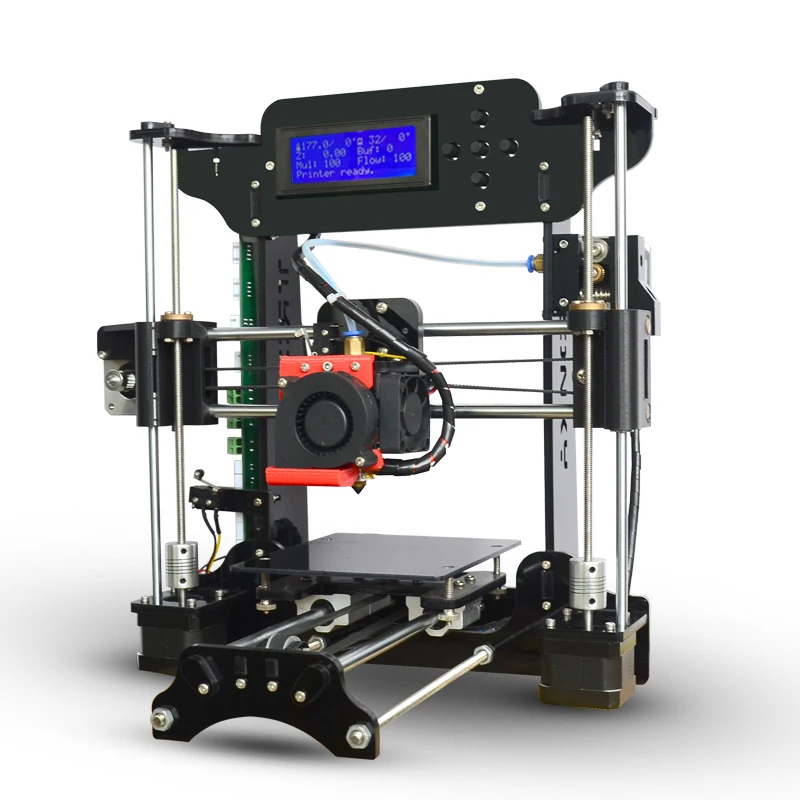
i2 and i3 are key platforms for self-assembly printer enclosures. There are also many modifications of them with various improvements, but for beginners, these two classic platforms should be considered, since they do not require special skills and fine-tuning.
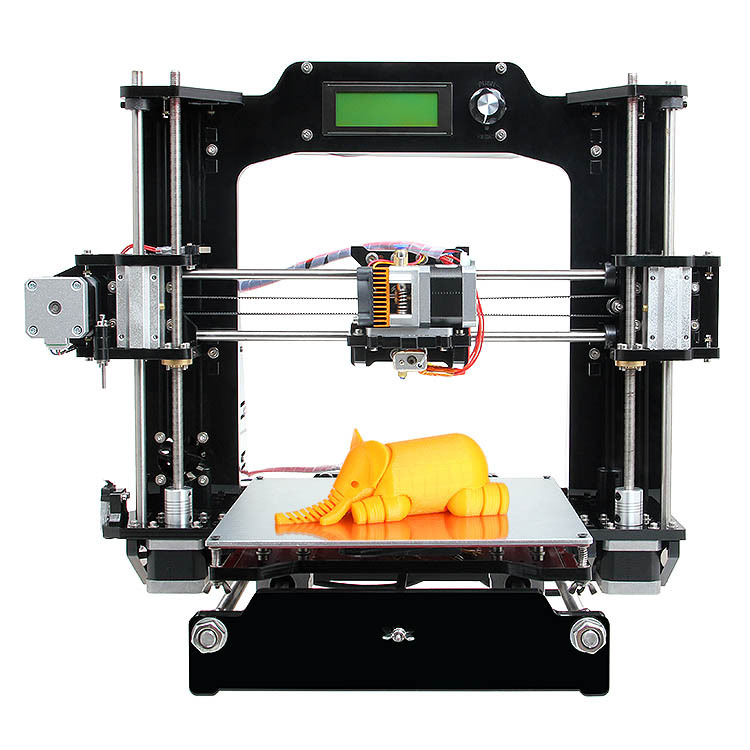
Actually, illustration of platforms: 1) i2 platform; 2) i3 platform
On the plus side of i2: it has a more reliable and stable design, although it is a little more difficult to assemble; more opportunities for further customization.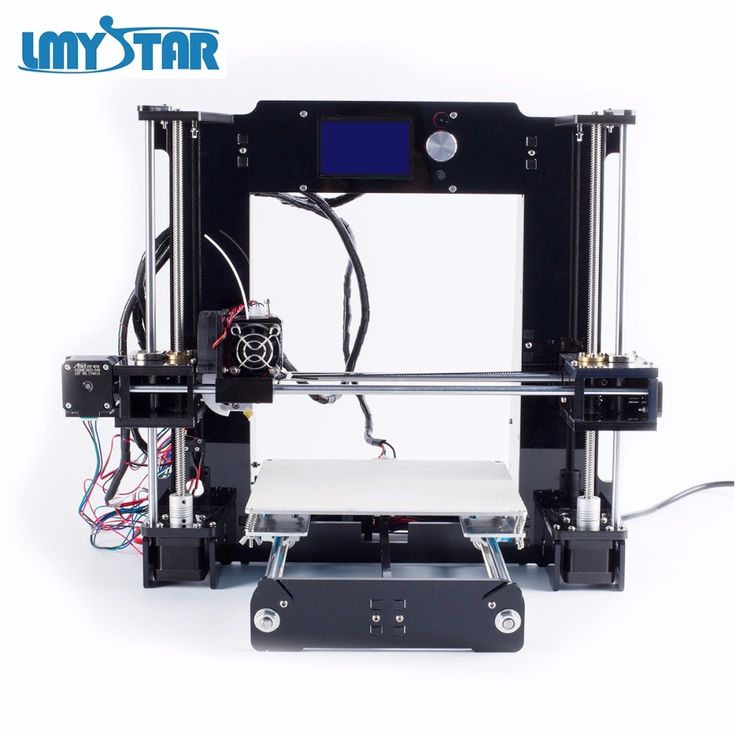
The i3 variant requires more special plastic parts to be purchased separately and has a slow print speed. However, it is easier to assemble and maintain, and has a more aesthetically pleasing appearance. You will have to pay for simplicity with the quality of printed parts - the body has less stability than i2, which can affect print accuracy.
Personally, I started my experiments in assembling printers from the i2 platform. She will be discussed further.
Assembly steps, challenges and improvements
In this block, I will only touch on the key assembly steps using the i2 platform as an example. Full step by step instructions can be found here.
The general scheme of all the main components looks something like this. There is nothing particularly complicated here:
I also recommend adding a display to your design. Yes, you can easily do without this element when performing operations on a PC, but it will be much more convenient to work with the printer this way.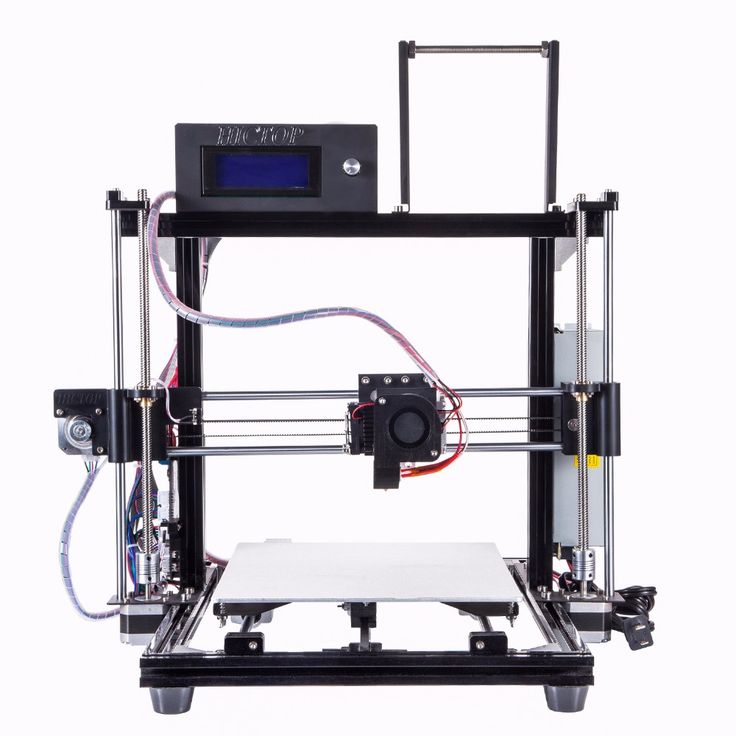
Understanding how all components will be connected, let's move on to the mechanical part, where we have two main elements - a frame and a coordinate machine.
Assembling the frame
Detailed frame assembly instructions are available on RepRap. Of the important nuances - you will need a set of plastic parts (I already talked about this above, but I'd better repeat it), which you can either purchase separately or ask your comrades who already have a 3D printer to print.
The frame of the i2 is quite stable thanks to its trapezoid shape.
This is how the frame looks like with parts already partially installed. For greater rigidity, I reinforced the structure with plywood sheets
Coordinate machine
An extruder is attached to this part. The stepper motors shown in the diagram above are responsible for its movement. After installation, calibration is required along all major axes.
Important - you will need to purchase (or make your own) a carriage for moving the extruder and a mount for the drive belt. Drive belt I recommend GT2.
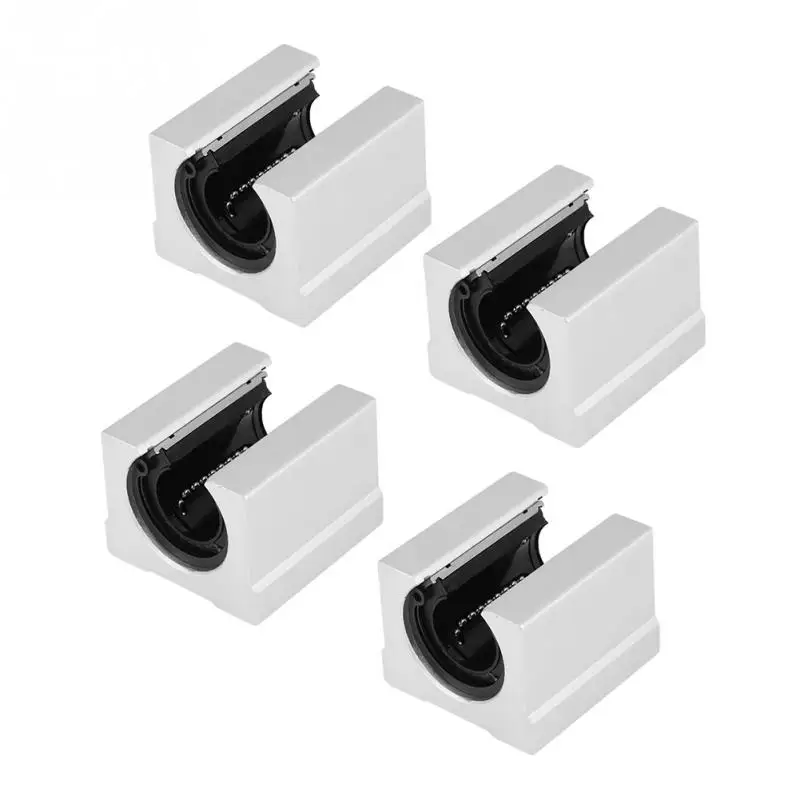
The carriage printed by the printer from the previous picture after it has been assembled. The part already has LM8UU bearings for guides and belt mount (top)
Calibration and adjustment
So, we completed the assembly process (as I said, it took me 150 hours) - the frame was assembled, the machine was installed. Now another important step is the calibration of this very machine and extruder. Here, too, there are small subtleties.
Setting up the machine
I recommend calibrating the machine with an electronic caliper. Do not be stingy with its purchase - you will save a lot of time and nerves in the process.
The screenshot below shows the correct constants for the Marlin firmware, which must be selected in order to set the correct number of steps per unit of measure.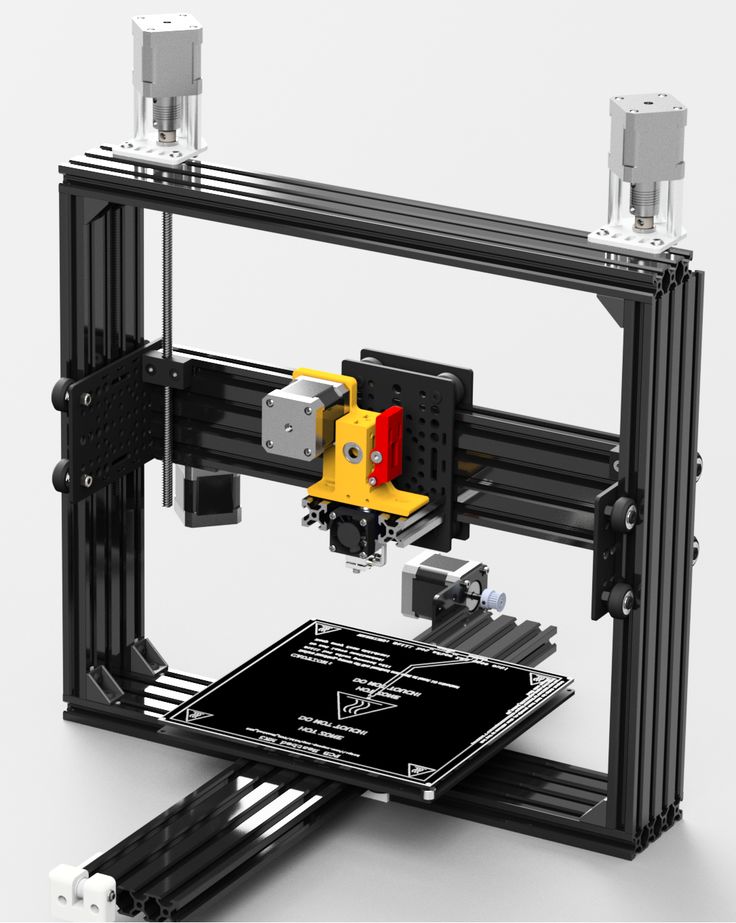 We calculate the coefficient, multiply it, substitute it into the firmware, and then upload it to the board.
Marlin 9 firmware constants0022
For high-quality calibration, I recommend relying on larger numbers in measurements - take not 1-1.5 cm, but about 10. So the error will be more noticeable, and it will become easier to correct it.
Calibrating the extruder
When the frame is assembled, the machine is calibrated, we start setting up the extruder. Here, too, everything is not so simple. The main task of this operation is to correctly adjust the supply of plastic.
If underfeeding, the printed test item will have noticeable gaps, like test die 1. Conversely, the result will look bloated if plastic is overfed (dice 2)
Getting Started Printing
It remains for us to run some CAD or download ready-made .stl, which describe the structure of the printed material. Next, this structure needs to be converted into a set of commands understandable to our printer. For this I use the Slicer program. It also needs to be set up correctly - specify the temperature, the size of the extruder nozzle. After that, the data can be sent to the printer.
Slicer interface
As a raw material for printing, I recommend starting with regular ABS plastic - it is quite strong, products made from it are durable, and it does not require high temperatures to work with. For comfortable printing with ABS plastic, the table must be heated to a temperature of 110-130 ° C, and the extruder nozzle - within 230-260 ° C.
Some important details. Before printing, calibrate the machine along the Z axis. The extruder nozzle should be approximately half a millimeter from the table and ride along it without distortion. For this calibration, a regular sheet of A4 paper inserted between the nozzle and the surface of the heated table is best suited. If the sheet can be moved with little effort, the calibration is correct.
Another thing to keep in mind is the surface treatment of the heated table. Usually, before printing, the surface of the table is covered with something that hot plastic sticks to well. For ABS plastic, this can be, for example, Kapton tape. The disadvantage of adhesive tape is the need to re-glue it after several printing cycles. In addition, you will have to literally tear off the adhering part from it. All this, believe me, takes a lot of time. Therefore, if it is possible to avoid this fuss, it is better to avoid it.
An alternative option that I use instead of scotch tape is to apply several layers of ordinary light beer, followed by heating the table to 80-100 ° C until the surface is completely dry and re-applying 7-12 layers. It is necessary to apply the liquid with a cloth moistened with a drink. Among the advantages of this solution: ABS plastic separates from the table on its own when it cools down to about 50 ° C and is removed without effort, the table does not have to be peeled off, and one bottle of beer will last you for several months (if you use the drink only for technical purposes :)).
After we have collected and configured everything, we can start printing. If you have an LCD screen, then the file can be transferred for printing using a regular SD card.
The first results may have bumps and other artifacts - do not worry, this is a normal process of "grinding" the printer elements, which will end after a few print cycles.
Tips to make life easier (and sometimes save money)
In addition to the small recommendations given in the text above, in this section I will also give a short list of tips that will greatly simplify the operation of a 3D printer and the life of its owner.
- Do not experiment with nozzles. If you plan to immediately print from materials that require high temperatures, then it is better to immediately take the MK10 extruder. On MK8, you can "hang" special nozzles that support high-temperature conditions. But such modifications often cause difficulties and require special experience.
 It is better to avoid this fuss on the shore by simply installing the right extruder for you.
 - Add starter relay for heated table. Improving the power supply system for this important printing part with a starter relay will help solve the known problem of RAMP 1.4 - overheating of the transistors that control the power of the table, which can lead to failure of the board. I made this upgrade after having to throw away a few RAMPS 1.4s.
- Select the correct filament diameter for printing. I recommend using 1.75mm plastic for MK8 and MK10. If we take plastic, for example, 3 mm, then the extruder simply does not have enough strength to push it at an acceptable speed - everything will be printed much longer, and the quality will drop. ABS plastic is ideal for MK8, MK10 will be able to produce products from polycarbonate.
- Use only new and precise X and Y guides. Print quality will be affected. It is difficult to count on good quality with bent or deformed guides along the axes.

- Take care of cooling. During my experiments with various extruders, the MK10 showed the best results - it prints quite accurately and quickly. The MK10 can also print plastics that require a higher print temperature than ABS, such as polycarbonate. Although it is not as prone to overheating as its younger brother MK8, I still recommend taking care of its cooling by adding a cooler to your design. It must be permanently enabled, this option can be configured in Slicer. You can also add coolers to keep the stepper motors at an acceptable temperature, however, make sure that their air flows do not fall on the printed part, as this can lead to its deformation due to too rapid cooling.
- Consider heat retention. Yes, on the one hand, we are struggling with overheating of the elements. On the other hand, a uniform temperature around the printer will contribute to high-quality printing (the plastic will be more pliable). To achieve a uniform temperature, you can put our printer, for example, in a cardboard box.
 The main thing is to connect and configure the coolers before that, as described above.
 - Consider insulating your desk. Heated table heats up to high temperatures. And if part of this heat leaves properly, heating the printed part, then the second part (from below) just goes down. To concentrate the heat from the table onto the part, you can perform an operation to insulate it. To do this, I simply attach a cork mouse pad to its bottom using stationery clips.
Pins
I am sure that during the assembly process you will encounter a number of difficulties specific to your project. Neither this text nor even the most detailed guides will insure against this.
As I wrote in the introductory part, the above does not claim the status of a detailed assembly manual. It is almost impossible to describe all the stages and their subtleties within the framework of one such text. First of all, this is an overview material that will help you prepare for the assembly process (both mentally and financially), understand whether you personally need to bother with self-assembly - or give up on everything and buy a ready-made solution.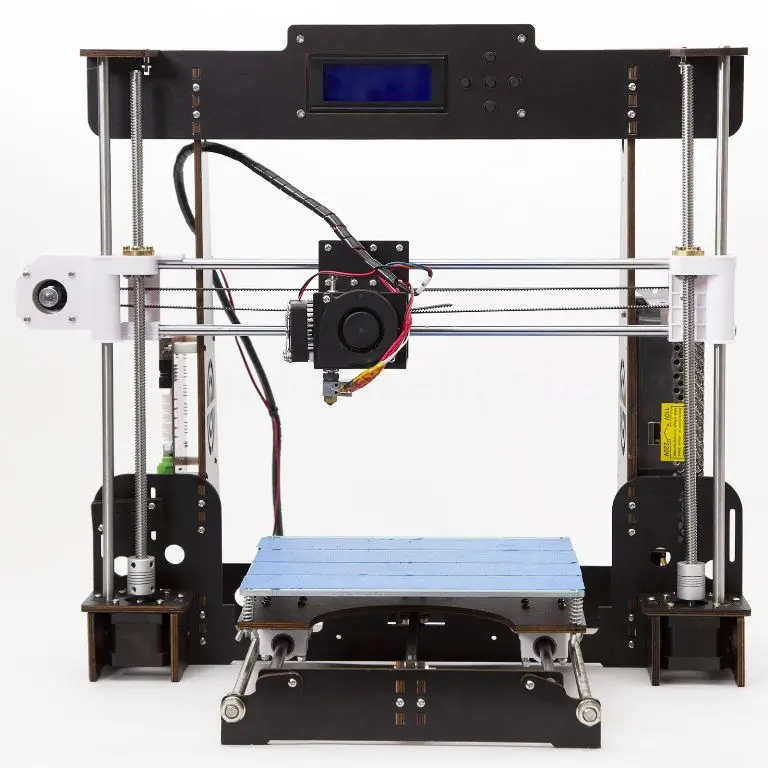
For me, assembling printers has become an exciting hobby that helps me solve some issues in home and work affairs, take my mind off programming and do something interesting with my own hands. For my children - entertainment and the opportunity to get unusual and unique toys. By the way, if you have children whose age allows them to mess around with such things, such an activity can be a good help for entering the world of mechanics and technology.
For everyone, the vectors of using 3D printers will be very different and very individual. But, if you decide to devote your personal time to such a hobby, believe me, you will definitely find something to print :)
I will be glad to answer comments, remarks and questions.
What to read/see
- what can be printed;
- 3D printer forum;
- RepRap community site with model descriptions and assembly instructions;
- printer that prints electronics.
Subscribe to the Telegram channel "DOU #tech" so you don't miss new technical articles.
Topics: DIY, embedded, tech
Homemade DIY 3D printer
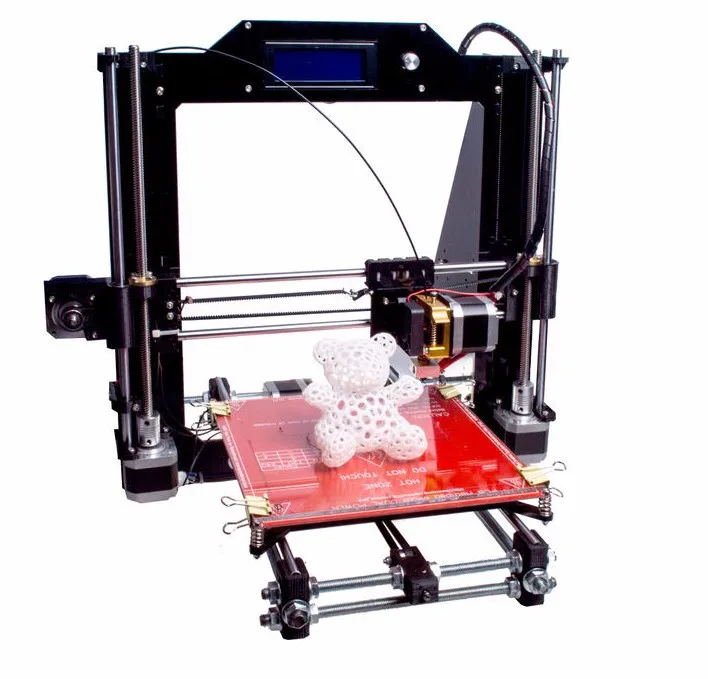
So, the homemade 3D printer that we will be building is quite simple to manufacture, portable and cheap. Creating a 3D printer from blueprints can be a daunting task in itself for some. But, in fact, it is not so difficult to assemble it, although the work takes a lot of time. It is desirable that you have a basic understanding of how a 3D printer works.
This manual provides a complete description (with high-definition photos and videos) of how to build a DIY 3D printer from scratch, as well as a description of the software part of the device. In general, if you can understand all the steps of the instructions, then you can easily create this printer and be able to print your own models yourself.
The home 3D printer will use Fused Deposition Modeling (FDM) technology. This technology involves the creation of three-dimensional objects by applying successive layers of material that follow the contours of a digital model. Thermoplastics are used as printing materials.
Before you start making a printer, read the article to the end. The last step of this article is very important, don't skip it.
This article can be divided into four main parts:
- Device assembly.
- Download and install software.
- Testing and setting up a 3D printer.
- Print.
So let's get started!
Step 1: Assemble the device
Parts for making the device are readily available on Ebey and other websites. Below is a list of required parts and recommended tools.
Parts:
- Extruder assembly with 0.4 mm nozzle - 1 pc.
- Stepper motor - 4 pcs.
- Belt pulley - 2 pcs.
- Pulley belt - 4 pcs.
- Furniture drawer guide - 6 pcs.
- Long nut - 2 pcs.
- Long hairpin - 2 pcs.
- Arduino Mega controller - 1 pc.
- Shield add-on RAMPS 1.4 – 1 pc.
- A4988 motor driver – 5 pcs.

- Thermistor 100 kOhm - 2 pcs.
- Toggle switch - 1 pc.
- Power supply from an old computer - 1 pc.
- LED - 2 pcs.
- MDF sheet - 1 pc.
- Small nails, nuts and bolts
- Limit switch - 3 pcs.
- Heated platform - 1 pc.
- Polyimide tape (thermoscotch)
- RAMPS 1.4 compliant shield and switch (optional).
Tool:
- Hacksaw.
- Wood saw.
- Drill and drills.
- Hammer.
- Adhesive.
- Pliers.
- Screwdrivers.
- Level.
- Long steel ruler.
- Roulette.
- Marker.
- Sandpaper.
- Squares.
Step 2: Fabricating the Y Axis (Mounting the Heated Bed)
The Heated Bed is the Y axis for the printer. It is mounted on a base. The complete cutting and assembly process is shown in the photographs.
Step 3: Mounting the Y-axis movement mechanism
Show 3 more images
The Y axis mechanism consists of a complete motor. Assemble according to the photos.
Step 4: Making the Z Axis Motor Mount
The motor mounting device is used to fix the Z axis motor. The entire manufacturing process is shown in the photo.
Step 5: Build the Z-Axis
The Z-Axis frame is used as a base and adds strength to the printer. The dimensions of the frame are not critical and are chosen taking into account the necessary space for moving the extruder.
Step 6: Making the X Axis
Show 7 more images
The X Axis holds the extruder and the X Axis Assembly slides over the Z Axis Assembly. The X Axis Assembly screws into the Z Axis Guide and moves it up and down. The design is assembled according to the photo instructions.
The X-Axis Assembly slides in the Z-Axis direction by means of screw studs. These studs are screwed into fixed nuts that are fixed in the X-axis assembly. Thus, when the stud is rotated by the motor, the X-axis moves up or down.
Mounting of the nut is also shown in the photographs.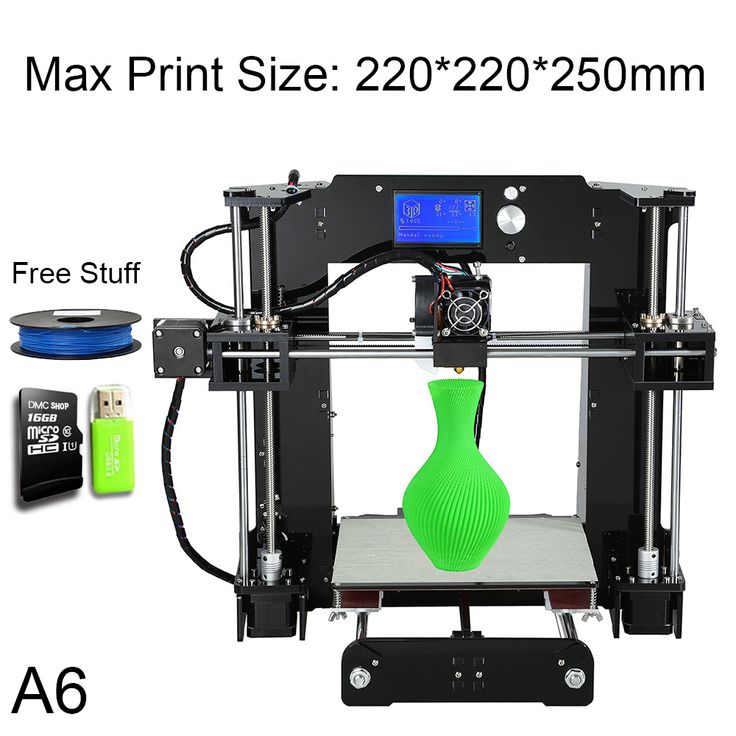
The extruder mechanism is mounted on the X axis. The extruder assembly is shown in the photographs.
Step 7: Installing the Electronics and Wiring
Show 3 More Images
Connecting and mounting the printer electronics is an important part of the build, it must be hidden (inaccessible), tidy and have access to connect.
Locations of the RAMPS shield, Arduino controller, motor driver and power connector are shown in the photos.
To make the printer mobile, a carrying handle is provided at the top.
The power supply is located on the bottom of the printer. The red wire of the block is +5V power, the yellow wire is +12V, the black wire is ground. To turn on the power supply, you need to close the green and black wires together. Therefore, we install a toggle switch between these two wires to turn the power supply on and off.
Wiring manual shown in photos.
Step 8: Perform a preliminary test of the device
The preliminary test consists of checking the functionality of the components and performing movements. An Arduino sketch is included at the end of this step. Upload it to the Arduino controller and test it via the serial monitor. The code in the sketch is not complicated, and it can be changed at your discretion.
Files
- test1.ino
Step 9: Download and install the software
For the correct operation of the printer, in terms of software, 3 things are required:
- Firmware for Arduino.
- Printer interface.
- Tool for converting 3D objects to G-code.
You will need an object model (.stl file). You can either design the part yourself, or use a ready-made file. The Thingiverse service provides many 3D models for download in the form of *.stl files and is a very useful service for owners of 3D printers.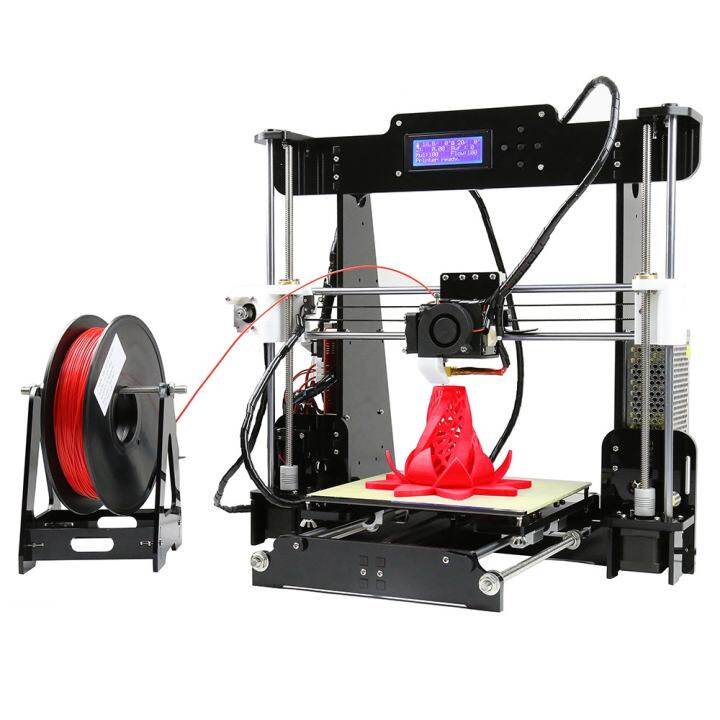
The next step is to convert the *.stl file into G-code, which is the instructions for the 3D printer. For this you need special software. There are many different conversion programs available, such as Slicer, Cura, etc. Cura is preferred because it is easy to use.
After generating the G-code, you need to send it to the printer. Although Cura supports plugins for this, it is better to use another 3D printer control program like Repetier-Host, Pronterface, etc. The next thing you need is an Arduino firmware that interprets the G-code and executes his. To do this, we use the firmware "Marlin".
So what you need:
- Cura program (for cutting).
- Program "Pronterface" (for interface).
- Firmware "Marlin" (for Arduino).
Download them.
Step 10: Setting Up the Marlin Firmware
The Marlin Firmware is the code for the Arduino. Actually this code consists of a set of text files. You don't need to go deep into all the subtleties of programming now, just change the code as described below. More precise code fitting will be described later.
Replacing the motherboard
Open the "Configuration.h" file and change the code as follows:
#ifndef MOTHERBOARD
#define MOTHERBOARD BOARD_RAMPS_13_EFB
#endif
Changing the temperature settings
Change the temperature settings in the "Configuration.h" file "
" change:
#define TEMP_SENSOR_0 5
#define TEMP_SENSOR_1 0
#define TEMP_SENSOR_2 0
#define TEMP_SENSOR_BED 5
"Changing DEFAULT_AXIS_STEPS_PER_UNIT will be done later."
Now upload "marlin.ino" to Arduino via Arduino IDE.
Step 11: Setting up Pronterface
Setting up Pronterface is easy.
Connect the printer and start the program. Set the baud rate specified in the firmware code (#define BAUDRATE 250000) in the program. If you do everything correctly, you will see that the printer has connected to the Prontrface program.
In order to check if everything works, we will do the following:
- Extruder test.
 Set "heat" to 250 degrees. If the graph starts to grow, then there is no error.
 - Heated platform test. Set the "platform" (bed) to 70 degrees. If the graph grows, then there is no error.
- Checking the X, Y and Z axes. Press the arrows with the corresponding axes to move each one.
If everything works, proceed with the adjustment.
Step 12: Testing and tuning
Testing and tuning is not the most difficult, but quite important step, because it will determine the quality of future printing.
X-axis adjustment
Follow the steps below to set the correct scale. Using the Pronterface program, park the X axis to the starting position. Make a mark on the x-axis where the extruder is located. Now press the button to move the x-axis by 100mm. Measure the distance the extruder has moved. If it is equal to 100 mm, then everything is in order. Otherwise, open the "Configuration.h" file and find the values of the DEFAULT_AXIS_STEPS_PER_UNIT parameter. They might be something like this:
#define DEFAULT_AXIS_STEPS_PER_UNIT {78.7402,78.7402,200.0*8/3,760*1.1}
Values (comma-separated) for the X, Y, Z and extruder axes, respectively, are specified in curly brackets. Divide the value from the code by the actual distance the extruder moved in mm, then multiply by 100. Replace the old value in the code with the new one.
Formula
New value = (Old value / Travel distance in mm) * 100
There are other ways to calibrate the movement of the axes, but the one described above is the least laborious, fast and accurate enough.
Do the same for the other axes and extruder and then you can print your first model.
Step 13: Print your dream
Print a calibration block as a test part (file attached). Open the *.stl file in Cura. Drag the object to the desired location.
- Set the thread diameter to 1.75 mm.
- Set the nozzle size to 0.4 mm. Leave all other settings as default.
 If necessary, you can change them too.
 - Now generate the code with the command File Save G code (File Save G-code).
- Connect the printer and start the Pronterface program.
- Open the G-code file in "Pronterface".
- Before printing, check that all axes are parked in their home positions.
- Click Print and enjoy the process.
Don't be discouraged if the first print doesn't print out right. As they say, the first pancake is lumpy. There are a lot of tweaks that need to be made before the details start to turn out right.
Step 14: Important Tips
Before you print, here are a few important tips to remember and follow.
- Make sure the platform is level enough.
- Make sure that when the Z-axis is at the home position, the gap between the platform and the nozzle is equal to the thickness of a standard sheet of paper.
Learn more