Best linear bearings for 3d printer
Bushings or Bearings: Which are Best for 3D Printers?
Are bearings or bushings best for 3D printers? And how can they be improved so that 3D printers can more quickly and reliably turn out parts of higher quality? Although increasing the quality and speed of 3D printers involves all the components used in them, a good place to start are the bearings and bushings that make up the linear-motion subsystems critical to 3D printers.
Bushings and Bearings and Linear Motion
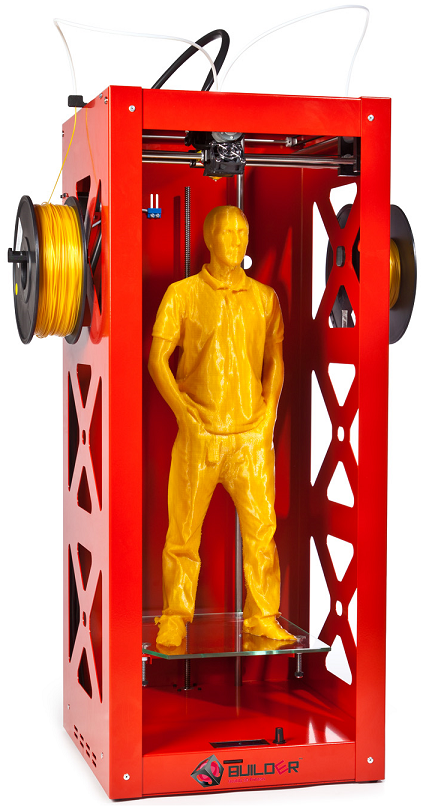
In most 3D printers, the build platform (including the extruder) slides over smooth rods as it moves back and forth. The polished rods support the components and guide the extruder along a precise linear path. Bearings or bushings are used on the straight steel rods to reduce friction and smooth out the motion so that it is jerk-free.
Bushings, also known as sleeve or plain bearings, are cylinders generally made of bronze, steel, or polymers. These materials reduce friction and the power needed to create linear or rotational motion, as well as to lower noise and wear. Bronze bushings are sometimes impregnated with oil so they are lube-free, or require external lubrication.
Bronze bushings tend to be less expensive than linear bearings. In addition, they can run on hardened or less expensive non-hardened shafts, so ancillary equipment can also be less expensive.
The downside of bronze bushings is that they can wear away at the shaft and sometimes need significant amounts of lubrication at regular intervals; this lubrication can form a gritty mixture that wears away at the shaft. In addition, bronze bushings can have a stick-slip problem, which results in jerky motion when printing—because, as the name implies, the bushings are prone to stick on the shaft (static friction), then slip over the shaft. They can also have large tolerances because many are not made to specification, and this makes them a poor fit for 3D printers.
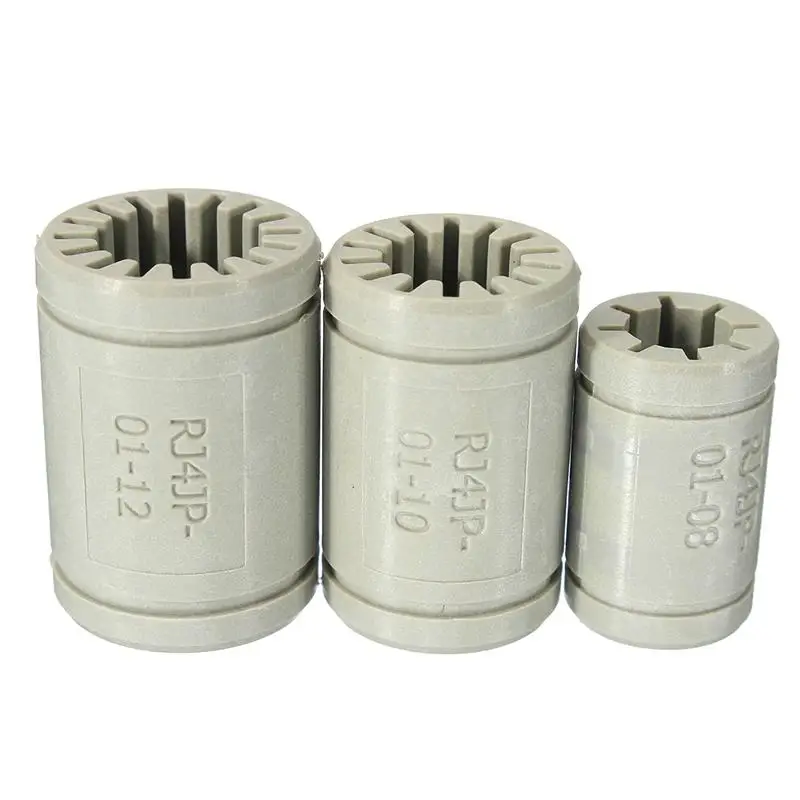
Vesconite Hilube bearings or bushings come in a variety of types and sizes and are well suited to providing smooth motion for 3D printer components.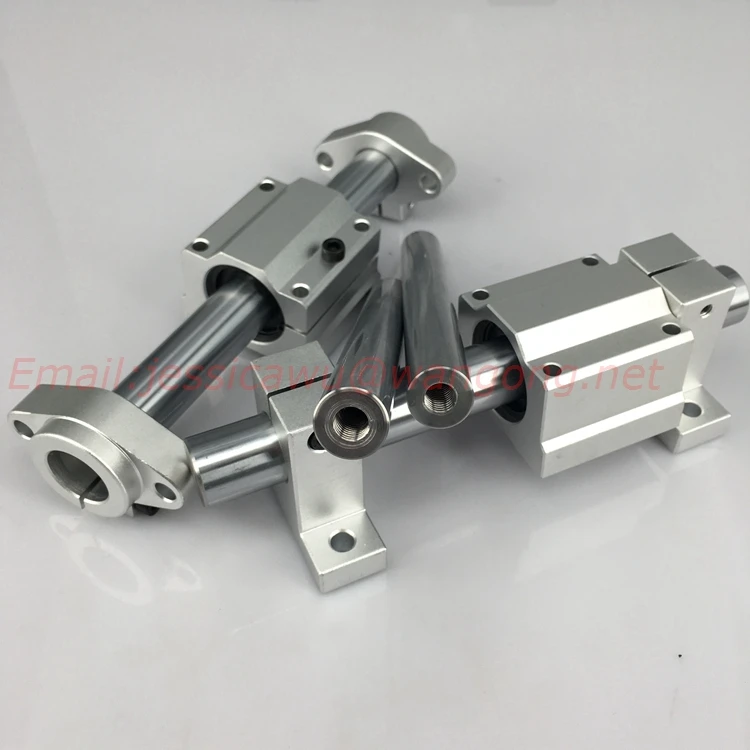
Polymer bushings, another option for sleeve bearings, can be made from a range of materials. But they also suffer from slip-stick and overly large tolerances, especially if they are made from less expensive polymers or mass-produced. In addition, mass-produced polymer bearings are sometimes available in limited sizes and may not meet the needs of the 3D printer manufacturer.
High-end self-lubricating polymers will reduce the risks of slip-stick, especially when the coefficient of friction is low and the dynamic and the static coefficients of friction have similar values. However, with more expensive polymer bushings, it may be possible to get exact tolerances and precise sizes.
Linear ball bearings are the alternatives to bronze and polymer bushings. They can be tube-like, flanged, or pillow boxes, and all have ball bearings along their inside diameter where they run on a shaft. This results in rolling motion rather than sliding.
The cost of ball bearings varies significantly, depending on quality.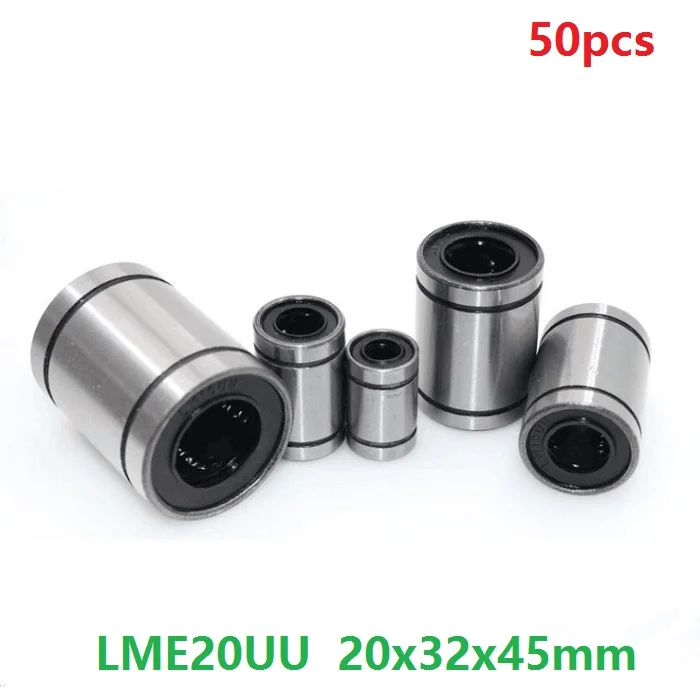 Durable, name-brand ball bearings can be expensive compared to bushings. In addition, they should be used with hardened shafts so that the balls do not eat into the shaft. This makes the rods the bushings runs on expensive.
In addition, some believe linear ball bearings require more maintenance and regular lubrication to retain performance. Moreover, because dirt and dust can be attracted and mixed into the lubricant (usually grease), the balls eventually run louder and even jam if the grit-becomes significant.
Hilube bushings (white) mounted in a 3D printer on a smooth guide rod.
3D Printers
The question of whether to use bearings or bushings seems to be more pronounced among those with RipRap printers. Those users (aka Makers), prize a high degree of innovation and many prefer to replace components or make the components themselves.
For those converting their machines or those committed to modifications, the debate as to whether to use bearings or bushings is particularly pertinent.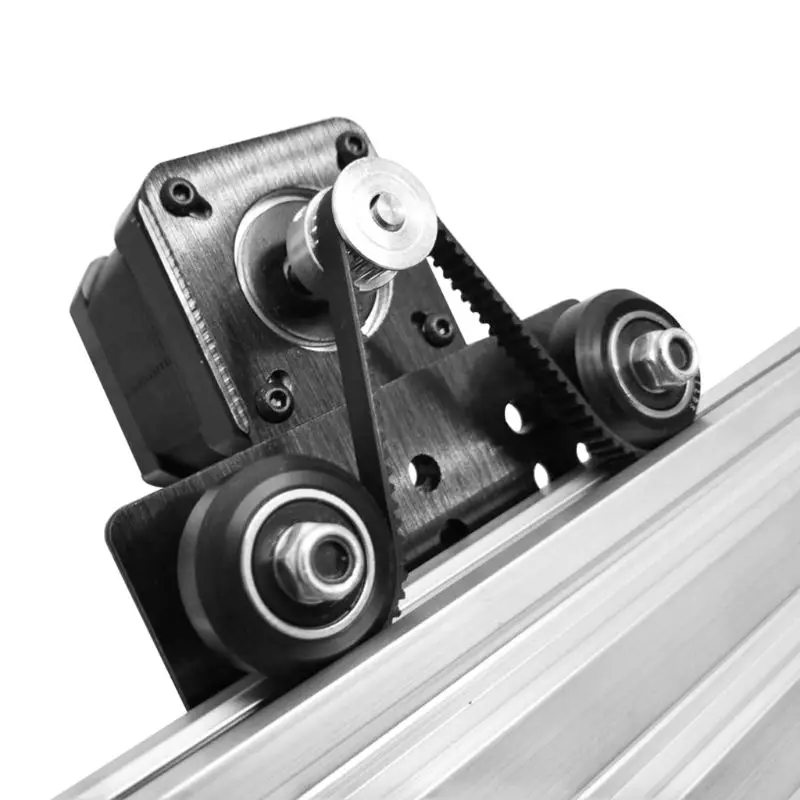 There is always the option of including specified parts described in production catalogues. But for those who want to replace parts with similar non-OEM ones, it is wise to investigate alternative brands. If they are also swopping bearings for bushings or vice versa, the alternative of making bushings or bearings can be important.
Here’s a close-up of the Vesconite Hilube bearings used on a 3D printer.
Vesconite Hilube Bushings
3D printer that use bushings or bearings sometimes exhibit a phenomenon called dimpling and pimpling on finished parts. It occurs when the guide rod becomes nonuniform and is caused by the rod slightly lifting on one side and slightly tilting on the other as the extruder head moves from one side to the other. This is typically a result of wear on the rod. This phenomenon is eliminated when Vesconite Hilube bushings are used.
Vesconite Hilube is an advanced thermopolymer in the Vesconite range that is particularly well suited to operating in wet conditions, including pump and marine applications. It combines low friction and low wear, letting it perform well under difficult operating conditions.
The material is self-lubricating and requires no greasing, so bushings require little maintenance. Because there is no gritty grease that can get embedded in the rod’s mating surface, wear caused by constant movement of this contaminated mixture is eliminated. Wear caused by metal-on-metal contact also becomes a thing of the past because the hard-wearing polymer glides smoothly over the rods.
Hilube has an unlubricated coefficient of friction on steel of 0.1, and can go as low as 0.08 on polished steel. This makes bushing movement along the rod particularly smooth and eliminates the problem of the jerky motion (stick slip) when the extruder on the 3D printer moves to a new location. Hilube bushings can be made to specifications with appropriate tolerances and delivered globally via distributors or by courier, which simplifies logistics. And using bushings made to specifications and tolerances has also improved the quality of 3D printed parts as bushing play can be minimized.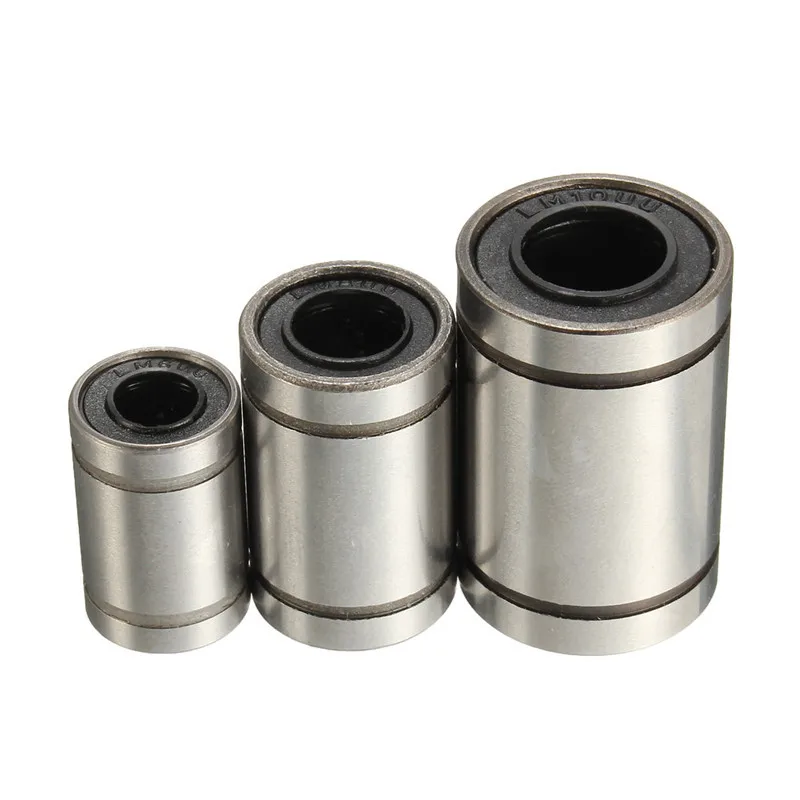
The Hilube bushing for 3D printers is self-lubricating, wear resistant, and has a low coefficient of friction.
Here are some case studies of successful use of Hilube bushings in 3D printers:
Norway: Norwegian innovator Kent Thoresen is using Hilube sleeve bushings in his project to build a more reliable and less-noisy 3D printer. About eight years ago, he started 3D printing various parts for other projects and became aware of some clear weaknesses in open-source 3D printer designs. So, he started redesigning and refining his own 3D printer. Friends began to request his designs, as well as friends of friends; he continued to refine his designs, eventually building more than 200 printers for his network of acquaintances.
His current printer assembly is stiff and dependable, an improvement over many of the low-cost, flimsy designs that are available. It is tough and technically solid, and does not require calibration if the plates are moved, unlike many of the less-sturdy, commercially-available designs.
“The current design has been tested for almost 4,000 hours,” says Thoresen. “I will test it for 5,000 hours and, if I am comfortable with its performance, the design will be released to the open-source community.
“After 2,500 hours, we also tested the bushings and there was no indication of wear,” he continues. The bushings, along with the other printer components, are currently undergoing their final leg of testing and, if they prove themselves, will be part of the final design.
“We want to create a printer that is cheap, dependable, and will eliminate worries about wear,” Thoresen notes. “Print jobs can take two to four days and I want to ensure that users can print continuously without having to worry about equipment failing or cost of the print time and the material used should there be a failure.”
South Africa: A company that sells South African computer components and accessories chose Vesconite Hilube bushings when the brass bushings on one of the owner’s 3D printers needed to be replaced.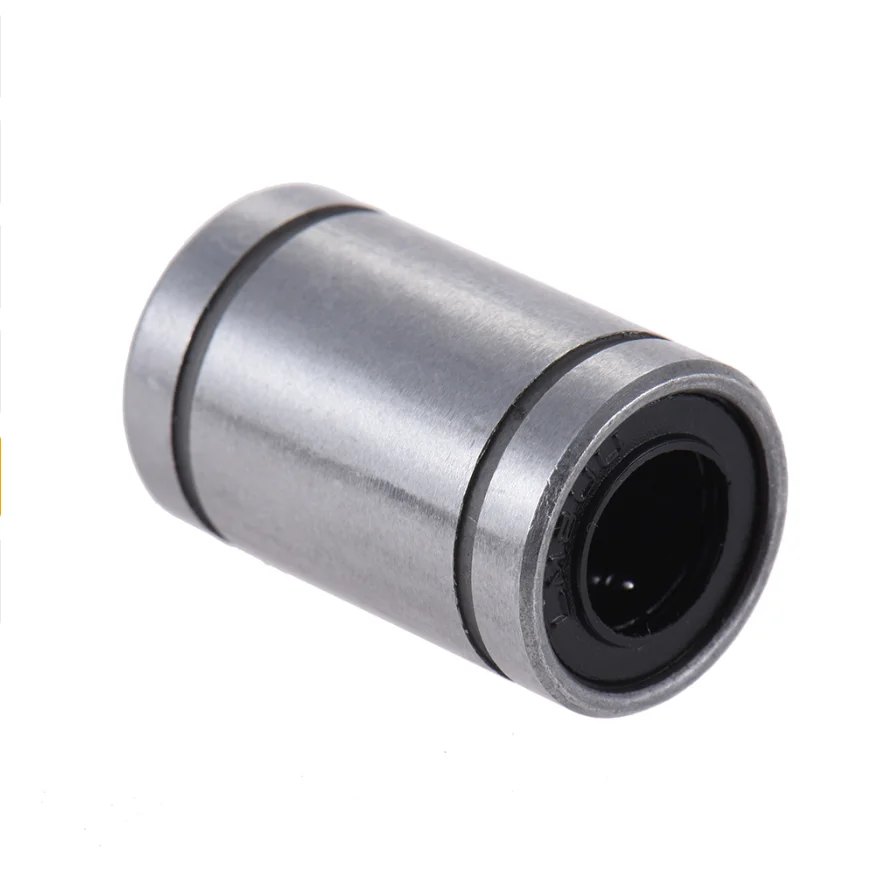 The owner, Deon Eksteen, has three 3D printers he uses to make components for local businesses and factories, as well as toys he sells.
When one of his printers’ bronze bushings wore out from a combination of use and the abrasive paste of lubricant and particles which formed between it and the shaft, he searched for a polymer bushing replacement for his XYZ Da Vinci 1.0A printer.
This was difficult in South Africa, where 3D printing is still establishing itself and where 3D printing stores and filament importers do not supply replacement components for that printer due to a lack of demand and support from 3D printer distributors.
Other parts, components, such as wear parts and bearing, can be made of Vesconite Hilube.
Eksteen sought in vain through an online shopping app known for supplying the latest electronics, fashion, phone accessories, computer electronics and toys, but did not find replacement brass bushings of the correct size. Approaching various brass bushings suppliers was also unsuccessful as he was asked to place orders for more than 1,000 units.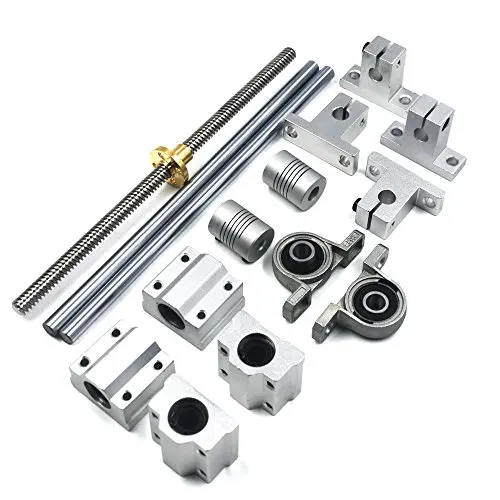
Armed with the dimensions supplied by a globally-recognized blog specializing in 3D printer conversions, Eksteen approached Vesconite Bearings and ordered 8mm-long bushings with the correct specification.
Within five days of finalizing the order and verifying that Vesconite Hilube was appropriate for his needs, a courier dropped off the bushings, which were exactly made to specification. Eksteen’s 3D printer was fitted with the bushings and, so far, has printed for 7,253 hours with no signs of wear on the bushings and the rods are still “super-smooth.” His previous bronze bushings had a life of 2,000 hours.
He also appreciates that the new bushings run quietly, unlike printers with linear bearings that, with linear movements at 120 mm/., are extremely noisy due to friction between the ball bearings and linear rods. The wear-resistant bushings are also not as prone to the uneven wear of bronze bushings, so there is no “dimpling and pimpling” and finished parts have a quality finish.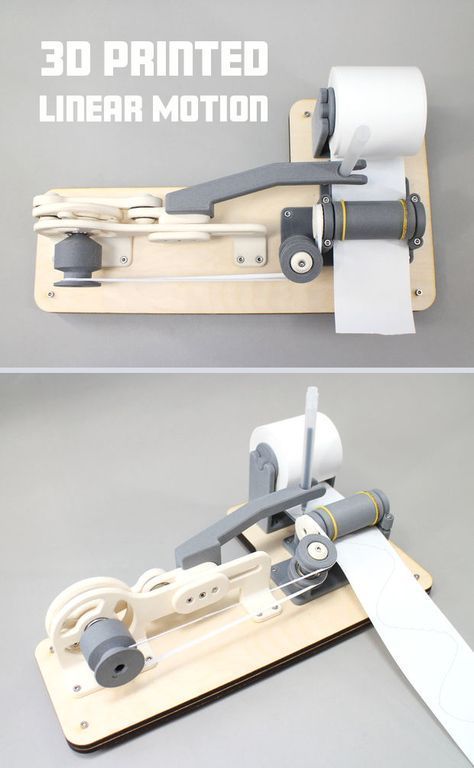
If you have any questions Vesconite Hilube bushings, please feel free to call the company.
Bearings for 3D Printers - 3DJake International
Sort byRelevanceBestsellersCustomer ReviewsPrice, Low to HighPrice, High to LowNew arrivalsHighest Discount
-
E3D Ball Bearings 5 Model types- With metal cover
- Many uses
-
BROZZL Linear Bearings LM6UU - LM12LUU- High precision
- Long life span
- Easy exchange
-
Creality Roller with Bearing- Original spare part
- For all CR-10 models
-
BROZZL V-Slot Guide Wheel Including Bearings- Outstanding rigidity
- Wear-resistant
- For high loads
-
E3D Linear Ball Bearings (Set of 2)- Good quality
- Good price
- Suitable for linear shafts
-
E3D Titan Bearings- Stainless
- Stable and robust
- Good quality
-
BondTech Needle Roller Bearings- High precision
- For shaft diameters of 3 mm
- Two bearings per drive wheel required
-
Artillery Wheel Bearing- Original spare part
-
BIQU Roller Wheel Bearings- Original spare part
- From BIQU
-
Voxelab Roller with Bearing- Original spare part
All prices incl.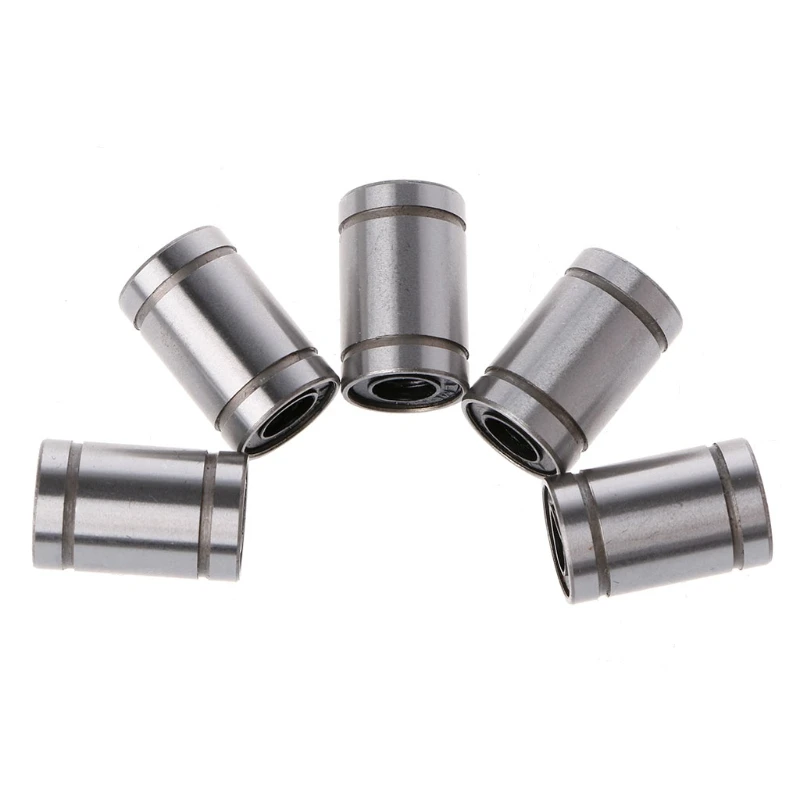 VAT.
VAT.
Diary of a 3D printer. Replacing linear bearings pain, sadness, disappointment and unexpected denouement
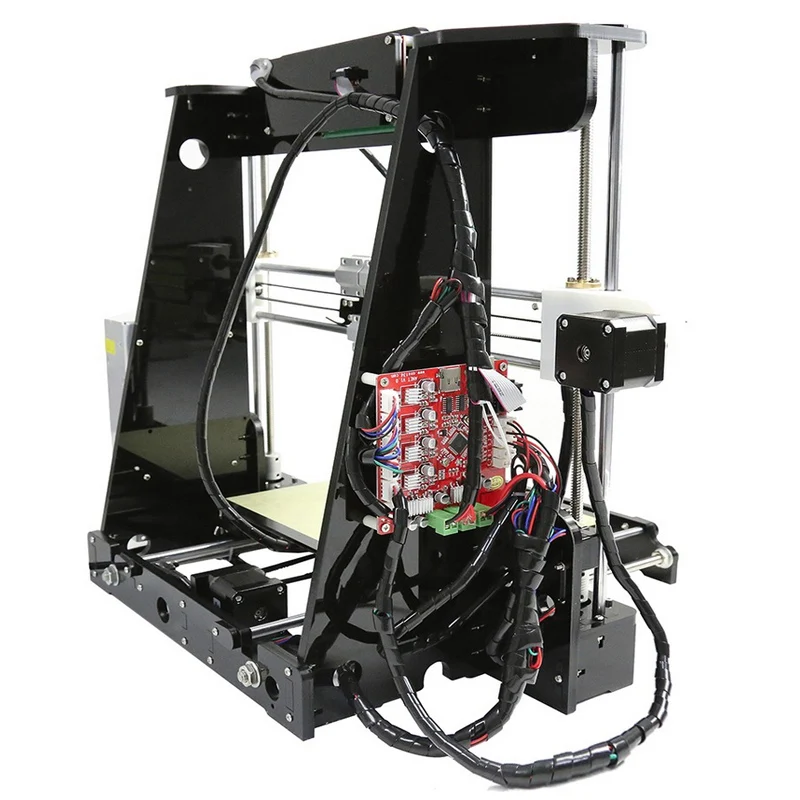
Hello everyone! I again return to the modifications of the Anycubic i3 mega 3D printer, which has already acquired a bunch of improvements and, in addition, turned into Anycubic Mega-S. As you know, I try to make the printer as quiet as possible, and got to almost all sources of noise, but it's too early to stop. This time it was the turn of linear bearings. They worked for me for more than a year and are already pretty tired. And so, let's get started.
In fact, the linear bearings of Anycubic 3D printers are a separate story. Although rather not a song, but a source of constant noise, crunch and rattle. Even when new, even out of the box. The owners of this printer model understand what I mean. Well, when the bearings wear out, it's time to change them. So I faced a choice:
- Order exactly the same bearings from China and continue to suffer from noise
- Order nylon bearings from China.
 They are quieter!
Finally decided to try nylon bearings. But as you know, ordering goods from China is a lottery and not only in terms of whether it will reach / not reach, but also in terms of what quality the order will be.
The Anycubic i3 Mega 3D printer uses LM8Luu brand linear bearings. This is not a very common bearing model. So reputable vendors like TriangleLab or Mellow Store don't have these bearings for sale. There are other sellers from whom to buy is a lottery. I finally plucked up the courage to order the LM8LUU nylon counterparts from some obscure vendor. The choice was not great. There are few sellers of such exotics. There are no reviews.
The bearings arrived on time and looked like this:
Outwardly the bearings looked nothing like this. And that's where their dignity ends. On the shaft they sat so-so. A little backlash and gave the impression that they sit exactly only on parole. I am not a great specialist in bearings and I thought, “What if I don’t understand something and in fact I just don’t understand it.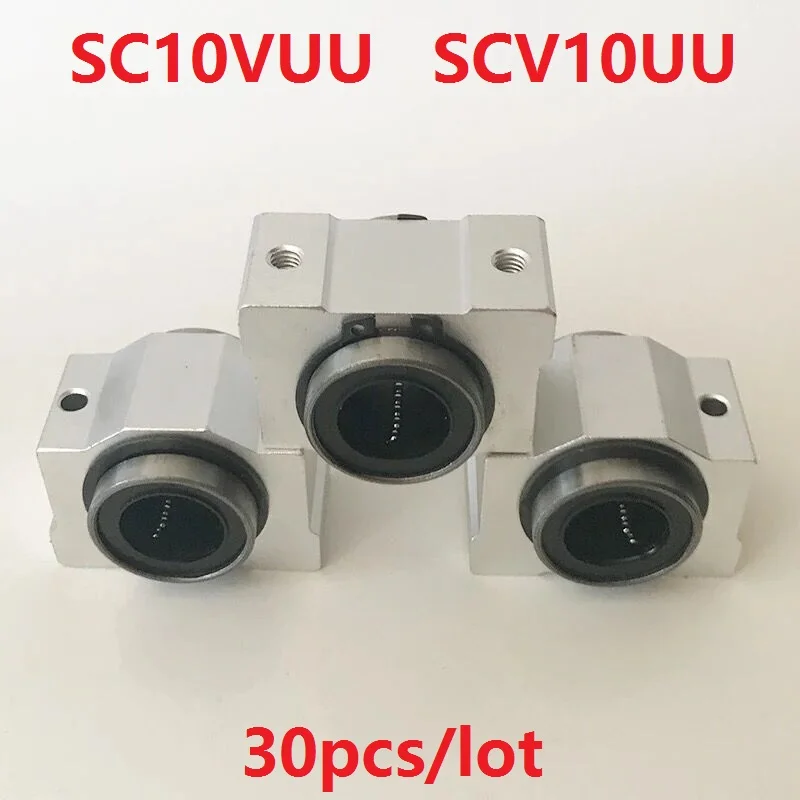 ” In the end, it was decided to install and test them in action.
And so. Let's start replacing the linear bearings on the Anycubic i3 Mega 3D printer. The instruction is also suitable for the Anycubic Mega-S 3D printer. The main task is to change the bearings on the shafts with minimal disassembly of the 3D printer.
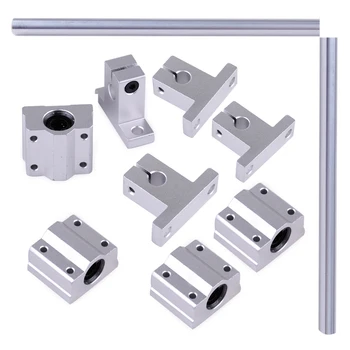
For this operation we will need the following:
Hexagon set or my favorite screwdriver with EMAX hex set
Bearings.
Gasoline “Galosha” or other solvent for removing oil (White spirit, acetone, Isopropanol or alcohol will not work).
Let's start replacing the bearings with the X axis. This is the one on which the printhead hangs.
First, place the printer comfortably on the table and turn it so that it is facing you.
There are special technological holes on the X axis through which you can loosen the screws securing the X axis shafts. See the photo below:
In order not to break anything, we will work with each shaft in turn. Let's start from the top.
Loosen the shaft fixing screws. on both sides:
After loosening the screws, carefully, holding the print head, pull out the shaft. The shaft must be pulled towards the stand on which the extruder motor is fixed, because. there is a special technological hole for mounting the shaft.
The shaft may not be pulled out completely. But I still pulled it out completely, wiped it and degreased it with Galosh gasoline.
Now let's deal with the bearing. It just pops out with a little effort. To do this, the bearing must be shifted parallel to the shaft axis.
Simply put, take it out of the holder and put it aside.
Now insert a nylon sleeve in its place.
We try to place the sleeve strictly in the center.
Now insert the Shaft back and fix it with the locking screws! Important! Clamp without fanaticism, because. you can break the thread.
Now we repeat all the same operations with the lower shaft.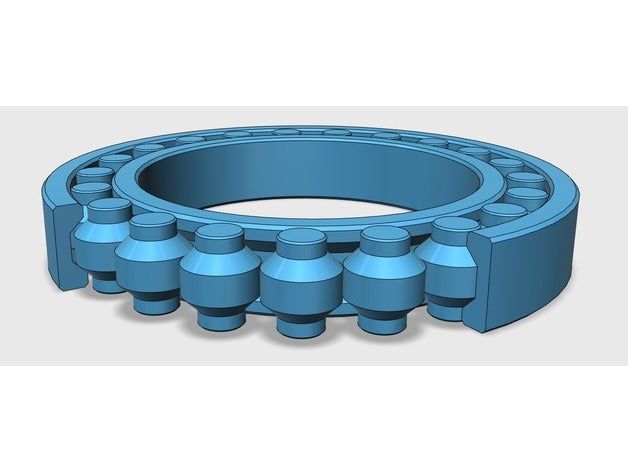 We unscrew from one side:
We unscrew from the other side:
We take out the Shaft.
If desired, clean the shaft from the remnants of old grease, dust, dirt, etc.
Change bearing
We insert the Shaft
We clamp the shaft. And that's it. Axis X sorted out.
More adventures await with the Y-axis. Because in the case of all drygosts, this is a table. So you have to change the bearings under the table. Naturally without complete disassembly. I must say right away that the process is a little difficult, but it is perfectly feasible even with my crooked hands :) Let's get started.
To start, release the fastening of the shafts along which the table moves. To do this, unscrew 2 screws on each side on each shaft. Those. Each shaft is fixed with two screws at the front and two screws at the back.
Loose screws? Great, now carefully remove both shafts in turn.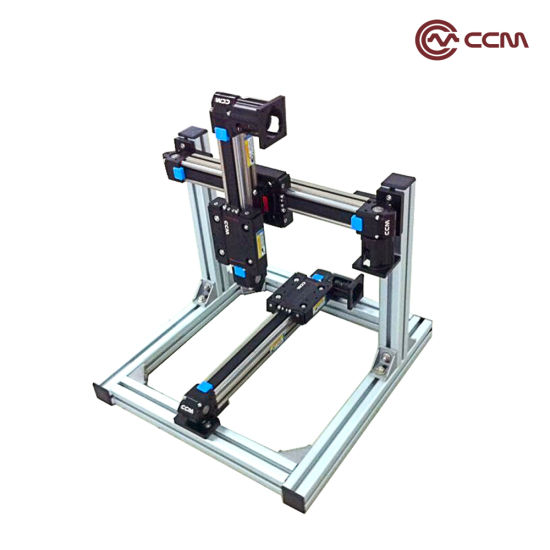
As a result, our table should lie on the cover of the printer electronics unit. It is more convenient to carry out further work with both shafts removed.
Shafts removed. Now they can be cleaned and degreased. Well, we continue.
Carefully remove the old bearings, being careful not to break anything or break the belt. It was convenient for me to do this with a surgical clamp, but you can get by with a long screwdriver, or simply push it out with a shaft.
Pushing out old bearings with new bearings (sleeves) is not a good idea, because it is not comfortable.
Now insert the new bushings in place of the old ones. It should look something like this:
Replaced bearings/bushings. Now put the shafts back.
Now it's time to align the table.
We push it forward as far as possible and carefully clamp the shafts with locking screws.
Once again I draw your attention to the fact that the shaft mountings are made of soft metal.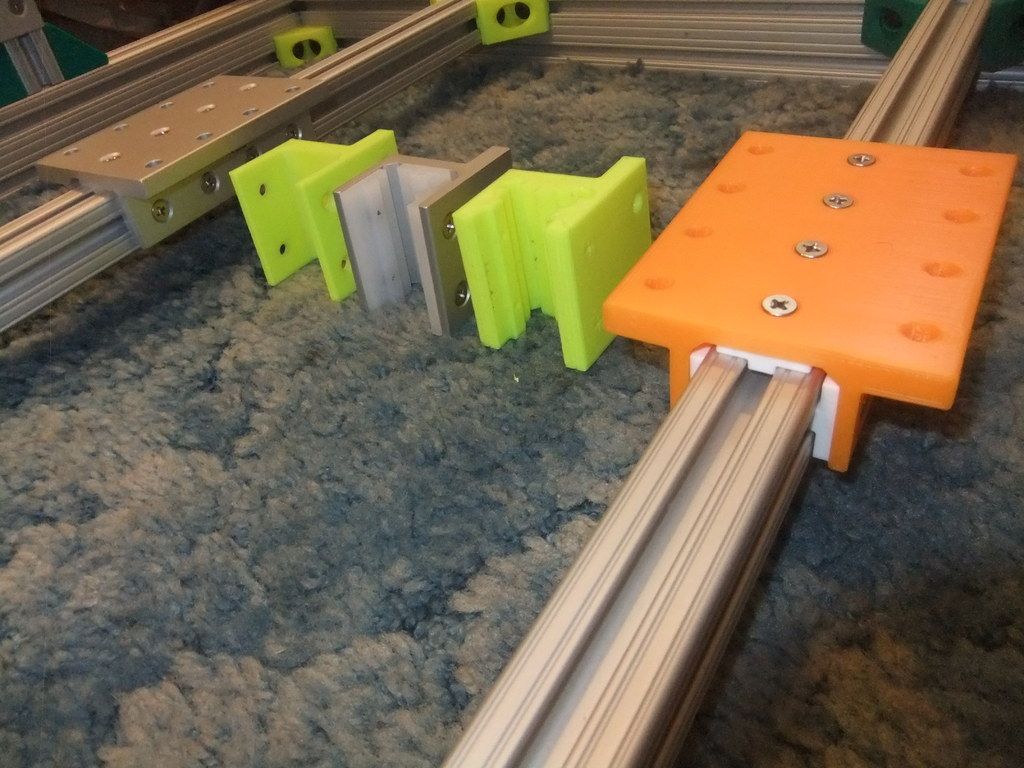 Overtightening the bolts will cause you to strip the threads and the shaft will not hold, and as a result, the printer will not be able to print.
I remind you of this because I almost broke the thread myself.
After they have been tightened from the front, move the table as far back as possible and clamp the shafts in the mounts at the back.
We check that the table moves evenly and does not bite. If the movements are not smooth, jerky, the clutch bites, you will have to adjust the shafts.
After all operations have been completed, adjust the table. Most likely his settings got lost.
This is how the mini-guide (mini instruction) for replacing the linear bearings on this printer looks like. But that's not all. But only the beginning of the story.
First there was Wow! The printer began to work quietly, almost silently! And then it was ... Well, in general, look at the photo, and think up the selected strong words that I might have uttered.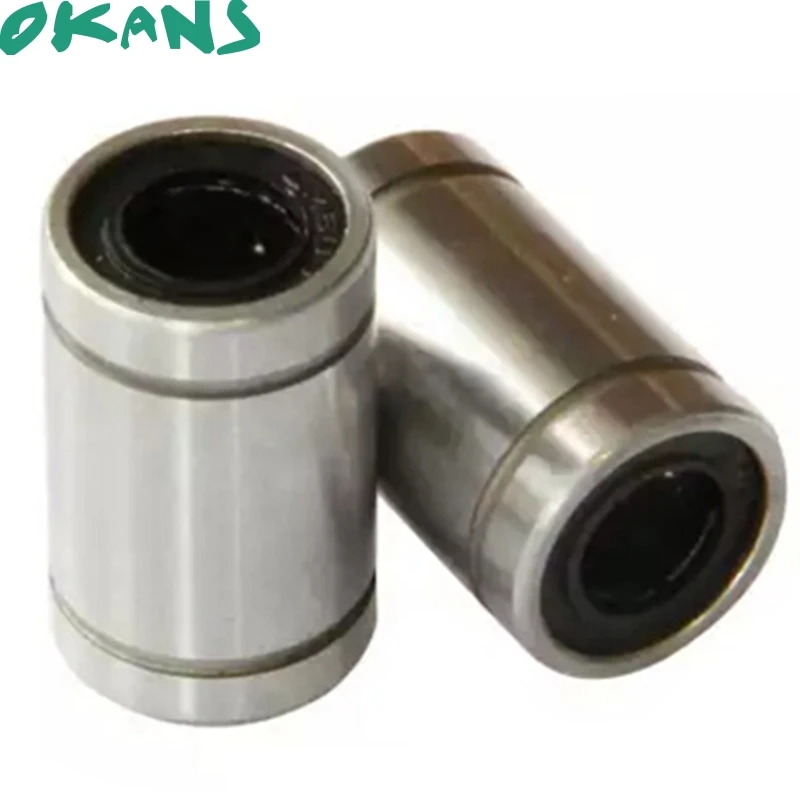
Due to the fact that the nylon bushings were of poor quality, they began to wedge during operation, as a result, the axle motors began to skip steps. And this naturally leads to displacement of the layers. Well, besides this, ripples appeared on the model.
Nylon bushings do not require lubrication to function properly, but even with lubrication the result is the same. So this is G ... I came across in the open spaces of Chinese trading floors. The bushings were made with large tolerances and anyhow, which led to such sad results.
I have already put native bearings back, but the guys from the Printers3d.by store helped me out. So to say, help came from where they did not expect. They just received plain bearings of the LM8UU format made of POM material. They were offered to me as an alternative to Chinese crafts. Yes, this is not exactly what I need, yes, they are not 45 mm long, but 24 mm, but it's better than nothing. And much cheaper than Japanese LM8UU or nylon from TriangleLab.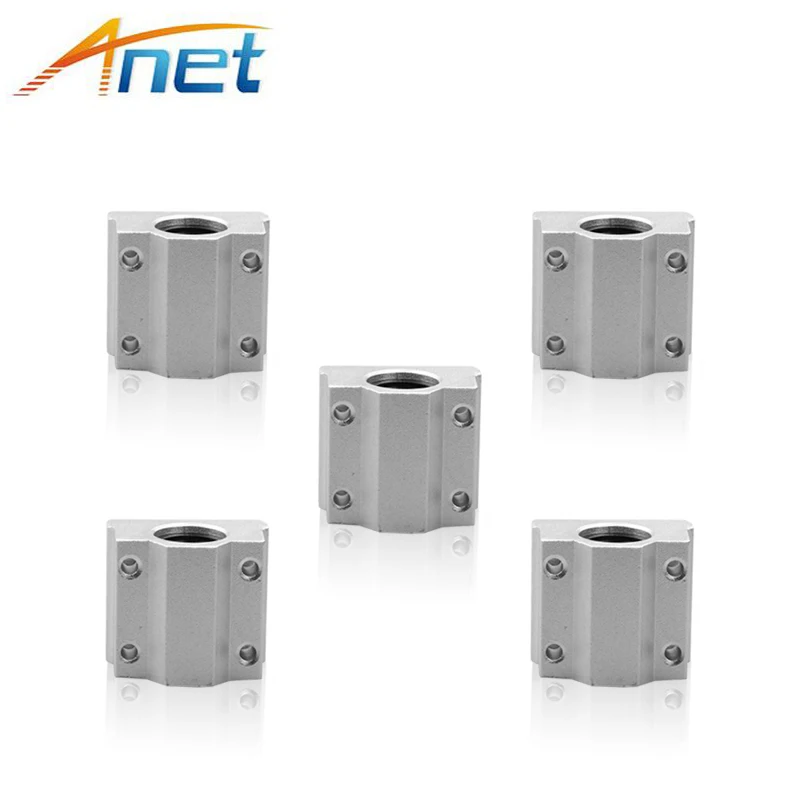 I don't really have anything to lose. So I agreed, came and took the kit.
I will not repeat the process of installing bushings from the POM. Everything is exactly the same. We unscrew, we change, we collect. Let's take a better look at what happened:
The bearings are obviously too small. At least for this mount. Yes, I understand that the lever is different and the load is different and all that. However, what's done is done. After installing, I moved on to the tests and then a whole bunch of surprises awaited me.
First! I was shocked that the printer began to work silently. From the word at all! The crunch, clanging and other unpleasant sounds disappeared. And taking into account the fact that I have been trying for a long time to make the printer work quietly, the result impressed me. SILENCE! And only a quiet rustle of coolers (a hefty cooler blowing the power supply should be replaced with a silent one).
Second. Print quality has gone up! Small ripples have disappeared on the model.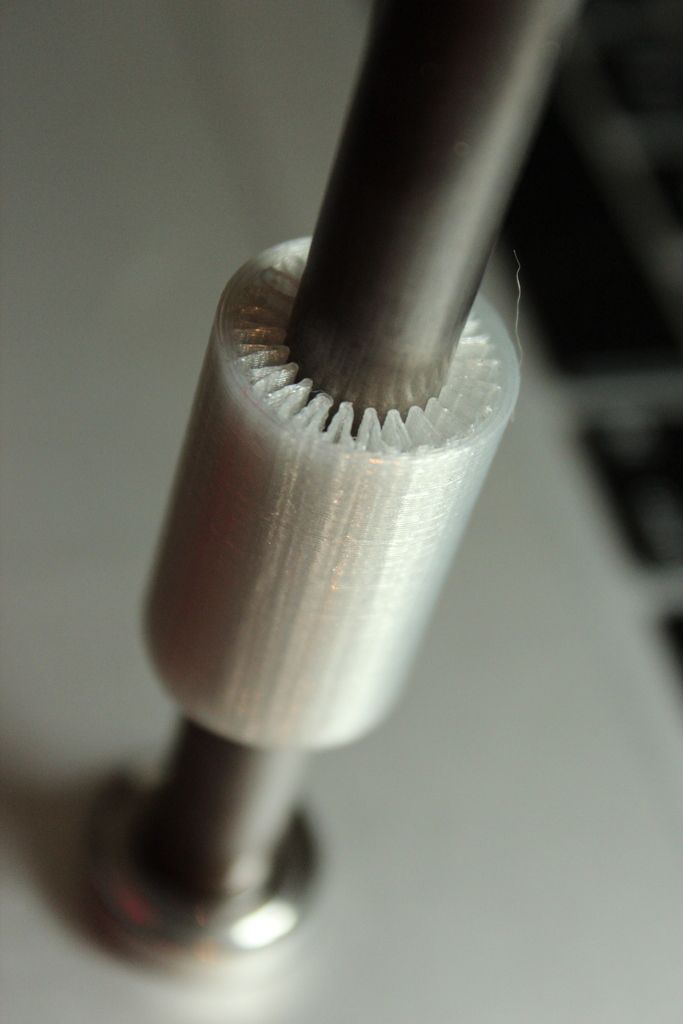 The lines became straight. And all this thanks to the replacement of bushings!
Third! Now you can increase the print speed without losing quality. Now this printer can print at a speed of 100 mm/sec without any problems.
So. there is no bad without good. I changed the bushings in December 2019. A month has passed and the printer works like a watch.
What can I finally say?
- If you want to achieve quiet operation of your 3D printer, change the bearings to bushings. Alternatively, you can consider replacing with bronze bushings.
- Do not get fooled by Chinese parts, especially from unverified sellers. Take goods only from trusted and always with a bunch of reviews.
- Don't be afraid to experiment!
P.S. I want to say a huge thank you to the Printers3d.by online store for their help!
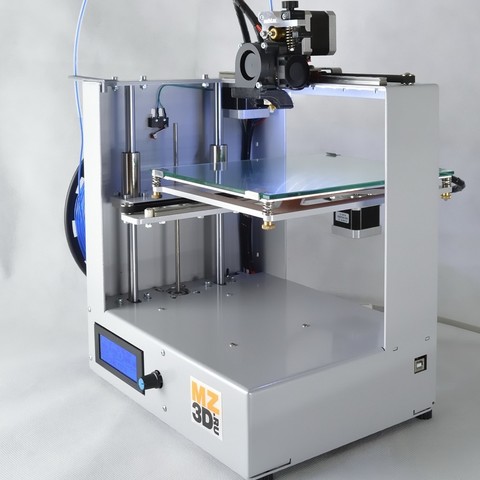
If you have not got a 3D printer yet and are thinking about which model to choose, I can recommend the following models:
Anycubic i3 Mega 3D Printer
Anycubic Mega-S (Anycubic S) 3D Printer
Anycubic 4MAX Pro 3D Printer
These are links to trusted vendors that sell original printers.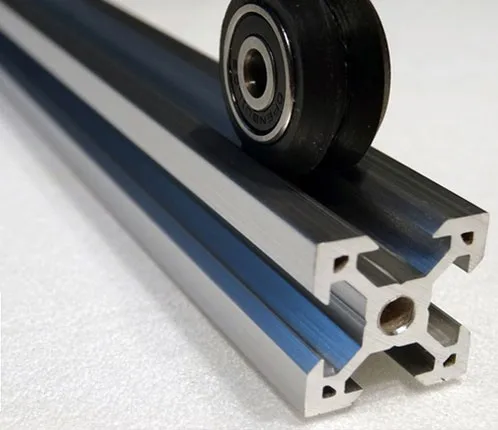 They provide technical support and give a one-year warranty.
If you like the article and want to support the site and receive notifications of new materials, join our Vkontakte group: https://vk.com/ionline_by
If you want to be notified when new articles are released, connect yourself to PUSH notifications link: https://ionlineby.pushassist.com/
Every 3D printer - on rails / Sudo Null IT News
I have long wanted to write an article about my positive experience of converting a 3D printer from linear rods to rails, it looks like the time has come.
In the course of this article I will tell you what and how I did, perhaps my experience will help someone put their workhorse on the rails.
▍ So let's start.
It seemed that not so long ago there was a dream to purchase a 3D printer, a dream come true, the ANET E16 printer was ordered back in 2019year from Uncle Liao's country.
Surprisingly, the printer arrived quickly enough and the box was almost without dents :) Naturally, the printer was assembled on the same evening and test prints were delivered: cubes, boxes, turrets. Traveled until late at night. The optimal settings were determined, adjusted, the table was leveled. Uhhh, when I remember, I shudder. It took about 2 weeks to set up the printer to achieve an acceptable print quality, but I had to learn to work with this miracle machine on the go, each time solving several tasks at once and not always sequentially. When the experiments led to good results, it pleased, so there is room to grow.
After 2 months of operation, in almost daily printing mode, I began to notice that when the table moved forward and backward (Y axis), as described, steel rods with a diameter of 8 mm (in fact, it turned out to be nickel-plated low-grade steel rods) and linear bearings LM8UU - they creak and the table wobbles, as if riding on potholes.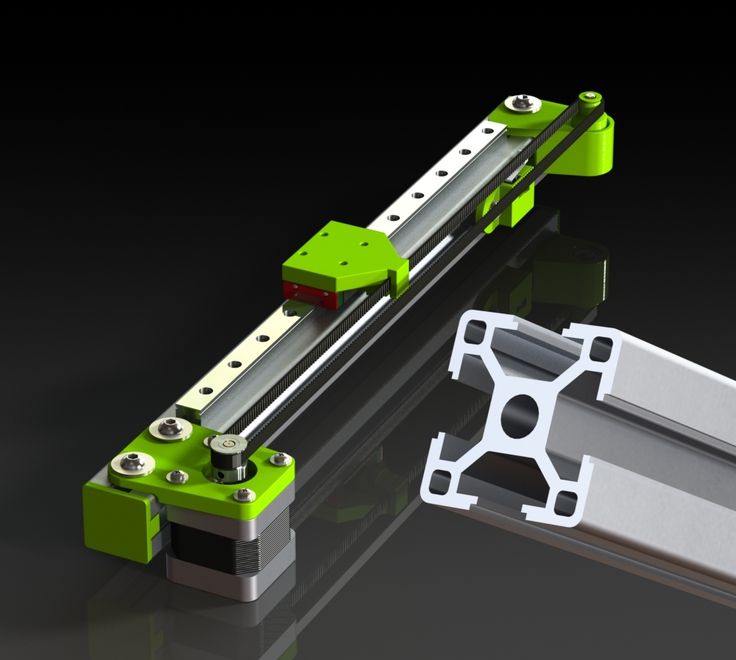 Two rods plus 4 bearings, at first I looked if they were dry - grease was present. It turned out to be a load on the table and, accordingly, on the guide rods and bearings.
Along the guides, paths were gradually drawn from the pulled up material of the rods.
▍ Something needs to be done about this urgently!
Two elements make it difficult to achieve printing accuracy and smoothness of the table:
“Floating table” , you bring the table to “zeros” before starting the printer, and after starting work, the table leads in an unpredictable way to any of the cardinal directions, because. if the bearings work unevenly, then distortions, wedges are provided, a matter of time. 93 = 45,720 grams or approximately 46 kilograms. Even if we take into account that the bearings distribute the load into three unequal parts, roughly 46kg / 3, we get 15 kopecks per third of the length of the rods 50cm / 3 = 16.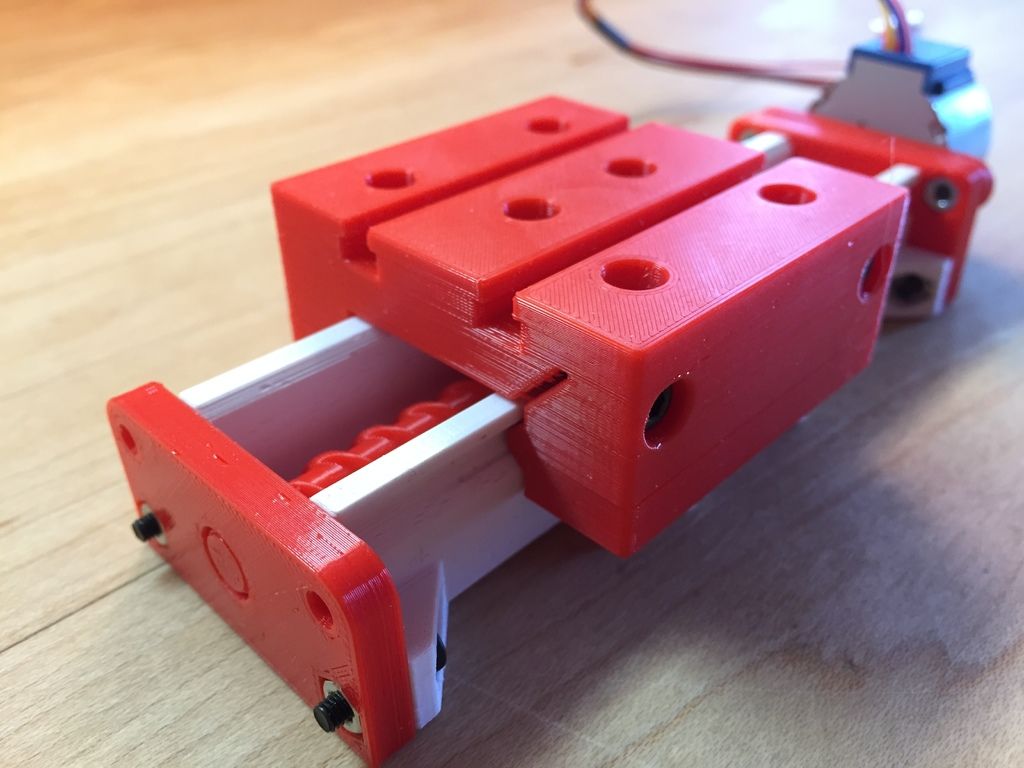 6 (and 6 in the period) centimeters in the ideal case. Taking into account the fact that the linearity of the rod along the line of movement is a key characteristic and ideally should not change at all, in my case the rods simply bend and this despite the fact that I never gave them the maximum load. Realizing that the rods can’t hold such a weight, he left for a couple of days to read books, google and re-read dozens of forums in order to find out how people live with this and enjoy life by directly moving the 3d printer table?
As shown by the search and the results of reading books and forums, everything was invented before us.
▍ There is a way out! Rails are our everything!
In most options, rails with carriages are preferred, such as these MGN12H. In my case, the carriages were ideal in size and height, because. on the tips of the rails, you still have to install a regular limit microswitch.
The internal arrangement is shown below.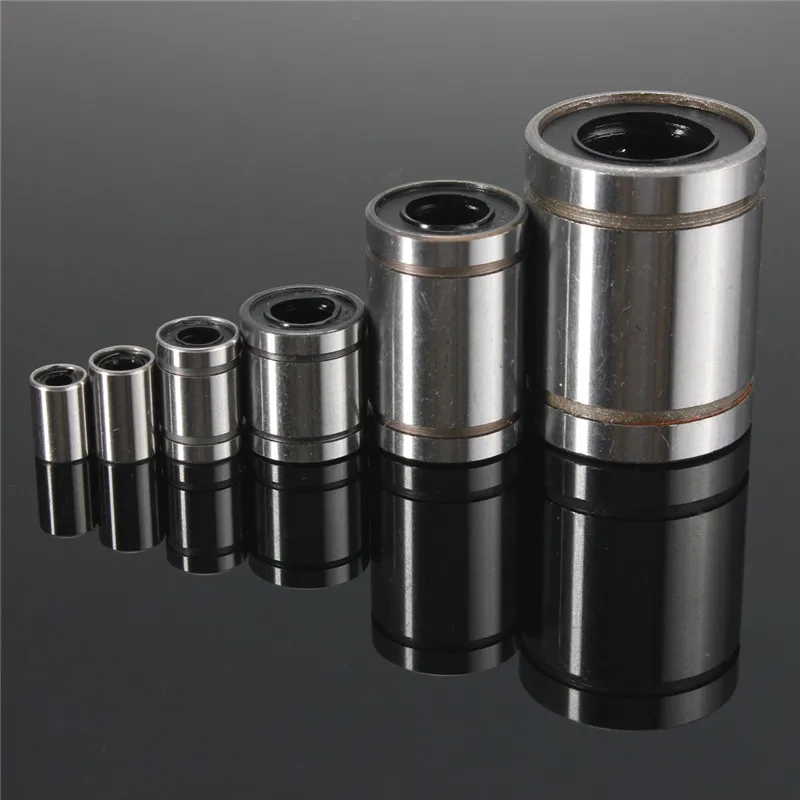
The rails themselves, carriages and bearings are made of durable steel. I ordered in China, from a seller with good reviews. Branded rails and carriages from HiWin cost like a small plane, but they give a guarantee on their rails and carriages.
Let's estimate the "load capacity" of rails and carriages:
- Load capacity stat. 5.88 kN
- Load capacity dyn. 3.72 kN
kN - kiloNewton, kiloNewton Karl !, this is not a mistake, in statics it turns out that a rail with a carriage can withstand a mass in kg: 5.88 * 1000 / 10 \u003d 588 kg will withstand and will not hesitate and will not sell through. I counted twice, suddenly a mistake, I can’t even believe it. At a rail length of 500 mm, under our table, the rails with carriages do not even move, and before the deflection, the margin of safety is simply huge. I can’t imagine that you can ride on such little girls, just midgets on steroids.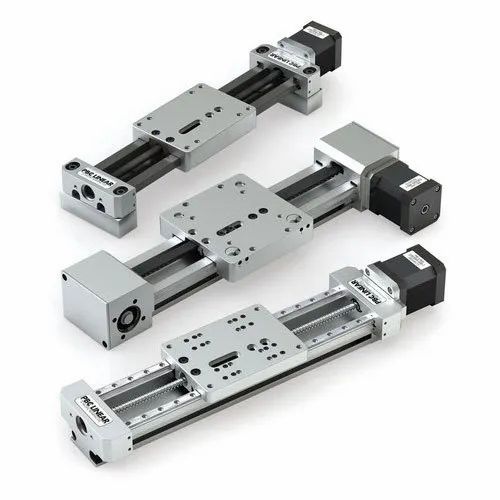
The advantage of rails and carriages is described very simply, they are made with very high precision, the play is so small that when you move the carriage along the rail it seems that it does not roll, but flows along the rail. The move is so smooth that you wonder how so many ball bearings work smoothly. Whoever came up with this design is a genius.
you have to work with exact dimensions and you need a working printer to print new parts, I decided to model all the parts first in a 3D editor and for good reason, because fitting in hardware takes much longer than in a 3D editor.
I drew all the important elements: new tips are of a universal type, you can put them in any place, including under the end mic.
a substrate between the carriage and the table frame - it is very convenient to set up the table after assembling the entire structure.
As a result, after modeling, it turned out to be a fairly reliable, durable and simple design.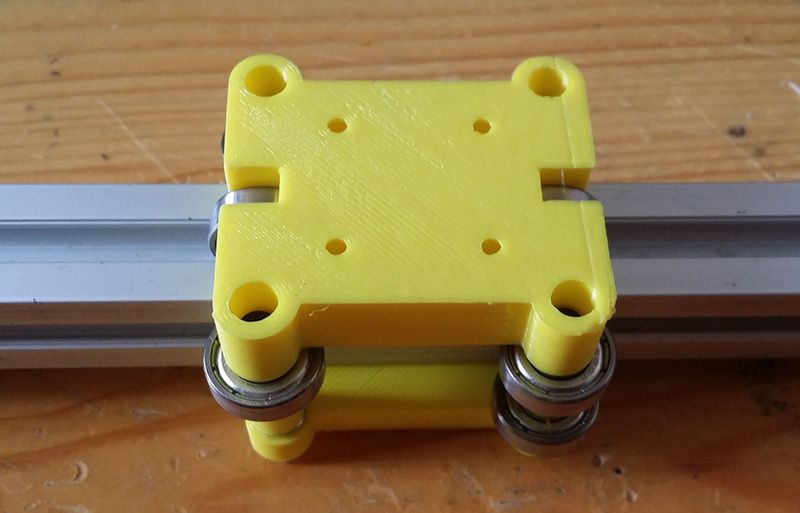
I printed for the last time, with a scratch, all the necessary details. He removed the tips, rods with bearings. I installed all the details, connected everything together with screws, that's what happened.
I installed the spring-loaded base of the table in its regular place, inserted the screws into the attachment points of the tips and tightened them according to their native fasteners. This is where the surprise awaited me. The table reached the middle and didn’t want to go further, as if resting on something, the answer came from the manual along the rails ... tolerance for parallelism ...
We are interested in the average accuracy - column H, for a length of 500 mm, Parallelism can deviate by 131 microns, no more. With a micrometer you will not jump, especially in motion.
It was decided to let this dynamic system level itself and self-adjust.
As time has shown, the decision was correct. Having loosened all the screws securing the tips, after 2-3 printing of test tasks, the rails stood up as they should. The carriage with the table rolled to its full length without jamming or stopping. Then the screws were tightened.
I am very pleased with my technical solution. The labor costs and time, not as big as many people think, that I invested in the design of the printer paid off completely, I have been printing since January 2020 and to this day everything works perfectly. And every time, watching how the printer works, I rejoice like an elephant :)
▍ Finally reached the next
- Print quality improved.
- Printing accuracy has become at the level of 0.01-0.03 mm.
- No need to set up and calibrate the table every time, does not lead it, stands dead.
- The print speed has increased while maintaining the quality.
- Quiet operation of carriages on rails, the printer is almost inaudible during operation.