Dice 3d printer
DICE - it's tiny, compact, rigid and superfast.
This time I did it different. My previous printers had daily buildlogs and status-updates, but this one was build on the QT.
Therefore, you get an exclusive and packed info right now. Make yourself comfortable and enjoy, the secret is about to be lifted:
|
size comparison |
I already own a printer with a big buildvolume (bigger than 30x30x30cm) and because of the size it needs a lot of energy and is rather slow. That's why, I started to plan a smaller printer back in october 2015. It was clear from the outset that the new printer had to be small, precise and fast. Side effects of this would come automatically: less energy-consumption and easier handling in moving this printer around. On top of that, I wanted to build a printer that was beautiful too and assigned my priorities right from the start:
- clean look
- all parts inside the housing, even the powersupply
- use of high quality parts
- less than 20cm edge length
- silent
- compact and fast
And this is what I made out of it:
|
CAD view
|
Looking at this, it begs for its name:
It is my fourth printer - codename: DICE
With an overall dimension of exactly 20x20x20cm, one could really speak of a small dice.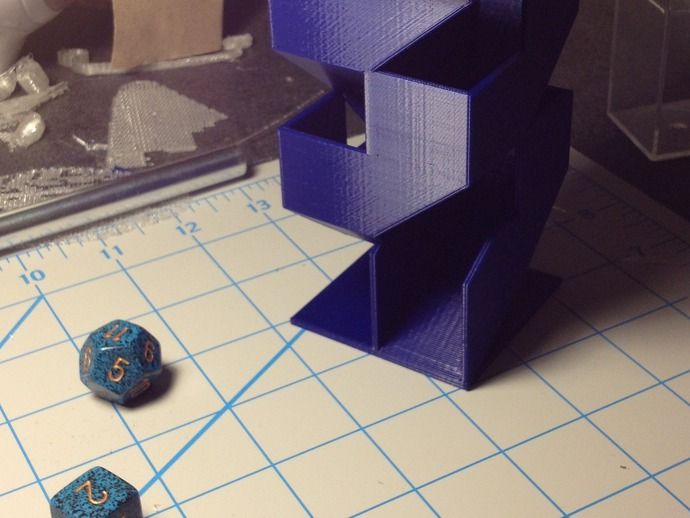 During the design and build of the DICE, I was able to consider all of my priorities - this was less easy than I had expected. The final version in CAD looks like this today:
It is the spitting image of the real one:
Now to the key features:
mechanical:
- casing: 20x20x20cm small
- buildvolume: X90 Y75 Z 80
- moveable distance: X98 Y75 Z80, so the printhead can move beside the printbed, e.g. for anti-ooze-scripts at printstart
- coreXY-system
- linear movement with high quality linear rails (HIWIN MGN9R) in X, Y, Z
- full metal hotend E3D-V6 1,75mm in bowdensetup
- PEI-coated perma-printbed made out of precission-milled warmcasted aluminium ( EN AW 5083 ) and recessed silicone heater
- direct-drive-extruder (MK8)
- massive enclosure milled out of 4mm thick akuminium, all bores in DXF included
- XY-plain is lasercutted out of 2mm thick stainless steel sheet, all bores in DXF included
- enclosure-sheets are conceived as load-bearing and stiffing parts, but can be dismantled all together without the printer falling apart.
- all parts are designed in a way to make adjustings easy and the components inside accessible.
- all parts are designed to use only one needed manufacturing technique (lasercut) and are repeating and symmetrically
electrical:
- AZSMZ-mini 32bit-controllerboard with smoothieware firmware
- 4x most silent TMC2100 stepperdrivers, passive cooled
- despite the small footprint, use of full-fledged NEMA17 steppermotors for sufficient output reserve
- heated bed (230V / 60W), with recessed silicone heater
- motor supply voltage: 19V
- total power input: 230V / 0,65A at max
miscellaneous:
- more silent than 50dB in realistical and normal operation (unadorned measures!)
- up to 1000mm/s travelspeed
- up to 10.000mm/s² acceleration
- not until 6.
 000mm/s² acceleration and 100mm/s, ghosting becomes barely visible
 - junction deviation up to 0,5mm tested
- the complete X-carriage (real print-setup) weighs only 160g
- the complete X- and Y-carriages with all mounted parts (real print-setup) weighs only 290g
- Hotend mounted with 2 screws, fast interchangeable
- bowdenlength is only 35cm (complete from MK8 to the thermal barrier in the hotend)
To design the DICE was an unexpected experience and I had a lot of fun. The permanent challenge to get every detail perfect and to reach a valuable compromise in every aspect, still with the priorities in mind, was thrilling. On one hand, I had to make every part and every space as small as possible to reach the maximum buildvolume. On the other hand, things need to be convenient and accessible for maintenance and construction. On top of that, it should stay simple and with a clean design.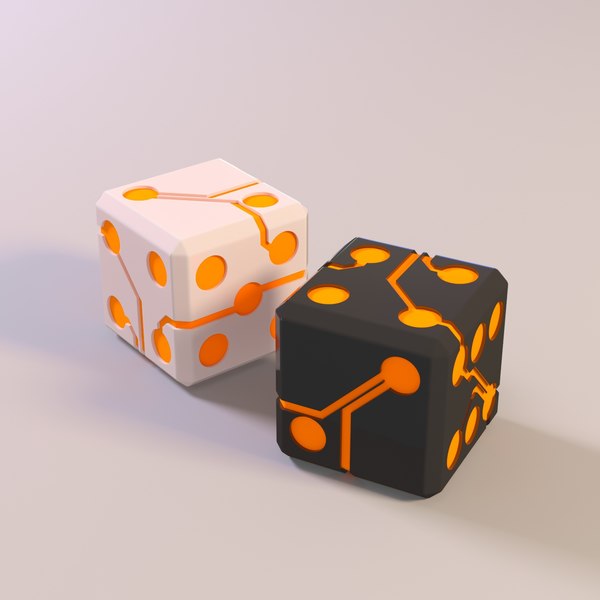
To reach all this, I did a vast number of designs for every part and sometimes started with a finished part all over again, when another part comes into play. I had a big advantage in using my existing 3D-printers. Its one thing to design a part in a CAD-software, but it is the complete other side to hold this part in hands and try if it works.
In my mind, the most challenging part to design was the printhead / X-carriage. The size of the carriage had a big impact on the later buildvolume. Every millimeter saved at the carriage was gained in more buildvolume immediately.
|
|
|
printhead with axial- and radial-fan, E3D-hotend |
I managed to design the whole printhead (including the 2 coolingfans and the linear-carriage) so compact, that the whole assembly isn't greater than 42mm x 56,6mm.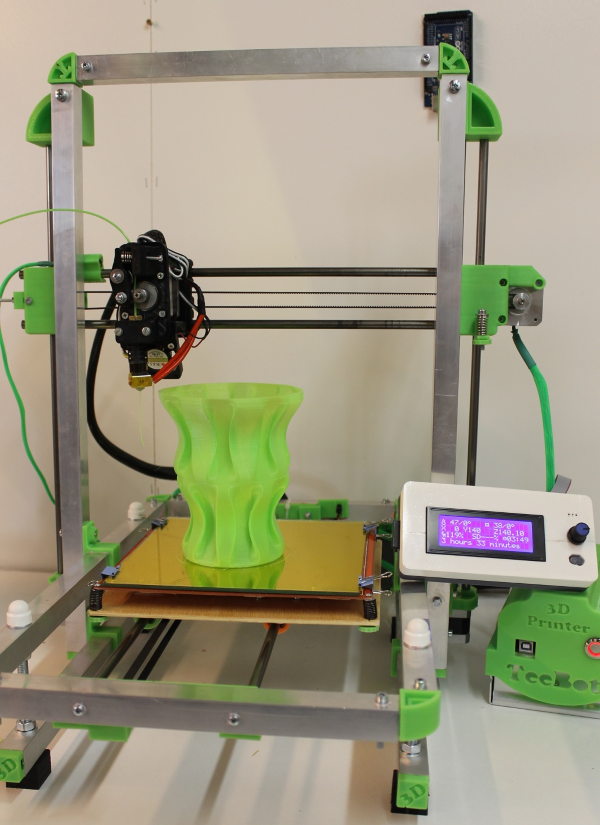 A future upgrade would be a smaller hotend, which is the limiting factor right now.
|
|
|
view on the E3D-V6 |
With this compact printhead, the desired buildvolume of 8x8x8cm was reached. Just when in need for print-cooling, like for printing e.g. PLA or PETG, I have to pass on 5mm buildvolume in Y-axis. The previous planned coolingfan with his 30mm-formfactor didn't make sufficient cooling and had to move for a more powerfull, but bigger fan with 35mm formfactor. If not in need for print-cooling, a fast and simple change brings back the full buildvolume.
|
Bigger: "3510 radial blower fan" |
The remaining measures of the DICE were much easier to handle.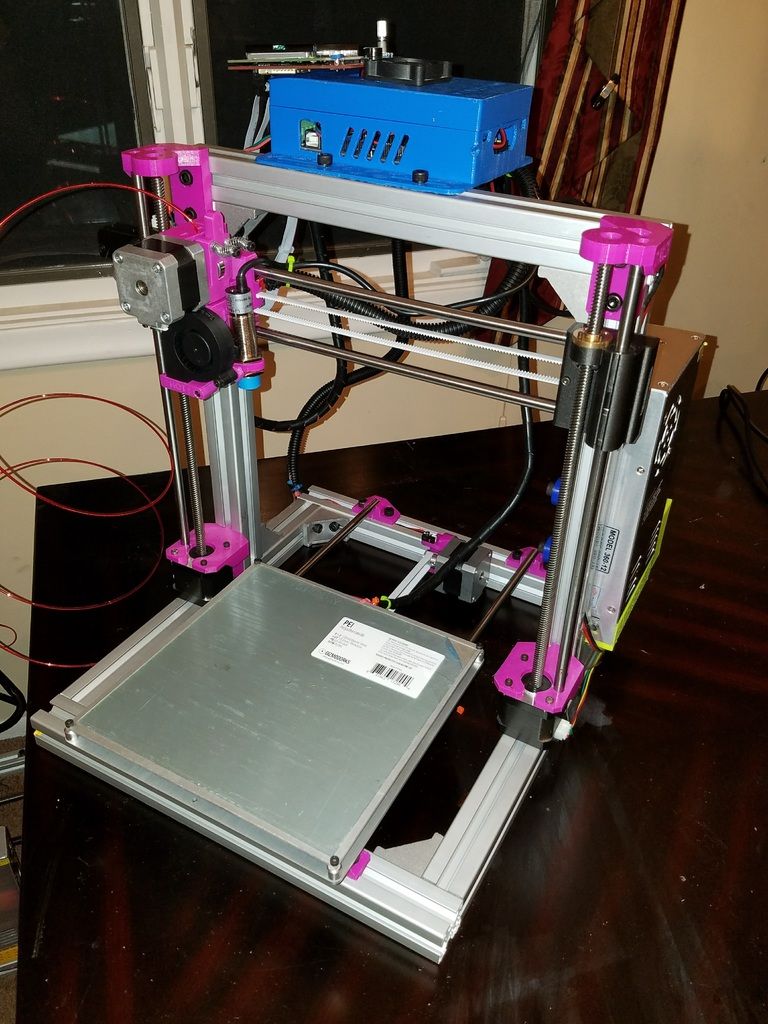 They come from existing parts and if the part is moving, I added a "generous" 1mm gap to avoid grinding. Simply said: I worked myself from the outside in.
For example, the height of the XY-plain is exactly 38mm. This is apparent from two facts:
- The motor of the z-axis is a shorter NEMA17 with 34mm length, with 2mm sheet on each side. Without a recess for the motor-body, no smaller distance is possible.
- The smallest possible assembly of one Y-carriage with flange-bearings is exactly 33mm (I tried this several times) and allows for 1mm gap for the movement with the 2mm sheet on each side. I even use the smallest possible flange-bearings. The limiting part with this is the GT2 belt. The belt is 6mm wide and two MF104ZZ-flange-bearings have a runningsurface of merely 6,4mm.
|
assembly of the XY-plain with miniature flange-bearings MF104ZZ |
With the 38mm top plain given, I made it symetrically and used the same 38mm height for the electronic compartment at the bottom.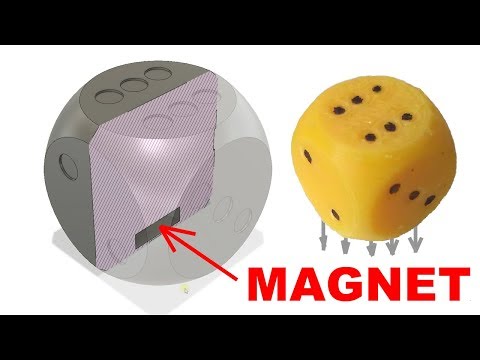 I needed to find a power supply that fits inside and is able to deliver up to 60W (so I need 90W because rule of thumb: don't use a powersupply at 80% or more of it's size). All popular affordable industrial power supplies in the needed powersize had too much design height. And all racking controllerboards, like RAMPS or RADDS are oversized, too. The GT2560 and the AZSMZ-mini have been shortlisted for mounting.
|
GT2560 (8bit) |
|
AZSMZ-mini (32bit) with powersupply |
Short before, I had the occasion to try out a Smoothieboard and because of this the decision was easy: I picked the smoothieware-compatible 32-bit-board AZSMZ-Mini. Who once experienced smoothieware with it's ease of use and drag'n drop functionality, knows what's good and will never change back to repetier or marlin.
Although stacking the stepperdrivers (TMC2100) with it's rather big heatsink was possible and would have fitted inside, I did take another path. With the use of the conventional heatsinks, I still would have had to use an active cooling and if you look closely on the picture above, I already designated two 30mm-fans for this. But I wanted to avoid additional soundsources and thought about cooling the stepperdrivers passively:
|
TMC2100 ready for passive cooling |
I put all stepperdrivers on the thick sheet right beside the controller-board.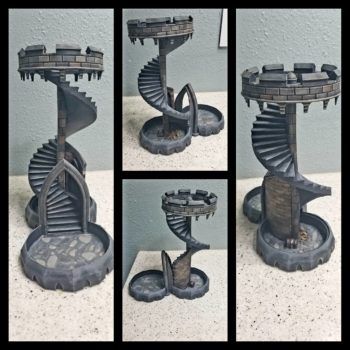 Because of its size, the 4mm thick sheet is an impressive heatsink.
|
TMC2100 stepperdrivers passively cooled |
After hours of testing without loosing steps, I was sure that the stepperdrivers stay cool enough the whole time. But I still have one fan operating: it's a 12V-one connected to 5V and therefore inaudible operating. This makes a small airflow for the powersupply and the controllerboard, just in case. Additionally, this small airflow reduces the temperature of the "heatsink" drastically. And needed or not, the CPU on the AZSMZ-mini got its own nice heatsink:
|
heatsink on the CPU of the AZSMZ-mini |
This two 38mm high, horizontly plains leave exatly 124mm room for vertical movement of the z-axis. Deducting a carriage-length of 29mm of the linear-carriage (MGN09CZ0M, Hiwin), I ended with 95mm possible stroke.
|
sideview DICE |
One need to consider, there is additional room needed for the printbead-adjustment and depending on the mounted nozzle, there are even some more millimeters needed. The planned printheight of 80mm left enough room to design the adjustment for the printbed generously. Additionally, I could lower the hotend a bit more, to get it more "inside" of the printer itself.
The back of the DICE is exactly 51mm thick. This is the exact size the mounted NEMA17 need to fit in, not more.
The touching sheets are functioning a bit as additional heatsinks, the motors do stay cooler. If you look closely, you will recognize that there is no clutch on the z-axis. Because of reasons of space, I used a motor with integrated spindle, a TR8x4. Beneath the 3 motors for the X,Y and Z-axis is enough room for the extrudermotor and the 230V-plug with integrated switch and fuse. For a better view, here is a render instead of a fotograph:
|
render of the backside without backplate |
The NEMA17 in this picture represent a good size comparison for the size of the DICE. Remarkable is, that all mounted steppermotors are mounted in one plain and are located right beside each other. Even the extudermotor is mounted inside and only peaks outside with its shaft.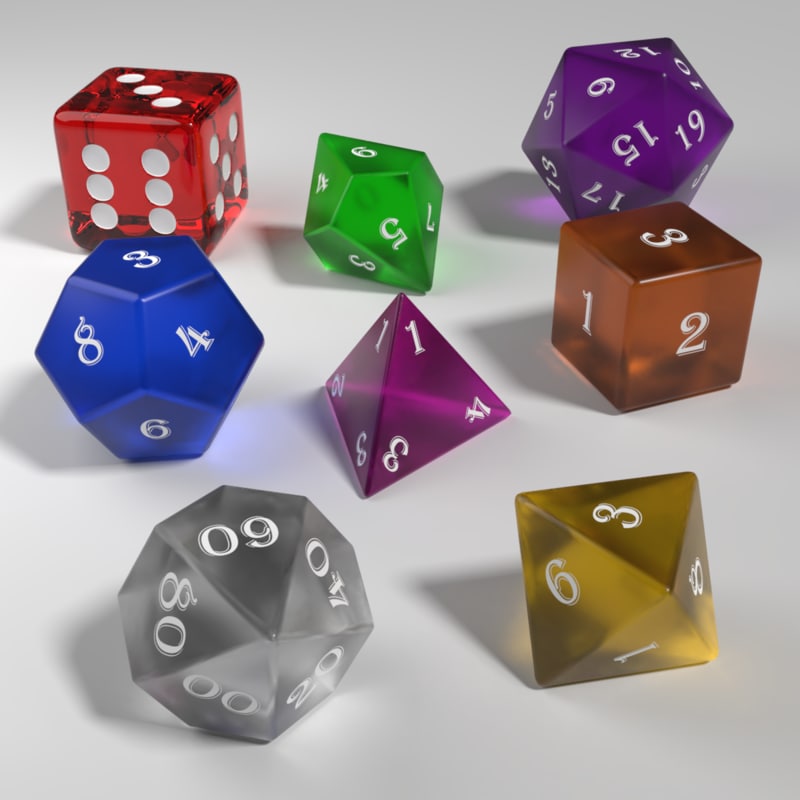 On the outside, I mounted the most compact Extruder I know about. The author of this design did respond to my needs and made some changes on his design for me. That's why I could mount the best possible design.
|
"compact bowden extruder" on the backside |
|
backside with USB-Port, powerplug and Extruder |
The extruder is a printed one with an MK8-gear and made for 1,75mm filament.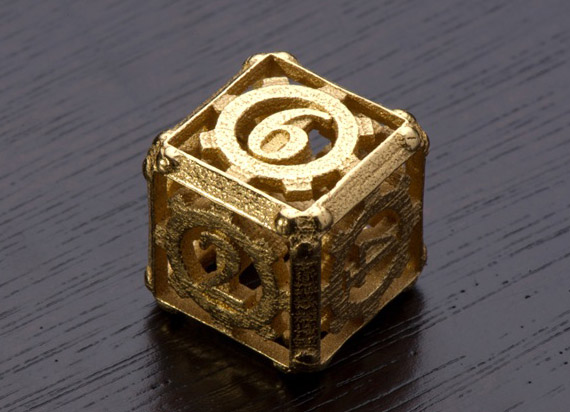 This extruder is used on all my 3D-printers and I am very pleased with it. Super simple, super cheap to make and super reliable.
If dismounting all of the cover panels, the inner frame is still able to hold everything in place. This makes any maintenance or adjustment very easy, even in this tiny printer every part stays reachable.
|
|
|
DICE without cover panels and with printed frameparts |
While building the DICE, I printed the custom parts to check if everything fits together.
The same parts could also be made out of aluminium, which I did to get an even more quality build.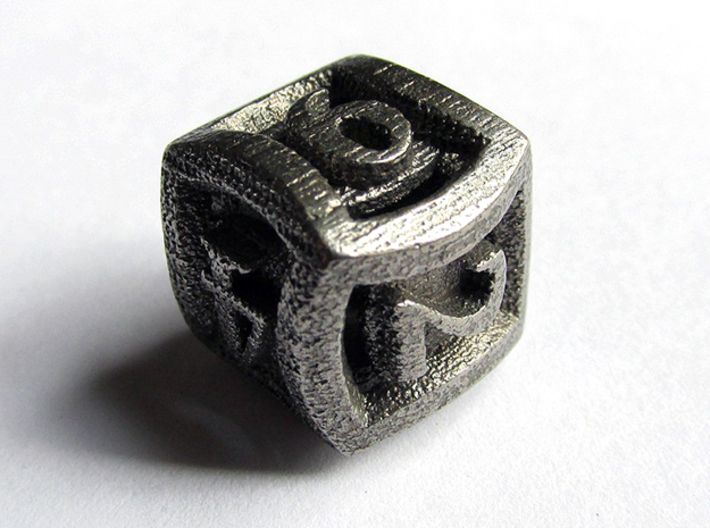
A further remarkable detail is the independent XY-plain. The whole assembly of the X- and Y-axis is mounted between the two lasercut stainless steel sheets and because of the given mountingpoints, the linear rails just fit in place with little to no further adjustment needed. Besides that, it is possible to test the coreXY-movement right at beginning of the overall build:
This video shows one of the first testruns that I made a video of. At first, I used RAPS128-stepperdrivers, but they are not silent enough for me. In the video, the XY-plain is set on top of 3 big expanded-plastic parts and therefore acustically decoupled from everything else. Nevertheless, even with 128-µstepping, the motors made too much noise.
In the following video you will see the movement of the X- and Y-axis with 500mm/s speed. Because of the native 128-µstepping of the RAPS128-stepperdrivers in combination with my 1. 8° steppermotors, this is the topspeed I can reach, even with the powerfull 32-bit controllerboard.
The TMC2100 stepperdrivers interpolate their 256-µstepping out of a base 16-µstepping. That's why they are much more silent and much faster in movement:
Another video with even higher acceleration- and speed-settings:
At the first rather complete assembly of the DICE, i made another test run to receive an impression of the stiffness of the frame:
I encountered heavy vibrating noises. As it later transpired, one of the coverpanels was mounted improperly and did vibrate against one steppermotor. The previous tested movement-speeds made me curious and I tried an extrusion test at 250mm/s:
This test did perform so well, that I started recording midprint. You can observe printing infill and at the first toplayer there is a little underextrusion. That is because of a low setting at "bridge-low" of 0.8 - insufficient for this high speed. But the following layers are printed immediately better again, a sign that the maximum isn't reached yet.
With each test run I got more curious about the limits of the DICE. In absolute terms, the 100kHz-rate of the AZSMZ-mini would allow a maximum speed of 833mm/s.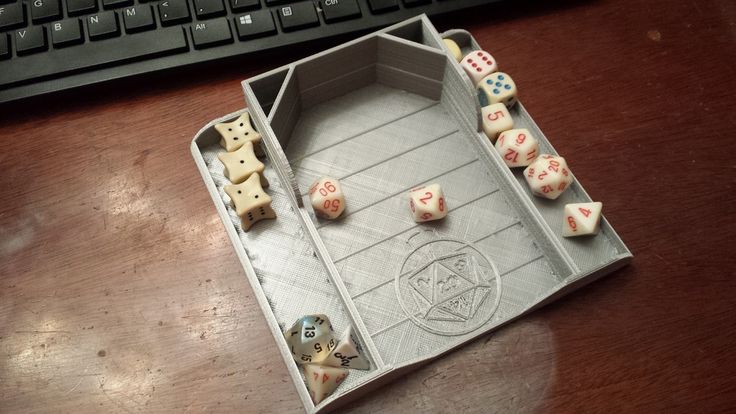 The acceleration of 10.000mm/s² at the available distance would allow a little more than 850mm/s². So the controllerboard is the limiting factor in this setup. To test this, I wrote a gCode-script that runs the printhead around 5 times, each time with an even higher speed:
The DICE starts at 500mm/s and raises the speed by 100mm/s every round. You can hear clearly, that after the third round (800mm/s) no further increase in speed happens.
The most important part: printing! The DICE is capable of this, too :D I observed, that higher acceleration and the high setting of junction deviation (this is more or less like the jerk in repetier and marlin) are resulting in way better printresults. Blobs and round corners are virtually non-existant. The edges of toplayers are absolutely flat. Of course, with tweaking the coasting-setting in S3D or the "advanced-faktor" in repetier firmware, it is possible to reach similar results. But without appearing flaws at all, it is easier to get better printresults.
I was expecting the DICE to print well, but that these high setting would affect the print in such a positive way blew my mind. At settings with lower layerheights, this is even more visible. I will investigate this at a later point and will do an additional posting about my findings.
|
3D-Benchy |
Tags: DICE
15 Cool 3D Printed Dice You Can Print At Home
Game-players of all kinds tend to have their prized, custom pieces that reflect their pride. Chess players have custom boards, and trading card players have their rare favorites. For players of many games of chance, their pride is usually their dice.
3D printed dice are especially popular for those who play games like Dungeons and Dragons, as the game revolves around building unique settings and scenarios with customized characters.
While custom dice are the pride of many a serious D&D player, 3D printed dice can also be used to replace lost pieces in old board games, or act as prizes for competitions.
Dice may seem like a simple enough concept, but the different varieties and cool ideas make 3D printed dice a lot more of a creative pursuit that most would assume.
Here we’re going to look at some of our favorites, as well as 3D printed dice towers that put the ‘fair’ back in ‘fair play.’
First, we have 3D printed dice you can download for free and print today, and we’ve also included 3D printed dice towers, and dice holders.
3D Printed Dice
LED Die
This 3D printed die may seem on first look like a simple hollow cube with an LED in it, but it’s actually a little cooler than that.
This design includes a ball that acts like a gyroscope, keeping the internal 5mm LED pointed skyward, this means that the only number that lights up is the number the die rolls!
It’s an easy but attractive concept, and by making a whole set of these, you’ll have a collection of 3D printed dice that stand out regardless of your game of choice.
While some wiring is involved, the instructions included in the files here lay out the steps clearly for those who are new to the electronics side of 3D printing.
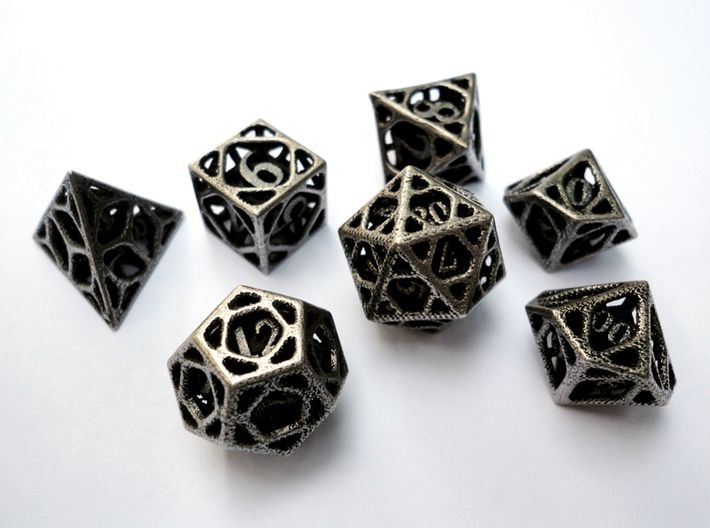
Outset D&D Dice
Since its inception in 1974, Dungeons and Dragons has been a consistently popular role playing game for casual and hardcore players alike.
The key draw to the game is its endless customizability, in both player characters and their various adventures, and unique and custom dice are a must for anyone who plays D&D both regularly and seriously.
Because of this, 3D printed D&D dice are not only popular, but creative designs have been uploaded on many sites.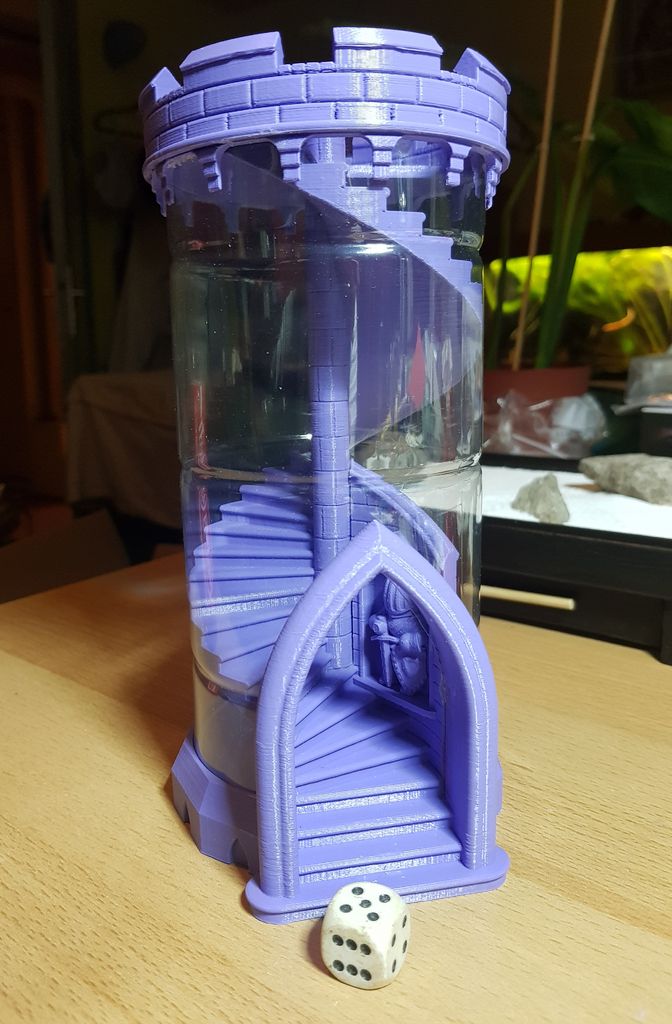 Our favorite are these 3D printed dice with outset numbers that reflect the arcane nature of the game itself!
As well as being printed in a variety of colors, the files found here come with all the necessary shapes one needs when questing, from D4 to D20.
Fitness Dice
Many people feel like they could do better when it comes to exercise, but between the bustle of our everyday lives and the amount of effort and time it takes to get and stay in shape, it’s often a lot easier said than done.
The hundreds of contradictory videos and articles don’t help, as each one tells you the supposed best way to exercise without ever really telling you why.
For exercisers who just want to raise their heart rate and try something new, these 3D printed dice, called ‘fitness dice’, work like a game to make exercising more fun by removing the dreaded routine of strict moves and reps.
These 3D printed dice are customizable to include any exercises you want, but the standard in the files found here include workout sides like ‘dance’ or ‘sit ups’, as well as a time die and a rep die, to include different exercises of various intensity levels.
While designed to be used in a group or as a family, these 3D printed exercise dice also work as solo exercises, and include a ‘deep breath’ die just to be sure you don’t overwork yourself.
For a different way to exercise, the designer has included D20 versions here, which have a standard numbered die and one with various exercises to roll. The constantly changing exercises are great for keeping your workouts interesting by removing the routines that can tire us out more than just physically.
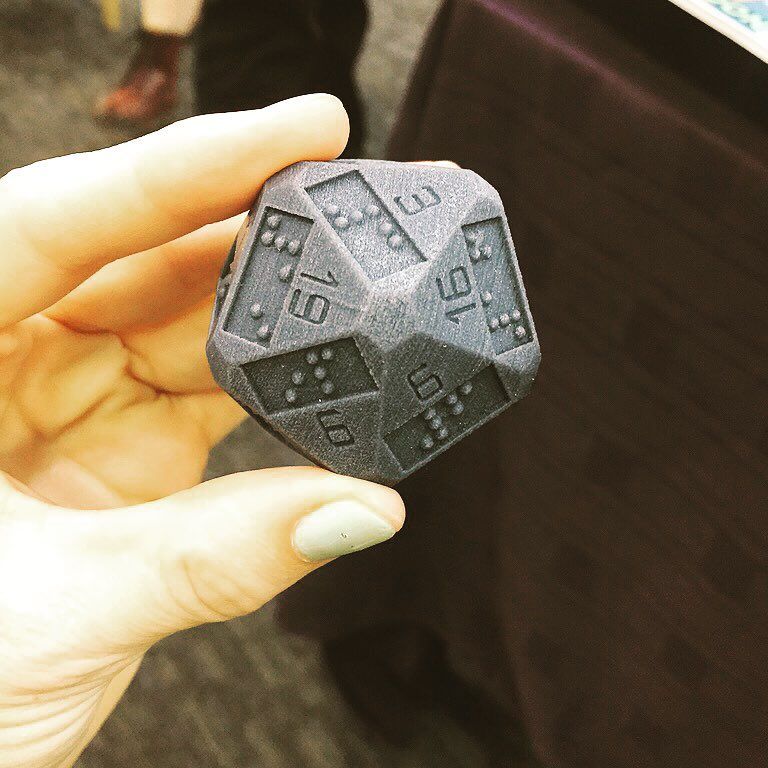
3D Printed Braille Dice
Most dice are imprinted to make the numbers easily readable by those with reduced eyesight. However, to many blind people, these numbers involve an extra learning curve and can lead to mistakes in reading.
Quite often, people with reduced vision have to rely on others to tell them the total they’ve rolled, so this designer made a set of 3D printed dice that have braille numbering so those who need to use braille to understand.
These 3D printed dice – found here – are larger than standard sets, making them easier to find and read when rolled, and come with the standard 6-sided die as well as D4s to D20s for use in any game.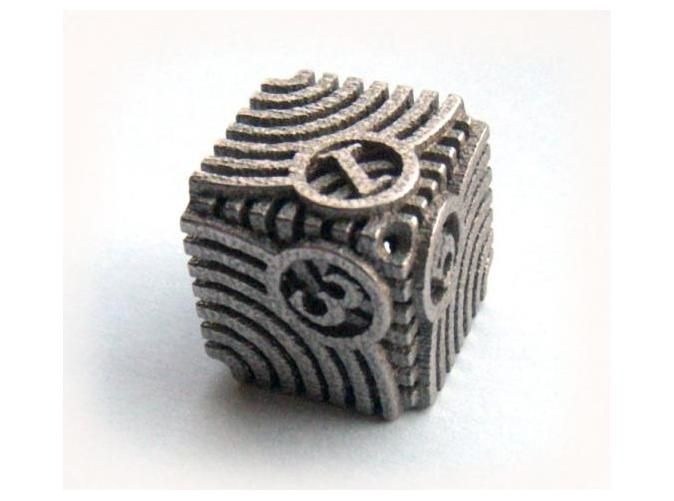
The added accessibility of these 3D printed dice makes them a welcome addition to anyone’s game sets for themselves or for blind friends who may not be comfortable using standard indented dice.
3D Printed Dice Towers
Not all games are fair, and let’s be honest, not all players are either. Dice towers act like pachinko machines in that they bounce the inserted dice around a series of internal platforms to ensure a fair roll to combat manipulation and cheating.
Naturally, dice towers don’t have to look like boring structures, and so 3D printed dice towers have been uploaded all across the internet to jazz up a playfield. Here are just some of our favorites.
3D Printed Dice Tower
Starting with the simplest 3D printed dice tower, this easy-to-pring, pocket-sized dice tower is very handy for both home use and for taking on the road or camping.
Its narrow design means it doesn’t take up too much space in a suitcase, and it also doubles as a container box to store the dice when not in use.
Dice Dice Baby
Yes, you read that right. This 3D printed dice tower was designed to look just like a castle tower made entirely of different sized dice. While a little on the nose for most, this dice tower is quite clever and looks pretty cool too!
While most of the Dice Dice Baby will need to be glued together for stability, the top and bottom parts of the main tower can be kept detachable for easy storage and transportation.
The Clockwork Monster Dice Tower
Unlike most of the other entries on this list, the clockwork dragon 3D printed dice tower isn’t free to download, but one look at it and most will agree that it’s well worth the $7 price tag.
The steampunk dragon design is undeniably cool, and the designer has ensured that the files come as both one large print and as two separate pieces so it can be easily printed on smaller 3D printers.
While it is designed for larger dice like D20s, the print can be reduced in size by 60% to accommodate standard 10mm dice too.
Three-Path Dice Tower
No matter how cool they look, 3D printed dice towers are little more than ornaments if they don’t ensure fair play. This three-story, three-path 3D printed dice tower ensures fairness by upping the randomness of the rolls compared standard towers.
This free project was something of a passion project by the designer, and has seen numerous updates and improvements to ensure it both looks cool with its stone-like finish, and functions well as a dice tower.
The three-path dice tower doesn’t need supports, and is simple enough to be made on almost any 3D printer. The files found here also come with instructions to ensure even newbies will be able to get this print up and rolling in no time!
DM Screen Dice Tower
Any D&D player knows that the dungeon master needs to ensure that their secrets are well kept, lest they spoil the game, and so DM screens are used to ensure the hidden details of any given journey stay hidden.
Dungeon masters also need to roll to determine the outcomes of various circumstances, and so this designer created a 3D printed dice tower that also acts as a DM screen. This not only hides the details of the quests from the players, but also ensures that the dungeon master’s rolls are random.
This design should turn the head of any veteran dungeon master, as its dual use as a DM screen and a dice tower makes for one handy (and very customizable) tool for anyone sending their friends towards unknown dangers.
Read more: our full list of 3D printed dice tower files (20+)
3D Printed Dice Holders
Dice are fickle things. Despite their cubed shape they seem to roll around a lot, getting lost under tables and even down sofa cushions somehow!
While most dice collections bought separately will come in their own containers, there are a lot of 3D printed Dice holder designs to make the storage a little more interesting.
Portable Dice Holder here / DND Dice Tray here / Round Dice Holder here / Large D20 Dice Holder here / Hinged Dice Case here
Related articles:
- Dungeons and Dragons 3D prints
- 3D printed anime figurine files
- 3D printed dice towers
- 3D printed fidget toys
How bones, vessels and organs are printed using 3D printers / Habr
In the early days of rapid prototyping, it was widely believed that 3D printing would transform all manufacturing, spurring a consumer revolution that would bring a printer into every home. This has not yet happened, however, as has happened with many of the latest technologies, rapid prototyping has found its application in a completely different area - in medicine.
Article from the Gizmodo website.
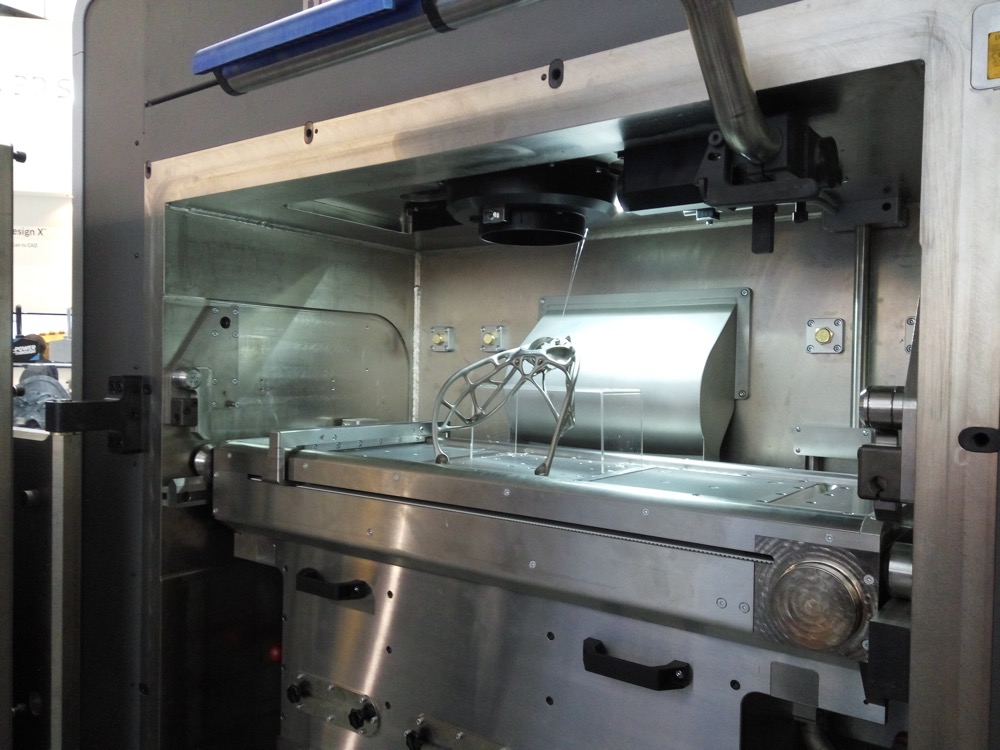
The research and projects below are some of the most interesting examples of the use of bioprinting and the use of computer-controlled machines to assemble biological matter using organic inks and ultra-strong thermoplastics. The range of application of bioprinting is very wide - from the reconstruction of the main parts of the human skull to the printing of scaffolds - scaffolds on which stem cells can develop into new bones. Read the details below.
Skulls
Osteofab is a product of the company
Oxford Performance Materials . Initially, OPM entered the market by selling in its raw form a high-performance polymer often used in the manufacture of medical implants - a thermoplastic called polyetherketone ketone (PEKK), but over the past few years the company has become the first to master the use of this material, primarily in additive manufacturing .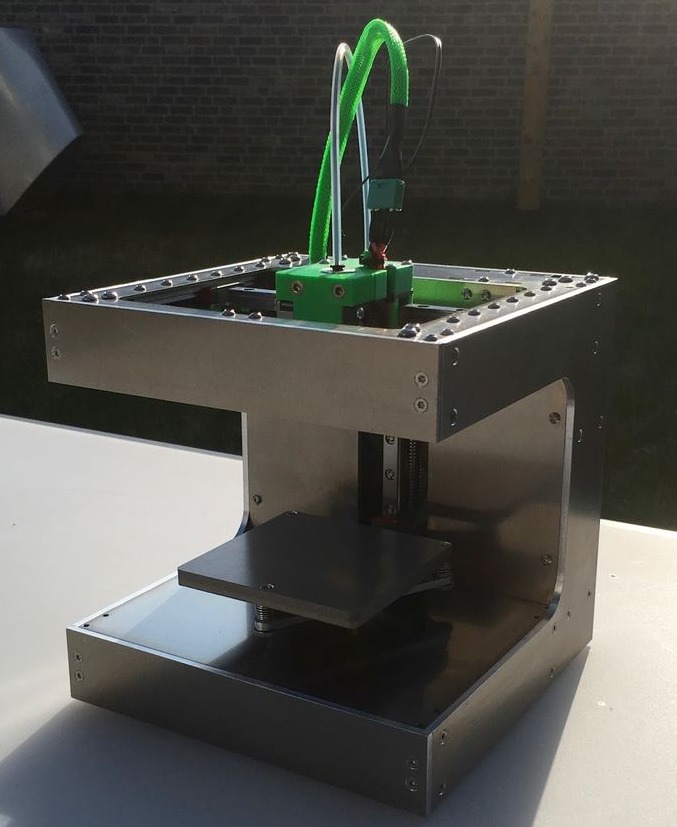 So, in February 2013, an American patient
FDA approved 3D skull implant. The casting and printing was carefully crafted to match the unique geometry of the patient's skull, of which 75% is now an implant.
Leather
The main problem with creating new skin using printing is the difficulty of recreating a specific shade from the entire possible spectrum. Given that our skin is unique, thin and subject to change, it is quite difficult to create an exact copy of it. There is a huge amount of interesting research on this topic, the essence of which cannot be put into a short story.
However, here are two of the most interesting: Scientist James Yoo of Wyke Forest University, with a grant funded by the US Department of Defense, is working on a machine that can print skin directly on burn victims. Another study is being carried out by scientists at the University of Liverpool, who are using carefully calibrated 3D scanners to obtain skin samples containing all of its finest nuances, which will allow more realistic implants to be printed later.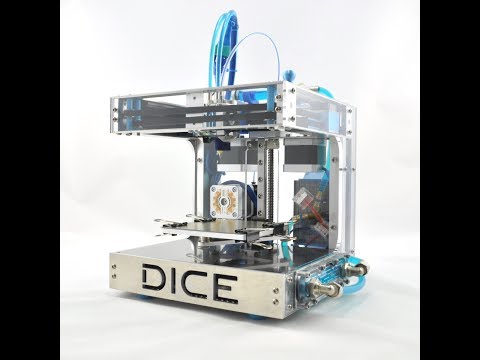
The research is still ongoing and the team plans to create a "skin sample database" of scanned samples that can be accessed from remote hospitals that do not have the cameras needed to scan a particular patient's skin. [ Gizmodo ; PhysOrg ]
Noses and ears
The creation of prosthetic ears, noses and chins is often a painful, expensive and time-consuming process for both the patient and the doctor himself. British industrial designer Tom Fripp has worked with scientists at the University of Sheffield over the past 5 years to develop a cheaper and easier-to-make 3D printed facial prosthesis. The process of creating such a prosthesis includes 3D scanning the patient's face (which is much less painful than casting it), modeling the replacement part and printing it, which uses pigment, starch and medical silicone.
These prostheses have the added bonus that when they wear out (which they eventually will), they can be reprinted at a very low financial cost. [
[
]
Prosthetic eyes
Fripp and a team at the University of Sheffield published the results of testing a similar process for making prosthetic eyes. Prosthetic eyes are expensive and, because they are hand-painted, can take months to make. Fripp Designs printers can produce 150 prosthetic eyes in an hour, and details such as iris color, size and number of blood vessels can be easily changed to suit the needs of the patient. [
PhysOrg]
Functional implants
As electronic devices — from drones to medical implants — get smaller, scientists are struggling to create batteries for them that are small enough, but with those could provide the necessary charge. However, a team of engineers from Harvard University is already printing microbatteries the size of a grain of sand using a 3D printer. Here's what the press release says:
“…researchers created an anode ink using nanoparticles of one lithium oxide compound, as well as a cathode ink made from nanoparticles of another kind of this compound. The printer applied ink to the teeth of two gold combs, thus creating a tightly connected structure of anodes and cathodes. The scientists then placed the electrodes in a tiny container and filled it with an electrolyte solution to make a battery."
Over time, they will be able to charge medical implants, which are held back due to charging problems. [ Harvard ]
Bones
3D printed implants such as the jaw have been around for several years. However, a small group of researchers is conducting an experiment whose goal is to print real bones. For example, scientist Kevin Scheiksheff of the University of Nottingham invented a bioprinter that creates matrices from polylactic acid and gelatin alginate, which are then coated with stem cells.
The implanted matrices will gradually dissolve and be replaced by new growing bone: it will take approximately three months for the bone to completely transform. [ Forbes ]
Blood vessels and cells
We can already print
organs , but there is a serious problem in creating a functioning circulatory system.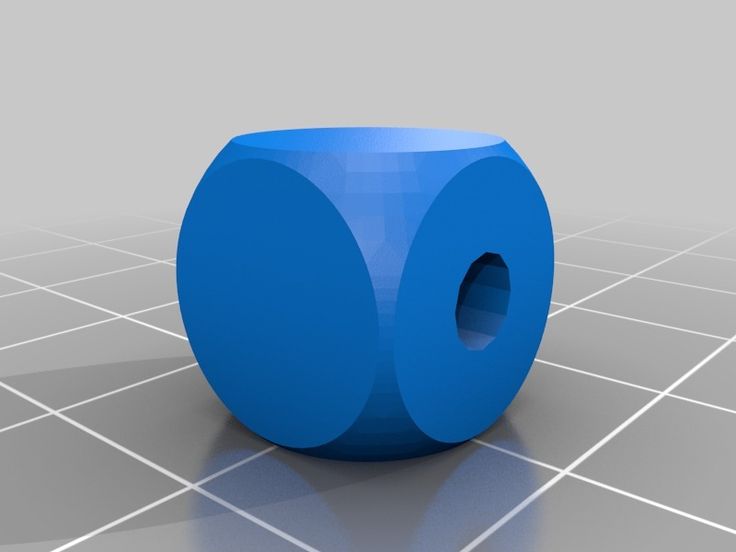
German scientist Günther Tovar, head of the Fraunhofer Institute for Interfacial Engineering and Biotechnology, is working on a project called BioRap. His task is to use a 3D printer to print blood vessels, which uses a mixture of synthetic polymers and biomolecules. The printed circulatory systems are being tested on animals - they are not yet ready for introduction into the human body. However, they will eventually make organ transplants possible. [ Fraunhofer Institute ]
How do you see the future of 3D printing with living and substitute artificial materials for use in the human body? Will we soon be able to grow and replace full-fledged organs, such as the liver? Share your opinion in the comments.
what Tomsk scientists print on a 3D printer
3D printing technology, thanks to its unique ability to print almost anything, has already taken over the world. Scientists at the Research Center for Physical Materials Science and Composite Materials at Tomsk Polytechnic University (TPU) are developing improved materials for bone implants created using 3D printers.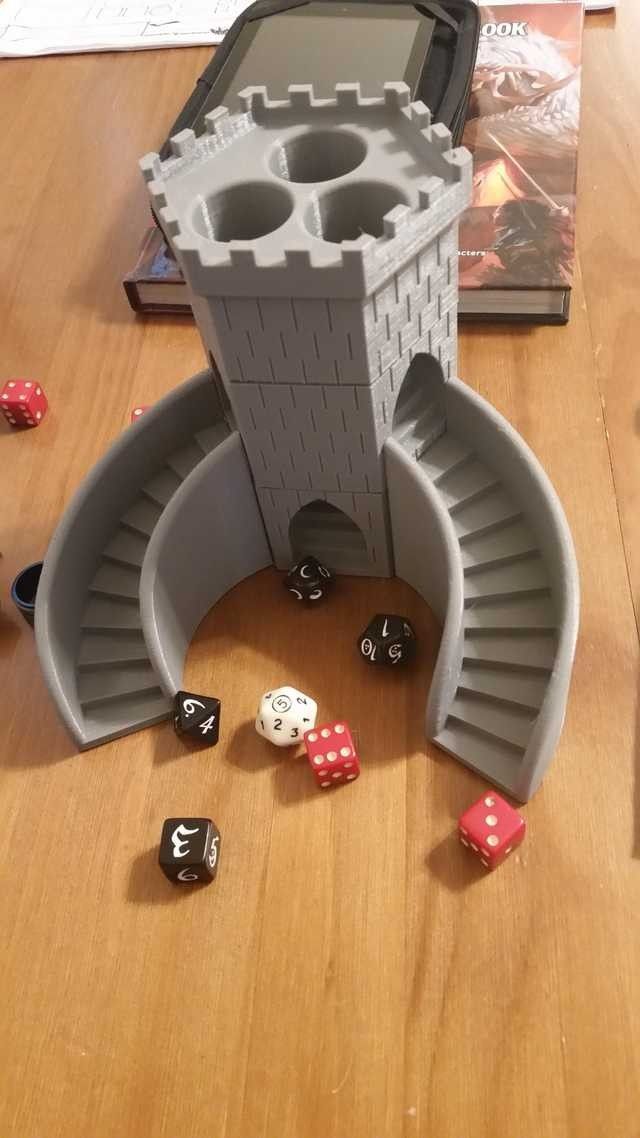
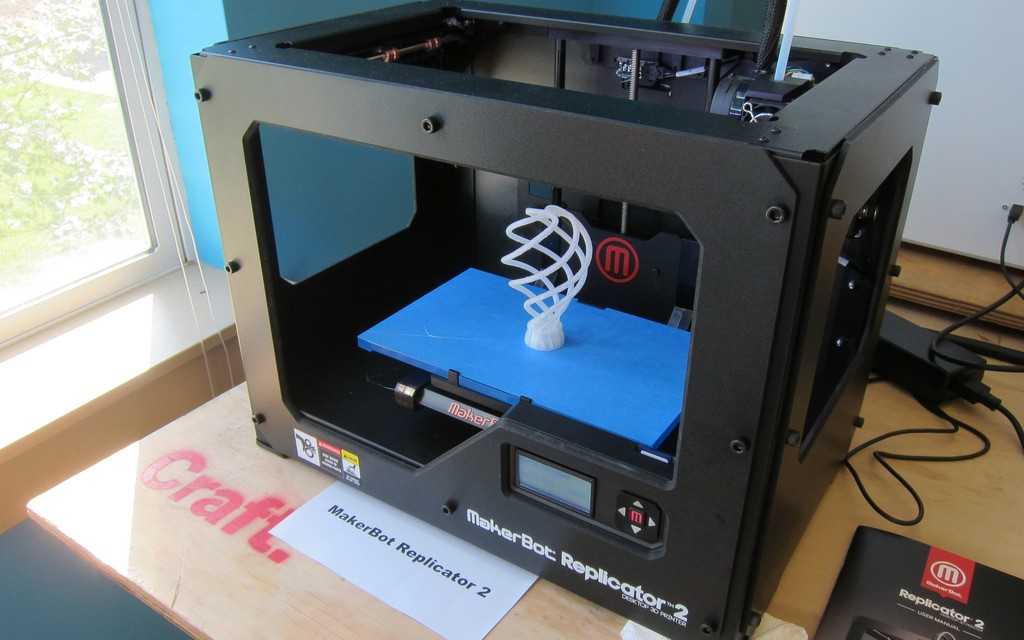
3D printing is an innovative technology for creating three-dimensional objects. A classic 3D printer works on the principle of layer-by-layer fusing modeling, when a three-dimensional image of a future object is divided into layers using software, from which it is then recreated. As a result, 3D printing is distinguished by a high speed of execution of orders, layouts for which, among other things, can be transferred online, which also saves time.
Now, thanks to 3D printing, almost any object can be created on a 3D printer: building materials, spacecraft parts, various implants and other medical products. At the same time, they can be printed from metal, plastic, unique biomaterials, etc.
Thus, employees of TPU Research Center "Physical Materials Science and Composite Materials" are developing bioinspired materials for 3D printing to replace bone defects.
According to Roman Surmenev, human bone tissue is a complex composite material with a structure organized at several levels and possessing unique mechanical characteristics.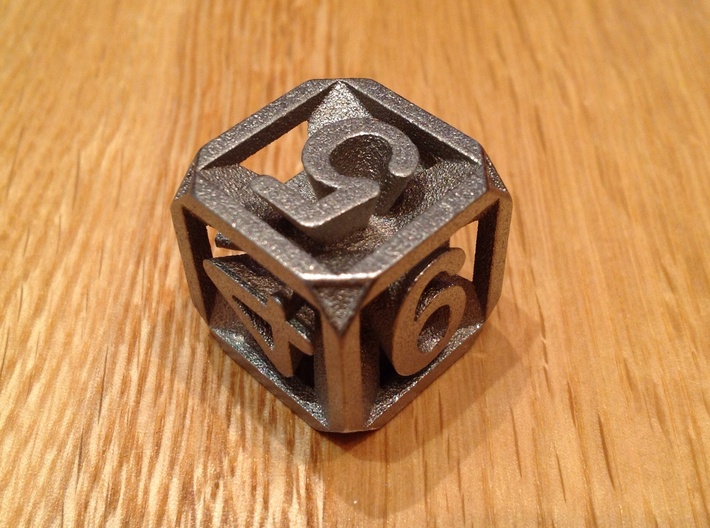 In turn, scientists work with mechanical metamaterials, manipulate their properties, such as density, to achieve similarities with human bone.
“We use pure titanium, or an alloy Ti-6Al-4V, which is approved for medical use, while changing its architectonics (construction. — Approx. ed.), which mimics the structure of bone,” he said.
Director of the Research Center "Physical Materials Science and Composite Materials" of the Tomsk Polytechnic University Roman Surmenev. Source: TPU press service
Thus, the addition of niobium ions significantly improves its mechanical and biological characteristics. Together with Russian and foreign partners, the employees of the center have already performed cellular and in vivo (on living organisms) experiments, which showed the promise of using such a titanium alloy.
How to print a bone
As Surmenev said, each person has his own physiological characteristics, therefore, in order to "print" a bone for him, it is necessary to perform a computed tomography of the area that needs to be replaced, and collect an anamnesis. This must be done by a healthcare professional.
“It is the surgeon or orthopedist who should contact us and set the task, knowing our capabilities,” he explained.
Then the developers perform a computer simulation of the future implant. “A mathematical three-dimensional model of the structure is being created, virtual engineering makes it possible to optimize the structure according to the required criteria. Next, a file is created with an extension suitable for the printer, the model is divided into layers and materialized by layer-by-layer build-up,” Surmenev explained.
After shaping the product, the powder is removed and special processing methods allow to achieve the optimal surface of the product. “At the last stage, it is necessary to make sure that all financial investments and the work of scientists have not been wasted, and indeed we are holding a unique product in our hands that will improve the patient’s life,” the scientist emphasized.
According to the principle of nature
“The term “additive technologies” (layer-by-layer building up and synthesis of an object using 3D technologies. — Ed.) appeared from the word “additive” — “to add,” says Surmenev. “This is what distinguishes 3D printing from traditional technologies where you need to subtract to get a design with complex geometry.”
In additive technologies, he says, the same approach is implemented as in wildlife, namely “top down” or “from big to small”. Nature created the surrounding world in a similar way - by layer-by-layer build-up, the scientist notes.
"You can pick up many epithets, but the stars really aligned, this technology is the best way to get materials with architectonics close to the structure of human tissue," the specialist is sure.
At the same time, he emphasizes that if we consider electron beam melting - the method by which they work in the center - then this technology is the most complicated in comparison with others.
“Requires a high quality powder, the presence of a vacuum during production, traditional post-processing does not allow to achieve the desired surface.