Reddit resin 3d printer
New users guide to 3D resin printing : PrintedMinis
I recently became introduced and subsequently obsessed with the world of 3D Resin printing - specifically miniatures for tabletop gaming (i.e. D&D). There is a LOT to learn when you get into this hobby, and I myself have only been doing it a few weeks. But I put together this guide as a means to help anyone else thinking about jumping in or just getting started themselves and hopefully learning from my mistakes early on.
This is by no means ultra comprehensive - but Im just trying to compile all of my notes and learnings since getting started. Huge thanks to everyone in this subreddit for all their help as well as on discord! I will continue to update this doc as I learn more and answer any questions I can along the way!
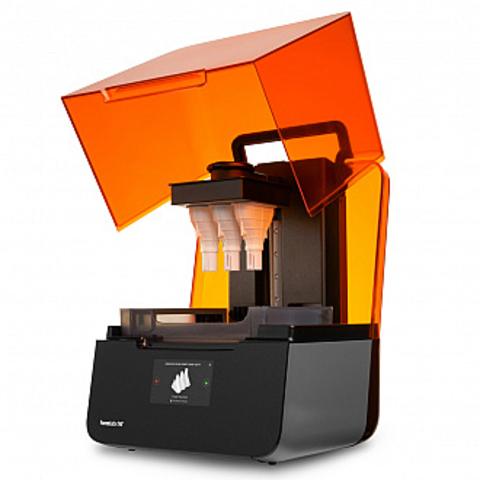
Disclaimer: I purchased the Anycubic Photon S so my experience and choices are biased towards that device but generally most of what I discuss can be applied to any resin based printer.
Shopping List:
In addition to the printer itself, obviously, you’re going to need quite a bit more tools. Most of this is due to the fact that A) resin is very toxic and skin contact should be avoided and B) resin models require special steps in order to be properly cured (hardened).
Amazon:
Nitrile Gloves To keep your skin safe from contact with the toxic resin chemicals.
99% IPA For cleaning up resin - IPA dissolves resin so its basically one of the only ways to properly clean your printed models as well as clean your printer and tools themselves.
Putty Knife (thinner the better, Home Depot paint aisle) For scraping printed models off your build plate when it’s finished.
Safety Glasses For safety ;)
TACKLIFE Cordless Rotary Tool For finishing work like sanding down imperfections left from removing supports.
Craft tools This is a great set of tools for working with your models. Sanding, clipping off supports, etc.
Blue shop towels (better than paper towels) For cleanup - generally these towels are better than generic paper towels mainly due to paper towels being abrasive and could potentially scratch/fog your FEP sheet.
UV Lightbox kit (see Formlabs tutorial): Curing resin models requires exposure to UV light. Theres plenty of that for free outside on a nice sunny day - but sometimes you A) don't have good access to the sun or B) want to cure at night.
Nail Lamp Dryer
Solar powered Display turntable
Dollar store:
2x deepish Tupperware containers with lids - Fill both roughly halfway with IPA (the depth that you can submerge your completed prints). One to do the initial dip to clean your printed model. The 2nd to do another round of cleaning in slightly less “dirty” IPA.
2x Disposable foil baking trays (deep not flat) - I use one to store my tools and swapping back and forth between tools when they become “contaminated” and the other for placing the build plate and dirty paper towels etc.

Tongs - For grabbing your submerged models and swishing them around
Deep frying spatula thingy - Similar as tongs, I grabbed both and can’t really decide which I prefer but for a buck it doesn’t hurt to have both.
Clear shelf liner (stick on) - I stuck this as a covering to my table surface that my printer sits on just in case any resin drips/spills while working.
NOT putty knife - Don’t buy putty knives from the dollar store - they are really cheap quality and the metal is generally very thick and might scratch/damage your models/build plate when removing them. Spend a few more bucks and get a good one from Home Depot or Lowes.
Optional:
Face-mask/respirator - Not going to lie, resin stinks! if you don’t like the resin smell or the smell of IPA (and IPA fumes are generally not healthy anyway) its good to wear a mask while working with this stuff.
Better thumb drive - The stock Photon S drive is garbage included with the printer is basically known to be junk and can sometimes even be the reason your prints fail.
 Don't even bother with it and just grab a decent drive from Amazon for 10 bucks.
Different/better/color resin - The Photon S comes with a semi translucent dark green resin and its fine for initial prints. But I prefer something that looks a little more solid and plastic so I recommend the ELEGOO ABS-like resin of which there are many different colors.
FEP replacement sheets Probably don’t need these right away, but it doesn’t hurt to have a pack on standby. The Photon itself comes with a single replacement sheet out of the box.
Ultrasonic cleaner A decent priced, highly reviewed product that might be worth checking out (I haven’t yet, but plan to order one). The argument for one of these is that just dunking your model in a container of IPA isn’t enough, and these guys will do a much more thorough job. Likewise these will agitate the model and likely reduce the amount of potentially trapped resin inside the model (assuming you’ve provided drain holes).
Before your first print:
Safety!!! It's extremely important you watch this video first and fully understand what you’re getting involved in when deciding to start working with resin.
Part 1: Intro to Chitubox and supporting minis like a pro, the first in a line of videos to come! - YouTube Another absolute must watch. Supports is one of the most important and potentially time consuming elements of 3D printing with resin and it’s also important that you understand what’s involved and some key techniques to applying proper supports. It’s pretty rare that you can download a model, apply auto supports, and print it with success.
Some Youtubers to follow: 3DPrintingPro, 3DPrintFarm, M3DM, Maker’s Muse, 3D Printed Tabletop
Reddit: r/printedminis, r/anycubicphoton
Environment setup:
Leveling your build plate: The manual includes steps on how to ensure your build plate is level. Theres mixed feelings on if this is the best way to do it or not, but it’s worked for me.
 Search on youtube for another method that might work better for you. Also ensure that your printer itself is on a level and stable platform (use an actual level for this first).
Tighten your FEP sheet: Sometimes your FEP sheet can get loose over time. When unpacking the unit double check to be sure if the screws can maybe be tightened a little bit.
Ventilation: Resin stinks! When your printer is working and has been printing for a few hours the room can start to stink too! It’s always best to work in a room that has some kind of ventilation. For what its worth I don’t personally mind it and its not something that I can really complain about. It was, however, the one thing that I was most concerned about before I actually got a printer.
IPA cleaning bins: Ensure you have containers (Tupperware with lids) that you have about half full of IPA. Use one to do the initial dunk/cleaning as this will collect most of the resin.
 Then use the second as a second pass to clean further. Ideally your bins will appear mostly green with the first and mostly clear with the second. Over time you will want to replace these with fresh IPA. Search youtube on good methods for doing so but the TLDR is you can place the bins outside on a sunny day and the resin dispersed into the IPA will cure and harden, while the IPA itself will evaporate.
Drying bin (for tools) Use one of the baking trays as a place to put your tools when you’re not working with them or after they’ve been in contact with resin/IPA. Generally I just overly soak my tools after each touches resin in IPA to clean them and then use a paper towel to wipe them as well.
Drying bin (for printed model) Use the other baking tray and line the bottom with some paper towels. Use this to place your model in after its been soaked and cleaned and let it dry.
Lightbox Use your UV Lightbox to cure your models after they are clean and dry or just place it outside on a sunny day.
Workspace for removing supports, sanding, painting, etc.
Patience! You’re definitely going to need a lot of this, but the reward is worth it so hang in there!!
Software: Chitubox, Photon Validator, Prusa Slicer These programs are basically the only programs I use (at the moment).
Chitubox is great for hollowing out models, orienting to your build plate, adding supports, and slicing. A sliced model is just a model saved as a file format that is basically a stack of images for every “vertical pixel layer” of the model.
Photon Validator is a great tool for opening a .photon file and scanning it quickly to find and highlight any islands that you might have. An island is basically any unsupported print layers that won’t stick to your model and thus wind up sticking to your FEP or just floating around in your reservoir and potentially causing damage to your printer!
Prusa Slicer is another great tool and option instead of Chitubox for adding supports and orienting your models for printing.
Settings: (resin, supports, etc.) There are a lot of settings you can tweak in Chitubox and initially it can be quite intimidating. The tutorials I linked earlier (3DPrintingPro) have everything you need to know. Mainly tweaking A) your support settings and B) your printer settings. Every type of resin is unique and requires unique printer settings. The excel doc linked above has a good list of resins you can use to find the one you want to use and adjust your printer settings accordingly.
Additional software: Meshmixer, Prusa, etc.
Before a print:
Orientation: Orient your model so that A) none of it will get cut off (i.e. no red parts) and B) can eliminate super flat portions or super long overhangs and C) allow you to comfortably provide decent supports without compromising the quality of the final print.
Hollow: To save resin, hollow your models unless they are too small/thin to hollow.
 Theres no reason to print solid models unless you A) want them heavier or B) want them to be more expensive or C) want them to require longer curing times.
Drain holes: For hollow models, you want to have at least 2 tiny drain holes so that you can drain out resin trapped inside as well as allow IPA to get inside when soaking/cleaning. Chitubox has a handy feature for adding these - I tend to put them on the bottom of my models, specifically the feet of the minis I print that I know I’m just going to wind up mounting to a base anyway so they will never been seen.
Supports, supports, supports! No Auto supports (edit: or... maybe?)!! Watch the 3DPrintingPro videos - they were a lifesaver for me as supports are literally going to make or break your success rate with perfect prints and utter failures. edit: See 3D Printed Tabletop's video on a better way to save time/energy by using Prusa's auto orientation/support feature.
:quality(80)/images.vogel.de/vogelonline/bdb/1696600/1696673/original.jpg)
Validate & check for islands* see tutorial Once you’re happy with your supports, slice and save and open in the Photon Validator program. Click the right/left arrows to jump between the layers that have been flagged red as having unsupported islands/pixels. Note the layer number and switch back to Chitubox and find the layer and address the island. Don’t stress out about single pixel islands as A) they are generally impossible to address and B) generally are safe to ignore. Once you’ve repeated this process enough that you’re confident there are no more major islands proceed to next step.
Save as sliced file to usb stick: Save the final sliced file as a .photons and copy it to your thumb drive.
Shake resin and fill reservoir: Make sure to shake the resin bottle well but don't go nuts as you don't want to create a billion bubbles that wind up in your reservoir and may potentially act as a minor obstruction during prints.
 Remember your gloves and any other protective gear and carefully pour so that you don't wind up over filling or spilling (about 1/3 full or slightly less is ideal). Remember that the build plate goes well into the reservoir during prints so you don't want it to cause too much resin to overflow and make a huge mess.
Print!
*Note: currently the Photon Validator program does not support .photons files which are proprietary to the Photon S. A workaround (albeit somewhat lame) is to change your printer to Default in Chitubox, Slice and save as a .photon file. Then open that in the Validator, auto fix, and look for major unsupported islands and address in Chitubox. Repeat until satisfied and then change back to your Photon printer and Slice and save as .photons for copying to a USB drive for the printer.
After a print:
Soak in IPA (2 bins: first dirty then cleanish)
Optional: Ultrasonic bath put your model in a sealed ziplock bag of IPA and place the bag into the water inside the bath.
 This will allow the model to be cleaned in IPA without polluting the water in your ultrasonic bath itself and is generally just a nice quality of life hack.
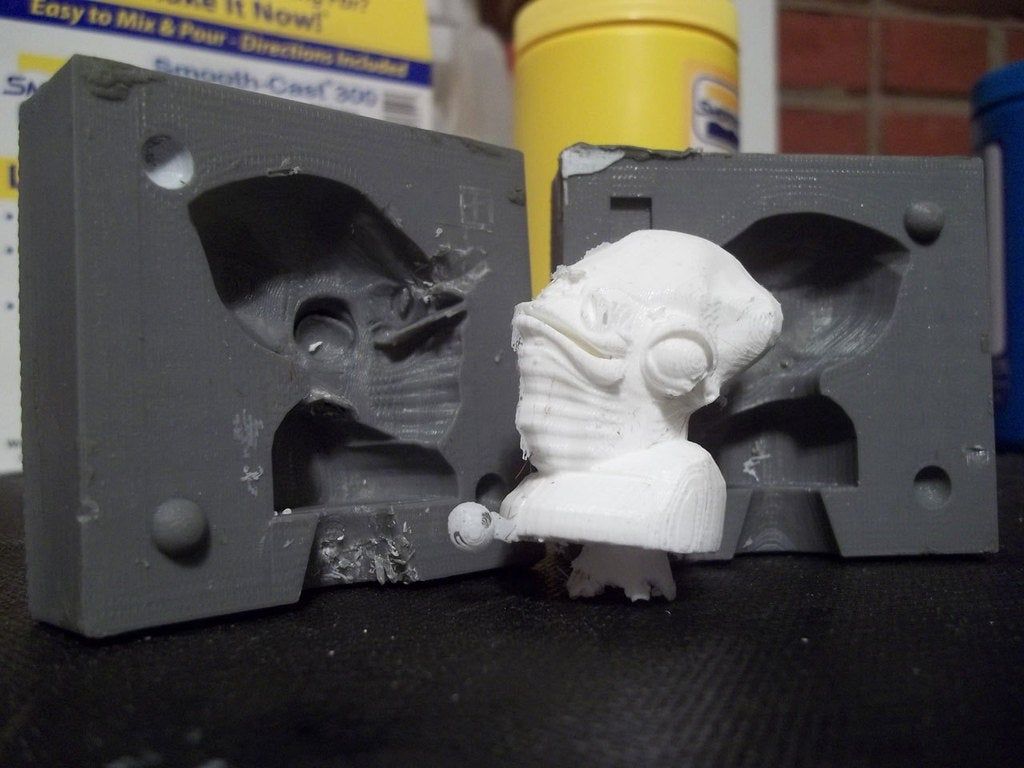
Cleanup You want to clean your build plate after every print. But if you’ve had a successful print and your reservoir is free of any small debris or failed print bits of cured resin you can go ahead and leave it and use it for your next print. If you’re not going to print for longer than 24 hours, you should pour your resin back into its bottle using the provided filter or a coffee filter. Clean the build plate and reservoir/FEP with a towel soaked in CLEAN IPA (don’t dip it in your cleaning bins as both of those are contaminated with resin and will result in your FEP becoming foggy).
Removing supports Use your craft tool snippers to cut way any of your supports. Using the Light support settings from earlier, I've found that most of them will simply break right off.
 I do this before I cure so they are a bit easier to remove as they aren't fully hardened yet. (Don't forget to wear your safety glasses!)
Curing: Use the Lightbox you built earlier or just place the model outside in robust sunlight to allow the UV rays to fully cure and harden the resin/model. I’ve found that 30 minutes usually does a good job for the minis I’ve printed.
Fixups/cleaning (sanding, etc) Once cured and hardened you are finished! Only thing left is to clean up any imperfections left over from supports and minor print fails. Use your TACKLIFE tool and the soft polisher to get rid of any little support tags that are left without overly sanding the model itself.
Disposal: With all those dirty paper towels you've used cleaning up this mess you don't want to just toss them into the trash. Ideally you let them sit in your drying pans until you're finished then sit them outside for a few minutes in the sun or even in your Lightbox so that the resin on the rags cures - then throw them out.
 Ideally you don't want to throw out raw resin because it is a safety hazard and needs to be disposed of properly/safely.
Prime/Paint! Prime the model and paint it!! Here are some great Youtubers on this topic: Miniac, Black Magic Craft
Failures:
It happens! Don’t stress about it. My first print was a success (and I have no idea how as I must have just got really lucky) and my second was a total fail. That 2nd print really bummed me out but by the time I got through most of the tutorials outlined in this guide, I felt more confident to get back on the horse and try again. My next print was flawless!
How to deal/cleanup Try to catch failed prints early so you don’t wind up wasting resin and potentially worse damaging your printer (built up gunk on the FEP can cause pressure against the screen below when the build plate presses down). Abort the print, remove the build plate and remove the model.
 Clean and cure it anyway so you can properly dispose of it. Likewise empty (and filter) your reservoir as well as clean your FEP. You will likely need to very gently scrape any stuck resin off of the FEP with the provided plastic scraping tool. Try to avoid using the metal putty knife because its very easy to poke a hole in your FEP and this you absolutely do not want to do!
What went wrong Many things can contribute to a failed print. Some of the easier ones to diagnose/troubleshoot include: checking that your build plate is level as well as your printer itself. Check that your supports are good and that you’ve validated and accounted for every island. Ensure the temperature of your resin isn’t too cold or too hot (you can soak your bottle in warm water before printing etc).
Don’t sand your build plate!! I’ve seen this advice a few times and I cringe. I understand the sentiment but absolutely disagree. The build plate is naturally rough (brushed nickel looking) and your prints should be able to adhere to it no problem.
 Before going to such drastic measures first rule out the obvious like: do you have a good solid base for the model to adhere to? Make sure you have your model elevated from the base like 5.00 and that you’ve got really good supports initially for the very bottom. These will be the foundation for the entire print basically!
Replacing your FEP (important tutorial). When it comes time to replace your FEP, follow this tutorial as its very much not as obvious as you’d think. Theres a bit of a trick to it and it specifically requires installing the sheet somewhat loose so that when it gets tightened it doesn’t wind up being too tight (which can actually result in failed prints and your Printer working too hard to remove the print from the suction on the FEP and cause a potential short).
Where to find models:
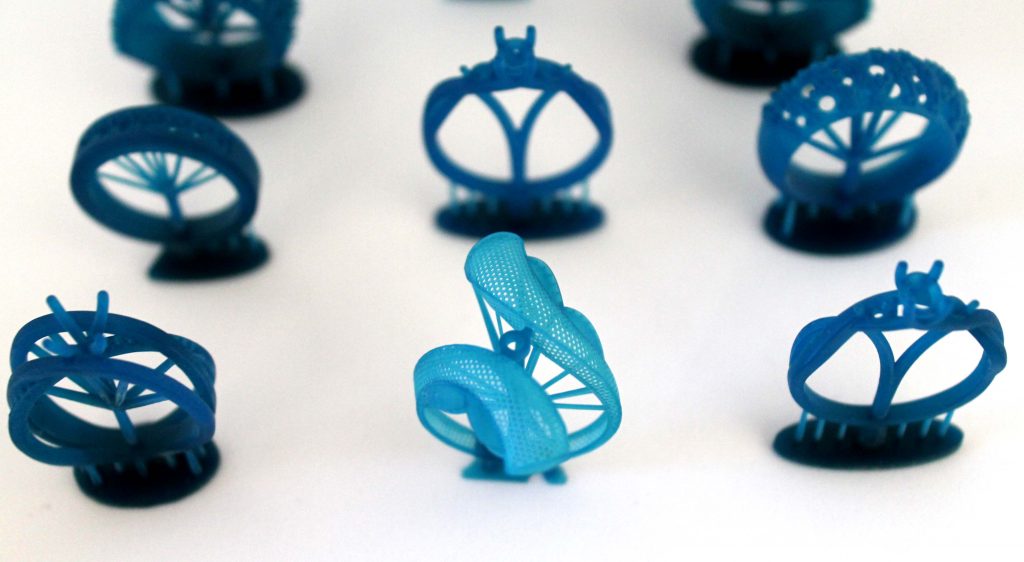
Thingiverse: MD3M
Patreon: ArtisanGuild, Onmioji, CastNPlay
MyMiniFactory
Kickstarter
Purchase Advice Megathread - August 2022 : 3Dprinting
Welcome back to another purchase megathread!
This thread is meant to conglomerate purchase advice for both newcomers and people looking for additional machines.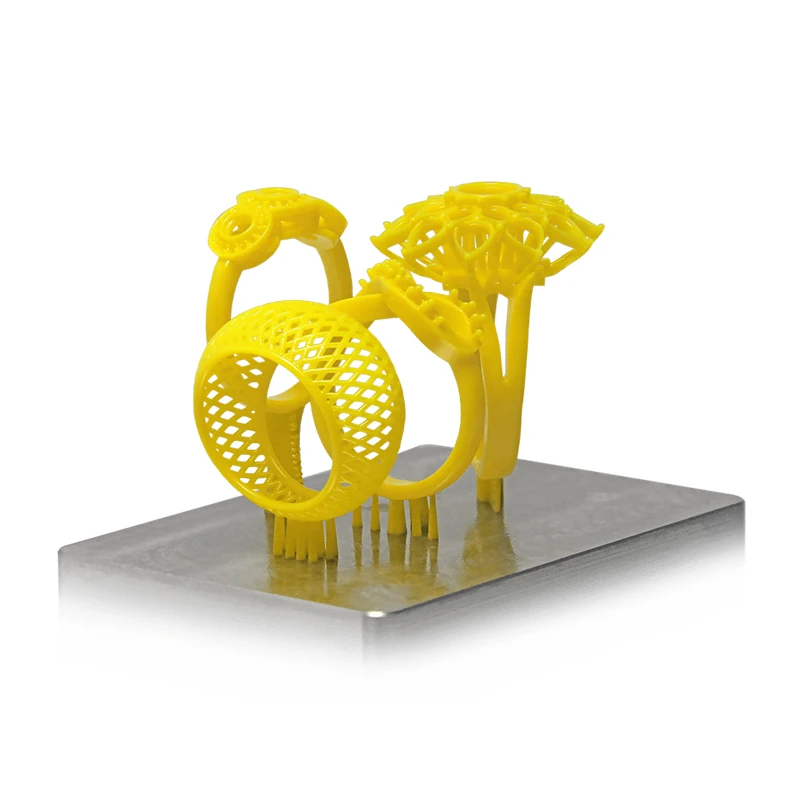 Keeping this discussion to one thread means less searching should anyone have questions that may already have been answered here, as well as more visibility to inquiries in general, as comments made here will be visible for the entire month stuck to the top of the sub, and then added to the Purchase Advice Collection (Reddit Collections are still broken on mobile view, enable "view in desktop mode").
If you are new to 3D printing, and are unsure of what to ask, try to include the following in your posts as a minimum:
Your budget, set at a numeric amount. Saying "cheap," or "money is not a problem" is not an answer people can do much with. 3D printers can cost $100, they can cost $10,000,000, and anywhere in between. A rough idea of what you're looking for is essential to figuring out anything else.
Your country of residence.
If you are willing to build the printer from a kit, and what your level of experience is with electronic maintenance and construction if so.
What you wish to do with the printer.
Any extenuating circumstances that would restrict you from using machines that would otherwise fit your needs (limited space for the printer, enclosure requirement, must be purchased through educational intermediary, etc).
While this is by no means an exhaustive list of what can be included in your posts, these questions should help paint enough of a picture to get started. Don't be afraid to ask more questions, and never worry about asking too many. The people posting in this thread are here because they want to give advice, and any questions you have answered may be useful to others later on, when they read through this thread looking for answers of their own. Everyone here was new once, so chances are whoever is replying to you has a good idea of how you feel currently.
Reddit User and Regular u/richie225 is also constantly maintaining his extensive personal recommendations list which is worth a read: Generic FDM Printer recommendations.
Additionally, a quick word on print quality: Most FDM/FFF (that is, filament based) printers are capable of approximately the same tolerances and print appearance, as the biggest limiting factor is in the nature of extruded plastic. Asking if a machine has "good prints," or saying "I don't expect the best quality for $xxx" isn't actually relevant for the most part with regards to these machines. Should you need additional detail and higher tolerances, you may want to explore SLA, DLP, and other photoresin options, as those do offer an increase in overall quality. If you are interested in resin machines, make sure you are aware of how to use them safely. For these safety reasons we don't usually recommend a resin printer as someone's first printer.
As always, if you're a newcomer to this community, welcome. If you're a regular, welcome back.
Examples of positive and negative applications of the 3D printer
Every year 3D printing becomes more and more popular. The 3D printer, as a tool for turning a digital model into a physical object, is gaining popularity, outperforming other production methods in many ways due to its affordability.
But do not forget that a 3D printer is just a tool. A lot depends on how this tool will be used.
Available 3D printing technologies
All 3D technologies can be conditionally divided into 4 types.
Layer by layer welding with molten material.
The principle of operation is similar to the familiar glue gun. The print media is melted to a semi-liquid state in the print head and applied with a nozzle to the print surface where it solidifies. This is how the finished 3D model “grows” layer by layer on the printing table. Not only thermoplastics can be used as consumables, but, for example, chocolate, icing, concrete, etc.
This is the most common type of printer. Inexpensive FDM printers are often used as home assistants. This is facilitated by an inexpensive price and a variety of consumables.
Selective curing of resin (photopolymer printers).
The material used is a photopolymer resin that hardens under the influence of UV radiation. As a source of UV radiation, a thin laser beam, a DLP projector or an LCD screen with a UV matrix, or any other design can be used. For example, some industrial 3D printers apply a photopolymer using thin nozzles and immediately illuminate it with a UV lamp.
Previously, these printers were quite expensive. Today, with advances in technology, photopolymer 3D printing has become affordable and photoresin printers have become popular as home hobby printers.
Selective bonding of powdered material.
On the print head of the printer there are several nozzles through which a binder is supplied, which is selectively applied to the powdered material. Various materials can be used as a material: for example, gypsum or metal powders. But gypsum is most often used.
Since dye can be added to the "glue" during printing, such printers are usually used for the production of color demonstration models or souvenirs.
Laser sintering of powdered materials.
The youngest technology, but with great potential for use in large-scale industries. With the help of a laser or a heated print head, selective sintering of the metal powder occurs in an environment filled with an inert gas.
These are already serious industrial printers that are used for the production of functional metal assemblies and parts. Currently, such 3D printers are actively used in the aerospace industry.
Unethical use
3D piracy
Where there is duplication of objects, there are always disputes about copyright and piracy.
The production of any product is a long and painstaking work, and often more than one person. Before you get a finished decorative product, for example, a figurine, you need to think through everything to the smallest detail. Usually, before modeling, the artist draws a lot of sketches, the details of clothing and accessories are thought out. Only after that the 3D modeler gets to work and begins painstakingly recreating the 3D model.
Functional models are often redesigned by engineers after the prototype has been made. There can be a very long way between the initial idea and a stable working mechanism. And it’s very disappointing when such work is simply copied and posted in the public domain.
LEGO
It was one of the first mass manifestations of "3D piracy". At that time, 3D printing was only gaining popularity, and many users, having printed a dozen figurines, were looking for a useful application for a 3D printer. Given the low plastic consumption, the printed LEGO blocks were very inexpensive.
3D printed LEGO bricks
Despite the far from ideal surface, many were satisfied with such a copy. Some have argued that the accuracy of a home FDM printer is not enough for the bricks to fit well with the original LEGO, but for most users everything fit perfectly.
At the moment, LEGO is actively removing models that copy the original sizes of the famous bricks and men from the network. On popular sites, only custom elements of LEGO-men and LECO are left that are not the original size.
Custom heads for LEGO men
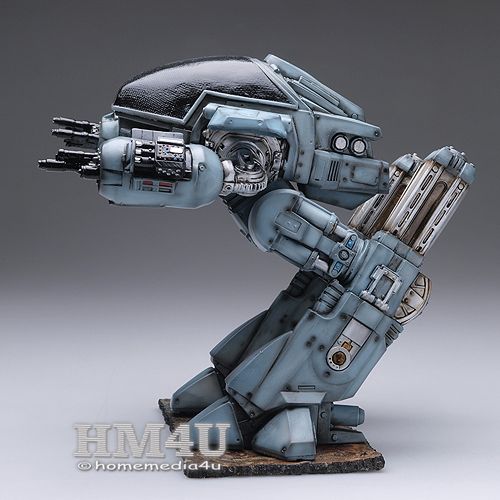
Games Workshop
Games Workshop, which produce the most expensive table soldiers in the world, sued Thomas Valenti (USA) back in 2012. Thomas has modeled, printed and made publicly available several miniatures based on the Warhammer universe. The court sided with Games Workshop and the models had to be removed.
3D Printed Chaplain
Chaplain 3D model from Warhammer 40k
Games Workshop went one step further by banning fans from creating art and other work based on the original settings and characters. As a boycott, users of the Warhammer 40,000 section on Reddit are proposing to abandon the company's products as much as possible - print game figures on 3D printers, use paints from other companies, or switch to other universes.
Hollywood
The production of modern films is not a cheap pleasure, and film companies try to recoup their costs not only by showing them in cinemas, but, for example, by producing souvenirs.
DreamWorks has an entire consumer goods division that helps recoup the cost of a movie if it fails at the box office. Film companies recognize that fan-made productions often surpass the official "souvenir" in accuracy and detail.
DC Universe Batman fan model
Many film companies are closely following the development of 3D printed merchandise, but do not yet know how to respond. For example, Paramount Pictures, Marvel Studios and Warner Bros. They themselves began to upload models for 3D printing to the network, before the release of new films.
Weapon Seal
Seal of weapons
24-year-old law student Cody Wilson was the first to make a gun on a 3D printer. Cody designed and 3D printed a combat pistol on his own. After 8 years, the idea of making firearms using 3D printing has not only not died out, but flared up with a bright fire.
It started in Texas in 2012. It was there that the company Defense Distributed was registered, the ideology of which was the development of models of firearms that anyone could make on a home 3D printer.
Guns
Liberator
The first “swallow” was the Liberator - a compact plastic pistol printed on a 3D printer from ABS plastic. The only thing that could not be made on a 3D printer was the striker, which was successfully replaced by an ordinary nail. The first printed pistol was made on a Stratasys Dimension SST 3D printer.
Liberator - the name is borrowed from a cheap pistol that was developed in 1942 in the USA.
The Liberator fired a fairly weak .380 ACP round and could only last a dozen rounds at most.
Failed Liberator
Zig Zag
In the spring of 2014, a video appeared on the Internet with a man shooting from a plastic revolver with a huge drum. The video greatly stirred up all of Japan.
Zig Zag
Unknown was Yoshitomo Imura (Yoshitomo Imura) - 28-year-old employee of the Shonan Institute of Technology. Despite Imuru's claim that he fired blanks on the tape, he was arrested and sentenced to 2 years in prison.
The Zig Zag design was a reimagining of revolvers popular in the 19th century, which used a rotating .38 caliber barrel block mounted on a pistol grip.
Washbear
In 2015, mechanical engineering student James Patrick posted a video online showing a 3D printed PM522 Washbear in operation.
PM522 Washbear
The PM522 visually resembled a children's pistol from a science fiction movie, but at the same time the pistol had a strong and rigid frame. Washbear is also safer than its predecessors. At rest, the firing mechanism was not in line with the primer, so the PM522 was protected from accidental firing, for example, when dropped.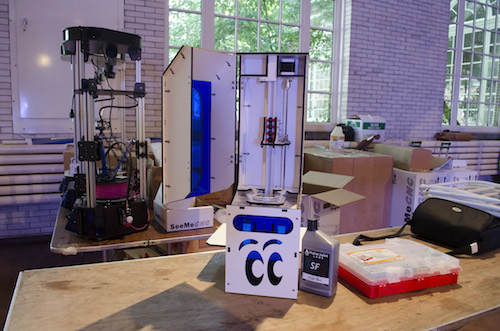 The only metal part was the nail that replaced the striker.
Rifle
Grizzly
Canadian with the nickname CanadianGunNut, ThreeD Ukulele or simply Matthew, inspired by the Liberator project, designed and posted his project - Grizzly. Grizzly is an ABS+ plastic rifle. It took the Canadian 3 days to design the rifle and another 27 hours to manufacture it using a Stratasys Dimension 1200es industrial 3D printer.
Grizzly 9 Rifle0063
The first version of the Grizzly had a smooth and straight .22 barrel. But this turned out to be not a very good decision, and the barrel cracked after the first shot. Subsequently, Matthew replaced the barrel with a tapered barrel with rifling inside.
Plastic “cutting” could not affect the ballistics of the bullet in any way, but added strength to the barrel.
Shotgun
Liberator 12k
The Liberator 12k is a 12-round shotgun made by a well-known, in narrow circles, enthusiast in the world of 3D printing - Jeff Rodriguez.
Liberator 12k
Rodriguez managed to create a simple and at the same time reliable design, "mixing" a pistol and a pump-action shotgun in the design of the Liberator 12k. A huge plus for manufacturing and reliability was the absence of small parts in the shotgun mechanism.
Since the plastic was not strong enough, Rodriguez reinforced the design of the Liberator 12k with metal pins and added metal tubes inside the barrel and drum. The metal parts were purchased from a regular hardware store, so anyone could easily make a Liberator 12k with their home 3D printer.
Semi-automatic weapons
Shuty-MP1
The first sign was the Shuty-MP1, a semi-automatic pistol made by an amateur gunsmith with the nickname Derwood, in April 2017.
Shuty-MP1
Shuty AP-9
The Shuty AP-9 still uses a pistol barrel, but the trigger and return spring are taken from the civilian version of the M16. This improved the reliability of the rifle.
Ethical use
Despite the negative examples of application, 3D printing is actively used in many areas, helping to save time and create products that cannot be produced by other methods.
Medicine
Implants
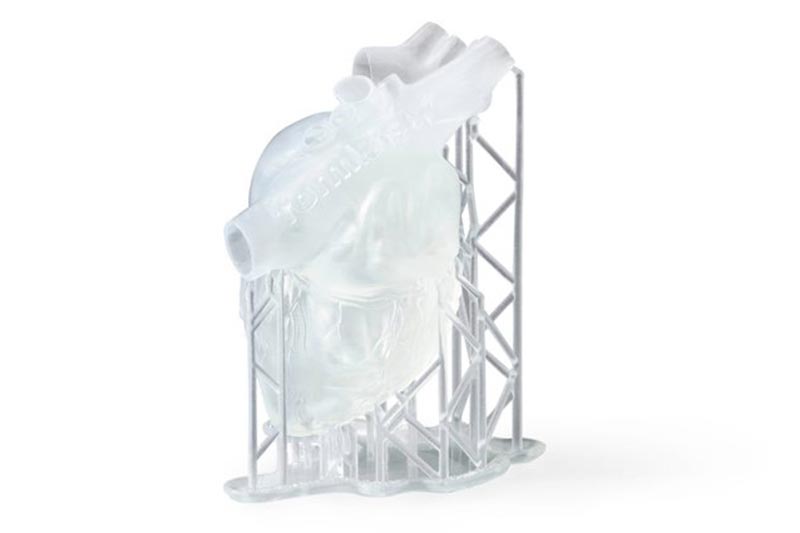
Metal-printing 3D printers are actively used in medicine for the manufacture of titanium implants. For example, a patient needs to have a hip joint implant made. According to the results of CT, the necessary area of bone tissue replacement is agreed with the doctors and a prosthesis model is created that is ideal for this patient. After all approvals, the finished model is sent for printing.
3D model of implant
The main areas of 3D printing of implants in medicine are maxillofacial surgery, traumatology, orthopedics, oncology and veterinary medicine. A big advantage over the classical methods of manufacturing implants is the ability to create a cellular or porous structure. This allows for better integration of the prosthesis into the bone tissue.
Samples of printed implants and pins
Dentures
The manufacture of even a relatively simple traction prosthesis is a rather laborious and lengthy process. 3D printing has reduced costs and accelerated the production of prostheses. In addition, it became possible to customize the prosthesis.
Customized child prostheses
Some enthusiasts are modeling and posting models and detailed instructions for assembling traction prosthetic hands and fingers in the public domain so that any user can print and make a prosthesis at home.
Simple Traction Hand Model
Production
Building custom drones
Aerialtronics is a small Dutch company that specializes in building unique, customized drones. Aerialtronics manufactures and develops unique drones, the characteristics of which can vary depending on the needs of the customer.
Initially, a basic concept model was designed, which consists of a platform and a set of elements that can be changed at the request of the customer. Changes can affect almost any part of the drone. The customer can choose the number of motors and their power, payload, flight time, supported software and much more.
Aerialtronics base model
But any, even minor changes in the characteristics and design of the drone required the manufacture of new elements and design changes. Classical manufacturing methods turned out to be quite laborious and long. To save time and money, a Stratasys uPrint SE Plus 3D printer was purchased.
Drone Assembly
Thanks to 3D printing, it was possible not only to speed up production, but also to devote more time to improving individual components, because the finished model is ready the next morning. Rapid manufacturing allows you to print a part, test it, make the necessary changes to the 3D model and make a new sample.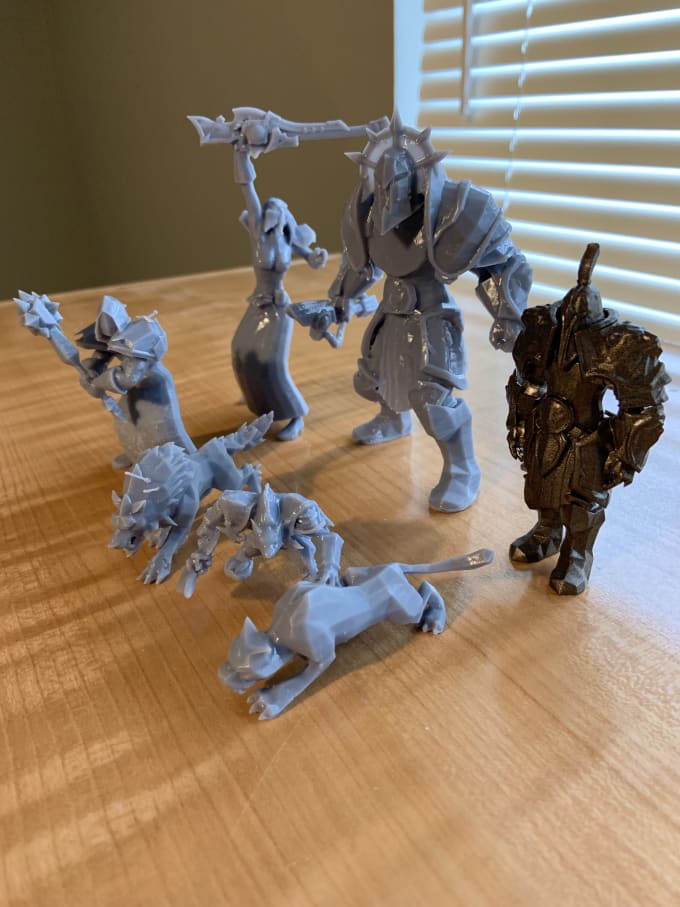 Aerialtronics engineers manage to manufacture and test 8-10 variants of a part in a few days in order to achieve maximum quality.
Prototyping
Gas turbine prototyping.
Prototyping by traditional methods is often time consuming and expensive. Because of this, the price of an error in calculations and 3D modeling can be very expensive.
For example, the production of turbine engine parts is usually based on careful preparatory calculations, but even this does not always prevent errors in the production of a test prototype. After all, even the most modern software methods cannot replace physical tests. But due to the high cost (over $20,000), it becomes impossible to produce multiple prototypes for testing.
Turbine Technologies (Wisconsin, USA) and its subsidiary Kutrieb Research have found a way out - 3D printing. Thanks to the 3D Systems ProJet 3D printer, it was possible to reduce the cost of prototyping by about 10 times to $2,000.
3D model and printed part of turbine
A turbine model is printed on a wax 3D printer, tested and then cast from metal. In addition to the cost, it was possible to significantly speed up production. After all, the production of traditional stencils with filling in molds took up to 5 weeks, and the 3D printed model is ready by the morning.
Totals
Despite the unethical side of 3D printing, there are still more positive use cases. 3D printers have become indispensable assistants in various industries - from home hobbies to serious industries. With the help of 3D printers, unique products are made that could not be obtained using other machines.
Popularization of 3D printers is a matter of time. But do not forget that 3D printing is just a tool, just like a drill or a hammer. It depends only on the user how it will be used.
the world's fastest and most accurate resin 3D printer・Cults
HITRY, a team of innovators in 3D printing since 2014, recently announced the launch of Rocket 1, the world's first 3D printer with DCLF (Digital Continuous Liquid Forming). Learn more here: https://comingsoon.higizmos.com/rocket1.
Rocket 1 is capable of printing at 260 mm/h, which is 20 to 60 times faster than traditional resin printers.
This is the highest speed achievable for a 3D printer. In the future, the printing speed may reach 1000mm/h! Instead of waiting for hours, you can now complete your project in minutes!
This exciting new product from HITRY sets a new standard in 3D printing with DCLF (Digital Continuous Liquid Forming) technology, which combines 35µm ultra-high XY resolution, DLP ultra-durability and stereolithography top-down surface curing.
The key to continuous liquid molding of DCLF technology is a self-developed photosensitive resin.
In addition to nanomaterials to help quickly level the resin, our photosensitive resin also contains components that enhance the polymerization oxygen barrier, which increases the uncured layer in contact with oxygen, the dead zone, from zero to ten microns to tens of microns and hundreds of microns for ultra-high resolution results. . Thus, the top-down surface can be leveled quickly without changing the curing properties of the resin or using a scoop to achieve incredibly high print speeds.
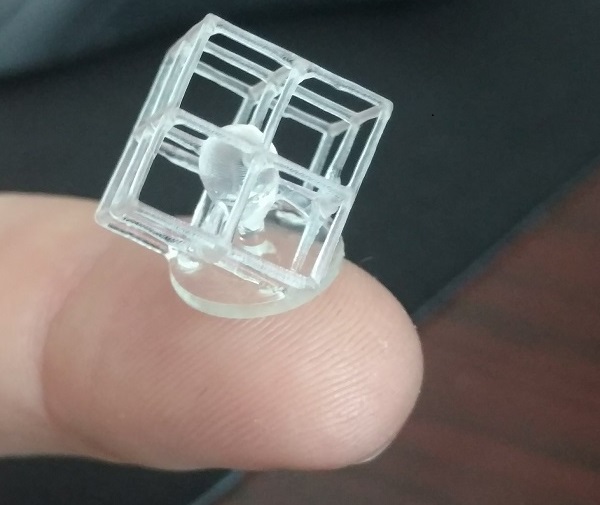
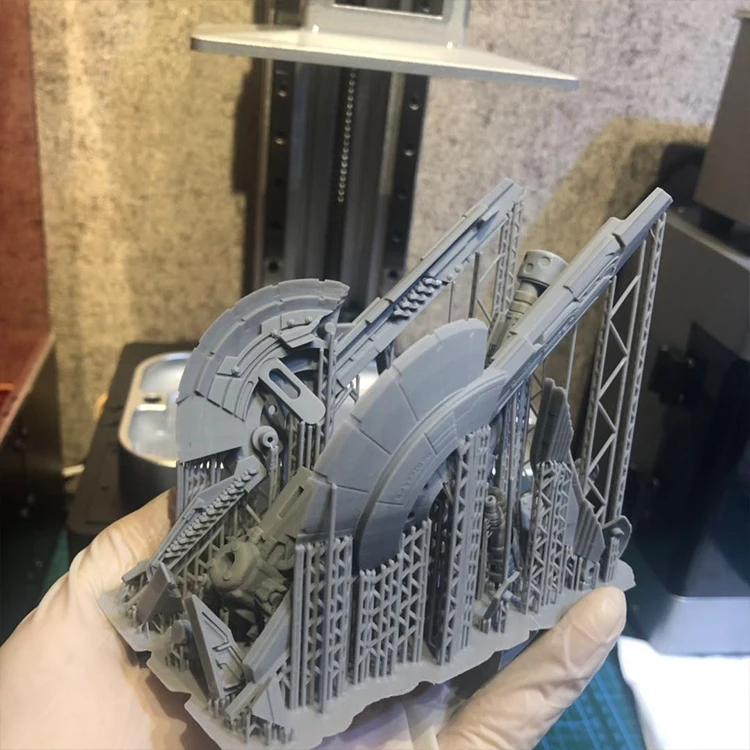
In addition to the fastest print speed, Rocket 1 also has the highest XY accuracy to date. This printer can easily create intricate parts and holes as small as 0.2mm, allowing liquids and gases to pass freely - exactly the kind of precision required by researchers who use complex models to study.
Top-down printing also protects prints from gravitational and peeling forces, allowing high-transparency printing. Rocket 1 prints as transparently as glass. You can even use it to print a pair of glasses for yourself. Thanks to the top-down design, it is easy to print flexible models, such as shoe lasts. Models printed by Rocket 1 need very few or no supports, saving a lot of time in post-processing.
Rocket 1 creates its pieces with very fine detail and each piece can fit perfectly with only 0.05mm gap on one side which is much better than most 3D printers and the model comes out smooth and flawless as a piece, cast under pressure. Rocket 1 offers 8 types of photosensitive resins that cover all industries as well as a variety of applications, and it can start printing immediately with just 300g of resin.
With powerful DCLF technology, the Rocket 1 is capable of printing solid 8CM cube models. In addition, Rocket 1 is intuitive and easy to use. No alignment or professional experience required. Just plug it in and start typing. Because light is projected from the top of the machine down onto the surface of the resin and cures it, Rocket 1 has no vulnerable parts such as LCD screens or release films, so no maintenance is required, saving you time and money.
With maximum speed and ultra-high resolution DCLF technology, the HITRY Rocket 1 is ushering in a new era of 3D printing, offering powerful, convenient, quality printing experiences for everyone. HITRY Rocket 1 is coming to Kickstarter soon. Limited special offers start at $599. Learn more here: https://comingsoon.higizmos.com/rocket1.
Rocket 1 is looking for KOLs to help with the first hands-on review.