Diamond hotend 3d printer
The Diamond 5 colour (“Fullcolor”) hot end (and other related stuff). – Hot filament and cold Coffee
Apologies to anyone who follows my blog for not posting much for a while but life has been very hectic lately. Anyway, I’ve finally got a bit of time to do this post. To make up for the lack of frequency of posts, this one will be quite long as I have a lot to talk about.
What follows are my experiences with the 5 colour version of the Diamond hot end. There are also some other observations to do with mixing hot ends in general. I hope the information will be of use to others.
Before I go any further, I want to make it clear that the Diamond 5 colour hot end was generously supplied at no cost to me by RepRap.me for evaluation purposes. However, my acceptance was on the clear understanding that anything I write about it, good or bad, would be completely unbiased by this fact. I think readers will see that I have honoured this and that everything that follows is a true and unbiased account of my personal experiences.
I should probably also mention that the Duet3D team helped me out by generously supplying two E3D Titan extruders to supplement the three that I already had. The reason being that they wanted me to take my printer (with 5 colour capability) to the TCT show to help demonstrate the capabilities of the Duet electronics and firmware. It’s fair to say that when it comes to 3d printing electronics and firmware, I am biased towards the Duet. That’s not because of any freebies but because I personally think it’s the best.
I should also make it clear that I was born in England and so I use English spelling which is why I write “colour” rather than “color”.
Anyway, I’ve already covered the modifications that I made to the printer here 5 Colour upgrade so I won’t go over that again. Assembly of the 5 colour is much the same as the 3 colour except that the heat sinks have two flats on the top which makes it much easier to tighten them by using a spanner instead of messing around with pliers or pipe grips.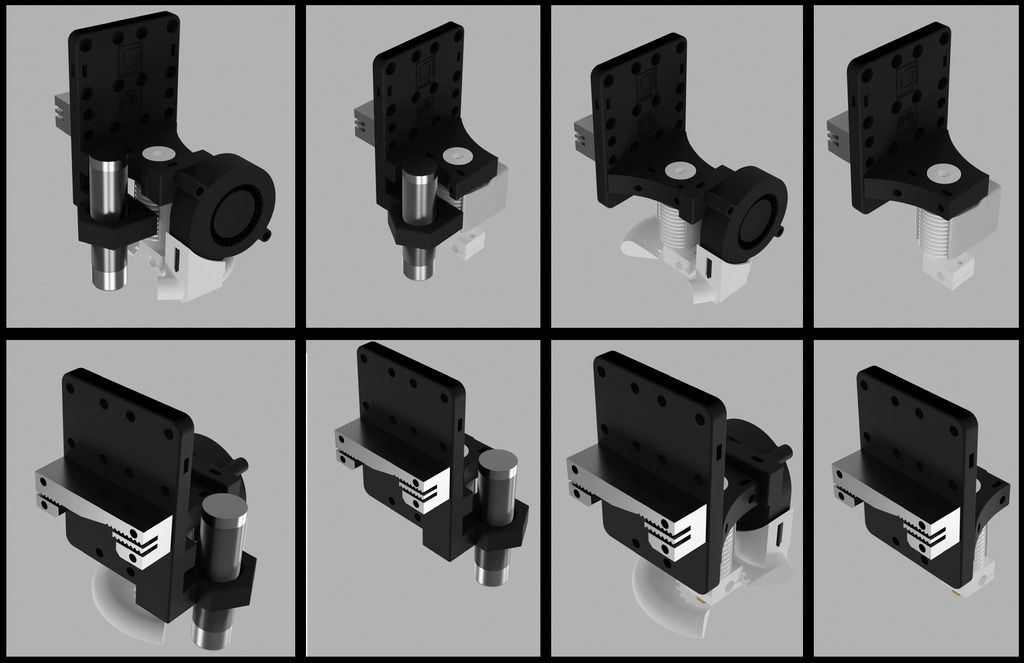
The first thing of note is that the 5 colour Diamond comes with a massively powerful 80 Watt 24V heater or 60 Watt 12V heater, rather than the more conventional 40 watt heater that the 3 colour version comes with. As my system is 24V, I therefore had the 80 Watt version. Here is a link to the relevant part of RepRap.me’s web site https://www.reprap.me/diamond-fullcolor-hotend.html.
There is no mention of why it is necessary to use such a powerful heater except for this statement “Special heater cartridge is necessary for the Diamond Fullcolor Hotend”. One thing that immediately struck me was the fact that, presumably if it needs an 80 Watt heater (the 24 volt version), then the 60 Watt 12 volt version might be marginal. Conversely, if 60 Watt is adequate, then why does the 24V version have to be 80 Watt? Anyway, after fitting the hot end assembly, the first thing I did was to tune the PID parameters using the Duet auto tune facility. The result was fairly alarming in that after the tuning sequence, I received a warning to the effect that the heater could potentially reach 647 deg C.
This was all done with the heat sink cooling fan running by the way. Also, I use a fan which shifts about 22 cfm which is higher than the one that RepRap.me suggest at 18cfm, (at least for the 3 colour version). There is no specification that I could find for the fan on RepRap.me’s web site for the 5 colour version, except that it’s 50x50x15 mm and as near as I can tell, it’s the same fan for both the 3 colour and the 5 colour. The price is identical so I’d guess that it’s the same fan. Anyway, the one I use is 50x50x20 (5mm taller) and I haven’t been able to source a 50mm fan that has a higher flow rate – more on this later.
Having tuned the heater, I tried heating the hot end and the first thing I noticed was that it heated up very quickly (nice) but overshot the set temperature and then oscillated quite a lot about the set point (not nice). It seemed that although the PID algorithm was trying its’ best, the heater was simply too powerful. I loaded filament into all 5 inputs and tried again but with the same results. At this point I sent an email to RepRap.me asking them why they thought that such a powerful heater was necessary but didn’t get a reply.
So I re-tuned the heater but this time I used 60% PWM, effectively reducing the power to 60%. This time I got more sensible results with a predicted maximum temperature of 350 deg C. I ran the printer like this for quite a while with no adverse effects. Some time later, I had to strip down the hot end to make a change to the mount, so I fitted a “standard” 40 Watt heater cartridge at the same time. I have done a lot of testing with this, even feeding 5 filaments using a mixing ratio of 0.20:0.20:0.20:0.20:0.20 (equal amounts of each) of PET-G at around 230 degrees C and at quite high speed and haven’t witnessed any significant drop in hot end temperature while doing so. My conclusion therefore is that a 40 Watt heater is perfectly adequate. I have a theory as to why RepRap.me think a more powerful heater but I’ll come to that later.
The next thing to note is that the 5 colour Diamond suffers from the same issue of not actively mixing the filaments, as the 3 colour version.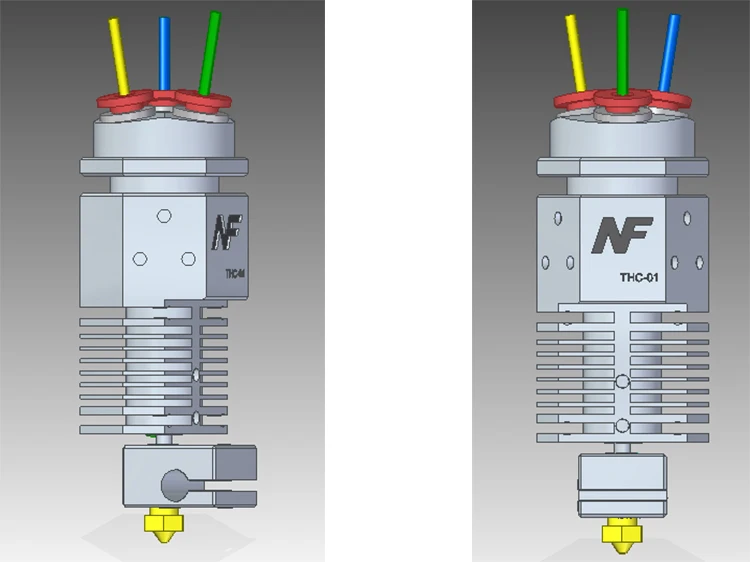 That is to say, what comes out of the nozzle is akin to stripey toothpaste. This was no real surprise to me because as far as I can tell, the only difference between the 5 colour and the 3 colour is that there are 5 inputs going into one, instead of 3 inputs. However, it should be noted that RepRap.me refer to it as a “Diamond Fullcolor” hot end rather than “5 colour”. To me, this implies that it will actively mix filaments to create other colours but in practice, the actual colour varies around the printed object because what comes out of the nozzle is biased towards each input. Here is an example
This is the same “Aria” by Loubie (https://www.thingiverse.com/thing:600550) that I printed in FilaPrint Premium solid PLA viewed from different sides. I did it by running a little script on the gcode file to vary the mixing ratio at each layer change. It started with White which it then mixed with Blue, then Blue with Yellow, Yellow with Red and finally Red with Black.
Just looking at the Green on the lower part of the body in the lower picture.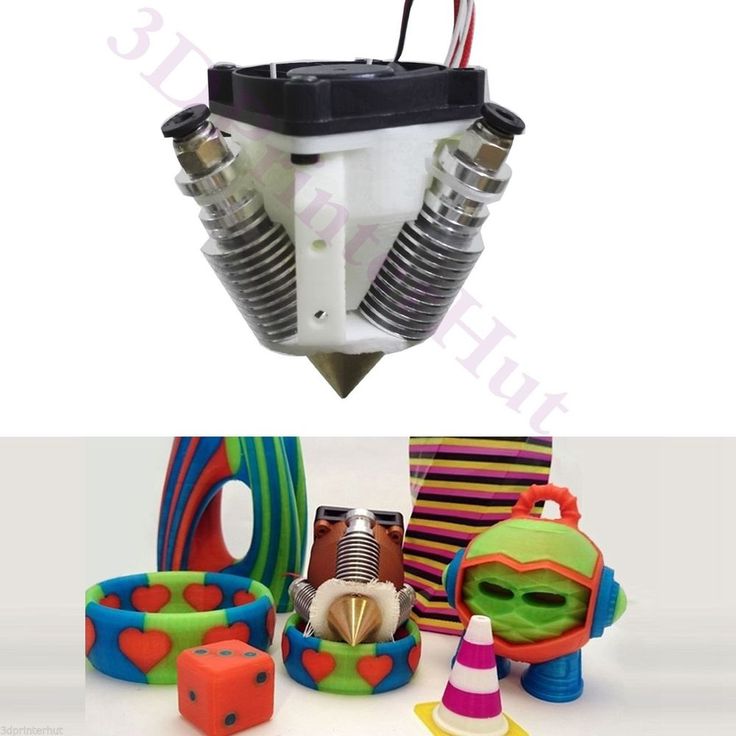 This was produced by mixing Blue with Yellow. Yet in the upper picture, there is very little Green but Yellow is much more prominent because that was the side where the Yellow filament entered the hot end. Arias’ face shows an even starker contrast with one side being Black and other Red.
This effect can be negated to a large extent by using transparent filament. So here is a scaled up version of Aria that I printed in transparent FilaPrint PET-G.
Here you can see that it appears the colours are much better mixed and look very similar from both sides. In fact, the filament still comes out of the nozzle as “stripey toothpaste” but because the bead is transparent, it doesn’t matter if one side of the bead is Blue and the other side is Yellow – it will still appear Green to the eye.
As an aside, there are other issues with the 5 colour Diamond which mean that this particular print was very difficult to produce and needed a somewhat “hands on” approach. This is covered at the end of this post.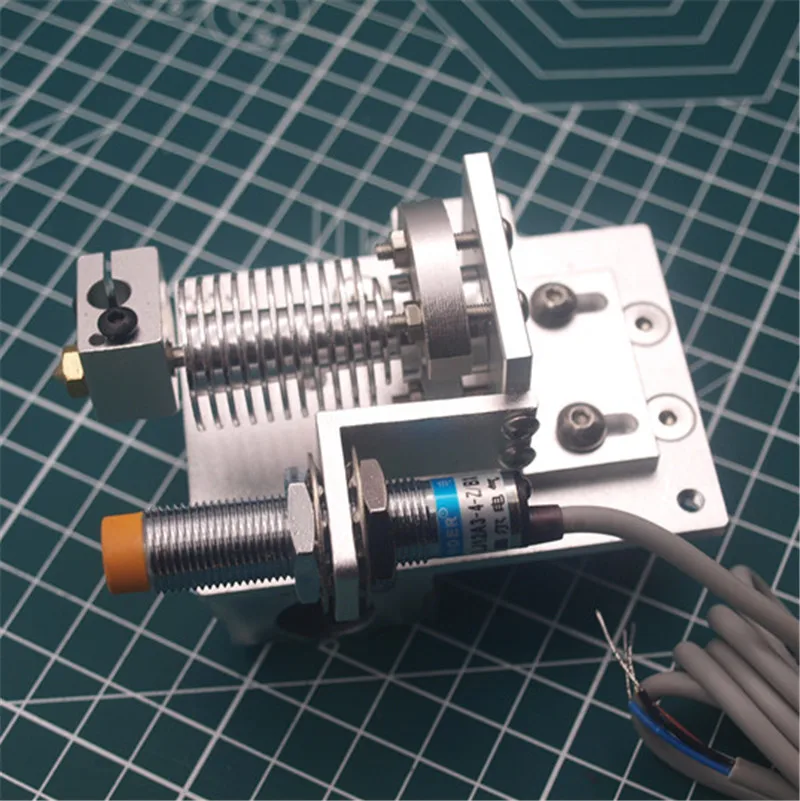
So, it seems to me that there is very little point in scouring filament suppliers to try and obtain Cyan, Magenta, Yellow, Black and White because they will not be actively mixed to produce other colours. Instead, I substituted Cyan with Blue and Magenta with Red because these colour are much more readily available.
Moving on, we come to the next little issue with mixing hot ends which is to do with the characteristics of PLA. As far as I know, this is undocumented elsewhere – at least I haven’t come across anything in my own research. It is common to the 3 colour Diamond as well as the 5 colour Diamond and will also affect any hot end that has filament loaded at print temperature but which may not be moving forward, including for example E3D’s Cyclops.
What happens is this. Once the filament reaches about 170 degrees C, it starts to become less and less viscous (more and more runny). I met a very nice and knowledgeable lady called Susan Woods (susi) from Rigid Ink at the TCT show and here is her explanation.
…………….”As you have noticed, PLA starts to degrade (hydrolyse) when kept at printing temperatures for more than a few minutes. Just to really cheer you up, this degradation starts at 175°C and accelerates the higher that the ‘holding temperature’ is set at.”…………
So what does this mean in practice? Well basically, if you mix PLA in anything other than 50:50 ratio, then one filament is likely to be more runny than the other unless you print at highish speed. The greater the difference in mixing ratio, the more prominent this will be. Another thing is that it is essential to use some sort of purge mechanism if you have a filament that has sat in the hot end for more than a few minutes. This is a blow to my attempts to try and print without purge by moving the tool change point forward in the gcode file. Although the script has now had all the bugs ironed out if it, what happens is that when switching between filaments, what is in the melt chamber will come out all at once as a single runny blob. Of course a purge mechanism doesn’t have to be a sacrificial tower. It can still be the infill but in that case it does mean that the infill itself my be weakened.
As an experiment I tried to print an object that was essentially a series of twisted cylinders set in a circle. There were 10 cylinders in total, 2 each of 5 colours with each pair of colours opposite each other. I didn’t use a purge tower. Instead I sliced the object with 3 perimeters, thinking that when changing from one colour to another, the purging would happen during the inner two perimeters so by the time the outer perimeter was laid down, the new “colour” would be flowing. My thinking was that each filament would be in the melt chamber for the same amount of time, so should have “hydrolysed” by the same amount. In which case, maybe varying the extrusion amount would compensate. Here is the result:
Unfortunately this hasn’t photographed well but if you look closely at the Red cylinder in the upper picture, you can see raised ridges with a slight trace of Black. This had me wondering for a while as it had occurred on all of the cylinders. Eventually, I realised that the pattern of ridges for each pair of cylinders was diametrically opposite, which is shown in the lower picture. That is to say, where there are raised ridges on one cylinder, the other cylinder on the opposite side of the circle has “valleys” and vice versa. You can see the effect better on the Yellow cylinders which have some bleeding from another colour although in this case, the ridges themselves aren’t as prominent. I finally figured out what was causing it. At each layer change, one colour is printed before moving on to the next colour so the cylinders were printed in pairs. But the order changes. First it prints (say) Black, then Red then Yellow then Blue then White. After which there is a layer change and it starts again only this time it continues with the White, then Black, then Red, then Yellow then Blue and as it has already done the White, there is a layer change. The next layer starts with the previous colour, in this case Blue.
 To further “scramble” things the next cylinder of the pair will be the one that is nearest the print head.
It transpires that the raised “ridges” coincide with which tower was printed first. So, for the first tower, the filament has sat in the hot end for a while and has hydrolysed so is more “runny”, leading to over extrusion and the raised ridges. By the time the second tower is printed, new filament has been pushed into the hot end so is more viscous and extrudes “normally”.
The cure for this is would be to always purge the filament before printing with a new colour. It is more about purging the new but hydrolysed PLA than it is about purging the old colour out. That is to say, the purge has to be enough to clear out the remains of the colour that has just been used plus whatever of the new colour has been sat in the melt chamber and hydrolysed.
The good news is that it still isn’t a huge amount of filament that has to be purged compared to other ways of printing multiple colours. Mr Prusas’ smart towers come to mind which use a massive (in my opinion) amount of filament. I did manage to produce this vase for the TCT show which prints with no separate purge tower. Basically I wrote another little script that goes through the gcode file and randomly assigns a tool (colour) to each layer. It was sliced with 3 perimeters and because it is larger than the cylinders I printed earlier, the inner perimeters lay down enough filament to purge out the old as well as the new but “hydrolysed” PLA.
At this point I just want to digress slightly. At the TCT show, the Duet stand was very close to E3D’s stand. One of the people from E3D saw this vase being printed and asked if he could have it or buy it for his wife and I was happy to donate it. Then another lady from E3D said that she wanted it, so I printed another for her. I was very flattered by that (printing objects to give to people who work for E3D). To top it all, a Swiss couple who were just looking around the show, also took a shine to the original that I had taken along.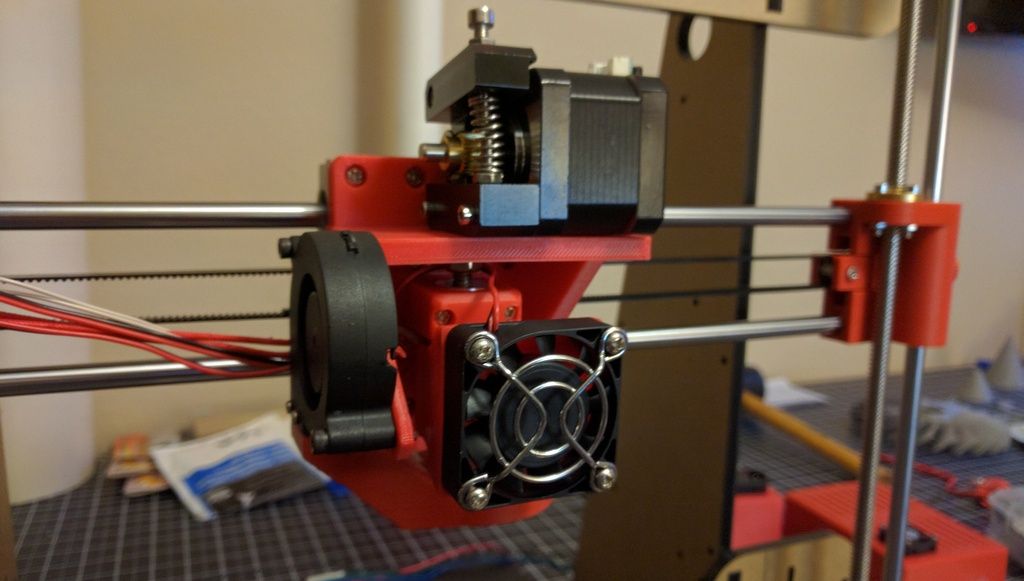 To cut a long story short, I gave them that one at the end of the show and received this response a day or two later by email.
Dear Mr. Pegg
My wife and I would like to thank you again for your generosity. We are really happy that we can exhibit your beautiful vase next year at the jubilee exhibition of Stamparia Strada, the historic printing museum I work for (www.stamparia.ch<http://www.stamparia.ch/>). In case you shall be in the Engadine valley next summer: Do not miss to have a look at your piece of art!
Kind regards
Ted Gut
So fame at last! Please excuse the digression but I’m really flattered and just had to mention it here.
Anyway, back on topic………..
After abandoning my tool advancing script I wrote another quick script to look for a tool change, then retract, move the head to the rear of the bed, un-retract, “draw a line” about 200mm long, retract, move back and resume. My longer term plan is to physically move the print bed back which will allow the print head to be in a position where it isn’t above the glass build platform. Then I can simple “squirt” some filament into a “bucket” to purge the hot end. My slicer of choice, for various reasons is Slic3r but it doesn’t do purge towers well.
With that purge mechanism, I was able to produce this:
Obviously, with something like this where there are 5 colour changes on every layer and it’s viewed from above, there is nowhere to hide any purging so it has to be done outside of the print. You can see the purge “lines” at the back of the bed so it illustrates how little filament is actually needed, even when the new filament is PLA which has hydrolysed.
Finally, there is one more thing I need to mention which is specific to the 5 colour Diamond hot end and it’s not good. When using PET-G I had big problems with what seemed partial blockages. To cut a long story short, the filament was swelling somewhere in the area of the heat break, to the diameter of the PTFE liner. It wasn’t a case of molten filament being drawn up above the heat break by too much retraction, and then solidifying. Rather it was just a swelling of the filament. I seem to be getting it with PLA too but it doesn’t cause a problem. I have a hunch that it is temperature related so anything below about 200 degrees is OK but above that , problems occur. With PET-G (which has to be printed at a higher temperature than PLA), this “slug” (about 6mm) of swollen filament binds inside the tube and it takes an awful lot of extruder tension to get it moving. Once that “slug” has gone into the hot end, the filament moves freely until it sits and soaks at print temperature for half an hour or more. The longer it sits there, the worse it becomes. To make matters worse, using a high extruder tension on my Titan extruders can simple grind the filament away. This is because with a mixing hot end, we have to retract all the filaments at the same time – not just the one(s) that is\are being used. So taking the large “Aria” for example, there are about 5,400 retract\un-retract cycles. This means that by the time the final colour comes into play, the same section of filament has probably be retracted and un-retracted about 4,000 times.
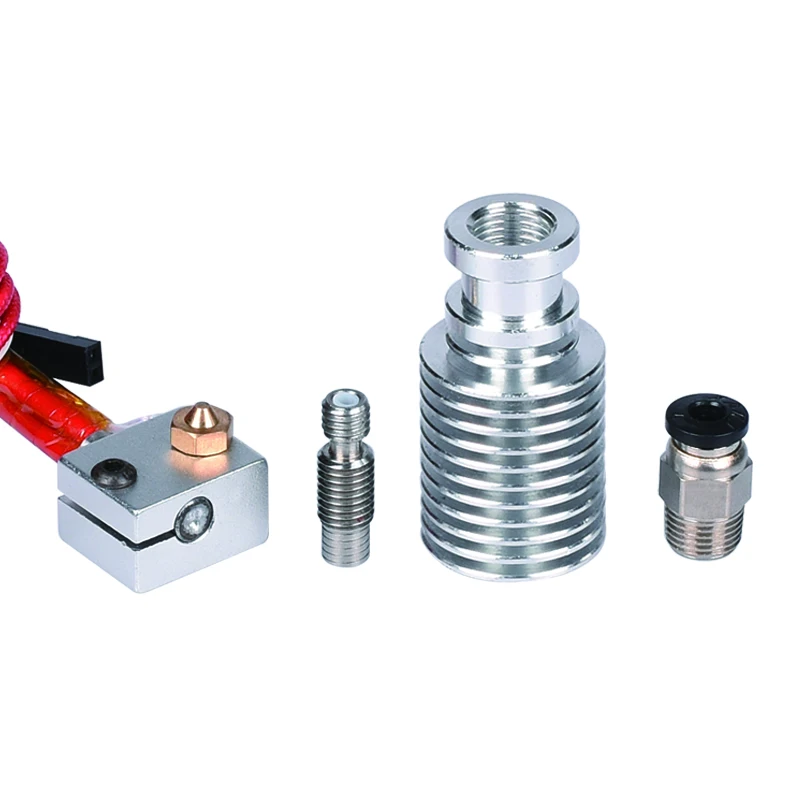 Bizarrely, PLA can withstand this sort of treatment as the hobbed bolt seems to cut small grooves in the filament which then acts like a rack and pinion. With PET-G, I found that the grooves got bigger and bigger and it just ground away the filament.
I mentioned earlier that to print the large Aria in PET-G required a “hands on” approach and this is why. Essentially I had to start with “normal” extruder tension when mixing the first two colours, then just before the next colour came into play, I had to increase the extruder tension on the “new” filament to overcome the partial blockage caused by the filament swelling inside the PTFE tube. Once the new filament was flowing freely and a few mm had been extruded, I could then back off the extruder tension and all would be well until the next filament came into play.
So it rather looks like the 5 colour suffers from “heat creep”. In fairness, it is possible that the issue is caused by the way I chose to install the hot end such that it is mounted between two parallel 2020 rails. Potentially this could restrict the flow of exhaust air as it exits the heat sink fins. On the other hand, the 3 colour version is mounted in exactly the same way and I don’t have any issues with that. So I’d be interested to hear if anyone else has experienced the same problem or otherwise.
My suspicion is that this is an inherent problem due to the design of the heat sinks. In order to fit 5 of them in the same circumference, the lower fins have been reduced in diameter compare to the 3 colour version. Here is a picture of the 5 colour to illustrate.
This next picture shows the 3 colour version for comparison.
You can see how much bigger the fins at the bottom of the 3 colour version are compared to the 5 colour version (the bottom being that part closes to the brass nozzle and not the way they are oriented in the pictures). This is likely to make the heat sink less efficient at conducting heat away and may explain why I have the problem with the filament swelling and jamming inside the tube.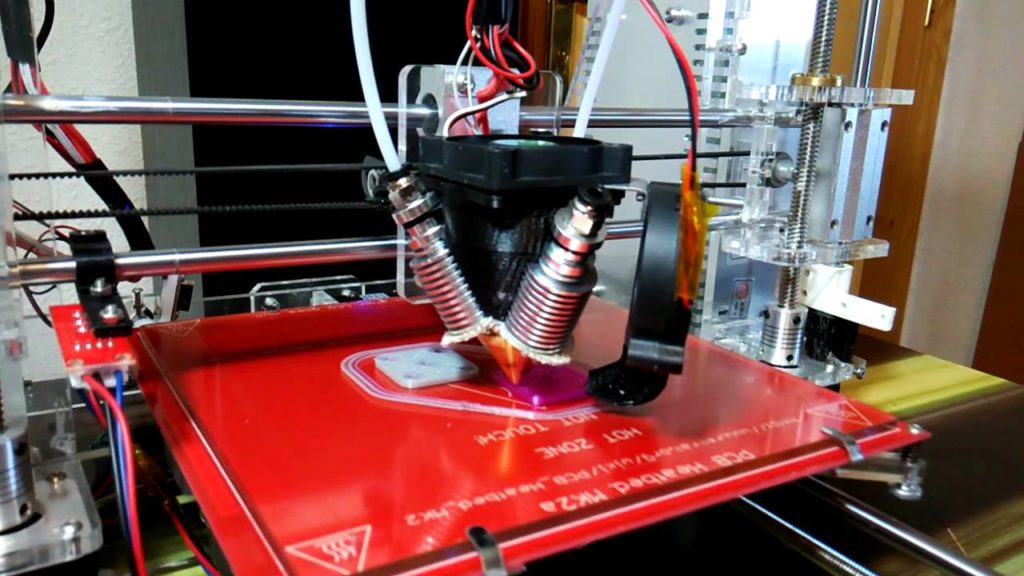
I did do a crude and not very scientific experiment to try and measure the temperature by putting a thermocouple between the lower two fins with the hot end heated to 200 deg C and the fan running as normal. With the 5 colour version, I was reading around 66 deg C but with the 3 colour version it was around 42 deg C. It wasn’t very scientific because I cannot be sure how much of the thermocouple was in contact with the fins in each case, so it may not be a valid comparison but such a big difference seems to add weight to my theory.
Furthermore, it brings me back to the first part of this post where I mention that a 60 or 80 watt heater is recommended but that I have found that a 40 Watt cartridge is more than adequate. I can’t help but think that the reason such a large heater is specified is that problems with filament jamming have been encountered, and without fully understanding the reason for that jamming, it has been thought that a 40 watt heater is under powered.
Of course, I could be completely wrong so my next step is to try and prove it and hopefully find a solution. So my plan is to get more air flow over the heat sink fins – especially the lower ones. I have mentioned that I cannot find a higher flow rate 50mm fan so I am redesigning the mount, fan ducts and shrouds in order to fit a 60mm fan. I have two on order. One is 50cfm and the other a whopping 80 cfm.
Once I have these parts, and a bit more time, I will test and report my findings by posting on this blog.
I hope there is something in all the above ramblings that may be of use or interest to readers.
Ian
Like this:
Like Loading...
Diamond Hot end - Too Hot? - 3D Printers - Talk Manufacturing
Nicademus
#1
Hiya all - New to the Forum, and about 6 months in 3D printing, but a Maker from Waaaaay back… Sorry slightly long post here…Thanks in advanced.
I just recently installed a Diamond Hotend on an Anet A8 - as a part of a build I am doing of a far larger scale Ultimaker clone. But printing something the other day, it finished the print then retracted the Z axis a few millimeters, then as a I turned away then back I noticed smoke and a whole lot of Melted Liquid filament run down the side of the print…and it appeared to be bubbling. Just wondering if anyone else has run into similar problems either with this style of print head, or others, and might have any suggestions to alleviate it
It was almost as though the 200 Degree print temp I had it set to had all of a sudden increased to far more than this and Burnt the PLA…
I noticed when pressing on what looked like melted candle wax down the side of the print after it cooled that pressing on it it was quite brittle, almost like Sap on a tree, as it appeared to have been Crystalised (presumably a resulting property of the cornstarch when burnt.)
What makes it hard to imagine that the Print head suddenly jumped to this higher temperature is that Octoprint showed the same temp through the print (with slight deviations of course.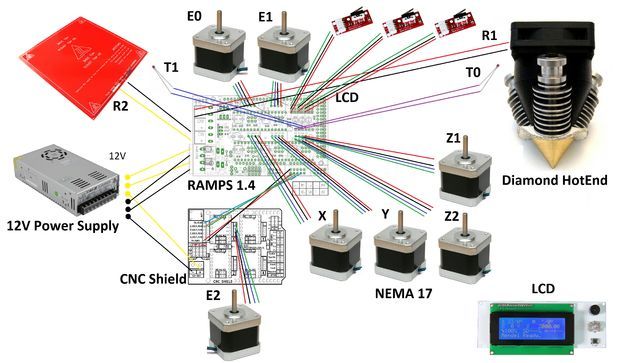 ) - then when the print was over it didn’t spike…But not only that, the Diamond Head takes far longer to “spool up” and if anything due to the good cooling I have in the venturi it actually cools down rather quick (hence why it takes so long to get to temp…)
I had a theory:
Maybe it is something like the location of the Temp sensor potentially getting a direct stream from the cooling fan through a gap, so showing a temp lower than what is at the Nozzle itself…and then when the print was finished and the Extruder retracted - the filament still in the final end of the nozzle heated to Liquid temperature due to also being stationary, but potentially cooling at the tip and within the “lava tubes” I call them in the DH, closer to the Cooled area in the venturis . Therefore building up pressure and eventually bursting out the tip where it was still not as cool as the top of the Head. Because that is what actually alerted me to look back at it, I heard a small fizzle sound, then saw the molten filament. It was just like a how Lava acts…
I wonder if I just need to either Lower my temp - I had noticed that this print was a little wonky, and the sides were not smoothy, but a little bumpy. The 2 changes I made compared to 2 previous prints were a higher temp by 10 degrees, and increased Filament feed rate from 95% to 105% as I saw with the previous print it looked a little under extruded…
I’m far less concerned if the prints don’t work, the biggest concern was just the Smoke and Molten aspect, which could definitely ruin my day in a hurry - Bad enough that I spent 40 minutes last night trying to find which Smoke Alarm in the house was beeping due to a flat battery…Last thing I want is to need to rely on them!!!
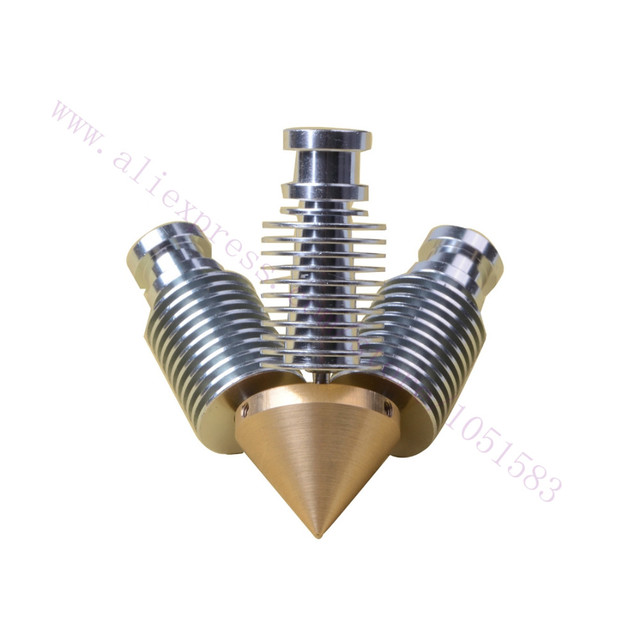
Free Shipping Diamond 3D Printer Hotend Multi Color Hot End 3 In 1 Out Extruder Prusa I3 Sprout Extruder 0.4mm/1.75mm 12V From Rs.
For most common 3D printers, it can usually only print one color; some are a little advanced, you can print two colors like our Prusa I3 Pro C model, some are more advanced which can print 2 mixed colors like our Prusa I3 Pro M201 model.
2 in 1 mixed color printing is a fun experience, but what about a 3 in 1 mixed color with great potential?
This 3-in-1 Hotend, as its name suggests, has three independent feed channels and has one outlet nozzle at the end of the three feed channels. This could be the next frontier in 3D printing.
Based on the principle of three primary colors, three filaments of different colors will be fed according to a certain percentage of feed rate, then they will be melted and mixed in the nozzle chamber to obtain another new color or mixed color, which can print a model with any color.
The main feature of this 3-in-1 Hotend is the diamond-shaped nozzle. We have designed the nozzle to have the smallest mixing chamber possible, in order to change color as quickly as possible and avoid unnecessary filament waste. To ensure that the nozzle heats up quickly, we have designed the nozzle as compact as possible.
This 3 in 1 from Hotend is designed for use with Kossel or Rostock printers. If you want to use it on a different printer, you will need to make changes to suit your project.
Main Features:
1. 3 in 1 of diamond boot support 3 strands of different colors and different materials.
2. Create prints with a wide range of colors and materials in one object, in one print.
3. Easily aligned nozzles make it easy to get started with multiple extrusion lines.
4. Absolute minimum size and weight that won't weigh down your printer or degrade print performance
5. All-metal, high-performance J-head with efficient heat dissipation for fantastic printing.
6. All-metal accessories that can withstand the higher temperatures involved in the printing process, so you can print with multiple filaments that require higher temperatures, such as ABS.
Tips. Different filament materials have different melting points. When printing with two different materials, choose those that have a similar melting point.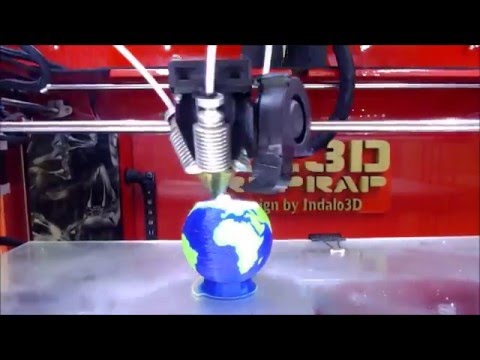
Specifications:
1. Filament quantity: 3
2. Filament material: PLA, ABS
3. Heater cartridge: 40W, 12V (default) / 24V; size: 6*15mm
4. Heater cartridge wire length: 700mm
5. Thermistor: 100K NTC
6. Thermistor wire length: 1m
7. Operating temperature: 190°-230°
8. Cooling fan: 40 x 40 x 10 mm
9. Fan voltage: 12V
10. Filament size: 1.75mm
11. Nozzle size: 0.4mm
12. Net weight: 175g
13. Shipping weight: 300g
3
one nozzle, but many colors and materials
Technician
If you think that we are talking about Picaso 3D products, then you are mistaken. We will talk about a new project on Kickstarter, where it is proposed to purchase The Diamond Hotend, which is essentially an add-on for a 3D printer that allows you to print with three different materials without changing spools, using multiple extruders (nozzles) and other dances with tambourine.
Comparison with the Russian Picaso PRO 250 3D printer What is the difference between this proposal and the invention of the well-known Picaso PRO 250 3D printer? Yes, almost everything! First of all, Picaso offers the possibility of two-color printing only with his printer, on Kickstarter you can buy this three-color add-on either in parts, or in a bq Prusa i3 KIT kit or with a completely ready bq Witbox printer. At the same time, the buyer can correlate his skill as an electronic engineer with financial capabilities and choose the best option for himself.
For example, the cost of a hotend is $30, the entire printhead together with the control board will cost $300, Prusa i3 with an upgrade - $800, and the same WitBox - $2500.
in which printing in two colors is realized using a quick change of two nozzles located on the same head. The fact is that no matter how hard you try, when printing through one nozzle, a mixture of plastics and border blurring will inevitably appear at the border of the color change, which, by the way, can be seen in the picture below.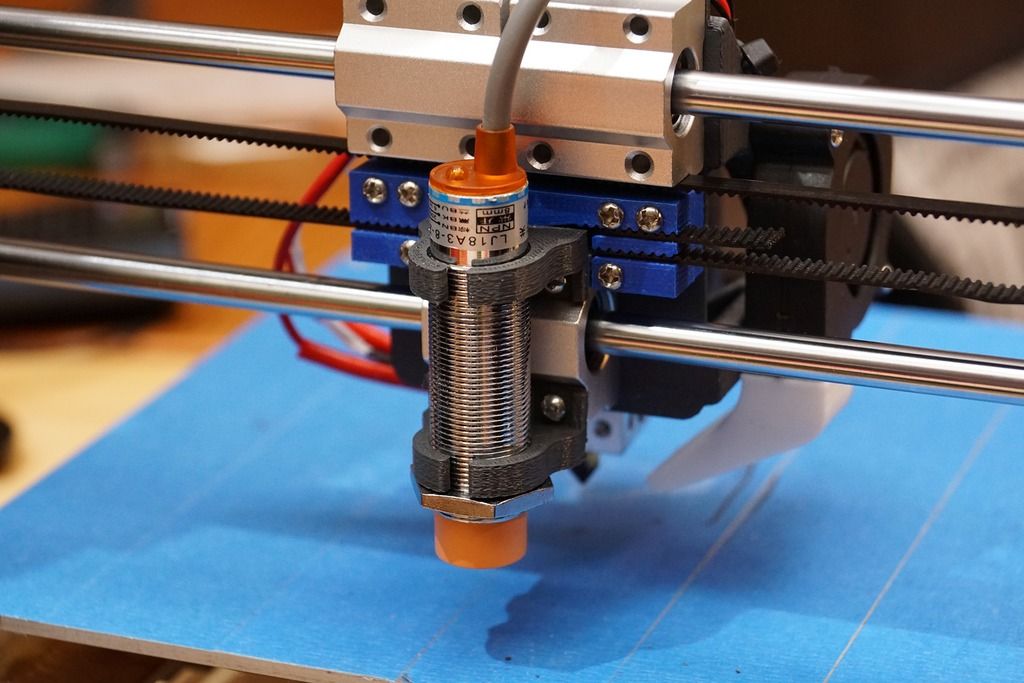
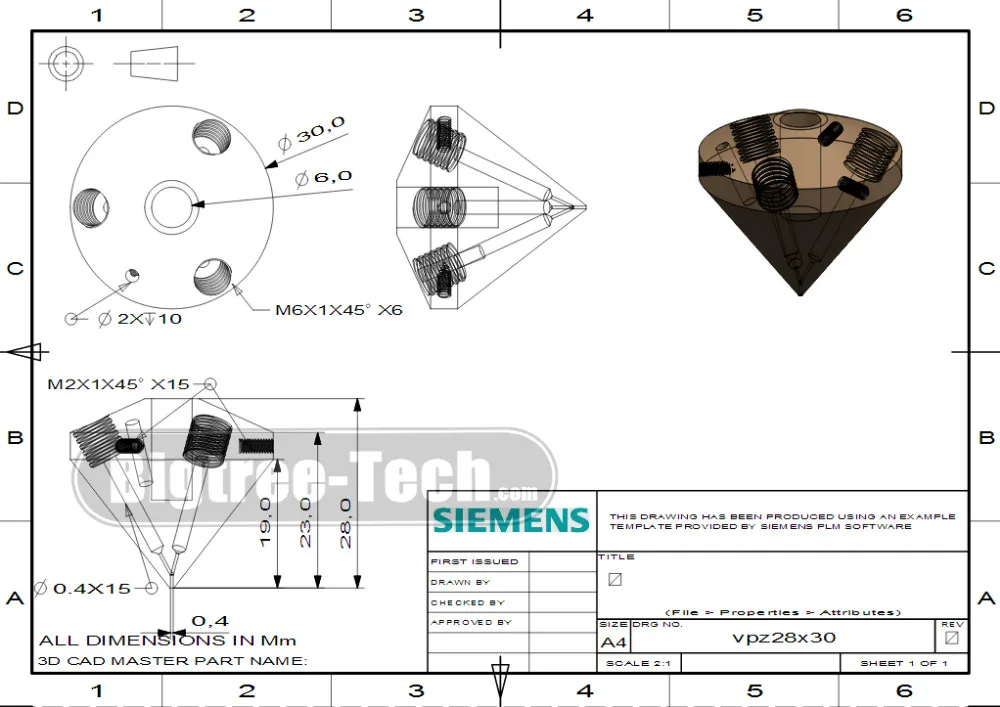
The Diamond Hotend: design and features
As you can see in the picture, the whole invention consists of the usual parts:
• 50 mm thick fan.
• It attaches to a 3D printed cover placed over E3D heatsinks.
• A thread must be fed inside them through a special channel to melt it in a heated hot end with a nozzle diameter of 0.4 mm.
The latter, by the way, is the main feature of the whole structure.
The key point of the hot end is its tip, or rather, the size of the inner chamber common to all three threads. After all, the smaller it is, the clearer will be the transition from one material to another. According to the developers, they managed to reduce its size to a minimum.
The inventors have tested the above device for compatibility with most different materials, in particular: PLA, ABS, HIPS, FLEX, and PETG. In all experiments, they got excellent results.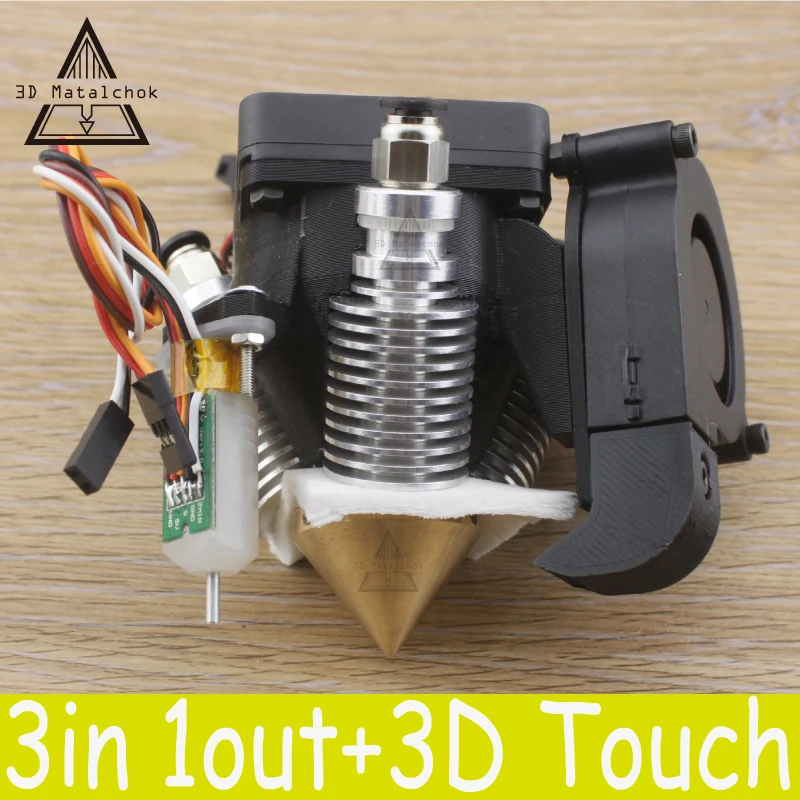 An example of the operation of the Prusa i3 printer with the Diamond Hot End can be seen in the video:
Follow the author
Follow
Don't want
11
More interesting articles
slylis
Loading
11/29/2022
2269
67
Subscribe to the author
Subscribe
Don't want
Greetings! The Chinese bearing crumbled in the midst of printing (8 hours of printing down the drain). K...
Read more
alexpr0
Loading
08.12.2022
350
2
Subscribe to the author
Subscribe
Don't want
Modification Creality Filament Dry Box (Part 1)Description
Inexpensive box for warming.