3D printer alternatives
Not only FDM: Other Types of 3D Printing
ALA > Tools, Publications & Resources > Not only FDM: Other Types of 3D Printing
By Jason Griffey |
Editor's Note: This is the fourth of a series of posts excerpted from Jason Griffey's Library Technology Report "3D Printers for Libraries."
As noted in earlier posts in the series, FDM (fused depostion modeling) printing is by far the most common inexpensive method of 3D printing. In this post, we’ll look at alternatives.
Stereolithography
We are starting to see stereolithography (SLA) printing move downmarket into the affordable-for-libraries zone. I’m aware of a couple of libraries that have already purchased stereolithography printers.
SLA involves a light-sensitive resin and lasers. Liquid resin is contained in the body of the printer, with a build plate that moves up and down inside the resin. The resin solidifies when exposed to a specific wavelength of light, usually in the UV spectrum, and the printer has a laser or lasers tuned to that specific wavelength. The build plate starts near the top of the resin, and the lasers sweep across, solidifying the resin in the appropriate areas. The build plate then lowers, and the lasers repeat their sweep, building layer after layer, one after the other as the object is built. You can also have this process occur upside down, as in the FormLabs Form 1 printer, where the build plate is actually above the resin, and as layers are added it pulls the completed layer out of the resin.
SLA printing has several advantages over FDM. Because the print is always encased in liquid resin during the process, it is much more forgiving as to geometry of design. Not completely-- there still has to be some connection to the base layer. You couldn’t print a “floating” horizontal piece, for instance. But in general, the resin provides substantially more support for designs than those available from FDM printers. The other major advantage is that the detail level is limited by the crystallization of the liquid and the size of the lasers, which means that you can have very fine details in an SLA print. It’s possible to achieve .025mm (25 microns) layer heights with SLA prints.
Stereolithography printing has its limitations. The first is that the resin is only available in a very limited number of colors, generally a clear or translucent material and white. When compared to the rainbow of colors available for FDM printing with ABS or PLA, it feels limiting. The second, and far more worrisome, is that most vendors of this type of printer manufacture their own resin. The printers are designed to tune the wavelength of the lasers to the specific resin they sell, thus making it very difficult for anyone to compete with them on consumables for the printer. This would be the equivalent of buying a printer from HP, and having to then buy paper and toner from them as well in order to use the printer.
Small SLA printers are just beginning to hit the market, available in the $2,500-3,500 range. The consumable for printing, the photosensitive resin, is more expensive than filament for FDM printing as well. The most popular of consumer-grade SLA printers, the FormLabs Form 1, has resin that sells for $149 per liter.
Selective Laser Sintering
Simultaneously the most flexible and the most expensive type of 3D printing commonly used, selective laser sintering (SLS) printing is similar to stereolithography in that it uses lasers to solidify a loose substrate. In SLS printing, the printing substrate is a powder, and the printers use high-energy lasers, rather than UV. The high-energy lasers selectively fuse sections of a powder together, a new layer of powder is deposited on top of the sintered layer as the entire print bed drops, and the lasers do another pass, fusing the single-layer of powder to the already solid layer below. Thus prints are completed layer by layer, exactly as in the other printing technologies that we covered, except the end product is a solid object that’s been drawn by lasers, encased in all of the powder that wasn’t fused.
This method provides total support for the print in question, so nearly any imaginable geometry can be printed using SLS printing. It is also possible to use any material for SLS that is capable of being powdered and fused with heat, including thermoplastics, covered in my previous post, as well as steel, aluminum, titanium, and other metals and alloys. Prints produced in this way are very nearly as strong as solid-cast parts, which means that it’s possible to 3D print mechanical parts that are directly usable in engineering projects via SLS printing.
Layer height and resolution in SLS printing is completely determined by the resolution of the powder being fused, but is typically on par with SLA printing, averaging around .1mm layer heights. Another similar technology is electron beam melting (EBM) that uses high energy electron beams to melt powdered metals in order to produce 3D objects. The use of electron beams allows for even higher precision than lasers, allowing for up to . 05mm layer heights, which is nearly unheard of by any other method.
Laminated Object Manufacturing
The last specific type of 3D printing that I’ll describe is, in my opinion, particularly clever. Laminated Object Manufacturing takes thin materials like paper or plastic sheets, cuts them to a specific shape, and then uses adhesive to glue one layer to the next. The most well known of these types of printers is manufactured by a company called MCor Technologies. Their printer uses normal, ordinary copy paper as its substrate, cutting one sheet at a time into the appropriate shape for the given layer, and then using paper glue to laminate the individual layers together. The high-end model of the MCor printer includes a full-color inkjet printhead inside, to allow for full color 3D prints to be created from very inexpensive raw materials; literally paper, ink, and glue.
Other 3D Printing Types
Numerous other 3D printing technologies are available, many that are patented and limited to a single company.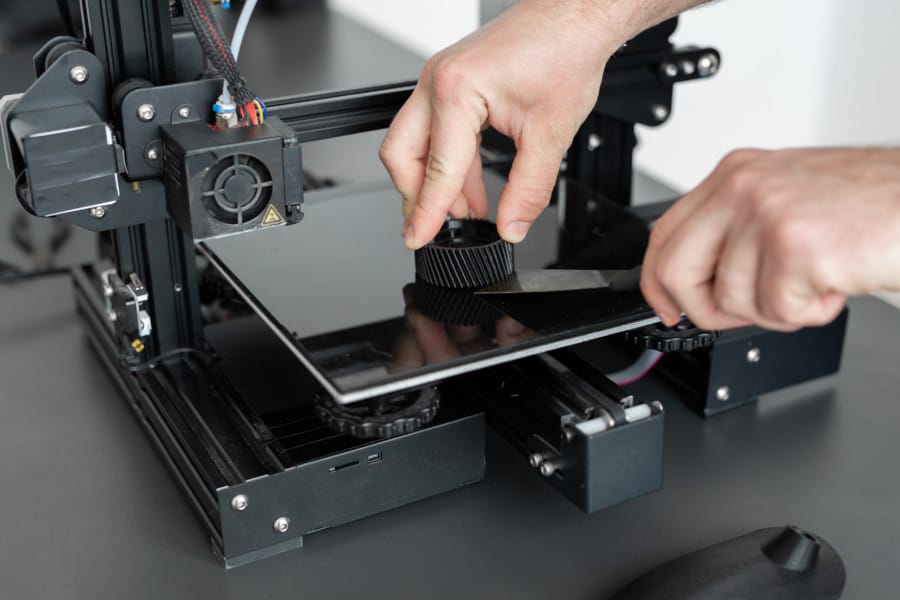 For example, 3D Systems uses a type of 3D printing methodology that they call Color-Jet Printing (CJP) that uses two different materials that are combined using a sort of high-end inkjet printer in order to create the solid end-product. This patented process allows them to print in materials like food-grade ceramic. 3D Systems also makes a 3D printer that is capable of printing in sugar, called the ChefJet, and the high-end model, the ChefJet Pro can print edible 3D models in full color.
The Top Eight Alternative 3D Printer Filament
Published on August 14, 2020 by Michelle J.
As 3D printing is becoming more and more wide spread, various FDM machines are being produced to accomodate the needs of manufacturers and customers. For these machines there are the “standard” plastics such as pure ABS, PLA and PET. However, it is also possible to have an alternative 3D printer filament. A lot of these are hybrid materials. This time we have collected a list of some of the most interesting and fun alternative 3D printer filaments. We have previously made a list collecting the craziest materials used for 3D printing. However, this ranking is focused on filaments to provide you an alternative to the more standard ones.
1. Coffee 3D printer filament
Let’s start our list of alternative 3D printer filament out with a refreshing cup of coffee, or coffee grounds that is. As Coffee grounds have found its way into textile manufacturing as a sustainable way of reusing a waste material. So have it been repurposed for alternative 3D printer filament. The waste, or byproduct if you will, from the coffee produced is mix in with a traditional plastic such as PLA as its base polymer, creating a filament from it.
One company that has worked on this is 3Dfuel with their Wound Up™. They have created a series called c3composites focused bio-based products. The filament shows as a brown colour and noticeable natural grains to provide textures. In this context it can be used by any machine that can use PLA leaving the uses of it open to the same possibilities as well.
2. Conductive PLA or ABS
Keeping it simple this filament is a 3D material with conductive carbon particulates included into it. It basically means that the material has the feature creating prints with low-voltage electrical circuits, often including sensors and LED lights. One company creating this filament as PLA is Proto-pasta with the purpose of expanding the usage of 3D printing. The filament can be combined with regular PLA material through a dual extrusion 3D printer. Simple circuit boards can be made directly in the printer. The fact that it is possible to get both PLA and ABS makes it more personalised to what you prefer to work with.
3. Sandstone 3D filament
From here we will add to the alternative 3D printing filament with a robust looking filament – sandstone. This kind of filament is basically made up of PLA with Brick mixed into it, it can be in form of a fine chalk powder or similar to provide a stone-like colour and texture to it.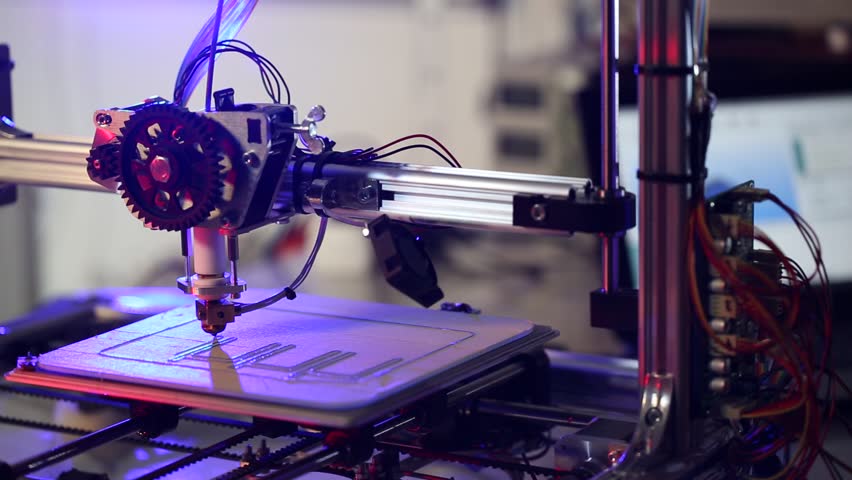 One of the best-known producers right now is the LayBrick brand. The general look can vary depending on the settings of the machine used, and can go from smooth to rough and anything in between. The material has only few limits, but, is still mostly used in a niche market pointed towards landscaping and architecture because of the nature of the material.
4. Hemp 3D printer filament
Although hemp and weed are a debatable topic, legalizations are being passed in countries all around the world; so, it is only natural to see it being used in 3D printing too. Hemp fibre is based on fine particles and is mixed with a PLA polymer base. Due to the natural abilities of the material, it has a number of positive attributes. When talking about hemp 3D printer filament, there are multiple brands on the market. One of the most recognized is 3Dfuel, which in collaboration with C2renew, launched its interlaced filament. It contains visible bio-fill that creates a unique texture. The filament is a biodegradable plastic that can be recycled or composted after use, making it a sustainable material.
5. Magnetic PLA
As it is stated through the name this alternative 3D printer filament has magnetic properties to play around with. It is often done through the use of iron powder being mixed into the PLA filament. This creates the unique trade for the filament. Proto-pasta is a main producer of the material. Simply put, the iron particles provides the material with the magnetic attributes as well as gives the 3D printed parts a grainy and gunmetal-ish finish.
6. Wood 3D printer filament
Now we’ll once again look towards nature with wood based filaments. These are often made up of recycled wood but can range from cork that otherwise have 80% of its use going to wine bottle corks, bamboo a plant of fast growth and dry stems, wood dust and much more. The wood fibres can be mixed in with various bases such as PLA/PHA and more as a hybrid filament. Companies such as the Dutch Colorfabb and American Hobbyking have seen the opportunity to jump in and sell various versions providing a natural looking material. They look and more or less smell like actual wood, giving a great finishing for the filament when printed well. It can be used for a variety of things. Ranging from décor, tables, figurines and anything else you can think of in need of a wooden look and feel to it.
7. Fluorescent 3D printer filament
As the name implies, this alternative 3D printing filament glows in the dark. However, it cannot do so indefinitely without help. The 3D printed object needs exposure to light for the source to recharge. From there, it will light up in whatever colour you have choosen to make the 3D print in. Companies such as Glow and Spoolery are behind producing various versions both in ABS and PLA. It is a safe product and environmentally-friendly, making it harmless and opens up for a wide audience to use it. It is therefore also a great way to decorate things like kids’ bedrooms, used for Halloween or similar situations in need of creativity. However, it is an abrasive material. Meaning it will quickly wear out the 3D printer’s nozzles, in particular when made of brass. A hardened steel nozzle holds out best when printing with this filament.
8. Biodegradable filaments
We will end the list of alternative 3D printing filament with a more ethical input. This category is rather unique, as the main value does not lie with physical attributes. Instead, as the name suggests, the value is in the biodegradable aspect. When you 3D print, the final outcome is not always in the quality one would wish for, leading to a ton of plastic being thrown away. This is where biodegradable filaments come in, as a way to counteract the environmental impact from 3D printing. One of the most popular biodegradable filaments is PLA made from sources such as sugar canes or corn starch etc. But there are brands that have developed different filaments so that they can be biodegradable. This is the case of the French company Kimya, with its OWA series that recycles 2D printer toners. It even offers the possibility of recovering the waste from your machine to recycle it again. There is also the company Biome3D with its line of BioFila filaments, whose main goal is to recycle your plastic waste. Although these materials do not offer a great variation in terms of strength or flexibility, they are certainly an option to start with in 3D printing.
Recycled and recyclable filaments.
Do you know of any other alternative 3D printer filament worth checking out? Drop a comment below or on our Facebook and Twitter page. And don’t forget to sign up to our free weekly Newsletter to keep updated on all the latest news in the 3D industry coming straight to your inbox!
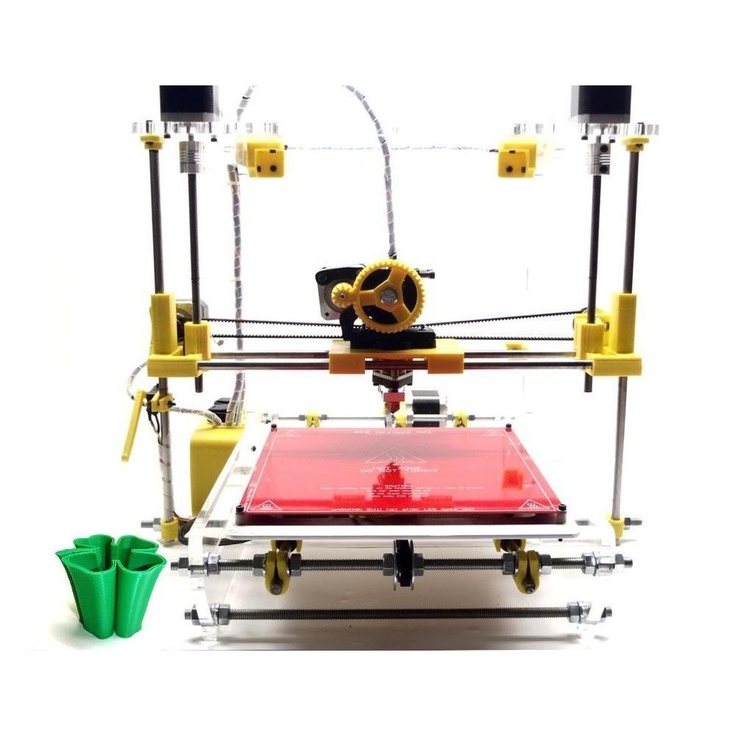
JG Maker is a worthy alternative to inexpensive 3D printers for beginners / Sudo Null IT News Everyone determines their own budget for themselves, and then the search begins for this cost of the printer, reviews are read, communities are considered ... As a result, the cheapest ones become the most common, as the threshold for entering 3D printing decreases from year to year. And if at the dawn of 3D printers they were assembled by enthusiasts from improvised spare parts, then acrylic constructors appeared, and then kits using extruded aluminum profiles began to appear en masse.
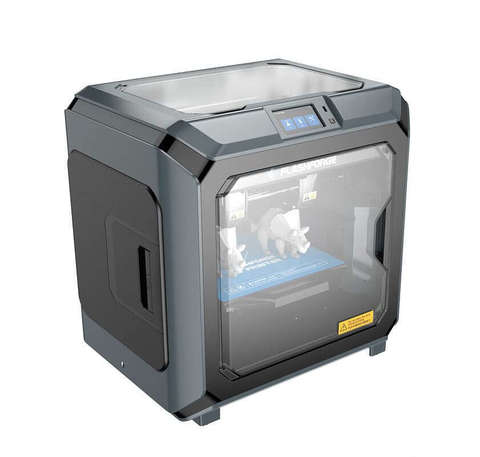
One of these printers is JG-maker from a fairly well-known company, which was one of the first to start production and sale of kits for assembling 3D printers.
I will not hide, the printer was provided for review, but I will try to tell everything honestly about it. From the moment I was offered to test it and before the courier delivered it to me, 4 days passed. This means that the printers are already in stock in Moscow and, if desired, they can be received faster than waiting from a warehouse in China. But, in practice, this slightly increases the cost. To whom it is critical, look from which warehouse the delivery takes place.
The printer arrives in this branded box. She, as I mentioned above, was brought by the courier home and handed over personally.
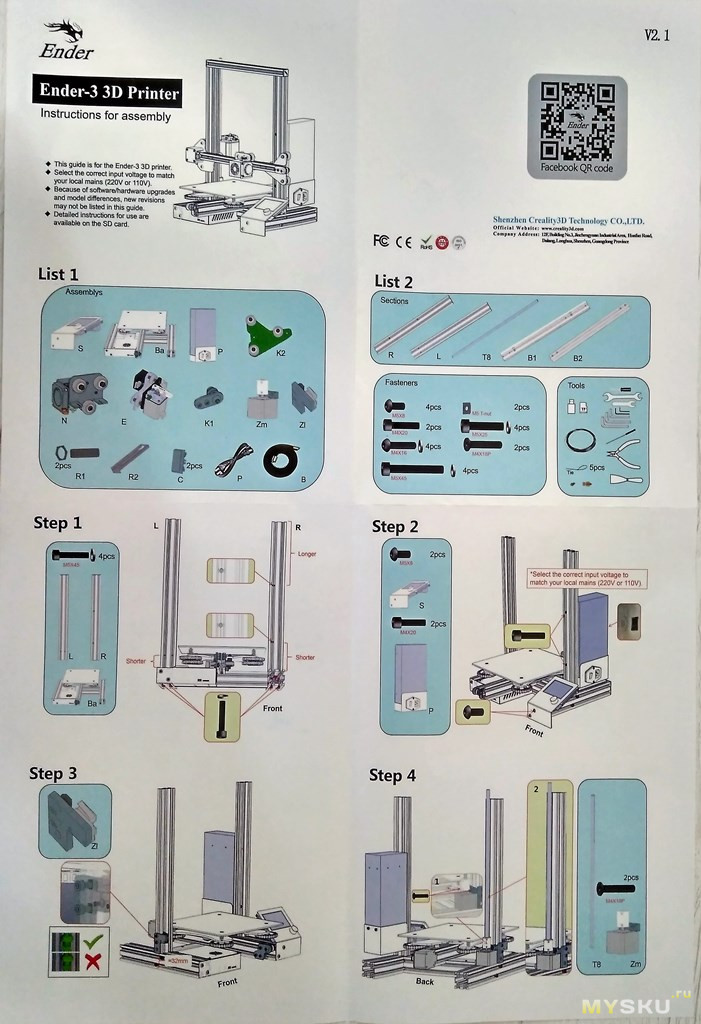
We open the package and see the instructions and a bag with various useful little things.
The instruction manual is duplicated from English into Russian. But the assembly instructions also have two languages, but one is Chinese and the other is English.
Thankfully everything is illustrated step by step. Yes, and collecting here is not particularly difficult. Slowly for an hour, you can easily meet.
The following was found in a small package:
- Cable for connecting the printer to a computer or flashing the board. The board, by the way, is still based on Arduino. The solution is time-tested and very reliable, but many are already switching to 32 bits, although this again affects the cost.
- PLA Probe
- Several bags of screws
- Z-axis end cap
- Filament Sensor
- X-axis belt tensioner
- X-axis belt
- Set of keys and hexagons
- Palette knife (now put instead of a spatula)
- Card reader with 8 GB memory card inside
- And spare parts in the form of ties, nozzles, fittings and other hardware
Further, on the top cover of the inner package there is an inscription that it is better to look at the instructions on the memory card before assembling. The manual is actually there, it is in PDF format. But paper is more than enough.
Actually, here are the main parts of the printer.
The movable table, control board and cables connecting it to the main components are one large module in a steel case. It is necessary to fasten the guides of the X and Z axes to it, as well as the holder for the coil, which is also made of metal. Everything is very reliable.
One of the main elements of any printer is its print head, where the hot end with the cooling system and the airflow of the printed area are located.
The extruder here is quite simple and unpretentious. This is one of the latest models of budget extruders with improvements that allow you to print with relatively soft plastics. For very soft plastics, such an extruder is not suitable. If the task is to print with soft TPU, TPE or Flex plastics, the extruder will need to be replaced.
The table has an additional layer with a rough coating, to which all plastics stick well. This coating was not glued directly to the surface of the table, but was glued to a thin textolite, which makes it easy to remove large printouts. It is enough just to remove and bend the table so that the part peels off.
One of the main elements of interaction with the printer is the card reader. It is designed for a standard SD card. Inside there is a spring-loaded latch. To remove the card, you need to click on it.
Power socket with internal fuse. There is a 230-110V switch on the power supply. The connector was sealed with a warning sticker so that you definitely do not forget to check in which position the switch is. Although maybe the sticker should have been nearby. But the case is covered with powder dye, to which stickers do not adhere well. I tried to re-glue this one, but it fell off by itself after a few minutes.
I noticed a nice nuance - a PTFE tube flared inside. This solution allows the bar to easily enter the tube without getting stuck and easily enter the hot end. Nice little thing.
The table, also known as the Y axis, moves along cylindrical guides - shafts. The shafts are fixed with metal clamps. The belt spool is in a plastic cradle. But the plastic is molded by molding and should last a long time, there are no complaints about this knot.
Before starting the review, I looked at what the previous owners and bloggers had to say about the printer. The main claim was to the table. Since the wires were not fixed in any way + the table had a regular connector. As a result, the wires either broke from constant movement or there was a bad contact in the connector, and it burned. This model already has a modification of this node and, as can be seen above, the wires are not only fixed, but also securely soldered.
Under the hood of the printer is the control board and power supply. Well, the block, as usual, from the LED strip. But high-quality, with active cooling. But the board seems to be its own design from JG Aurora.
In principle, this is a fairly simple board with inexpensive drivers. These drivers aren't the quietest, but the printer doesn't make much noise. In addition, they do not heat up so much, which allows them to be used without radiators at all. But, if you have a desire to replace the drivers with fashionable 2208, then you will have to change the control board at the same time. The price of the printer affects, let me remind you that it is in the most affordable niche.
We assemble the Z and X axes. To do this, unpack the aluminum rails.
First, screw the Z-axis motor and limit switch. The end cap doesn't need to be over tightened. After assembling the printer, it will need to be moved a little more.
We screw 2 vertical guides ...
And proceed to the assembly of the X axis. There is a feature here, you need to correctly position the elements relative to the guide, in accordance with the recesses. There are different distances from the edges to them.
Next, tighten the belt.
After fixing the belt in the “head” clamps, you need to adjust its tension. The belt should not be stretched like a string, but at the same time it should not sag. The roller on the left is responsible for the tension. It is necessary to loosen its clamp, insert something between the roller and the frame, slightly tighten and tighten the screws.
Next, place the X axis on the vertical guides.
It turns out like this.
At this point, you can already adjust the Z-axis stop. I advise you to tighten the slightly spring-loaded table screws and then adjust the stop so that the nozzle just barely touches the table. Then, by releasing the screws, it will be possible to easily adjust the gap of the first layer.
We screw the upper rod.
And install the decorative element on top. In addition to beauty, it also protects the upper groove of the profile from dust. It is not very convenient to wipe it there, and with such a cap it will be a little easier to keep the printer clean.
We insert the trapezoidal screw into the nut on the X axis.
And fix it in the clamp on the stepper motor. Next, we screw the motor with the extruder and the bar presence sensor.
We insert the signed connectors into the desired slots. We screw the holder for the coil and the printer is completely assembled.
Next, you need to adjust the table gap. To do this, we put the head in turn in each corner of the table and adjust the height of the gap with the lamb under the table. Here, as usual, you need to place a piece of paper between the nozzle and the table and clamp it until it moves with little friction. It is better to repeat the procedure a couple of times in a circle at each corner. Since there are four screws, and the plane is easier to set when there are three of them. With four screws, it doesn't align perfectly the first time, as the diagonal screws offset each other a little, and by raising one edge, the other can drop a little. This is another non-critical minus. In principle, four screws are placed on the table in most printers. And in such printers with a moving table, the third screw will also be very difficult to adjust.
There is already a sliced file on the memory card. Through the G-code viewer we look at what is there. There is a test cube. He is on the raft. but the raft is not separable. In addition, for some reason it is cut with adaptive layers. Some are very thin, some are standard. But it prints fine. I did not use the test PLA, but immediately applied the proven PLA PRO. It has stable diameter and excellent quality.
Launching another model. And here it turns out that the holder is not very suitable for this type of coils. The coil is inserted very tightly there because of the high side on the edge of the holder. It is better not to risk it, otherwise you can not remove it later. I use a separate holder.
Prints smoothly and steadily. All without complaints.
After about 12 hours, we have a ready base for the brain puzzle.
There are slight irregularities in the layers in the direction of the Z axis. But, as for me, they are not very critical.
Next, in red again, print the puzzle pieces.
The puzzle is quite difficult to assemble. Well, the model has the opportunity to print the assembled version and it is already easier to assemble according to the sample.
After a couple of days, Yorick is ready. The puzzle pieces took about 16 hours to print on one half of the brain.
What is the result?
The printer turned out worthy for the money. In the initial segment of 3D printers, the choice has become wider, which is good. Everyone chooses for himself what he likes best.
This printer has the following specifications.
Printable area: 220x220x250 cm. The default nozzle is 0. 4 mm. Spare of the same diameter. The trapezoidal screw allows you to make a minimum step in height of 0.02 mm, I recommend cutting layers in the same multiple of this value.
The printer has an all metal body and 95% metal parts. All critical components are made of metal, this will increase the service life. Plastic parts to a minimum, but those that are made by casting in the factory. The printer is easy to assemble and ready to print within an hour of getting your hands on it. I put in an hour for assembly. Can be collected faster.
Minor cons: The spool holder does not fit some types of spools. Namely, under 750 grams from the FD-layer. The same spools are used for the welding rod... Here you need to either sharpen the holder or use a free-standing spool holder. You can also print your version. Another disadvantage, but not critical, I would include the absence of eccentrics on the guide wheels. True, on my other printer, I haven’t touched them for 2 years already and everything prints smoothly, without going astray. And here it is straight from the factory.
Replicators as an alternative to 3D printers - Technocrat's Blog
Stanislav Shulga | February 11, 2020 | News | No comments
The further, the more 3D printing becomes a common technology, but it turns out that there are already alternatives that you can be surprised at.
California scientists at the University of North Carolina have unveiled a 3D printer that creates an entire object at once, rather than building it layer by layer, as "typical" 3D printers do. They called the new printer a "replicator," as the Star Track device was called, which could materialize almost any inanimate object.
According to Joseph De Simone, a chemist at the University of North Carolina at Chapel Hill, the replicator is designed to quickly create small transparent parts. The device, described in Science at the end of January, works like a CT scan, only in reverse. In tomographs, an x-ray tube rotates around the patient, taking several images of the internal organs. The computer then uses the projections to create a 3D image.
Scientists at the University of North Carolina realized that this process could be reversed: given a computer model of a three-dimensional object, the researchers calculated how it would look from many different angles, and then fed the resulting two-dimensional images into a conventional slide projector. The projector cast the images into a cylindrical container filled with acrylate, a synthetic resin.
When the projector cycled through images that displayed all angles of the object in all 360 degrees, the container rotated to the appropriate angle. “As the volume rotates, the amount of light received by any point can be independently controlled. If the total amount exceeds a certain value, the liquid will become solid,” explains one of the developers, Hayden Taylor, of the process. This is because the chemical in the resin absorbs photons and once it reaches a certain threshold, the acrylate undergoes polymerization - the resin molecules join together in chains to form a hard plastic.