Rostock 3d printer review
Rostock Max v3 Review 2022
Is the Rostock Max v3 3D printer something for you? Considering buying it? Read what we discovered when we tested this 3D printer and see if it's for you!
By Justin Evans
3.9
See Price
So you’re in the market for a high-end 3D printer. The good news is that there’s a lot of options. The bad news is that there might actually be too many of them. Don’t worry – we’re here to help! We’ve decided to take a closer look at some of the most popular 3D printers on the market to see if they’re worth your time and money.
Today we’ll be examining the Rostock Max v3 – an unusually shaped filament printer with a lot to offer. We’ll identify any strengths or weaknesses it may have so you can tell if it’s suitable for your needs. Without further ado, let’s begin!
| Filament Diameter | 1. |
| Extruders | 1 |
| Supported Materials | ABS, PLA, Exotic |
| Connectivity | USB, SD Card |
| Printing Speed | 100mm/s |
| Build Volume | 10.8 x 15.7” |
Table of ContentsShow
Design
While most 3D printers are cubic in shape, the Max v3 is large and cylindrical. Its exceptional size allows users to create objects far larger than most mid-budget printers would allow so it’s a powerful choice for printing models that can’t be assembled from smaller parts.
Users can import models either directly from their PC or by transferring them via SD card. This is quite standard, but for a high-end printer, we’d really expect to see some kind of WiFi compatibility or even a dedicated mobile app. Still, the import is the least essential part of the process so this is only a tiny annoyance at worst.
On the plus side, both the hardware and software used are open-source. This means that you can print up a few replacement parts in case anything goes wrong, and guarantees you don’t have to pay for the software itself. Construction takes a long time, though, at around 20 hours.
Printing
This printer uses standard 1.75mm, 1lb filament spools. The materials you can use are fairly limited for such an expensive printer, but unless you’re making specialized display models, PLA and ABS will likely work just fine. At up to 100mm per second, the v3 is a little slower than most, but are the finished models worth the wait?
Absolutely. The Max v3 is capable of producing very high-quality objects, even from fairly complex models. Once properly configured, very little material is wasted, and you’ll find that it replicates finely detailed structures very well indeed. It does take a bit of trial and error to reach this point, though.
With a minimum layer size of 0.1mm, your prints look very professional, with nicely concealed seams. It’s worth mentioning that while exotic materials are supported, you’ll want to buy a metal nozzle for any fiber-imbued filaments since one isn’t included in the box.
Features
This printer features a small microcontroller, but this can be a little difficult to use. Instead, we recommend using the included copy of MatterControl – it’s fairly simple once you get the hang of it. We liked that there are four fans built-in, although some users have reported problems getting the printer started if the ambient room temperature is below 17°C.
One of this printer’s biggest strengths is its automatic bed-leveling feature. With a single click, you can remove much of the frustration associated with getting ready to print, leaving you free to focus on the fun part: actually generating the object you see on-screen.
We loved that there’s a lot of extra space both on the frame and electronic parts of this printer. This allows experienced users to tinker and expand its capabilities by adding their own mods, although if you’re a beginner, we’d obviously recommend familiarizing yourself with the base design first.
Cost
It costs around $1000 for a version of the Rostock Max v3 that you have to manually assemble. This is a long and difficult process, so you might want to spend an extra $500 and get a pre-made one instead. This removes the risk of damaging components during the construction process, something we’re all a little afraid of.
You aren’t limited to using proprietary filaments here, and both PLA and ABS are pretty affordable. This allows you to keep your costs down, even if you print every day. We’ve heard reports of the hot end burning out, but they usually last around 5km before this happens, and are fairly inexpensive to replace.
Ultimately, you’re trading a higher upfront cost for lower running and maintenance costs. This printer might be a little expensive for hobbyists, but it’s more or less perfectly priced for low-yield 3D printing companies.
Support
There’s a pretty good selection of customer support information on the SeeMeCNC website. You can contact the team for help by phone, email, or by submitting a ticket, and the customer service team works full-time during office hours so you should see a pretty speedy response to any queries.
There’s also a user forum where you can ask any general 3D printing questions. Interestingly, the company provides a curriculum or educators looking to introduce 3D printing into a learning environment. This is an unusual step, but one that we welcome wholeheartedly.
We like that there are download links for several popular printing applications, not just the one that comes with the printer. Additionally, there are some fairly in-depth tutorials, so all of the most common problems you’ll encounter can be solved as quickly as possible.
Summary
The Rostock Max v3 takes a lot of work to fully assemble, but once it’s all set up, it outperforms lower-budget 3D printers in almost every area. Its prints are of an exceptionally high quality, and you can mod it extensively to better fit your needs.
Sure, it’s not the fastest printer on the market, and we’d have preferred to see a wider range of supported filaments, but all things considered, we think the Max v3 is a strong choice for anyone looking to upgrade their existing low-end printer.
Wanhao Duplicator i3 Review
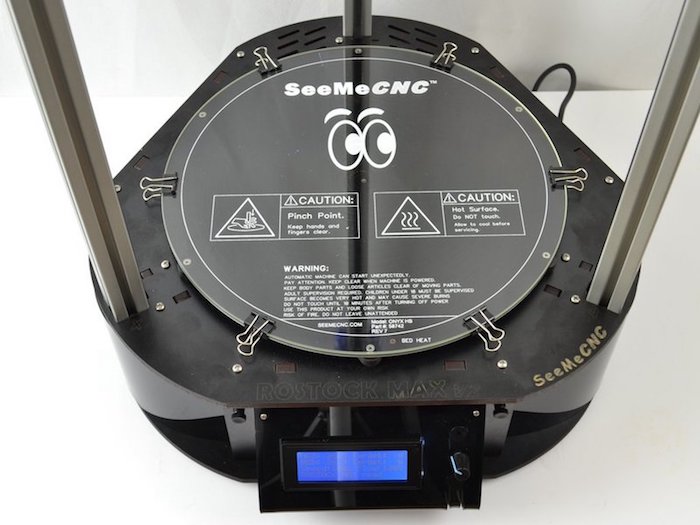
SeeMeCNC Rostock Max V2 3D Printer In-Depth Review
ADVERTISEMENT
8.5Expert Score
SeeMeCNC Rostock Max V2
Rostock Max V2 by SeeMeCNC is a 3D printer offering large print volume along with accurate printing. Based on FDM 3D printing, housing a Delta-type construction, the printer does take its own time to set up. But once that is done, it stays rigid for very long life.
Affordability
7
Quality
9
Speed
9
Capability
8
Practicality
9
User Expectations
10
PROS
- Huge build volume.
- Universal 3D printer.
- Lasercut frameworks and high-quality injection molded parts.
- Easily changeable nozzle.
- High torque generating NEMA motors.
- Fast print speeds.
- Borosilicate glass build plate.
CONS
- Assembling Rostock Max V2 is a pain in the ass, especially for beginners.
- With patience, users also need lots of parts to put the printer together.
If you are someone who does not mind putting in some extra effort when it comes to choosing the best value 3D printer, SeeMeCNC Rostock Max V2 is ...
Add to wishlistAdded to wishlistRemoved from wishlist 0
Add to compare
|
 75 mm 0.07 in
Table of Contents
Rostock Max V2 is a 3D printer that is suitable for all kinds of users, from beginners to experienced. If you are a first-time builder, the machine’s simple mechanism will be a major plus for you. Whereas, if you are a seasoned enthusiast, the printer’s large build volume will certainly please you.
Adding to its universality, Rostock Max V2 has a long list of mind-boggling features like Lasercut frameworks and high-quality injection molded parts. These features, as summed up by many others, work in constant coordination to generate dimensionally accurate prints.
Moreover, the printer is a version upgrade of Max V1. Therefore, the users will note certain upgrades and improvements not available with the predecessor. In case you are interested in buying Rostock Max V2, do not forget to check the detailed review of the 3D Printer.
ADVERTISEMENT
Features
Although there are upgrades in Max V2 compared to V1, SeeMeCNC hasn’t replaced the complete hardware.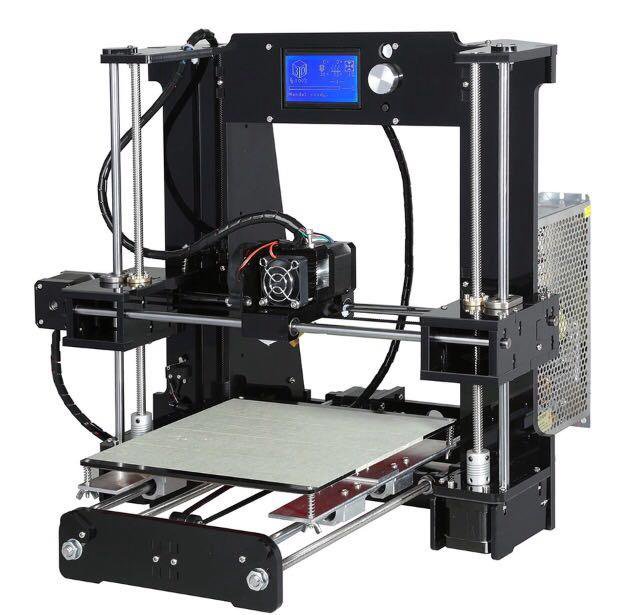 So overall, it’s a fusion of the already tested components with newer ones.
Worry-Free Assembly
To offer worry-free assembly, the manufacturer includes Delta arms and mounts. They enable fast movement of the nozzle system to the print bed and back.
Additionally, the rails attached to the printer’s support are worth appreciating. After all, a combined effort of all these components results in the production of excellent parts and functional prototypes.
Improved Hot End
Improving on their previous version, SeeMeCNC has equipped Rostock Max V2 with a redesigned hot-end platform. It’s capable of withstanding higher temperatures and for doing even more precise 3D printing. Also, the printer now allows printing with a greater number of materials than its predecessor.
Protected Electronics and ImprovedRrigidity
A new base enclosure protects Rostock Max V2’s electronic components from the dust and dirt layers. Such protection increases the components’ life. Which in turn leads to an increase in the printer’s overall life.
Moreover, it gives the complete kit a clean and attractive appearance. Another noteworthy aspect of the printer is its new top design!
Not only does this provide the machine more rigidity, but also leads to better prints, easier assembly, and calibration.
One of the chief concerns with Delta 3D printers is their vibration during the 3D printing process. Taking that into account, the printer manufacturer has equipped it with parts that increase solidity.
The improved print bed, top design, rails, mounts, and arms all contribute towards increasing the printer’s overall robustness.
ADVERTISEMENT
Huge Build Volume
Rostock Max V2 is capable of printing various geometrical parts in one go. Users can build nearly 1300 cubic inches of build volume utilizing the printer’s build space.
It enables building more than 10.5 inches of diameter and 15+ inches of height. Such a build volume is difficult to get with printers available in the same price range.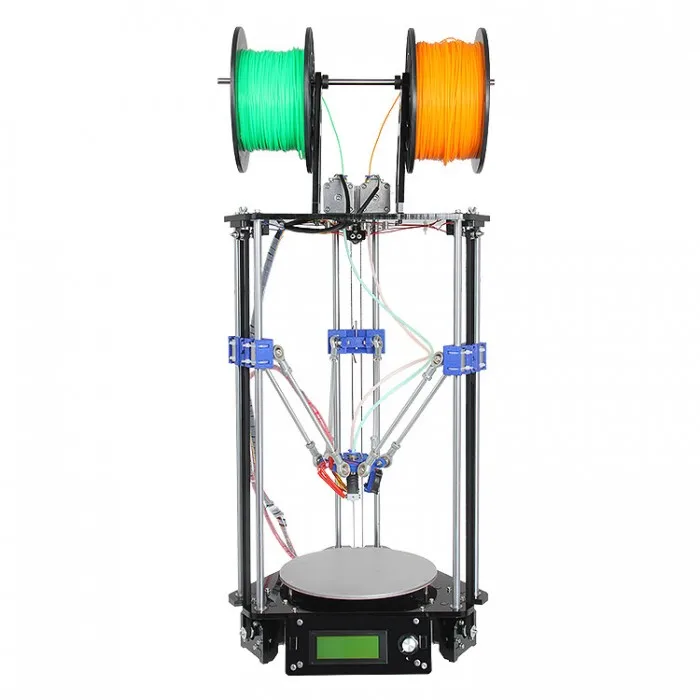
Reliable Components
SeeMeCNC manufactures Rostock Max V2 in the USA using parts of high quality. Each component that makes up the printer is laser cut, injection-molded, and CNC machined. These parts are well-known in the industry for producing accurate printing performances.
The printer’s EZ Struder and hot-end setup are responsible for melting 1.75 mm filaments, thereby starting the 3D printing process in an ideal way.
Users can easily change Robust Max V2’s standard 0.5 mm nozzle with other available sizes. So, managing various flow rates on the printer is efficiently possible.
The movement of the nozzle system on the rails is made possible by high torque generating NEMA 17 stepper motors.
Management of Robust Max V2’s electronics is taken care of by Rambo – the best available 3D printer controller by UltiMachine.
All of these are tinker-friendly electronics and hardware, meaning that they are changeable according to the need. Also, not to forget the base of the printer – Borosilicate glass build plate is an epitome for safety and precision.
ADVERTISEMENT
Specifications
Credit: vanhack.caSeeMeCNC Rostock Max V2 has an average printer size of 18 inches in diameter and is 48 inches tall. The printer weighs 25 pounds, meaning that the printer is transportable.
It has standard power requirements of 100 to 240 Volts AC, 350 Watts. Its shipping dimensions are 32 inches * 19 inches * 6 inches.
The maximum printable X/Y area on Rostock Max V2 is 11 inches in diameter, equivalent to 280 mm. Therefore its users can print sizes lower than it in one go.
The printer can create square-sized parts of 7.75 inches i.e. 197 mm with a height of 14.75 inches or 375 mm.
Rostock Max V2 offers a maximum resolution of 0.1 mm or 100 microns, 0.125 mm on the X/Y and Z axis of it, respectively.
For printing parts or functional prototypes on the printer, the user can run it on an average print speed range of around 30 to 60 millimeters per second.
To achieve its extraordinary print speed Rostock Max V2 needs an unmatched maximum movement speed of 300 millimeters per second.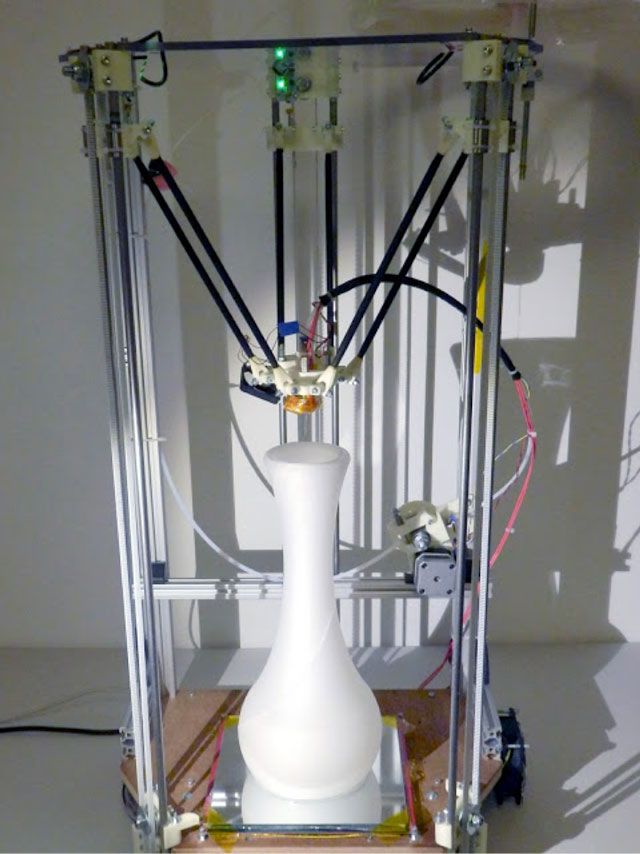
The maximum hotend temperature that Rostock Max V2 can withstand is 245 degrees Celsius. So, you’d be able to print parts having less glass transition than it.
Similarly, the printer’s heated bed can restrict temperatures up to 100 degrees Celsius. It also hosts a GCode-controlled part cooling fan.
ADVERTISEMENT
Price
SeeMeCNC Rostock Max V2 is available at a market price of $999.
First Impression
From the two most popular design styles of FDM 3D printers available in the market, Rostock Max V2 is Delta-type.
It’s the second most common kind of 3D printer after the Cartesian type. As you can notice, the complete arrangement of Max V2 is supporting the extruder with three arms making a triangle.
In such a construction type, each arm is capable of moving up and down vertically. Whereas, it’s fine to move any one of the three arms independently to move the extruder.
Typically Delta 3D printers like Rostock Max V2 are known to print at fast speeds that are hard to achieve with a Cartesian type 3D printer.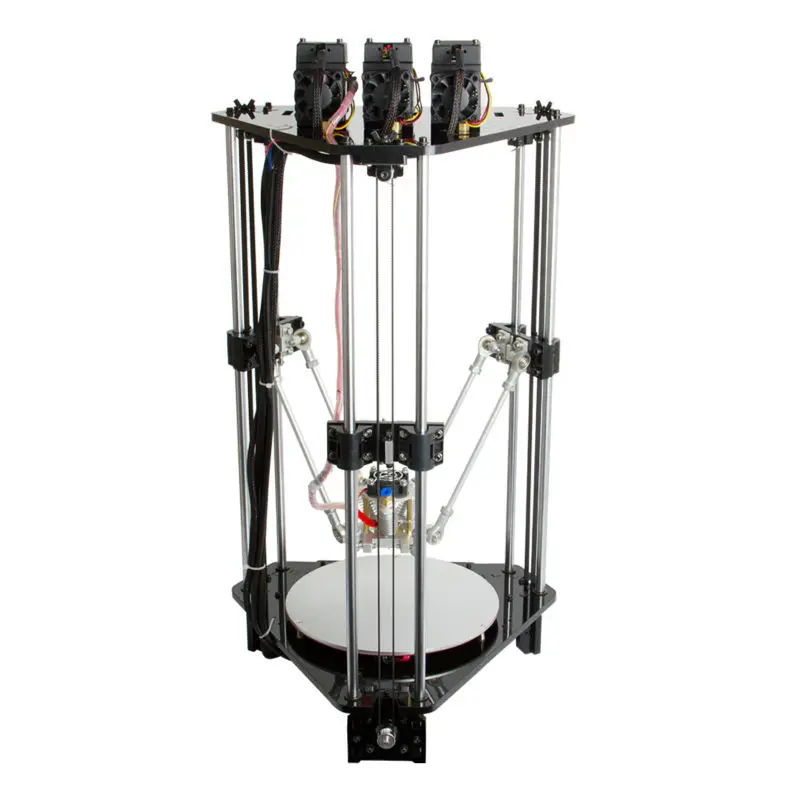
Moreover, they are equipped with heavy motors and extruders fixed on sides as well as the top. But, the tool head is kept very light and minimal, which lets the printer maintain high accuracy despite blazing speeds.
There is a display screen near the bottom of the Max V2’s body on which you can see notifications. The complete frame of the machine is transparent, thereby enabling monitoring of the entire 3D printing process.
ADVERTISEMENT
Setup
SeeMeCNC honestly mentions the time one may take to assemble Rostock Max V2. The printer manufacturer claims a period of approximately 20 hours varying based on skillset.
In addition to it, the printer manufacturer also includes:
- Standard Allen wrench set.
- Metric Allen Wrench Set.
- Needle nose and/or small pliers.
- Wire crimping tool or solder and soldering iron.
- Standard and Phillips Screwdrivers.

- High Temp RTV silicone for hotend assembly.
- A roll of Kapton tape for hotend insulation.
- ABS filament for printing fan shrouds and calibration prints.
The only downside to using Rostock Max V2 as a beginner is its Setup. Users will need to maintain a lot of patience while doing it. However, if one manages to strive through this, one can learn a lot about 3D Printer construction.
Print Type/Cost
Fused Deposition Modeling, also known as Fused Filament Fabrication, is a cheap and efficient way of making 3D printed parts. It is also the most widely accepted method.
The process starts with fixing a solid filament spool on the 3D printer. When the machine is ready, squeezing of the filament through its hot end takes place.
Melting of filament is the next step into making, followed by depositing it layer by layer on the printer’s print bed. The second last step is the fusion of already laid layers, thereby forming a part.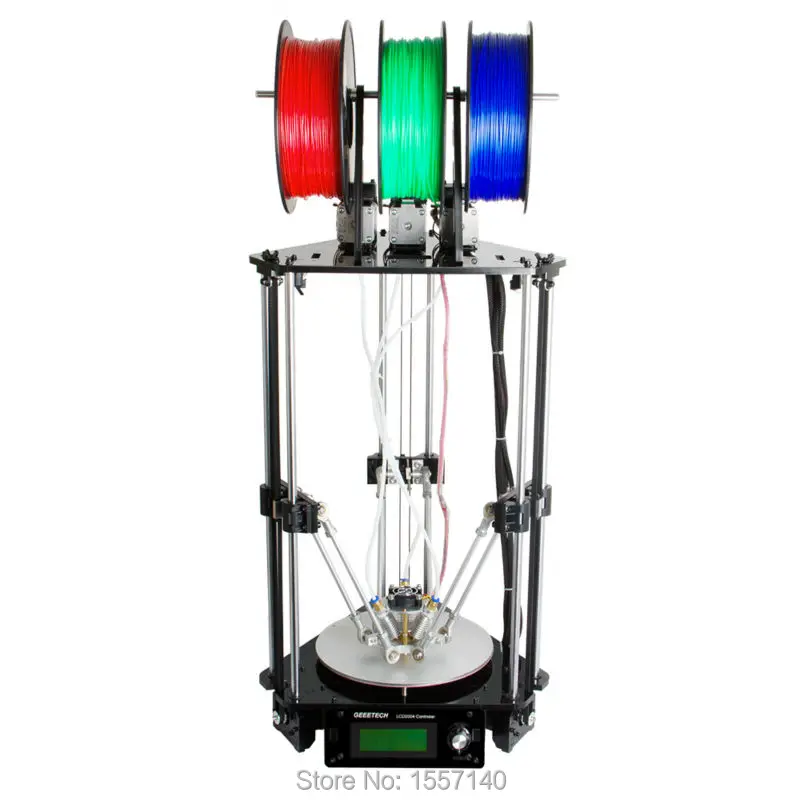 After which, 3D printed object is removed and sent for post-processing.
Generally, the 3D printing cost per part via FDM technology is lower compared to other methods. The reason being: there is no particular curing source used in this process like the ones in vat polymerization or powder bed fusion techniques.
However, the overall cost of printing a part depends on various parameters. Such as the geometry of the object, amount of infill, support structures, the cost of filament, and more.
ADVERTISEMENT
Print Quality
Credit: treatstock.frRostock Max V2 is capable of manufacturing parts and functional prototypes with an excellent surface finish. The printer offers maximum resolutions of 0.1 mm, 0.0125 mm along its X/Y and Z axis respectively.
Users can make intricate geometries within 11 inches diameter and 7.75 inches square size. The machine is known to deliver outstanding results even while making parts with a maximum Z height of 14. 75 inches.
Customer Support
To offer uncompromising support to its clients, SeeMeCNC displays General FAQs related to its products. Documents and Guides are available online to solve your queries via text.
The printer manufacturer has also put in place a Quick Start section that’ll assist its users in the rapid assembly of its printers and starting 3D printing on them.
Additionally, SeeMeCNC offers training to its customers for easing their journey with its products. Apart from this, for any kind of technical support one can write to the company and wait for their reply. Lastly, the printer manufacturer also offers Archives for references.
Parameters Influencing Buying Decision
Below mentioned are Rostock Max V2’s most important pointers that sum it up like no other.
3D Printer Cost: The printer is available to you for under $1000 and offers a large build volume and decent print quality. It’s definitely affordable.
3D Print Speed: Being a Delta 3D printer, it’s normal for Max V2 to display the extraordinary print speed at the level of 30 to 60 millimeters per second.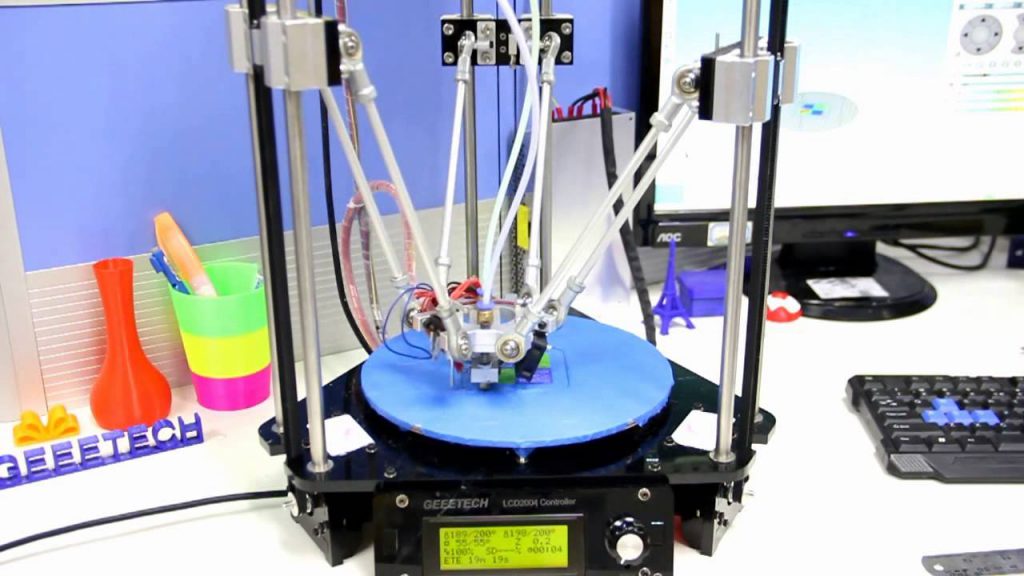
3D Printer Quality: Although the printer is FDM type, it manages to produce objects with intricate geometries with ease.
3D Printer Capability: Max V2’s hotend and printed are capable of withstanding high levels of temperatures, therefore allowing the user to print with various filaments.
3D Printer Practicality: The printer efficiently balances out print speed with part quality. And, it is suitable for professionals, enthusiasts, home users, beginners. In short, for almost all kinds of users.
3D Printer User Expectations: There is no one class of audience that Max V2 caters to, it’s a 3D printer for all. It manages to fulfill beginners’ expectations of being budget-friendly. On the other hand, the printer also manages to stand upon experts’ expectations of being technically advanced. It’s primarily for those who wish to create parts of decent quality quickly.
The Verdict
In a nutshell, Rostock Max V2 by SeeMeCNC is a 3D printer offering large print volume along with accurate printing. Based on FDM 3D printing, housing a Delta-type construction, the printer does take its own time to set up. But once that is done, it stays rigid for very long life.
So, if you are willing to spend some time setting a 3D printer before beginning your first print, Max V2 can be a very impressive choice. It can work great for beginners as well as for advanced users.
The printer is not only affordable and easy to maintain, but it also delivers dimensionally accurate prints even while making intricate geometries.
Chinese 3D printer D-Force, or why Chinese quality is better than American / Habr
A couple of years ago, the topic of 3D printers was just beginning to gain popularity. I also showed interest in her. After a long search on the Internet, reading a bunch of reviews, a long shoveling of forums, a candidate for purchase was selected. It turned out to be the American printer Rostock MAX. Of all the printers, it had, judging by the video, simply incredible print speed, excellent speeds and accelerations (and this is extremely important when fusing printing).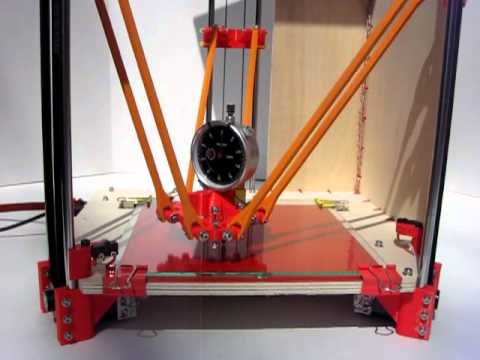 The printer also had a relatively low price and a huge print area, it could also be ordered as a kit of parts for subsequent assembly. All this influenced the decision to buy it.
Then followed the process of buying directly from the manufacturer, a long wait for a kit from America - about a month. I received a 3D printer in the form of a box, which contained three MDF laminated panels, cut through by a laser (the parts themselves), several bags with small things and an aluminum profile for vertical racks. Joy knew no bounds. Everything seemed very high quality, thoughtful and logical.
On this, the positive moments ended and the assembly began. It turned out that laser cutting was clearly not the strength of the laser cutting machine on which the panels were processed. The instability of the dimensions of the grooves, in some places the walls of the cut were not vertical. Some grooves were smaller than necessary, some more. In some places, the back layer of the laminate was not cut through. Periodically I had to sharpen and file something. The process of “picking out” the parts from the workpiece took about 4 hours.
All electrical components were packed "as is". No soldered connectors, no plugs. I was especially pleased with the simply nested 350W computer power supply. But the instructions indicated which wires should be cut off, which and how many to solder together, and in which places on the RAMBO board all this should be screwed later.
In general, the entire assembly was delayed for three days. Which, in principle, is not so much. Then came the calibration, at the end of which he should have started to print perfectly, just like in the video from the site.
Calibration was carried out, not without nervous costs of course (how it was, you can write a separate article). I was very upset by the long warm-up time of the nozzle and the VERY long warm-up time of the working surface. It is so long that for ABS plastic it tends to eternity and the temperature of 85 degrees gains only hours after 3 prints, and even then, in a rather warm room.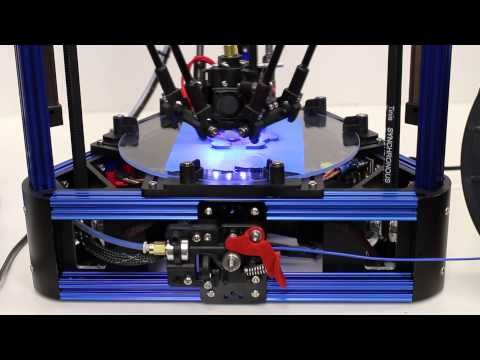 But the most interesting was ahead.
The movement system on plastic rollers initially raised some questions, but during printing it turned out that the rollers that compress the aluminum profile into tension can add an error in any of the coordinates (delta printers have such a property - they have each physical axis responsible for movements immediately along three geometric axes). The plastic rods that run from the carriages to the printing platform are made by casting, which at first even pleased, but had such a design that they gave play at the junctions with the hinges of the carriages and the platform. The hinges themselves on the carriages and the platform also had a slight backlash. All these backlashes added up already gave a serious backlash of the print head. As a result, at high print speeds, the print head in the places where the trajectory changed was rather “skidded”. Deviations were up to half a millimeter, and there was no point in talking about some kind of printing accuracy.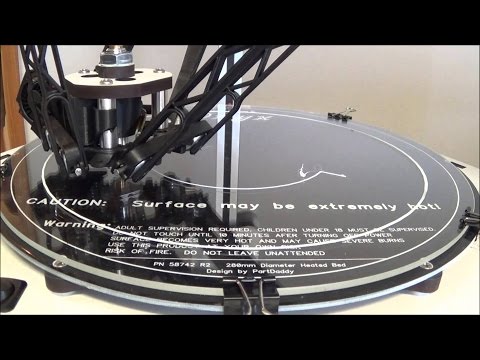
The print head deserves a separate discussion. She is typing. Although not so - it is able to extrude plastic, but not for long. The design is such that it tends to cause the plastic to jam if you are printing something other than a hollow vase and there is a periodic reversal of the plastic required. In addition, the junction of the Teflon tube and the print head is too close to the nozzle in a high temperature area. As a result, the plastic flows into all the cracks there, cokes, and then just plugs the channel.
Another problem that is not treated is the printer firmware. There is a bug in it, which leads to the fact that from large parts you can print only the emblem of the Mercedes company. It's just that in all other places, when printing the first layer, the print head will be too far from the platform and the plastic will not stick. The problem with the print head was solved by replacing it with a head from the British company E-3D. With its installation, the problems with plastic ended. The problem with the firmware is treated by replacing the control board with an Arduino mega2560 + GRBL shield and installing the modified marlin firmware.
After solving the problem with the print head, the problem with the heating of the platform had to be solved. The power supply that came with the printer was a computer one, so the maximum output voltage was 12V. And this despite the fact that the heating platform was designed for a voltage of 24V. The conclusion followed - you need to install a 24V power supply.
After fixing the power issue, print quality still left much to be desired. The reason for this was the large backlash in the mechanisms of the system. After reading through the forums and smoking a bunch of manuals, I found out that the problem can be solved by installing precision profile guides with HIWIN rolling carriages and installing magnetic rods on neodymium magnets. Some craftsmen even sell a set of magnetic rods and a platform for upgrading the Rostock MAX printer.
What do we end up with? And we have the following that in order to make this American engineering product print with high quality, you need to:
- replace the print head;
- add 24V power supply;
- replace the control board + board with drivers and relays, as well as firmware with "custom";
- to refine the movement mechanism by installing profile guides and magnetic rods, which entails the replacement of the printing platform.
And what then remains, from what the manufacturer sent? And what remains is a frame, 4 motors, a manual control screen, a computer power supply, a filament feeder (by the way, it was also slightly modified) and a heating platform.
In the end, after wasting a lot of time and never getting it to work properly, this product of the American engineering genius was sold. I got some of the money back. The buyer received an excellent educational toy.
Having played enough with Rostock MAX, I gained a lot of experience and as a result gained a clear understanding of what a quality 3D printer should be and what a quality 3D printer should not have.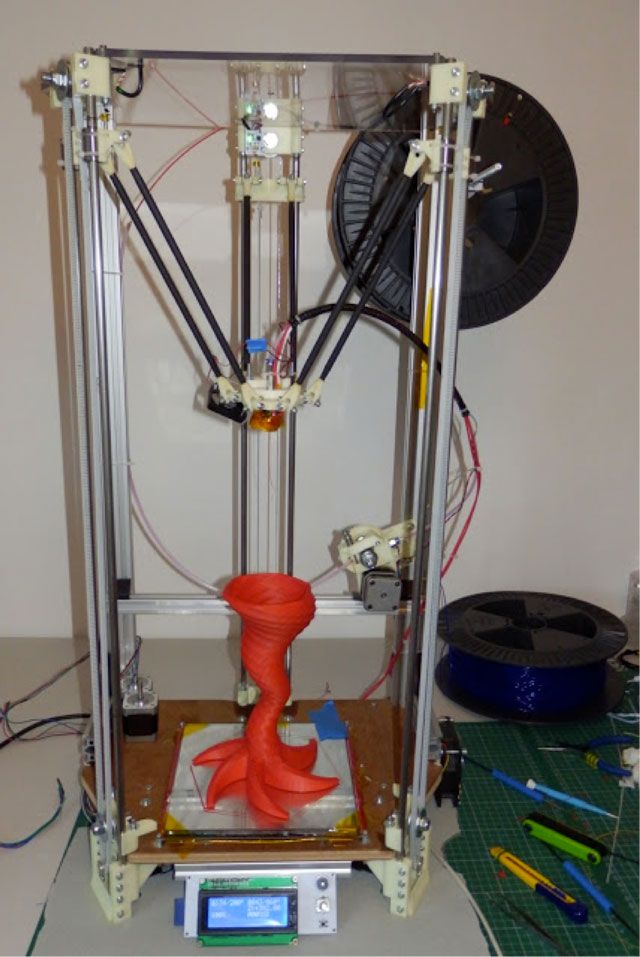
Having studied the offers on the market, I found out that the product from the "heavenly" under the modest name D-Force satisfies all our requirements best of all. It seems that the Chinese, before making this wonderful printer, first bought Rostock MAX and found out on it how not to do it and how to do it. It was described as the ideal printer, or "dream printer".
According to the descriptions, it had excellent speeds and accelerations, it had an Arduino mega2560 control board with an Arduino GRBL shield expansion board, it was possible to print from an SD card. There was an ALUMINUM print bed, a 24V power supply, precision profile rails with rolling carriages in all axes, steel ball joints in all joints, an aluminum extruder assembly, an optical surface sensor, optical end sensors in all axes, and finally a printhead from E-3D! The epitome of the perfect 3D printer!
The fact that the printer was designed and assembled in the “Celestial Empire” did not bother me at all. There is an experience of buying Chinese precision components for industrial CNC machines - there are no complaints about the quality.
Paid through Aliexpress. A month later I received a package. Later, I learned that the D-Force printer is also on sale in our country, but somewhat more expensive, but without problems with customs and they promise that they will be sent already checked and calibrated.
The printer came almost completely assembled, in a wooden crate, wrapped in a "pimple" film. It only remained to install attachments, such as a spool mount, a filament feed motor, and a control panel. Assembly tools were included. Also, the kit included a piece of filament for test printing, an SD card with everything that may and may not be needed for successful printing, grease for rolling carriages, and a tube of grease for steel hinges.
Assembly took 15 minutes. After assembly, I charged the filament and started printing a file from the SD card that came with the printer.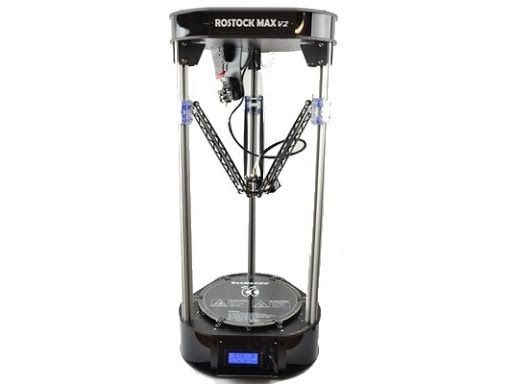 The platform heated up to 110C in 4 minutes, the nozzle warmed up for another 30 seconds. After that, the automatic calibration process on the platform surface started and printing was started directly. I didn't even take out my shaman tambourine. There was never a desire to start dancing with him. The printer just picked up and started printing. Moreover, there were no complaints about the quality of the print. Just great print quality. True, a little later, I revealed some deviations in the geometry of the printed parts. I changed some settings in the firmware, slightly corrected the hinge mounts that had shifted due to shaking during transportation, spent some time selecting the parameters of the delta circuit in the firmware. After 4 hours the problem was solved.
As a result, having spent less on the purchase, without spending effort and nerves, I got an excellent 3D printer that does an excellent job of what it was bought for - it prints 3D objects and does it quickly and efficiently.
Studying the device, I was amazed at how thoughtful everything was. Simple belt tensioner. Simple and effective clips for the ends of the belt, simple and very accurate adjustment of the end sensors. For the sake of interest, I removed the heating platform to see what's inside. Very pleased with the quality of performance. All connections are soldered and insulated with heat shrink. The heating platform is connected via a solid state relay. Stepper motors are fixed on aluminum corners. A USB connector with a case mount printed on a 3D printer is brought out.
The moral of this story is that Americans are great at selling. Advertise your product, paint non-existent advantages, hide shortcomings - this is their strength. The Chinese do not know how to advertise and promote goods, but they have already learned how to produce relatively inexpensively and with high quality. Gone are the days when "Chinese Quality" was an unflattering definition.
A detail that shows the print quality of slopes with a negative angle.