Zbrush and 3d printing
3D Print Hub | ZBrush Docs
Pixologic
Step into the future of product development and manufacturing with the awesome power of ZBrush and the 3D Print Hub plugin.
Open up to a world of 3D printing. Extend your design concepts beyond the confines of your computer screen. Pixologic’s ZBrush supports all major 3D printing file formats including STL (stereo lithography), OBJ and VRML. STL files are the standard files used to output your ZTools as physical objects. The VRML file format takes this one step further by providing support for UV’s, textures and PolyPaint, giving you the ability to print in color. In addition to these, you get the versatility of OBJ file support.
Take your digital designs from photo-real, to desktop-real!
Main features
-
- Export in STL, Binary and Ascii.
- Export in VRML.
- Size in Inches and millimeters.
- Export the current or all the SubTools.
3D Print Hub in 5 Steps!
Using this plugin is very easy and can be done by just pressing few buttons!
Before beginning you will need to load a ZTool to export, such as the Demo Soldier.
This Tool must be a PolyMesh 3D. If your model is a Primitive or a ZSphere model, you
need to convert it first.
With your model selected, open the ZPlugin >> 3D Print Hub menu. Let’s start!
- Click the “Update Size Ratios” button to capture the ZTool’s bounding box size.
- A window will appear with several size settings. Choose the one which best fits your model size, scale and units (millimeters or inches).
- Change one of the three sliders to define the size of the object to export. The values here will depend on the units chosen in Step 2.
- In the Export options, choose if you would like to export all SubTools, only the visible SubTools or just the currently selected SubTool.
- Finally, click the file format that you wish to export: OBJ, STL or VRML.
 You can also click the appropriate link to open the model in the compatible target application of your choice, like Preform for Formlabs 3D printers.
It’s done!
Of course, you can modify the different settings and options available in the “Size options” and “Export options” to fit your needs.
Preparing the Model
If you want to have your model printed in 3D, you should check several things prior to using 3D Print Hub. Please be aware of these items in order to avoid complications during the printing process.
Notice
If you know which company will print your model, visit their website or contact them to learn about their restrictions or advice. Some of them have dedicated FAQs or tutorials about their printing processes.
The Exporting Process
The export process is quite easy but needs to be done in separate steps. For most of the basic and simple usage, you only have to modify a very few settings and can ignore the advanced options.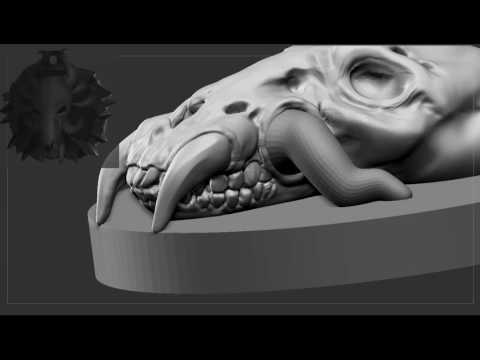 Even if you do need to use the advanced options, you will still need to first set or change the basic items.
The 3D Print Hub plugin with its tools
1. Updating the size information
To accurately set the size of your model and export it to the correct scale, you must tell ZBrush what the ZTool’s real-world measurements actually are. This is done by updating the size information for your loaded ZTool. This step must be done for each model you will export.
Simply click the Update Size Ratio button to update the size of the loaded ZTool. This action will open a window which will let you choose the scale of your model. It also provides alternatives for the model’s size and your choice of units. ZBrush does not natively work with units. For this reason, even if you have set TransPose Units and are working with accurate proportions, ZBrush doesn’t know whether you are using inches or millimeters.
This dialog box lets you choose between four solutions which mix the unit and the scale in what is basically a 2. 54 ratio between mm and in. By selecting the size which is close to your target size, you will help the plugin to start with the most convenient size values.
The computation of the size/scale is based on the advanced options found in the Size Options section. If the option “Use size of the selected SubTool” is enabled, the size of the whole model will be based on the selected SubTool and all the other SubTools will be scaled accordingly. If this option is disabled, the bounding box will be computed from all visible SubTools as if they are a single model. (Hidden SubTools are always excluded.)
Please read the Advanced options section for more information.
2. Set the Unit and Size
In this step, you specify the dimensions of the exported model and whether that size is in inches or millimeters. This value applies to the entire model, including all visible SubTools.
3. File Format and Exporting
When all your basic options have been set (and any advanced option), the last step is to choose the file format you need:
Clicking one of these buttons immediately opens a system dialog box so that you can name your file and specify where it and any corresponding textures will be saved. When the export process is completed, a note will be displayed on-screen to let you know it was successful.
4. Exporting to a 3rd party 3D printer
3D Print Hub includes a mechanism for sending the 3D model directly to the printing software provided by certain 3D Printer manufacturers. This functionality will export the model at the set size, automatically opening the target software and loading the file into it.
For most uses, this process makes the 3D printing export process truly seamless.
Preform and Formlabs printers
Preform is the software from Formlabs which manages their 3D printers: Form1, Form1+ and Form2. Using the function Send to Preform will automatically:
-
- Launch Preform
- Fix your model’s topology if needed
- Launch the one click print functionality
Of course, you can override the one click functionality and take the full control of the printing process.
To learn more about Formlabs and Preform, visit their website.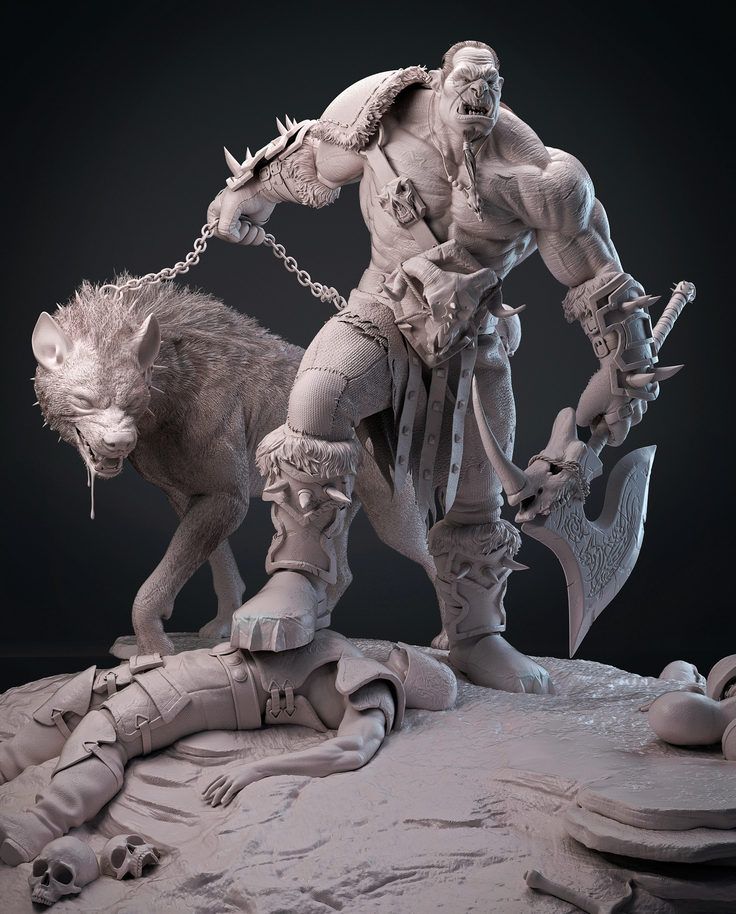
5. STL import
3D Print Hub can import the STL file format, which is commonly used by 3D scanners. This allows you to import your scan data for use in ZBrush, as well as loading your STL files back into ZBrush.
When clicking on the STL Import button, a system dialog box will open so that you can browse your hard drive and select the desired STL file. ZBrush will then import the model. If another 3D object is currently in Edit mode, ZBrush will replace that model with your imported model — just like it does with the default Import process.
ZBrush will retain a record of the model size from the imported model, but it has no information about the units used in the software that generated the model. If the model was 10mm width in the original software, it will become 10 “units” in ZBrush.
Advanced Options
3D Print Hub includes several advanced options allowing you to fine tune your imports, size settings and exports. It is strongly advised to look at these settings as in some cases you may need to make use of several of them.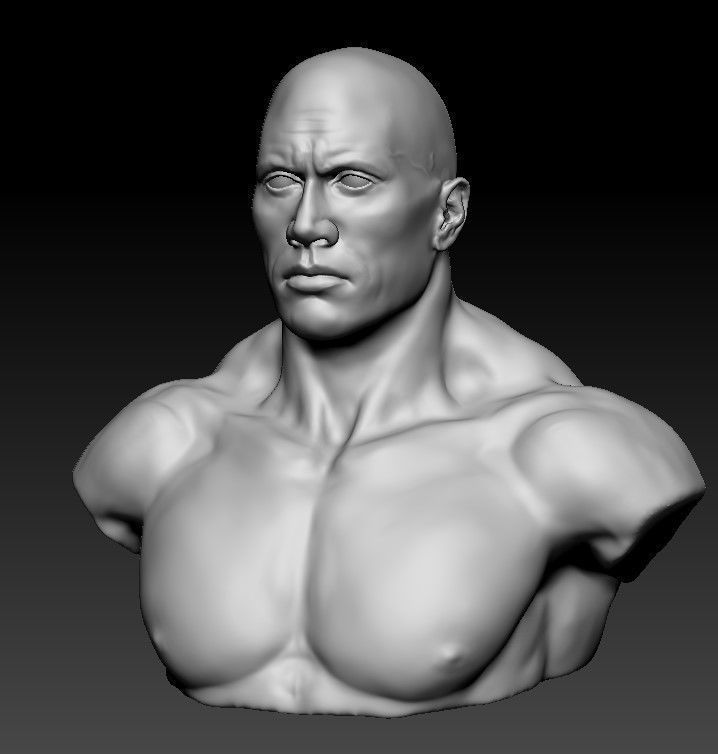 For example, if you need to scale a figurine based on the size of its base.
To display these settings, click the Import, Size and/or Export options buttons. You must modify these settings prior to clicking the desired main action.
1. File Import Options
-
- Skip color: This option will ignore any color information included in the imported STL file. Only a few programs support exporting color as part of an STL file, so this option is enabled by default.
- Weld Threshold: This option will automatically weld all the imported model vertices which are very close to each other in 3D space. The STL format doesn’t have welded polygons, which means that when the file is imported, the vertices must be welded to produce a watertight mesh and clean surfaces.
The default setting will work for the vast majority of imported models but one very rare occasions you may need to increase or decrease the value. - Store Import settings: This option will save a configuration file containing the current Import settings for future uses of the 3D Print Hub plugin.
 This is convenient if you always need the same settings for all your 3D model imports.
2. Size Options
-
- Move bounding box axis to origin: Move the origin of the bounding box for the exported 3D object (even if the object is comprised of multiple SubTools) to the 0,0,0 location.
- For all SubTools: All SubTools will be moved to the new Origin location, while retaining their positions relative to each other. This is the default option when using the Move to Origin feature.
- Per SubTool: When enabled, all SubTools will be individually moved to the origin location and scaled to fit the bounding box size.
- Use the size of the selected SubTool: Defines the size of the bounding box based on the currently selected SubTool. All other SubTools will be resized relative to this one. This option is convenient if one item must have an exact predefined size – such as a support object, in which case all other parts need to be resized according to the support.
- Original Size: This option will only work for a model that has been imported into ZBrush. Enabling it instructs ZBrush to use the original dimensions of the model as they were set by the source program. In this case, 3D Print Hub will ignore the size dimensions specified in the basic settings.
- X, Y and Z: Enable one of these to keep the ratio constant based on the specified axis. The sizes for the other two axes will be recalculated.
- Store size settings: This option will save a configuration file containing the current Import settings for future uses of the 3D Print Hub plugin. This is convenient if you always need the same settings for all your 3D model exports.
3. Elements to Export Options
-
- All: When enabled, all the SubTools are exported, including those which have been hidden.
- Visible: When enabled, only the visible SubTools are exported. Non-visible SubTools won’t be exported.
- Selected: When enabled, only the current SubTool is exported.
- Export in separate files: When enabled, each SubTool is exported as a separate file (OBJ, VRML or STL). When disabled, all visible SubTools will be exported as part of a single file.
- Textures: Exports any textures on the SubTools using the Texture Format. (See next section.) Only the VRML and OBJ file formats can export textures.
- PolyPaint: Exports any vertex color painting information (PolyPaint) on the SubTools as part of the saved file. Only the VRML and STL file formats can export vertex painting.
4. Texture Format Options
Image file size can be important with some printers. It is critical to choose a texture file format that will fit your printer’s limitations.
-
- The JPG, PNG and BMP buttons are used to specify the image format which will be used when 3D Print Hub needs to include any textures that are applied to the SubTools.
- JPG provides a destructive compression (data and quality loss) but has a very small file size.
- PNG provides a non-destructive compression. It produces files larger than with JPG but a lot smaller than that of uncompressed formats.
- BMP provides uncompressed images with no quality loss, but produces very large files.
- Quality: This setting is used only when the JPG file format is selected. It specifies the amount of compression. Values under 60 will see significant image degradation.
5. STL Export Options
These options are specific only to the STL file format.
- Binary and Ascii: Save your STL file as a clear text (ASCII) file or in binary format. Binary format results in a smaller file size and is the default setting since almost all printing companies and software can read the binary format.
- Magics and SolidView: These options set the way vertex color information is written within the STL file format. Please check your other 3D packages or with your printing company to determine which file formats they support.
- Store Export settings: This option will save a configuration file containing the current Import settings for future uses of the 3D Print Hub plugin. This is convenient if you always need the same settings for all your 3D model exports.
For a PDF of this documentation, see 3D Print Hub PDF.
Become an insider
Sign up to access exclusive tools, giveaways & tutorials
Get Access
Pixologic :: Pixologic :: Industry :: 3D Printing
"FROM VIRTUAL TO REALITY: NEW CREATIVE OPPORTUNITIES."
ZBrush is the market's leading application when it comes to working with high resolution geometry or optimizing high resolution 3D scans and preparing 3D prints. Use ZBrush to seamlessly move from the virtual world and the real world -- and back again!
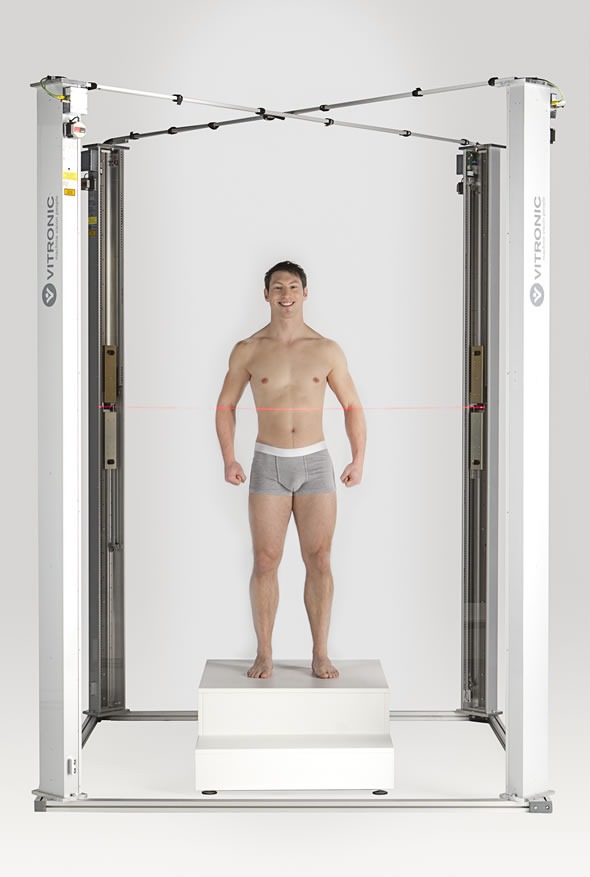
Capturing Reality with ZBrush and 3D Scans
With the democratization of technology and performance improvements, 3D scanning has become a new tool in numerous production environments.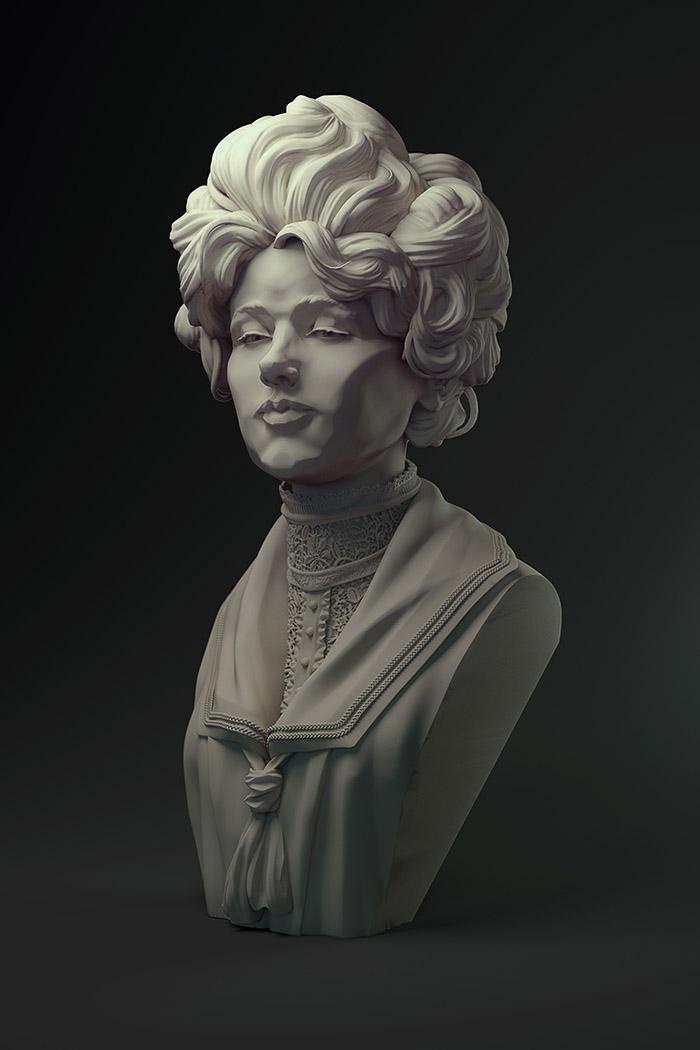 However, scans are often incomplete and have many defects which need to be corrected on both a geometry and texture level. It's at this stage that ZBrush comes in to effectively and quickly clean these various artifacts. It can fill holes and add any missing parts in an intuitive way.
ZBrush has terrific versatility and can also smoothly handle millions of triangles on a standard computer. Through ZRemesher and other features it can also easily convert these triangles into the quadrangles that many applications such as animation require. If you've seen The Avengers, you've seen this in action as scan data of Mark Ruffalo was used in ZBrush to literally transform Bruce Banner into the Hulk.
For these reasons, ZBrush has become the tool of choice for people who work with scan data. Whether you are a freelancer or work in a studio, ZBrush processes your scans with great ease.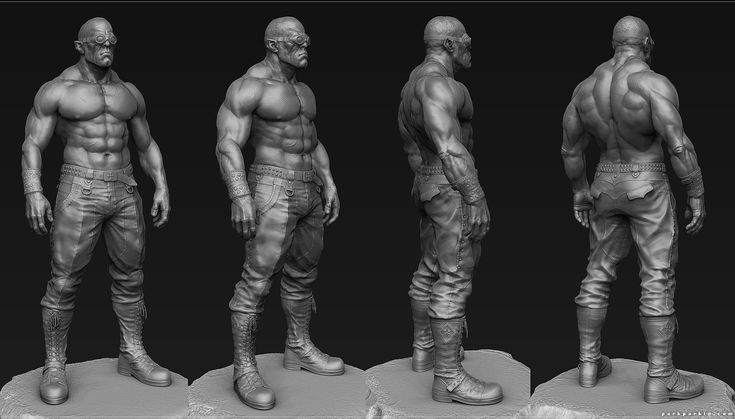 Further, its intuitive sculpting tools allow you accomplish more than merely optimizing your models; you are free to be truly creative.
Major Studios use ZBrush
Many artists are already using ZBrush to create high quality figurines for studios while others are starting a business in this trendsetting industry. With ZBrush, they have the perfect tool in their hands for production and print-ready optimization of their models. All the big names in the toys and figurines industry are using ZBrush: Hasbro, Gentle Giant Studios, Kotobukiya or Mattel to name a few.
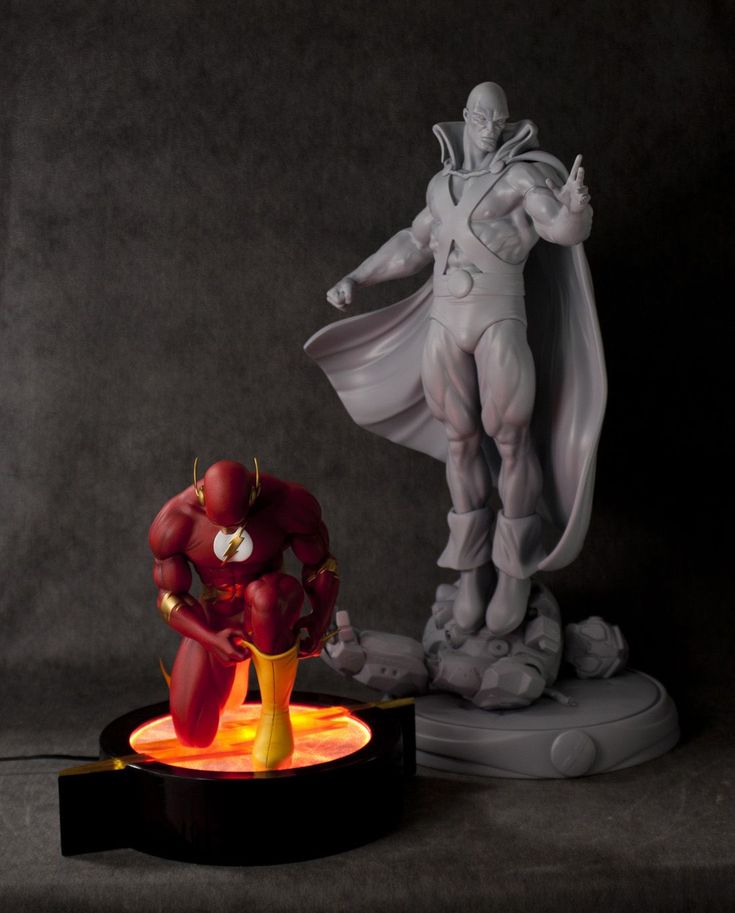
From Concept to Real World
Other industries are also being deeply modified by the capabilities of 3D printing.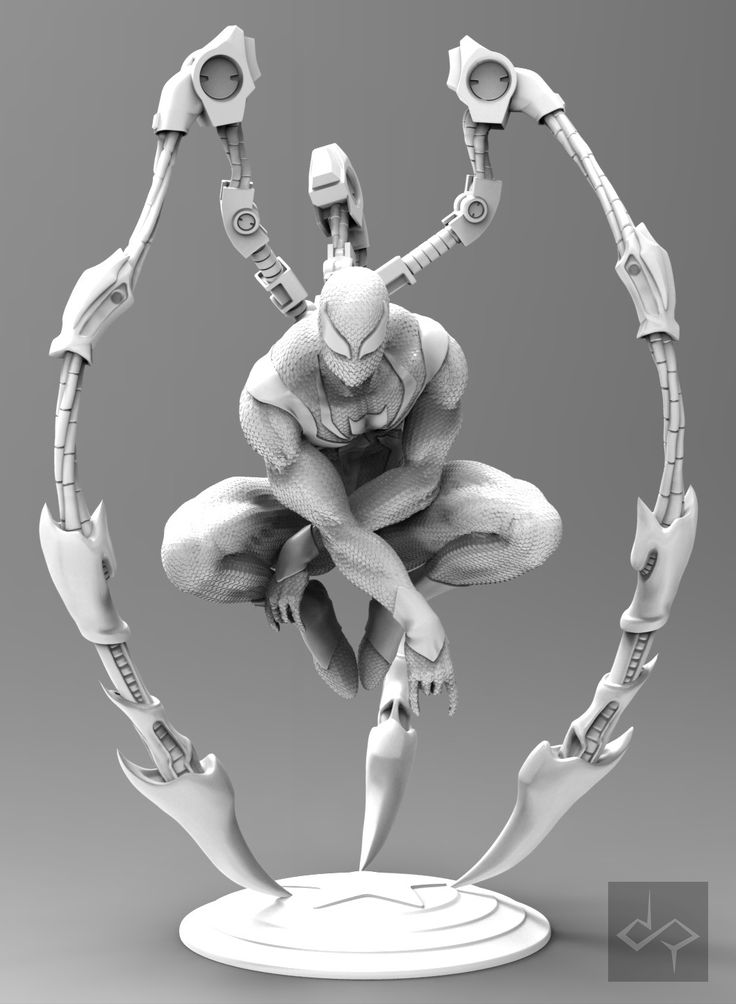 One example of this is Special Effects where Iron Man’s armor and the combat suits of Jaeger pilots in Pacific Rim were initially 3D “sketched” using ZBrush and then printed by Legacy Effects. ZBrush and 3D printing combine to give artists the opportunity to go from concept to real-world model in just a few days rather than the several weeks that have previously been needed for traditional fabrication methods.
Create for 3D Printing with ZBrush
Have you just bought your own printer? If so, you will find that ZBrush is its best friend, opening the door to creative areas that you might never have even considered: pieces of art, everyday objects, toys, utilities, etc.
Tech Corner
Clean Scan Artifacts
If you are working with 3D scans, the different Smooth brushes will unify the scanned surfaces.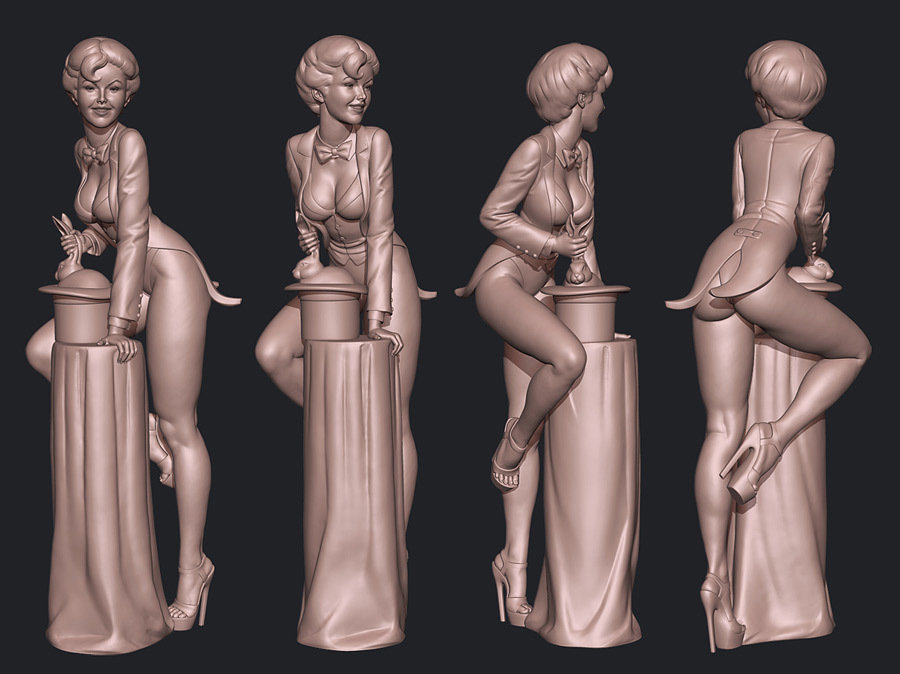 DynaMesh will close any holes or help restore missing parts. Projection tools will provide the best solution to transfer information from a scan to an optimized model. Only ZBrush gives you the freedom to fully modify scans to your liking and iteratively use that data on your model!
Prepare for Production and Optimize
As for 3D printing, ZBrush covers both ends of the process. Its many tools for creation and modification give everything you need to make fantastic models. From there you can prep and optimize the figure for printing by cutting it into parts, adding keys and joints as well as hollowing it out to use less material -- all of which is accomplished with the various DynaMesh features. Finally, with Decimation Master and 3D Print Exporter you can reduce the density of your mesh and then export it as STL or VRML with real-world units and sizes already defined.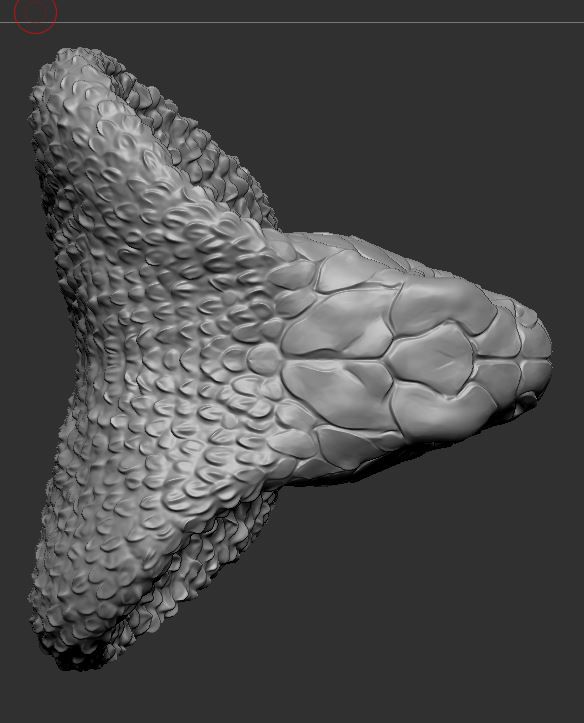
ZBrush in the 3D Printing Industry
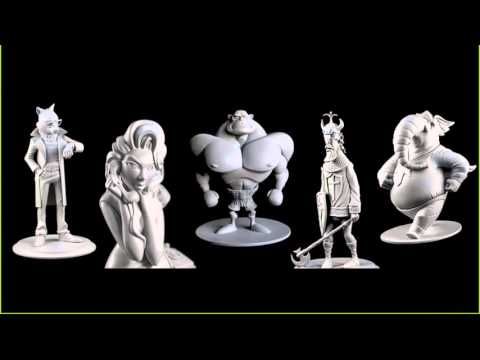
Modeling and 3D printing by art. Zbrash and comics.
Among digital artists, those who like them are sometimes given fanarts of their characters or from their setting. So these figures will mainly come from this opera. Models were sculpted in Zbrush by art. I'm not an artist, so the digital models are "amateur" level. ABS material from various manufacturers, more often DEXP. Execution time: after hours and weekends in 2018 - 02.2019.
#1 - Den Diesel from FurryGuys .
I decided to make it only in the form of a bust, since by that time I had not opened zbrush for more than a year, and without that the initial skill was completely lost. Full height, I was afraid I wouldn't pull it =))
Several links to the art of the character. 1, 2.
Large, 11 cm high, safely sent to the Author (must be in the VK group) .
Since I'm not looking for easy ways, and I suffer from pathological masochism, I decided to make the model with my mouth ajar.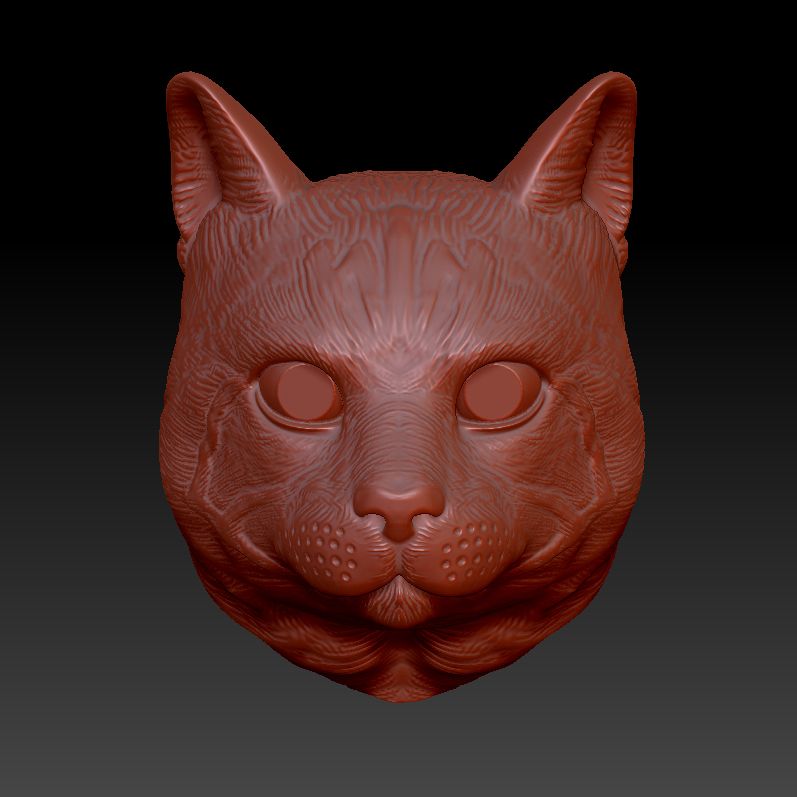 Moreover, with a bust size of 11 cm, the oral gap came out 1.5 mm. You can't get support out of your mouth. Having beaten the head against the wall, the lower jaw was made separately, and the head was printed upside down. Hairstyle separately, on a pile of supports. It is very "fun" to separate them when the strength of the tip of the hair is close to the strength of the support. And for a vertical small element not to fall sideways on a support, you have to print them without gaps.
When printing the jaw for the first time encountered the problem of overheating (small part), which was solved by cooling and simultaneously printing the technological turret in the distance.
Since I'm not looking for easy ways….. I modeled my hairstyle in such a way that it didn't sit on my head, didn't stretch. It's like putting on a retaining ring if it didn't spring back. – the jamb is fixed manually. A kink with a neat seal of the seam.
Now the normal method has been mastered after work No. 5 of the current post: ABS heating to Т > Тrsoftening ≈ 110…120 deg. I prefer a low heat burner. The selection of the height above the flame and, consequently, the temperature - with a multimeter thermocouple. The plastic remains softened for at least a few seconds - enough to pull-put a thin-walled hairstyle on your head.
Attention! In the process of heating above Trasoft. the model is slightly deformed, including under its own weight. So the method is very limited in terms of the subject of processing.
Acrylic primer, paint with acrylic brush. Acrylic allergy =((
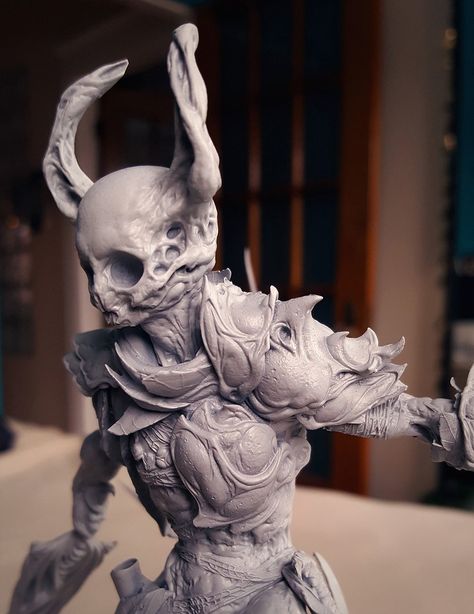
№2 - Jelani, webcomic "Eighth".
More precisely, his chibi, children's-anime version. I tried to sculpt an adult (art) - too tough. Printed kite, size 13 cm, safely sent to Author
My favorite miniature in terms of productivity. It was possible, for the first and only time, to position the 3d model with rigging - the internal skeleton, and print it without problems. It consists of only 3 parts: 2 hands and everything else.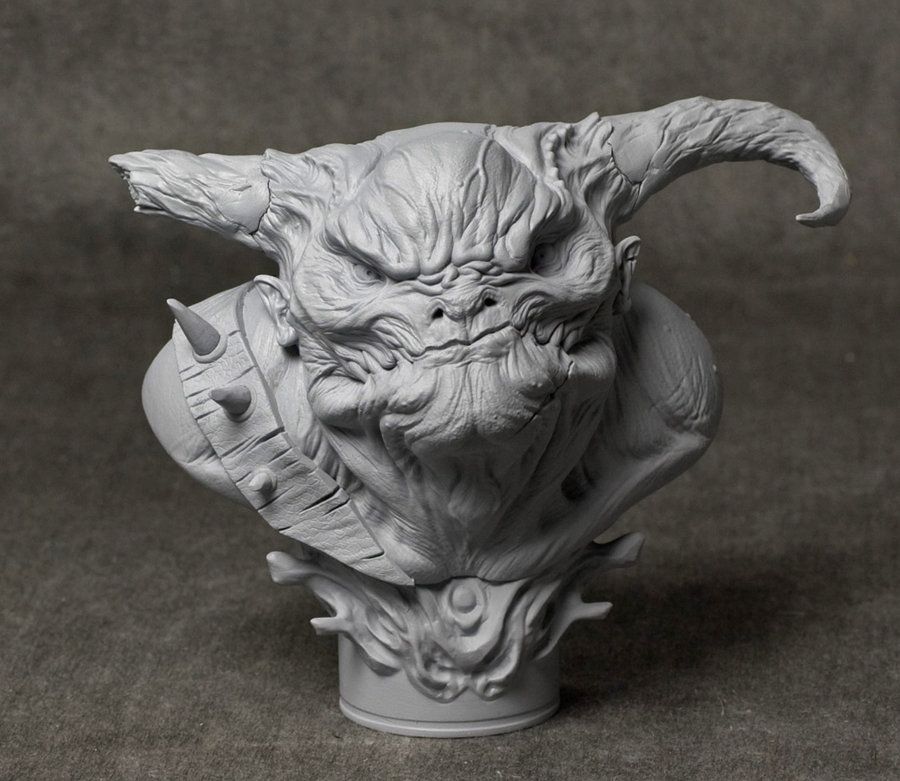 The base green color is the color of the most pro-acetone ABS - glitter =)). Paint eyes, hands and hair in 4-6 layers of acrylic, due to the lack of primer. The eyes are stained using molar tape as a limiter.
No. 3 - Jonty from " Stories with known endings »
Sculpted according to reference. The first, 21 centimeter, went to the Author.
A hell of a lot depends on the coloring and, somewhat less, on the photograph. In the photo above, Jonty was made by the first with a purchased paint job. I painted the second and third in the photo below - failure on the left, success on the right.
A difficult model for my skill. But I wanted something more ... In an original way for me, the tail was printed in a prickly design. It consists of 3 parts, however, the spines of the underlying element overlap the butt seam. That is, landing with a seam inward, as well as shoulder-body, legs-body.
By the way, for a long time I could not find the Boolean subtraction operation in Zbrush, which is common for 3D programs.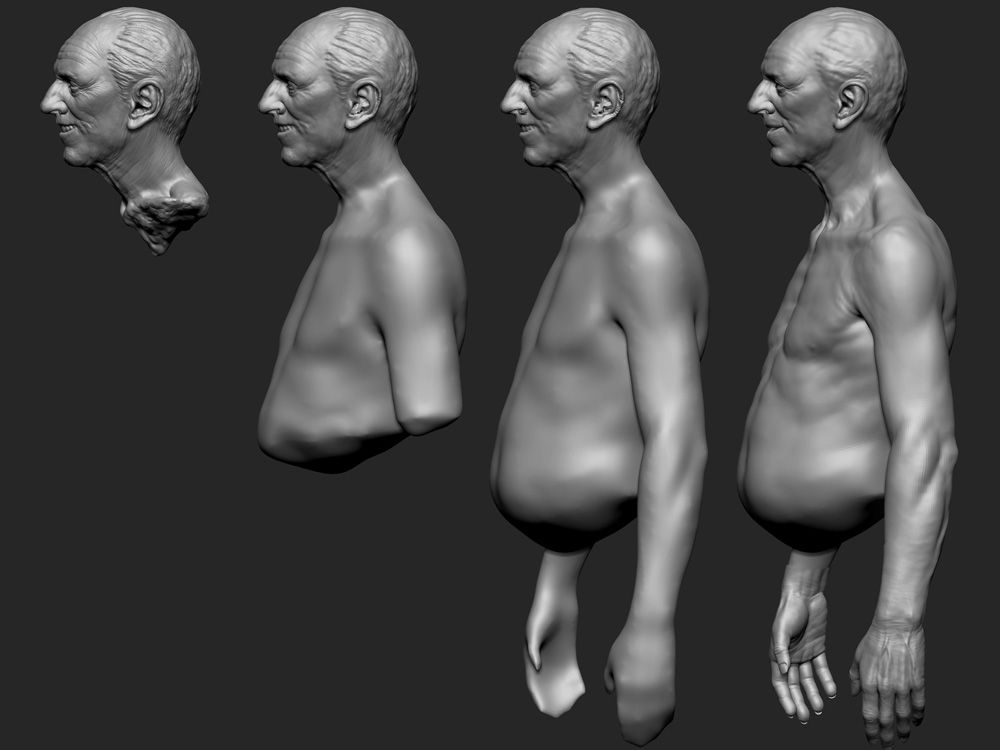 Previously, he made dragons with joints along the planes.
No. 4 - Sergal.
Specifically, this sergal is not from any setting, but the character of the customer, for which there is a concept art, and the model of which had to be made.
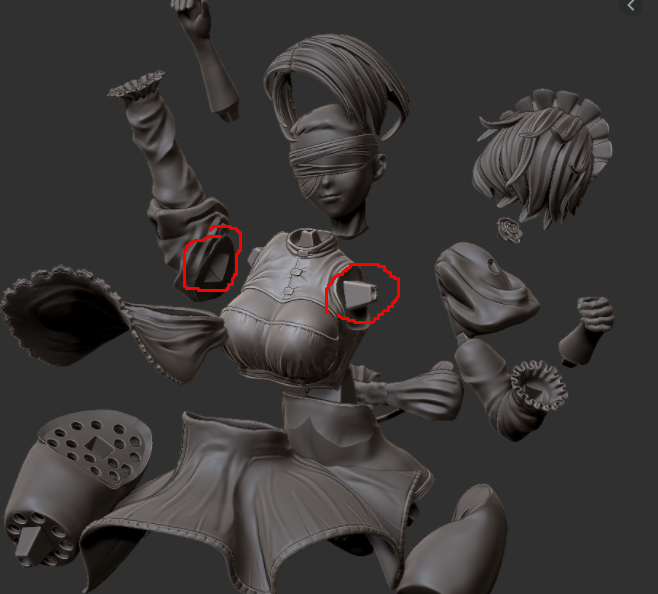
Disassembled photo and the result of the collage:
I got the machine from the network. Printed from the bottom up from the stock of 2 parts. Came out about 7 cm in length - terrible. Too small elements for FDM, but no DLP or SLA =(
#5 - Clementine from " Stories with a known ending "
My favorite work. One, 21 centimeter, went to the Author. Sculpted according to reference. As always, not without problems. Master Plaster from the DNS went to the poor thing. Absolutely terrible filament =(
+ Convenient fast delivery of DNS.
+ Attractive price. With the possibility of payment upon receipt.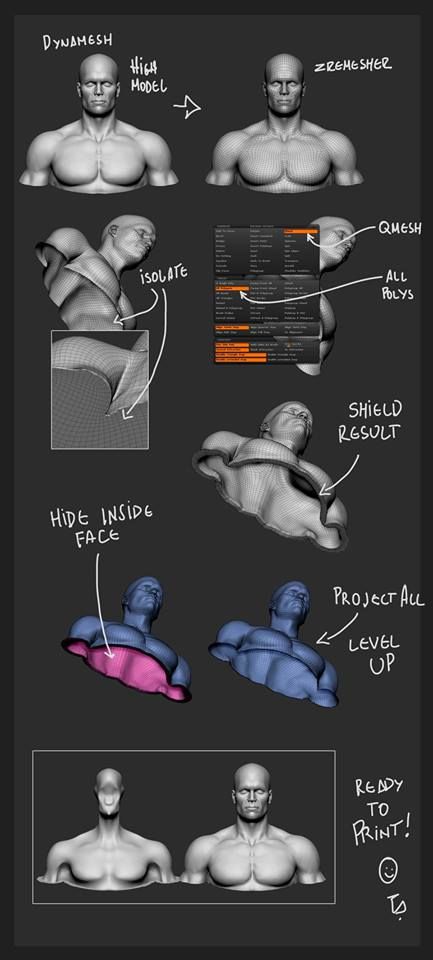 in the upper temperature range.Measurement of resistance by pushing by hand, so without measurements and not according to GOST.
- The roughness is subjectively higher, both before and after dip acetoning, compared to other manufacturers. The reason is not known to me.
It took a long time to finish the locksmith method. Processes and results:
Wings and tail deeply recessed into the body. Their bases are pinned with a wire ⌀2 mm, 15 mm long. Drilled and planted with heated wire.
There is a problem with kinks in the mail delivery process. Jonti (work No. 3) and Sergal (No. 4) came to customers with breaks in small parts. So for Clem, I crafted a special package with fixation on the pedestal using cardboard and hot melt adhesive. Sent by sdek.
Approximate labor input:
On the example of Clementine in my performance for 1 model. Timing did not lead, accuracy ± 20%.
Production preparation.
1) Model (I don’t know how but I try): 150…180 h.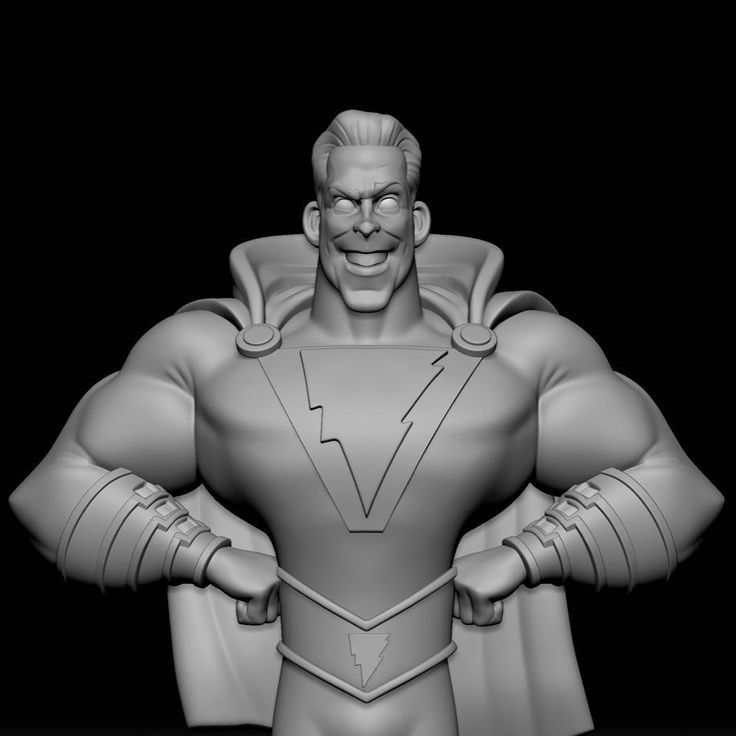 5 hours
Production .
4) Camera work (excluding machine time, of course): 1 hour
5) Post-processing + assembly. 8 hours
6) Painting: Outsourcing. Painting related works: No. 4 Sergala and No. 3 Jonti took me under 15 hours. Therefore, it is better to buy the operation.
7) The painting came unsatisfactory. Repainted +10 hours
______________________
Total. Satisfied with the result, categorically not with labor productivity! The most terrible stage, of course, is the model. In order to sculpt quickly and on a level, it is very desirable to work in this area, or at least practice from school and student time. On the financial side, materials and other costs paid off, the machine did not start. But the pleasure is received =)
| |||||||||||||||||||||||||||||||||||||||||||||||||||||||||||||||||||||||||||||||||||||||||||||||||||||||||||||||||||||||||||||||||||||||||||||||||||||||||||||||||||||||||||||
 Preparing for printing.
 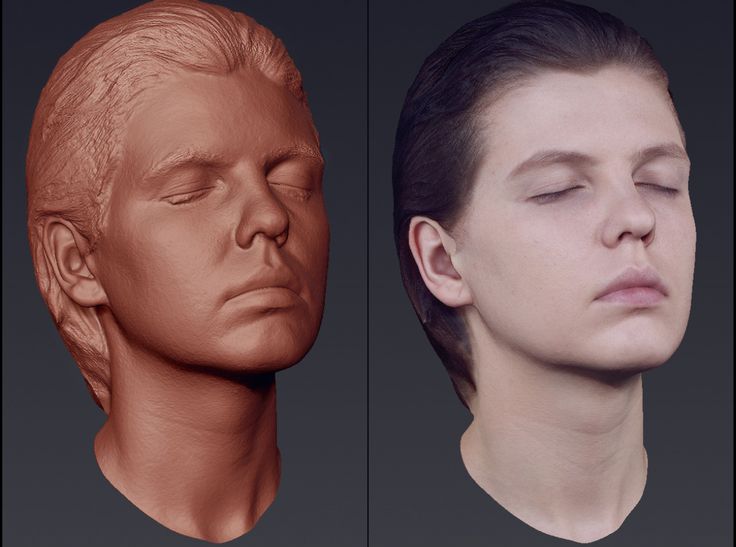 It is possible to optimize all subtools at once, but this procedure is slow, Zbrush can freeze, so I group the details in small portions of 3-4 million polygons. The picture shows the same object before and after optimization. It consists of two closed meshes, no merging has taken place, after the "Auto Groups" operation they can be easily separated.
 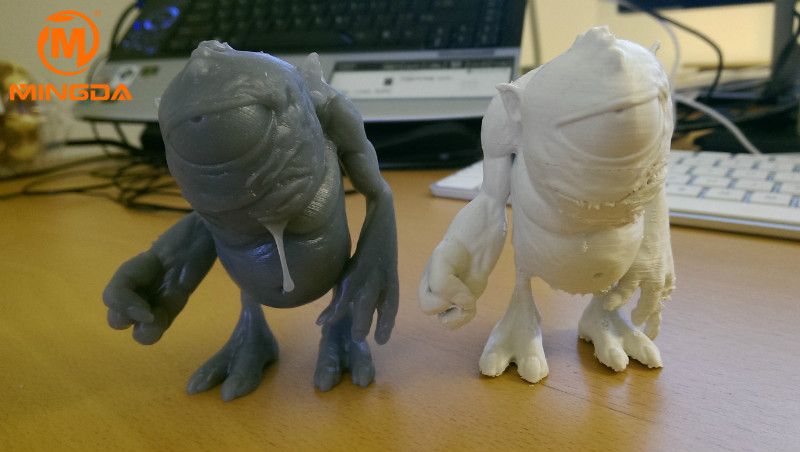 If ladders cannot be avoided in any way, then at least you can try to minimize them. For example:
 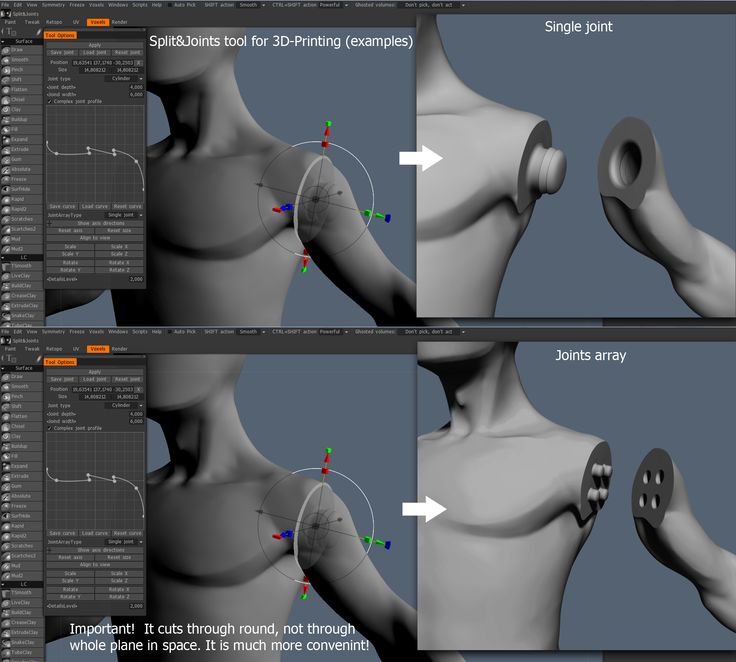 The distance between the parts is at least 2 mm.