David 3d scanner review
David SLS-1 3D Scanner Review
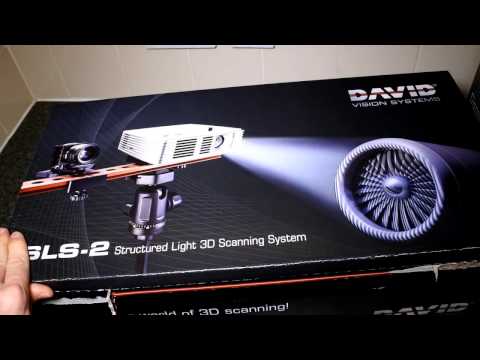
Review - Unboxing The David SLS-1 3D Scanning Kit
This is a visual summary of my first ever use of the David SLS-1 3D structured light 3D scanning Kit, from the unboxing to 3D Print.
On first impressions, the kit is well presented, all components are of a high quality and well finished. The box has sponge inserts and can be reused for safe portability and storage. From the anodized bracket, the aluminium calibration boards to the tripod - all things have been well considered. There's even a decent HDMI cable and a universal power adapter.
The David SLS-1. This Complete Kit with everything you need to start 3D scanning.
The included Acer K11+ Structured Light Projector has a customised lens with a high focal range, enabling it to be calibrated for large and small scanning volumes. You can use it as a movie projector as well with surprising picture quality and contrast.
The new DAVID-CAM-3-M now with double the resolution (1280x960). Can it capture the claimed 40 mircon detail? Let's find out....
The high quality 12mm Computar Lens is now included in the David SLS-1 3D Scanning kit for increased precision and accuracy.
Test One: The Finger Print Test - I just had to give it a go. The image shows the fringe patterns being projected onto the subject.
Wow...My heart skipped a beat! I have seen scanners 30 x the price that would not stand a chance at getting this kind of detail. The David Lasserscanner 3.6 software is intuitive and easy to navigate. It takes you through the required workflow step by step. Hardware Setup, Calibration, Scanning, Alignment and finally Fusion where the model is stitched together into one complete object. The included colour manual takes you through each step of the way.
Test Two: The Lion. A small lion that is 100mm in length which has some very fine texture, will the David SLS-1 pick it up?
The hardware is quick and easy to set up, the only tricky thing is working out what the squiggly lines on the screen are. They are used to get the exposure right. No need to install any software as it runs off the USB dongle. All I needed to do was install the camera drivers and turn the project on. I have used other scanners before, the logic remains the same. The first stage of the set up is decide what size volume you want to capture with each shot. A good rule of thumb is to set it up the scanners so you can fit your entire object in a single shot. That way it is going to be easy to work around the object to capture is in it's entirety. If you need more detail, you can always go down to a smaller volume but you will need to take more shots to get a complete model. Here the scanner is set up and calibrated, ready for our lion test scan.
I thought tigers had stripes, now lions do too! These are the projected fringe patterns from the SL projector K11+projector. Make sure the exposure of the camera matches the colour of your object.
The first captured image from the structured light scanner using the David 3. 6 software. The David sls-1 scanner has no problem picking up the fine texture.
The David Laserscanner software finds common features between each capture which it uses to align them together.
The face on this model is smaller than a finger nail, the resolution on the scan is truly astounding.
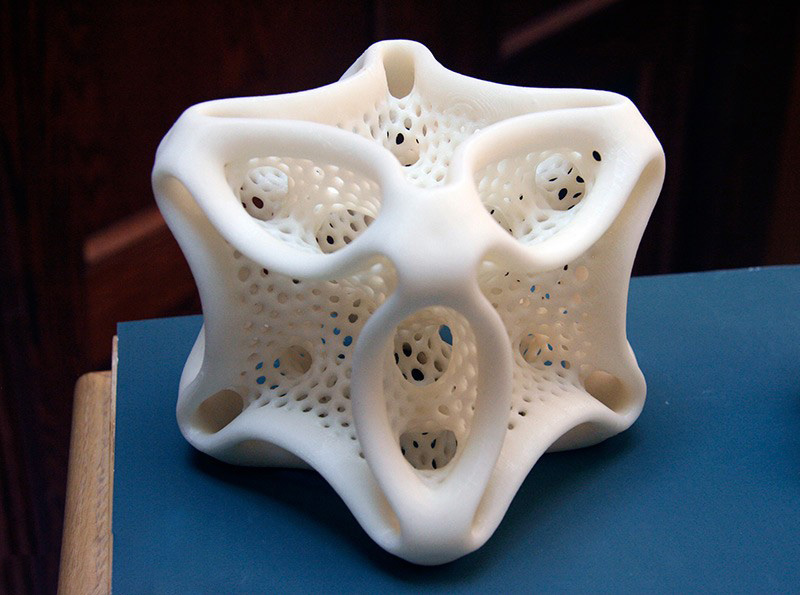
The multiple scans are stitched together into a watertight using the Shape Fusion command. The final result on the lion blew me away! The texture on the model is finer than you can see with the naked eye!
The complete model stitched together into a watertight model, ready for reverse engineering or 3D Printing.
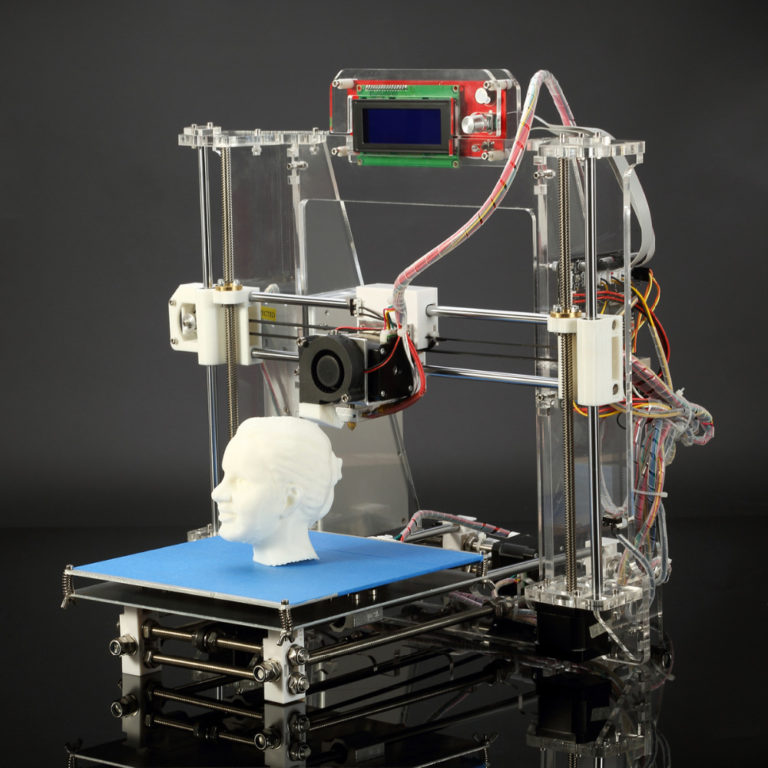
Half way through the print. Check out the tail held on the platform by the support structure which is automatically created with the Up! 3D Printer software.
Hot off the press! The lion was 3D Printed at 1:1 scale in "Tickle me pink" filament on the Up! 3D Printer Plus.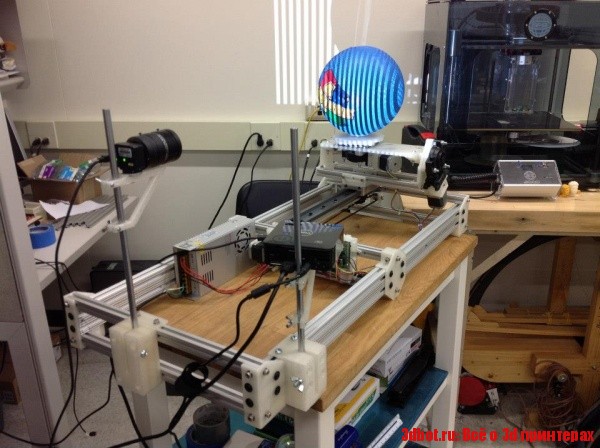
The 3D Printed Lion standing next to the original scanned object.
3D Scan to 3D Print reproduction using the David SLS-1 Structured Light Scanner and the Up! 3D Printer Plus
Conclusion:
The David SLS-1 Structured Light 3D Scanning Kit by David Vision Systems (Germany) is truly a remarkable package. They have carefully composed the best cost to performance 3D scanning system on the market to date, without compromising on quality. The package is very complete and includes everything you need to start scanning. It has an upgraded camera and lens enabling double the resolution down to 40 microns (0.04mm) and is backed with a 2 year warranty. The system is versatile by being able to be calibrated to scan different volumes. It can scan details finer than can be seen by the naked eye up to the size of a lounge. It can even capture colour and map it onto your model. The included software is powerful, simple to use and has an intuitive workflow. There is a lot of smart technology working in the background of the David Lasserscanner Software. Complex algorithms work in background that analyse the captured information to reduce noise and eliminate erroneous data. Once sufficient views of an object have been captured, the software aligns each of the individual views by finding common features between them. It can even use captured colour information to assist in this automated alignment process. The Fusion command does a very neat job of stitching the model together into a complete watertight mesh ready for 3d printing, reverse engineering, analysis or exporting into other downstream applications.
I have been working with 3D scanned data and professional 3D Laser and Structured Light Scanners for over ten years. I was skeptical that results of this quality could be achieved with any 3D scanner under $30K. My first foray using this David SLS-1 left me speechless. This is a complete package with powerful software put together with intelligent German ingenuity and attention to detail.
The David SLS-1 Kit is a game changer. This is a great package for professionals, designers, engineers, schools and enthusiasts. Thanks to David Vision Systems, high resolution structure light 3D scanning is now available to everyone.
written by: Mark Pestkowski - Industrial Designer, specialising in complex freeform design, reverse engineering and 3d scanning.
David SLS-1 3D Scanner: Review
The DAVID SLS-1.
A few years ago we spent some time with the original DAVID scanner Starter Kit. A functional and easy to use home laser scanning solution.
But the technology at that time meant the scanning process was slow and it also meant spending time in a dull to dark environment. The results were impressive but the level of involvement was high.
Since that time the team behind the DAVID Scanner, DAVID 3D Solutions, have released their latest addition to their 3D scanning Portfolio. DAVID-SLS-1 scanner uses Structured Light technology, to produce 3D scans in a matter of seconds.
Laserscanning: What is SL?
SL 3D scanning, otherwise known as Structured Light, is a means scanning objects using a projected striped pattern from a projector and reading the result using a camera.
The SLS-1 comes with all the tools needed to perform these scans without the need for any supplementary hardware or software.
SL basically works by pulsing a series of light patterns at the object and building a mesh from this. In comparison to the Starter Kit which involves painting a laser over an object's surface there's a huge leap in time saving and ease of use. That being said, setup time intially, for those new to 3D scanning can be somewhat slow. But once you refine the process you would be ready to scan an object within 5 to 10mins.
The hardware included to do the SL scanning is substantial. An Acer K11 projector, high quality camera, Hahnel high adjustable tripod, 2 calibration studios and the DAVID software on a USB device.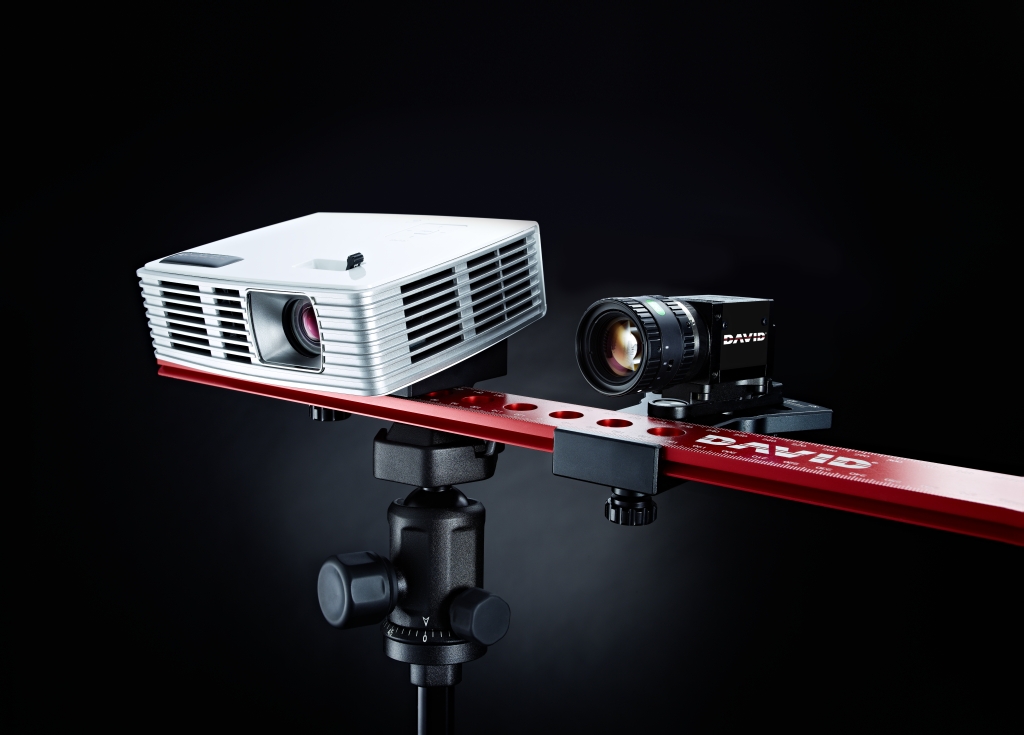
For this review I decided to use a 10" replica of Michelangelo's David. As you can see in the opposite images the end results was a good return for the work involved.
I did have to do some polygon decimation in Blender as the actual result was too detailed to use in SketchUp. Below is the raw scan in Blender.
The scan
The SLS-1, as mentioned takes some time to setup but you are walked through the process with a supplied User Guide. The hardware assembly is straightforward and the only real head scratching comes when you have to do a bit of physical measuring of objects and distances between projectors, cameras and objects.
Once your are ready the DAVID scanning software looks after most things. Projector and camera calibration does mean fiddling with focus rings and aperture settings but it takes longer to type that sentence than it is to do it.
When everything is dialled in you can start the scanning process. There isn't much to do other than click scan and rotate your object on completion. For a full 360 degree scan I found anything between 8 to 12 rotations gave the best results.
In the top image you can see the object in the calibration studio, then result of the each pass and finally the completed 'fused' mesh.
To take your series of scans and compile them into one mesh the DAVID software has a system called 'Fusion' which will automatically align and heal any holes in the scanned mesh and export the result to either .obj, ply or stl. Ideal if you plan to go the 3D print direction.
You can also choose to export each scan separately to do further work in applications of your choosing. Another element to 'Fusion' is that it can also capture textures and apply these to the scanned meshes. I did play with this somewhat on other objects with mixed results. It is not flawed but when dealing with lighting and reflections it can get discontinuous with obvious changes in textures from scan to scan.
Also the difference in scan resolution between both means the SLS-1 is 5 times more accurate.
The Verdict 7/10
Pros:
- Fast
- Accurate
- Ease of Use
Cons:
- Expensive
- Software can crash at times
Overall, the scanning and mesh tools in the DAVD software are excellent. It caters for someone that wants to grab a quick scan all the way up to highly detailed scans.
In terms of accuracy and speed the SLS-1 is a crowd pleaser. The build quality is high and the bundled software gets the job done.
Since this review David Solutions has released SLS-2 which builds on the foundations of SLS-1
Tags for this article: review | 3d scanner | scanning | structured light | software | david sls | sls-1
David SLS-2 3D Scanner Review
Reviews
This relatively inexpensive scanner allows you to get high-quality 3D models of objects and will be an indispensable device for both the designer and the jeweler.

David SLS-2 3D scanner specifications.
David SLS-2 3D scanner package:
- LED project;
- camera with lens;
- mounting stand with slider for camera configuration;
- tripod with case;
- glass calibration plate + 2 fixing angles 90⁰;
- DAVID 3D-Scanner PRO Edition USB driver and software, camera drivers;
- projector accessories: external power supply and power cable; remote control; VGA adapter for universal I/O; VGA cable; HDMI cable; case; user manual;
- adapter for international outlets;
- USB cable for camera;
- cable holder;
- turntable;
- scan object mount;
The 3D scanner has user-friendly software developed by David Vision Systems. The software is supplied on a flash drive and runs directly from it.
The DAVID 3D-Scanner PRO Edition software will not be difficult even for an inexperienced user - the program has an intuitive Russian-language interface.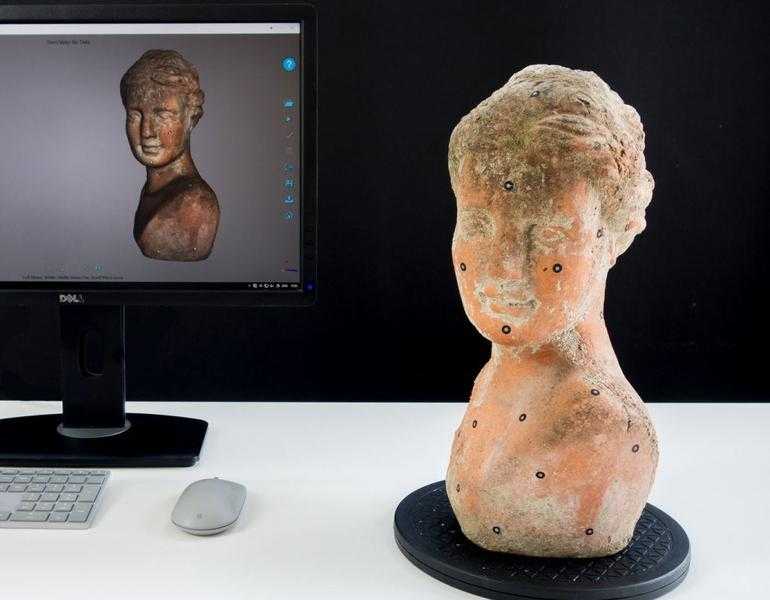
A few words about the scanning process:
In order to start scanning on the David SLS-2, you need to assemble the scanner according to the instructions and prepare it for calibration. Calibration is carried out automatically using a calibration panel and software.
After the calibration is done, you can proceed to scanning. For this, it is enough to simply replace the calibration panels with the object to be scanned. Further, by controlling the scanner using the program, making scan after scan, we get a complete picture of the 3D object.
In order to facilitate the process of scanning and “gluing” scans, David 3D has released a special turntable and mount for scanned objects.
Results of our scans:
Main advantages:
- Affordable price;
- Short scan time;
- Easy to learn;
- Scan quality;
Main disadvantages:
- Relatively small scanning area;
- Recalibrate when scanner is moved;
Conclusions:
The David SLS-2 3D Scanner is a high-quality, inexpensive 3D scanner that can handle scanning tasks of varying complexity, such as: reverse engineering, object duplication, digitization of real objects. It is easy to operate and learning to 3D scan is easy and the result is really professional. The David SLS-2 is a great choice for design engineers, jewelers, and anyone else who needs 3D scanning in their work.
Follow author
Follow
Don't want
4
More interesting articles
0
Subscribe to the author
Subscribe
Don't want
FlyingBear Ghost 6 is a new model from the popular line of 3D printers from FlyingBear! What's new...
Read more
0
Follow the author
Subscribe
Don't want
Another new video review of Formlabs large format device, but this time. ..
..
Read more
90
Subscribe to the author
Subscribe
Don't want
This post will cover the whole path from the idea of buying a 3D printer to the development of useful ...
Read more
DAVID 3 3D Scanner Quick Review-Instruction 3D Scanner. x
DAVID 3.x Describes how to use the scanner.
Structured Light: Hardware Setup and Calibration
Introduction
Scanning Structured Light (SL) is a 3D scan with a video projector instead of a laser.
DAVID will use a video projector to project a series of stripes on the site. The camera will cover the object from different angles (above, below, to the left or right of the projector) and take (ultimately) one image for each mode. Structural streaks that are caused by deformation on these objects, DAVID will calculate the exact 3D cell on the surface of the scanned object.
– Camera calibration is similar to laser scanning. But scanning is much faster and easier:
- Panel calibration can be removed after camera and projector calibration
- No moving parts
- Only one click
- Scanning only takes a few seconds
Mobile Scanner. It is much easier to mount the camera and the projector from a fixed distance on the same stand (eg tripod). Once calibrated, this mobile scanner can be moved and can continue scanning anywhere as long as the camera and projector and their optics remain stationary. DAVID SLS-1 has such settings.
Step 1 : Projector setup in Microsoft Windows
Connect the projector to the PC (usually via VGA, DVI, HDMI or DisplayPort).
We recommend that you turn off all filters that the projector may use to “enhance” the image, such as sharpening and contrast, frame interpolation, etc. If your projector has presets, you need to select “default”, “neutral”, “video ” or “cinema”.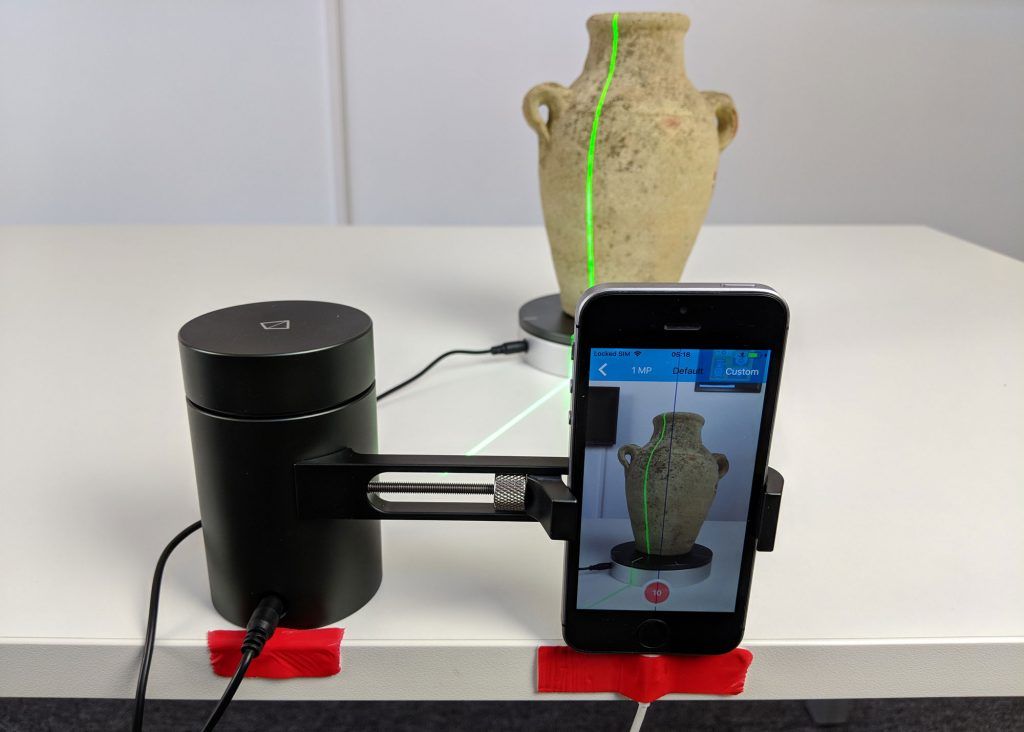 Presets like “dynamic” or “game” usually have a bad effect on scanning. Also disable any automatic or manual keystone settings!
Briefly: set the projector as an extended desktop (screen 2). Set both monitors and the projector to their native resolutions. Go to step 2.
Enhanced: Windows does not distinguish between a projector and a monitor: both are “screens” or “displays” with specific resolutions. It can be set to show similar content on both (clone) devices, or for different content (extended desktop) spreading from one screen to another. This is what we need! Icons, windows programs and mouse pointer, etc. can be placed on any screen, or moved from one to another. The only thing "cloned" on both displays is your desktop background image.
Quick Option: In Windows 7 you can press Win+P to open the menu. Select "Extend". The scheme is:
In any version of Windows, you can right-click on the desktop and select “Properties” or “Screen Resolution” (depending on your version of Windows). Select “expand”, and set each display to its native resolution (maximum). You can click the "Identify" button to see which is which. You can also choose which one is your “primary display” (should be your monitor).
Move the mouse around the border display to see it leave one display and reappear in another. You can move any windows, desktop icons or even taskbar icons to wherever you want, but generally you will want them all on your monitor.
Step 2 : Equipment Placement
The projector must be placed to the left, right, above or below the camera, of course, so that both are facing the subject. It makes sense to mount them together on a single mobile tripod, but you can also simply place them above or next to each other on a table. The entire scale of the scanner depends on the size of the object. The following table describes the values of the DAVID SLS-1 scanner (12mm, medium size projector). Webcams tend to have a wider field of view and should be set to shorter distances.
Step 3: Hardware Setup Menu
To start DAVID 3 and open HW Setup from the menu on the left.
Projector Setup
Select “Structured Light Setup”. Set the Screen ID so that the structured bar is directed towards the projector (usually 2) - if this is not possible, go back to step 1 and be sure to set the projector as a secondary screen.
Position the object so that the projector illuminates the surface of the object - no less, no more. The focus adjustment of the projector should be such that the projection is sharp. Depending on the projector model, if the projector is perfectly orientated, fine lines between projector pixels may cause scanning noise. If this happens, we recommend setting the projection out of focus. This will not reduce the quality of the scan.
Camera Setup
In DAVID, select your camera as the video source (usually “ DAVID -CAM-…”). You should see the current camera image. If necessary, adjust the focus and iris.
Position the camera so that the projected model is on the surface of the object (or nearly) filling the camera's field of view. If the camera shows a much larger view than the scanned surface, then the distance between the camera and the object should be reduced. Attach the ball joint (where available). Adjust the camera's focus for a sharp image.
A very important step is to adjust the image brightness. It depends on:
Exposure ? set so that the image is stable and does not wobble – usually 1/60s is enough
Camera settings (“gain”, “brightness”) ? should be default (neutral)
Projector brightness ? must be set to maximum
Lens mechanical iris
If you need to fix the exposure time to avoid flickering/pulsing, in most cases you should use a mechanical lens iris that adjusts the brightness of the image. If your camera does not allow this (webcam), you will need to dim the projector's brightness.
DAVID measures the intensity of the image using 3 horizontal and 3 vertical lines and displays them as red curves. It is very important to find good settings so that these red curves show up well. In relation to the areas of the picture that show how the incoming waves: the intensity of the red curve should be sinusoidal and should not be over- or under-saturated. In other words, the red sine wave should not be cut off by the blue line.
too dark - sine too flat good (but too much) too bright - sine cut off
The following images show the same sinusoids, but during scanning. This image shows the ideal settings:
In the following image, the sine waves are distorted (more saturated). This will cause waves in the scan result. This can be avoided by reducing the camera exposure or brightness. If this is not possible, you can reduce the projector's brightness using the slider at the top.
The next frame is too dark. In this case, increase the camera exposure and/or brightness.
The machine is now optimized for your site and needs to be calibrated. From now on, the scanner is fixed.
Step 4 : Calibration menu
Select a calibration sample that matches your object size / desired scan volume (see table above). Its angle must be strictly 90 °.
Remove the object and set the calibration angle in one area at the front of the scanner. If you have a mobile scanner, you can move or tilt the entire unit, but keep the camera and projector stationary relative to each other. The cameras don't need to see all the marks, but at least 6 rings and a few dots. In general, the image from the camera should be filled with calibration marks. Cameras should not see past calibration panels.
In DAVID, open the calibration menu.
Enter the correct calibration scale in “Calibr. Scale".
Check the camera image again. In areas that show waveforms, the intensity of the red curves should not be cut off at the blue line.
If the scanned object is much darker than the white calibrated panel, the sine wave will be distorted. To fix this, you need to reduce the “projector brightness”.
Camera image should look something like this:
Press “calibrate” to calibrate the scanner. At this point, the program will measure the position, orientation, focal length, and distortion factors of the camera. This will then design a sequence pattern that will define the same optical performance of the projector. If texturing is not turned off, then it will change the white balance settings.
After a successful calibration, DAVID will design a staggered design whose corner points must fall exactly on the calibration marks.
Calibration Completed
The scanner is now calibrated. This refers to the positioning of the camera and projector relative to each other, and the focus and brightness of the image. You can move, rotate and adjust the scanner as a whole, and you can close and restart the DAVID software without losing calibration.
However, if you move the cameras or projector separately, or change the focus (for example, to scan something smaller or larger), then you will have to repeat the entire calibration procedure.