Custom 3d printer heated bed
Heated Bed – Core3D Custom Printers
For starters, everything I write about down below involves electricity. Working with electricity is dangerous. Do this at your own risk!!!
MK2a 300×200
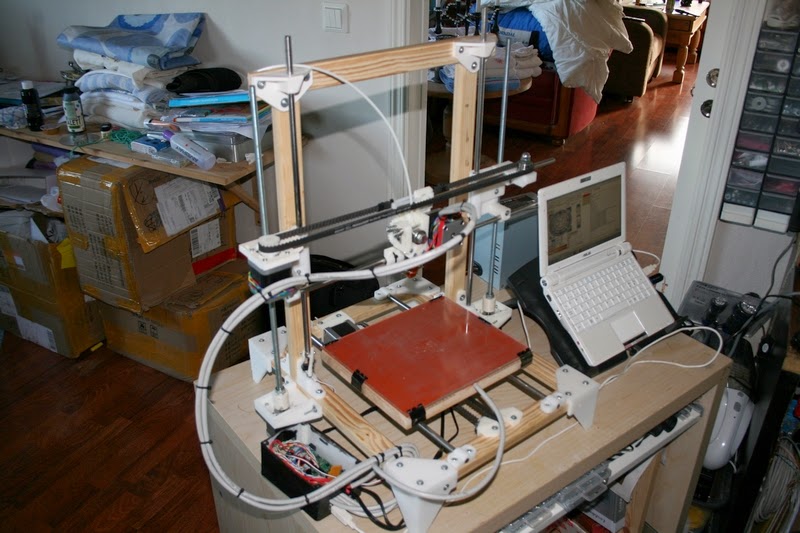
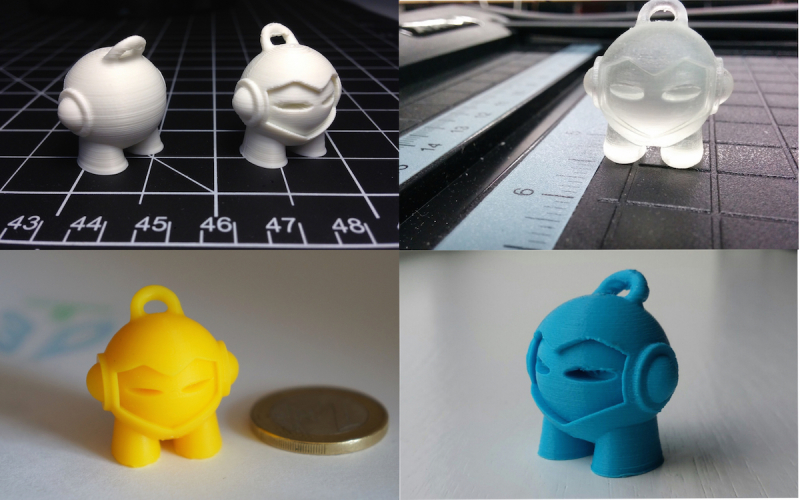
Haha, first blog post about my brand new printer and I’m already upgrading, that’s what happens as you learn as you go. The first implementation for the heated bed on my Core3D printer was a “standard” 200x300mm MK2A bed with Borosilicate Glass, purchased on Ebay. It worked fine for PLA but the intent of the Core3D printer was to print with ABS and if possible with a bed temperature of 110 C (still experimenting on whether that is the best temperature).
Original MK2a bedThe original bed took 12 minutes to get to 60C and I never even tried to get to 110C. It pretty much maxed out at 78 (even inside closed chamber). 12 volts for a 200x300mm bed simply does not seem to do it.
Faster hot and hotter
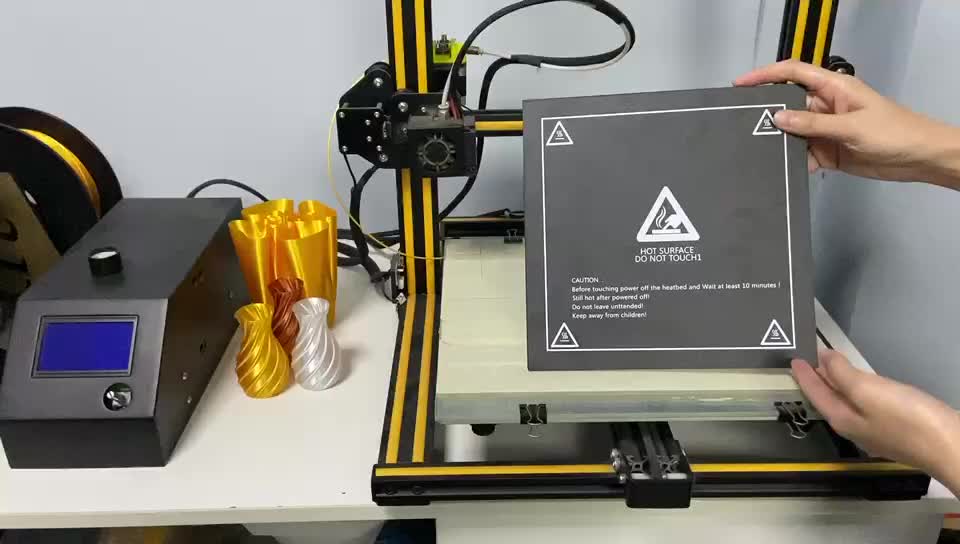
I needed faster and better heating so I decided to install a 110 volt heated bed. I figured it would get hotter and it would get hotter faster. It worked out. It gets HOT and it gets hot FAST (See video below).
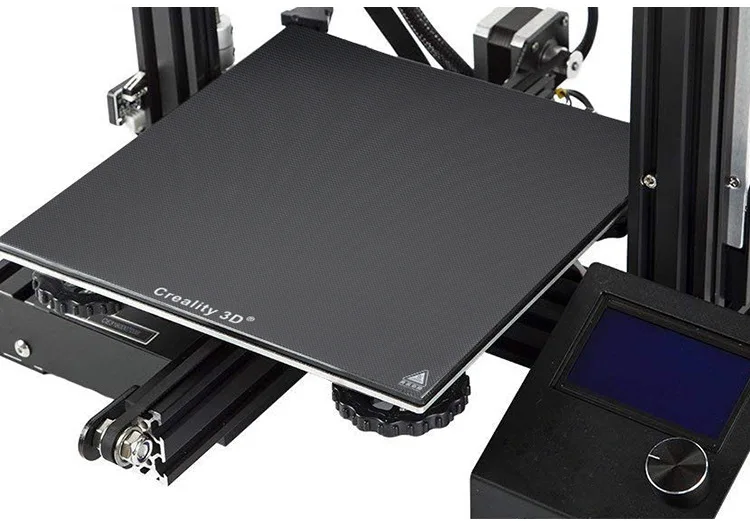
The other thing I recently changed was from a fixes Z-endstop to Auto Bed Leveling. The “old” Boro glass would not do for Auto bed leveling as it requires metal to detect so a new aluminum bed it was.
Original adjustable Z endstop designed in Fusion 360Bed leveling Inducer, replacing Z-Endstop
For the aluminum bed, I chose the RepRap Champion 300x200mm Aluminum Heated Bed Build Plate 3D Printer RepRap Prusa i3 Upgrade Kit from Amazon.com.
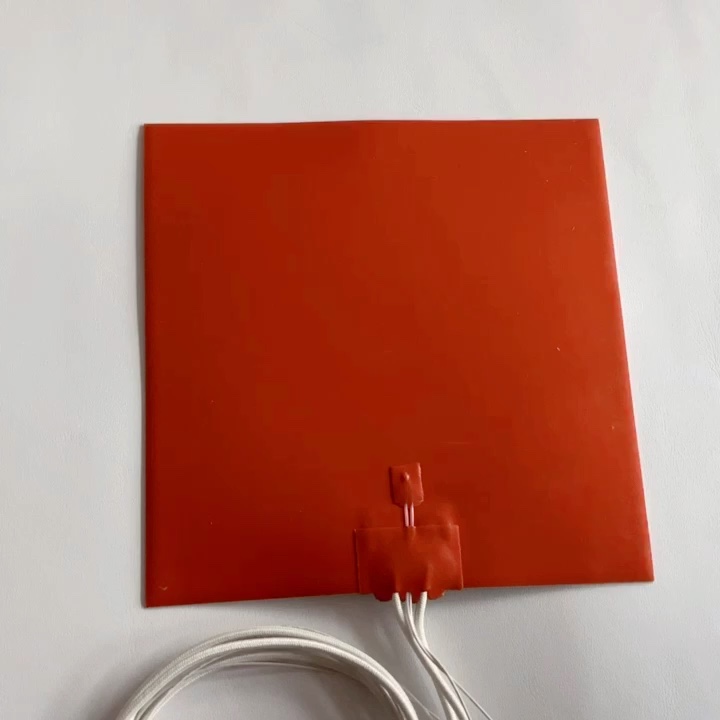
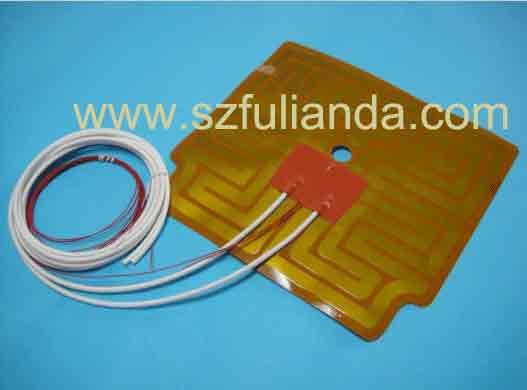
For the heater I got the 200 X 300mm (8 ” x 12″ approx.) 110V 600W, with 3M PSA & NTC 100K thermistor, KEENOVO Silicone Heater Mat/Pad,3D Printer HeatBed
Pretty sure it came from China as it took over 2 weeks to arrive.
Since the Core3D currently uses RAMP 1.4 and the board puts out 12 volts for the bed, I also needed something to allow for the 110Volt bed so for that I installed a Solid State Relay.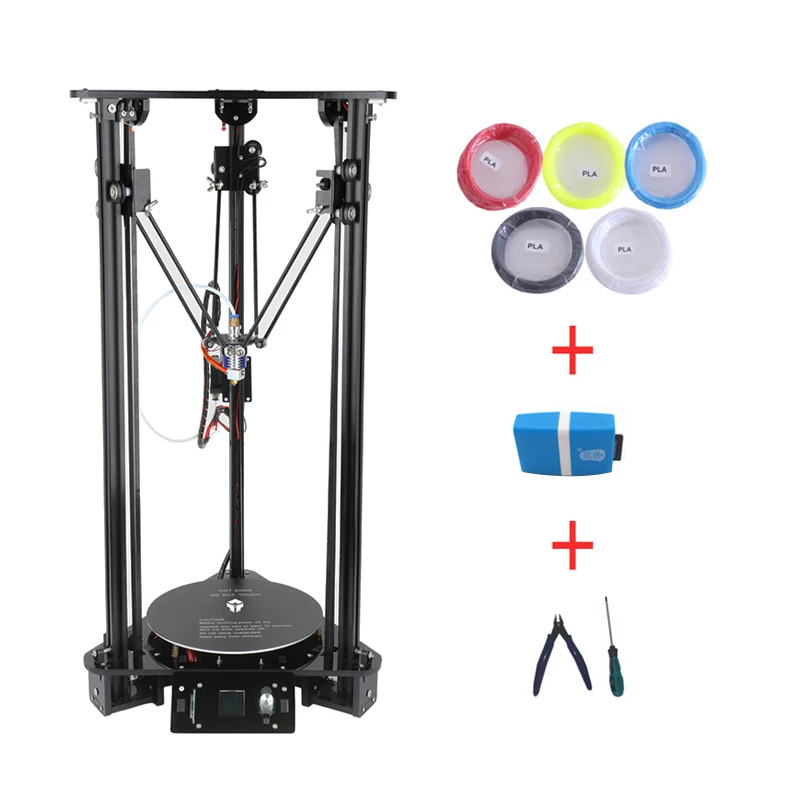 For this I got the uxcell SSR-25 DA 25A 3-32V DC / 24-380V AC Solid State Relay + Heat Sink
Wiring the new bed
The wiring is fairly simple, yet a little intimidating. Practically everything on the Core3D (except for a chamber heater) is running at 12 Volt. It does not hurt when you touch the wrong wire running 12 Volts. 110 Volt DOES hurt. be careful. If you’re in Europe: 220 Volt HURTS EVEN MORE!!
I’ll be honest even now that it is all wired up, I have every intention to have someone with an electric engineering degree to look things over. When soldering some wire (printer was turned off but plugged in) I got a nasty zap when the solder iron touched the load wire. It shouldn’t have. To date I’m not sure it’s the printer or the solder iron that is defective (more on this later).
Applying the silicon heater to the bed
Be warned, I screwed up on this one (somewhat). The silicon heater I got came with the factory applied adhesive backing. First, clean off the surface to which you will apply the silicone heater. Make sure there is no dirt or grease on the plate. Next peel off the adhesive backing paper partially. It’s suggested you start at the opposite site from the wiring. You’re supposed to do this at an angle, possible with a roller of some sort.
WARNING: YOU ONLY GET ONE CHANCE!!!
I followed the instruction but was so focused on making sure there were no bubbles, I lost track of the alignment. My bed ended up somewhat crooked on on the aluminum bed. I was lucky it stayed within the bounds of the screw holes, but I didn’t miss them by much. You really only get one chance. I tried slowly backing out but the adhesive started separating from the silicone. I quickly back off from that. Everything, I’ve read seems to indicate that once you loosen the silicone, you’ll need to remove all glue and apply new one of your own. A messy procedure to say the least.
Am I happy?
Yes, I am. I love the aluminum bed and the fact that it allows me to use Auto Bed Leveling.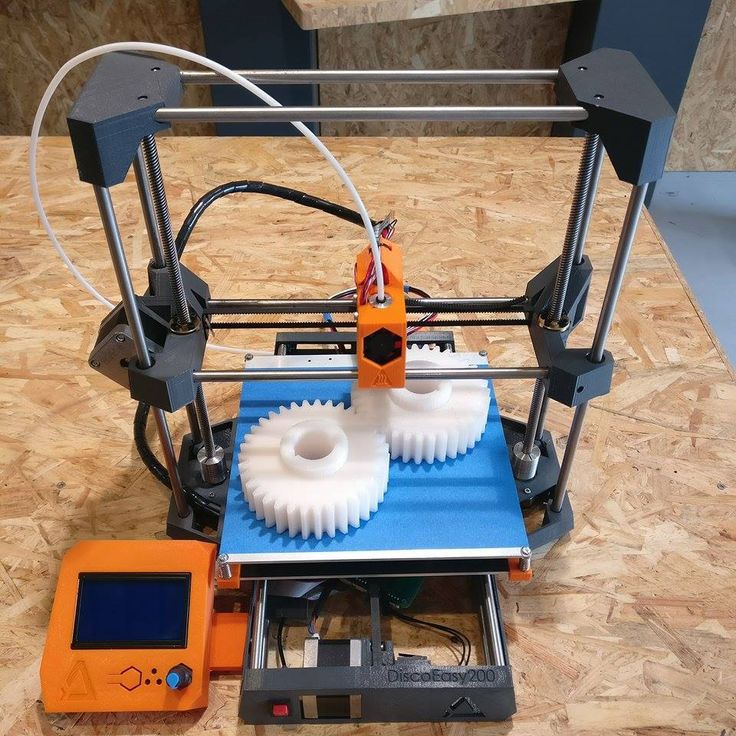 The silicone pad looks fine, even though it got on a little crooked and it heats fast and gets hot. As a matter of fact the bed now heats faster than the hot-end.
video is running at 4x speed
We’re not done yet
It’s been stated elsewhere that using the thin aluminum bed is not the best medium for this type of heater. It tends to warp as you heat it. I have not noticed this yet but it might be that the auto leveling is compensating for it.
What I definitely miss is the glass plate I can remove, treat and handle externally from the printer. For this reason I’ve ordered a second aluminum bed that I can lay on top (using the old paper clips). Once I get it, I’ll need to figure out if simply laying it on top will suffice or if warping of the bottom plate prevents proper contact.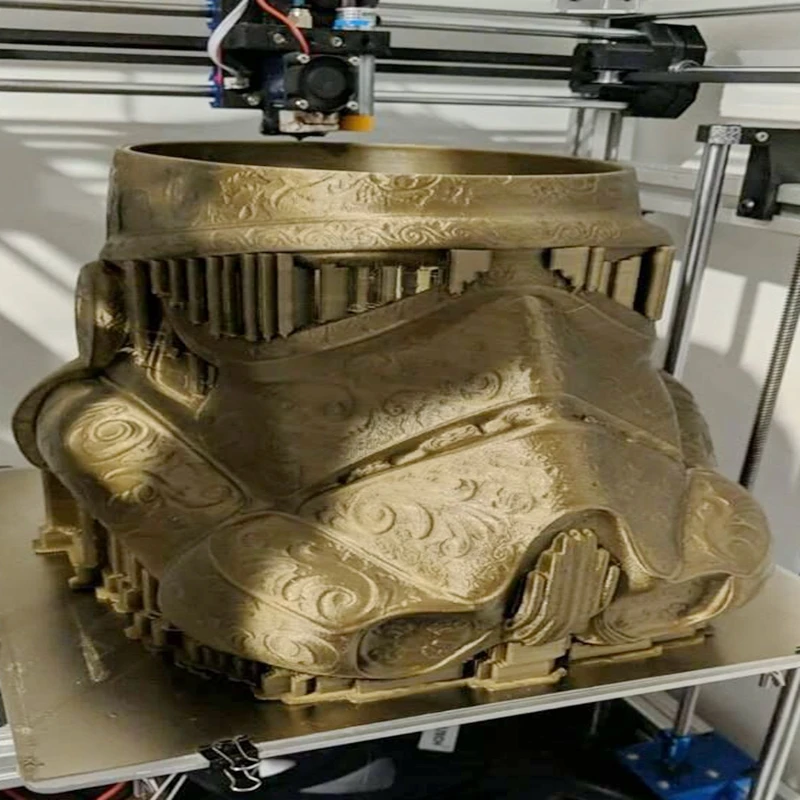 I’ll keep you posted on that.
Please note: I’m an affiliate to several vendors. Some of the products above link to the actual items from the vendors I purchased from. Do me a favor and use these links to purchase your items, I get a little kick back. Building 3D printers costs money.
custom heated bed 3d printer - Buy custom heated bed 3d printer with free shipping
custom heated bed 3d printer - Buy custom heated bed 3d printer with free shipping | Banggood ShoppingBrands
SEE MORE
Plug Type
Printing Size
- 200mm≤X(1)
SEE MORE
Working Type
- FDM (1)
SEE MORE
-
Home
- "" 40 Results
Price -
OK
Ship From
Total 1 pages
Go to Page
Go
Confirm your age
You must be at least 18 years of age to enter this section.
I AM UNDER 18 I AM OVER 18
Specifications - Modix Large 3D Printers
Specifications (all models):
Home Information
- Printing Technology - FFF (Fused Filament Making)
- Delivery - DIY kit. The build guide includes easy-to-follow videos and interactive 3D models that can be rotated and scaled.
- Similar basic concept All our printers have the same core design based on Modix BIG-60 V3.0.
- Upgrade - New versions are developed with backwards compatibility in mind. Owners of Modix printers benefit from both configuration and hardware upgrades from time to time.
Detailed specifications
Chassis and body
- Solid aluminum profiles with T-slot 40X40
- Laser-cut, powder-coated aluminum brackets and hinges
- Enclosure - Enclosed enclosure made of 3 mm thick black aluminum composite panels (ACP).
 The case is an optional add-on for the BIG-60 and BIG-120X and is the default option for all other models.
Duet 3D Printer Controller
Duet 2 WiFi Powerful UK Made 3D Printer Controller
- Powerful 32-bit Processor
- Dedicated Wi-Fi module with external antenna
- Quiet TMC2660 stepper motor drivers, up to 256 microsteps.
- High-speed USB memory stick and support for a second external SD card if required.
- Dual extruders controlled on main board, up to 5 additional stepper drivers controlled on expansion board.
- High Power: Each stepper driver supports 2.8A motor current, currently software limited to 2.4A.
- Access to the printer via a PC, tablet or smartphone on the local network.
- Web-based printer setup and management.
Interfaces
touch screen
- 7-inch touch screen Duet3D, integrated with controller
Web Web
- Internet access to the Wi-FI for remote control from mobile or perpetual users download files for printing directly from your workstation
Tilt Screen & Emergency Button
Tilt Screen
Tilt Screen is a “convenience” designed for our tallest machines: Modix BIG-Meter and Modix-120Z, but compatible with all our printer models.
Emergency Reset Button
Along with the upgrade to the tilt screen, the emergency reset (soft reset) button is now located on the front of the machine. This control and safety feature will allow you to immediately stop printing when needed.
* These two features are sold as one combined add-on.
Movement system
- Linear guides HIWIN MGW9H
- Four Z ball screws for movement along the Z axis. Diameter 12 mm, pitch 4 mm.
- Gates GT9 timing belt 2mm wide, fiberglass reinforced
- Axial motors: Motech Nema 17 60mm long MT-1705HS200A.
Holding torque 8.2 kg/cm (114 oz/in). Current/phase: 2.00 A+ - Mechanical positioning accuracy: X-10 micron, Y-10 micron, Z-0.5 micron
- Print speed - normal quality 60 mm/s, draft 100 mm/s, calculated for 0.4 nozzle. Larger nozzles are usually required for slower printing, but parts are made much faster due to fewer layers.
Power supply
- Both 110V and 230V support
- For electronics: Meanwell 24V 280W power supply
- Protection: against short circuit / overload / overvoltage / overheating.
- Power consumption without load <0.5 W
- LED power supply indicator
- switches and aviation class connectors
- Protection: against short circuit / overload / overvoltage / overheating.
- Heating from a variable current
- Controller of the PID heater PID from Autonic connections 208-240V 32A
- North American customers: NEMA L6 30P 30A outlet
- EU / AU / UK customers: IEC 309 32A socket, blue (2P + E)
- Tripp Lite PDU for meter and 180x
- For North American customers: https://www.tripplite.com/ support/PDUh40HV.
- EU/AU/UK customers: https://www.tripplite.com/support/PDUh42HV
Print bed
- Alcoa Mic6.35 cast aluminum plate 6 mm thick, made in USA.
- 1370W AC powered bed heater (1,200W for 110V users). Requires a dedicated independent 15A AC source.
- Dual heating zones. Internal size 200X200mm for small objects and low power consumption.
- Maximum temperature - 110 o in (with housing)
- Print surface - PEI film with 3M high temperature adhesive.
Removable magnetic bed
This add-on will greatly improve the user experience and save you time every day. Modix printers come with PEI sheet by default, which allows sheets to be printed after the table has cooled to room temperature. With the addition of a detachable magnetic platform, users do not have to wait or work hard with a spatula, and they can easily and immediately remove objects after completing a print job by simply bending the spring steel plate.
This add-on includes an adhesive magnetic sheet to be attached to the aluminum base plate and a removable spring steel plate to be placed on top of it.
Flexible spring steel plate can be printed on both sides. One side is PEI powder coated giving a textured underside and the other side is covered with a smooth PEI sheet giving a glossy underside.
Another benefit is that the PEI installed on the baseplate can degrade over time during maintenance. Removing the print with a spatula can cause unwanted scratches that will later appear on the bottom of the printed object. It is much easier to replace the PEI on a removable spring steel or even buy a spare block than to remove it from the bed itself.
Automatic bed leveling
- BLTTouch probe
- Bed shape detection is stored in the controller memory and activated before each print.
- Probing grid: Big60 - 100 points, 120X - 200 points.
* The photo on the right shows the calibration process interface. These results indicate that the rear left bed support needs to be moved up slightly.
Automatic calibration extension
This add-on improves the user experience by automating calibration procedures. With this add-on, you now have automatic print bed tilt calibration (Z-axis) and automatic gantry alignment (X-axis).
This update comes in the form of a new controller box that has an additional electronic board called the DUEX-5 expansion board that doubles the total number of stepper drivers from 5 to 10.
By dedicating a dedicated driver to each of the Z and X motors, each of which can be micro-adjusted up and down, allowing the tilt of the bed to be adjusted at the touch of a button.
This type of control box is already included by default in the BIG-Meter and BIG-180X and is now available as an optional upgrade for the BIG-60, BIG-120X, BIG-120Z and BIG-40.
The update includes a fully wired new electronic box with a Duet 2 WiFi controller, Duex-5 expansion board, wires for all motors and an additional X axis stop. You can leave your default electronic box as a spare/backup.
* Will only work on V3 models.
GPR Software
- Open source Duet RepRap firmware. Leading 3D printing firmware allowing for multiple configurations and easy customization via the macro system.
- Any available slicer and 3D printer controller can be selected, including Slic3r, Cura and Simplify3d (recommended).
Specific printer configurations are shipped in the customer area.
Griffin printhead
The new Griffin printhead, previously an optional upgrade and now the default printhead on all of our printers, is a significant improvement to our offering.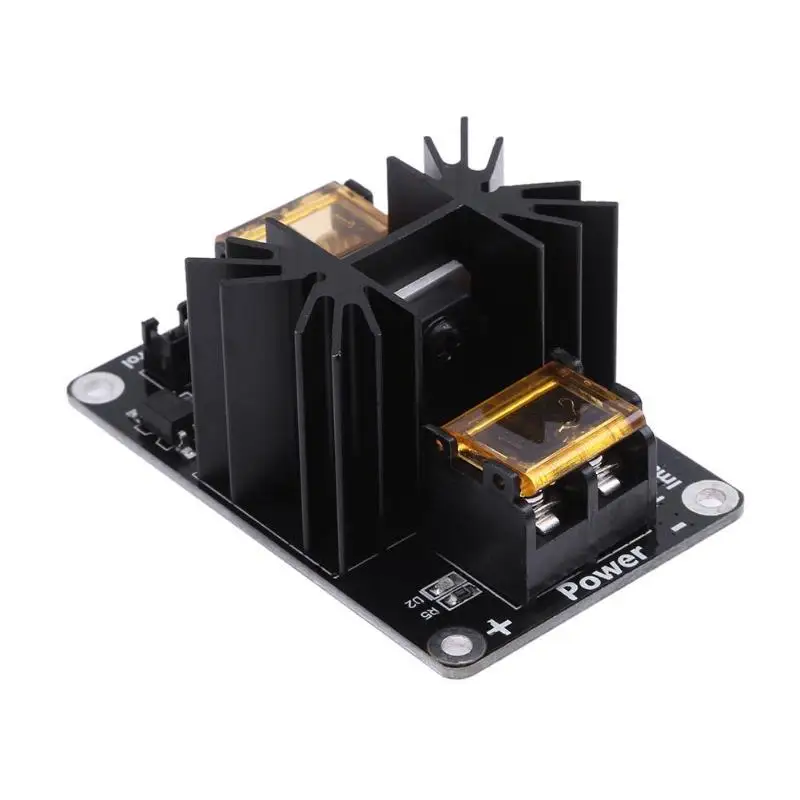 It consists of a custom made Bondtech extruder (based on the BMG model) and a new hot end designed by Modix. The new design comes standard with every Modix printer and includes the following enhancements:
High Flow and High Print Temperature: The Bodtech extruder is equipped with a dual drive system that picks up the filament from both sides. The thermal block is made of nickel-plated copper for improved heat transfer rates and compatibility with higher printing temperatures. The design includes Slice Engineering's advanced bimetal thermal break, which expands the melt zone inside the fuser, as it is also primarily made of copper. In addition, the upgraded PT-1000 temperature sensor allows printing at higher temperatures up to 500°C. The hot end components are rated for 500°C and have so far been tested for printing up to 340°C.
Higher reliability: Large-scale 3D printing typically runs the risk of scratching or hitting the printhead on thicker models, causing thermal breaks to bend or break.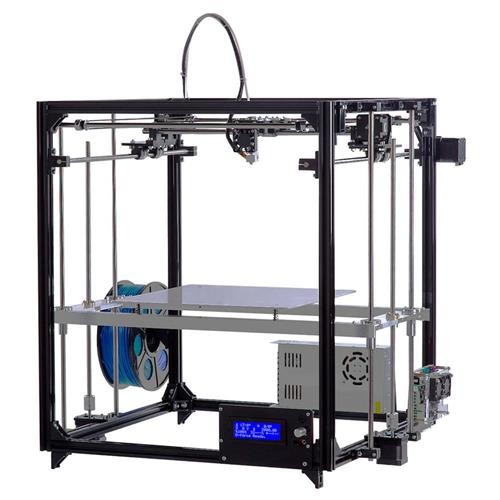 The new print head provides a rigid mounting of the fuser, which is naturally more reliable and reduces the number of such situations. The main reason for this is that now the heat block is attached on three sides, and not just on one. With this extra mount, it can withstand a much stronger impact. The longer E3D Super Volcano can also be attached to a hard mount using a dedicated adapter (Late Summer 2022)
Improved user interface: New print head design makes changing nozzles easier. The rigid fastening of the thermoblock allows you to change the nozzle with one hand, which makes it even easier to switch to a nozzle of a different diameter.
Easy Exchange: The design of the mounting bracket and D-rod of the Slice Engineering thermal breaker allows users to easily replace the entire filament melting subsystem. This will allow users to allocate full customization to a specific filament type. those. leave one setup for abrasive carbon filler and another for prototyping with PLA.
Compact Design: The new design retains the benefits of a compact design that maintains high z-travel and is compatible with a wide range of E3D Volcano tips in a variety of sizes and materials.
Smart: The new printhead allows automatic calibration of the Z offset between the nozzle and the BL Touch sensor. It is easier and more accurate than the manual procedure. A special sensor allows the BL-Touch and the nozzle to touch the surface. The exact relative distance between probe and nozzle (“Z-offset”) is automatically stored in the printer.
*Brass nozzle must be replaced with a nozzle capable of operating at higher temperatures, as well as at temperatures above 300°C.
Primary extruder Griffin
included:
- Gryffin Hotand
- temperature sensor PT -1000122 - heater
- silicone sock
22 duct and brackets
– Z calibration probe with offset
Secondary extruder Griffin
included:
- Gryffin Hotand
- temperature sensor PT -000
- Silicone sock
- Mirror Extra brackets
- Fan, duct and brackets
Standard and optional hot end configurations
- Our standard Griffin hot end is compatible with E3D Volcano high flow nozzles.
 By default, we offer brass Volcano nozzles with a diameter of 0.4, 0.6 and 0.8 mm.
 - E3D offers a wide range of compatible Modix tips, including tips that can handle abrasive fibers such as carbon fiber or metal-filled fibers.
- Our hot end and extruder are suitable for 1.75 mm filament.
- Heater cartridge 24V 50W, default maximum temperature 285°C. Can be converted to higher temperature up to 500°C
- Griffin extruder is also compatible with two alternatives of the E3D hotend, we sell both as add-ons:
- E3D-V6 with a shorter fuser for detailed printing
- E3D Super Volcano for XL high performance printing.
High-flow E3D Super Volcano add-on
for fast printing of large bulky objects.
E3D V6 with shorter heater block for detailed print jobs.
Dual printhead
The secondary printhead allows you to print complex models that require easy support removal. those. models with internal geometry. For such print jobs, it would be better to use an optional print head that can print with dissolvable filaments that can be removed with water.
Clog Detector
Previously an optional add-on, it is now installed by default on every printer and improves printer reliability. The clogging detector is equipped with a special high sensitivity encoder capable of detecting the following potential faults:
- Hot end clogs
- Filament spools
- Filament outlet
- During extrusion, for example when the nozzle temperature is too low or the nozzle is too close to the bed.
When a failure is detected, the printer is suspended and the print job can be saved. No more discovering a printer that prints in the air!
This add-on is provided as a replacement for the current filament runout sensor. Consider purchasing two units for a dual printhead configuration.
* Requires Duet controller, will not work on models without V2 updates.
Fault Detector
Formerly an optional add-on, now installed by default with every printer, provides an additional layer of security in the rare event that the BL-Touch Platform Leveling Sensor fails and the failure is not detected by the printer controller. In this case, the detector will prevent the print head from colliding with the base.
Active Air Filter
The Modix Active Air Filter (MAAF) is an external air filter. The filter cleans the printer chamber by trapping microparticles and gas vapors that are released from the melted filament during the 3D printing process. MAAF provides constant air purification throughout the entire printing process by circulating air in and out and back into the printer, cleaning it repeatedly.
Multi-layer filtration
A large fan inside the machine draws air out of the printer through a flexible vent tube connected to the top of the machine. The air then passes through a set of three filters before it is returned to the printer.
Triple filter system includes
1. Pre-filter - Remove large dust particles from the air.
2. HEPA Filter - High Efficiency Particulate Absorption (HEPA) filter, consisting of a mat of randomly arranged glass fibers designed to trap the smallest particles emitted during printing.
3. Activated carbon filter - Purify the air of toxic fumes released during the 3D printing process.
It's about your health!
Submicron particles and vapors released during the plastic melting process are hazardous to your health. Therefore, every owner of a Modix 3D printer is highly recommended to install an air filter. The air filter is a MUST HAVE add-on if you are going to print with any plastic other than PLA e.g. PETG, ABS... While it is common knowledge that printing PLA in a well ventilated area is normal, there is no clear definition of proper room ventilation in winter and summer times the windows are usually closed.
Air speed control
The front speed switch allows you to control the air speed. Running the filter at the lowest speed during the printing process will not affect the temperature inside the chamber while still providing effective filtration. Towards the end of the print, you can set the maximum speed for a few minutes to ensure that the entire chamber is completely clear of any harmful additives that open the doors.
Spare filters
Based on daily use of the printer in a clean room, the HEPA/charcoal combo filters last 6 to 12 months and the prefilter lasts 3 to 6 months. There is a replacement warning indicator on the front panel.
Power Distribution Unit (PDU)
The PDU is included by default with the BIG-Meter and BIG-180X due to their high current requirements. Because we found this to be a very convenient cable management solution, it is now available for all other models*. Replace 3 AC cables with only one cable connected to the wall.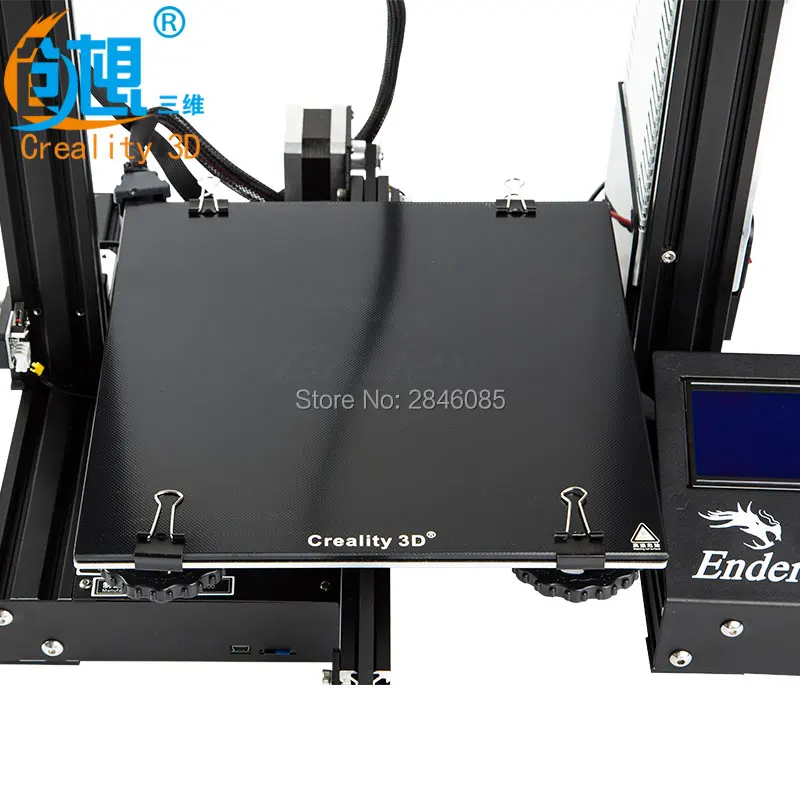
* This solution does not support the 110V BIG-120X. Contact sales for an alternative solution.
Filament
Our printhead supports almost any existing filament, including:
PLA, ABS, composites: carbon fiber, wood, copper, brass, magnetic, PHA, PVA, hips, nylon, TPE and TPU (flexible ) Co-Polyester, PETG
Open thread - Any thread from any manufacturer can be used.
Filament runout sensor - Filament run out sensor stops printing when filament is used up.
Additional mounting shelf for spools 8 kg
Redesigned mounting shelf for spools now accepts 8 kg.
Send data sheet and additional information:
3D printing for "dummies" or "what is a 3D printer?"
- 1 3D printing term
- 2 3D printing methods
- 2.1 Extrusion printing
- 2.2 Melting, sintering or gluing
- 2.
 3 Stereolithography
 - 2.4 Lamination
- 3 Fused Deposition Printing (FDM)
- 3.1 Consumables
- 3.2 Extruder
- 3.3 Working platform
- 3.4 Positioning mechanisms
- 3.5 Control
- 3.6 Varieties of FDM printers
- 4 Laser stereolithography (SLA)
- 4.1 Lasers and projectors
- 4.2 Cuvette and resin
- 4.3 Varieties of Stereolithography Printers
The term 3D printing
The term 3D printing has several synonyms, one of which quite briefly and accurately characterizes the essence of the process - "additive manufacturing", that is, production by adding material. The term was not coined by chance, because this is the main difference between multiple 3D printing technologies and the usual methods of industrial production, which in turn received the name "subtractive technologies", that is, "subtractive". If during milling, grinding, cutting and other similar procedures, excess material is removed from the workpiece, then in the case of additive manufacturing, material is gradually added until a solid model is obtained.
Soon 3D printing will even be tested on the International Space Station
Strictly speaking, many traditional methods could be classified as "additive" in the broad sense of the word - for example, casting or riveting. However, it should be borne in mind that in these cases, either the consumption of materials is required for the manufacture of specific tools used in the production of specific parts (as in the case of casting), or the whole process is reduced to joining ready-made parts (welding, riveting, etc.). In order for the technology to be classified as “3D printing”, the final product must be built from raw materials, not blanks, and the formation of objects must be arbitrary - that is, without the use of forms. The latter means that additive manufacturing requires a software component. Roughly speaking, additive manufacturing requires computer control so that the shape of final products can be determined by building digital models. It was this factor that delayed the widespread adoption of 3D printing until the moment when numerical control and 3D design became widely available and highly productive.
3D printing techniques
There are many 3D printing technologies, and even more names for them due to patent restrictions. However, you can try to divide technologies into main areas:
Extrusion printing
This includes methods such as deposition deposition (FDM) and multi-jet printing (MJM). This method is based on the extrusion (extrusion) of consumables with the sequential formation of the finished product. As a rule, consumables consist of thermoplastics or composite materials based on them.
Melting, sintering or bonding
This approach is based on bonding powdered material together.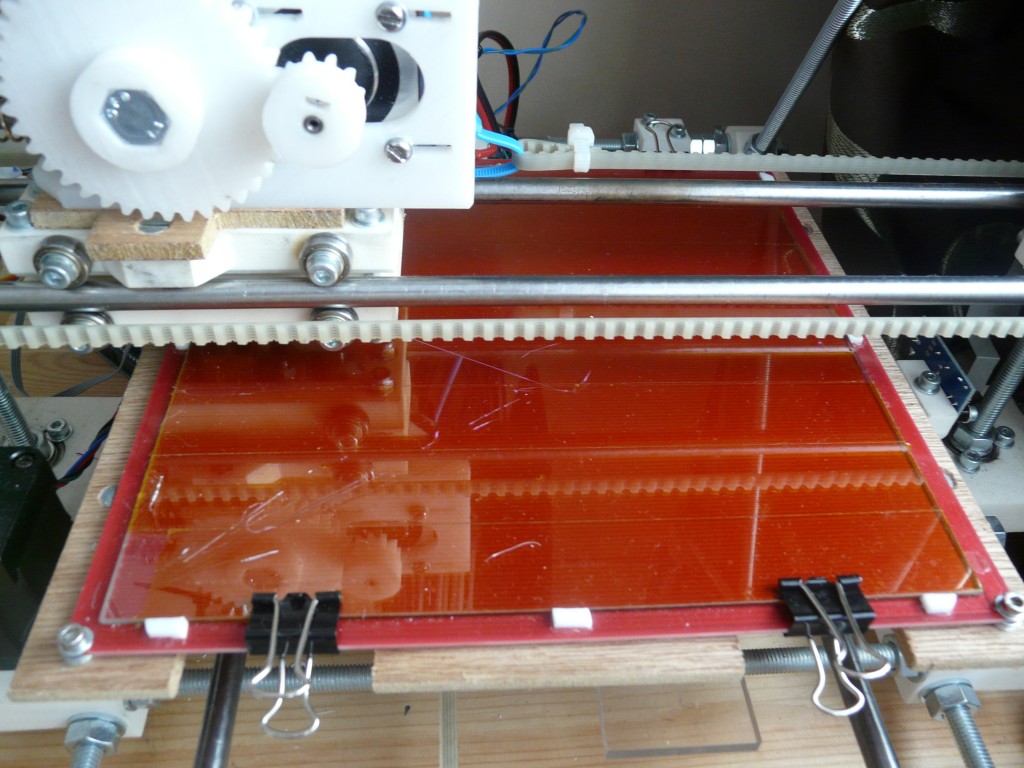 Formation is done in different ways. The simplest is gluing, as is the case with 3D inkjet printing (3DP). Such printers deposit thin layers of powder onto the build platform, which are then selectively bonded with a binder. Powders can be made up of virtually any material that can be ground to a powder—plastic, wood, metal.
This model of James Bond's Aston Martin was successfully printed on a Voxeljet SLS printer and blown up just as successfully during the filming of Skyfall instead of the expensive original
sintering (SLS and DMLS) and smelting (SLM), which allow you to create all-metal parts. As with 3D inkjet printing, these devices apply thin layers of powder, but the material is not glued together, but sintered or melted using a laser. Laser sintering (SLS) is used to work with both plastic and metal powders, although metal pellets usually have a more fusible shell, and after printing they are additionally sintered in special ovens. DMLS is a variant of SLS installations with more powerful lasers that allow sintering metal powders directly without additives.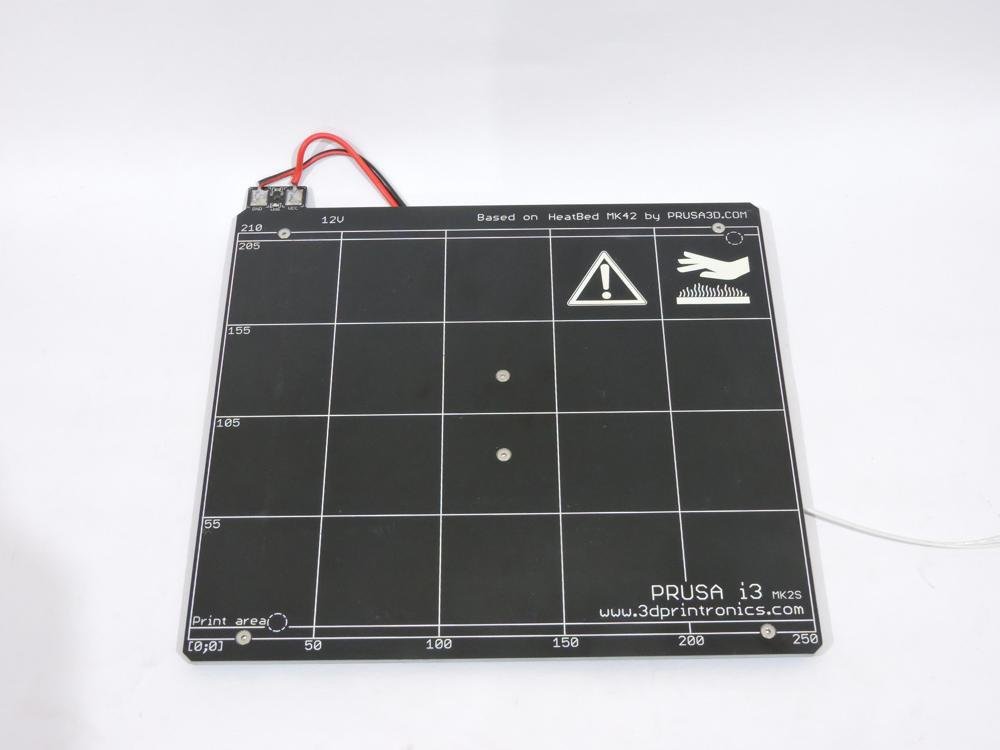 SLM printers provide not just sintering of particles, but their complete melting, which allows you to create monolithic models that do not suffer from the relative fragility caused by the porosity of the structure. As a rule, printers for working with metal powders are equipped with vacuum working chambers, or they replace air with inert gases. Such a complication of the design is caused by the need to work with metals and alloys subject to oxidation - for example, with titanium.
Stereolithography
How an SLA printer works
Stereolithography printers use special liquid materials called "photopolymer resins". The term "photopolymerization" refers to the ability of a material to harden when exposed to light. As a rule, such materials react to ultraviolet irradiation.
Resin is poured into a special container with a movable platform, which is installed in a position near the surface of the liquid. The layer of resin covering the platform corresponds to one layer of the digital model.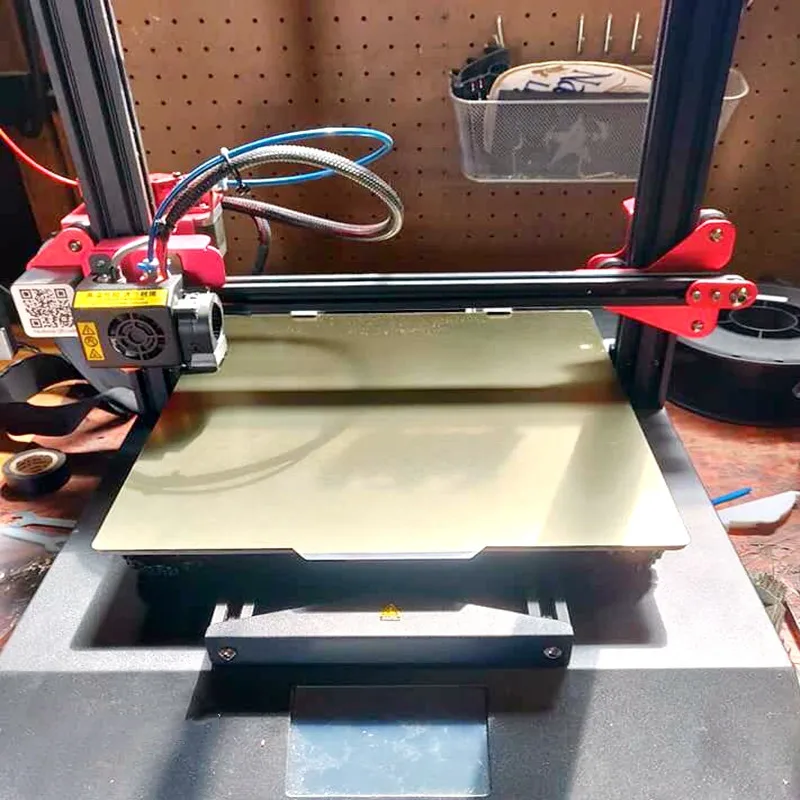 Then a thin layer of resin is processed by a laser beam, hardening at the points of contact. At the end of illumination, the platform together with the finished layer is immersed to the thickness of the next layer, and illumination is performed again.
Lamination
3D printers using lamination technology (LOM)
Some 3D printers build models using sheet materials - paper, foil, plastic film.
Layers of material are glued on top of each other and cut along the contours of the digital model using a laser or a blade.
These machines are well suited for prototyping and can use very cheap consumables, including regular office paper. However, the complexity and noise of these printers, coupled with the limitations of the models they produce, limit their popularity.
Fused deposition modeling (FDM) and laser stereolithography (SLA) have become the most popular 3D printing methods used in the home and office.
Let's take a closer look at these technologies.
Fused Deposition Printing (FDM)
FDM is perhaps the simplest and most affordable 3D construction method, which is the reason for its high popularity.
High demand for FDM printers is driving device and consumable prices down rapidly, along with technology advances towards ease of use and improved reliability.
Consumables
ABS filament spool and finished model
FDM printers are designed for printing with thermoplastics, which are usually supplied as thin filaments wound on spools. The range of "clean" plastics is very wide. One of the most popular materials is polylactide or "PLA plastic". This material is made from corn or sugar cane, which makes it non-toxic and environmentally friendly, but makes it relatively short-lived. ABS plastic, on the other hand, is very durable and wear-resistant, although it is susceptible to direct sunlight and can release small amounts of harmful fumes when heated. Many plastic items that we use on a daily basis are made from this material: housings for household appliances, plumbing fixtures, plastic cards, toys, etc.
In addition to PLA and ABS, printing is possible with nylon, polycarbonate, polyethylene and many other thermoplastics that are widely used in modern industry. More exotic materials are also possible, such as polyvinyl alcohol, known as "PVA plastic". This material dissolves in water, which makes it very useful for printing complex geometric patterns. But more on that below.
Model made from Laywoo-D3. Changing the extrusion temperature allows you to achieve different shades and simulate annual rings
It is not necessary to print with homogeneous plastics. It is also possible to use composite materials imitating wood, metals, stone. Such materials use all the same thermoplastics, but with impurities of non-plastic materials.
So, Laywoo-D3 consists partly of natural wood dust, which allows you to print "wooden" products, including furniture.
The material called BronzeFill is filled with real bronze, and models made from it can be ground and polished, achieving a high similarity to products made from pure bronze.
One has only to remember that thermoplastics serve as a binding element in composite materials - they determine the thresholds of strength, thermal stability and other physical and chemical properties of finished models.
Extruder
Extruder - FDM print head. Strictly speaking, this is not entirely true, because the head consists of several parts, of which only the feed mechanism is directly "extruder". However, by tradition, the term "extruder" is commonly used as a synonym for the entire print assembly.
FDM extruder general design
The extruder is designed for melting and applying thermoplastic thread. The first component is the thread feed mechanism, which consists of rollers and gears driven by an electric motor.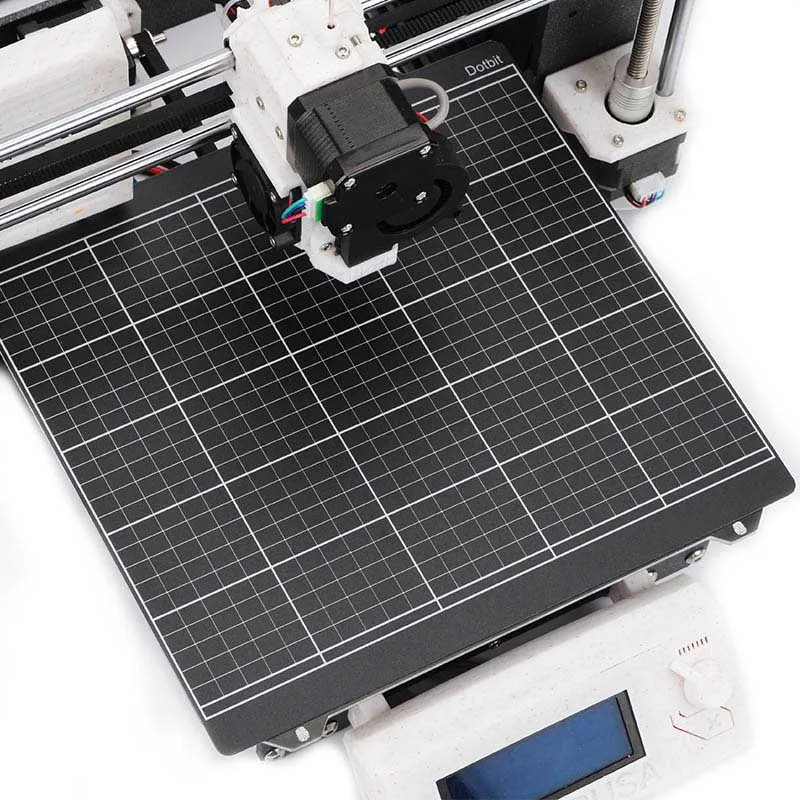 The mechanism feeds the thread into a special heated metal tube with a small diameter nozzle, called a "hot end" or simply a "nozzle". The same mechanism is used to remove the thread if a change of material is needed.
The hot end is used to heat and melt the thread fed by the puller. As a rule, nozzles are made from brass or aluminum, although more heat-resistant, but also more expensive materials can be used. For printing with the most popular plastics, a brass nozzle is quite enough. The “nozzle” itself is attached to the end of the tube with a threaded connection and can be replaced with a new one in case of wear or if a change in diameter is necessary. The nozzle diameter determines the thickness of the molten filament and, as a result, affects the print resolution. The heating of the hot end is controlled by a thermistor. Temperature control is very important, because when the material is overheated, pyrolysis can occur, that is, the decomposition of plastic, which contributes both to the loss of the properties of the material itself and to clogging of the nozzle.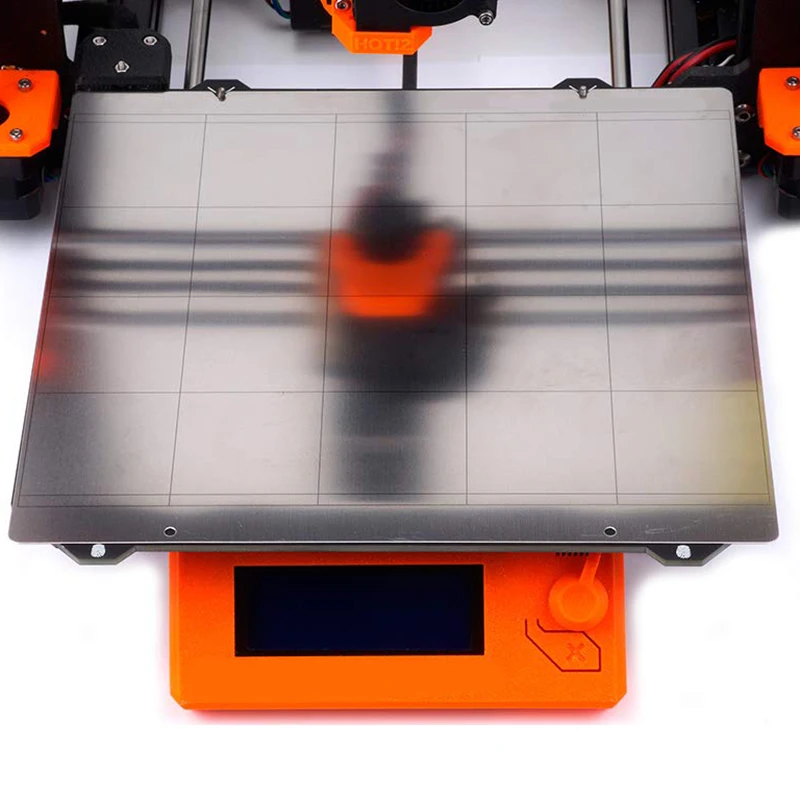
PrintBox3D One FDM Printer Extruder
To prevent the filament from melting too early, the top of the hot end is cooled by heatsinks and fans. This point is of great importance, since thermoplastics that pass the glass transition temperature significantly expand in volume and increase the friction of the material with the walls of the hot end. If the length of such a section is too long, the pulling mechanism may not have enough strength to push the thread.
The number of extruders may vary depending on the purpose of the 3D printer. The simplest options use a single print head. The dual extruder greatly expands the capabilities of the device, allowing you to print one model in two different colors, as well as using different materials. The last point is important when building complex models with overhanging structural elements: FDM printers cannot print “over the air”, since the applied layers require support. In the case of hinged elements, temporary support structures have to be printed, which are removed after printing is completed. The removal process is fraught with damage to the model itself and requires accuracy. In addition, if the model has a complex structure with internal cavities that are difficult to access, building conventional supports may not be practical due to the difficulty in removing excess material.
Finished model with PVA supports (white) before and after washing
In such cases, the very water-soluble polyvinyl alcohol (PVA) comes in handy. Using a dual extruder, you can build a model from waterproof thermoplastic using PVA to create supports.
After printing, PVA can simply be dissolved in water and a complex product of perfect quality can be obtained.
Some FDM printers can use three or even four extruders.
Work platform
Heated platform covered with removable glass work table
Models are built on a special platform, often equipped with heating elements. Preheating is required for a wide range of plastics, including the popular ABS, which are subject to a high degree of shrinkage when cooled. The rapid loss of volume by cold coats compared to freshly applied material can lead to model distortion or delamination. The heating of the platform makes it possible to significantly equalize the temperature gradient between the upper and lower layers.
Heating is not recommended for some materials. A typical example is PLA plastic, which requires a fairly long time to harden. Heating PLA can lead to deformation of the lower layers under the weight of the upper ones. When working with PLA, measures are usually taken not to heat up, but to cool the model. Such printers have characteristic open cases and additional fans blowing fresh layers of the model.
Calibration screw for work platform covered with blue masking tape
The platform needs to be calibrated before printing to ensure that the nozzle does not hit the applied layers and move too far causing air-to-air printing resulting in plastic vermicelli. The calibration process can be either manual or automatic.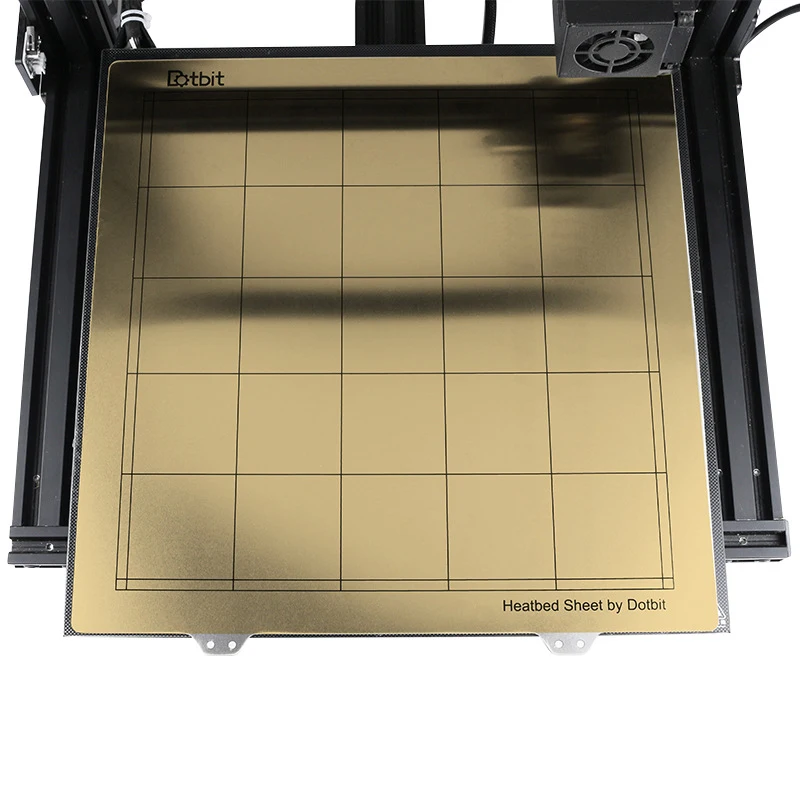 In manual mode, calibration is performed by positioning the nozzle at different points on the platform and adjusting the platform inclination using the support screws to achieve the optimal distance between the surface and the nozzle.
As a rule, platforms are equipped with an additional element - a removable table. This design simplifies the cleaning of the working surface and facilitates the removal of the finished model. Stages are made from various materials, including aluminum, acrylic, glass, etc. The choice of material for the manufacture of the stage depends on the presence of heating and consumables for which the printer is optimized.
For a better adhesion of the first layer of the model to the surface of the table, additional tools are often used, including polyimide film, glue and even hairspray! But the most popular tool is inexpensive, but effective masking tape. Some manufacturers make perforated tables that hold the model well but are difficult to clean. In general, the expediency of applying additional funds to the table depends on the consumable material and the material of the table itself.
Positioning mechanisms
Scheme of operation of positioning mechanisms
Of course, the print head must move relative to the working platform, and unlike conventional office printers, positioning must be carried out not in two, but in three planes, including height adjustment.
Positioning pattern may vary. The simplest and most common option involves mounting the print head on perpendicular guides driven by stepper motors and providing positioning along the X and Y axes.
Vertical positioning is carried out by moving the working platform.
On the other hand, it is possible to move the extruder in one plane and the platforms in two.
SeemeCNC ORION Delta Printer
One option that is gaining popularity is the delta coordinate system.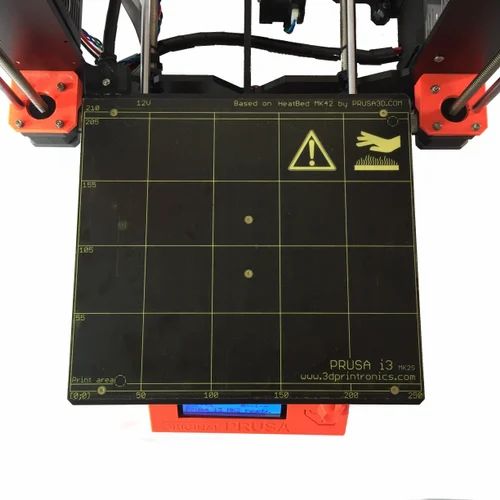
Such devices are called "delta robots" in the industry.
In delta printers, the print head is suspended on three manipulators, each of which moves along a vertical rail.
The synchronous symmetrical movement of the manipulators allows you to change the height of the extruder above the platform, and the asymmetric movement causes the head to move in the horizontal plane.
A variant of this system is the reverse delta design, where the extruder is fixed to the ceiling of the working chamber, and the platform moves on three support arms.
Delta printers have a cylindrical build area, and their design makes it easy to increase the height of the working area with minimal design changes by extending the rails.
In the end, everything depends on the decision of the designers, but the fundamental principle does not change.
Control
Typical Arduino-based controller with add-on modules
FDM printer operation, including nozzle and platform temperature, filament feed rate, and stepper motors for positioning the extruder, are controlled by fairly simple electronic controllers.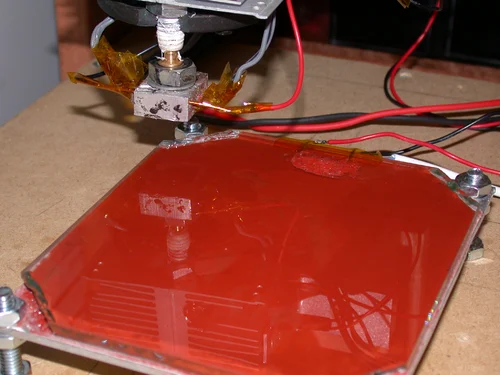 Most controllers are based on the Arduino platform, which has an open architecture.
The programming language used by printers is called G-code (G-Code) and consists of a list of commands executed in turn by the 3D printer systems. G-code is compiled by programs called "slicers" - standard 3D printer software that combines some of the features of graphics editors with the ability to set print options through a graphical interface. The choice of slicer depends on the printer model. RepRap printers use open source slicers such as Skeinforge, Replicator G and Repetier-Host. Some companies make printers that require proprietary software.
Program code for printing is generated using slicers
As an example, we can mention Cube printers from 3D Systems. There are companies that offer proprietary software but allow third-party software, as is the case with the latest generation of MakerBot 3D printers.
Slicers are not intended for 3D design per se. This task is done with CAD editors and requires some 3D design skills. Although beginners should not despair: digital models of a wide variety of designs are offered on many sites, often even for free. Finally, some companies and individuals offer 3D design services for custom printing.
Finally, 3D printers can be used in conjunction with 3D scanners to automate the process of digitizing objects. Many of these devices are designed specifically to work with 3D printers. Notable examples include the 3D Systems Sense handheld scanner and the MakerBot Digitizer handheld desktop scanner.
MakerBot Replicator 5th Generation FDM Printer with built-in control module on the top of the frame
The 3D printer user interface can consist of a simple USB port for connecting to a personal computer. In such cases, the device is actually controlled by the slicer.
The disadvantage of this simplification is a rather high probability of printing failure when the computer freezes or slows down.
A more advanced option includes an internal memory or memory card interface to make the process standalone.
These models are equipped with control modules that allow you to adjust many print parameters (such as print speed or extrusion temperature). The module may include a small LCD display or even a mini-tablet.
Varieties of FDM printers
Professional Stratasys Fortus 360mc FDM printer that allows printing with nylon
FDM printers are very, very diverse, ranging from the simplest home-made RepRap printers to industrial installations capable of printing large-sized objects.
Stratasys, founded by Scott Crump, the inventor of FDM technology, is a leader in the production of industrial installations.
You can build the simplest FDM printers yourself. Such devices are called RepRap, where "Rep" indicates the possibility of "replication", that is, self-reproduction.
RepRap printers can be used to print custom built plastic parts.
Controller, rails, belts, motors and other components can be easily purchased separately.
Of course, assembling such a device on your own requires serious technical and even engineering skills.
Some manufacturers make it easy by selling DIY kits, but these kits still require a good understanding of the technology. RepRap Printers
And, despite their "homemade nature", RepRap printers are quite capable of producing models with quality at the level of expensive branded counterparts.
Ordinary users who do not want to delve into the intricacies of the process, but require only a convenient device for household use, can purchase a ready-made FDM printer.
Many companies focus on the development of the consumer segment of the market, offering 3D printers for sale that are ready to print "straight out of the box" and do not require serious computer skills.
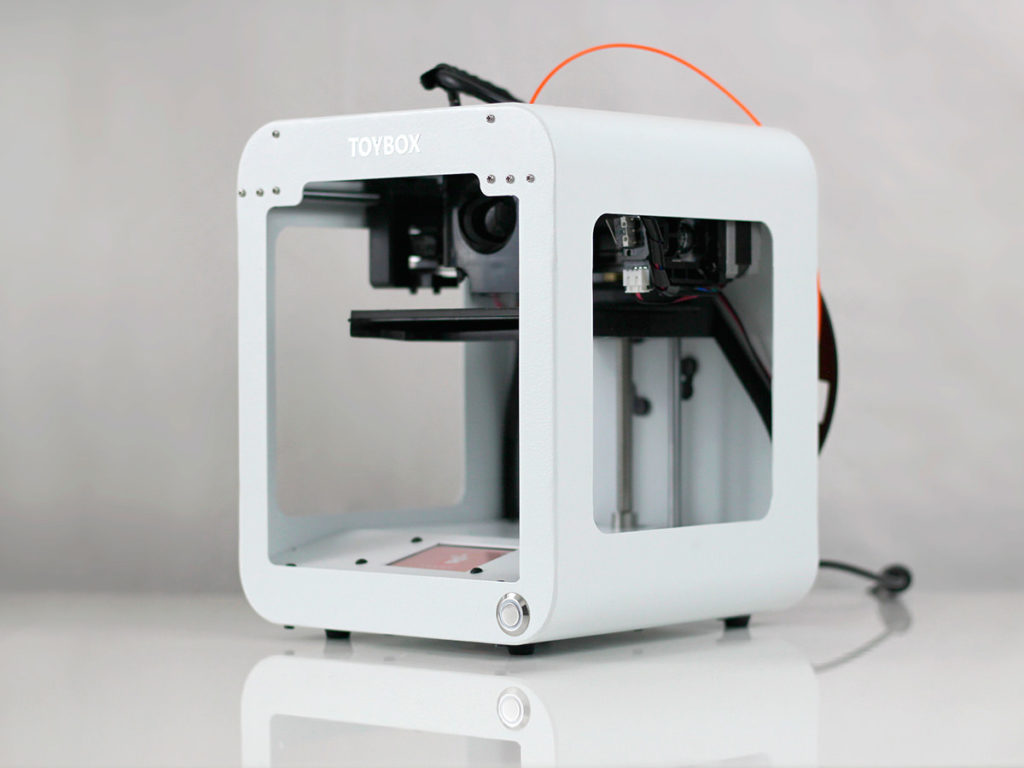
3D Systems Cube consumer 3D printer
The most famous example of a consumer 3D printer is the 3D Systems Cube.
While it doesn't boast a huge build area, ultra-fast print speed, or unsurpassed model build quality, it's easy to use, affordable, and safe: This printer has received the necessary certification to be used even by children.
Mankati FDM printer demonstration: http://youtu.be/51rypJIK4y0
Laser Stereolithography (SLA)
Stereolithographic 3D printers are widely used in dental prosthetics
Stereolithographic printers are the second most popular and widespread after FDM printers.
These units deliver exceptional print quality.
The resolution of some SLA printers is measured in a matter of microns - it is not surprising that these devices quickly won the love of jewelers and dentists.
The software side of laser stereolithography is almost identical to FDM printing, so we will not repeat ourselves and will only touch on the distinctive features of the technology.
Lasers and projectors
Projector illumination of a photopolymer model using the Kudo3D Titan DLP printer as an example
The cost of stereolithographic printers is rapidly declining, due to growing competition due to high demand and the use of new technologies that reduce the cost of construction.
Although the technology is generically referred to as "laser" stereolithography, most recent developments use UV LED projectors for the most part.
Projectors are cheaper and more reliable than lasers, do not require the use of delicate mirrors to deflect the laser beam, and have higher performance. The latter is explained by the fact that the contour of the whole layer is illuminated as a whole, and not sequentially, point by point, as is the case with laser options. This variant of the technology is called projection stereolithography, "DLP-SLA" or simply "DLP". However, both options are currently common - both laser and projector versions.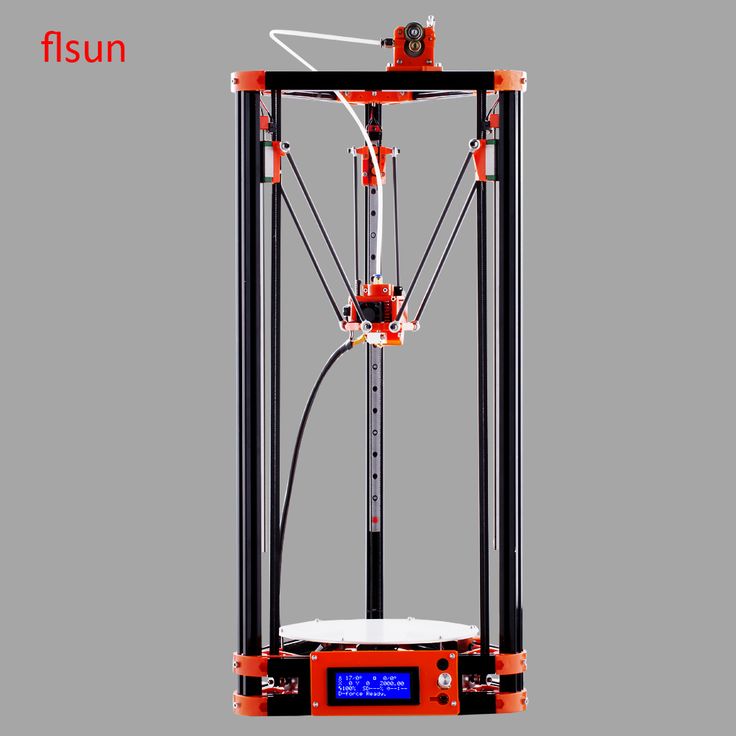
Cuvette and resin
Photopolymer resin is poured into a cuvette
A photopolymer resin that looks like epoxy is used as consumables for stereolithographic printers. Resins can have a variety of characteristics, but they all share one key feature for 3D printing applications: these materials harden when exposed to ultraviolet light. Hence, in fact, the name "photopolymer".
When polymerized, resins can have a wide variety of physical characteristics. Some resins are like rubber, others are hard plastics like ABS. You can choose different colors and degrees of transparency. The main disadvantage of resins and SLA printing in general is the cost of consumables, which significantly exceeds the cost of thermoplastics.
On the other hand, stereolithographic printers are mainly used by jewelers and dentists who do not need to build large parts but appreciate the savings from fast and accurate prototyping.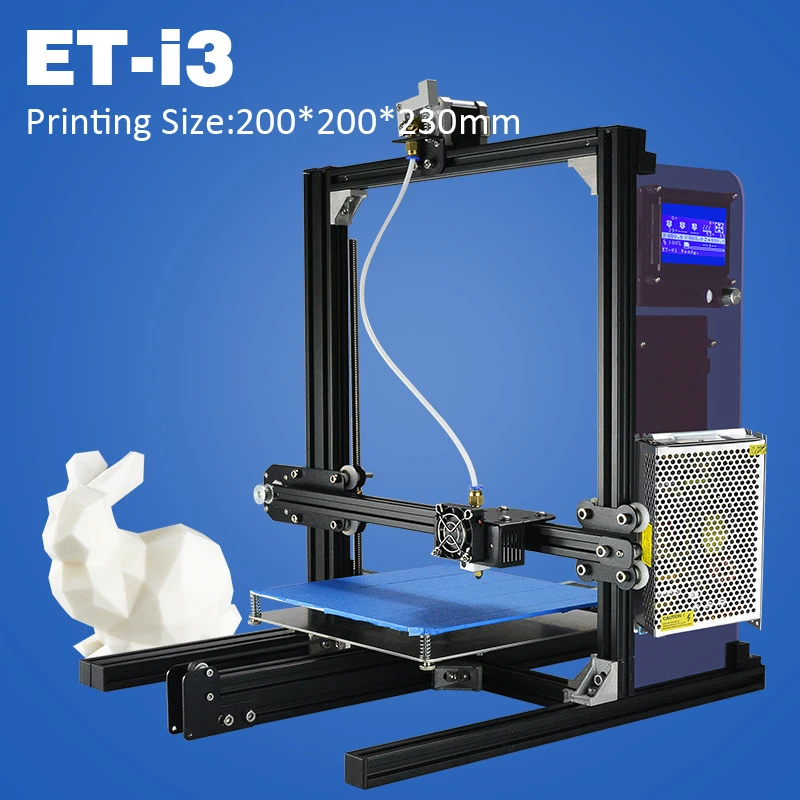 Thus, SLA printers and consumables pay for themselves very quickly.
An example of a model printed on a laser stereolithographic 3D printer
Resin is poured into a cuvette, which can be equipped with a lowering platform. In this case, the printer uses a leveling device to flatten the thin layer of resin covering the platform just prior to irradiation. As the model is being made, the platform, together with the finished layers, is “embedded” in the resin. Upon completion of printing, the model is removed from the cuvette, treated with a special solution to remove liquid resin residues and placed in an ultraviolet oven, where the final illumination of the model is performed.
Some SLA and DLP printers work in an “inverted” way: the model is not immersed in the consumable, but “pulled” out of it, while the laser or projector is placed under the cuvette, and not above it. This approach eliminates the need to level the surface after each exposure, but requires the use of a cuvette made of a material transparent to ultraviolet light, such as quartz glass.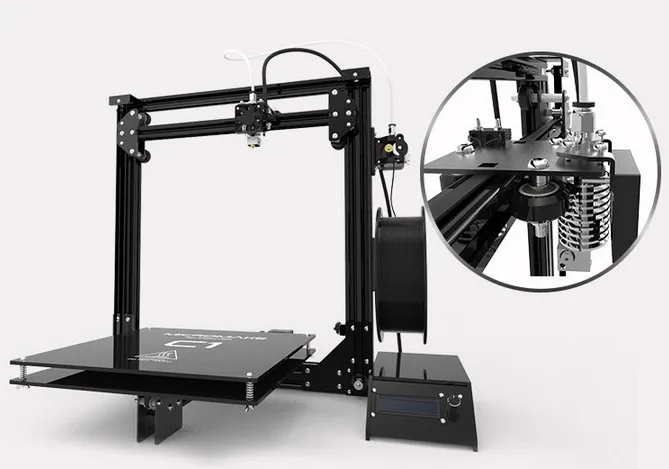
The accuracy of stereolithographic printers is extremely high. For comparison, the standard for vertical resolution for FDM printers is considered to be 100 microns, and some variants of SLA printers allow you to apply layers as thin as 15 microns. But this is not the limit. The problem, rather, is not so much in the accuracy of lasers, but in the speed of the process: the higher the resolution, the lower the print speed. The use of digital projectors allows you to significantly speed up the process, because each layer is illuminated entirely. As a result, some DLP printer manufacturers claim to be able to print with a vertical resolution of one micron!
Video from CES 2013 showing Formlabs Form1 stereolithography 3D printer in action: http://youtu.be/IjaUasw64VE
Stereolithography Printer Options
Formlabs Form1 Desktop Stereolithography Printer
As with FDM printers, SLA printers come in a wide range in terms of size, capability and cost.