Kickstarter autodesk 3d printer evaluation
Autodesk and Kickstarter Test Print – Begonova
Hello,
Dear Rose Go backers!
This week we printed a prototype of FDM on Kickstarter using ROSE GO, and it worked great, so let's take a look at our results.
The test geometry is a single, consolidated STL file that tests a printer’s dimensional accuracy, resolution, and alignment. We tested it on the ROSE GO prototype and printed with a layer height of 0.15 mm.
Source: https://github.com/kickstarter/kickstarter-autodesk-3d
3D Printing
- Model: ROSE GO
- Filament: ROSE GO PLA
- Nozzle Temperature: 195℃
- Layer Height: 0.15mm
- Printing Speed: 30 mm/s
- Time: 8h
- Infill:10%
To assess dimensional accuracy, measure each tier of the dimensional accuracy stack and record the absolute different between the target and the measured dimensions in a table.
- Record a “1” if the magnitude of the overall average error is greater than 0.40mm.
- Record a “2” if the magnitude of the overall average error is between 0.31 and 0.40mm.
- Record a “3” if the magnitude of the overall average error is between 0.21 and 0.30mm.
- Record a “4” if the magnitude of the overall average error is 0.11 and 0.20mm.
- Record a “5” if the magnitude of the overall average error is between 0.0 and 0.10mm.
ROSE GO earned a score of 5 for this test.
Using a pair of calipers, measure the height of the shortest spire on the top of the test print. Visually inspect for threads of material connecting the spires. Measure the shortest spire.
- If the spires are less than 30mm long, assign a 0.
- If the spires are greater than 30mm, but there is stringing between them, assign a 2.5.
- If the spires are greater than 30mm long and there is no stringing between them, assign a 5.
ROSE GO earned a score of 4 for this test.
Attempt to remove all the pins from their holes using fingers (no tools).
- Record a “0” if no pins can be removed.
- Record a “1” if 1 pin can be removed.
- Record a “2” if 2 pins can be removed.
- Record a “3” if 3 pins can be removed.
- Record a “4” if 4 pins can be removed.
- Record a “5” if all pins can be removed.
Five pins were removable from the test print. For this test, the ROSE GO earned a score of 5.
Overhangs
Inspect the overhang surfaces.
- Record a “1” if the printer compiled the geometry but dropped loops and infill on the 15, 20, and 30 degree overhangs.
- Record a “3” if only the 15 and 20 degree surfaces differ from the 45 degree overhang.
- Record a “4” if only the 15 degree overhang differs from the 45 degree overhang.
- Record a “5” if there the surface finish between all four overhang surfaces is equivalent.
ROSE GO earned a score of 4 for this test.
Bridging
Inspect for contact between bridges and the surface beneath each.
- Record a “1” if more than 3 are in contact with the surfaces beneath them.
- Record a “2” if 3 bridges contact the surfaces beneath them.
- Record a “3” if 2 bridges contact the surfaces beneath them.
- Record a “4” if 1 bridge contacts the surface beneath it.
- Record a “5” if no bridges contact the surfaces beneath them.
For this test, there are 5 bridges contact the surfaces beneath them. So ROSE GO earned a score of 5.
Visually inspect the X and Y ringing features, illuminating the test print from the side to highlight any ringing captured in the print.
If rippling in the X or Y axis can be observed at or past three hash marks, record a “0”, otherwise, record a “2.5”.
ROSE GO earned a score of 2.5 for this test.
If a layer registration effect with a period equal to that of the leadscrew is visible on the pillar supporting the fine positive features test, record “0,” otherwise, record “2.5.”
For this test, ROSE GO earned a score of 2. 5.
5.
Sum the results of each section of the test protocol. The highest possible score is 30, indicating a very well-calibrated system.
Here’s a breakdown of ROSE GO’s results:
- Dimensional Accuracy: 5 of 5 points
- Fine Flow Control: 4 of 5 points
- Fine Negative Features: 5 of 5 points
- Overhangs: 3 of 5 points
- Bridging: 5 of 5 points
- XY Resonance: 2.5 of 2.5 points
- Z-Axis Alignment: 2.5 of 2.5 points
Overall, the ROSE GO prototype scored a total of 28 out of 30 points.
And then we made a comparative table.
Source:
- https://www.youtube.com/watch?v=Zvh4U8mChuo
- https://www.youtube.com/watch?v=zoPfZK9tk4Q
- https://www.kickstarter.com/projects/snapmaker/snapmaker-20-modular-3-in-1-3d-printers/posts/2509142
That's all for our first test on Autodesk / Kickstarter Test Print. Hope you enjoy it and hopefully after you receive ROSE GO, you can try it out on your own. I'm sure you'll have a lot of faith in ROSE GO.
Autodesk and Kickstarter 3D Printer Torture Test - Calibration | PrinterKnowledge
JavaScript is disabled. For a better experience, please enable JavaScript in your browser before proceeding.
- Thread starter Nifty
- Start date
Nifty
Printer VIP
This is very interesting!
Autodesk and Kickstarter teamed up to create this torture test for 3D printers:
Info: https://www.kickstarter.com/blog/toward-better-3d-printers-a-new-test-from-autodesk-and-kickstart
Github info & files: https://github. com/kickstarter/kickstarter-autodesk-3d/blob/master/FDM-protocol/README.md
I think this thing is brilliant! Seems to cover almost everything needed. I love that they have a somewhat objective scale from 1-5 on the various tests.
I got a bunch of cheap filament that was on sale ($8 a 1kg roll + free shipping), so I think I'm going to run this test on the filament I'm currently using and then this filament... using the exact same settings... and see what we get!
The Hat
Printer VIP
Nifty said:
Autodesk and Kickstarter teamed up to create this torture test for 3D printers:
Click to expand...
My environment is my biggest test..
I swore I would never print the Benchy test, but I broke that rule and surprising got great results from it, a few days later I tried it and again and I ended up with a Feckin mess the second time, did I learn anything from it.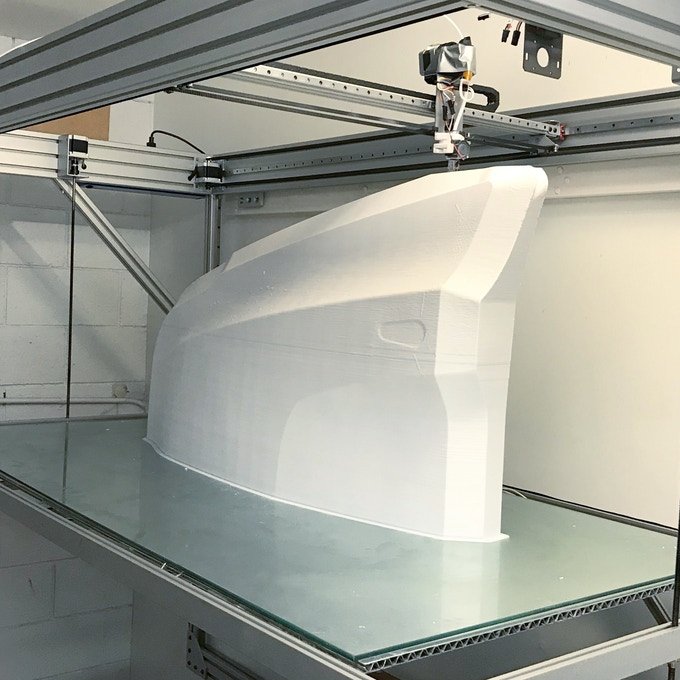 . ? Don't do it again...
I found all of these torture tests meaningless for my own 3D printing situation, because I can get great results from them one day but the next day they’ve gone to hell, which took a while for me to figure out.
What I reckoned was, it all depended on ambient temperature in and around the printer itself that day, and more so to have constant humidity, the filament can bubble in the hotend nozzle causing an erratic filament flow.. Less than expect output..
Because my filament comes out of the dry box (Humidity 50% + or - 5%) it travels anywhere between 50 cm to 1.5 metres before it gets to the extruder motor and the protection of the Bowden tube.
I have tried enclosing the filament in long Bowden tubes, but that is not very practical because all the tubes would have to be different length to reach from each box to each printer. (From 8 different rolls) !
Now all of these factors can and will produce different results, mostly fairly good, but sometime pretty awful, and the last factor is the filament quality itself, the filament rolls can be perfect most times, but can give poor results towards the end of the roll.
Now giving all of the above factors, any test that I might carry out will vary wildly, when some of these factors change, the daytime temperature here doesn’t vary much, but the humidity moves like a Feckin Yoyo by 50% in either direction in a matter of an hour.
When it comes down to quality output I get pretty reasonable results most times but there are days when I just can’t print anything and I have to suspend all printing till the weather improves, varying moisture/humidity levels are my biggest enemy because I don’t heat the shed…
Redbrickman
Printer Master
I ran that test on the CR10 a long time ago and was surprised how good it came out, especially the overhang.
If you are interested in doing some calibration tests and playing with a nice Slicer then check out SuperSlicer a variation of Prusa Slicer and Slic3r.
It has built in tests amongst other things and is reckeoned to be better than Cura and S3D. I have installed it a few days ago and it is nice to work with but I'm still learning about it.
https://github.com/supermerill/SuperSlicer
Nifty
Printer VIP
Mine came out pretty good! Some stuff was even better with the cheaper filament, which is interesting!
Nifty
Printer VIP
One thing that is clearly something I need to address is the z axis irregularities. My towers / z-axis sides aren't very smooth and even. The issue is that there isn't any pattern or consistency... which makes me think it's a filament feeding issue.
The Hat
Printer VIP
I Feckin hate doing these torture tests and mostly try to avoid them, but seeing as my two latest printers never done any I decided to give them a go, warts and all.
First the little KP3, I had a bit of a problem with tracking or a code shift, I reckon cause by the poor micro card quality, it probably needs a reformat, but I continued never the less.
Here you can see the shift, the way it moved out and then back in.
click to enlarge...
This is the underside, and how it fairs out without a bridging..
And here the bridging on the sides was less than satisfactory.
This is the finished where it scattered all of the vertical little pins on top and only one cylinder was able to come out.
Moving onto the CR-10s, here is the underside where it handle the bridging a lot better on the unsupported angle and the inside of the base.
Here is the finish and all of the vertical pins are all perfect and again I only got one cylinder to pop out.
On the side the bridging was pretty good on all 5 pieces.
But none of this reflects on how each machine prints overall, when printing any project the quality is more than adequate and the pieces usually do the job that they were intend for, if something needs a bit of tweaking, I just reprint the piece again. .
.
Tigerman
Printer Master
What good 3D printer for CAD models ?
You must log in or register to reply here.
Share:
Facebook Twitter Reddit Pinterest Tumblr WhatsApp Email Share Link
Top
Printing the "kickstarter-autodesk-3d-master" test, implicit features of the test model that affect the passing of the test, refinement of the test model and the results of printing the test on the Lad-1.
 0 printer.
 We print
Subscribe to the author
Subscribe
Don't want
7
This test is interesting for quantifying the capabilities of the printer. The test was performed twice.
Test #1 was run with the following settings:
- Material - ABS unpainted from #3DPlast.
- Nozzle diameter 0.3 mm.
- Layer height 100 µm.
- Printing temperature 240°C.
- Default speed 40 mm/s.
- Outside perimeter speed 20 mm/s.
Based on the results, a score of 27 out of 30 was obtained.
During the test, a feature of the construction of the test platform 2 (plastic feed accuracy) was revealed that affects printing, but does not affect the test score. It turned out that the features of the model do not allow the S3D slicer to properly process the base of the platform, which causes the perimeter to sag (especially when printing in thin layers) and some of the loops of the supporting surface formed on it are shed.
Necessary changes have been made to the model geometry to eliminate unnecessary complexity during the test.
Then, after installing a nozzle with a diameter of 0.4 mm and increasing the layer height to 200 µm, another test was performed (#2).
Based on the results, a score of 25.5 out of 30 was obtained.0018
The final estimate is 27
Causes of difficulties when printing the area of the test 2.
Comparative construction of the bridges (comparative construction of the bridges (comparative construction ( test 5) and test 2 pads:
When building a bridge (shown at the top of the figure),
- perimeters are printed between two supports,
- also, the bearing surface of the bridge is printed between two supports,
- the following layers of the model are printed on top of the formed support surface
When constructing the site (shown in the lower part of the figure),
- the perimeters are printed along the contour of the future support surface,
- the support surface is printed between the previously formed supports and a thin perimeter hanging in the air .
 With such a length, the thin perimeter sags under the weight of the loops of the supporting surface laid on it and some of the loops are not sufficiently welded together, are not welded to the pliable thin perimeter and are dropped,
 - without a normally formed support surface, subsequent layers lie randomly and form a test site only due to its total thickness.
Changes to the test model to correct the test pad 2
Since the pad itself does not affect the test score, a 1.5 mm high pad perimeter has been added to the model to properly form test pad 2.
The result is shown in figure.
Modified model here:
Test #2.
- Size accuracy - 5
- Plastic accuracy - 2.5
- The accuracy of the gaps - 4
- Building of the canopies - 4
- Construction of bridges - 5
- Resonances XY - 2.5
- Uneven Z - 2, 2, 2, 2, 2, 2, 2, 2, 2, 2, 2, 2, 2, 2, 2, 2, 2, 2, 2, 2, 2, 2, 2, 2, 2, 2, 2, 2, 2, 2, 2, 2, 2, 2, 2, 2, 2, 2, 2, 2, 2, 2, 2, 2, 2, 5
Final grade - 25. 5
5
Follow the author
Follow
Don't want
7
Best prints
amforma
3
Loading
06.10.2022
414
ten
Subscribe to the author
Subscribe
Don't want
The entire "Selfie Girls" series in 1:43 scale.
3D printing master model from photopolymer...
Read more
5
Subscribe to the author
Subscribe
Don't want to
Custom printed window detail. eSUN pla+ material. 3D printer Artillery Sidewinder X2....
Read more
gamebox
Loading
05/03/2018
18924
110
Subscribe to the author
Subscribe
Don't want to
Almost a year ago, having printed plenty of ready-made models, I decided to comprehend the basics of 3D modeling in time .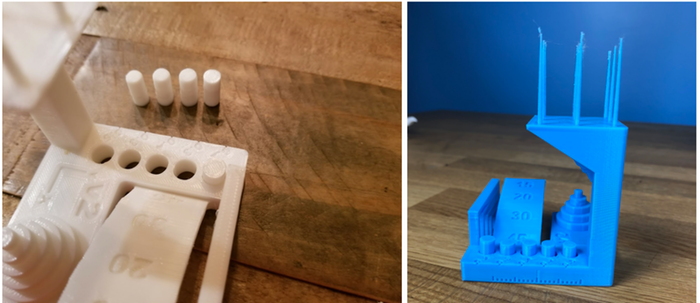 ..
..
Read more
Do you have a model? Kickstarter Introduces 3D Printer Capability Benchmark
You Are Here
Home
Kickstarter, being a favorite crowdfunding platform for emerging 3D printer manufacturers, decided to start standardizing. Now the authors of new projects will be able to demonstrate visual printouts of standard 3D models, specially designed to assess the capabilities of the proposed equipment.
The three most common things in the universe are hydrogen, stupidity, and 3D printers on Kickstarter. On the wave of additive hype, one miracle project after another appears, but in many cases, potential customers have to guess about the real abilities of the proposed devices or take the word of the developers. Many designers accompany advertising campaigns with 3D printed samples of well-known models for quality assessment - owls, boots and other whistles, but there are no specific, generally accepted rules in this regard.
The Kickstarter administration decided to introduce a benchmark in the form of a special model with which you can demonstrate the merits of your development. Something similar already exists: in case someone is not in the know, the well-known 3DBenchy boat (pictured above) was designed by the Swedish 3D printing bureau CreativeTools as a calibration tool: there are hinged surfaces, and the need to print bridges, and the ability to evaluate printing with several extruders simultaneously. But the Kickstarter administration decided to do amateur work and turned to Autodesk for help with creating their own standard.
The result is this model, which allows you to evaluate a 3D printer for the presence of wobbles, print resolution, the ability to build inclined surfaces and bridges without support structures, detailing of small elements, and so on. In everyday use, the model can be useful as a calibration sample, just like 3DBenchy.
In addition to the model, a unified quality assessment system is proposed: each aspect is proposed to be evaluated on a five-point scale according to the proposed instructions, and then summarize the results.


