Creality ender 3 pro 3d printer upgrades
The Best Creality Ender 3/Pro Upgrades and Mods – Creality 3D
The Ender 3 is an amazing 3D printer. For the money, it's hard to find one that will give you better prints right out of the box. However, it's far from perfect.
In this guide, I'll show you the top must-have upgrades and mods for the Ender 3 and Ender 3 Pro—both 3D-printable and purchased upgrades/mods.
A note on this guide:
In researching this guide, I found a lot of others with massive lists containing every upgrade and mod under the sun—unfortunately, many of those upgrades are pointless wastes of time and money. So, in this guide, I'll cut through the BS and cover the most impactful items that will give you better prints while also improving your overall printing experience.
- Upgrades and mods to 3D print
- Silent mainboard v1.1.5
- MeanWell power supply (PSU) upgrade
- Glass print bed
- BLTouch auto-leveling sensor
- LED strip
- Bed springs
- Metal feeder assembly
- Stepper motor dampers
- Direct Drive Extruder
- Firmware upgrade
Below are the top 3D-printable Ender 3 mods and upgrades you can perform. Tons of other printable mods exist, but this is the core list that will give you the best bang for your print time.
Board fan guard
Before you print anything else, print this mod. The location of the mainboard fan is directly beneath the build plate, meaning bits of filament can fall in and damage the fan or board. The model is available on Thingiverse.
Filament guide
This filament guide holds the filament away from the feeder, allowing for a more consistent feed rate and less skipping. It snaps directly into the side of the upper support.
Cable chain
This cable chain is a must-have for preventing dangerous cable snags when the bed moves along the Y-axis.
Display PCB cover
This simple screen cover protects your Ender 3 display's PCB (printed circuit board) from damage.
Bowden tube fitting fix
If your Bowden tube has popped out of place or if you're having print quality issues, you might want to print these pressure fitting shims that will prevent your Bowden tubes from shifting or popping out during printing.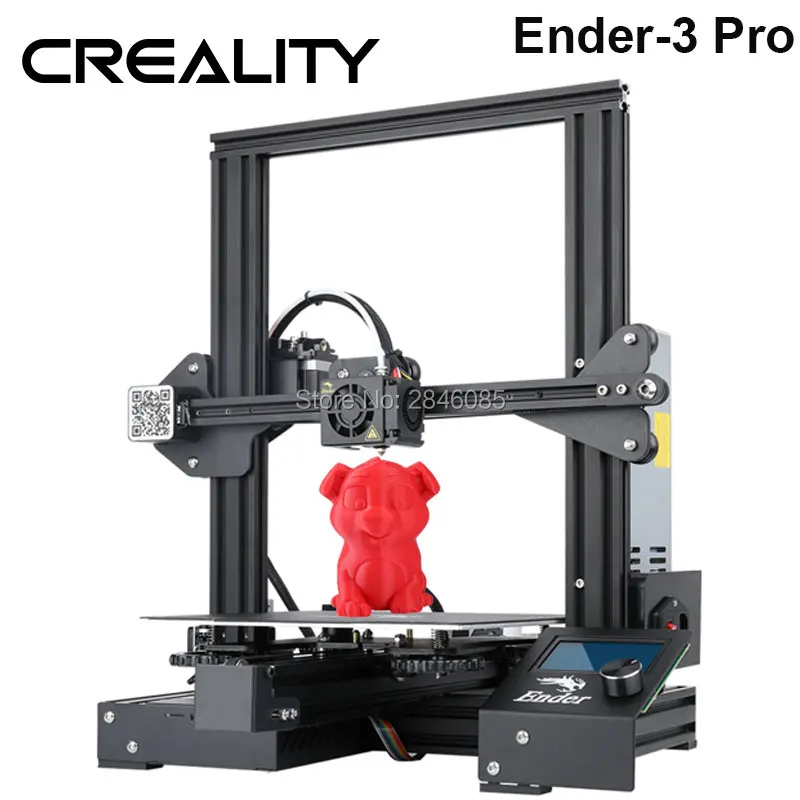
Beeper silencer
You've probably noticed how loud the Ender 3 beeps when navigating the menu interface. This beep can level villages and knock satellites out of orbit. This 10-minute print mutes the beep quite a bit, getting rid of that annoyance and protecting our countrysides and space assets.
If you're using a 3D printer enclosure, I recommend printing these mods using ABS or PETG filament; ambient enclosure temperatures can cause PLA to warp and deform over time.
There are two main sources of noise on your printer: 1) fans, and 2) the drivers (chips) that run your stepper motors. The "whirring" noise you associate with printing is caused by the cheap stepper motor drivers used on the stock Ender 3 board.
Enter the Creality Silent Mainboard (v1.1.5). This board directly replaces your existing Ender 3 mainboard, upgrading your printer to the silent TMC2208 stepper motor drivers. This is the biggest "sound" upgrade you can make. It reduces your printer's noise from approximately 48dB to 36dB, with the remaining sound coming from the Ender 3's fans (which can also be upgraded to quieter fans).
If I had to choose a single upgrade from this guide (other than OctoPrint), it would be this one. Combined with the MeanWell PSU upgrade also mentioned in this guide, I often forget my printer is running since it now generates so little noise.
Of course, in addition to decreasing noise, this board and its upgraded stepper motor drivers improve the quality of your prints.
There are several reasons to upgrade your Ender 3 to a MeanWell PSU including noise, safety, and even reducing bed-leveling issues.
Noise
Compared to the stock PSU whose fan runs continuously, the MeanWell PSU only runs when it needs to—usually less than 20% of the time. This means a much quieter printer, especially when paired with the silent board upgrade. This reason alone made the upgrade worth it to me. I work in the same room as my printer, so noise is a huge issue.
Safety
MeanWell PSUs use higher quality components than the cheap stock unit, providing cleaner power with fewer of the electrical spikes and sags that could pose a safety hazard.
Reduce auto-bed-leveling issues
If you're using an auto-leveling sensor such as the BLTouch or EZABL, the MeanWell PSU's consistent, clean power reduces issues related to power ripples and grounding.
Form factor
The MeanWell PSU is noticeably thinner than the stock unit, which is handy if you're using an enclosure and need to relocate it.
Which one to buy (and where)
The MeanWell LRS-3500-25 PSU is the correct 24V MeanWell power supply for the Ender 3, and this upgrade takes about 20 minutes to perform, excluding PSU housing print time.
There are tons of different build plate surfaces out there: metal, magnetic, BuildTak, painter's tape, and tons more. But after printing for many years on several different printers, I've always had the best experience with glass.
Glass beds are supremely flat, fixing the all-too-common "warped Ender 3 bed" issue that many of us experience. Glass beds also save on prep time, are easy to clean, and offer effortless print removal with a semi-glossy print finish.
Choosing a bed
I wrote a comprehensive guide to 3D printing on a glass bed if you'd like to dive into the details. tl;dr; Choose a thin borosilicate glass bed, and adhere it directly to the existing build plate using small binder clips. This 235x235mm glass bed is the one I recommend for the Ender 3.
Bed leveling the Ender series 3D printers is key to the perfect first layer and overall print quality. Unfortunately, it's also one of the most annoying "chores" in 3D printing. Just when things are going well, you realize you forgot to relevel your bed and things look terrible.
But what if a simple sensor, installed in just 45 minutes, could automatically level your bed for you every time? That's what BLTouch does.
How BLTouch works
BLTouch uses a small probe to build a mesh of points at the beginning of each print to determine exactly how unlevel (or warped) your bed is, and in which directions. It then takes that into account when performing a print, altering each GCODE instruction as needed to account for the imperfect build surface.
The process
Here's a breakdown of what goes into this upgrade:
Hardware: The probe mounts next to your print head assembly and connects to the existing Ender 3 mainboard.
Software: A slight firmware modification is needed to allow BLTouch to work.
Slicer/OctoPrint: You'll need to insert a few lines into your slicer (and OctoPrint, if equipped) so that each GCODE file you generate will include some BLTouch instructions at the top.
This Instructables guide does a good job of explaining how to do this on the CR-10, though the process is similar for the Ender 3.
Which one to buy (and where)
I recommend this BLTouch sensor (V3.1 or newer) since older versions won't work with newer Marlin firmware.
Proper print illumination allows you to identify issues with your prints early—it's also nice to be able to see what's happening clearly. There are tons of methods for adding an LED strip to your 3D printer. I prefer one that places the light source as high as possible in order to illuminate the entire print bed, not just the current print area.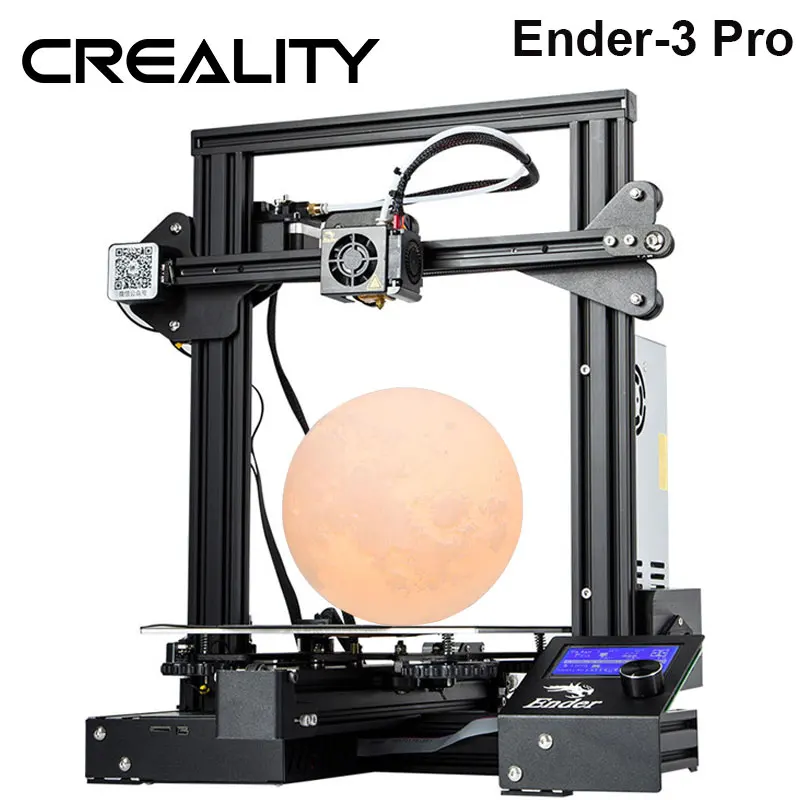
I wrote a comprehensive guide on adding an LED strip to your 3D printer, featuring the Ender 3 specifically. Using the method outlined there, you can even power your LED strip directly from your Ender 3 by regulating the voltage using this buck converter in conjunction with this XT60 splitter cable.
Your bed springs might seem like an insignificant part of your 3D printer, but they're actually quite important to bed leveling and stability.
The stock Ender 3 bed springs are terrible and can lead to print issues and frequent bed leveling. These issues are largely caused by:
The cheap metal used to manufacture the springs, and
The rounded design of the springs themselves
In fact, if you compare the stock and upgraded springs side by side, you can see only the upgraded ones feature a flat surface on the top and bottom. This leads to less shifting compared to the stock springs.
Upgraded Ender 3 springs take minutes to install and mean less frequent bed leveling between prints. This upgrade costs about $10, making it one of the least expensive Ender 3 upgrades out there.
The plastic metal feeder assembly on the Ender 3 leaves something to be desired, and improper tension can even cause feeder gear skips, leaving gaps in the layers of your print. Installing an all-metal feeder assembly such as this one will add durability and stability to your printer.
Yet another noise mod—adding these dampers to your X- and Y-axis stepper motors decreases the noise they generate by 5-10dB. This is a simple, inexpensive mod with a measurable noise reduction impact.
- All-metal case, sturdy and wearable
- Direct extruding, more precise feed-in
- Compatible with more filament. such as TPU, PLA, ABS, etc
- Easy to install and use
- Suitable for Ender-3 Series
- Output voltage: 24V
Get the latest Firmware
SOURCE: howchoo.com
3D Printer Review: Creality Ender 3 V2, Good for Beginners?
Odin(
180
)
0
The Ender 3 V2 is an improved version of the Ender 3, showing Creality’s continued efforts at expanding this bedrock model in their impressive 3D printer line-up.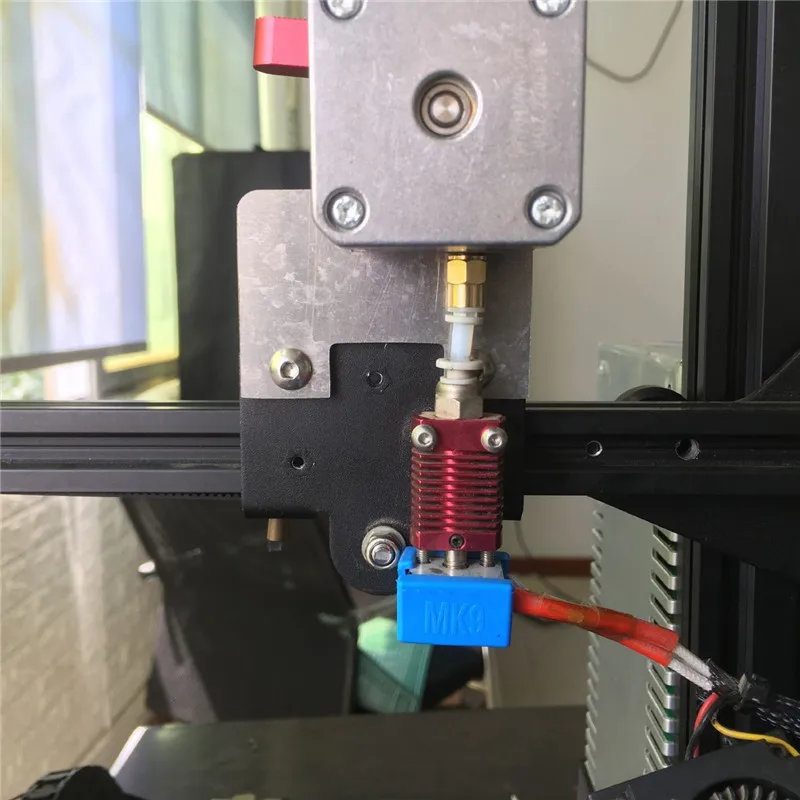 Without a doubt, Creality still laps the competition when it comes to a heavily modifiable 3D printer, offering a platform from which a dedicated enthusiast could go far on the wings of their imagination.
However, beginners to the world of 3D printing might find the basic nature of the Ender 3 V2 intimidated and complicated. The Ender 3 V2 lacks some helpful advanced features and comes at an advanced state of disassembly, requiring a fair amount of work to get ready to actually start printing.
There are pluses and minuses to this printer for a beginner, depending on your use-case, your proclivity to DIY projects, and your desire to have a hands-on experience with your printer.
The TLDR is: get this if you want to learn the ins and outs of 3D printing, and your printer, from the ground up. Grab something more expensive with more included features if you’re mainly just hoping for a good 3D printing experience out of the box.
| Creality Ender 3 V2 3D Printer | × | 1 |
Howchoo is reader-supported. As an Amazon Associate, we may earn a small affiliate commission at no cost to you when you buy through our links.
Specifications of the Ender 3 V2
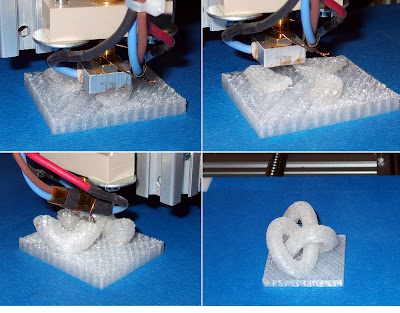
The Ender 3 V2 is an FDM printer, which stands for “Fused Deposition Modeling.” This type of printer works by printing thin layers of plastic one atop another to create or “build up” an object. The Ender 3 V2 follows the original Ender 3 in maintaining great specifications for a low price, offering a 220 × 220 × 250 mm (8.6 × 8.6 × 10 in) build area, tempered glass build plate, and can handle ABS, PLA, TPU, among other filament types.
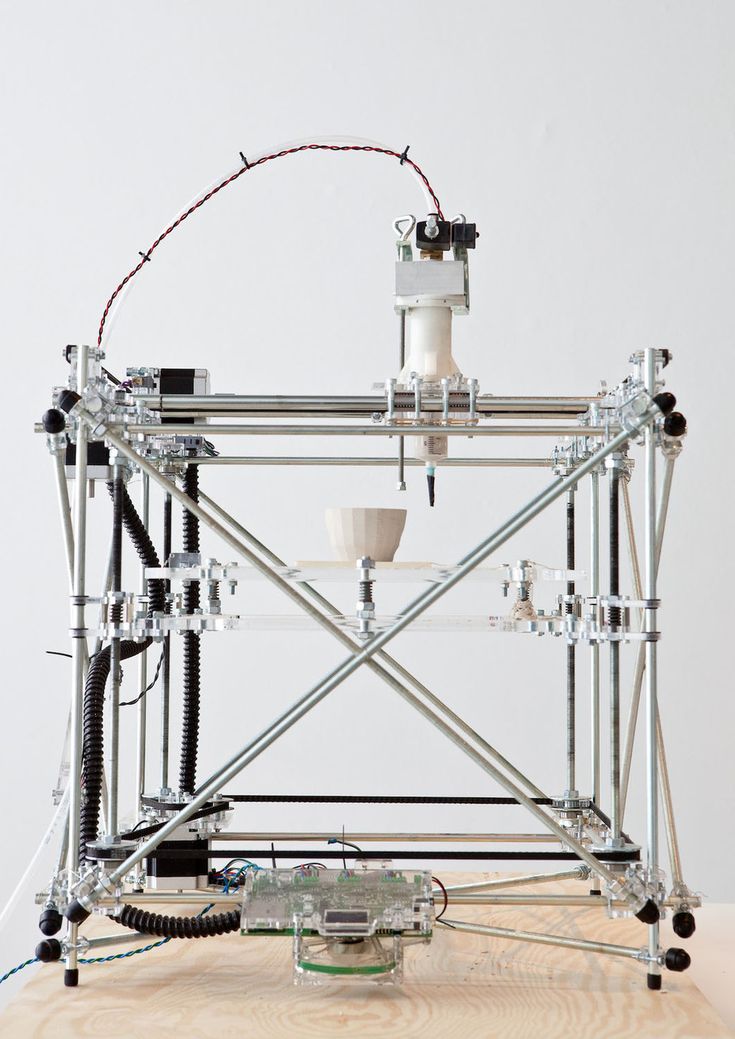
It’s a sturdy little printer, too. Though it only weighs 17.6 pounds in its unmodified form, its all-metal body means that it sits well and doesn’t wobble, improving the build quality of your prints. That metal frame also comes in handy when you do want to start modifying it, offering a huge range of attachment point possibilities and easy access to the printer’s internal electronics.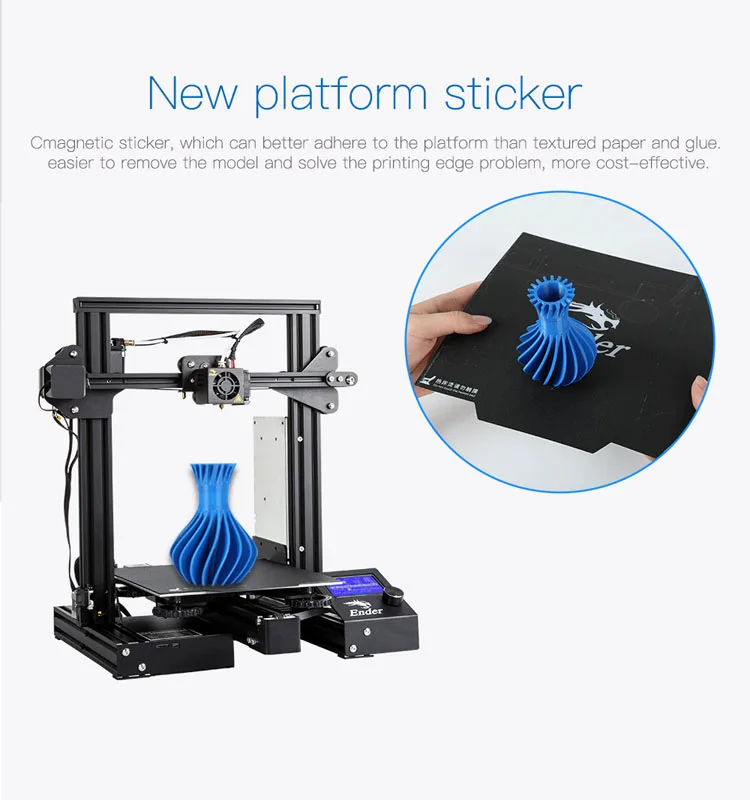
Ender 3 V2: ease of assembly
As I showcased in my set-up guide for the Ender 3 V2, this printer is fairly easy to assemble if you take your time and follow the steps from beginning to end. I repeatedly found references to multi-hour complexity for assembling the Ender 3 V2 when I first started researching it, but my own experience putting it together showed that it could be finished and ready for testing in just 2 hours.
That said, I fancy myself a relatively technically minded person, I have a degree of orderliness and patience, and I’m a big guy capable of easily manipulating the 18-pound printer without any difficulty. I absolutely found points in the assembly process where someone without those qualities, someone easily made anxious by poor instruction manuals, or someone generally uninterested in DIY projects, would have a hard time.
I recommend the Ender 3 V2 specifically for those people who like a bit of a challenge, want to teach themselves all about the intricacies of how a 3D printer works, and who are excited about the prospect of upgrading their Ender 3 V2 in the future.
Upgrading your Ender 3 V2
Upgrading the Ender 3 V2, as it was with the original Ender 3, is almost half the point of purchasing it. This printer, at its base state, is basic. It offers, out of the box, a powerful platform capable of turning out good prints, but where the real magic happens is inside the process of printing your own parts and using those parts to upgrade the printer’s look and functionality.
There is a massive range of potential modifications to make to the Ender 3 V2, some of which are relatively simple and cosmetic, others which will require soldering skill, knowledge of electrical circuitry, and the patience to experiment (and possibly mess things up in the process).
You can absolutely take your basic Ender 3 V2 and turn it into a powerhouse 3D printer capable of matching pre-assembled printers that come at a much higher total price-point, but doing so is going to itself be a long-running DIY project that will challenge you to acquire and practice a wide range of skills beyond simply learning how to use a Slicer program.
You can purchase upgrades, like an enclosure, stepper motor dampeners, and a whole new controller board. You can even purchase a Raspberry Pi mini computer and enhance the Ender 3 V2 with wireless compatibility and other awesome features.
You can also print your own modifications, like cable chains, custom enhancements for storage and filament unspooling, and even editions that allow your 3D printer to take on other functions, like turning it into a stability platform for macrophotography. With the range of options nearly limitless, and the printer’s initial cost so low, it starts to become easier to see why the Ender 3 V2 remains a dominant name in the 3D printing market.
Getting the Ender 3 V2 is a great choice for beginners who already know they love DIY experiences. But it might also be good for people who are hesitant about DIY work, too. Getting the Ender 3 V2 means you will need to teach yourself all the basics of how to use a 3D printer and how one functions, from the ground up. As you slowly start adding modifications to the printer, your skills will level up, and pretty soon you’ll find yourself capable of doing neat things like soldering in your own specialized power pack, or upgrading the circuit board with wicked Raspberry Pi integrations. If you go the quick and easy route of buying a printer that already does it all, you might miss out on learning some awesome skills and tricks. This might be the perfect opportunity to challenge yourself!
Functionality of the Ender 3 V2
The reason we get a 3D printer is to, well, 3D print things. So, how well does the Ender 3 V2 actually perform in real-world conditions? Admirably, as it just so happens, even when you use it completely stock, sans modifications.
The Ender 3 V2 can handle a large variety of models, and it produces them with reasonable clarity. You will start to find problems emerging with longer, bigger prints, however. This is due to how easily the stock Ender 3 V2 loses its build platform level.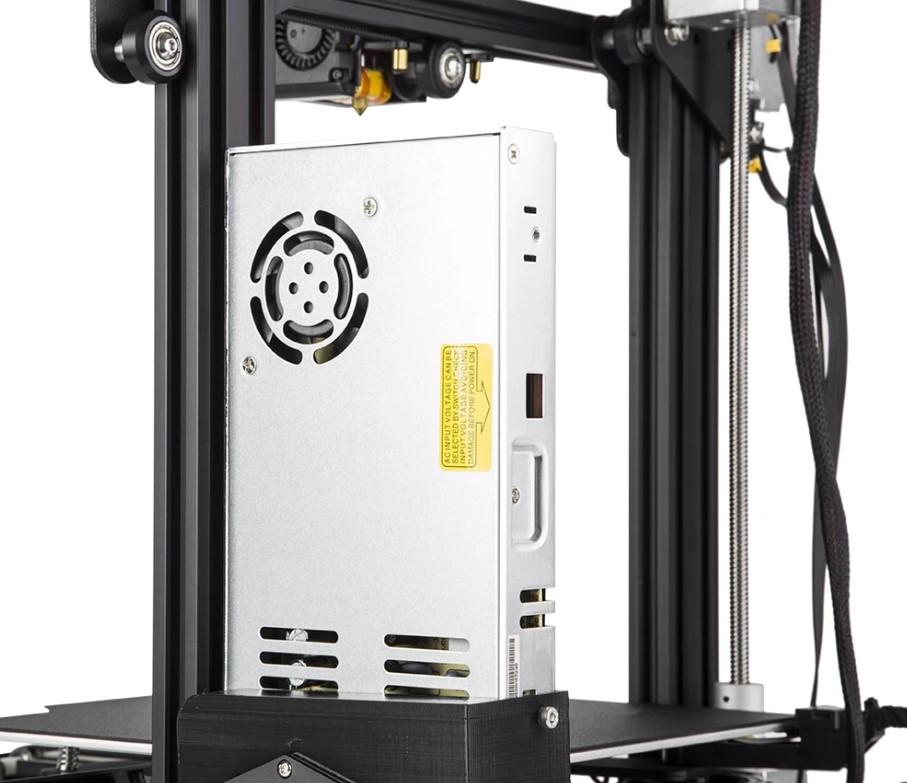 At the very least, you’ll find yourself manually re-leveling your build plate after every print. But you might also find bigger prints getting a bit wonky, especially if your Ender 3 V2 was already a little off-level when you started printing. Upgrades can solve this, but that requires time, expense, and the sheer desire to DIY.
The Ender 3 V2 cannot create extremely high-definition minis (FDM printers in general aren’t great at this sort of work, you want to go for a resin printer instead), but I found that reasonable role-playing game mini figurines could be printed using its stock settings.
You can also print larger items, like a Boba Fett helmet for cosplay purposes, if you print the large model in pieces and then assemble it later using glue or heat.
The TLDR of it is: yes, the Ender 3 V2 works respectably well out of the box, but it’s still going to require some DIY and a more hands-on approach than printers with a few more automated and quality of life features built in. If you love going the DIY route, grab this printer right now. If you prefer to focus on learning how to slice models and just want your printer to work with a button press, I reccomend checking out the Anycubic Kobra Plus, which has become my go-to daily printer.
Ender 3 V2: price comparison
When considering which 3D printer to buy, especially as a beginner to the hobby, it’s important to think about the cost-to-benefit ratio.
A more expensive printer might have numerous features that will make your quality of life as a beginner easier from the get-go. However, starting out with a cheaper printer like the Ender 3 V2 might allow you to still produce cool prints, but can help you spend money on upgrading your printer more slowly, thus lowering the total coast and spreading that cost out over months or even years.
The Ender 3 V2
If you have a sub-$300 budget, the Ender 3 is probably the best way to go. Know that you’re going to have a steeper learning curve and a more basic experience, but keep in mind that your ultimate goals should be to slowly upgrade this printer into a 3D printing beast.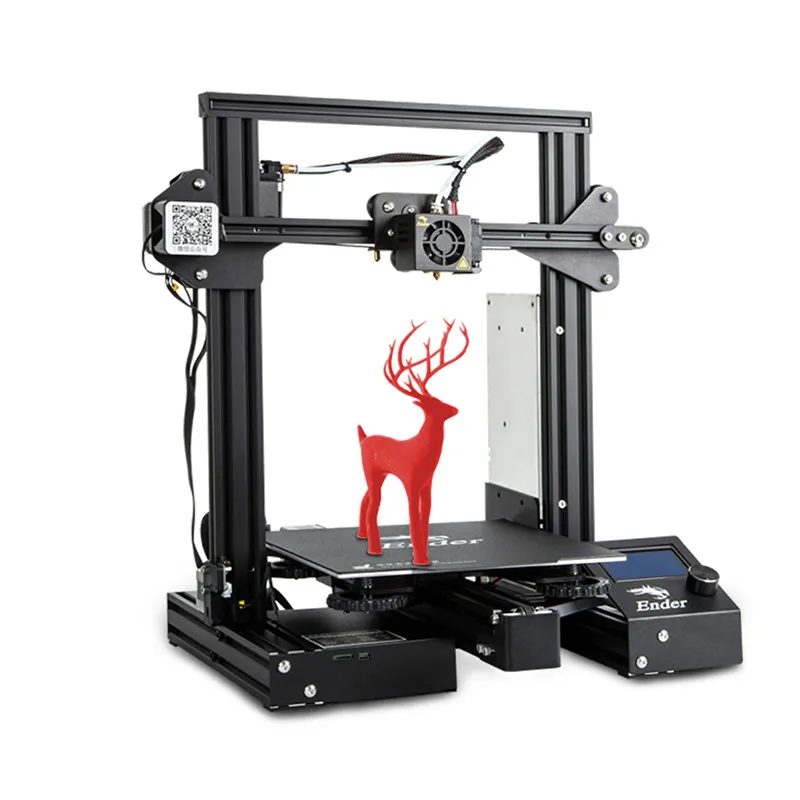 You’ll learn as you go, and you’ll become a 3D printing wiz in no time.
The Anycubic Kobra Plus
The Anycubic Kobra Plus
My go-to recommendation if you care more about getting straight into printing and will read up on the fine points of the machinery behind it all as you go. This puppy comes with auto-leveling built in, and a whole host of other quality of life features that will make your experience fun basically right out of the box.
Elegoo Mars 3
Elegoo Mars 3
If you want a printer that can handle fine detail, you need to go the route of a resin printer. The Elegoo Mars 3 is a 4K printer in a low-ish price range, offering good build volume for the cost. Resin printing comes with its own massive learning curve that’s totally different from what you’ll find with an FDM printer, but the quality of your prints is going to astound you.
NEXT UP
jtjones1988(
1
)
30 minutes
In this guide, I will remove the stock Ender-3 motherboard and install a BIGTREETECH SKR mini-E3. The process is the same for both the 1.2 and 2.0 versions of the motherboard.
Continue reading
Modernization Ender 3
Technician
Subscribe to the author
Subscribe
Don't want
9
Good day to all. Where should I start the story? Perhaps from the very beginning. I wanted to make myself a present and bought some used 3D printer Ender 3. With a small problem in the form of a non-working extruder motor. Since I am a super techie and part-time Vanga! I negotiated the extruder driver! During operation, the extruder took one step forward and one step back, which turned out to be obvious to me that this is a driver. Buying driver 4988 I started to resolder it. It turned out to be not so easy, since its small legs and slenderer contacts were very difficult to solder, but still I did it. But to my surprise, this did not lead to anything, and the motor, as it walked, Step forward, step back, and continued to walk, which introduced me to a little confusion.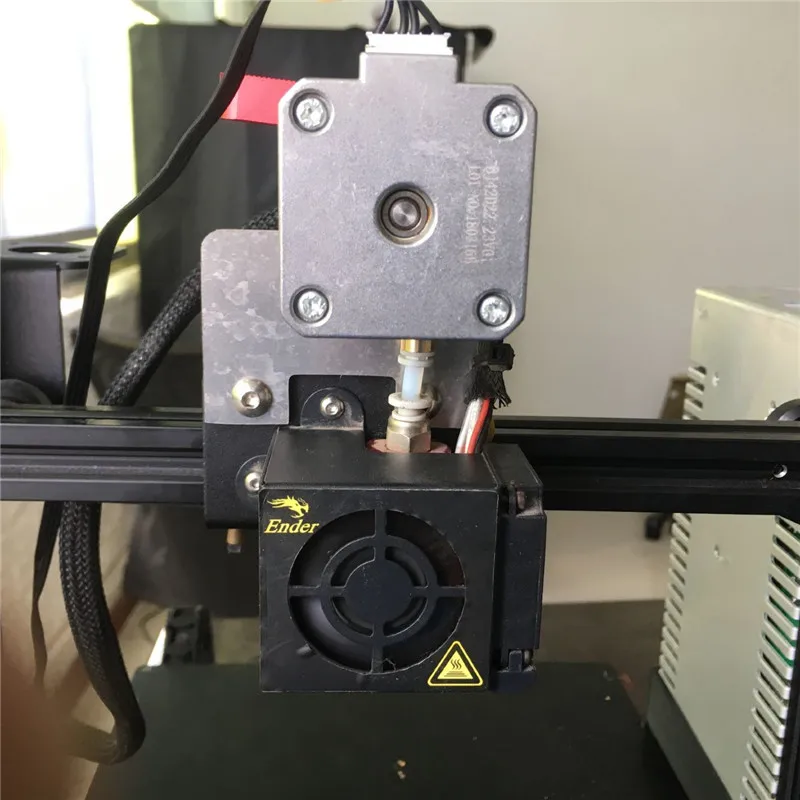 killed and my inattention cost me my time and money. Before buying Ender 3, I had an anet 6 printer and I expected better printing results from Ender, but my joy was not long and after a couple of prints I started a long and thorny path with a clogged nozzle with which I started this whole alteration.
That's actually the beginning.
It was decided to buy rails with carriages for all axles.
I ordered the Y-rail axis from Ali. Rail 30mm and 12mm wide. It is installed on m3 mortgages and m3 × 8 bolts, by the way they must be ordered separately and immediately and not like me, then I still waited 2 weeks😅. I didn’t particularly notice the ease of movement that I was promised, but I was pleased with the rigidity.
I decided to install the X axis from the top and it was, in my opinion, correct, but also how difficult it is. Everything rested, or rather rubbed against the belt, which runs in the upper groove of the profile. I took a sheet of metal 4 mm thick and made a strip 9mm wide and 30 mm long along the length of the profile and cut a thread in it at a step in the rail.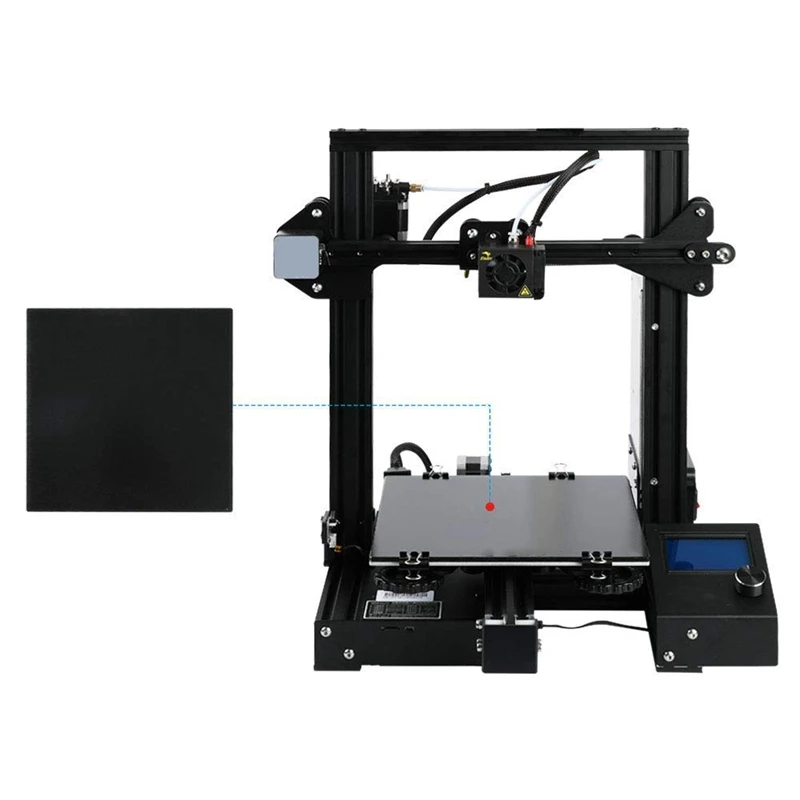 I shortened the bolts to 6mm. Notably having played engineer Tyk A.Yu. (according to his method) I achieved the result and the belt went quietly without hitting the fasteners.
To fix the hot end to the X axis, I made a mount from aluminum.
Z-axis - to ordered rails with aluminum profile.
Length 35mm, profile 2040 and rail 12.
Putting everything together and getting the first fruits of our labor
When buying a rail, I encountered a backlash that is noticeable only if there is a lever. On the Y-axis, I defeated him by installing 2 carriages. On the Z axis, I defeated the backlash by adjusting the rails a little tight from each other and installing a second screw and a gait-spring😀. Backlash on the X axis was not originally, you can say lucky!? So if you decide to buy rails, then be careful and read the review.
I also bought and installed the SKR MINI 3 v2.1 board, the installation is simple, we rearrange everything as on the old board, except for fan 1 and fan 0, they need to be swapped. We connect and enjoy the silence. By default, I had a crooked firmware and the steps of the motors were different and the steppers on hold were very hot. I solved the problem by changing the firmware.
I installed an aluminum extruder in place of
I made a thermal barrier from two old boards. Now the air blows only on the radiator and does not cool the heating block.
I also bought a heater for the table on aliexpress. The blessing of this good there in bulk. The insulation comes on one side with aluminum foil to reflect heat, sealing foam and a self-adhesive side, installation is generally simple - degreased and stuck. The second attempt will not be torn off😁.
I decided to pack my final alteration in a chipboard box. as it turned out, it was quite furniture and I did the dimensions with the expectation that I would put it in the closet, but as it turned out that I would not put it away😊. In the inside, I embedded the backlight in aluminum ships. Buttons for turning on: printer, backlight, thermostat and drying container.
Powered by 24 volts. so powered by the printer. The LED strip is powered by 12 and there are two ways, install a dc-dc converter as I did or connect 2 pieces of tape in series.
I fixed the power supply for the printer to the wall of the box from the inside and made a hole in the back wall for cooling.
I installed the door on furniture hinges with the possibility of snapping off and tilting down.
During operation, I removed the magnetic mat, as it has a meager temperature limit of up to 60 degrees.
Instead, I use a mirror.
Final result
Exploiting the finished model of the month 3. Printing details 9 out of 10 (1 defective for 10 models) ? Or not? Time will tell. Thank you for your attention .
3D printer 3D upgrade improved
Follow author
Follow
Don't want
9
More interesting articles
APToni
Loading
11/01/2022
2496
fourteen
Subscribe to the author
Subscribe
Don't want
Installing Klipper on a Debian 11 machine.
Recommended hardware...
Read more
7
Subscribe to the author
Subscribe
Don't want
Hi all!
My first post, so please save your slippers)
Zaden...
Read more
257
Subscribe to the author
Subscribe
Don't want
Snot. Who hasn't encountered them?
How many times this question has been raised.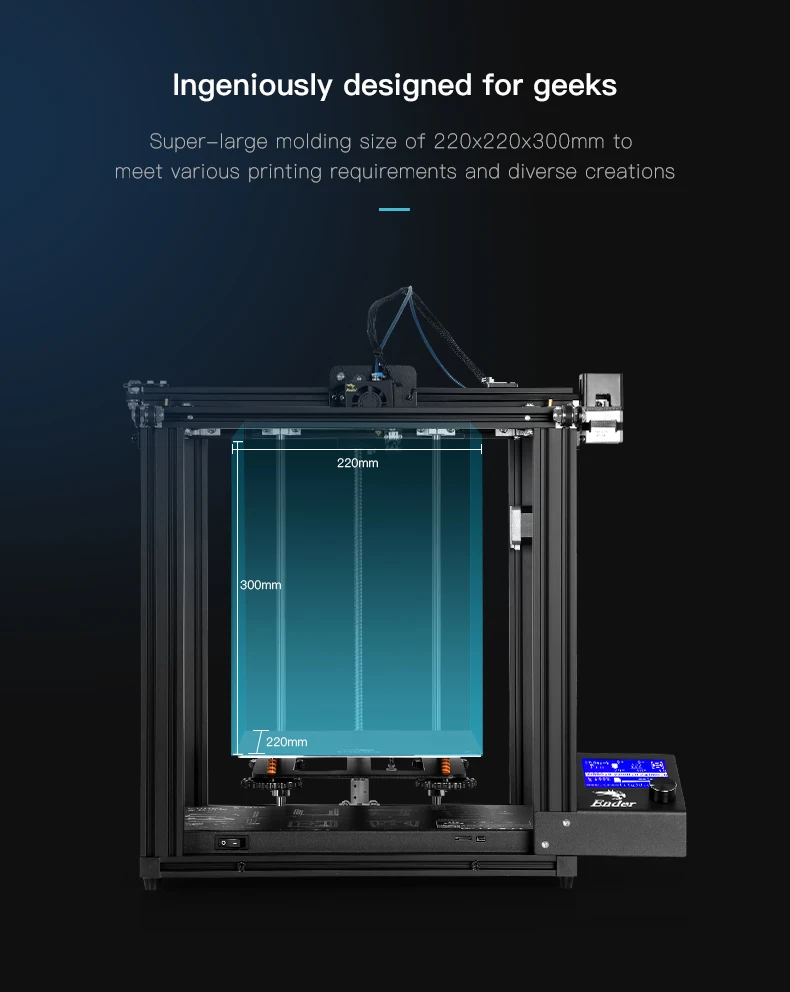 How many topics...
Read more
Modernization and upgrade of Ender-3. 10 Important and Useful Improvements to Ender 3 Performance and Security.
Ender 3 is a great printer for home and small business. You can buy the Ender 3 for about 10 times the price of many desktop printers. So if you're planning a start-up or just want to use your printer for a hobby, the Ender series 3D printers can be a great entry point into the world of 3D printing.
Thanks to the largest community of Ender 3D printer fans, you can find examples of practical and useful improvements to your printer on the web. We have collected some of them and in this article we want to introduce you to budget options for upgrading your printer.
Assume you have already assembled your Ender-3 by following the instructions posted by Creality 3D printer enthusiasts and hobbyists. You assembled it well, adjusted the roller pressure, aligned all the shafts. If so, then you are already one step ahead of those who built their Ender-3 by simply following the instructions included in the kit. However, there are a few upgrades that will improve the performance and security of the Ender 3, and in this article we want to introduce you to them.
1. Firmware.
Marlin is the world's most popular 3D printer firmware. It is free and open source.
Marlin supports both 8-bit and 32-bit 3D printer motherboards. Marlin firmware allows you to implement an ever-growing number of useful features that improve the security and performance of your 3D printer. The Ender 3 has basic preconfigured configuration files that can be downloaded directly to the printer's motherboard if it has a bootloader.
Experienced makers will love the huge range of Marlin features for Ender 3s. However, be aware that with a standard motherboard on the 3 and Pro, you will have a limited amount of memory (eg 1284 bits for Ender 3). Accordingly, if you want to add additional features, you may have to turn off some core features to save space.
Useful Marlin firmware features include the ability to add automatic calibration and a low filament sensor.
In addition, you can use the heat setting functions, which provide a more precise way to keep the hotend and table at a constant temperature.
Another feature that Marlin has recently added is Linear Advance, which allows you to adjust the run-out at the corners of printed parts.
All in all Marlin is a sophisticated software with almost unlimited possibilities to help your printer perform better. This is a great option for both the amateur craftsman and the experienced engineer.
2. Power supply and motherboard connectors.
Ender-3's power supply and motherboard are designed for quick installation. A set of ready-made cables comes out of the power supply housing and from the motherboard. To connect the power supply to the motherboard, wires with XT60 connectors are used, which must withstand a direct current of at least 60 A, which generally provides a good margin of safety. The problem is that, on at least some Ender-3s, these connectors are wired incorrectly, resulting in noticeable heat even at 10-20A.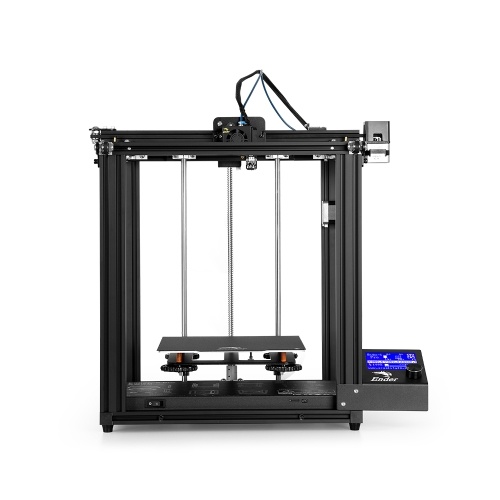 0003
0003
An effective way to fix this problem is to simply solder the wires to the connectors, creating a tight and strong connection. Use heat shrink tubing for insulation. In general, you will spend 10-20 minutes to implement this improvement if you already have soldering experience.
3. Protective cover for motherboard fan
A cooling fan is installed in the control electronics housing. This is good. Active cooling of the motherboard has a positive effect on the reliability of the printer during long printing, as well as at high ambient temperatures.
The problem is that the fan is mounted on the top cover of the case, that is, directly under the work platform. During operation, it draws in air, as well as waste plastic threads that can easily block it. The solution is to add a protective cover to the cooler. One of the most popular 3D printable models is posted on thingiverse by Admant77.
Download Creality Ender-3 Motherboard Cooler Protective Case.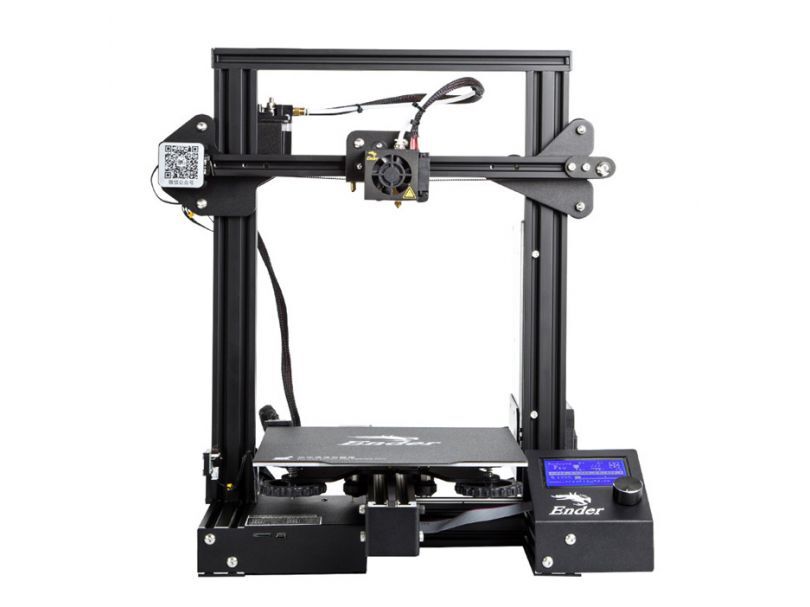
Protective case for Ender-3 cooler (Source: thingiverse)
4. Motherboard fan power supply.
There is another problem with the above fan. By default, it is connected to the motherboard along with the parts cooling fan. For this reason, it sometimes works, sometimes it doesn't. It all depends on whether you have turned on the cooling of your parts.
To solve this problem, plug it in where there is always voltage. Cut and insulate the wires and connect it near the main power socket.
5. Extruder
Ender-3 is equipped with a simple but reasonably well designed extruder. However, there is still room for improvement here.
The spring on the lever is rather weak and the extruder is not designed to adjust its tension, so the bearing does not press the filament against the roller enough, which can cause the filament to slip.
You can easily increase the tension of the spring by adding a regular printed washer, but here the second problem may arise: the extruder arm is not strong enough - it can break at the bearing mount.
Fortunately, an effective solution to both problems is very simple and cheap. Simply print a new stronger lever with adjustable spring tension compatible with factory bearing and factory spring.
Feeder for Creality Ender (Source: thingiverse)
User RaffoSan posted a great one on thingiverse. Print this model, add 2 screws, 1 nut and (optionally) a piece of teflon tubing. This small modification worked so well for most users that many have given up on buying the metal version of the factory extruder, deeming it an unnecessary expense.
Download improved feeder for Creality.
6. Fittings
One of the components that typically wears out over time are the sleeves that hold the PTFE Bowden tube. When they fail, the Bowden tube is disconnected and the filament begins to wind around the outside of the printer. Sometimes, after they have failed, you can reconnect the tube, but we still recommend that you replace the fittings immediately.
As a temporary solution, you can use 3D printed fittings.
Change fitting to Ender-3 (Source: makersteve)
On thingiverse user bert_lz posted a printed model.
Download fitting
Some netizens claim that they work well and are a great replacement for metal fittings. But we treat this replacement with a certain amount of skepticism and recommend that you buy standard steel or brass couplings.
7. Filament
This is not a modification or improvement to the printer, but a good 3D printer filament is also required to obtain the desired 3D print quality.
If you are just getting started in the world of 3D printing we recommend using the easiest material to use i.e. PLA. In addition to being the easiest filament to print, PLA is also an eco-friendly plastic, making it suitable for use anywhere, including the home, classrooms, and even kindergartens.
If you want to evaluate the print quality of your printer, then we recommend you to buy PLA 1. 75 in Devil Design grey. It is gray plastic that best allows you to determine the quality of the print. On the other hand, if your print needs to look the most presentable, we recommend Devil Design filaments with "glitters" such as aluminium, purple or black Galaxy. The shiny particles in these materials mask the “layering” and seams that are characteristic of FDM printing.
8. 3D printer table
Ender-3 is equipped with a heated table with an aluminum surface on which a black PVC overlay is installed. While the self-adhesive sticker works well, it does have a few drawbacks. For example, it is not always perfectly even. A good, simple and inexpensive solution is to replace the PVC platform with silicon carbide glass, the same as the Ender 3 V2.
We recommend that you buy silicon carbide glass, which has several advantages over PVC platform. Pros include strength and wear resistance, a perfectly smooth surface, and excellent adhesion.
9. 3D Printing Adhesive
Every 3D printer owner knows that first coat adhesion is the key to successful printing.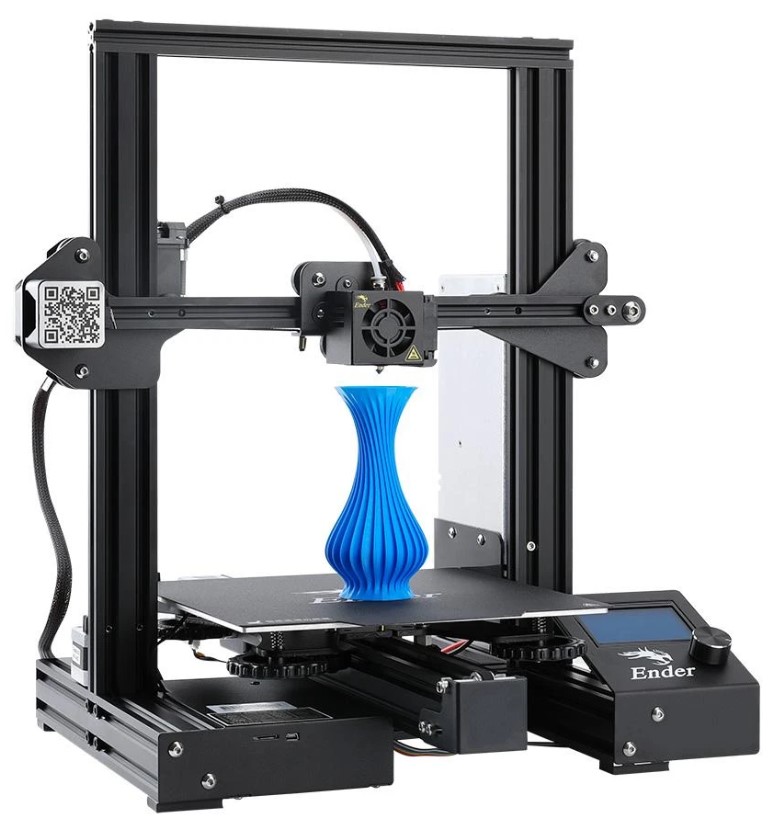 Whichever platform you use, it's very important to make sure your first layer is securely attached to the platform.
On the net you can find countless tips on how to improve the adhesion of the part to the platform. Tips include using glue stick, ABS juice, beer, blue tape, hairspray, etc. All these options work to some extent, but at the beginning of our journey, we discovered the 3D Lacquer of the Spanish brand 3DLAC and since then we have been using only it.
This is a really cool adhesive that is economically consumed and allows you not only to securely attach the part to the platform, but also to remove the model without problems after it has completely cooled down.
10. Goodies
Of course, one article cannot include all options for upgrading and improving your Ender-3. In the previous 9 sections, we mentioned important upgrades that affect print quality as well as the safety of your printer. Additional upgrades include a handy tool box, spool stands, chain-style wire organizer, large rotary knobs, filament guides, and more.