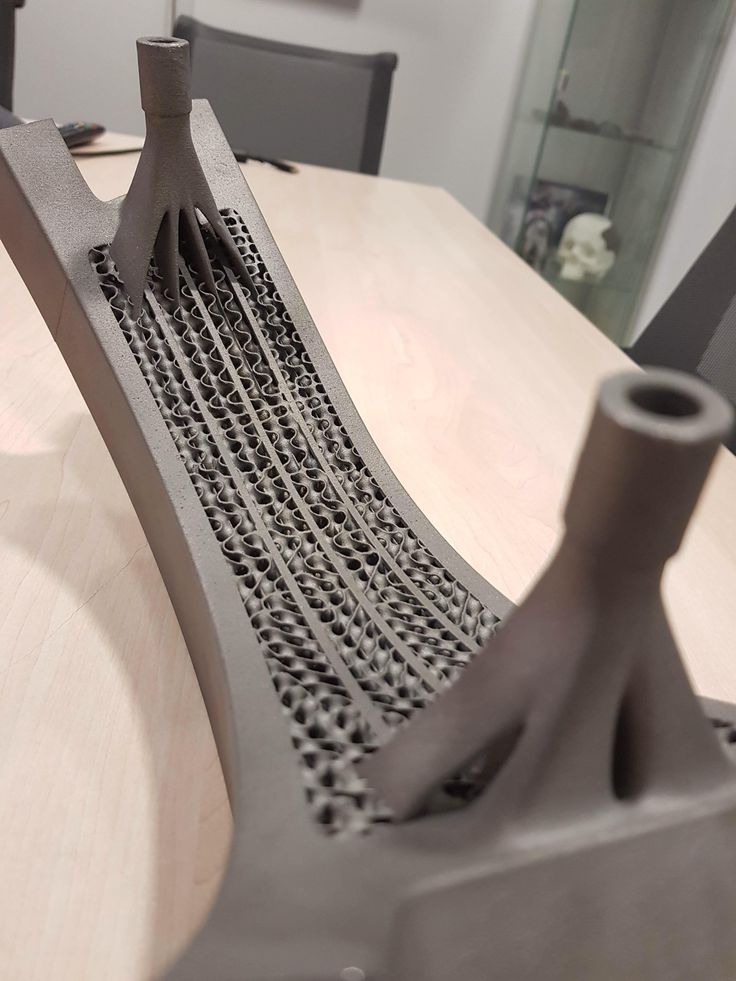
3D printed rc car stand
▷ 1 5 scale rc car work stand 3d models 【 STLFinder 】
RC Car Work Stand
thingiverse
Brought to you by http://rcnewz.com This is a two piece RC car stand with a parts tray and holes for building both 1/8 and 1/10 scale shocks. We invite you to try printing it for yourself and letting us know what you'd like to see changed in future...
1/10th Scale RC Car Stand
thingiverse
## 1/10 scale RC stand This stand looks cool and take pressure off your tires so that they stay nice and round.
There are two pieces that fit together with a tab in the center. Print the individual pieces, the combined file is just included so. ..
1/10 scale RC car Stand
thingiverse
A basic stand for my HPI RS4 EVO+ Mustang nitro car. It may be a little big but i've not had an issue with size as the printer i use is 1m3 Update V2 version made. ...Top plate splits into 2 parts and holes added for less material usage.* Print Settings...
RC Work Stand Top for 1:18 Scale Vehicles
thingiverse
... of a two piece work stand. ...This modification is made to fit into the base of Quick5pnt0's work stand and allows for smaller model vehicles to be worked on or displayed. ...
The platform measures 70x110mm and has 9. 7mm opening for building shocks.
1/12 - 1/18 scale RC car stand
thingiverse
A quick stand to store a small scale (sub-1/10) rc car. Storing your RC cars on a stand keeps flat spots from developing on the tires. Might be a bit tall. Adjust Z-scale to your tastes. ...Made to fit on a 150 mm x 100 mm bed.
1:24 RC Work Stand
pinshape
SummaryMade a RC Work Stand for my Carisma GT24b, one with premade places to put furniture pads, and one with even surface! ...Hope you enjoy it ;) The one with spots for furniture tabs are 25x50mm, I use 2x 25x25mm pads on each side.Print...
1:24 RC Work Stand
thingiverse
Made a RC Work Stand for my Carisma GT24b, one with premade places to put furniture pads, and one with even surface! Hope you enjoy it ;) The one with spots for furniture tabs are 25x50mm, I use 2x 25x25mm pads on each side.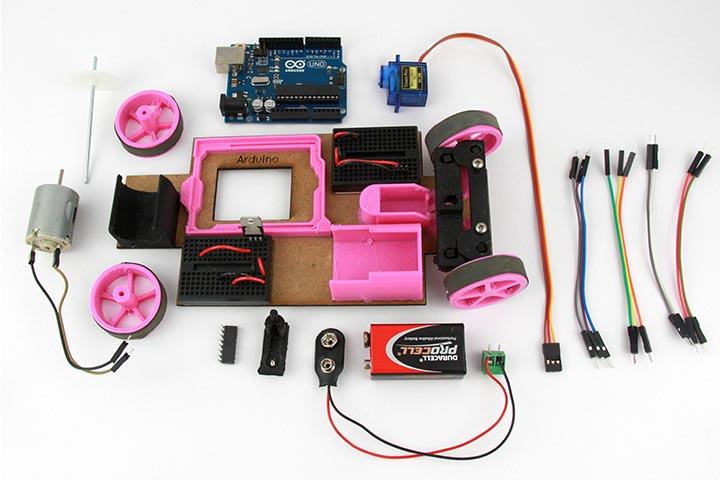 ...Print Settings Printer: ...
1:10 RC work stand
thingiverse
Didn't found a RC stand that I liked, so I built one. Plate is 150x150mm in size, has shock stand holes from 12 mm to 18 mm and a small tray for screws. Needs 4 M4x25 screws, preferably round head ones. Plate GCODEs have 4 infill modifiers for...
1/10 Scale Drift RC Car Wheel Stand
prusaprinters
A wheel stand to lift you RC car off the carpet or floor. Quick and easy to print. Flip the model upside down to print without supports. ...10% infill is more then strong enough also 2 perimeters.</p>
rc car model repair station Work Stand
thingiverse
rc model repair station What you need Thread m8 a 6cm Nuts m8 Rings m8 2x 608 skateboard bearings Attention is still Work-In-Progress so there can definitely be things changing would appreciate it if you print this please let me know,, happy printing
2 Post Car Lift for 1/10 1/8 1/5 Scale RC Cars Trucks Crawlers working model
thingiverse
https://cults3d. com/en/3d-model/game/1-5-1-8-1-10-scale-2-post-car-lift This is a Working Model of 1/8, 1/10 scale 2 Post car Lift. ... The parts you will Require is listed below 2 pcs Nema 17 Stepper motor 2 pcs Stepper motor Driver (4988) 1 pcs...
2 Post Car Lift for 1/10, 1/8, 1/5 Scale RC CARS, TRUCKS, CRAWLERS. Working Model
myminifactory
This is a Working Model of 1/8, 1/10 scale 2 Post car Lift. ... The parts you will Require is listed below 2 pcs Nema 17 Stepper motor2 pcs Stepper motor Driver (4988)1 pcs Ardiuno nano2 pcs SM10UU leaner bearing2 pcs 10mmx500mm SS smooth rod2 pcs...
Wheel 1/5 rc car
grabcad
Wheel 1/5 rc car
1/5 Scale RC Servo
thingiverse
This is my RC Servo designed for ⅕ scale project needs (it’s 2x the size of a standard servo). The design leverages a motor with a built in gearbox for initial gear reduction and a commercially available controller. The combination allows for...
1/10 RC Buggy Work Stand
thingiverse
This is a 1/10 Scale off-road work stand modeled after the arrowmax work stand. This stand includes holes for shocks. I made the holes 15.1mm and 13.6mm to allow for dimensional accuracy issues. ...Let me know how you like it!
RC car stand 1/10
myminifactory
Universal RC car stand for scale 1/10 or smaler. ...Two pieces can be print without raft and later glued together.
1/10 scale rc car jackstand
prusaprinters
1/10 scale rc car jack stand
1/10 scale rc car wing
prusaprinters
rc car wing with munt for 1/10 scale rc cars
1/5 RC CAR all
thingiverse
video about this car - https://youtu. be/gy0d7zdInlc
Snorkel for 1/10 Scale rc car
thingiverse
Replace part for 1/10 scale rc car Special design for SLA printer for best result
1/10th Scale RC car side mirror
thingiverse
Side mirror for 1:10th scale RC cars (touring/street cars). ... Right mirror only, you have to mirror it yourself.
RC Car Stand 1/10
thingiverse
... and rubber; your drop gauge number start with 44mm
You can paint thin areas with a toothpick.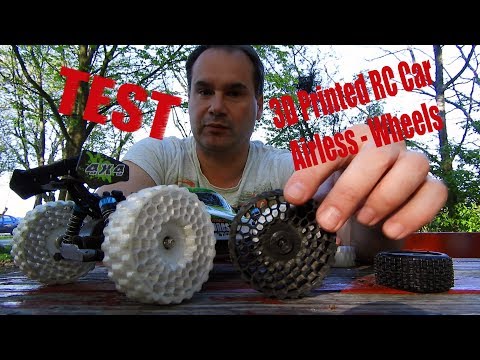 My print setting like that: nozzle 0.4 layer height 0.1 initial layer height 0.1 wall thickness 0.4 infill 100 support No build plate adhesion Brim
1:10 scale RC Car Holder
cults3d
this has worked for all my 1:10 scale cars.
2022 F1 1:24 Scale RC Car
thingiverse
To make the car you will need: 1x m3 nut 1x m3 x 8mm 2x m3 x 10mm (cut off head) / cut m3 rod 2x m3 nylon locking nuts 2x #6 hex nuts 2x #6 hex kep nuts 2x #6 washers (optional) 1x 6-32 x 3" threaded rod 2x 1/4" OD x 1/2" long nylon spacer 2x 1/8" x...
RC car axle.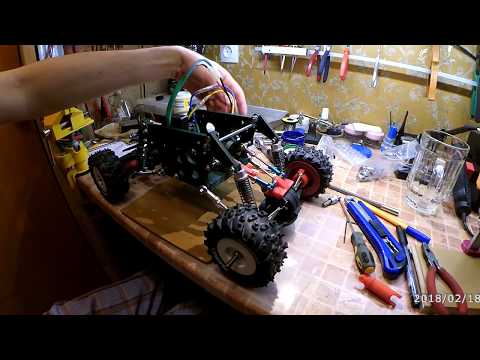 1:10 scale
thingiverse
Small 1:10 scale RC car axle. check out vid to see in action. Uses m3 bolts. 2 sets of tyres/wheels are also on to fit the axle. ... https://youtu.be/Jv2s2o5fva0
MiniRC 1/20 scale buggy RC Car
thingiverse
I race 1:10 RC buggies on carpet so I decided to go half the size of my racing car hence the choice of scale. The smaller size means the car is low in weight, around 400g complete vs 1500g of the 1/10 car, hence strength-wise the requirement is well...
1/10 Scale RC Car Body Post
thingiverse
3D printable Body Post for 1/10 scale buggy rc's Please Tip if you want to, encourage me to make more designs.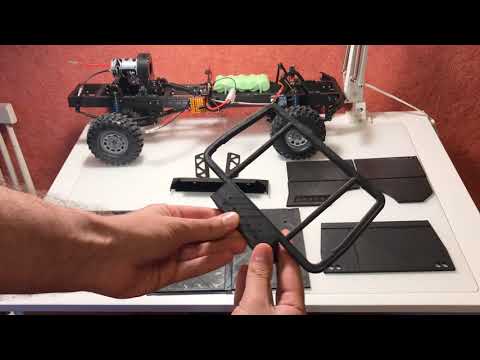
1:10 scale RC touring car hangers
grabcad
An easy way to store you 1:10 scale touring and rally cars.
Scale 1/10th RC Car Trailer
myminifactory
Again I used RC boat prop shaft and housing as axle but M3 this time, there is a propeller drive dog on top of assembly on which the Handle wheel stand get glued on. You can probably make something more simple with just a M3 thread rod and the...
1:25 Scale RC Car Chassis
thingiverse
. stl files are in "INCHES", scale to 25.4 This Chassis is for converting the AMT Slot car Camaro kit (Kit # SCAMT744/12) to RC. Instructions You need the AMT slot car kit "scamt744/12" kit (1970 Camaro). Print the chassis and the left and right...
Cool tips and tricks for 3D printed RC cars
The combination of 3D printing and RC models is a perfect match! We haven’t heard of anyone who printed his own RC car and then got bored of it. On the contrary, people love the possibilities! With a 3D printer, it’s possible to create plenty of original pieces and take your RC models to the next level. In this article, we’ll give you several useful tips and tricks to demonstrate that printing RC cars is easy and fun. Plus we have a small surprise for you at the end of this article. And we are working on a video showing how these cool cars work, so stay tuned!
We consulted resources for this article with Jiří Lorenčík, co-founder of the 3D Sets project.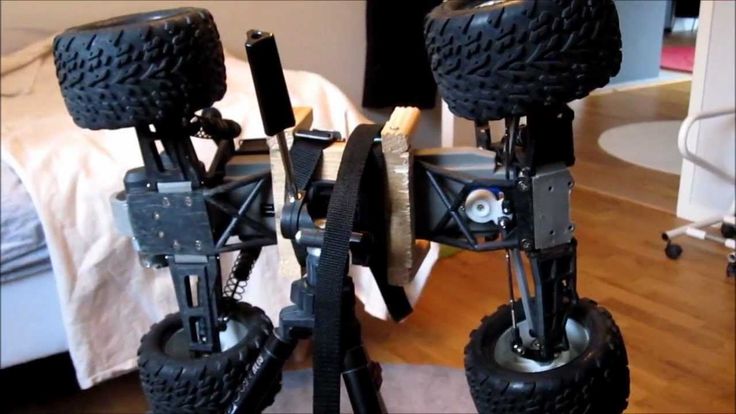 If you don’t know what it’s about, you should definitely go ahead and browse their webpage. It’s an amazing company offering detailed files for 3D printable RC cars with complete assembly manuals. And it’s a perfect match with the Original Prusa printers and Prusaments! One of their models can be downloaded from Printables.com, others can be bought directly on their website. We really love their cars because they’re nice, functional and easy to assemble – just like our printers. 🙂
Model Sandy, recently published by 3D Sets. You can get it on their website.
Model looks
Let’s start with the most exposed parts of the model. The overall look of the model is the most important part for pretty much everybody. There are even people who buy preassembled chassis and print only the visual parts. Others like to print RC models just to be static, without the electronics inside.
Landy by 3D Sets
Print with PLA
The first piece of advice we’ll give you is a simple one: print it with PLA. PLA in general is the best-looking and most easy to print material. It’s made in many color variants and comes with a nice matt surface, therefore it’s perfect for printing visual parts. PETG, on the other hand, is often printed with small visual defects, such as stringing and oozing and needs some level of postprocessing. PETG also comes with a glossy surface that might not look as good as you’d expect (but it is still good for certain situations). PC Blend, ASA and ABS tend to warp at room temperature and tend to be a bit more of a challenge, at least for beginners. They are also more expensive than PLA and PETG. These materials are therefore suitable for printing mechanical parts.
We recommend printing detailed parts with the Original Prusa SL1S SPEED. We’re talking about small-scale car bodywork, interiors (dashboards, etc.), or transparent parts like headlights.
You can still use PLA for printing surprisingly small details, though. Check out the interior of Bamboo 4×4 by 3D Sets.
3D printed part orientation
The surface orientation of a 3D printed model affects the aesthetics a lot. Sometimes you’ll have to print the part seemingly illogically oriented just to make it nice. For example, thin parts of the bodywork are better to be printed perpendicular to the print surface.
3D printed transparent parts
Some time ago, we published an article about printing glass-like models. So you might be wondering whether the same steps can be used to produce parts for RC cars. The answer is yes and no. Printing large thin transparent parts, such as windows, doesn’t make much sense. Postprocessing them is really difficult and time-consuming and even the smallest mistake will be visible on the model. It’s better to cut the windows from a transparent foil or film. Just keep in mind that superglues (cyanoacrylate) tend to leave ugly white maps on the foil. It’s better to squeeze the foil between two parts instead of gluing it there. And if it’s not possible, we suggest using a different type of glue (epoxy for example).
But there are certain applications where 3D printing comes in handy. The headlights, for example, are a good example of possible transparent material postprocessing, especially if you own an SLA printer. Another option is to print a mold, so you can make transparent parts with epoxy resin. And if you’re a perfectionist, you can even make the car with working lights. Newer models by 3D sets come with openings for wires, LEDs, etc.
The foil fogged up with superglue on a recently crushed model Sova 120 by Tomáš Hubík.
PLA heat resistance
We asked 3D Sets whether people struggle with high summer temperatures, direct sunlight, etc. The answer is obvious: yes, they do. PLA tends to get soft and warps at relatively low temperatures (see our annealing article). If you put your RC car in a heated car trunk during a hot summer day, it will most likely get deformed in just a few moments. Similarly, the model will have a hard time surviving on asphalt heated by the sun. That’s just a downside of printing with PLA that you need to take into account. If you need better temperature resistance, a good idea is to print the model with another material even when it requires more demanding postprocessing. Printing with light colors might help a little too – dark filaments absorb heat much easier than light ones.
Filament shrinkage
Jiří Lorenčík also emphasized that certain materials tend to shrink more than others. If you decide to use PETG to print parts designed for PLA, you may quickly find out that they don’t fit precisely. Something similar can happen with ASA and ABS – these materials shrink a lot more than PLA and PETG. We suggest printing small parts first to see if everything fits before you print the whole car. This will help you save a lot of filament.
You crush it, you print it!
One of the main advantages of printing your own car is the fact that you can fix almost everything.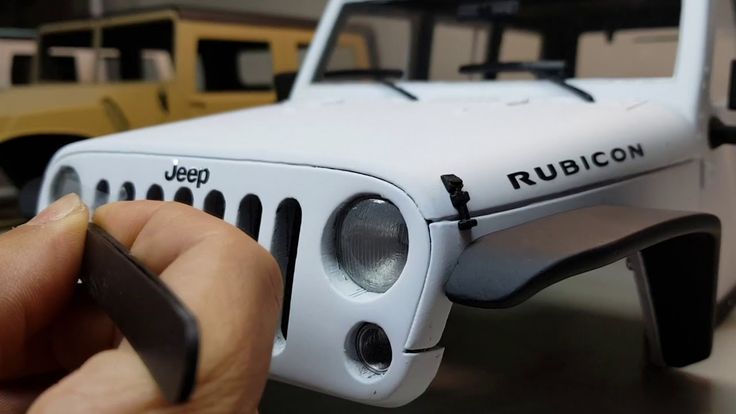 Did you break your bumper? Never mind, reprint it! The whole concept of 3D Sets (and 3D printing in general) stands on easy prototyping and repairing. We destroyed a few cars during our testing but instead of spending money and waiting days or weeks for new parts, we simply reprinted them and we can ride again.
Crushed models waiting for reprinting…
Printing mechanical parts
Some parts are suitable for 3D printing, others not so much. And sometimes you need to pick specific materials for their advantages. Can you tell which material is suitable for what purpose?
Choosing the material
According to 3D Sets, the best material for most of the parts (including the technical ones) is Prusament PLA. But you still need to know various material properties to decide what to choose. You can get a good overview by looking at our material table but we’ll sum up the most common materials and their use here.
PLA – mechanical parts for cars by 3D Sets are almost entirely printed with Prusament PLA, even gears, driveshafts, etc.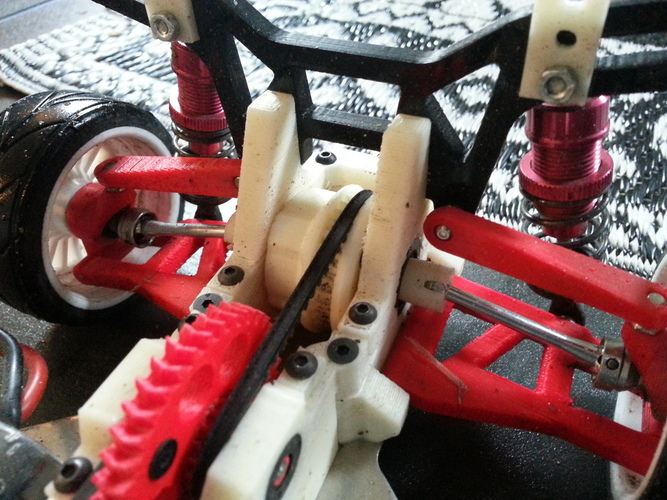 PLA works surprisingly well for slow cars, even with large clearances between the gears. However, it’s not suitable for printing parts requiring some heat resistance (motor pinion) and small gears.
PETG – thanks to the higher flexibility it’s good for exterior parts exposed to impacts, such as bumpers, wheel discs, etc. It’s not suitable for printing gears – it will wear out quickly and stop working.
PC Blend – ideal material for mechanical parts, 3D Sets recommend this for printing differentials, small gears and heated parts (around motor).
PC Blend Carbon Fiber – this material is better than PC Blend in temperature resistance and dimensional stability. It’s suitable for most mechanical parts with no need for elasticity and high impact resistance. Due to the low coefficient of friction, it might be useful for some moving parts (gears for example). The main disadvantages are the high price and the necessity of using the hardened steel nozzle.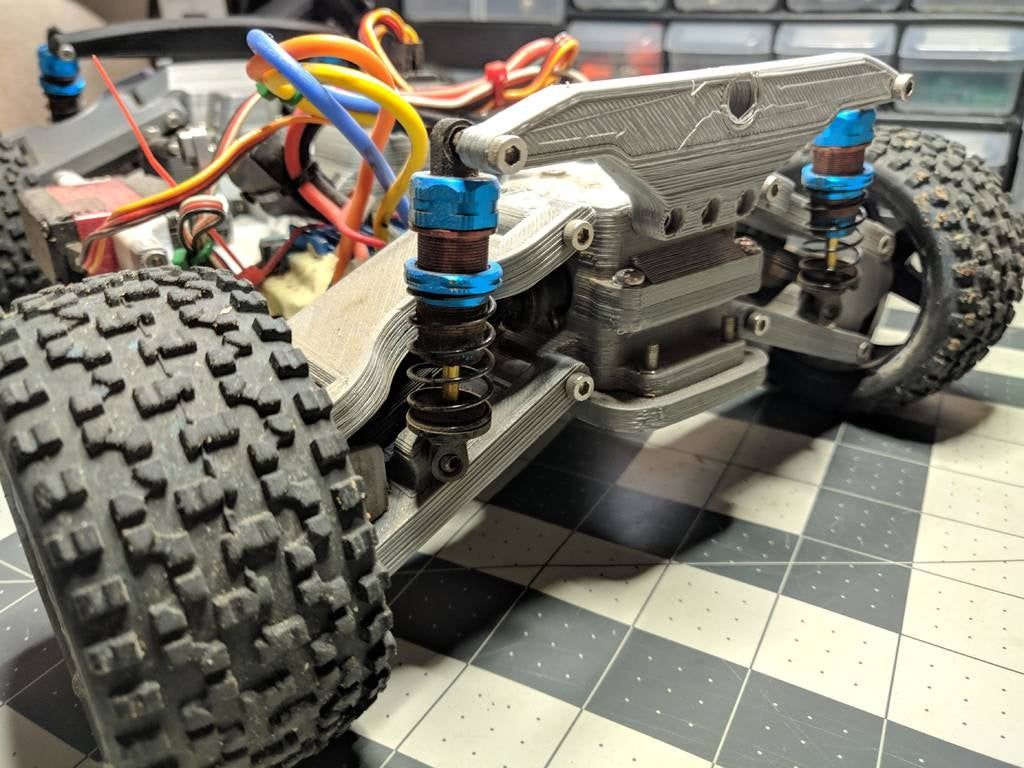
ASA / ABS – cheap materials with higher heat resistance than PLA and PETG. If you don’t have a PC Blend, these work great for printing heat-resistant parts. Don’t forget that these materials warp a lot during printing at room temperatures. We suggest printing it in an enclosure.
Polyamide (Nylon) – this is by far the best material for printing gears and bumpers but it’s also the hardest to print. Usually, you won’t be able to print detailed shapes, the material warps a lot and absorbs moisture rapidly.
Flexible filaments – these materials come with great mechanical resistance and layer-to-layer adhesion. It’s good for bumpers, special tires and other parts exposed to impacts. The main disadvantage is the higher print difficulty which makes it suitable for experienced users only.
Keep in mind that it’s recommended to print mechanical parts with a higher number of perimeters. 3D Sets print several parts with a 100% infill but there’s a general rule that tells you to increase the number of perimeters to make it stronger.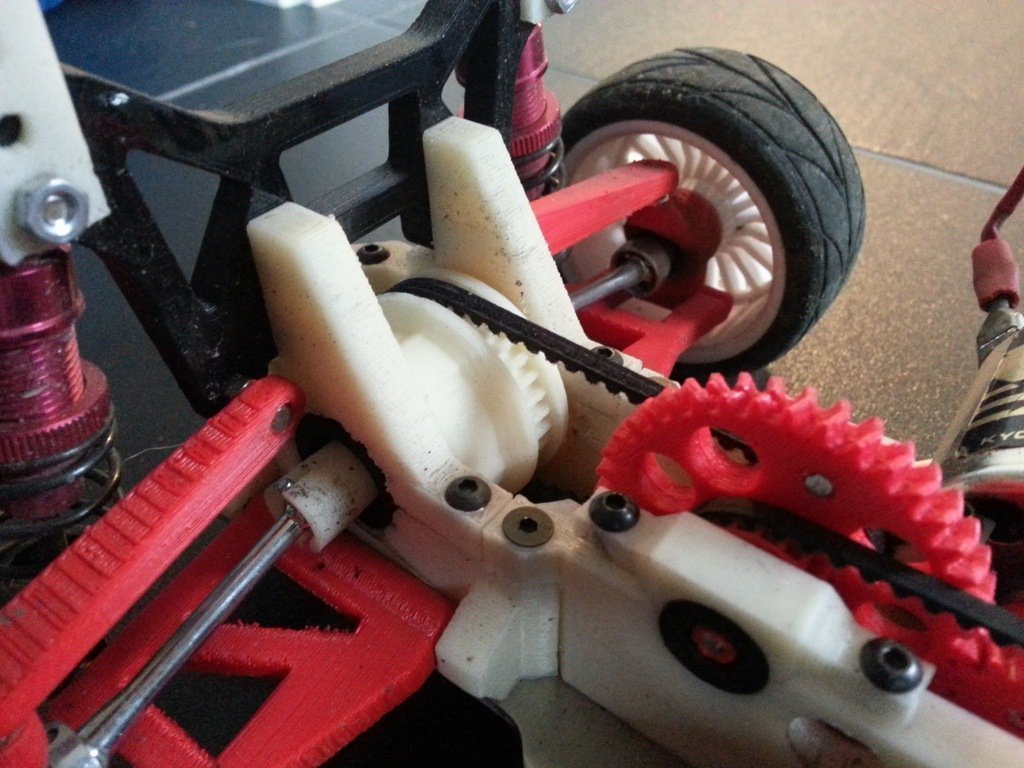
Printing a chassis
You may have already asked a question about whether flexible filaments can be used to produce RC car tires. In short: it’s usable but there are limits.
It makes sense to 3D print special tires instead of regular ones. For example, wheels made for driving in the sand (seen above) or really hard tires for drifting are great ways to use flexible filament. 3D printed tires have much lower adhesion to the surface compared to regular ones, due to the greater hardness of the material. Also, flexible filaments are usually a bit more difficult to print. Strong layer-to-layer adhesion and poor bridging make it difficult to print supports and detailed structures. It’s not easy to give a definitive answer here. The best option is to test 3D-printed tires on your own and see if you’re happier with 3D printed or injection-molded tires.
Some tires need to be attached to wheels to prevent slipping. You can either glue them or squeeze them between two discs printed with tougher materials. Slower cars (crawlers) usually don’t need gluing – they won’t slip unless you drive in the water.
The discs for crawlers can be printed with basically anything. They won’t get damaged unless the car falls from a high spot. But fast cars are prone to sustain more damage, so we suggest printing the discs with PETG or Prusament PC Blend.
Choosing and printing a gearbox is surprisingly easy: cars with a 4×4 drive need a gearbox with a dual-side output. A simpler gearbox with 4×2 drive is not suitable for terrain vehicles but it’s definitely great for fast cars and for drifting. Just don’t forget to use some grease, especially if it’s PLA. To be completely honest, we forgot to do that and regretted it shortly after. The grease not only helps smooth out the movement but also conducts heat away.
Parts unsuitable for 3D printing
Some hobbyists print shock absorbers. If it’s for a static model or if you drive on a smooth and flat surface, it might actually work. But if you want to have fun in rougher terrain, you need to use stronger parts.
A similar rule applies to bearings: there are 3D printed models but their lifespan and reliability are debatable. Metal bearings can be really cheap nowadays and can withstand a lot of stress.
Choosing the right electronics
Every RC car needs electronics. Unfortunately, every model needs something a little different. You will definitely need to study it on your own but we will at least give you a few tips. Luckily, many people enjoy this great hobby so all you need is to look at hobby forums (for example Instructables, Facebook, etc.) or video channels on youtube, etc.
One of the most important parts is the servo for controlling front wheels. When the car is moving, there is no need to use excessive force for steering. But when the car is standing next to an obstacle, it is quite necessary to be able to steer anyway. That’s why 3D Sets use 20 kg/cm torque servos for their 3-4 kg cars. We suggest that you start with these values when designing your own project.
It gets a little more complicated when choosing a motor. Again, you need some basic knowledge of RC models. You need to consider car size and gearbox design when choosing a proper motor. Some cars by 3D Sets use size 540 DC motors but some cars can use AC motors, too. The “Sandy” uses a DC aircraft motor, for example. Slower cars often use so-called sensor motors where the ESC can accelerate slowly and smoothly. You also need to pick proper rotations per Volt when picking a DC motor. These motors are weaker than AC ones and it really doesn’t make sense to choose a motor with 4000 rounds per Volt. Finally, don’t forget to choose a fitting ESC for your motor.
The batteries used in cars are Li-Po because of their versatility. They’re light, have a large capacity, work with strong currents and charge fast (1 hour for example). But they can be damaged by undercharging, mechanical impacts, water, etc. Improper handling can lead even to an explosion (see the aircraft catastrophe caused by a Li-Po battery). There are hard case batteries made for RC cars to make them safer.
The transmitters for cars are usually equipped with the steering wheel but you will be most likely interested in their price. It all depends on how often you drive and how many cars you own. With more models, it’s good to invest in a better transmitter and buy more receivers. But this way you will most likely end up with a joystick transmitter, like Frsky X12 (recommended by 3D Sets).
Print the legendary Skoda Favorit!
As we promised in the beginning, here’s the little gift. We asked Mr. Tomáš Hubík, author of the 3drcmodely.cz page, whether he could share one of his models – and he did! Check out this great model of Skoda Favorit. If you like Mr. Hubík’s (and other designers’’) work, don’t forget to support him by buying models on his page or by donating at Printables. com. If you’ve ever designed something, you know that it takes a lot of time. Many authors share their models out of their goodwill but they will surely be grateful for any tips. When a user has his PayPal account paired with Printables.com, all you need to do is press „Donate“ on the left side of his profile.
We used the Original Prusa SL1S SPEED to maintain the detail but you can also print it with FFF/FDM printers.
Finally, you can browse our collection of cool prints related to RC cars. We believe that you will like it. And if you’re working on some project of yours, don’t forget to share it with others!
Happy printing!
90,000 giant 3D-printed radio-controlled machine Michael Curry weighs 32 kg
Archive
Subscribe to the author
Subscribe
I do not want
Giant 3D-printed radio-controlled car Michael
Designer and 3D-print enthusiast from Kanzas City Michael Curry (aka Skimbal) started building his 3D printed giant RC car in December 2013. Curry has always tried to push the boundaries of what can be done with a single conventional 3D printer by printing large parts in batches. If you haven't seen Michael's early work, you should definitely check out his Gothic Cathedral toy and Racing Tortoiseshells on Thingiverse.
Over the weekend, Michael posted new videos and photos of his 3D printed RC car project.
Frame and two pivots for steering gear
This machine is already (almost) ready for the Regional DIY Show 2014 (05/17/2014-05/18/2014). It weighs about 70 pounds (nearly 32 kg) and was printed within 5 months on two MakerBot Replicator 3D printers. All parts are printed at standard settings (2 layers of outline, 10% density, layer height 0.2mm) except for the Blue pins, which were printed at 20% density and 4 layers of outline.
Little by little I am building my 3D printed car. This is a frame and two hinges for the steering mechanism. I have to make it work like a giant RC car for the Regional DIY Gadget Show.
3D printed RC car mechanism part on the floor
next to the MakerBot Replicator 2 3D printer
“They say: “You can’t download a car!” Well, now it's possible!"
Check out some more videos Curry made to document the process of building this giant 3D printed car:
3D Printing a Giant RC Car - Rear Axle Update made March 25, 2014.
Suspension and transmission development update. In addition, you will be able to take a look at the final version of the rear axle.
3D printed giant RC car rear end prototype #2 dated February 15, 2014.
The second prototype of the rear suspension for a 3D printed car and the beginning of the creation of wheel structures.
Giant RC Car 3D Printing - Rear Suspension Test on December 31, 2013
The following is the rear suspension test version of Curry's 3d printed machine. Printed in PLA on two Makerbot Replicators.
3D printed giant RC car - 3D printed differential - lab tested December 15, 2013
Lab test of my 3D printed rear diff. Printed on a MakerBot Replicator 2 at medium settings: 2 layers of outline, layer height 0.2mm and infill density 10%. The entire structure weighs 70 pounds (about 32 kg). At the end, the chain jumped off the sprocket and twisted, which completed the tests for this day.
If you're planning to attend the Regional DIY Gadget Show this weekend, don't forget to find Curry's work and see his machine in action.
Article prepared for 3DToday.ru
Subscribe to the author
Subscribe
Don't want
Even more interesting articles
7
Subscribe to the author
Subscribe
Don't want
So, you are thinking about the possibility of making money on 3D printing. How realistic is this? Quite, although the way...
Read more
four
Subscribe to the author
Subscribe
Don't want
One of the most promising and least developed areas of 3D printing is bioprinting. Whole a...
Read more
3
Follow the author
Follow
Don't want
Not so long ago, we talked about an interesting engineering and architectural project that is directly related to the.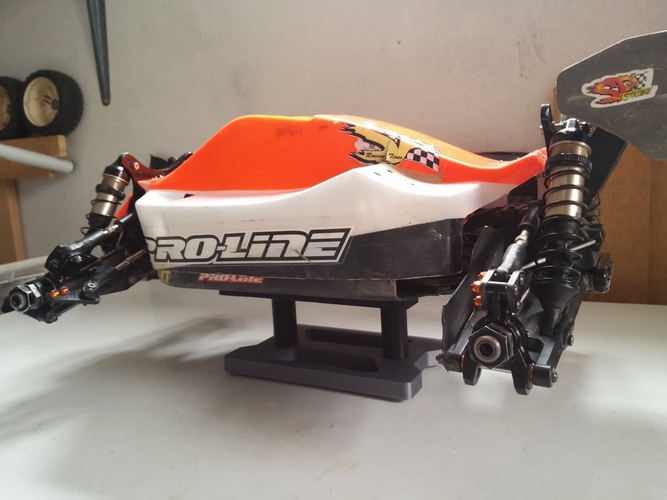 ..
..
Read more
Rack for storing car wheels using 3D printing
Application
Subscribe author
Subscribe
Don't want
17
Hello everyone! In this article, if you can call it that, there will be nothing special, just an experience of creating a compact wheel storage rack in the garage using 3D printed parts. But maybe my experience will be useful to someone.
It all started when I needed a compact car wheel rack with the wheels along the wall. All options for ready-made racks or racks in stores or on the Internet were offered with the location of the wheels across the wall. But in the garage there is already little space, and I wanted a compact narrow rack. Ready-made fasteners were also offered separately for each wheel in the form of a bracket fixed directly to the wall. But I excluded this option, as it is not entirely reliable. Such a bracket may, for one reason or another, eventually fall out of the wall under the weight of the wheel.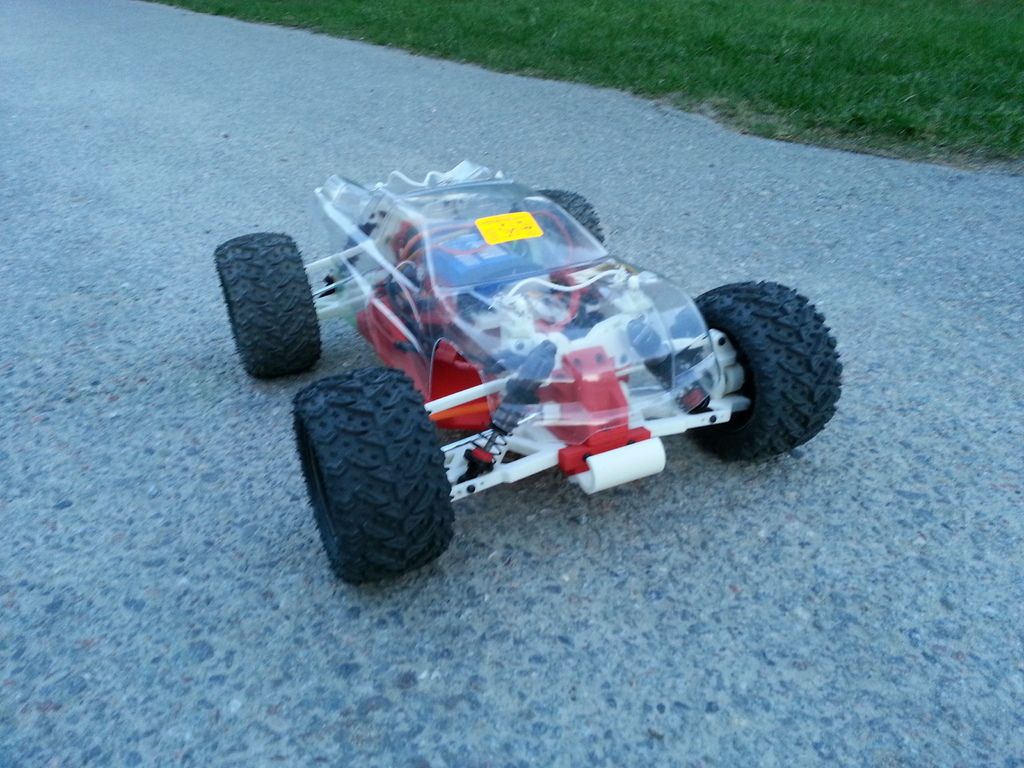 In general, I wanted to make a stand that would rest on the floor, and in which the wheels would be parallel to the wall. Therefore, I modeled the following welded structure:
Later I changed this design a little, but the essence remained the same. I welded it from a steel rectangular profile measuring 40x20x1.5 and 20x20x1.5. By the way, it is better to take a metal thickness of 2 mm, since it is much easier to cook. But I don’t see the point in writing in detail about welding, since the story is about 3D printing. In the future, it was necessary to come up with some large cylindrical parts that would be put on four metal pipes, and the wheels would be attached to these parts. It was at this moment that the idea to print these parts on a 3D printer matured. So I sat down in CAD and modeled the design in the right way.
The dark part is a flange that is put on the central steel pipe. The light detail - the sleeve, is put on the flange and is made of a softer material because it interacts with the wheel disk. Both parts have small holes perpendicular to the axis of the pipe. M5 screws are installed in them so that the sleeve and flange cannot rotate around the steel pipe or fall out of it. The flange has holes for M12 bolts and nuts. Fastening the wheel to the flange will occur in the same way as on the hub of the car. Only the fixing nuts will not be 5, but 3. And in fact, it will be possible to tighten only 1-2 nuts, so long as the wheel does not fall.
The details to be printed are directly shown below.
According to the materials at that time, I just had almost a whole coil of blue Petg, which was very rarely used, as well as black Petg. I printed flanges from Petg. There were also two SBS coils, which I used to use often, but over time I realized that this is not a very valuable material. However, for bushings for automobile wheels, it will be just right. In addition, SBS is a soft material, and therefore there is no possibility of any damage to the rim when installing it on the bracket.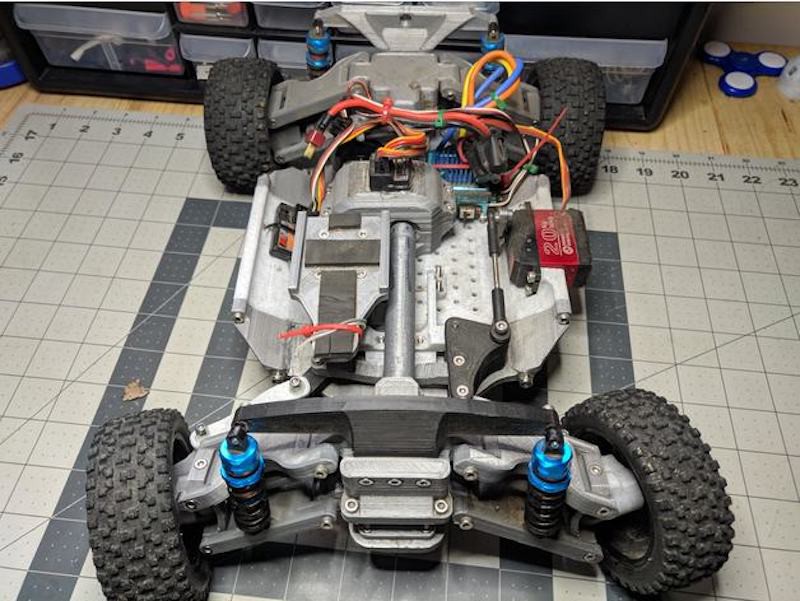
The photo shows the printing process:
The parts turned out to be quite large in size and with thick walls. But despite this, there was an idea that plastic could not withstand the load from the weight of the wheel. Yes, the weight there is simply distributed through the walls of the bushings onto the metal pipe. However, there were concerns about this. Although after testing the design, it turned out that everything was in order. The weight of each part shown in the photo below is approximately 230 g. The height of the layer is 0.25 mm. Nozzle 0.5 mm. It was printed in 4 perimeters with approximately 75-80% infill.
Details have not been coated or processed in any way. Although SBS is afraid of ultraviolet radiation, it will be in a closed garage 99% of the time, and the sun will not be able to influence it. Petg also does not require a protective coating.
Actually, here are the finished assemblies:
After printing, I installed them on a welded structure.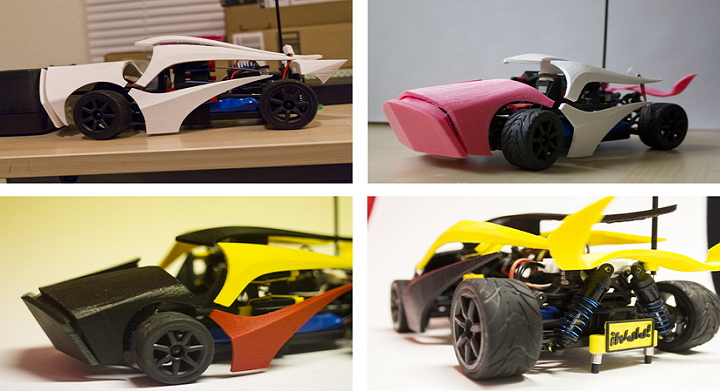 The following photo shows what the rack looks like with one wheel mount installed. The steel pipes on which the printed bushings are mounted are made removable. Therefore, you can put at least one fastener, at least two, at least four. The rack itself stands securely on the floor and is bolted to the wall with dowel-nails.
And the next photo shows the finished structure with wheels. The stand is compact and durable.
Here's an easy way to use 3D printing to store wheels in your garage! Of course, this could have been done in a different and perhaps simpler way. But I have a 3D printer and a desire to print!)
Join my VK group: https://vk.com/alexmaker_3dprint
Even more interesting articles
5
Subscribe to the author
Subscribe
Don't want
Foreword. What it is used for. Brief description of the robotic milking machine.