
Convert 3d printer to laser cutter
How to convert a 3D Printer to a Laser Cutter
How to convert a 3D Printer to a Laser Cutter
Pretty much every maker has at least one 3d printer nowadays. This is awesome, as there are so many things you can do with a 3d printer. But you can not only use your 3d printer for printing, but it is also an XYZ motion platform. By attaching a laser to the extruder, for example, you can easily convert your 3d printer to a laser engraver or even cutter. If you also still keep all the 3d printer parts attached, you can quite quickly build a dual-purpose machine, with the laser diode being the only cost to your new laser cutter.
One suitable method to control the laser is to use the part cooling fan PWM signal for the PWM input of the laser. While you are lasering, you don’t need the part cooling fan, and it is straightforward to control it with gcode. Provided your laser uses the same input voltage as your printer, you can likely also use the already present power supply to power your laser. This works because you are not using the heated bed and hotend during laser cutting, thus leaving a lot of energy available for the laser.
One thing that you absolutely need with a laser, that you most likely don’t already have on your 3d printer, is an enclosure with a vent to the outside. Laser engraving and even more laser cutting produce a lot of smoke that is not healthy to breathe in, not to mention it smells horrible. The enclosure doesn’t have to be anything complicated, just some construction foam with a door to access the internals will do. If you want to add a window to see your progress, I would recommend using orange acrylic, as it will block most of the blue laser light, protecting you from harm. For the exhaust, you can get a simple ventilation fan with some flexible ducting for less than $20 from China.
If you want to go one step further and make your laser even better, you can consider adding an air assist. By blowing away all the generated smoke and loose particles as fast as possible, you can prevent discoloration around the engraved areas and also increase the power of the laser, as there will be no smoke obstructing the path.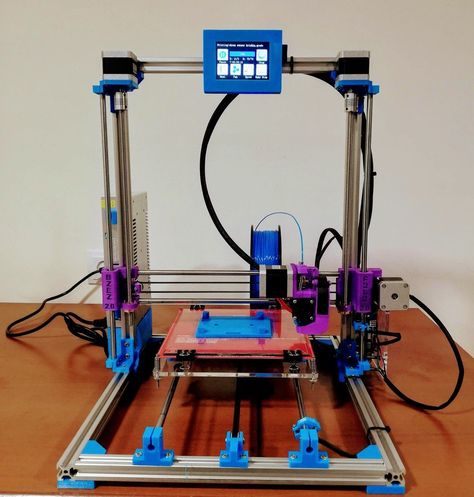 Especially when cutting wood, this can give you a much cleaner result. For the air source, you will need some kind of compressor or air pump. A good option is using an airbrush compressor, as they are often designed to be reasonably quiet and provide enough air for a simple air assist. As you want as much air velocity out of your little compressor, adding a tiny nozzle, like a 0.2mm 3d printer nozzle, will be beneficial.
If you plan on doing a lot of through cutting, it is also a good idea to pick up a honeycomb or mesh table that will allow the smoke to move away from the cut on the bottom of your material. If you don’t feel like paying for a honeycomb laser table, an alternative is to use some wire mesh, some spacers, and a bottom plate and build something simple yourself. Depending on the style of your printer, you can either place this contraption on top of the build plate or, if you have a removable glass plate, you can just swap out the two beds depending on what you need the printer for.
David Wieland runs a YouTube channel called Datulab Tech. He also makes videos and writes articles for Endurance Lasers, who offers a wide range of diode lasers to retrofit onto your 3D printer or CNC machine.
Converting your 3D Printer into a Laser Engraver
By replacing your printer hotend (or CNC toolhead) with a laser, you can make use of the XY motion to control the path of the laser to engrave metals and cut other materials.
Florida-based Endurance Lasers have been manufacturing their plug-and-play laser systems for CNC systems and 3D printers since 2015. The lasers are very easy to set up, and do not require any extra software or skills to install.
You can see how easy it is to wire up the laser to the most common 3D printer boards at this link.
Starting at 4 Watt systems for metal marking, and going up to 15 Watts with the dual beam DUOS laser, there are a range of lasers of various types and power levels to suit a range of budgets and needs, accordingly.
Let’s start by looking at the 4 Watt system and work our way up.
4W DPSS laser
The 4 Watt DPSS (diode pumped solid state) laser module is a great place to start for those wishing to dip their toes into metal marking with their existing CNC/printer hardware. Its 1064nm YAG laser is ideal for jewelry marking, and for color engraving on a variety of metals including gold, silver, copper, aluminum, iron, and steel, and can even be used on ceramics such as sapphire glass.
The 4W DPSS is ideal for marking metals (Image credit: Endurance Lasers)It also works well on plastics such as plastic film and is suitable for use on plastic packaging. You can see an example of the multi-color marking on a sheet of titanium in the image below.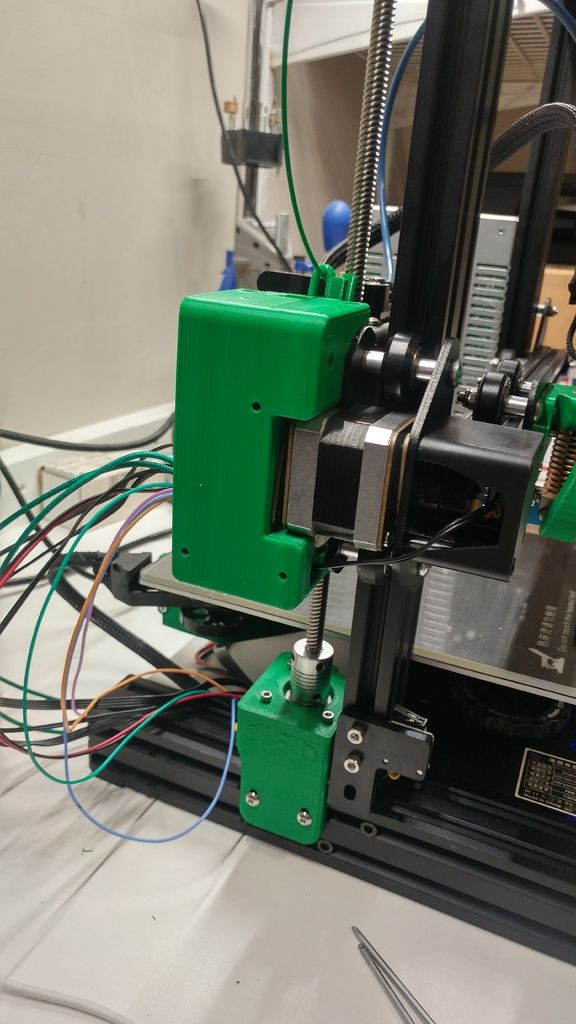
The kit includes the following items:
- – DPSS laser module (1064 nm) with 4 watt optical power.
- – AC/DC 12V 25A (PSU).
- – An advanced mounting bracket.
You can read more about the 4W marking laser right here.
10W Delux laser
The 10 Watt Delux model laser offers the best combination of cost and power, which is why this is the top selling laser from Endurance Lasers. Featuring a Nichia diode type laser with a 445 nm wavelength, the Delux is suitable for engraving materials such as polished and anodized aluminum, steel, stainless steel without needing to use engraving paste. With engraving paste, engraving on both copper & brass can be achieved easily.
Adding a laser to your printer is easy (Image credit: Endurance Lasers)The 10W laser makes light work of cutting certain materials too, and can cut 3.8mm thick plywood in a single pass, as you can see in the image below.
Plastics such as dark acrylic can be precisely cut up to 8mm thick with just a couple of passes of the laser, and thicker woods and plywoods up to 5mm can also similarly be cut with 2 or 3 passes.
This kit comes with the following items:
- – 10W diode laser module 445 nm.
- – Laser box (laser driver) with Mo1 PWM.
- – PSU (12V 5-6A)
- – 3 fixation laser lens rings.
- – Air nozzle ver 1.0 with a tube
You can read more details about the Delux laser at this link.
10W PLUS PRO laser
The 10 Watt PLUS PRO offers the most powerful single beam diode laser 445 nm module for laser cutting and laser engraving with an advanced laser control box. It has the most advanced electronics in the range and features double TEC cooling systems to keep the laser diode cold all the time.
In addition, it comes equipped with an air nozzle and an air compressor for effective laser cutting as soon as you mount it to your 3D printer or CNC machine. The PLUS PRO can cut through 5mm of plywood without hassle and is great for cutting soft materials such as leather and even sail material.
This laser module kit comes with the following:
- – 10W PLUS PRO Laser module
- – Laser box ver. 2.0
- – Regular 3 element lens
- – Bigger focusing rings x 3PCS
- – 2 x 12V 8A AC DC (PSU) power supply
- – Air compressor and air nozzle (ver 1.0)
- – 2x DC/DC for TEC cooling
For more details about the 10W PLUS PRO laser kit, visit this link.
15W DUOS laser
The DUOS model is the most powerful diode laser on the market with combined 2 beams, and is capable of cutting a wider range of materials and at high speeds of up to 500mm per minute. Naturally, the DUOS comes with two nozzles for your air supply also, as you can see in the image below.
Dual nozzles for dual lasers (Image credit: Endurance Lasers)For example, the 445 nm wavelength DUOS can slice through 3. 5mm thick cedarwood with just two passes of the dual laser.
The video below shows how the 15W DUOS compares to a 10W laser.
The kit includes:
- – 15W “Duos” laser beam system. ver 1.1.
- – A big single laser box with Mo2 PCB.
- – DC/DC converters for TEC cooling
- – 2 x PSU (12V 8A AC/DC).
- – 2 x air nozzle ver 1.0.
- – 1 x an advanced mounting bracket.
Further details of the DUOS are available over at this link.
Extras and Discounts
In addition to the included components listed for each model, each purchase also comes with focussing plates, laser connectors, protective gloves, and goggles specific to each laser’s wavelength. You also get some stickers too.
There are some big discounts currently available on the site right now also, with savings of several hundreds of dollars being available on most models.
If you’d like to see their range in full, then head over to the Endurance Lasers website.
How to turn your 3D printer into a laser engraver/cutter
3DPrintStory Reviews How to turn your 3D printer into a laser engraver/cutter
If you want to create something more than just 3D printed parts, or simply expand the range of materials you work with, laser cutting and engraving is a great choice. It allows you to work with other materials and does not require special experience.
But perhaps the best part is that this technology can be easily used by upgrading your 3D printer. The motion system of 3D printers far exceeds the requirements for laser cutting, and laser diode modules can be as small as hot end nodes.
Converting a 3D printer into a laser cutter and engraver is a pretty big deal. In this article, we'll talk about laser technology in general, and then we'll discuss the main steps involved in converting your 3D printer.
What is laser cutting and engraving?
Laser cutting is a process in which a laser beam selectively removes material along a specific path by vaporizing it. Engraving is basically the same, but instead of removing material, it marks the surface, changing its appearance through oxidation.
Two laser technologies are mainly used for the manufacture of tabletop machines: CO2 and diode. CO2 lasers are powerful enough to cut most materials, including some metals, and are widely used in industry.
However, CO2 laser machines are bulky and require rather expensive and fragile equipment such as CO2 tubes, mirrors and lenses. On the other hand, diode lasers are lightweight and relatively cheap, since they consist mainly of one small module.
Diode lasers are much less powerful than CO2 and are best suited for engraving and cutting thin sheets of balsa and plywood. In comparison, a CO2 laser can deliver up to 400W, while diode lasers can only deliver 10W maximum.
Do you need to convert your 3D printer to a laser engraver?
Converting a 3D printer to a CO2 laser machine can be quite a challenge given the size of the tubes and the complex system of mirrors. For this reason, it is much better to use diode lasers.
However, please note that these lasers can only cut certain materials such as paper, cardboard, balsa and plywood with a thickness of 3 to 5 mm. Due to the wavelength of the laser, it cannot cut or engrave transparent materials such as acrylic.
Also be aware of the safety requirements when using lasers. Class 4 lasers are dangerous to the eyes, so the use of safety goggles is mandatory. In addition, the products of combustion emitted during the operation of the laser can be harmful to our health, so enclosure and proper ventilation are required.
Take all of this into account before deciding to convert your 3D printer to a laser machine. Given the risks involved, it is especially important to take precautions.
How to turn a 3D printer into a laser cutter/engraver?
The process of converting a 3D printer to a laser machine varies but usually involves the same steps.
First of all, we need to choose the laser module that best suits our requirements (eg functionality and price). Next, we need to figure out how to adapt it to the electronics and physical interface of the 3D printer.
Laser module
Powerful solid state lasers are a relatively recent development, but the market has quickly caught up with demand for diode laser modules.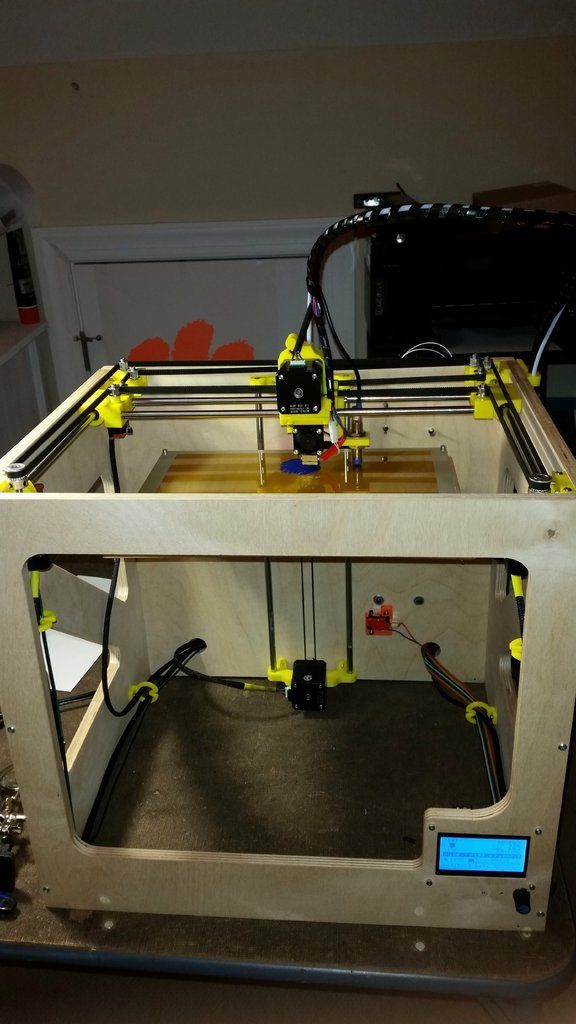
The laser power is always between 1 and 10 W. Some white label lasers you see online are listed as 30W or even 40W, but that is definitely not optical power output.
Power will determine which materials can be engraved and whether materials such as wood (and how thick) can be cut. Laser manufacturers usually provide a list of materials that can be engraved and cut, so be sure to check it out.
Variable focal length, which you sometimes see as an advertised feature, is not really important here, as the 3D printer's Z-axis can raise or lower the module to fit a fixed distance.
The air blower is an interesting feature as it blows air directly onto the surface to disperse particles that interfere with the laser, resulting in cleaner cuts. Some lasers have this feature built in.
Compatibility and connection
Most laser modules can be connected directly to the 3D printer control board. The partial cooling fan on a 3D printer requires an adjustable power output to control its speed, and it is this port that can power and drive the laser.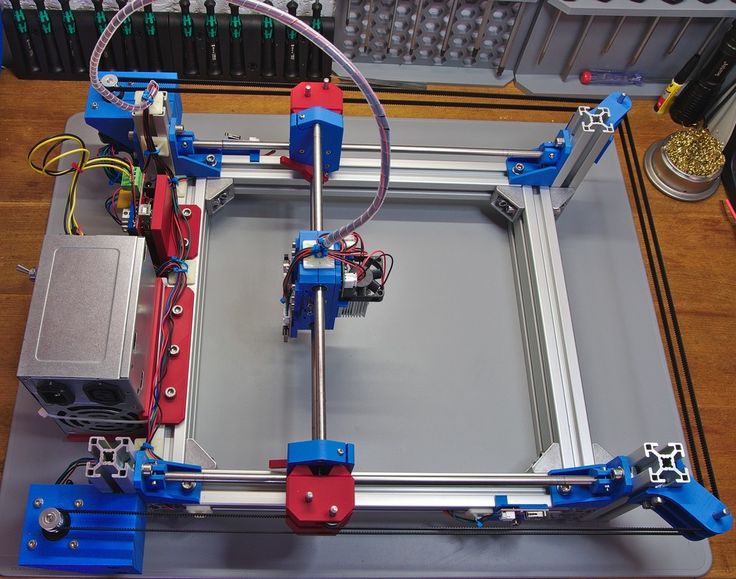
Some lasers require a special 12V power input. This is usually via a separate driver board, which can be powered by either the printer's power supply or an external power supply. This setup also requires a connection to the printer through the fan port.
Refer to the laser manufacturer's documentation for correct connection instructions.
Installation
Installation and mounting of the laser module is perhaps the only major equipment change in the entire conversion process. Although some lasers come with non-standard brackets, some adaptation will always be required.
Fortunately, you already have a 3D printer, so anything is possible. You may be able to find suitable designs on sites like Thingiverse. Otherwise, it might be time to try some 3D modeling software like Tinkercad or similar. The model doesn't have to be fancy, just a joint between holes and screws that will be used to hold the hot end.
Once you've attached the laser module to your 3D printer, you're done! However, in order to start engraving or cutting, you may need a new firmware.
Next steps
The laser cutter and engraver is one of the coolest machines we can have at home because it allows us to make things from a wider range of materials than extruded plastic filament. Converting a 3D printer to a laser printer is an inexpensive option, and you can always go back to 3D printing in the end.
By the way, for Ender and CR-10 users, Creality offers special laser kits to add (not replace) laser modules to these printers.
Be sure to check out some step-by-step guides online. For example, Instructables user Goss Adema has documented converting the Anet A8 to a laser cutter and engraver, and the TeachingTech YouTube channel has great step-by-step instructions on how to do it on any 3D printer.
(There is a solution) Converting a 3D printer to a laser engraver
▲ 9
Yes, you can turn a 3D printer into a laser engraver, and it's not even that much of a problem.
- You will need to purchase a laser diode.
 They aren't usually available with high power - certainly not the hundreds of watts that come from a proper CO2 laser - but depending on your printer it can be pretty much an add-on.
 - A non- conversion is too invasive and takes much less time than creating a printer from a kit. All3D converted the Ender-3 to a laser in less than an hour. In their walkthrough, they plugged it into their printer's 5V part cooling fan port. Whichever laser diode you choose, the setup will be the same if your diode is running at 5 volts.
- Once installed on the physical side, you will need to prepare prints with another "slicer" that uses commands for fan speed as laser power:
-
M106 Ssets the power to S, where S is a number from 0 to 255 ; Without an S value, it is enabled until the last setting (if disabled viaM107). -
M107turns off the laser.
-
One such slicer would be the Creality workshop which would work with any Marlin printer as long as you use a fan as a diode power source./cdn.vox-cdn.com/uploads/chorus_asset/file/8132379/cover.jpg)
, @ Trish
▲ 5
Perhaps a laser... and a laser mount. Then connect its power supply, which will switch with the extruder's power supply/signal. In addition, there would be no need for any movement along the Z-axis other than setting the correct height of the laser device.
However, if you're not DIY savvy, don't fiddle with microcontrollers and electronics, don't modify firmware, and have no experience building your own 3D printer, then it's probably easier to just buy a ready-made engraver.
However, and after reading Trish's answer (more technically detailed and precise), this is probably not that hard to accomplish. In addition, if you already have a printer, then the modification will be cheaper than buying a completely new device.
Here's a handy video tutorial that shows how easy it really is: from 3D printer to laser engraver for less than $60