Colorful 3d printer
Guide to Color 3D Printers
Are you looking to 3D print parts in color or to create vibrant, multi-color parts? Over the last few years, multiple new methods have emerged to 3D print in color, and newer 3D printers have become more accessible, empowering any designer, model maker, or hobbyist to create objects in a range of hues.
In this guide, we dive into the several techniques you can use to produce colored 3D printed parts, as well as the technologies and applications of color 3D printing.
There are several options to produce colored 3D printed parts, from color mixing to color matching, full color 3D printing, painting 3D printed parts, and hydrographics.
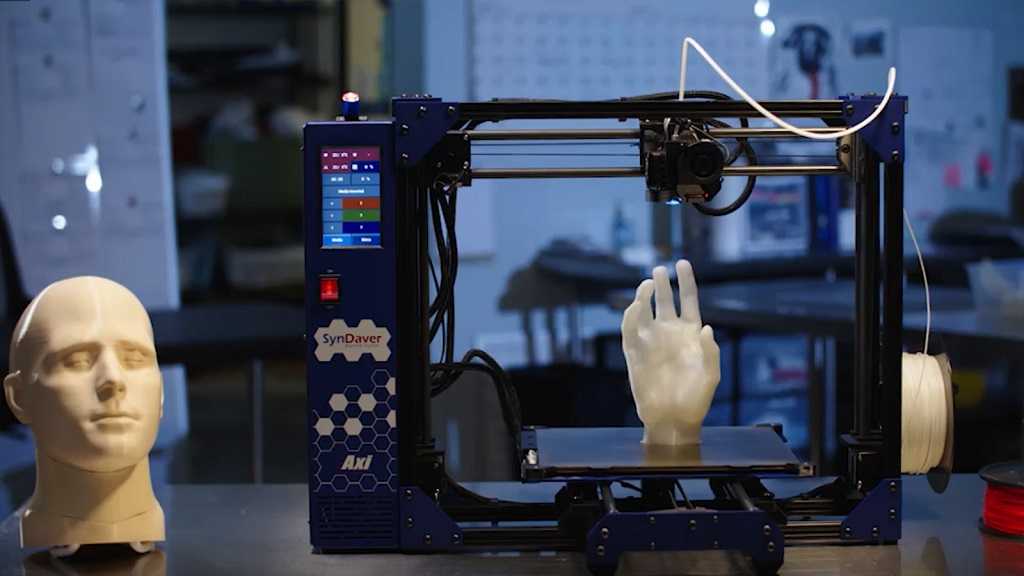
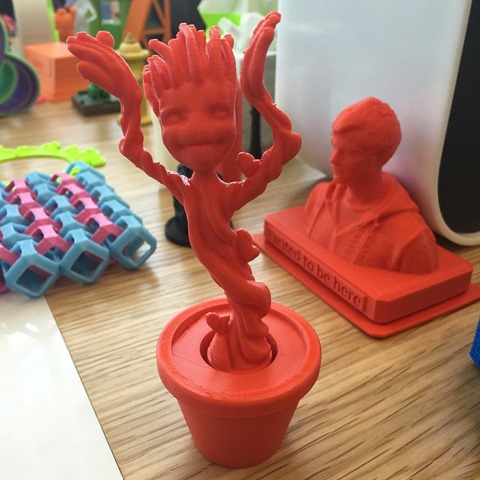
Direct color, also known as multicolor 3D printing is the most basic way to 3D print parts in multiple colors. It involves loading colored raw material into the printer. The most common way is using colored filaments with 3D printers that use fused deposition modeling (FDM) technology, which melts and deposits the filament onto the printer bed.
FDM 3D printing in color. (source: 3Dnatives)
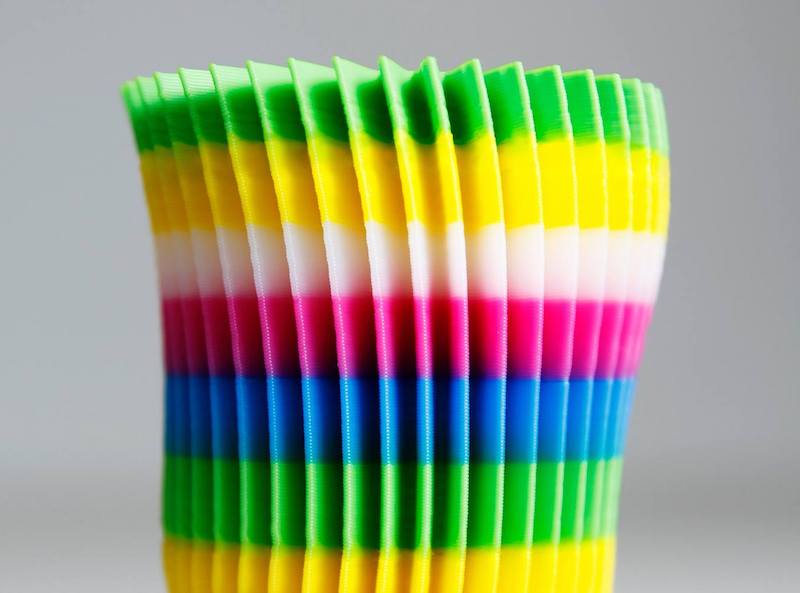
FDM 3D printers can print in a single color, using colored filament, in two colors, using a dual extruder, or in multiple colors and gradients using color mixing, depending on how many filaments feed through the printer simultaneously.
The main advantage of these multicolor 3D printers is that they're easy to use and affordable. However, the disadvantages are that it’s not possible to achieve a specific color tone, and the final part will likely have visible layer lines. Also, the more extruders an FDM printer has, the bigger the chance of print errors.
While direct color printing only offers off-the-shelf color options, color matching allows you to create 3D printed parts in almost any custom color.
SLA 3D printed parts in various custom colors.
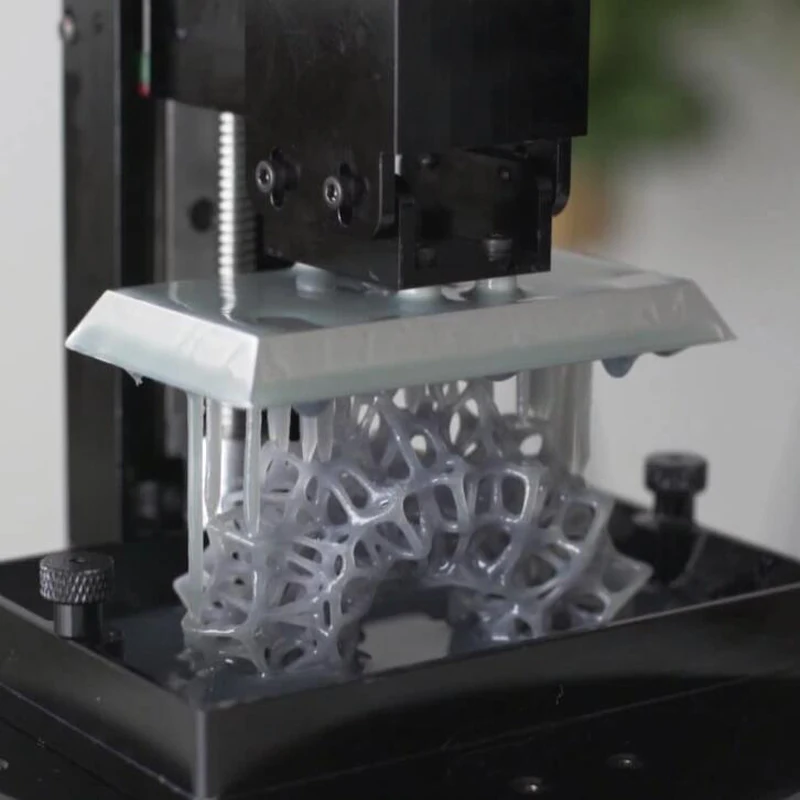
As the first integrated color-mixing solution for stereolithography (SLA) 3D printing, Formlabs Color Kit mixes color pigments into the base material to create a full cartridge of customized color resin.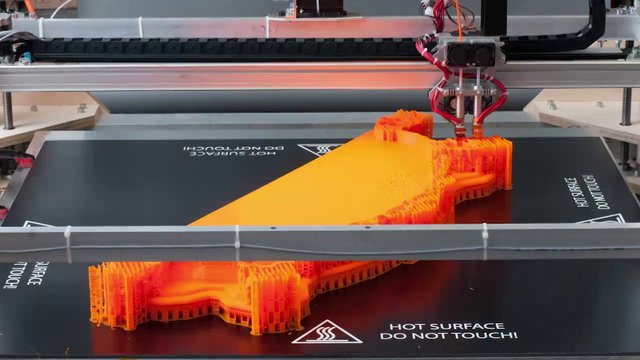 The SLA 3D printing process then uses a laser to solidify the colored resin and 3D print parts in vibrant colors with a smooth surface finish and almost imperceptible layer lines.
Color Kit, the first integrated color-mixing solution for SLA 3D printing.
Sample part
See and feel Formlabs quality firsthand. We’ll ship a free sample part to your office.
Request a Free Sample Part
Full-color 3D printing is the most versatile color 3D printing method, as it produces objects in multiple colors at the same time, matching any tone and making realistic parts.
Unlike colored filaments or resin, the material used in full color printing is not pre-colored—the color is added to the base material during the printing process, similar to a color 2D printer.
Full-colored 3D printed part with binder jetting. (source: Hubs)
Technologies such as binder jetting and material jetting are able to produce full-color 3D prints. However, these processes have a high entry price, making them inaccessible to most users, while only one manufacturer offers a more affordable full color FDM 3D printer.
In certain cases, colored 3D prints may lack the detail or the vivid colors that an artist or designer aims for. Painting monochromatic 3D printed parts with acrylic, oil, or spray paint, while more time-consuming, offers an inexpensive and fully custom solution.
Side by side comparison on the before and after painting a dinosaur 3D printed SLA miniature.
Models that need a perfectly smooth finish or very fine features may require post-processing techniques, such as sanding, priming, or using a solvent prior to painting.
Sanding reduces imperfections in the surface, and primer fills in small cracks and holes. Additionally, some 3D printed parts may need an undercoat to diminish the neutral color of the primer before the paint application.
Watch or read our step-by-step guide on priming and painting 3D printed parts.
Hydrographics, also known as hydroprinting, water printing, or water transfer printing, is a common method for applying printed designs to three-dimensional surfaces. The process uses an inkjet printer to print an image on a polyvinyl alcohol film. The film gets submerged in water and receives an activator chemical spray. The color film then stretches over and adheres to the object as it’s slowly dipped through the floating film.
If you're interested in this process, read our guide about full color patterns to 3D prints with computational hydrographics.
The most used technologies in color printing are FDM, SLA, SLS/MJF, binder jetting, and material jetting. Let’s look at the pros and cons of each process.
FDM, or fused deposition modeling, is one of the most common and least expensive technologies in consumer 3D printing. FDM 3D printers build parts by melting and extruding thermoplastic filament, which a printer nozzle deposits layer by layer in the build area.
Filaments for FDM printing in various colors. (source: All3DP.com)
FDM is mostly used for direct color printing, with single extruder printers, or for color mixing 3D printing, with dual or multiple extruder printers.
FDM can now also be used for full color 3D printing with the da Vinci Color 3D printer. With a colorless filament that is dyed using CMYK inkjet cartridges right before being extruded, it produces colored parts in a similar way to a color 2D printer.
SLA, or stereolithography 3D printing, uses a laser to cure liquid resin into hardened plastic in a process called photopolymerization. SLA parts have the highest resolution and accuracy, the clearest details, and the smoothest surface finish of all plastic 3D printing technologies.
Colored SLA parts, 3D printed with Formlabs Color Kit and Standard Resins.
SLA offers the possibility for color matching almost any custom color using Formlabs Color Kit, the first integrated color-mixing solution for SLA 3D printing. Thanks to their smooth surface finish, SLA printed parts can also easily be post-processed, painted, and used for applying hydrographics.
White Paper
Looking for a 3D printer to realize your 3D models in high resolution? Download our white paper to learn how SLA printing works and why it's the most popular 3D printing process for creating models with incredible details.
Download the White Paper
Selective laser sintering is the most common additive manufacturing technology for industrial applications, trusted by engineers and manufacturers across different industries for its ability to produce strong, functional parts.
Dyed SLS 3D printed parts. (source: Hubs)
SLS 3D printers use white, grey, or black nylon powder as a raw material. While the parts cannot be directly printed in color, they can be dyed or painted in post-processing.
White Paper
Looking for a 3D printer to create strong, functional parts? Download our white paper to learn how SLS printing works and why it's a popular 3D printing process for functional prototyping and end-use production.
Download the White Paper
The binder jetting 3D printing technology is similar to SLS and MJF printing but uses a colored binding agent to bond powdered sandstone material instead of heat.
Parts produced with binder jetting have a porous surface and are very brittle, which means that this process is recommended only for static applications, such as creating full-color figurines and concept models.
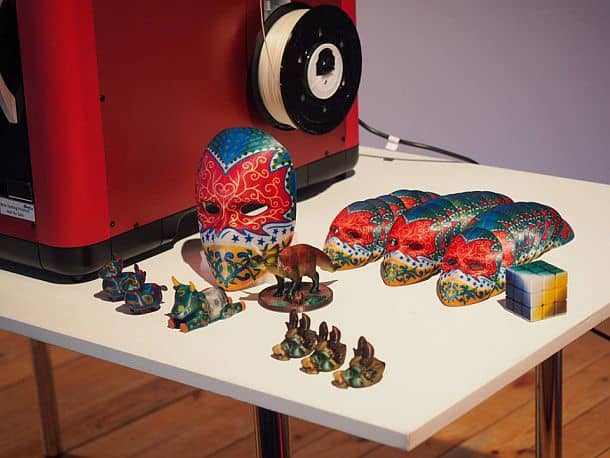
Figurines printed with binder jetting. (source: Shapeways)
Material jetting 3D printers combine traditional inkjet printing with the use of photopolymer resins, by depositing droplets of the material on a build tray similar to 2D printers, which then gets hardened by UV light.
This process offers a myriad of color possibilities and can create photorealistic parts with vibrant colors. However, the parts have poor mechanical properties, are heat-sensitive, and the entry price for this technology is the highest of all color 3D printing options.
Color 3D printing with material jetting. (source: Hubs)
| FDM | SLA | SLS | Binder Jetting | Material Jetting | |
|---|---|---|---|---|---|
| Resolution | ★★☆☆☆ | ★★★★★ | ★★★★☆ | ★★★☆☆ | ★★★★★ |
| Accuracy | ★★★★☆ | ★★★★★ | ★★★★★ | ★★★☆☆ | ★★★★★ |
| Surface Finish | ★★☆☆☆ | ★★★★★ | ★★★★☆ | ★★★☆☆ | ★★★★★ |
| Ease of Use | ★★★★★ | ★★★★★ | ★★★★☆ | ★★★★☆ | ★★★★☆ |
| Complex Designs | ★★★☆☆ | ★★★★☆ | ★★★★★ | ★★★☆☆ | ★★★★☆ |
| Description | The print head melts and extrudes thermoplastic filament | A laser solidifies liquid resin | A laser or light source sinters nylon powder | A binding agent bonds sandstone powder | An inkjet-like print head cures droplets of resin |
| Materials | Thermoplastic filaments | Varieties of liquid resin | Varieties of polymer powder | Sandstone | Varieties of liquid resin |
| Color 3D printing options | Direct color, color mixing, or full color | Color matching | None | Full color | Full color |
| Post-processing with colors | Painting (requires a lot of post-processing) Hydrographic printing | Painting Hydrographic printing | Dyeing Painting Hydrographic printing | Painting Hydrographic printing | Painting Hydrographic printing |
| Applications | Basic modelmaking | Rapid prototyping, miniatures and models, medical models | Rapid prototyping, end-use parts | Miniatures and models | Rapid prototyping, miniatures and models, medical models |
| Price | Budget printers and 3D printer kits start at a few hundred dollars. Higher quality mid-range desktop printers start around $2,000, and industrial systems are available from $15,000. Higher quality mid-range desktop printers start around $2,000, and industrial systems are available from $15,000. | Professional desktop printers start at $3,750, large-format benchtop printers at $11,000, and large-scale industrial machines are available from $80,000. | Professional benchtop printers start at $19,000. | Full color 3D printers start around $60,000. | Full color 3D printers start around $50,000 and large-scale machines are available from $100,000. |
Video Guide
Having trouble finding the best 3D printing technology for your needs? In this video guide, we compare FDM, SLA, and SLS technologies across popular buying considerations.
Watch the Videos
Color 3D printing empowers engineers and designers to save money and time with looks-like prototypes, movie makers to turn digital models into props, model makers to create vibrant miniatures, medical professionals to produce accurate anatomical models, and more.
Rapid prototyping helps companies turn ideas into realistic proofs of concept, advances these concepts to high-fidelity prototypes that look and work like final products, and guides products through a series of validation stages toward mass production.
The development team at birdkids used SLA 3D printing to create prototypes in color.
Concept models in color can demonstrate an idea to stakeholders, create discussion, and drive acceptance or rejection using low-risk concept explorations.
At later stages, realistic looks-like prototypes in color can give a better idea of what an end product will look like and how the end-user will interact with it. Ergonomics, user interfaces, and overall user experience can be validated with 3D printed looks-like prototypes before spending significant design and engineering time to fully build out product features.
Color matching 3D printing or full color 3D printing also allows product development teams to experiment with different color options and run studies with customers before moving into production.
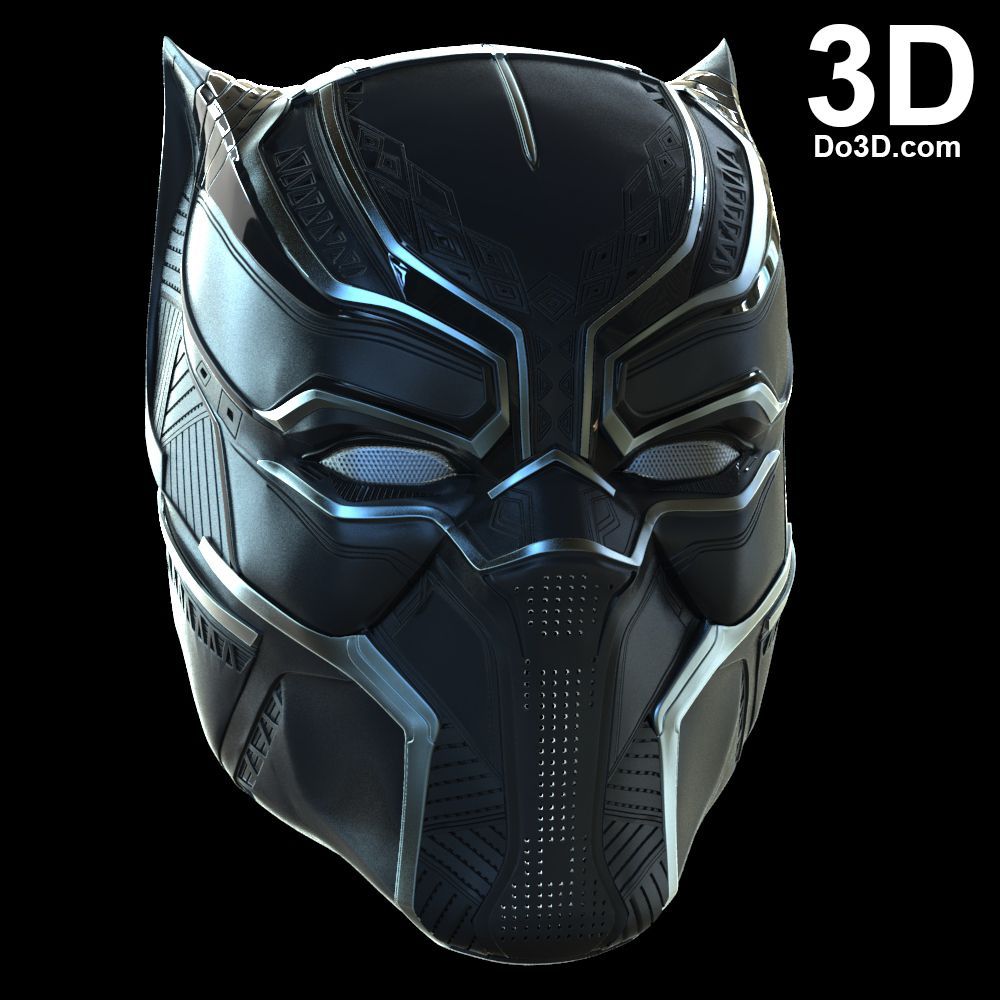
In the entertainment industry, 3D printed props and models are blurring the line between physical models and digital effects. Artists create realistic, detailed models using 3D modeling software and then bring them to life in a matter of hours using 3D printing. High-resolution 3D printing processes, like SLA, can reproduce even the most complex parameters of a design, such as skin texture.
A behind-the-scenes look at visual effects (VFX) and design studio Aaron Sims Creative’s process to design of Stranger Things’ Demogorgon.
Props masters, such as Russell Bobbitt for Marvel movies and Jaco Snyman for the Raised by Wolves series, as well as visual effects (VFX) and design studio Aaron Sims Creative for Stranger Things, have adopted the technology, as it significantly saves time in prop making and fuels creativity in the design process. The creation becomes more flexible and fluid, and props and models can be created in an efficient manner.
Without a doubt, 3D printing has revolutionized the creation of custom miniatures and figurines, whether for model making, tabletop games, collectibles, or other hobbies.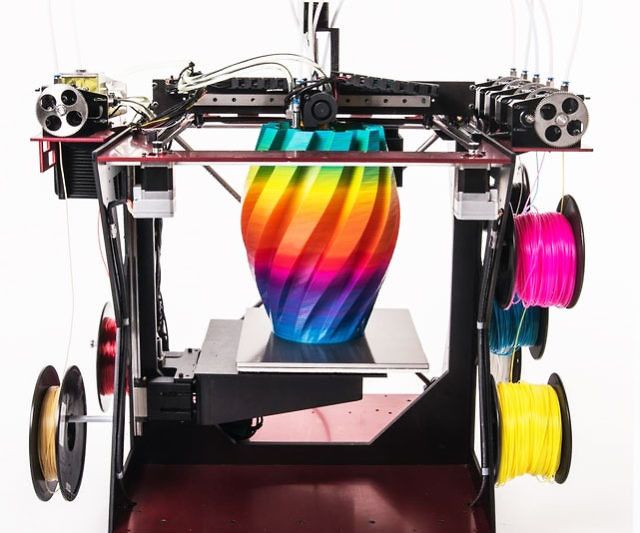
As full-color 3D printers are often out of budget for hobbyists and model makers traditionally hand-paint models anyway, the most popular way to create colorful models is to paint them after 3D printing.
For example, artists at Modern Life Workshop combine 3D modeling design with SLA 3D printing to create hyper-realistic celebrity portraits. The artists use the digital freehand sculpting software ZBrush to create detailed models on the computer. Then, they 3D print the designs on an SLA 3D printer and paint the parts by hand.
The artists from Modern Life Workshop create hyper-realistic sculptures with ZBrush and 3D printing.
In gaming, online communities have sprung up around tabletop games like Dungeons & Dragons, for which gamers use 3D printers to create one-of-a-kind D&D 3D printed miniatures, figurines, terrains, landscapes, and other board game accessories.
Professional model-making companies, like DM-Toys, also use 3D printing to accelerate prototyping and production cycles of custom models.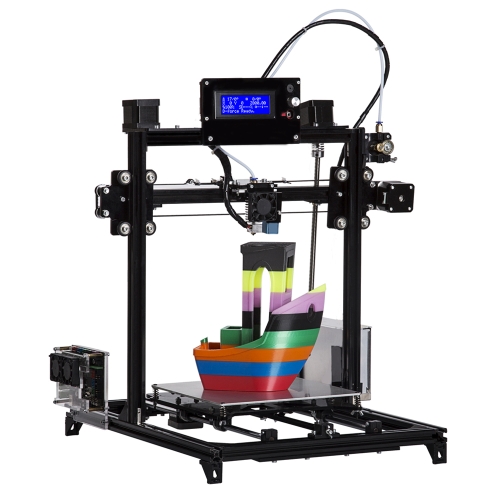
Global play and entertainment company Hasbro also uses the technology to create Hasbro Selfie Series figures—a groundbreaking endeavor to use 3D printing to manufacture personalized action figures at scale. For the first time, fans are now able to scan their face with a smart device and have a custom-made look-a-like action figure delivered to their door.
In healthcare, radiologists, surgeons, and biomedical professionals are increasingly turning to 3D printing to create accurate 3D models of anatomical features that can be used as reference tools for preoperative planning, intraoperative visualization, and education.
3D printing empowers medical professionals to create complex models with intricate details that would be impossible to produce with other technologies.
A fully colored pancreas model that was produced with SLA 3D printing and then painted with acrylic.
High-detailed color models are excellent in resident education programs, where each blood vessel or organ can be directly 3D printed or painted in different colors for easy classroom viewing.
Furthermore, patient-specific surgical models that are based on patient scan data are becoming increasingly useful tools in today’s practice of personalized, precision medicine.
Whether it is color matching to create 3D printed parts in almost any custom color, or printing high-resolution parts that can be painted to create hyper-realistic models, SLA 3D printing delivers incredible detail and seamless performance at an affordable price point.
Start 3D printing your own 3D printed parts on the Form 3 and bring your biggest ideas to life with the Form 3L.
See the Form 3See the Form 3L
The 6 best full-color 3D printers in 2023
What is the best full-color 3D printer?
It’s complex to 3D print in full, photorealistic color, and there are less than ten 3D printer manufacturers that achieve this.
Until recently, full-color 3D printing was exclusive to expensive industrial additive manufacturing systems from brands such as Stratasys or 3D Systems. Today, more affordable (under $10K) desktop full-color 3D printers also exist.
What is full-color 3D printing?
Full-color 3D printers are able to create objects with photorealistic color.
To do so, the 3D printer must be able to mix different filaments or inks together to obtain precise shades and gradients, similar to regular 2D paper printers.
This is also known as indirect color 3D printing, as the color is applied to the base material (the base material isn’t pre-colored before 3D printing).
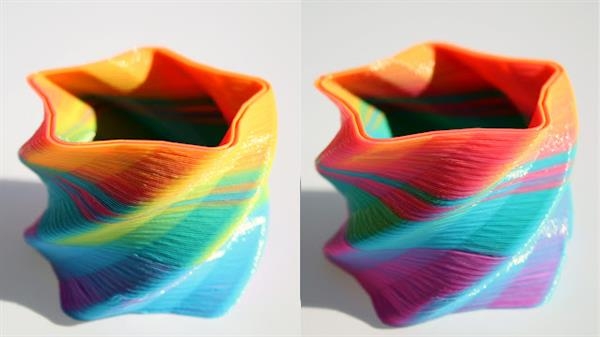
Full-color 3D printing vs. multicolor 3D printing
In the 3D printing industry, the term “multicolor” is sometimes used as a synonym for full-color.
However, for clarity in this article, we will only refer to multicolor for 3D printers and accessories that are able to 3D print a few colors (e.g.: 2-color 3D printers, 3-color 3D printers, Prusa multi-material add-on, Mosaic Palette, etc.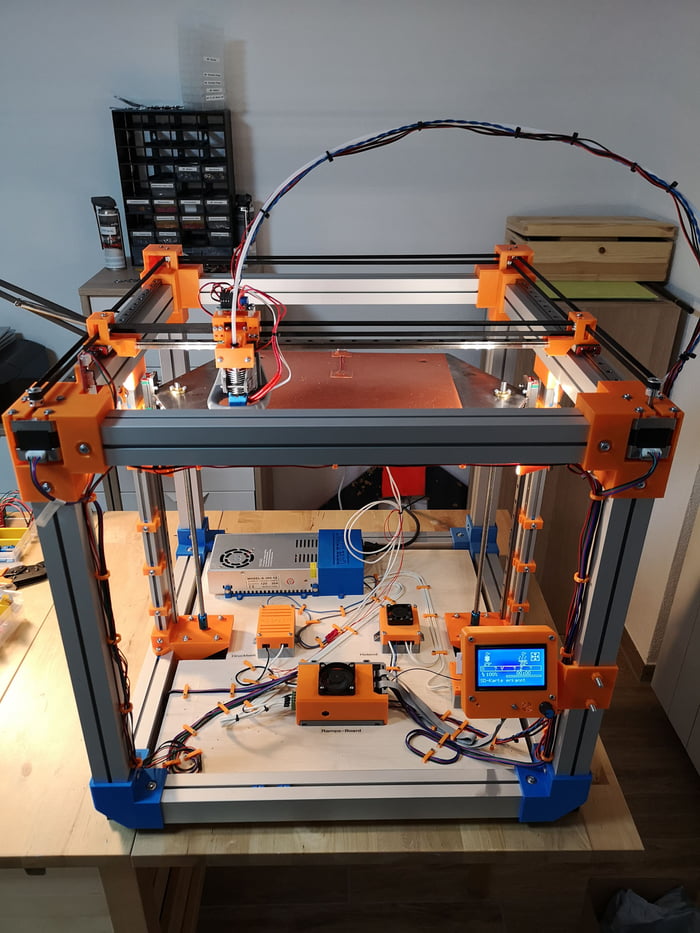 ).
).
This type of 3D printing is also called direct color 3D printing, as the filament already has a specific color before being 3D printed.
Examples of full-color 3D prints (left) and multicolor 3D prints (right).The best full-color 3D printers
| Brand | Product | Build size | Country | Price Approximate starting prices based on supplier-provided information and public data. Prices may vary by region, over time and do not include additional products or services (taxes, shipping, accessories, training, installation, …). | |
|---|---|---|---|---|---|
| ComeTrue | T10 | 200 × 160 × 150 mm7.87 × 6.3 × 5.91 in | Taiwan | $ 30,00028 242 €24,867 £4,043,040 ¥ | Quote |
| XYZprinting | PartPro350 xBC | 350 × 222 × 200 mm13.78 × 8.74 × 7.87 in | Taiwan | $ 30,00016 690 €24,867 £4,043,040 ¥ | Quote |
| Mimaki | 3DUJ-2207 | 203 × 203 × 76 mm7. 99 × 7.99 × 2.99 in 99 × 7.99 × 2.99 in | Japan | $ 39,00035 000 €32,327 £5,255,952 ¥ | Quote |
| Stratasys | J55 Prime | – | United States | $ 99,00095 000 €82,061 £13,342,032 ¥ | Quote |
| Mimaki | 3DUJ-553 | 508 × 508 × 305 mm20 × 20 × 12.01 in | Japan | $ 230,000200 000 €190,647 £30,996,640 ¥ | Quote |
| 3D Systems This brand is a certified partner from our network. | ProJet CJP 660Pro | 254 × 381 × 203 mm10 × 15 × 7.99 in | United States | upon request | Quote |
Expand to see more specs
The products in the table are ranked by price (low to high).
| Brand | Product | Technology | Build size | Country | Price Approximate starting prices based on supplier-provided information and public data. Prices may vary by region, over time and do not include additional products or services (taxes, shipping, accessories, training, installation, …). | |
|---|---|---|---|---|---|---|
| ComeTrue | T10 | Binder jetting (single-step) | 200 × 160 × 150 mm7.87 × 6.3 × 5.91 in | Taiwan | $ 30,00028 242 €24,867 £4,043,040 ¥ | Get a quote |
| XYZprinting | PartPro350 xBC | Binder jetting (single-step) | 350 × 222 × 200 mm13.78 × 8.74 × 7.87 in | Taiwan | $ 30,00016 690 €24,867 £4,043,040 ¥ | Get a quote |
| Mimaki | 3DUJ-2207 | Material jetting (UV-cured) | 203 × 203 × 76 mm7.99 × 7.99 × 2.99 in | Japan | $ 39,00035 000 €32,327 £5,255,952 ¥ | Get a quote |
| Stratasys | J55 Prime | Material jetting (UV-cured) | – | United States | $ 99,00095 000 €82,061 £13,342,032 ¥ | Get a quote |
| Mimaki | 3DUJ-553 | Material jetting (UV-cured) | 508 × 508 × 305 mm20 × 20 × 12.01 in | Japan | $ 230,000200 000 €190,647 £30,996,640 ¥ | Get a quote |
| 3D Systems This brand is a certified partner from our network. | ProJet CJP 660Pro | CJP | 254 × 381 × 203 mm10 × 15 × 7.99 in | United States | upon request | Get a quote |

Overview of the best full-color 3D printers in 2023
The ComeTrue T10 full-color 3D printer uses sandstone– a neutral, plaster-like powder– as its base material. This material is solidified and colored with ComeTrue’s proprietary liquid binding agent.
Then, users must insert the parts into a dry vacuum unit (available separately) to manually remove excess powder with an airbrush. The final steps involve covering the part in a liquid infiltrant for it to harden and then leaving the part to dry.
Contact manufacturer Get a quote Add to comparison
Targeting professionals such as architects and designers, the PartPro350 xBC 3D prints, colors, and cures materials all at once.
This full-color 3D printer features a removable build tray, enabling users to quickly launch a new print job before taking out freshly 3D printed parts from the previous tray.
Contact manufacturer Get a quote Add to comparison
The 3DUJ-2207 is an affordable full color 3D printer produced by Mimaki. Mimaki is a 3D printer manufacturer based in Japan. This 3D printer offers a build volume of 203 x 203 x 76 mm.
Contact manufacturer Get a quote Add to comparison
The Stratasys J55 Prime is a full-color 3D printer for professionals. Stratasys is a worldwide 3D printer manufacturer based in the United States.
This color 3D printer can print over 1,900 PANTONE colors.
Contact manufacturer Get a quote Add to comparison
Mimaki is a professional inkjet printing solution manufacturer from Japan. The 3DUJ-553 is their first 3D printer, and it produces high-quality, photo-realistic 3D prints.
To do so, its ink heads deposit a layer of colored ink, which the printheads then coat with UV-sensitive material to harden the layer with LED lighting. According to the manufacturer, this full-color 3D printer offers over 10 million colors.
Contact manufacturer Get a quote Add to comparison
This full-color sandstone 3D printer by 3D Systems produces high-quality parts. The ProJet CJP 660Pro deposits liquid color binding agent (proprietary VisiJet PXL) through its 1,520 jets in a process called ColorJet Printing.
Different infiltrants are available from 3D Systems for varying color 3D printed part properties: ColorBond, StrengthMax, and Wax.
Contact manufacturer Get a quote Add to comparison
Other full-color 3D printers
Below are a few mentions of products that are unavailable, discontinued, or suspicious.
M3D Crane Quad
The Crane Quad is a $999 desktop 3D printer that is advertised by M3D as capable of printing full-color objects with its four-in-one-out extruder. However, it has been brought to our attention that some users have never received the machine, while many others have encountered serious issues with it. A recap of user complaints and types of issues can be found in this BBB report. We don’t recommend this company.
Mcor ARKePro
Mcor debuted with the Mcor IRIS and Matrix 300+ and then launched the Mcor ARKePro full-color desktop 3D printers for professionals (an updated version of the original Mcor ARKe). The ARKe used Selective Deposition Lamination (SDL) technology, which consists of depositing colored ink on sheets of paper. Mcor is no longer active.
SOMETHING 3D Chameleon
This 3D printer was announced by Israel-based SOMETHING 3D (ST3D) in 2017. The Chameleon mixes five colors together (WCMYK) to create full-color 3D prints.
ORD Solutions RoVa4D full-color Blender
The RoVa4D full-color Blender is another filament-mixing 3D printer. Canadian company ORD Solutions launched this full-color desktop 3D printer on Kickstarter in 2016, but there has been very little news about its availability since then.
Apple full-color 3D printer
There were rumors of the tech giant developing a full-color desktop 3D printer. Apple filed a patent in 2015, which was approved at the beginning of 2018. However, the project appears to be on standby as no official Apple announcements regarding 3D printing have been made.
Ilios Ray
Ilios was a 3D printer manufacturer from Cyprus that closed its doors in late 2016. Their Ilios Ray resin 3D printer was claimed to mix colors with different resin cartridges.
SKY-TECH 3DPandoras
Launched on Kickstarter in 2014, this full-color powder 3D printer was well-received by the community– at first. Since then, its backers have largely denounced this product as a scam.
Multicolor 3D printing: alternatives to full-color 3D printing
As mentioned at the beginning of the article, multi-color 3D printing is different from full-color 3D printing. Multi-filament 3D printers, such as dual extruder 3D printers, are able to 3D print different colors at the same time. These multi-nozzle 3D printers can be considered multi-color, but not full-color.
Accessories such as the Mosaic Palette or the Prusa multi-material add-on also allow for multicolor 3D printing with simple single-extruder 3D printers. They enable users to 3D print with up to four or five colors.
With SimplyColor3D software, it’s also possible to program filament color changes. The software also allows users to paint 3D models and allows for less material waste during purge transitions.
Another solution is post-processing. Germany-based DyeMansion provides full-color post-processing solutions (“DyeMansion RAL color palette”) for powder-based 3D printed parts. See our post on multicolor 3D printers and multi-filament accessories for more information.
A multicolor Benchy 3D printed with the Mosaic Palette 2. Source: MosaicBenefits of full-color 3D printing and applications
Full-color 3D printers allow users to obtain photorealistic 3D models with limited post-processing required. This is useful for rapid prototyping as well as for the manufacturing of end-use products:
- Realistic prototypes (e.g. packaging, architecture models)
- Customized consumer products (e.g. phone cases, figurines, toys)
- Educational items (e.g. medical models)
Full-color 3D printing service
Full-color 3D printers are quite expensive and they require users to have at least some 3D printing knowledge. If users only need to 3D print a few parts a year, then ordering online service bureaus can be more cost-effective. Here’s a list of a few trusted online full-color 3D printing services:
- 3D Hubs
- i.
 materialise
 - Sculpteo
- Shapeways
- WhiteClouds
How much does a full-color 3D printer cost?
The price of a full-color 3D printer can range from $550 to over $250,000. It depends on the type of 3D printing technology that the 3D printer uses. Full-color extrusion 3D printers cost less, while complex binder jetting and material jetting are the most expensive.
Find the right full-color 3D printer for sale
Desktop 3D printers for the home
Anet Anycubic Creality3D CreatBot Dremel Elegoo Felix FlashForge FLSUN Flying Bear Formlabs IBRIDGER imprinta MakerBot Mingda Peopoly Phrozen PICASO 3D QIDI Raise3D Tiertime Ultimaker Uniz Voxelab wanhao XYZPrinting ZENIT Zortrax
Availability
In stock
Manufacturer
Phrozen Raise3D Creality wanhao FlashForge
PICASO 3D Anycubic Formlabs Tiertime Flyingbear QIDI Uniz CreatBot Dremel DigiLab Felix Zortrax XYZprinting Ultimaker imprinta Elegoo MakerBot Anet FLSUN iBridger MINGDA Peopoly snapmaker Voltera Voxelab ZENIT
Delivery
Assembled printer Assembly kit
Application
Architecture For large objects For beginners Medicine Education
Orthopedics Production prototyping Reverse engineering Advertising, exhibitions Sculpture Dentistry Hobby jewelry
Print technology
DLP/LCD/SLA FDM/FFF LFS
Thread diameter
1. 75 mm 2.85 mm 3.00 mm
Material type
ABS PLA PETG Photopolymers Flex
Nylon (Nylon) ASA Carbon flexible HIPS PC PEEK PP TPU Wood other Metal (Ultrafuse 316L, Ultrafuse 17-4PH)
Number of extruders (print heads)
Heating table
Yes No
Wi-Fi or other wireless network
Yes No
Country of origin
China Russia USA Taiwan Hong Kong
Netherlands Poland
Add to compare
Product added to compare Go
| Manufacturer | Creality |
| On order/Transit | Goods in transit |
| Construction area size | 220x220x250 mm |
| Number of extruders (print heads) | 1 |
| Country of origin | China |
Add to compare
Product added to compare Go
| Manufacturer | Creality |
| On order/Transit | Goods on the way |
| Construction area size | 220x220x250 mm |
| Number of extruders (print heads) | 1 |
| Country of origin | China |
Add to compare
Product added to compare Go
| Manufacturer | Anycubic |
| On order/Transit | Goods in transit |
| Construction area size | 220x220x250 mm |
| Number of extruders (print heads) | 1 |
| Country of origin | China |
Free Shipping
Add to Compare
Product added to compare Go
| Manufacturer | Anycubic |
| On order/Transit | Goods in transit |
| Construction area size | 180 x 163 x 102 mm |
| Country of origin | China |
Free Shipping
Add to Compare
Product added to comparison Go
| Manufacturer | Anycubic |
| On order/Transit | Goods in transit |
| Construction area size | 220 x 220 x 250 mm (capacity 12.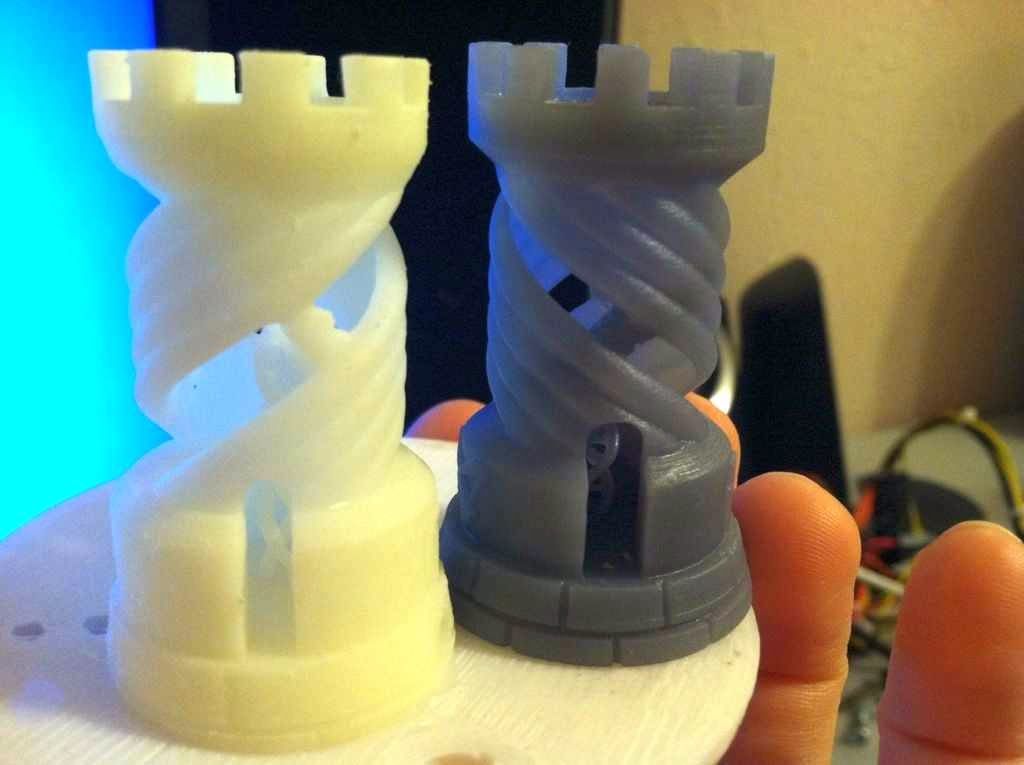 10 l) 10 l) |
| Number of extruders (print heads) | 1 |
| Country of origin | China |
Add to compare
Product added to compare Go
| Manufacturer | Creality |
| On order/Transit | Goods in transit |
| Construction area size | 220x220x250 mm |
| Number of extruders (print heads) | 1 |
| Country of origin | China |
Add to compare
Product added to compare Go
| Manufacturer | Flyingbear |
| On order/Transit | Goods in transit |
| Construction area size | 255x210x210 mm |
| Number of extruders (print heads) | 1 |
| Country of origin | China |
Add to compare
Product added to compare Go
| Manufacturer | Creality |
| On order/Transit | Goods in transit |
| Construction area size | 220x220x270 mm |
| Number of extruders (print heads) | 1 |
| Country of origin | China |
Add to compare
Product added to compare Go
| Manufacturer | Anycubic |
| On order/Transit | Goods in transit |
| Construction area size | 300x300x350 mm |
| Number of extruders (print heads) | 1 |
| Country of origin | China |
Free Shipping
Add to compare
Product added to compare Go
| Manufacturer | Anycubic |
| Construction area size | 102x57x165 mm |
| Country of origin | China |
Free Shipping
Add to compare
Product added to compare Go
| Manufacturer | Anycubic |
| On order/Transit | Goods in transit |
| Construction area size | 450 x 400 x 400 mm (capacity 72 l) |
| Number of extruders (print heads) | 1 |
| Country of origin | China |
Add to compare
Product added to compare Go
| Manufacturer | Creality |
| On order/Transit | Goods in transit |
| Construction area size | 220x220x280 mm |
| Number of extruders (print heads) | 1 |
| Country of origin | China |
Add to Compare
Product added to compare Go
| Manufacturer | FLSUN |
| Construction area size | 260 x 330 mm (D x H) |
| Number of extruders (print heads) | 1 |
| Country of origin | China |
Free shipping
Add to compare
Product added to compare Go
| Manufacturer | Phrozen |
| Construction area size | 165x72x180 mm |
| Country of origin | Taiwan |
Free Shipping
Add to compare
Product added to compare Go
| Manufacturer | Flash Forge |
| On order/Transit | Goods in transit |
| Construction area size | 200x148x150 mm |
| Number of extruders (print heads) | 2 |
| Country of origin | China |
Free shipping
Add to compare
Product added to compare Go
| Manufacturer | Flash Forge |
| On order/Transit | Goods in transit |
| Construction area size | 200*200*250 mm |
| Number of extruders (print heads) | 1 |
| Country of origin | China |
3D printing is one of the most promising areas of technological development in the 21st century.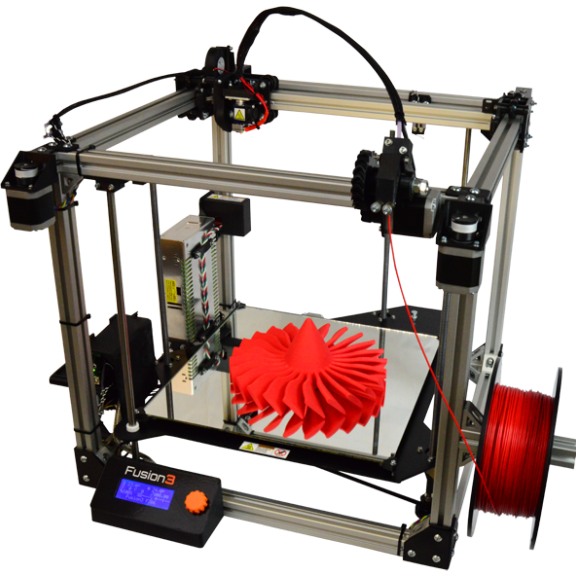 Having gone a long way from bulky and heavy boxes to compact desktop devices, 3D printers have ceased to be something inaccessible to a wide range of users. The era of mass additive manufacturing has already arrived, and every home can now house a real desktop factory.
You can buy a 3D printer capable of printing small models and prototyping of medium complexity today at the price of an entry-level laptop. The price of PLA or ABS plastic, which acts as a consumable, also no longer seems exorbitant. In a word, if you have long dreamed of getting to know the world of 3D printing and joining the ranks of makers, the right moment has come!
To save you time and make it easier to select equipment, we have collected in one section all desktop 3D printers optimized for home and office use. These are the real "workhorses" with the perfect balance of functionality, quality and price. Even a beginner can understand the settings, mount and calibrate a 3D printer, and as he gains experience, he will be able to print more and more complex three-dimensional models.
Post-processing of 3D printed parts (PLA, ABS, SBS, PETG)
Table of contents
- Removal of supports
- Removing Soluble Supports
- Sanding
- Cold welding
- Filling voids
- Polished
- Priming and painting
- Pair smoothing
- Epoxy coating
- Metallization
Introduction
FDM technology is best suited for rapid, low-budget prototyping. Layer lines are usually visible in FDM prints, so post-processing is essential if a smooth surface is to be achieved. Some post-processing techniques can also make a print more durable by changing the degree of its elastic properties, density, structural and textural features.
In this article, we will discuss the most common post-processing techniques in FDM.
Post-processed FDM prints (left to right): cold welded, void filled, raw, sanded, polished, painted and epoxy coated.![]() photo 3dhubs.com
photo 3dhubs.com
Removing supports
Removing supports is usually the first step in post-processing for any 3D printing technology that uses them. In general, props can be divided into two categories: standard and soluble. Unlike other post-processing methods discussed in this article, the removal of props is mandatory and does not result in improved surface quality.
Initial printout with props, poor prop removal, good prop removal. photo 3dhubs.com
Removal of standard props
Tools
- Nippers, needle nose pliers, tongs
- Toothbrush, brush
| Finishing | ★ ☆ ☆ ☆ ☆ |
| Approvals | ★ ★ ☆ ☆ ☆ |
| Speed | ★ ★ ★ ★ ☆ |
| Suitable for | all thermoplastics FDM |
Process
Normally, the backups come off the printout without problems, and hard-to-reach places (such as holes or cavities) can be removed from the backup material with an old toothbrush. Proper placement of support structures and correct print orientation can significantly reduce the negative impact of supports on how the final printout will look.
Pros
- Does not change the overall geometry of the part.
- The process is very fast.
Cons
- Does not remove layer lines, scratches or other surface defects.
- If excess material or marks remain from the support structure, print accuracy and appearance suffer.
Soluble Support Removal
Instrumentation
- Solvent resistant container
- Thinner
- Ultrasonic cleaner (optional)
| Finishing | ★ ★ ★ ☆ ☆ |
| Approvals | ★ ★ ☆ ☆ ☆ |
| Speed | ★ ★ ★ ★ ☆ |
| Suitable for | all thermoplastics FDM |
Process
Soluble support standard materials are removed from the printout by immersing it in a reservoir of the appropriate solvent. Supports are usually printed:
- HIPS (usually with ABS)
- PVA (usually with PLA)
A glass container like a preservation jar is fine. Any non-porous vessel is suitable for water treatment. To quickly remove props from HIPS/ABS printouts, you will need a solution of equal parts D-limonene and isopropyl alcohol. Many other support structure materials such as PVA (with PLA) dissolve in normal water.
Pro Tips
Use an ultrasonic cleaner to shorten the solution time and change the solvent as it becomes saturated. A warm (not hot) solution works faster - heating is useful if there is no cleaner.
Pluses
- Complex geometry is allowed for which the standard method of removing props is not possible.
- Smooth surface where the supports are attached.
Cons
- Incorrect dissolution of the props can cause discoloration and skewed printouts.

- Does not remove layer lines, scratches or other surface imperfections.
- May cause small holes or holes if soluble material seeps into the object during printing.
Cleaning with a skin
Skewon Slop Gray ABS ABS ABS PROBECTION
Instrumentation
- E END1 with grain
on 150, 220, 400, 600, 1000 and 2000 - Wiping cloth
- Toothbrush
- Soap
- Face mask
| Finishing | ★ ★ ★ ★ ☆ |
| Approvals | ★ ★ ★ ☆ ☆ |
| Speed | ★ ★ ☆ ☆ ☆ |
| Suitable for | all thermoplastics FDM |
Process
Once the props have been removed or dissolved, sanding can be done to smooth the part and remove any obvious defects such as blots or marks from the props. Which sandpaper to start with depends on the thickness of the layer and the quality of the print: for layers of 200 microns or less, or for prints without blotches, you can start with sandpaper at P150. If there are blobs visible to the naked eye, or the object is printed with a layer thickness of 300 microns or more, stripping should begin with P100.
The process can be continued up to P2000 grit (one approach is to go to 220, then 400, 600, 1000 and finally 2000). Wet sanding is recommended from the very beginning to the very end - this will avoid excessive friction, which can lead to an increase in temperature and damage the object, as well as contaminate the sandpaper itself. Between sanding, the printout should be cleaned with a toothbrush and washed with soapy water, then wiped with a cloth to remove dust and prevent it from sticking together. Even P5000 can be sanded to achieve a smooth, shiny FDM part.
Pro Tricks
Always sand in small circular motions - evenly over the entire surface of the part.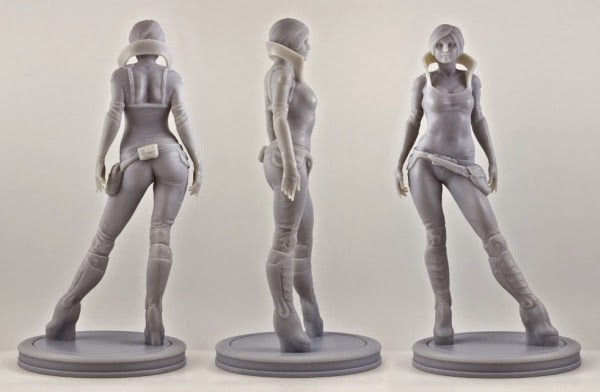 It may be tempting to sand perpendicular to the layers, or even parallel, but this can lead to gouges. If the part is discolored or has a lot of scratches after sanding, it can be heated a little to soften the surface and allow some defects to smooth out.
Pros
- An exceptionally smooth surface is obtained.
- Further post-processing (painting, polishing, smoothing and epoxy coating) is greatly facilitated.
Cons
- Not recommended for double or single shell parts as sanding may damage the printout.
- The process is difficult in the case of sophisticated surfaces and the presence of small details in the object.
- Grinding too aggressively and removing too much material can affect the appearance of the part. Acetone for ABS. Dichloromethane for PLA, ABS
- Foam Applicator
| Finishing | ★ ★ ☆ ☆ ☆ |
| Approvals | ★ ★ ☆ ☆ ☆ |
| Speed | ★ ★ ★ ★ ★ |
| Suitable for | all thermoplastics FDM |
Process
If the object is larger than the printer capacity, the object is printed in parts and then assembled.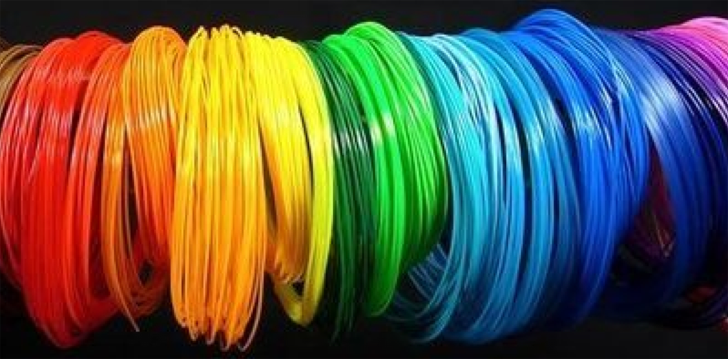 In the case of PLA and some other materials, assembly can be done with Dichloromethane or a suitable adhesive (the choice of adhesive depends on the plastic). In the case of ABS, it is possible to "weld" with acetone. The mating surfaces should be slightly moistened with acetone and squeezed tightly or clamped and held until most of the acetone has evaporated. So the parts will be held together by chemical bonds.
Pro Tricks
Increasing the surface area of the acetone contact increases bond strength. Tongue-and-groove to help.
Pros
- Acetone does not change surface color as much as most adhesives.
- After drying, the compound acquires the properties of ABS, which makes further processing easier and more uniform.
Cons
- The bonding of ABS parts by cold acetone "welding" is not as strong as if the part were printed as a whole.
- Excessive use of acetone can dissolve the part and affect final appearance and tolerances.

Void Fill
Black ABS Print, Filled and Sanded
Tool Kit
- Epoxy (for small voids only)
- Automotive body filler (for large voids and joints)
- ABS filament and acetone (only for small voids in ABS printouts)
| Finishing | ★ ★ ☆ ☆ ☆ |
| Approvals | ★ ★ ★ ☆ ☆ |
| Speed | ★ ★ ★ ☆ ☆ |
| Suitable for | all thermoplastics FDM |
Process
Unusual voids may come out after the part has been ground or the soluble props have been dissolved. These voids are formed during printing when the layers are incomplete due to any restrictions on the trajectory of the print head, which is often inevitable.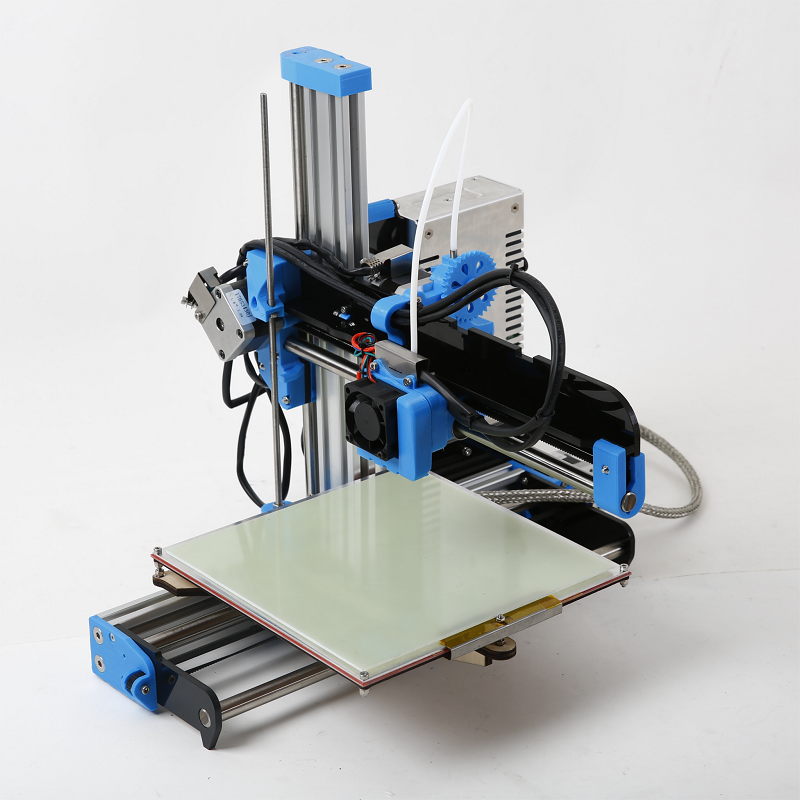 Small gaps and voids can be easily filled with epoxy and no additional treatment is required in this case. Larger gaps or voids left by assembling a multi-part object can be filled with automotive bodywork filler, but the printout will then need to be re-sanded. Putty works great, is easy to process with sandpaper and can be painted. Moreover, the parts connected by such a filler, or voids filled with it, turn out to be stronger than the original plastic.
Slots in ABS printouts can also be filled with ABS thinned with acetone, which reacts chemically with the ABS object and seeps into existing voids. It is recommended to make such a putty from 1 part ABS and 2 parts acetone, then it will not spoil the surface if used correctly.
Dichloromethane works on all plastics: ABS, PLA, HIPS, SBS, etc.
Epoxy is also useful if you want to make your 3D printed part more durable
Pros
- Epoxy filler is easy to sand and prime, resulting in an excellent surface for painting.

- An ABS solution of the same filament will give the same color so nothing will be visible on the surface.
Cons
- Auto body filler or other polyester epoxy adhesive is opaque when dry and will leave discolored areas on the printout.
- Additional processing required to achieve a uniform surface.
- Grinding too aggressively and removing too much material can affect the appearance of the part.
Polished
PLA model, polished. Photo rigid.ink
Tools
- Plastic Polishing Compound
- Sandpaper for P2000
- Wiping cloth
- Toothbrush
- Polishing pad or microfiber cloth
| Finishing | ★ ★ ★ ★ ★ |
| Approvals | ★ ★ ★ ☆ ☆ |
| Speed | ★ ★ ☆ ☆ ☆ |
| Suitable for | all thermoplastics FDM |
Process
Once the part has been sanded, a plastic polish can be applied to the part to give a standard ABS or PLA object a mirror finish. After the part has been sanded for 2000, it is necessary to remove dust from the printout with a cloth and rinse the printout under warm water using a toothbrush. When the object is completely dry, buff it on a buffing pad or microfiber cloth, adding a polishing compound as you go, such as polishing jewelry. They are designed specifically for plastics and synthetics and give a long-lasting shine. Other plastic polishes, such as those used to polish car headlights, also work well, but some of them contain chemicals that can damage the printout.
Pro Tricks
To polish small parts, place the polishing wheel on your Dremel (or other rotary tool such as a power drill). For larger and stronger parts, you can use a grinder, just make sure that the part does not stay in one place for too long, otherwise the plastic may melt from friction.
Pros
- The part is polished without solvents that can warp it or change its tolerances.
- When properly ground and polished, a mirror-smooth surface is obtained, very similar to cast.
- Polishing and deburring plastics is extremely economical, making this a very cost-effective method of achieving a quality finish.
Cons
- If you want to achieve a mirror-smooth surface, the part must be carefully ground before polishing, which may affect tolerances.
- After polishing, the primer or paint no longer sticks.
Primer and paint
Gray PLA FDM print spray painted black. 3dhubs.com
Tools
- Wiping cloth
- Toothbrush
- 150, 220, 400 and 600 grit sandpaper
- Aerosol Primer for Plastics
- Finish paint
- Polishing sticks
- Polishing paper
- Masking tape (only if multiple colors are expected)
- Nitrile gloves and matching face mask
| Finishing | ★ ★ ★ ★ ★ |
| Approvals | ★ ★ ★ ☆ ☆ |
| Speed | ★ ☆ ☆ ☆ ☆ |
| Suitable for | all thermoplastics FDM |
Process
After the printout has been properly sanded (it is enough to reach P600 when painting), it can be primed. Aerosol plastic primer should be applied in two coats. This primer is intended for subsequent painting of models, provides an even coating and at the same time thin enough not to hide small elements. Thick primer, which is sold in hardware stores, can clump, and then you have to seriously work with sandpaper. Apply the first spray coat with short pressures from a distance of 15-20 cm from the object, trying to do it evenly. Let the primer dry and smooth out the unevenness with 600 grit sandpaper. Apply a second coat of spray with light, quick pressures, also very gently and evenly.
When the priming is completed, you can start painting. You can paint with artistic acrylic paints and brushes, but a spray gun will provide a smoother surface. Hardware store spray paints are thick and viscous and difficult to control, so use paints that are designed specifically for modeling. The primed surface must be sanded and polished (sanding and polishing sticks, which are used in nail salons, can be purchased online, they are great for our task), and then wiped with a cloth. The paint should be applied to the model in very thin layers, the first layers should be transparent. When the paint finish becomes opaque (usually 2-4 coats), let the model rest for 30 minutes to allow the paint to dry completely. Carefully polish the paint layer with manicure sticks, repeat the procedure for each of the colors (between each applied paint).
Separate parts of the model can be covered with masking tape so that the colors, if there are several, do not mix. When painting is complete, remove the masking tape and polish the object with polishing paper. Polishing paper, such as 3M or Zona, comes in a variety of grits and is a relatively new product. It is sold in packs in various online stores, and after processing with this paper, the ink layer or topcoat will literally shine - and nothing else can achieve this effect. Apply 1-2 coats of top coat to protect the paint and let it dry completely. The top coat is selected in accordance with the recommendations of the paint manufacturer.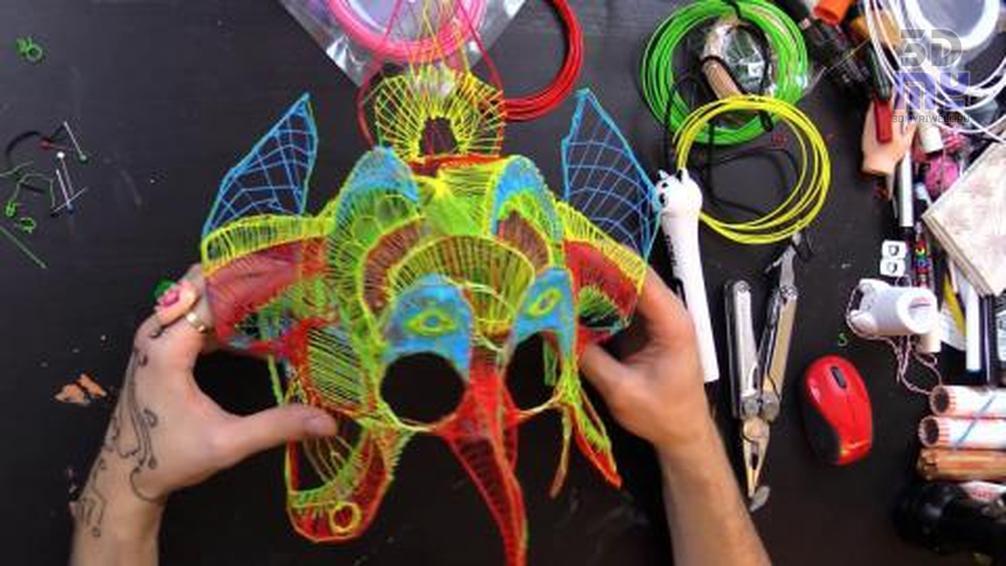 If the topcoat and paint are incompatible, it can render your entire painting job meaningless, so compatibility is very important here.
Pro Tips
Don't shake the can when spraying! It is important not to mix the pigment or primer with the propellant (propellant gas), which will cause bubbles to form in the spray. Instead, the can must be rotated for 2-3 minutes so that the mixing ball rolls like a pearl, and does not strum.
Pros
- Excellent result, if you take into account all the nuances of the process and practice.
- You can do anything with the final look of the object, no matter what material it is printed on.
Cons
- Primer and paint increase the volume of the model, which affects tolerances and can be a problem when it comes to a part of a larger object.
- High quality aerosol paint or spray gun increases costs.
Vapor smoothed
Vapor smoothed black ABS printed hemisphere
Tools
- Cleaning cloth
- Solvent resistant sealed container
- Thinner
- Paper towels
- Aluminum foil (or other solvent resistant material)
- Face mask and chemical resistant gloves
| Finishing | ★ ★ ★ ★ ☆ |
| Approvals | ★ ★ ☆ ☆ ☆ |
| Speed | ★ ★ ★ ☆ ☆ |
| Suitable for | all thermoplastics FDM |
Process
Line the bottom of the container with paper towels, if possible along the sides. It is critical that the vapors cannot damage the container and that the container itself is sealed. It is recommended to use a glass or metal container. Apply enough thinner to the paper towels so that they are wet but not soaked - this will also help them adhere better to the walls. Acetone is famous for its ability to smooth out ABS. PLA can be smoothed with a variety of other solvents (dichloromethane works well), but this plastic tends to be much harder to smooth than ABS. When working with any solvents, please follow the safety precautions for handling chemicals and always take appropriate precautions. Place a small "raft" of aluminum foil or other solvent-resistant material in the center of the paper towel-lined container. Place the printout on the "raft" (either side of your choice) and close the lid of the container. Steam polishing can take varying amounts of time, so check your printout periodically. To increase the speed of polishing, the container can be heated, but this must be done carefully so as not to cause an explosion.
When removing the printout from the container, try not to touch it in any way, leave it on the “raft”, take them out together. In all those places where the printout has come into contact with something, there will be defects, since the outer layer will be under-dissolved. Before working with it, let the printout completely “breathe” so that all solvent vapors have evaporated.
Many aerosols and/or solvent sprays are flammable or explosive and their vapors can be harmful to humans. Be extremely careful when heating solvents, always handle them and store them in a well ventilated area.
Pluses
- Many small blotches, as well as many layer lines, are smoothed out without additional processing.
- The printout surface becomes exceptionally smooth.
- The procedure is very fast and can be performed using commonly available materials.
Cons
- Doesn't "heal" gaps, doesn't completely hide layer lines.

- During the smoothing process, the outer layer of the printout dissolves, which greatly affects the tolerances.
- Negatively affects the strength of the printout due to changes in the properties of its material.
Immersion
PLA model immersed in dichloromethane. Photo 3dpt.ru
Tools
- Solvent resistant container
- Thinner
- Eye hook or cog
- Heavy wire for sculpture or landscaping
- Dryer or drying frame
- Face mask and chemical resistant gloves
| Finishing | ★ ★ ★ ★ ☆ |
| Approvals | ★ ☆ ☆ ☆ ☆ |
| Speed | ★ ★ ★ ★ ☆ |
| Suitable for | all thermoplastics FDM |
Process
Make sure the container you are using is wide and deep enough to completely submerge the printout in the solution. Fill the container with the appropriate amount of solvent - be careful not to splash. As with vapor smoothing, ABS dip smoothing can be done with acetone, which is easy to find in the store, and for PLA, dichloromethane can also work well with ABS, HIPS, SBS, PETG, and many other materials. PLA is quite resistant to solvent smoothing, so it may take several passes to achieve the desired result. Prepare the printout for dipping by screwing a hook or eye screw into it in an inconspicuous place. Pass the wire through the eyelet or wrap the wire around the screw so that the printout can be immersed in the solvent. If the wire is too thin, it will not be able to withstand the buoyant force on the printout, and it will be difficult to sink the object.
Once the printout is ready, use a wire to completely immerse it in the solvent for a few seconds. Remove the printout and hang it by the wire in a dryer or on a drying frame to allow the solvent to completely evaporate from the surface.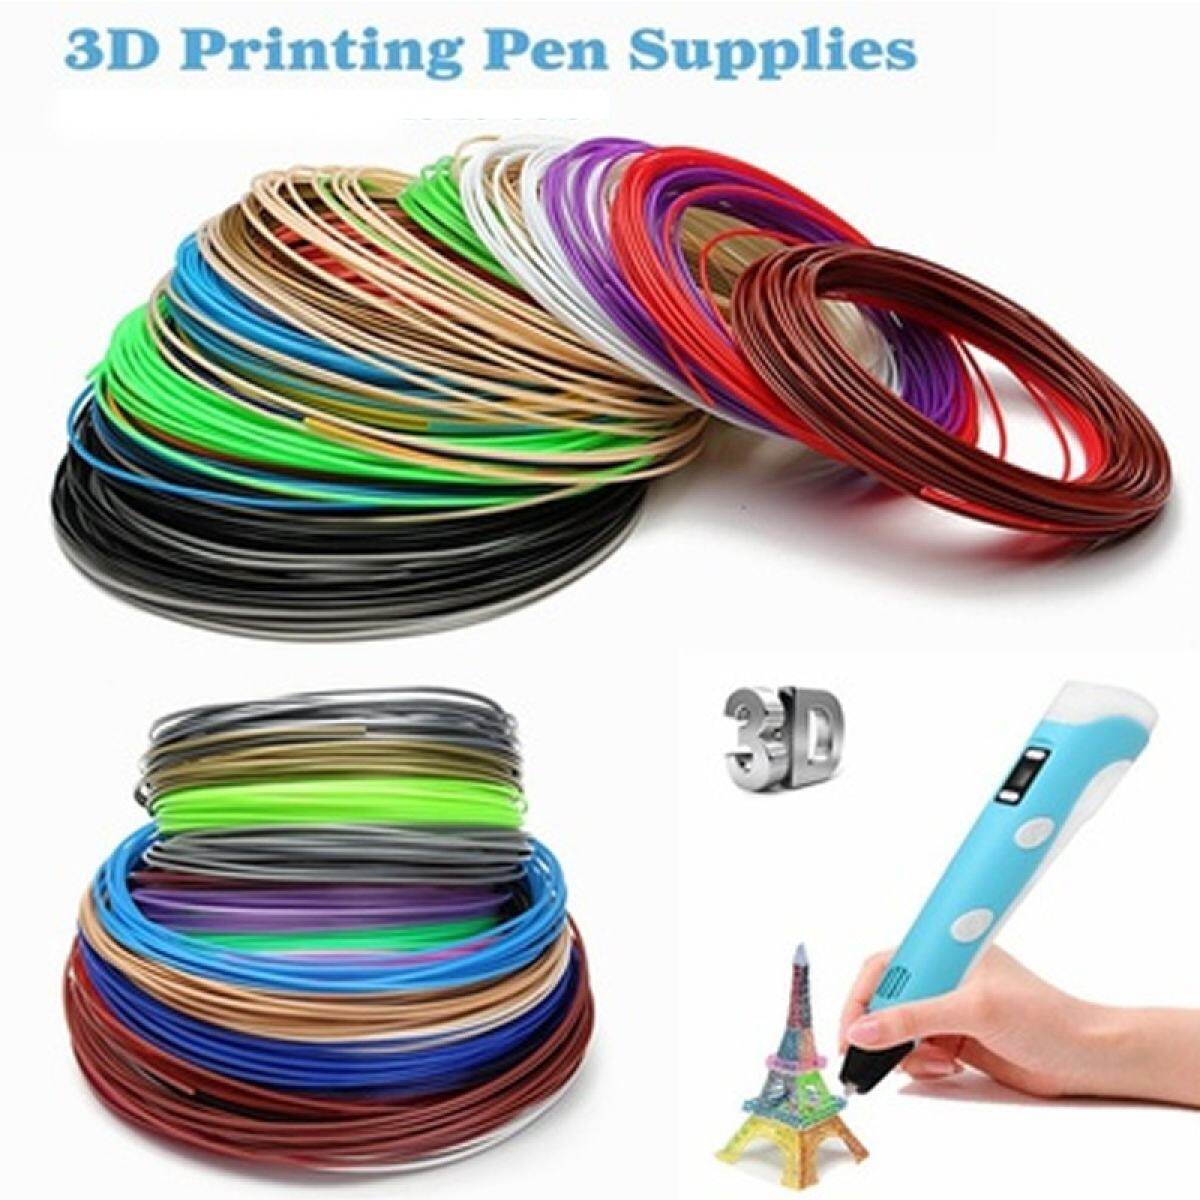 After ejection, the printout can be gently shaken to facilitate the drying process and ensure that no solvent has accumulated in the depressions.
Pro Tricks
If an opaque whitish coating appears on the print after drying, this can be corrected by holding the object over a solvent bath for a while so that its vapor slightly dissolves the surface. This restores the original color of the printout and achieves a shiny outer layer.
Pros
- The printed surface is smoothed much faster than steam polishing.
- Significantly less fumes are generated than other solvent polishing methods, so this method is less hazardous.
Cons
- The surface is smoothed very aggressively, so you can forget about tolerances.
- Immersion for too long can result in complete deformation of the object and a significant change in material properties.
Epoxy
Black ABS printout, half epoxy, half uncoated
Tools
- two-component epoxy
- Foam Applicator
- Mixing container
- Sandpaper P1000 or finer
| Finishing | ★ ★ ★ ★ ☆ |
| Approvals | ★ ☆ ☆ ☆ ☆ |
| Speed | ★ ★ ★ ★ ☆ |
| Suitable for | all thermoplastics FDM |
Process
After the printout has been cleaned (preliminary cleaning gives the best end result), wipe it thoroughly with a cloth. Mix the resin and hardener in the proportion indicated in the instructions, accurately measuring all volumes. The curing process of epoxy resin is exothermic, so glass containers and containers made of materials with a low melting point should be avoided. It is recommended to use containers that are specifically designed for mixing epoxy resins. Incorrect ratio of resin and hardener can result in longer curing time or no curing at all and result in a permanently sticky substance. Mix the resin and thinner as directed in the instructions - carefully, in smooth movements to minimize the amount of air bubbles remaining inside the mixture. Very little epoxy is needed, and most of these resins only work for 10-15 minutes, so plan accordingly.
Apply the first coat of epoxy with a sponge applicator, being careful not to build up in crevices and small parts. When the printout is sufficiently coated, allow the resin to fully cure - as described in the instructions that came with it. One coat may be sufficient, but for optimum results it is best to lightly sand the printout with fine sandpaper (on P1000 and above) to eliminate any imperfections. Wipe off the dust with a cloth and, in the same way as before, apply a second layer of epoxy.
Pros
- A very thin coat of epoxy won't affect tolerance too much (unless the printout has been sanded excessively hard first).
- A protective shell is formed around the object.
Cons
- The layer lines will remain visible, they will only be covered by a smooth shell.
- If too much epoxy is used, it can flood parts and edges, and the surface can appear greasy.
Plating
FDM printed structural element nickel plated with Repliform RepliKote technology
Tools (for home use)
- 2
- 2
- 2
- 2 A galvanizing solution can be obtained by mixing a metal salt, acid and water, but if the proportions are inaccurate and the substances are of insufficient quality, one cannot count on a professional result.
 If you buy a ready-made solution (as in Midas kits), you can be sure that the problems with plating are not caused by the solution.
  The rectifier is safer in the sense that it can simply be turned off and thus cut off the current during the galvanization process.
 | Finishing | ★ ★ ★ ★ ☆ |
| Approvals | ★ ★ ★ ☆ ☆ |
| Speed | ★ ★ ★ ★ ☆ |
| Suitable for | all thermoplastics FDM |
Process
Electroplating can be carried out at home or in a professional workshop.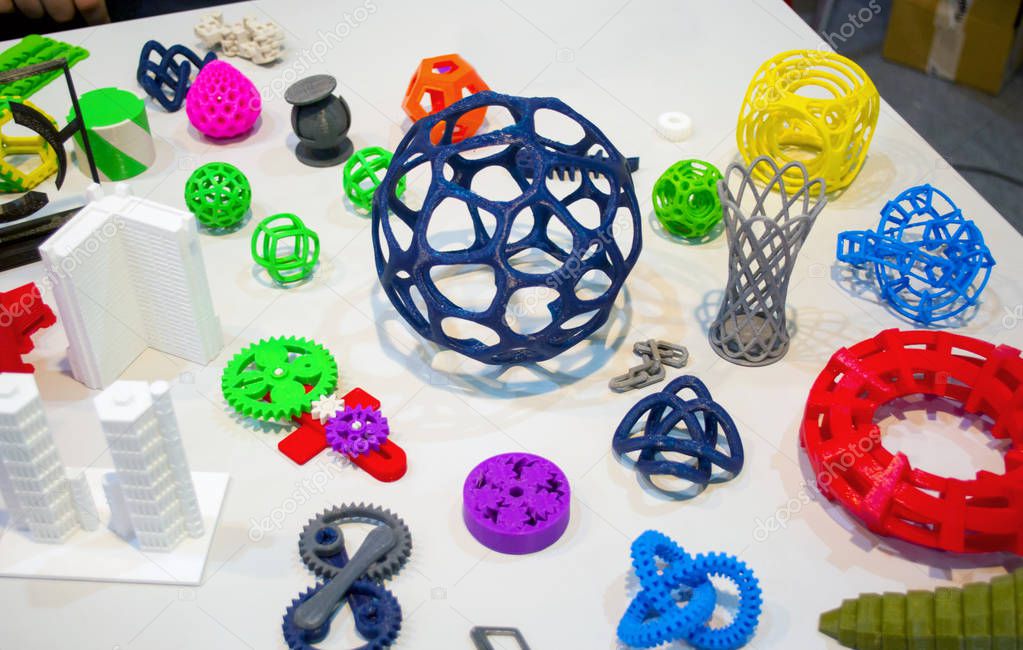 To do everything right, you need to be well versed in the materials, in what is actually happening - and at home these opportunities are usually limited. In order to achieve excellent surface quality and to have more plating options, including chrome plating, it is best to use the services of professional workshops. The copper galvanization process will be described below as an example.
At home, you can galvanize with copper or nickel, and this coating will then serve as the basis for galvanizing with other metals. It is critically important that the printout surface be as smooth as possible before it is galvanized. Any bumps and lines in the layers will be enhanced as a result of the process. Prepare the sanded and cleaned object for plating by coating the plastic with a thin coat of high quality conductive paint, or with a graphite and acetone solution for ABS printouts. Allow the conductive coating to dry completely, sand if necessary to ensure a smooth surface. At this stage, it is extremely important not to touch the printout with bare hands or to wear gloves, because sweat marks on the object will certainly affect the quality of the galvanization.
Insert a screw or eyelet in an inconspicuous place on the printout and connect it to the negative terminal of the rectifier. This will be the cathode. Connect the copper anode to the positive contact of the rectifier. Fill the container with enough copper plating solution so that the printout is completely covered with it. Immerse the anode in the container and turn on the power. After the rectifier is turned on, immerse the printout in the container, making sure that it does not touch the anode anywhere. Beware! When the object is already in the bath, the galvanization system is active, and contact with the solution, cathode or anode can be traumatic. Set the voltage on the rectifier to 1-3 Volts, and the process will go to full metallization. To speed things up, the voltage can be increased, but not more than 5 volts. When enough metal has deposited on the printout, simply turn off the power and dry the object with microfiber towels. When it's dry, varnish the object to protect it from corrosion.