Chep 3d printer profiles
Cura Profiles – 3dprintscape.com
Skip to content
Written by Robin Education
Here are the Cura profiles that I use with my printers. I plan on providing profiles for different purposes and will update them when I make changes.
If you guys have any questions or suggestions, you can leave a comment here or reach out to me on my YouTube channel https://www.youtube.com/c/3dprintscape .
Print Quality Ovierviw
I have three base profiles that I use and swap between them to meet my printing needs. Here is a quick overview of each.
Standard Quality
This is my go-to profile. Its geared towards larger prints with less detail or mockups. This profile has a layer height of .2mm.
High Quality
This is the profile I use if I am printing an object with more detail and can benefit from increasing the resolution. It has a layer height of .16mm, which will increase the print time. I only use this profile for about 10% of the prints I do.
Miniatures
This profile is geared towards Minifigures and has a resolution of .1mm. I made a lot of little tweaks to help make the Minifigures turn out better, but they do take a while to print. This profile will use more filament and print at a lower temperature, so I only use this if I am printing a Minifigure, which isn’t too often.
*Note: I have the temperatures set to work with the filament I use (typically HATCHBOX from Amazon). I would recommend printing a temperature tower and adjusting the profile based on the results.
Here is a video showing you how to print a temperature tower.
Profiles
Generic
| Print Quality | Cura 4.11 | Cura 4.12 | Cura 4.13 | Cura 5.0 | Cura 5.1 |
|---|---|---|---|---|---|
| Standard Quality | v1.0 | v1.0 | v1.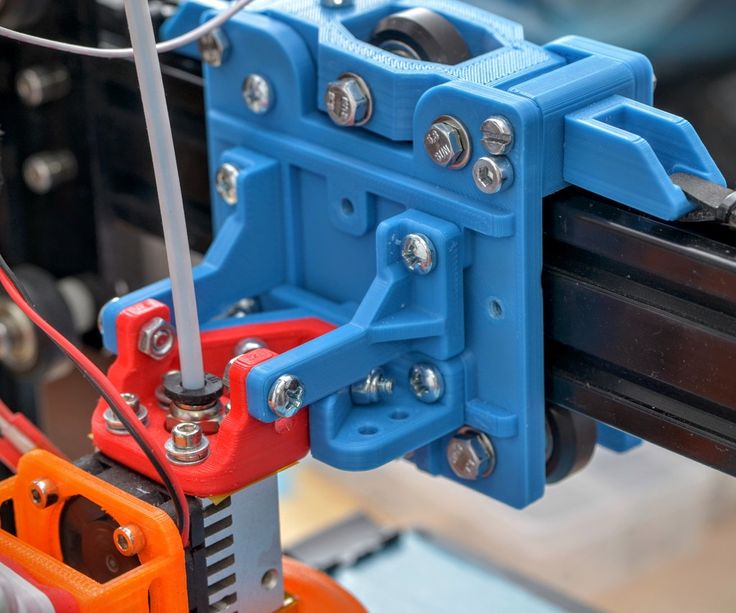 0 0 | v1.0 | v1.0 |
| High Quality | v1.0 | v1.0 | v1.0 | v1.0 | v1.0 |
| Lithophane | N/A | v1.0 | v1.0 | v1.0 | v1.0 |
Ender 3/3 Pro / v2
| Print Quality | Cura 4.11 | Cura 4.12 | Cura 4.13 | Cura 5.0 | Cura 5.1 |
|---|---|---|---|---|---|
| Standard Quality | v1.0 | v1.0 | v1.0 | v1.0 | v1.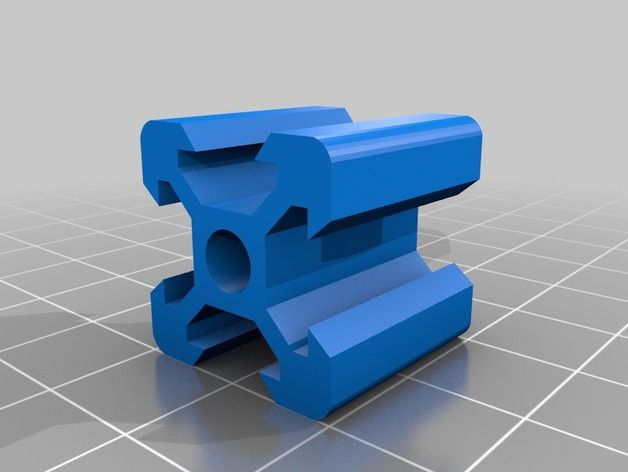 0 0 |
| High Quality | v1.0 | v1.0 | v1.0 | v1.0 | v1.0 |
| Miniatures | v1.0 | v1.0 | v1.0 | v1.0 | v1.0 |
| Lithophane | N/A | v1.0 | v1.0 | v1.0 | v1.0 |
Related Articles
- Create a Temperature Tower Using Cura – The Easy Way
- Cura First Layer Settings
- Cura Jerk Settings: How to Set Them
- How to Remove the Disallowed Areas in Cura
Make sure you check out our YouTube channel, and if you would like any additional details or have any questions, please leave a comment below.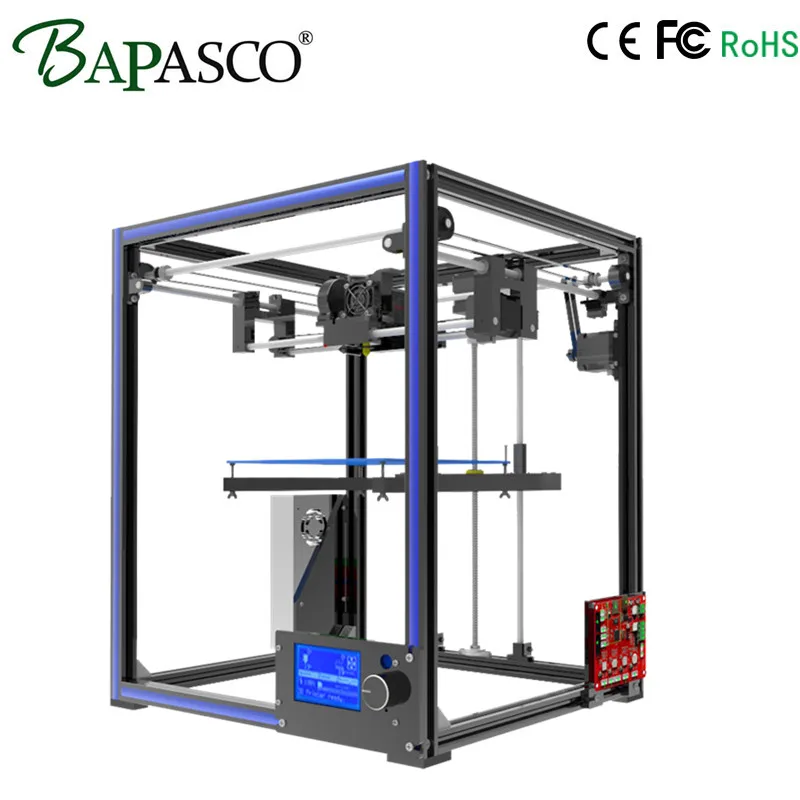 If you liked this article and want to read, others click here.
Recent Posts
link to Are Fillets Hard to 3D Print? What You Need To KnowAre Fillets Hard to 3D Print? What You Need To Know
In 3D printing, fillets enhance the aesthetics of a model’s design for a fantastic finish. However, fillets are vulnerable to many issues, like most designing elements and slicer settings in FDM 3D...
Continue Reading
link to SKR Mini e3 v3 Firmware GuideSKR Mini e3 v3 Firmware Guide
The new SKR Mini e3 v3 is a tremendous upgrade for any stock Ender 3 printer, or really most Creality printers. The first and most noticeable difference is the massive heat sink that covers all four...
Continue Reading
How to import profiles to Cura 4.x (Windows & macOS)
Written By: Jakub Dolezal
- Favorites: 0
- Completions: 127
Difficulty
Moderate
Steps
9
Time Required
Suggest a time??
Sections
1
- How to import profiles to Cura 4.
 x (Windows & macOS) 9 steps
Flags
0
- BackService manuals
- Full Screen
- Options
- History
- Download PDF
- Embed This Guide
-
-
WARNING: Current profiles were tested on the Cura 4.0.0 & 4.1.0 and may not work on the previous versions as there are new config files introduced. See section Obsolete manuals for older versions.
-
The following guide will help you import and activate custom profiles tweaked by Josef Prusa for your Original Prusa i3 printer.
-
This guide is valid both for Microsoft Windows and Apple macOS. There are some small differences in the setup, pay attention to the instructions ;)
-
Important: latest profiles include settings for generic PLA, ABS, PETG as well as Prusament.
-
Supported printers:
-
Original Prusa i3 MK3S and MK3
-
Original Prusa i3 MK2.5S, MK2.5 and MK2S
-
Click here to download the Cura package
-
-
-
The package includes several subfolders, which must be imported (or copied) into the Cura. Note you have to use correct version of the settings!
-
Folder 01_Cura_printer_definitons includes profiles for the printers with dimensions, speeds and other parameters.
-
Folder 02_Cura_printer_extruders additional parameters for the printer, specifically for the extruder properties (new in Cura 3.5.1).
-
Folder 03_Cura_meshes includes platforms (heatbeds), which are just for the visual effect, though it is good to know, where your object will be printed on the heatbed.
-
Folder 04_Cura_layerheight_profiles includes settings for various layer heights (print quality).
-
Folder 05_Cura_Prusa_materials includes materials, which should be imported because default Cura material values differ from what is recommended for Prusa filaments.
-
File Readme.txt summarises changes to this package.
-
-
-
By default Cura list of printers does not include Original Prusa i3 models.
 Let's fix it ;) First, save your work and close the Cura software.
 -
Open the unzipped package and go to the folder: 01_Cura_printer_definitions
-
Apple macOS: in a second window head to /Users/YOURUSERNAME/Library/Application Support/cura/4.x/definitions
-
MS Windows: in a second window head to C:\Program Files\Ultimaker Cura 4.x\resources\definitions
-
On Mac open the Finder, press "Command+Shift+G" and enter "~/Library" (without quotes)
-
The path can slightly differ, for example, if you have a different version of Cura installed. Also on macOS the "Library" folder is hidden.
-
Copy the file(s) "...def.json" from the package to the Cura folder.
-
-
-
Open the unzipped package and go to the folder: 02_Cura_printer_extruders
-
Apple macOS: in a second window head to /Users/YOURUSERNAME/Library/Application Support/cura/4.x/extruders
-
MS Windows: in a second window head to C:\Program Files\Ultimaker Cura 4.x\resources\extruders
-
The path can slightly differ, for example, if you have a different version of Cura installed. Also on macOS this folder is hidden.
-
Copy the file(s) "...def.json" from the package to the Cura folder.
-
-
-
In the unzipped package open the folder: 03_Cura_meshes
-
Apple macOS: right-click on the Cura icon, from the context menu select "Show package contents", then open folders in following sequence Contents->Resources->resources->meshes
-
MS Windows: in a second window head to C:\Program Files\Ultimaker Cura 4.x\resources\meshes
-
The path can slightly differ, for example, if you have a different version of Cura installed.
-
Copy the file(s) "...platform.stl" from the package to the Cura folder.
-
-
-
From now on the steps are the same both for MS Windows and Apple macOS.
-
Now, open the Cura software
-
In case you run the software for the first time, you will be asked to Add a printer, in the list click on Other and select yours.
-
Use only profiles named "Original Prusa i3...", those are developed and tested by our company. If the printer name is missing the "Original" in its name, then it is from different manufacturer.
-
In case you are already working with Cura, go to Settings -> Printer -> Add printer and select yours.
-
Cura allows you to add one printer at a time. If you want to add more printers repeat this step.
-
-
-
Go to Settings -> Profile -> Manage Profiles
-
Click on the Profiles and Import.
-
Find the profiles on your drive (folder 04_Cura_layerheight_profiles), select one and open it. Unfortunately, Cura doesn't support multiple profiles import at once.
-
Your new profile will appear under the Custom profiles. You can also click on Activate to select it or do it later on the main screen from a drop-down menu by simply selecting the profile.

-
Repeat this step until you import all the profiles you wanted.
-
DON'T CLOSE this window yet, we will use it in the next step.
-
-
-
Click on the Materials and Import.
-
Find the profiles on your drive (folder 05_Cura_Prusa_materials), select one and open it. Unfortunately, Cura doesn't support multiple profiles import at once.
-
Your new material will appear in the list named as Prusa Research (e.g. Prusament PLA). You can also click on Activate to select it or do it later on the main screen from a drop-down menu by simply selecting the profile.
-
Repeat this step until you import all the materials you wanted.
-
-
-
Before you slice and print, lets make a final check:
-
Your printer is selected (e.g. Original Prusa i3 MK3S).
-
The desired material is used (e.g. Prusament PLA)
-
Correct custom profile is applied (e.g. 0.2 Fast for MK3S).
-
That is all! Enjoy your printer and happy printing ;)
-
You can discuss your experience and print results on Prusa Research forum.
-
Almost done!
Finish Line
Cancel: I did not complete this guide.
127 other people completed this guide.
Author
Team
Same printer, profile only
RepRap
Follow author
Follow
Don't want
11
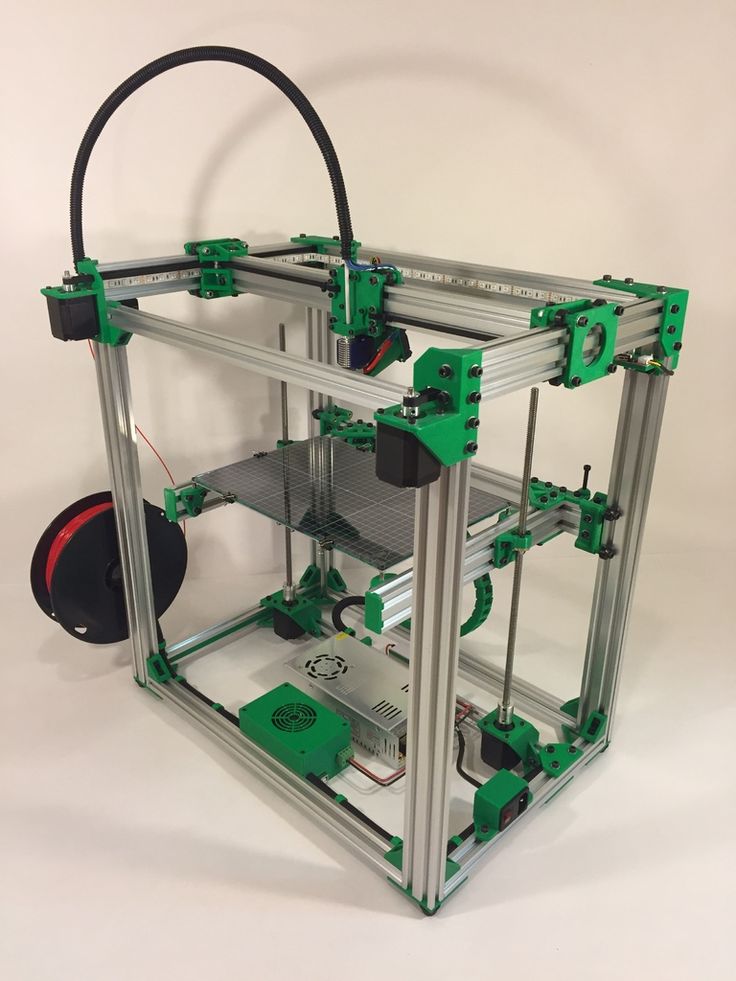
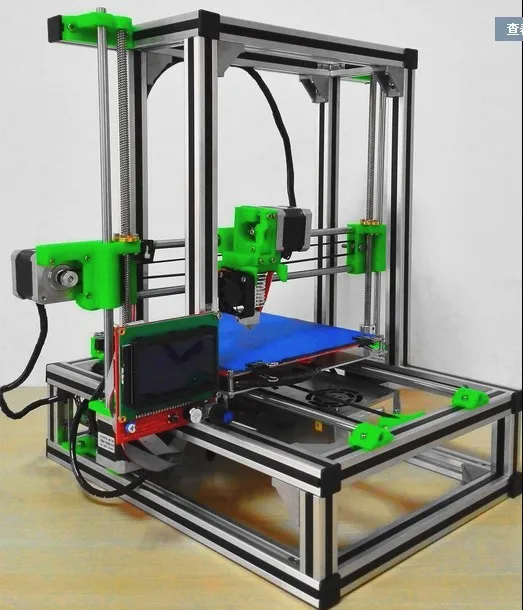
...in an aluminum profile :)
Since many members of our community are either seriously thinking about designing a 3D printer on their own, or are already doing it with might and main, I would like to add some information that may be useful to someone in this very not an easy matter.
So where does the construction of a printer for any enthusiast begin?
From the solution of the most fundamental question - the choice of the frame used, the frame for the device .
The classic materials used are quite standard. It can be wood, polycarbonate, steel. Frame elements are either prepared independently, or, more often, ordered by laser cutting according to drawings. And this path is good for everyone, but there is not enough freedom in it for the broad Russian soul :)
Undoubtedly, the method described below for creating structural frameworks has been known for a long time and is widely used. However, many 'mere mortals', such as myself, had no previous experience of 'communication' with him.
The aluminum structural profile is used as a frame for many different machines and devices. In simple terms - aluminum beams of various lengths with slots that allow installation.
Sounds very simple, but there are many possibilities behind the simplicity. There are thousands of different fasteners for connecting the profile. And installation is carried out using ordinary screws and special T-nuts.
What is the advantage of using a structural profile? For reasonable money, we get a solid metal structure that is very easy to modify, modify and improve. To install a new module, you only need a screw and a nut, there is no need to drill holes in the structure.
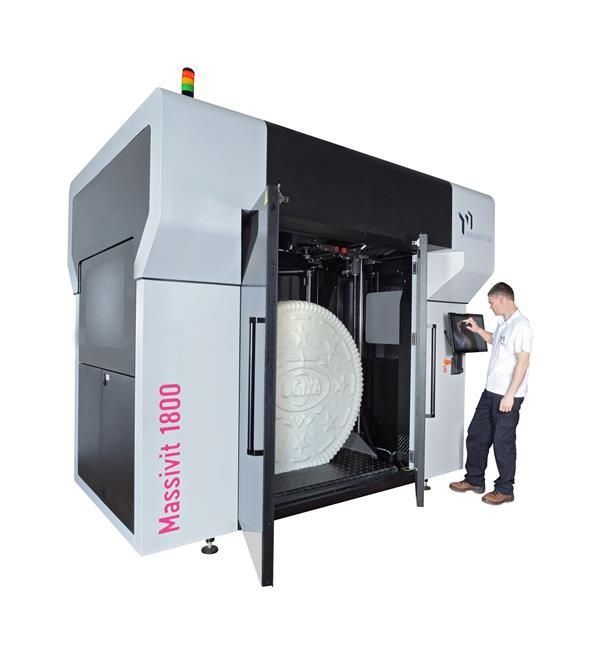
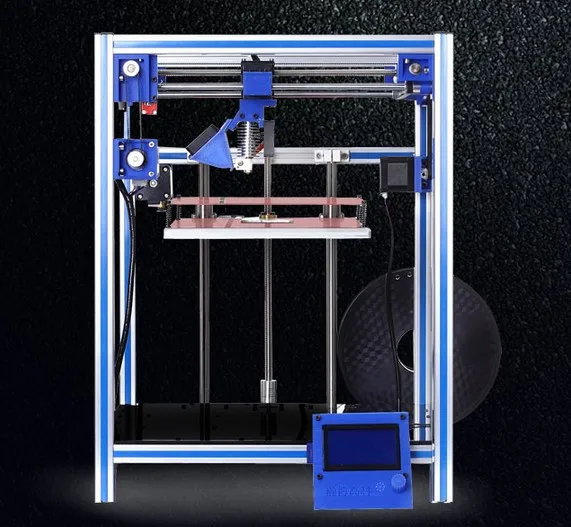
The profile can be of various sizes, but for amateur 3D printing, the smallest one - 20x20 mm (it is called everywhere - 2020) has gained the most popularity. On its basis, Prusa i3 modifications are made, various delta printers are built. Another advantage of the profile is that it can be printed (example) and safely used in conjunction with aluminum where there is no heavy load.
In some projects, the profile is even used as rail guides and, apparently, not without some success :)
As for the cost - it turns out to be more expensive than a cut frame, but it is quite acceptable considering the added advantages. Do not look for a profile on Ali, pay attention to our local manufacturers. It is quite possible to find a nice price tag somewhere nearby.
For example, I am now slowly building a Vulcanus printer.
The entire printer requires 10 meters of profile. I found it at 245 rubles per meter, 20 rubles per cut. As a result, the entire profile for the frame came out to me less than 3000 rub + 600 rub for 100 T-nuts with Ali.
In addition, there are ways to reduce the cost of construction. For example, if there is no heavy load, you can use ordinary T-nuts instead of T-nuts, slightly sharpening them. It is possible to print small elements of the 'plastic profile' - 2020 models are available in abundance on thingiverse, in particular at the link above in the text.
RepRap is a kind of constructor. And the more freedom we have for customization, the more opportunities and scope we have for realizing engineering fantasies :) In this vein, I personally really liked the aluminum profile.
It would be interesting to know your opinion regarding the use of this structural material in the comments :)
Follow author
Follow
Don't want
11
More interesting articles
Am0k
Loading
05. 10.2022
4562
55
Subscribe to the author
Subscribe
Don't want to
Read more
48
Subscribe to the author
Subscribe
Don't want
Hello everyone! Actually, I started designing all kinds of direct extruders based on the mechanism...
Read more
Zavodik
Loading
11/13/2018
42983
346
Follow the author
Subscribe
Don't want
Hello, dear lovers of additive technologies!
Work on the implementation of printing. ..
Read more
Aluminum profile as a one-stop resource for assembling anything. Part 2 / Habr
In the last article, we talked about types of aluminum profiles, types of fasteners and other nuances. Now it's the turn to add another great tool to the profile - 3D printing. Truly, using an aluminum profile and plastic parts printed on a printer, you can assemble anything.
Those of us who are lucky enough to have our own workshops can use woodworking, welding or metalworking. But if there is no workshop or it is small, or it is impossible to use all these methods for some other reason, it is better to turn to 3D printing and aluminum profiles.
Everything can be built from a profile
In the last article, some projects where an aluminum profile was used were already given as an example. For example, here is this adjustable modular desktop made of chipboard and profile.
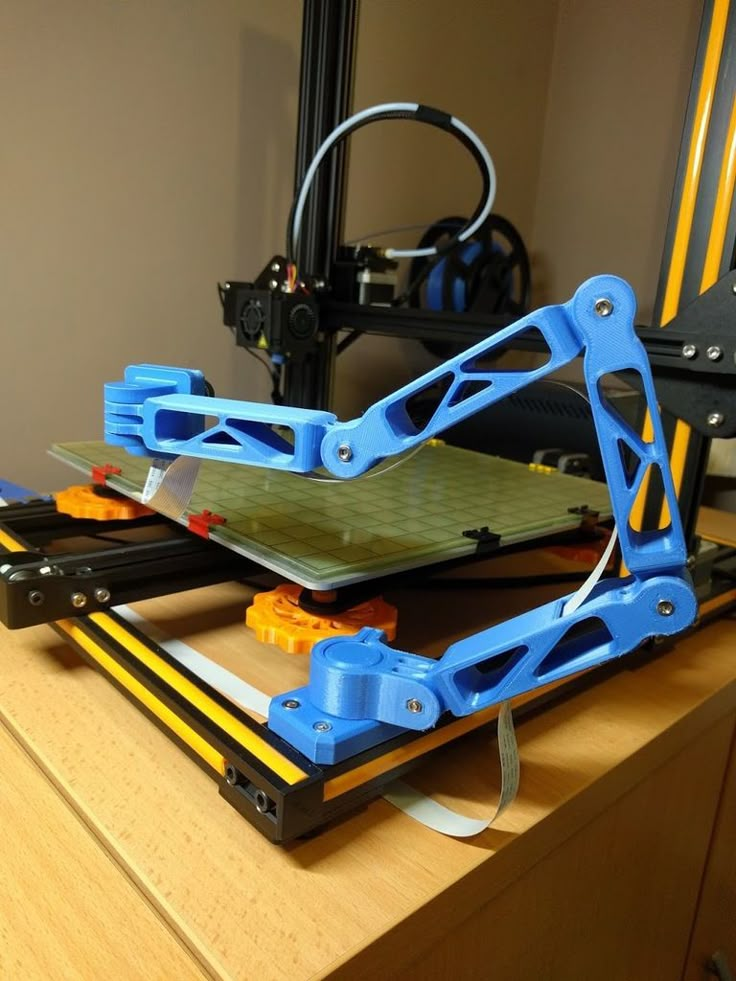
Using a 3D printer, you can create custom connections for an aluminum profile that differ from those found in most catalogs. As a rule, standard fasteners are designed to connect the profile at a right angle. Using printing, you can create connections of any shape.
With their help, you can fasten the profile at any angle - 30, 45 or 60 degrees - it's easy to make this. An example of a non-standard plastic connection is shown above.
Irregular - does not mean difficult
This is true - we can combine purchased components (profile and part of fasteners) with self-made elements. At the same time, the aluminum profile provides the overall structure of the product, and the plastic ties the guides together, setting a certain shape and maintaining it. Let's see how you can make fasteners for building non-standard angles.
Fastening design is carried out in any CAD program. Typically, this is a task of machining a rectangular solid with several cylinders cut to create mounting holes. A 3D-printed connection with a three-sided profile is usually strong enough to provide the desired structural rigidity. You can start designing small, gradually improving skills.
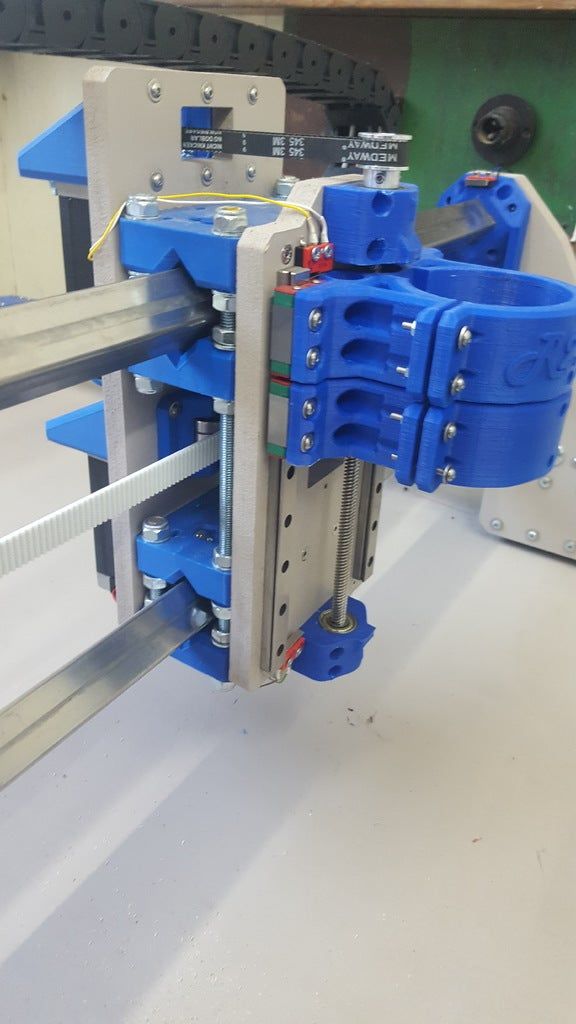
Example: Difficult corners without problems
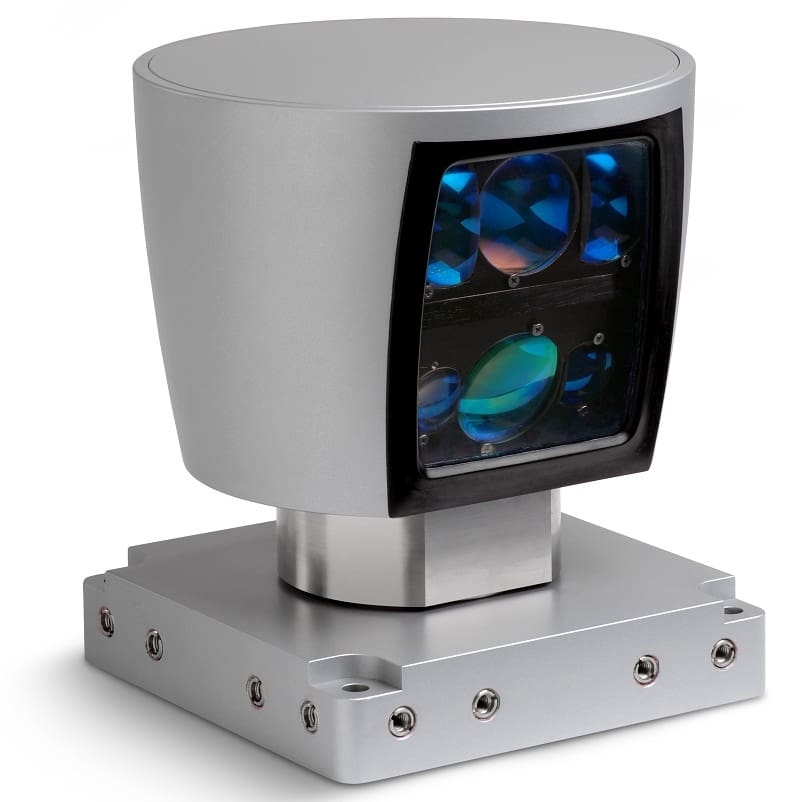
My project, an aluminum extrusion robot, is too complex to print as a single unit. Therefore, I divided the case into separate parts, connected together with fasteners printed on a 3D printer.
Look at the angles at which the profile elements are fixed. No fastener supplier will provide something like this, since the connection is non-standard. Moreover, the already customized plastic element is complicated by additional holes for bearings and some other elements. This is just a task for a 3D printer.
The purpose of the article is to show the possibilities of homemade connections, so for now we will not delve into complex topics. But still, it is worth noting the important features of 3D printing for us, which are important for creating complex structures.
Thus, the layer orientation and other parameters of plastic parts must be carefully selected, because if the calculated limit (bending load, etc. ) is exceeded, the part will simply break, breaking along the layer. For each axle, it is worth using at least two fasteners spaced apart by a certain width to distribute the workload. The use of only one will lead to increased stress and possible structural failure.
Little trick: change t-nut, insert and whatever
After the individual connection for the project is ready, we are faced with another problem - the need to purchase specialized fasteners. In the last article they were discussed in detail. Most often these are inserts and nuts for the T-slot. The shape of such elements is specially designed for embedding in the groove of an aluminum profile. It is not difficult to buy such fasteners, the problem is not in its inaccessibility or rarity, but in the fact that it is quite expensive.
An alternative is to use conventional nuts instead of T-nuts. Standard nuts are not compatible with all types of profiles, but only with Misumi 3 Series. Misumi also offers specialized nuts that cost about $9 for 100 pieces. At the same time, regular M3s cost about $0.88 for 100 pieces. We will use them, solving a couple of problems along the way.
The first problem is that a regular nut, although it fits the groove in the Misumi profile, does not provide the same tight and high-quality adhesion to the profile as a specialized nut. Secondly, specialized fasteners are usually held in place by a spring, but if you use a regular nut, we do not get any springs. It turns out that it is better to pay for specialized fasteners so that there are no problems later?
No, because we have 3D printers. And they are able to print something that will solve both of the above problems. Plus, it will be convenient to collect ready-made elements. The picture below shows a plastic element that eliminates the problems. Firstly, this part has a small protrusion that acts like a specialized spring, securing the connection.