Bloom 3d printing
Better surfaces with Light-off delay. Blooming phenomenon
Updated on September 2, 2021
This time we will take a look at one widely discussed issue of resin 3D printing called “blooming” and discuss how we could use light-off delay setting to avoid it. Although, this issue consistently happens with LCD/LED or so called mSLA 3D printers, it can also occur with genuine DLP 3D printers. This article should be interesting to both beginners and experienced 3D printing professionals as well. So, let’s dive in.
Recently, resin 3D printing community created the term “blooming”. It refers to the issue when after taking 3D printed object from the build plate, it has greasy surface that reminds of mucus or gel. You can usually wash away this gel, but even then you get uneven and rough surfaces. Probably one image is better than a thousand words.
After reading this article you will know why this issue happens and how you can use light-off delay and other techniques to avoid it.
Sources of the issue
Perhaps the most noticeable uniqueness of resin 3D printing is its materials. Liquid, photosensitive resins together with appropriate light sources are used to transform liquid material into solid. In the most popular bottom-up resin 3D printing method, a reservoir (also called VAT) is filled with liquid resin. 3D printer prints object upside down on a metal build plate. After each cured layer, build plate moves up, delaminates freshly cured layer from the bottom of resin tray and moves down again to cure subsequent layer. When all layers are completed, you have already 3D printed your object, which is now hanging upside down.
After 3D printer prints each individual layer, build plate has to go up and back down. During downward movement, previous layer and its cross-sectional area squeezes liquid 3D printing resin out of its way. When build plate gets down completely, only a small gap (depending on your layer thickness) filled with resin remains between the bottom surface of your resin VAT and previously cured layer. See image below.
The problem lays in squeezing motion of resin between previous layers and the bottom of the VAT. These liquid turbulences are the root cause of blooming effect.
However, that does not happen every time. That is because specific conditions must be in place to produce this undesired effect. “Blooming” is produced by premature start of new layer exposure. Simply saying, your 3D printer displays new layer on LCD screen or projector too early. So early that resin is still moving while being pushed out of the gap between the bottom of resin VAT and topmost surface of previous layer. If your resin moves when exposure of new layer starts, it will start to cure. Liquid resin will start to become gel, i.e. turn from liquid to solid, while still being squeezed. Thus, “blooming” is simply prematurely gelled material that your 3D printer pushed out of the gap between VAT bottom and previous layer. This often results in gel-like mucus on your object walls.
Next, we will run through all of the factors we were able to think of that have influence on “blooming” effect.
Factors that increase the odds of “blooming” effect
Material curing speed
Modern fast curing materials tend to have more severe issues of such premature curing. In short, if material is slower, it will not start to cure and transform into gel too quickly even while moving. This would somewhat prevent premature gelation of material. However, if you have high viscosity and relatively fast curing material, just imagine how this will end up! Even relatively slow materials became quite “fast” with the rise of monochrome LCD screens. With higher light output and shorter exposures such issues like “blooming” became more prevalent.
Cross-sectional area
High cross-sectional area of your layers means that 3D printer has more material to push out of the gap to prepare for the new layer. Simply saying, if you print non-hollowed models or models with very thick walls (more than 2. 5 mm), you have to be very careful and adjust your printing settings appropriately in order to avoid “blooming” effect. While properly hollowed models will rarely face this problem.
Material viscosity
Material viscosity plays an important role here. More viscous materials tend to be a lot more difficult to squeeze out of thin gaps due to natural viscoelastic properties. One can image liquid honey and, for example, olive oil. An attempt to squeeze both of them between two metal plates should clearly indicate, which requires more effort. Simply saying, it takes more time to push out higher viscosity materials out of the gap and prepare for the new layer.
Temperature
Influence of temperature might be negligible here. But what works in winter, may not work in summer. Temperature changes can significantly affect the viscosity and cure speed of the materials.
Down movement / retract speed
Retraction speed is also important. This speed determines how fast the build plate moves from the highest position of the cycle to the lowest, i. e. the bottom of the VAT. When the build plate moves down, it pushes resin out of its way. The faster you go, the higher liquid turbulences will be.
How to solve “blooming” effect?
Since problem is complex, there are two main ways to overcome this issue. Let’s discuss them one by one.
Apply
light-off delay settingThis is the most important setting to overcome “blooming” effect. Most 3D printers and slicers have this setting, you only have to find it. Some call it wait-time, some light-off delay. Essentially, this setting determines the delay of very next layer exposure when build plate is already at its lowest position. Right after build plate gets to the bottom, it stops, system waits for this pre-defined duration and then turns on light source and starts exposition of new layer. This delay brings more time to fully squeeze the resin out of the gap between previous layer and bottom of the VAT.
0.5 sec to 1 sec of light-off delay is generally enough to fully overcome blooming.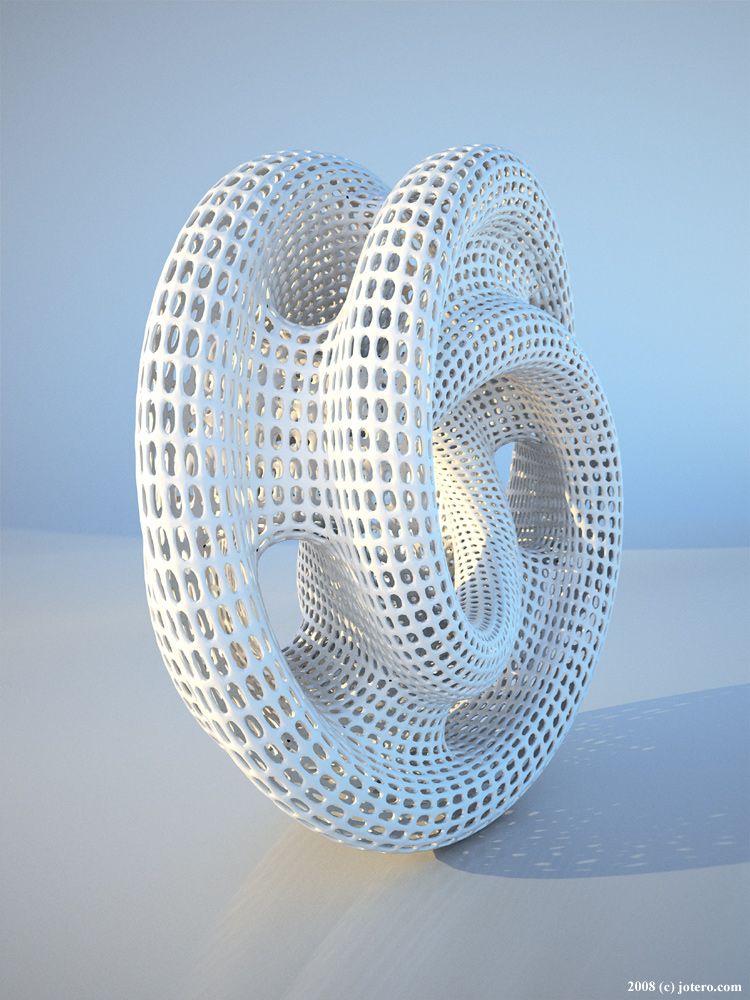
But you must be careful, as different resin 3D printers treat this setting differently. Some 3D printers actually require you to input just pure light-off delay time, like 1 second, but there is another side of the story here. When using other 3D printers, you will need to enter the duration of a complete layer preparation cycle. I know it sounds confusing and, to be honest, it is! Let me explain it in more detail.
Simply saying it is the time between exposure finish of one layer and exposure start of the next one. The problem here is that determination of this setting might be very tricky and this value can change dramatically if you change some other settings (like motor movement speed or lifting heights). There is no other way to measure it apart from empirical one. First, you have to set you desired motor speeds, lifting heights and then do a “dry run” with your 3D printer, i.e. 3D print without resin. Measure the complete duration of motor movement cycle with chronometer and add roughly 1 second. That is your new light-off delay. Enter it to the software and double check with another “dry run”. If you see that after motor has finished its movement there is approximately 1 second pause before light source is turned on to start cure of a new layer, you are good to go.
Reduce cross-sectional area as much as possible
This is quite worn out recommendation, but it applies to many resin 3D printing issues. We covered how it creates higher suction forces in our previous article about 3D printing supports. If you print non-hollowed models with large cross-sectional area of layers, you will have difficulties with “blooming” effect too. Large area will result in severe liquid turbulences and difficulties in pushing it out of the gap between VAT bottom and previous layer. Simply saying, it will require more time and, thus, increase your waiting and printing time. Therefore, if possible, reduce cross-sectional area of your prints as much as possible. You can do that by properly hollowing and orienting your models.
3D printing experiment
Let’s make a quick experiment that would help to understand how “blooming” effect is present with various light-off delay and retract speed settings. We did not mean to make this trial extremely scientific. Its purpose is to show this phenomenon in a simple manner and also how some specific 3D printing settings affect results.
For this experiment, we 3D printed a cube with dimensions of 30 mm x 30 mm. We did not hollow this cube on purpose to exaggerate the effect for visual purposes. We 3D printed with TGM-7 resin on Phrozen Sonic Mini 4K at 50 um layers and 2.5 sec exposures. After printing objects were cleaned with isopropyl alcohol and post cured for 30 minutes. Our 3D printing room has a controlled environment with an ambient temperature of 25 °C. Let’s review the results.
0 sec and 1 sec
light-off delay. 160 mm/min retract speed.It is clearly visible that absence of light-off delay produces significant surface “blooming” defects. On the other hand, 1 second light-off delay completely eliminated “blooming”.
Let’s take a look at how severe “blooming” effect is with various light-off delay settings.
0 sec and 0.25 sec
light-off delay. 160 mm/min retract speed.As previously mentioned surface damage is clearly visible with 0 sec light-off delay. But even with 0.25 sec light-off delay there is a significant improvement, although, some defects are still seen.
0.5 sec and 0.75 sec
light-off delay. 160 mm/min retract speed.At 0.5 sec light-off delay, scars on the surface are still barely present, however, at 0.75 sec – almost no “blooming” effect is present.
1 sec and 1.25 sec
light-off delay. 160 mm/min retract speed.Ignore the fact that there is just a half of the cube. Our bad… But results are clearly visible – with 1 sec and more of light-off delay, there is a negligible effect of “blooming”.
0 sec
light-off delay. 20 mm/min retract speed.By the way, we also ran a quick experiment to try if drastically reduced retract speed joined with 0 sec light-off delay can improve surface quality and reduce “blooming”. Result are below.
As you can probably see, very low retract speed doesn’t help. Surface damage is still visible.
Conclusion
Experiment clearly showed that even very short light-off delay times can significantly improve the quality 3D prints. Meanwhile durations above 1 sec seemed to be unnecessary, but can be considered in some cases with large cross-sectional areas. Last, but not least, reducing retract speed does not replace light-off delay and does not completely solve “blooming” effect. Therefore, you need at least short light-off delay to get decent surface quality.
Other articles from AmeraLabs
- Impressive test print for resin 3D printers together with the guide on how to understand its features
- Experiment: 3D Printing Supports that Work
- Why is it so important to shake the resin bottle?
- Why should you not use default 3D printing raft settings?
- How to design parts for SLA 3D Printing
- The Complete Resin 3D Printing Settings Guide for Beginners
Finally, don’t forget to visit our shop!
Bloom | Emerging Objects
Exterior view. Photo: Matthew Millman PhotographyBloom is a 9 foot tall freestanding tempietto with a footprint that measures approximately 12 feet by 12 feet and is composed of 840 customized 3D printed blocks. The experimental pavilion represents a new paradigm in building construction methods.
A pattern derived from traditional Thai flower patterns is mapped onto the surface of the structure that creates a figural pattern and stunning visual effect of light, shade and shadow on the exterior and interior. From the exterior the pattern is most striking from a distance or when viewed through the screen of a digital camera, which creates a surprise upon photographing the structure from up close.
Block production in the printFARM.Each block is printed using a farm of 11 powder 3D printers with a special cement composite formulation comprised chiefly of iron oxide-free portland cement. Iron oxide imparts a gray color to cement, and its removal makes this print much lighter. The blocks are assembled into 16 large, lightweight prefabricated panels, which could be assembled in just a few hours.
Also, 3D printed cement requires no formwork and produces no waste and the support material can be reused to produce more blocks. Coupled with portland cement is an ecologically derived UV resistant polymer that reduces the greenhouse gas emissions from production of resins by 50% over conventional petroleum based epoxies that uses plant-based materials that do not compete with food sources or displace food-based agriculture. Each 3D printed block is enumerated to designate the blocks position in the overall structure. Rather than a set of blueprints, a spreadsheet that demonstrated the position of a block, was used in constructing Bloom, and each block is assembled and held in place using stainless steel hardware.
Each block has a printed structural grid that defines the interior of the tempietto and requires no additional structural support, functioning as a load-bearing 3D printed enclosure. The curvilinear shape gives added stiffness to the thin, lightweight structure, informed by the thin masonry structures of Uruguayan architect and engineer, Eladio Dieste, particularly Iglesia Cristo Obrero, Jefferson’s serpentine brick walls at the University of Virginia, and Torqued Elipse, by Richard Serra, which inspires its form.
In plan Bloom is a curved cruciform shape that rises 9 feet to meet the same shape rotated 45 degrees, creating a torqued “x” shape with an entrance 45 degrees off of the structures axis. The undulated form and spaces recalls an elephants foot or, when coupled with the flower pattern on the surface, the traditional mud houses of the Tiebele people in Ghana — a reference to the earliest inspirations for 3D printing by emerging objects.
Looking up from interior. Photo: Matthew Millman PhotographyView of entrance. Photo: Matthew Millman PhotographyProject Date: 2015
Project Team: Ronald Rael, Virginia San Fratello, Kent Wilson, Alex Schofield, Sofia Anastassiou, Yina Dong, Dr. Stephan Adams, Alex Niemeyer, Ari Oppenhiemer, Reem Makkawi, Steven Huang.
Video Documentation/Editing: Sofia Anastassiou
Additional Project Information: Bloom was made possible by a partnership with the PrintFARM (Print Facility for Architecture, Research, and Materials) at the University of California Berkeley College of Environmental Design and the Siam Cement Group (SCG Thailand). Additional project support was made through generous sponsorship from 3D Systems and Entropy Resins.
Acknowledgments: Bloom would not be possible without the generous support from SCG and their team from Thailand including: Sanit Kessuwan, Managing Director of Innovation and Technology Office; Manasit Sarigaphuti, Research Director; Dr. Sakprayut Sinthupinyo, Cement and Cementitious Group Leader; Tipwimol Chintana, Researcher; Chatchawan Sethaburth, Chief Experience Maximizer, Sorathep Rattanayotsakun, Prinya Sainamthip, Clarence Tang Chong Shin. SCG Experience; Chua Kuptithanhi, Solution Maximizer; Issada Kawprasert, Professional knowledge Manager; Sunetra Chinkomolsuk, Brand Partnership Manager; Supitcha Sunyawoot, Brand Executive; Kornpong Nualsanit, Designer. Special thanks to the faculty and staff at the University of California Berkeley including: Jennifer Wolch, Dean, College of Environmental Design; Tom Buresh, Chair, Department of Architecture; Patricia Mead, Assistant Dean for Infrastructure and Information Technology; Semar Prom, Fabrication Shop Manager; Joyce Jennings, Management Services Officer; Eliahu Perszyk, CED Facilities Manager; David Spiegelman, Faculty Help Desk Manager; Mary Cocoma, Development & External Relations.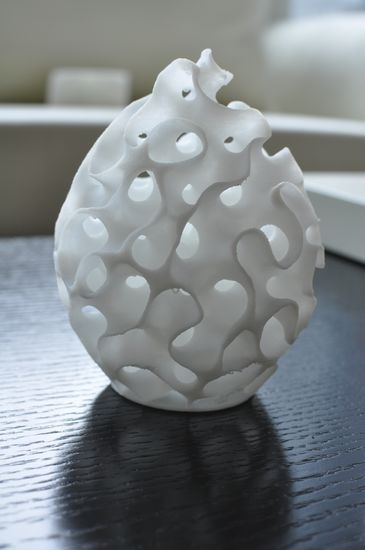 Department of Art Practice: Ehren Tool, Ceramics Meachanition, Greg Niemeyer, Associate Professor, Art Practice, Stephanie Syjuco, Assistant Professor, Art Practice; Kate Lewis, Industry Liaison and Contracts Manager; Eric Giegerich, Director Industry Alliances Office and all the volunteer student models. Thanks to the group at 3D Systems including: Hugh Evans, Cathy Lewis, Scott Summit, Annie Shaw and Andrew Jeffrey; and at Entropy Resins: Desi Banato and Tom T. Additional thanks to Paul Endres, Endres Studio, Denise Klarquist and Matthew Millman, Matthew Millman Photography.
Media: Architectural Record, Architect Magazine, 3D Printing Industry.com, Inhabitat, CBS San Francisco, UC Berkeley News Center, 3DPrint.com, Civil Engineering, Engineering News Wire.
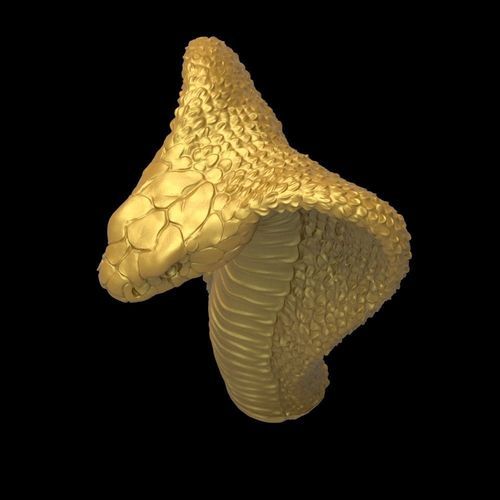
STL file non-perfect bloom・3D printer model to download・Cults
blood moon jhin helmet
18.82 €
wee jas skull
2,50 €
blood moon thresh mask
18. 82 €
82 €
Raven of the Titans
10 €
flying tarrasque
7 €
bust of lyanna mormont
7 €
Sculpt/Anatomy study
Free
balrog head v2
free
Best Files for 3D Printers in the Art Category
Gyroid coasters, G-Coasters
Free
Deactivated
Merry Christmas Moose
Free
Articulated Golem
1.44 €
Fire goblet
Free
Flexy Print In Place Snowman
2. 52 €
52 €
Robot Wall-E laser cutting cdr dxf file
free
Tiger III Wall Sculpture 2D
1,50 €
Art category bestsellers
Crystal Dragon Articulating Animal Flexi Wiggle Pet Printing In Place Fantasy
3.86 €
Cute sloth with flexi print
2,85 €
Articulated bat toy, imprinted body, snap head, cute flexi
3,28 €
Cute little fox with flexi print
2.41 €
Cute T-Rex dinosaur with flexi print
2,85 €
Biting dragon
3 €
Skeleton hand with flexi print
1. 92 €
92 €
Baby Crystalwing, Cinderwing3D, articulating Flexi Wiggle Pet, print on site, fantasy
3,86 €
Leopard gecko ball joint toy, imprinted body, snap head, cute flex
3,28 €
Flexi print Imperial dragon
3.81 €
Articulated axolotl
3.50 €
Pink Dragon, Valentine's Day, Articulating Animal Flexi Wiggle, Print on the Spot, Fantasy
3.92 €
Flexi Print-in-Place Dinosaur Brachiosaurus
2.85 €
FLEXIBLE STANDING STANDING YETI
2,85 €
Bearded Dragon Articulated Toy, imprinted body, snap head, cute flexi
3,28 €
Cute skeleton with flexi print
2. 85 €
85 €
Do you want to support Cults?
Do you like Cults and want to help us continue our journey on our own ? Please note that we are a small team of 3 people, so supporting us in maintaining activities and creating future developments is very easy. Here are 4 solutions available to everyone:
-
AD: Disable your AdBlock banner blocker and click on our banner ads.
-
AFFILIATION: Shop online with our affiliate links here Amazon.
-
DONATIONS: If you want, you can donate via PayPal here.
-
* INVITE FRIENDS: * Invite your friends, discover the platform and great 3D files shared by the community!
VAYNE Spirit Blossom STL File・3D Printing Idea for Download・Cults
evil eye
5 €
Neeko
5 €
lily
5 €
dark space suite
5 €
Serafina
5 €
Couple love
3 €
Calista
5 €
Jace
5 €
Best 3D printer files in Game category
Damas sol y luna
Free
MEDIEVAL BORDEAUX HELMET FOR LIFE-SIZE PLAYMOBIL FIGURINE
5,62 €
Deactivated
Card and dice holder - Rixe Marseille
Free
Goblin Dart Collision Mini
1. 28 €
28 €
Red Army Ekranoplan
4.83 €
Deactivated
Bestsellers in the Game category
Off-road vehicle
2 €
Savages Fotianna
9.65 €
Space Dwarf All - terrain vehicle
15.44 €
Altair Amberwatch
9.65 €
Articulated dragon
3.85 €
Catafrac Heavy Armored Warriors - Civil War Wargear Pack
2,50 €
Snake and rattlesnake
3.85 €
Vodfolk Explorer
9. 65 €
65 €
GIANT CROCODILE HINGED
4.28 €
Good flexi dragon
1.77 €
SKULL OF A BEARDED PUMPKIN
3.31 €
Iron Warrior Heads and Shoulders MK 3
€4.30 -fifteen% 3.66 €
Healer conversion kit SM
6 €
Chopper motorcycle print-in-place
1 €
Heavily armored warriors Catafrac - set of limbs
1,85 €
Dancing Skeleton
3.38 €
Do you want to support Cults?
Do you like Cults and want to help us continue our journey on our own ? Please note that we are a small team of 3 people , so support us at maintaining the activities of and creating future developments of is very simple.