Best software for monoprice 3d printer
Powerful, easy-to-use 3D printing software
Trusted by millions of users, Ultimaker Cura is the world’s most popular 3D printing software. Prepare prints with a few clicks, integrate with CAD software for an easier workflow, or dive into custom settings for in-depth control.
Slicing features
At the heart of Ultimaker Cura is its powerful, open-source slicing engine, built through years of expert in-house development and user contributions.
Intent profiles print specific applications at the click of a button
Recommended profiles tested for thousands of hours ensure reliable results
‘Custom mode’ gives over 400 settings for granular control
Regular updates constantly improve features and printing experience
Integrated workflow
If you own a 3D printer, software matters. Get the most from your printer with software designed to suit your workflow.
Seamless integration with all Ultimaker products
CAD plugin integration with SolidWorks, Siemens NX, Autodesk Inventor, and more
Compatible file types: STL, OBJ, X3D, 3MF, BMP, GIF, JPG, PNG
Easy to use
Manufacturing doesn’t need to be complicated. We design our software so anyone can use it – both experienced or rookie 3D printer users.
Prepare your 3D model for print in minutes with recommended settings
Simply choose speed and quality settings, and you can start printing
Ultimaker Cura is free and open source software
Ultimaker Marketplace
Being open and collaborating is in our DNA. Now we bring this to the professional 3D printing market with the Ultimaker Marketplace.
Download material profiles from leading brands for your application
Avoid manual setup when using third-party materials
Download useful plugins to customize the print preparation experience, star-rated by our community
An Ultimaker Cura experience that keeps your infrastructure rock-solid
Ultimaker Cura Enterprise delivers stability and security with features that are tailor-made for businesses.
Utimaker Cura Enterprise can be deployed, configured, and managed with cross-platform systems distribution
Ultimaker Cura Enterprise receives two updates a year.
 These are thoroughly tested by our community and ensure the most stable desktop application. We support updates for 12 months after release (including security patches and bug fixes)
Each release of Ultimaker Cura Enterprise is independently scanned, tested, and analyzed for vulnerabilities. We publish a summary of that report and we commit to continuously improving security
Backup & sync your materials & plugins
Save projects to the Digital Library
Access 3D printing e-learning courses
Join a community of 40,000+ active users
3D printers that simply work
Our award-winning 3D printers are robust, reliable, and easy to use. They deliver quality parts time and again. Designed and tested to run 24/7, they allow you to achieve the results you need more quickly and easily.
Learn about our 3D printers
Software ready for Industry 4.0
Trusted by millions of users across 14 languages, Ultimaker Cura slices your model and integrates with any workflow through Marketplace plugins.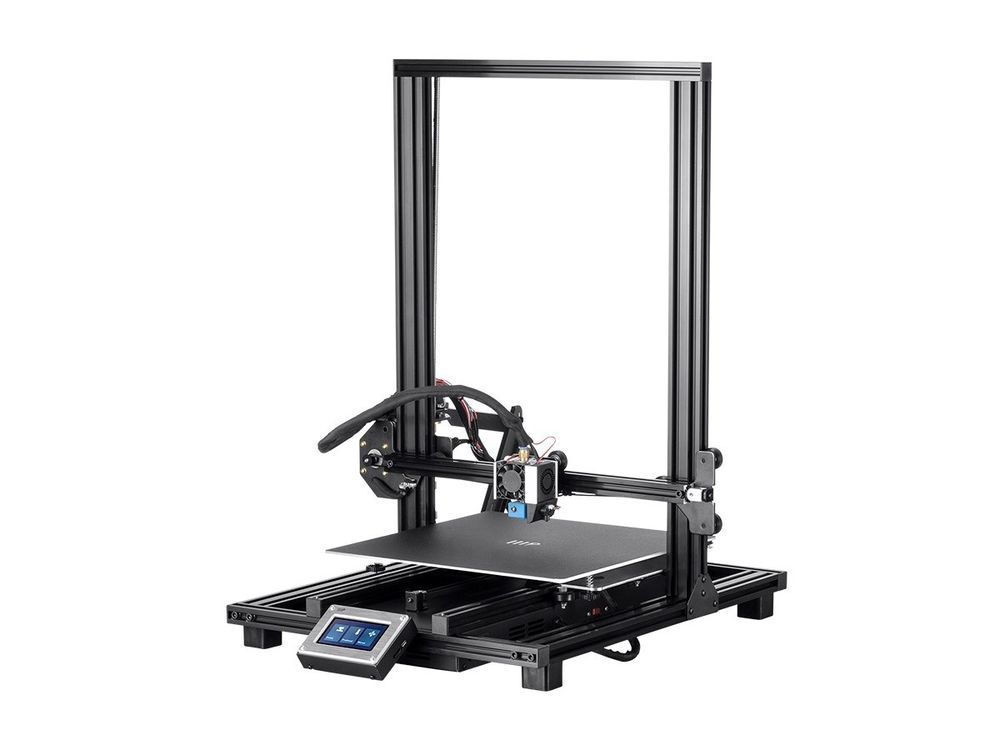 Then scale production and digital distribution with Ultimaker Digital Factory.
Material choice like never before
Ultimaker offers the widest material choice on the market. Through our Material Alliance, choose the perfect filament for your application – from advanced polymers to carbon fiber composites.
Learn about our materials
Support dedicated to your success
Wherever you are in the world, Ultimaker support is close by. Our global network of service partners offer professional installation, training, and maintenance in your language and time zone.
Learn about our support
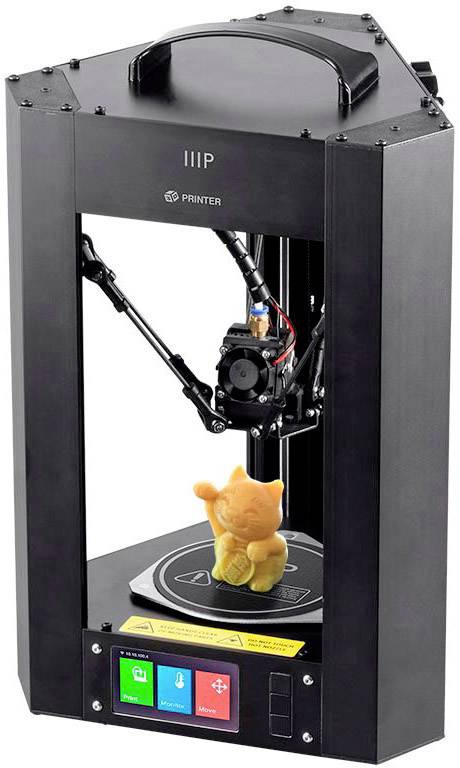
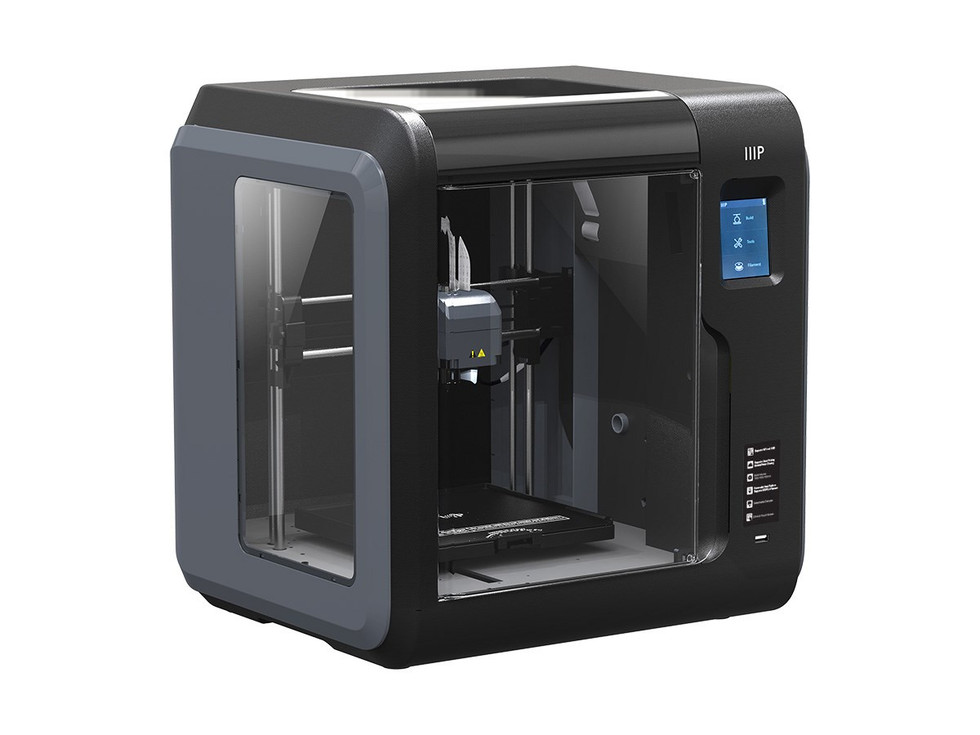
Getting the most out of Monoprice Cadet 3D Printer
I entered the world of 3D Printing recently with the small but surprisingly capable and affordable Monoprice Cadet 3D Printer. It has won recognition as the best budget 3D printer of 2020. In this post, I share tricks I learned over the past few weeks to make the most out of this printer.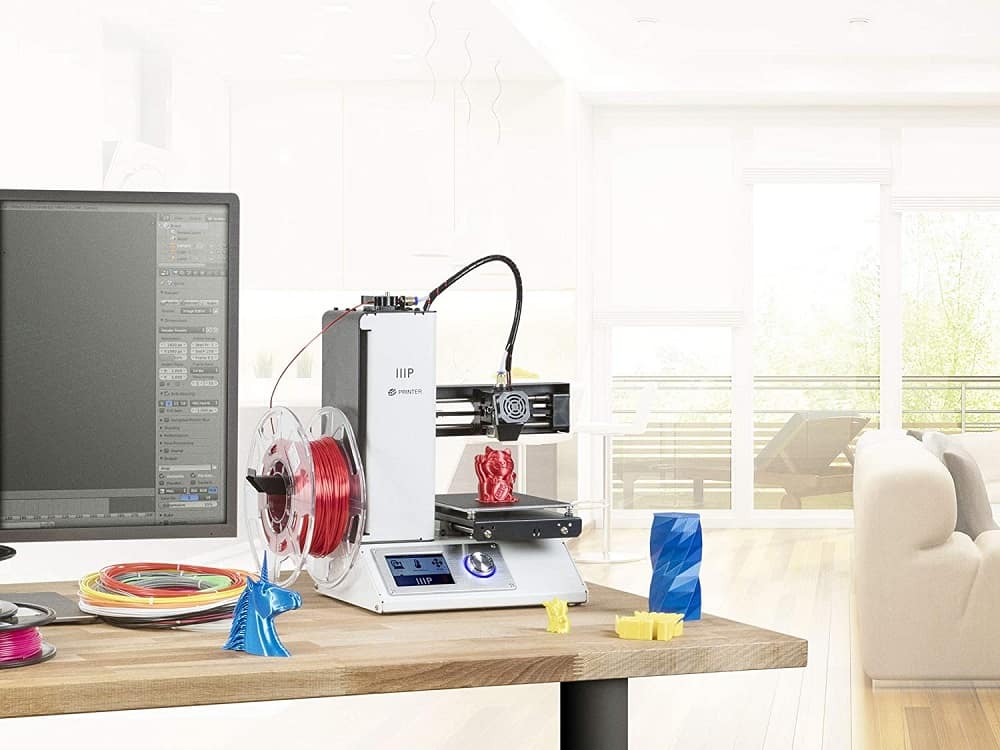
Though the printer is fairly small with a print bed of only 10 cubic centimeters, I was able to design and print quite a few useful things around the house using TinkerCAD
Organizing Remote Controls
Sheet Music Holder
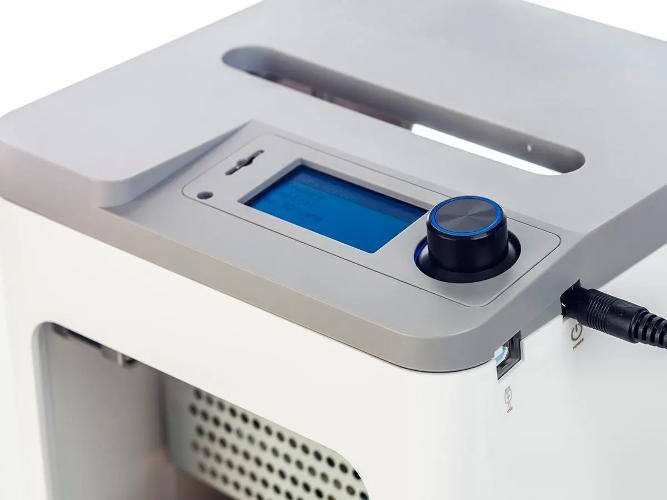
Monoprice Cadet has child-friendly features that make it a good choice for home use like auto-bed leveling, a removable magnetic bed to make it easy to remove printed parts and a finger guard to reduce the risk of curious little fingers touching the hot nozzle. It also has (slightly buggy) WiFi and USB connecitivty. While there are a number of un-boxing blogs and videos, in this post, I will focus on sharing a few less obvious tips.
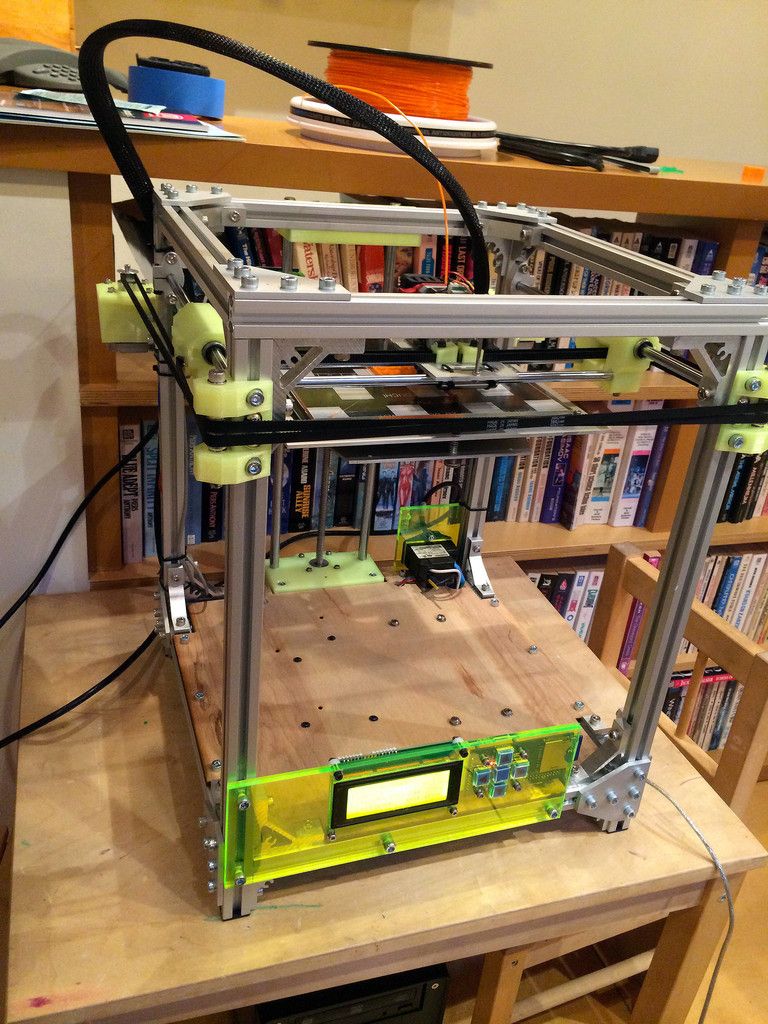
Buy a filament spool holder
The filament holder attached to the printer is woefully inadequete and small - probably to save package size & shipping cost. The amount of filament that comes out of the box with the printer is also barely adequete. Buy a filament spool holder like the one in the pic at the top to get a much better experience - it costs only 10-20 dollars (2020 prices).
Filament doesn’t feed into the tube
I got a scare the first time I tried to print as the filament simply did not feed into the printer & got stuck in the filament feeder. I found out that the tolerences in my printer’s feeder were such that the filament would get stuck inside the feeder’s components and not even enter the tube when I insert filament. A periodic clicking noise from the feeder is a sure sign the feeder is jammed in some way. Here’s how you can fix this issue.
- Press the black latch above the filament feeder to release it
- Remove the white filament tube while keeping the latch pressed
- Unscrew the stainless-steel feeder nut (you might need a spanner)
- Pressing the filament latch at the bottom, push filament through
- Re-insert the feeder nut threading filament through
- Re-screw the feeder nut to the feeder
- Re-insert the tube threading the filament into it
- Press the black latch & insert the tube back into the nut
WiFi connection issues
The recommended way to connect the printer to a WiFi network is to use the PoloPrint app from your smartphone. However, I had a number of issues getting this to work.
I eventually found out by researching the WiFi networks in the house and port scanning that if the Cadet printer is unable to connect to WiFi, it stands up an open WiFi network of its own with something like ESP32 or Espressif in its name . This refers to the famous ESP32 MCU that seems to be the brains of the printer. Here’s how I was able to set the WiFi credentials using this. Unfortunately, I didn’t take screenshots.
- Connect to the WiFi network put out by the printer
- Find out the printer’s IP address. On Linux you can do
arp. On windows, you probably need to run a port scanner like nmap to discover whats on your net - Connect to port 88 from your browser. Eg. if your printer is 192.168.0.1, then type
http://192.168.0.1:88in your browser - You will see a small web-app that will show you detected WiFi networks & allow you to connect to your preferred network setting credentials.
Upgrading to latest OEM Firmware & Software
WARNING: THIS MAY VOID YOUR WARRANTY AND MAY BRICK YOUR PRINTER. TRY THIS AT YOUR OWN RISK ONLY IF YOU UNDERSTAND WHAT YOU ARE DOING AND ARE WILLING TO RISK THE CONSEQUENCES. I DISCLAIM RESPONSIBILITY FOR ANY ISSUES AND I WILL NOT HELP DEBUG.
If you look at the generated GCode file produced by WiiBuilder software provided by Monoprice, you’ll find that the Monoprice Cadet printer seems to be essentially a re-branded version of a 3D printer called TINA 2 by a Chinese 3D printer manufacturer called WEEDO.
It turns out that the manufacturer has released newer versions of firmware, drivers and software on its website that are less buggy & have more functionality built-in than the versions offered by Monoprice.
Weedo also has a very comprehensive wiki with has detailed instructions including for maintainance and firmware update.
I followed the method 2 documented in the firmware update page to upgrade my printer’s firmware version to 2.. Everything went well and the new firmware seems to have much more stable WiFi support and additional support for OctoPrint. The logos changed from Monoprice to Weedo OEM branding.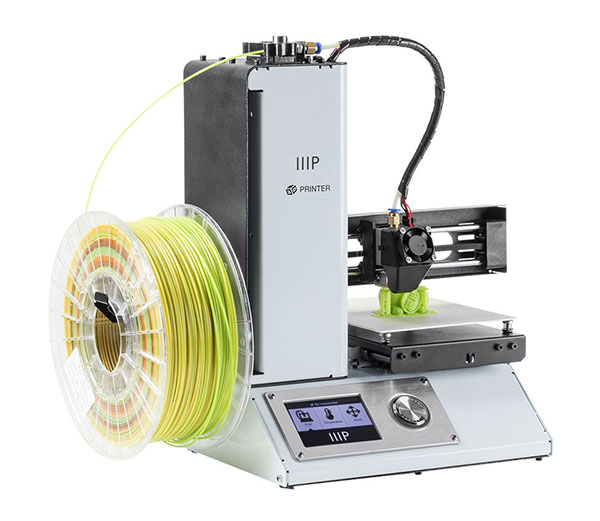 11
11
I also found that the latest version of WiiBuilder software (2.0.8.0) from the OEM far less buggy than the one provided by Monoprice when loading GCode files & uploading to the printer through WiFi. Since upgrading firmware & software, I have had no issues printing using a WiFi connection.
Using the latest version of Cura
WARNING: THIS IS UNSUPPORTED AND MAY DAMAGE YOUR PRINTER NOZZLE IF IT DOESN’T WORK PROPERLY. TRY THIS AT YOUR OWN RISK ONLY IF YOU UNDERSTAND WHAT YOU ARE DOING AND ARE WILLING TO RISK THE CONSEQUENCES. I DISCLAIM RESPONSIBILITY FOR ANY ISSUES AND I WILL NOT HELP DEBUG.
Cura is a much more powerful, flexile and widely used open source slicing software than WiiBuilder and supports multiple operating systems. It has a multitude of options to customize and fine tune your prints. For instance I routinely print with thicker walls and more in-fill than default as I find it better to spend a little extra time and material than have a toy I’ve printed for my daughter break.
Both Monoprice and WEEDO provide versions of Cura that supports Monoprice Cadet but the supported Cura version is quite old. Incidentally, if you look through the GCode file listing above, you’ll note that even WiiBuilder seems to use the Cura engine underneath to generate the GCode.
To use the latest version of Cura, you’ll have to setup the printer manually in the software. After looking through the generated GCode files from both the officially provided WiiBuilder and Cura software and understanding the generated the Marlin GCODE, I came up with the following configuration that seems to work with the latest version of Cura (4.7).
Here’s how you go about adding Cadet as a custom printer. Type in the settings from the screenshots below into the machine settings dialog screens in Cura making sure you fill in both the Printer and Extruder settings correctly. I have provided listings for the Start GCode and End GCode that I am using below.
Add Printer screen
Add a Custom Printer
Printer Settings
Extruder Settings
Start GCode listing
;(**** start.gcode for Cadet****) G28 Z G28 X Y; Home extruder G1 X55 Y55 F1000 G1 Z10 F200 G29 G1 Z15 F100 M107 ; Turn off fan G90 ; Absolute positioning M82 ; Extruder in absolute mode G92 E0 ; Reset extruder position G1 X90 Y6 Z0.27 F2000 G1 X20 Y6 Z0.27 E15 F1000 G92 E0 ; Reset extruder position M203 Z5
End Gcode listing
;(**** end.gcode for Cadet****) M104 S0 M107 G92 E0 ;(Reset after prime) G0 E-1 F300 G1 Z105 F300 G28 X0 Y0 G1 Y90 F1000 M203 Z30 M82 ;absolute extrusion mode M104 S0 ;End of Gcode
Happy 3D printing!
Srinath E-mail Curiosity driven innovator in data science & evidence based marketing.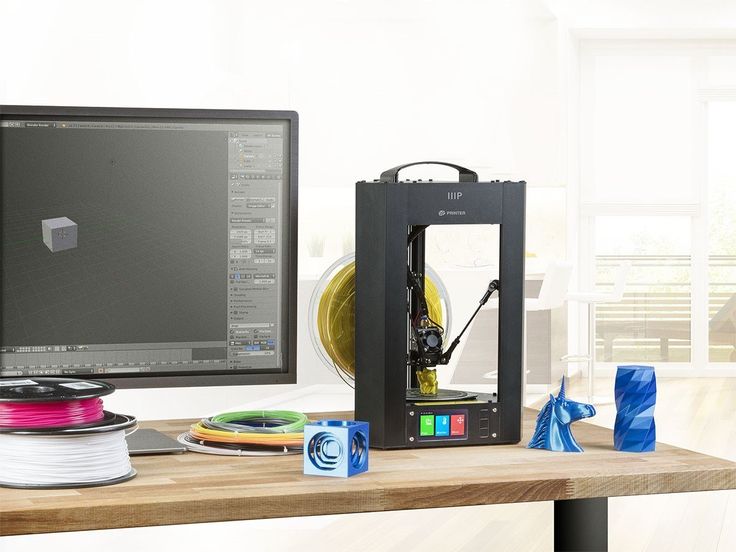 Programmer for over 25 years. Multi-instrumentalist.
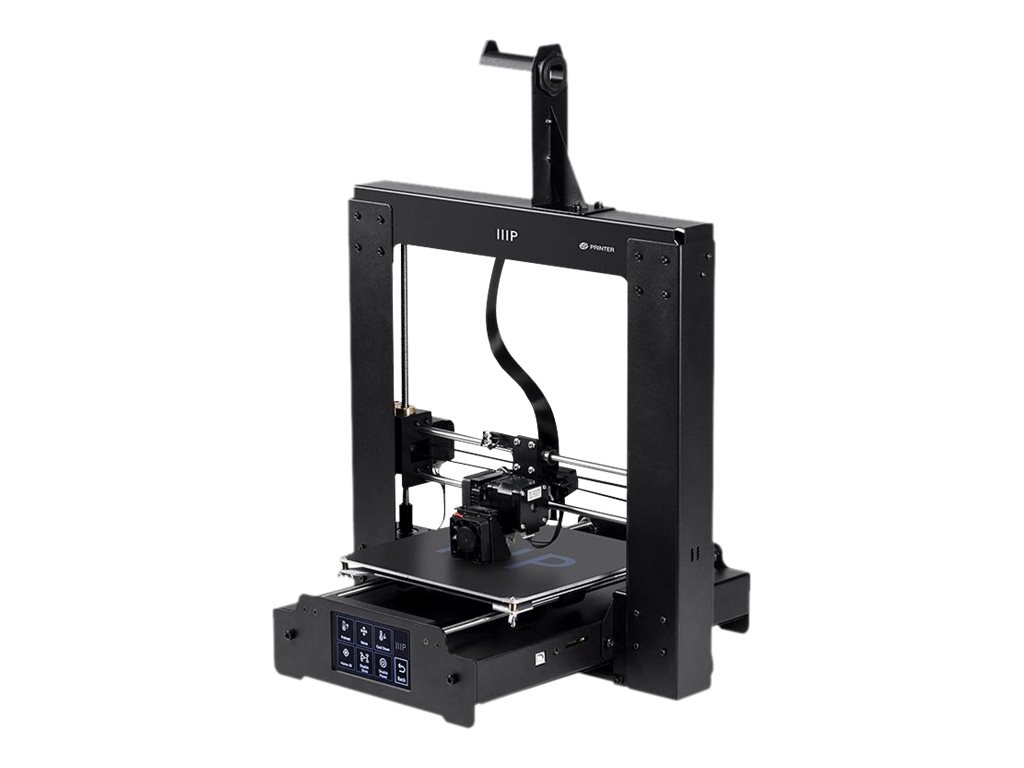
Overview of the budget 3D printer Monoprice Select Mini
3DPrintStory Reviews Overview of the budget 3D printer Monoprice Select Mini
Prices for desktop 3D printers continue to fall. There were times when a $600 3D printer was a delight and a desire to order it as soon as possible, but technology does not stand still, and developers and manufacturers are looking for new options to lower the price even lower. This review is dedicated to one of the budget 3D printers costing about $200 - Monoprice Select Mini.
It is worth noting that this inexpensive model breaks established traditions and did not start with Kickstarter, unlike others like M3D Micro, Tiko, OLO / ONO and Trinus, which attracted the attention of consumers and investors thanks to crowdfunding platforms (by the way, this is really an effective development strategy for small startups, but there is often a mismatch between expectations and the final product).
Monoprice is different. This is an American company that did not particularly bother with the development and production of its own 3D printer, but simply imported the Malyan M200 from China, hung its logo on it and put an attractive price of $199. What if you got a defective 3D printer? No problem, send it back and they will replace it for you.
A reasonable question arises: can such a cheap 3D printer compete with Ultimakers or Printrbots? And is it even worth comparing? We will try to answer these and other questions in the review below.
Features Monoprice Select Mini
- Available;
- Robust design;
- Easy to use;
- Predictable 3D printing at low speed;
- Works with any slicing software and standard 3D printing materials;
- Amenable to improvements and upgrades;
- I think we already mentioned the price?
Disadvantages Monoprice Select Mini
- Difficult to calibrate;
- Prints poorly at high speeds;
- Print table not protected;
- Faulty power supply;
- WiFi module not active;
- Unstable nozzle temperature;
- Strange quirks.
 ..
..
Short Verdict
The Monoprice Select Mini is a great 3D printer for the price. There is a heated table, easy to operate if you do not use high speeds, stable 3D printing quality.
Naturally, there are disadvantages. During operation, the temperature of the nozzle may change, and at high speeds, 3D printing errors occur. The calibration process takes a lot of time and the first time you have to tinker. Well, the most interesting thing is that the power supply burned out after 12 hours. But the latter, incorrect, can be attributed to an accidental marriage.
Despite all the shortcomings, the Monoprice Select Mini is a wonderful little 3D printer with many great features. In general, it performs in accordance with the information in the technical specifications, and the quality of the 3D printing even exceeded our expectations.
If you are not afraid to take it apart / put it back together, then you can do a few upgrades. The first thing to do is to replace the hotend and update the firmware to activate the WiFi module ( be careful! These upgrades have not been tested as part of this review and may damage your 3D printer! ). You can install the glass on the print table. Even with these upgrades, the price will still remain acceptable.
Would you recommend the Monoprice Select Mini as your first 3D printer? Yes, definitely.
Specifications and features Monoprice Select Mini
Monoprice Select Mini workspace 120 x 120 x 120 mm. The maximum resolution of 3D printing is 100 microns. Heated table. The 3D printing speed is 55 mm/s.
You can upload your 3D model via micro SD card or USB. The manual states that compatible slicing programs are Cura, Repetier-Host, ReplicatorG, and Simplify3D. This means that the Monoprice Select Mini recognizes the standard G-code, and this 3D printer is not tied to any particular software. Cura was used during testing for this review.
Monoprice Select Mini doesn't limit your media usage. You can print with any standard 1.75 filament using PLA or ABS thermoplastics. In our case, PLA plastic from ColorFabb was used.
These two points - the freedom to choose software and filament - are very important in this price range, because manufacturers such as M3D Micro and XYZprinting, which are Monoprice's main competitors in this niche, tend to use proprietary software and their own materials for 3D printing .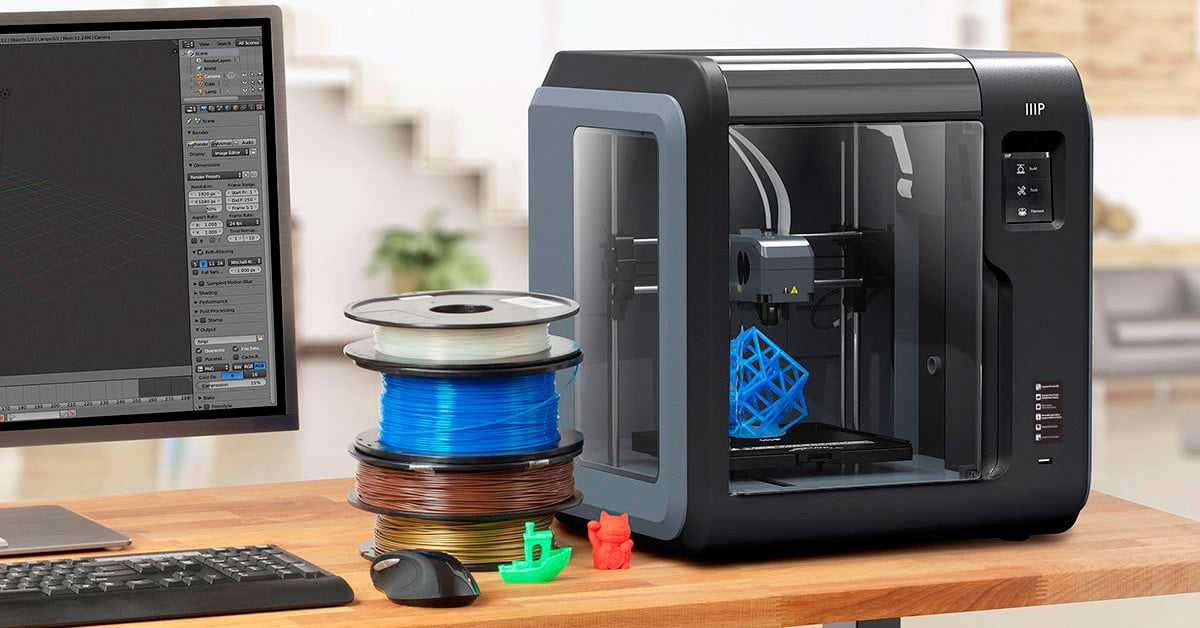
Unpacking and installation of the Monoprice Select Mini
Installation of the Monoprice Select Mini is quite simple. You can start typing within 20 minutes.
Inside the box you will find a 3D printer, a power supply, an imbus wrench for calibrating the table, a plastic spatula to scrape off the rest of the material from the table after printing, a 256 MB micro SD card and a micro USB cable.
One piece of paper contains a basic instruction and a link to a website where you can download the full version.
You will also find a rectangular steel sheet, the purpose of which is not clear at first. It turns out that this is a coil holder that is attached to the side of the main unit.
It is important to note that the Monoprice Select Mini kit does not include media test samples. So stock up on filament with a diameter of 1.75 mm.
You can use the wheel to adjust. The menu is well structured and easy to understand. You can start the calibration process, preheat the extruder and feed the filament.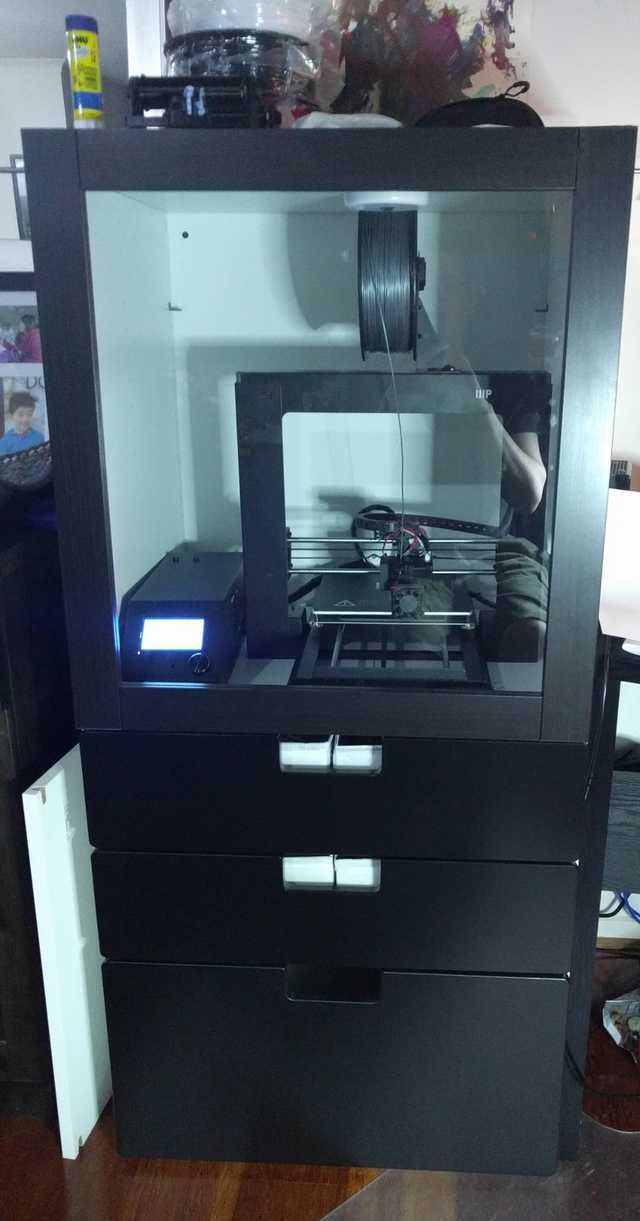
Calibration can be somewhat difficult. In theory, it should be carried out even before shipment, in production, and you should have a piece of paper between the nozzle and the printing table. If it doesn’t work, then hex keys will come in handy here. It will be necessary to try and tighten the screws at the corners of the table so that the sheet still passes.
At this stage, the first important shortcoming of this model becomes clear. The printing table is made of aluminum and does not have a special protective film or coating on it. So stock up on blue 3D printing tape or install glass right away. Otherwise, the table will wear out very quickly and you will have to change it.
Well, one more bug that got out in our particular case. The power supply burned out after 12 hours of use. Foaming it was not difficult, but it was very unpleasant. You can probably throw it off for marriage, but in any case, be prepared for a similar turn of events.
Design and build quality of the Monoprice Select Mini
Very pleased with the build quality of the Monoprice Select Mini. The construction is strong, reliable, with a steel sheet metal case that hides all the electronics. So don't worry about shipping damage.
This 3D printer uses deposition modeling technology. The classical Cartesian coordinate system is used. The design is similar to Printrbot Simple. One cooler is used to cool the nozzle. It is likely that problems may arise during 3D printing with unusual materials.
The extruder has a diameter of 0.4 mm and can be heated up to 230°C. We have not been able to test how easy it is to change, but in the long run this is an important factor as the nozzle will still need to be changed over time.
Monoprice Select Mini Print Quality
Pre-loaded models will already be on the micro SD card. They are supposed to be optimized for 3D printing on the Monoprice Select Mini. So before uploading our own models, we printed test ones.
The cat was printed first. The resolution was 200 microns. Everything went well until the last layers.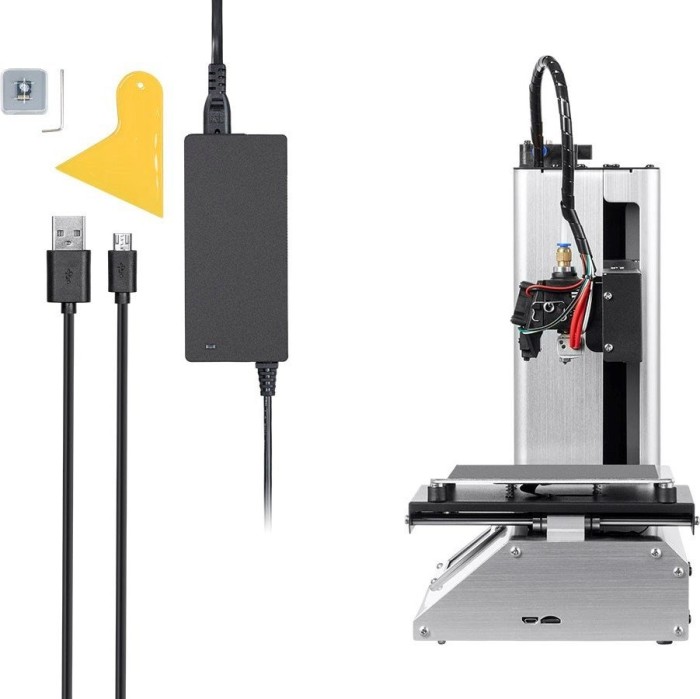 The upper part of the paw and ears could not be printed even once. There were 3 attempts in total.
G-code analysis in Simlify3D showed that the table accelerated up to 55 mm/s during the printing of the last layers. That is why the error was repeated. Quite a strange decision of the company - to provide a test model, which a priori will be printed with errors...
The second model that we printed is a test elephant. The resolution was also 200 microns and 10% infill. There were no problems! The result is excellent and you can see it in the photo below.
Next we moved on to our own models. We used Cura for slicing. This article reveals the excellent Cura settings for 3D printing on the Monoprice Select Mini and we used them.
We printed a classic 3DBenchy and Graphica model: a MEGA Ghost with 200 micron resolution and 10% infill, a V29 whistle with 200 micron resolution and 100% infill, and another 3DBenchy model with 100 micron resolution and 10% infill.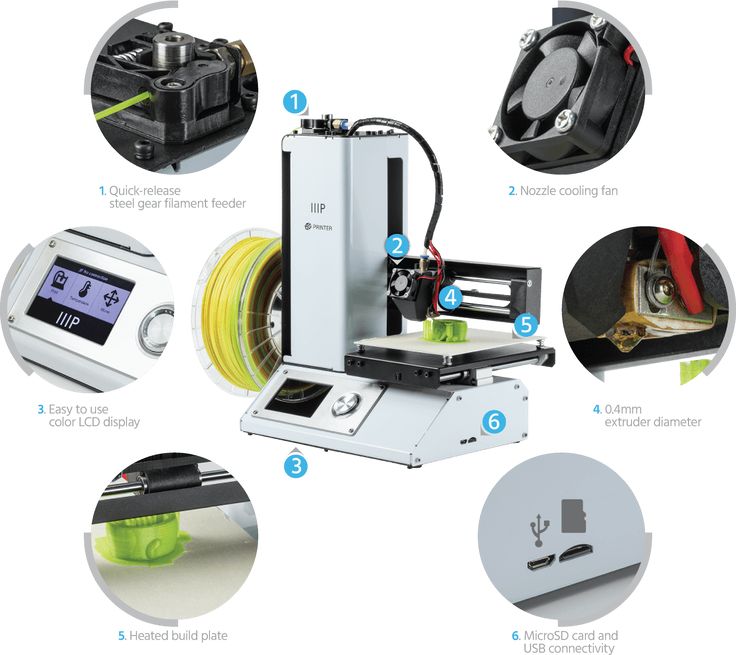
The simple 200 micron models worked well. There are no special problems with small protrusions and holes, although there are sagging. The layers are laid evenly along the X and Y axes.
The V29 whistle sounds as loud as intended, which means the partitions were printed correctly. The Graphica Mega Ghost with its long tongue also printed correctly. The hinge glided smoothly. The
3DBenchy at 100 microns worked well too. When you look at the photo, don't forget that this is a $19 3D printer.9.
We have noticed that most errors in 3D printing occur when the spool of filament clings or there is not enough adhesive coating on the printing table. This cannot be attributed to the shortcomings of the Monoprice Select Mini itself, since this is a global problem for all FFF printers.
During operation, the print table may block access to the control wheel. This point is implemented in the design is not very ergonomic.
Another disadvantage is that the nozzle temperature has an error in the region of 5°C. For example, when the 3D printing temperature is set to 215°C, it jumps between 213°C and 217°C on the control panel.
This does not particularly affect printing with PLA plastics, but may have a negative effect during 3D printing with materials that are more sensitive to temperature changes.
Finally, we printed a Low Poly Moai bust. We scaled the model by 50% and printed with 100 micron settings and 30% infill. It turned out well on the whole, the only small marriage is the influx of material on the chin. By the way, we observed the same effect when printing 3DBenchy with resolution settings of 100 microns.
Life hacks and upgrades Monoprice Select Mini
A few words about upgrading the Monoprice Select Mini 3D printer. There are no official upgrades! But here are a few options that you can try to implement on your own.
In our opinion, it is necessary to deal with the temperature of the extruder, make it more stable. For example, you can implement a PID temperature controller.
You can activate the WiFi connection by downloading the original Malyan M200 firmware. But be careful! This option has not been tested and there is a possibility that you may damage your 3D printer!
Monoprice Select Mini Summary
After testing the Monoprice Select Mini, this is one of the best 3D printers you can buy for $200.
But it's important to realize that the print quality can't be compared to the Original Prusa i3 MK2 or LulzBot Mini. Not to mention the more expensive models.
If you're looking for a small business 3D printer or just high-quality 3D without bugs, then the Monoprice Select Mini is not for you. In addition to the print quality, you will obviously not be satisfied with periodic bugs and a small workspace.
But if you are just starting to explore the world of 3D printing, then this is a great choice and a good alternative to the Chinese Anet A8 3D printer.
The Monoprice Select Mini has some drawbacks, but it's still a great option for learning and just having fun. It's easy to use and print quality rivals more expensive models.
Monoprice 3D Printers
For
For
Professional
Industrial
Personal
Commercial
3D printer type
3D printer type
Tabletop
Food
Professional
For home
Chocolate
Jewelry
Russian
Reprap
Dental
Full color
Industrial
Not expensive
Medical
For training
Material type
Material type
Plastic
600
Metal
50
Photopolymer
244
Other
142
Manufacturer
Manufacturer
3D Systems
84
PICASO 3D
8
Stratasys Ltd
38
Leapfrog BV
6
EnvisionTEC
51
Myriwell
4
3D-Experts
3
PrintBox3D
4
FELIXrobotics
11
Solidoodle
8
WANHAO
32
ROKIT
5
SeeMeCNC
4
mUVe 3D LLC
1
RepRapPro
5
Formlabs
9
Afinia
1
Airwolf 3D
6
Type A Machines
2
iRapid
1
RoBo 3D Printer
3
Mixshop Inc
4
IonCoreLtd
1
Old World Laboratories
1
XYZprinting
13
Panowin Technologies Co. , Ltd.
2
MiiCraft
7
Portabee 3D Printer
2
Zeepro
1
Pirate 3D
1
Qualup SAS
2
BEETHEFIRST
3
Heacent
2
Robot Factory
2
Kuhling&Kuhling
1
3Dfactories
3
Tangible Engineering USA Corporation
1
DWS Lab
1
Sedgwick
2
3DJoy
4
Futura Elettronica
1
Makible Ltd
2
ALT Design
1
Active 3D
2
Trinitylabs
1
Sumpod Ltd.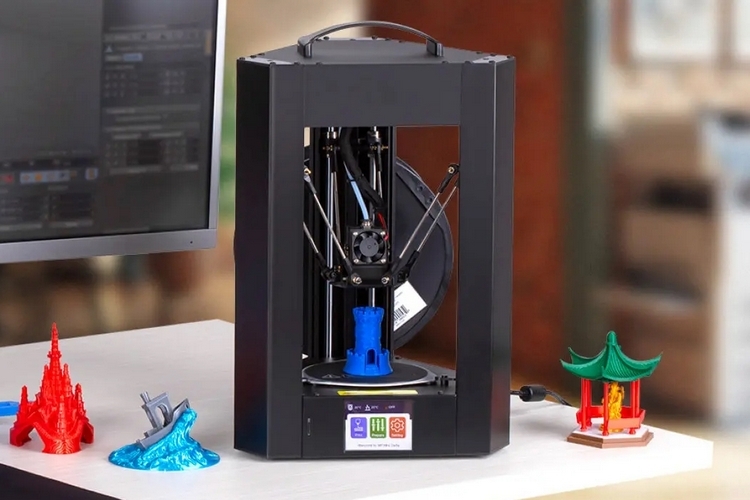
4
Brahma3
1
Hyrel 3D
5
Omni3D
4
BCN3D Technologies
7
Boots Industries
2
ORD Solutions
2
Ironvault
1
2PrintBeta
3
Unique Design
3
Hot Proceed
1
3DD Plas
2
York3dPrinters
1
Code-P
4
Deezmaker
3
Ruian Maitian Network Technology Co
2
CB-Printer
1
Print Technologies Pty Ltd.
5
MaukCC
1
Choc Edge Ltd
2
Shenzhen WeisTek Co.,Ltd
5
Delta Tower
2
Tegelbeckers Ltd
1
Deltaprinter
1
MindKits
1
Robot Co, Ltd
1
Romscraj
2
Fabmaker
1
Peerbhai Robotic
1
Sintermask GmbH
1
KL Services Group Inc
1
Fochif Mechatronics Technology Co.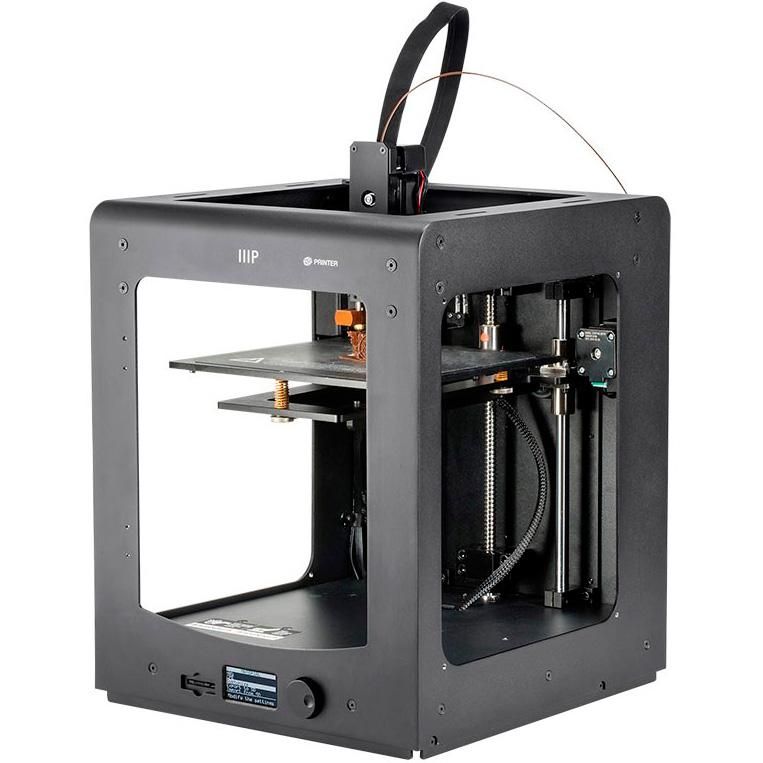 , Ltd
, Ltd
4
Teil3
1
Maker's Tool Works, LLC.
2
Gaminu
1
re:3D
1
inDimension3
4
Acuity Design
1
Essential Dynamics
1
Isis3D
1
Velleman
1
Kentstrapper
4
Blue Eagle Labs
1
Gubbels Engineering
2
Zortrax
8
3dBotic
1
MakerGear, LLC
1
Jelwek
1
it is 3D
2
Cablysa Systems, S.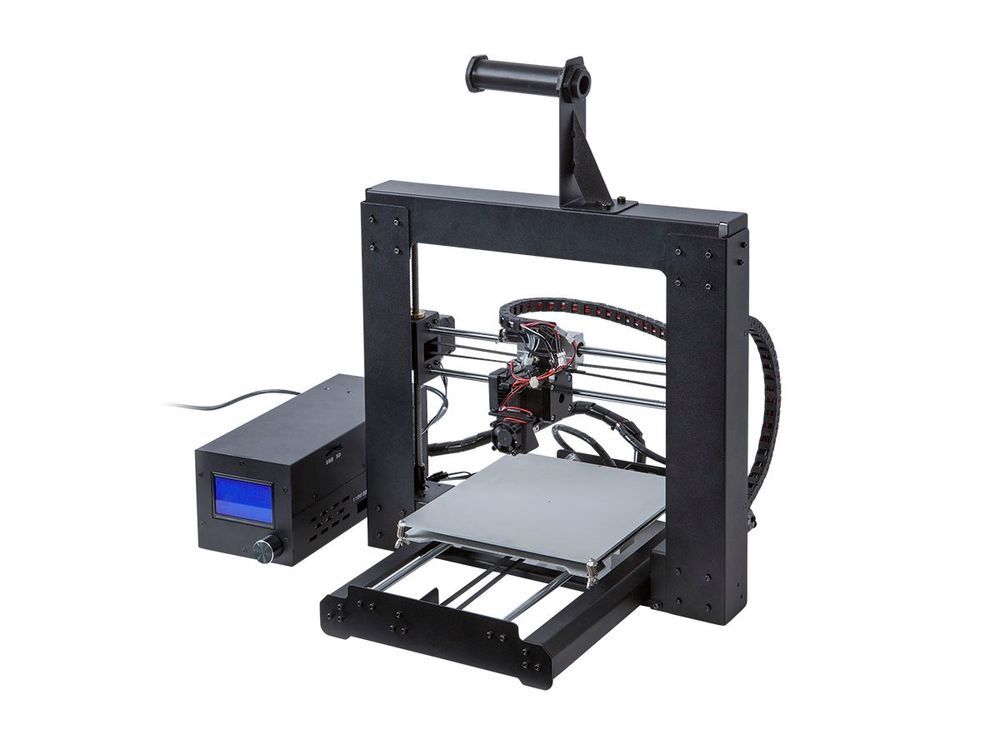 L.
L.
3
Ac123Dc
1
E3D Online
1
Hydraraptor
1
MakerBot Industries, LLC
8
Delta Micro Factory Corporation
3
Ultimaker B.V.
11
Solidscape Inc.
8
MBot3D
4
B9 Creations
4
Jinhua Flashforge Technology Co., Ltd
26
Tinkerine Studio Ltd
3
Aleph Objects Inc.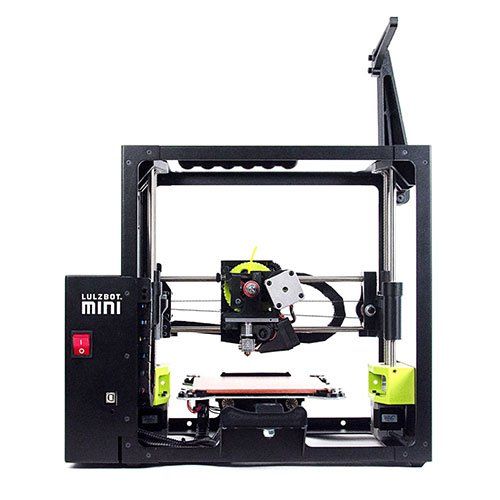
4
DeltaMaker
1
Reprap Austria
3
IC3D LLC.
1
Ultibots, LLC.
2
Intelligent Machine Inc.
1
Metamaquina
1
Shenzhen Mootooh Engineering Co., Ltd.
1
Multitec GmbH
3
German RepRap GmbH
3
Sharebot
17
Nova 3D
1
QU-BD Inc.
4
RDMCU
1
Full Spectrum Laser LLC
1
PieceMaker Technologies
1
Printbot, Inc
7
Terawatt Industries
1
botObjects
1
Lunavast
2
MakerFarm
3
NWRepRap
1
eMotion Tech
1
Printed Worlds
1
Reprapsource
1
Twelvepro Co
1
Replicator Warehouse
1
Stellamove Inc.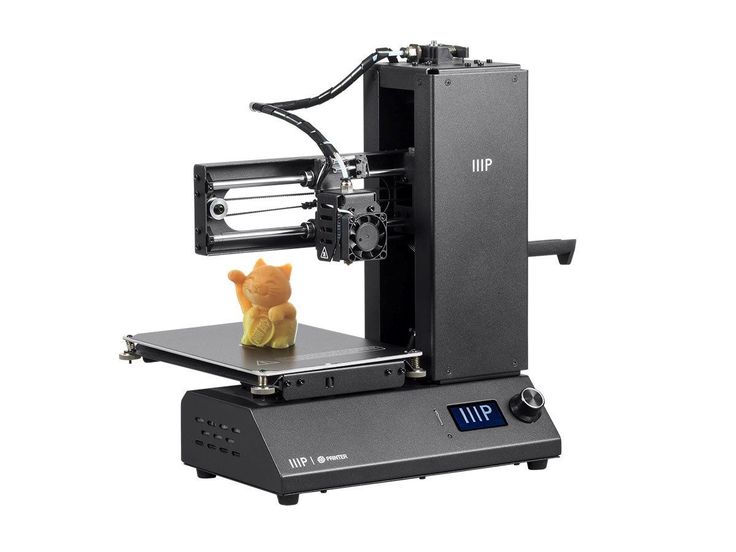
1
Make Mendel
6
Rapide 3D
2
Makealo
1
Crew Ltd.
1
Open cube
1
3D Kits
1
Coombes Solutions Ltd.
1
SHARK Limited Partnership
1
Smartfriendz
1
3DMonstr
1
Kikai Labs
2
THY3D
1
Tantillus
1
RepRap Diffusion
1
QSQM International Co.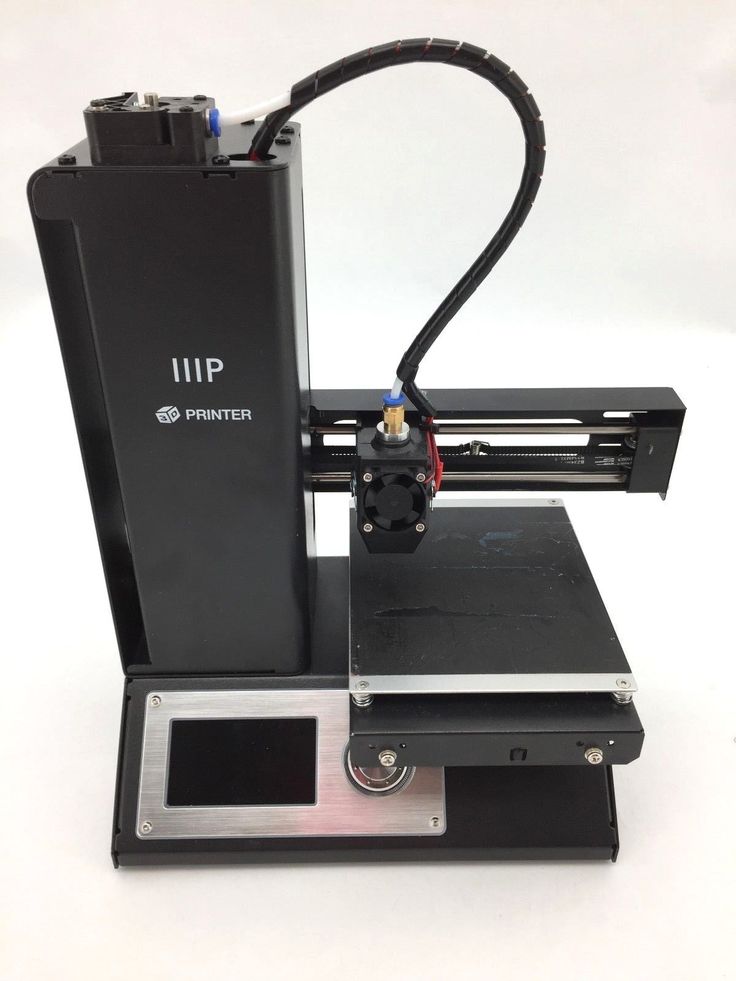
1
Tumaker
1
Makism 3D Corp.
3
3dBotZ
1
ZMorph 3d
1
Eckertech Inc.
1
Imec Proto
6
miniFactory Oy Ltd
1
printMATE 3D
1
CMET Inc.
5
Arcam AB
6
3Geometry Manufacturing Systems Pvt Ltd
8
Electro Optical Systems
15
Trump Precision Machinery Co. , Ltd
, Ltd
4
Wuhan Binhu Mechanical & Electrical Co., Ltd.
11
Optomec Inc.
1
Shaanxi Hengtong Intelligent Machine Co., Ltd.
9
Matsuura Machinery Corporation
1
ExOne Company, LLC
6
Concept Laser GmbH
9
Instrument Tech Co,Ltd
7
UnionTech
8
Renishaw plc
2
D-MEC Ltd.
3
Realizer GmbH
5
SLM Solutions GmbH
5
Fabriconic LLC
3
Mark Forged
8
Keyence Corporation
2
SYS+ENG
1
Lithoz GmbH
1
DWS s.r.l.
12
Beijing TierTime Technology Co. Ltd
17
Carima
3
Mcor Technologies Ltd.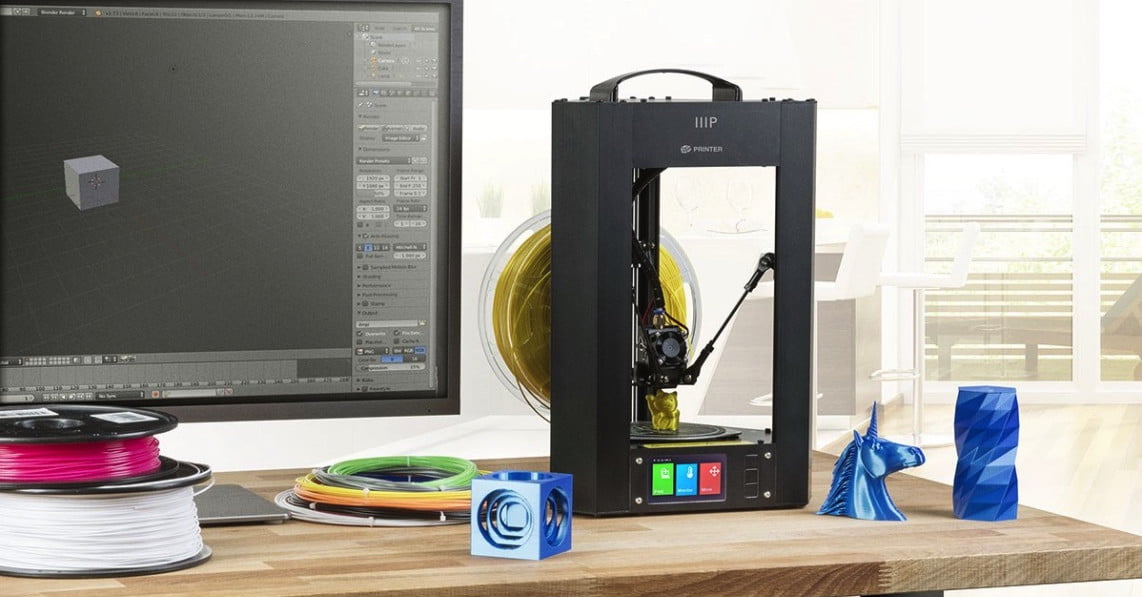
3
Asiga
11
Rapid Shape GmbH
14
solido ltd.
1
Blueprinter ApS
1
Kevvox Pte Ltd.
2
JER Education Technology Co., Ltd
1
Azuma Engineering Machinery Inc.
2
Space Monkey
1
Trimaker
1
Most Fun
1
Iniciativas 3D
1
IdeaLab 3d
1
MendBot Labs
Bonsai Lab
2
MakerDreams
1
i3Dbot Co.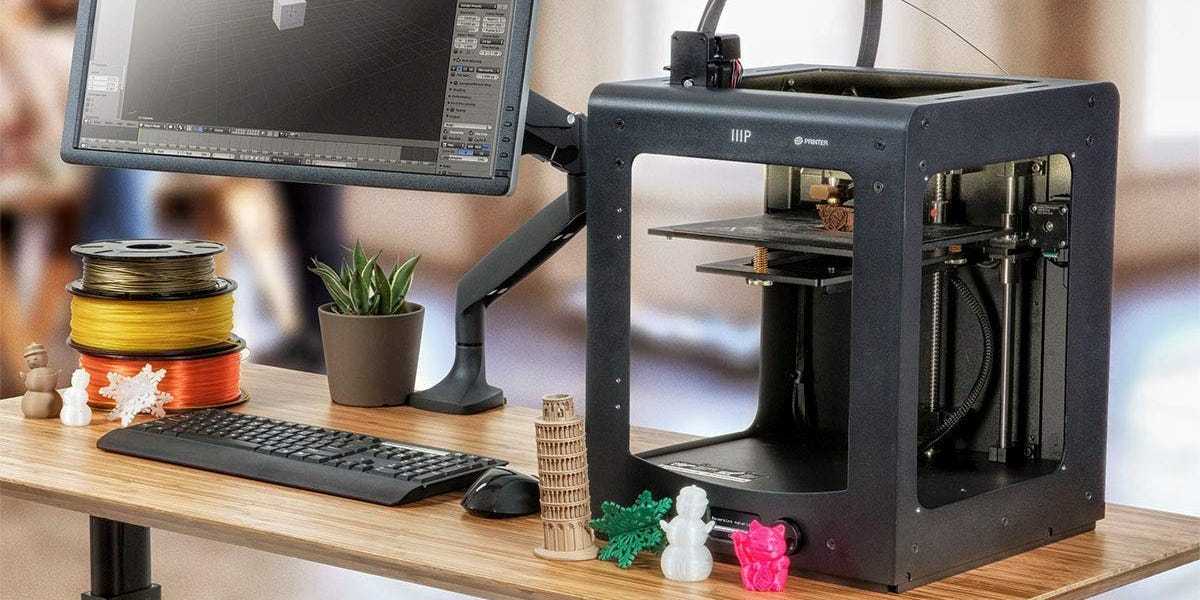 , Ltd
, Ltd
2
Natural Machines
1
Cyrus3D
ITALYmaker
Something3D
Cagelli Distribution
E Crew Vis
BigRep GmbH
2
Voxeljet Technology GmbH
5
Sciaky Inc.
Mankati
4
F&B rapid production
3
3D Quality
17
Workshop Churyumov
2
Unimix
2
Center for Additive Technologies
3
ENNOVA
1
Exclusive Solutions
2
Magnum
5
SHEKLA
1
D-Force
3
BigRep
4
Roland
1
Alphabet 3D
2
MAKEX
1
3D Master Kit
7
Shining 3D
25
3NOVATICA
3
AVS Robotics
1
IMPRINTA
11
Createbot
5
AIO Robotics
1
RK-3D
1
SPETSAVIA
3
3DiY
14
Wonwall
1
Apium Additive Technologies
3
3DSUN
1
Cheap3D
1
3rd
1
EGL3D
1
Creality 3D
42
UNIMATECH
2
VolgoBot
3
ZVER 3D
3
Zenith
2
MicroFactory
1
Hewlett Packard
2
Shenzhen Anet Technology Co Ltd
15
MASS PORTAL SIA
11
Cyberon
2
PHOTOCENTRIC
2
TotalZ
11
3dcon
2
Raise3D
6
OOO RUSSIAN ENGINEER
1
Vortex-3D
5
Flying bear
11
Print3D
5
ROBOINO
1
SoloPrint
1
Fun Distribution
1
Alekmaker
2
Cronos
2
TEVO 3D
9
3D printers from China
2
ZAV 3D printer
4
Epo3d
1
FLSUN 3D
3
WINBO
19
PROTOTYPE
1
UNIZ TECHNOLOGY
2
W2P Engineering GmbH
4
MAESTRO
1
3D printer Pi
1
Shenzhen Tronxy Technology Co
23
Kelandi
1
Geeetech
20
3DCeram
2
Omaker
1
Builder 3D Printers
6
Creatable Labs
1
ROBOZE
3
Desktop Metal
1
Sintratec
2
CreatBot
7
ANYCUBIC
29
3dlaboratorio
2
OOO SPC "Lasers and Equipment"
2
Prusa Research
6
Prismlab
3
ivilol
2
Geralkom-3D
7
EqMex
1
Tsar3D
2
Zhuhai CTC Electronic Co. , Ltd
, Ltd
3
Shenzhen Aurora Technology Co., Ltd
6
Monoprice
1
Shenzhen Salon Technologies Co., Ltd.
1
Shenzhen Sundystar Technology Co., Ltd
2
Shenzhen Easythreed Technology Co., Ltd
1
WOW Innovation Technology Co., Ltd.
2
Jinhua Xingzhe 3D Technology Co., Ltd
1
Shenzhen Zhongxin Microscience Software Co., Ltd.
1
Shenzhen Yaying Trading Co.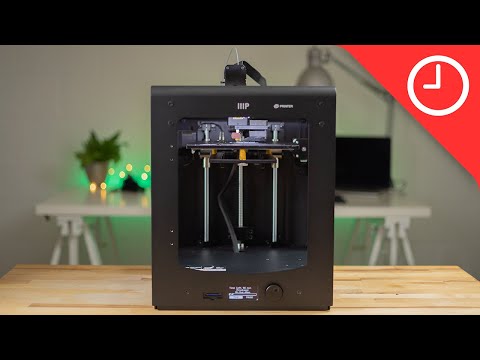 , Ltd
, Ltd
5
Z Bolt Co.
2
Anisoprint
1
Shanghai 3D ARTEL Science and Technology Co.
3
FABERANT 3D printers
1
Self-assembly 3D printers
4
Z Rapid Tech
21
Zonestar
13
3DGence
3
BLB Industries
1
Hard Light
1
Stereotech
2
TPM3D
1
Artillery
4
Phrozen Tech Co.