Anet a8 upgraded high precision desktop 3d printer
Anet A8 Upgraded High Precision Desktop 3D Printer Reprap i3 DIY Kits
Anet A8 Upgraded High Precision Desktop 3D Printer Reprap i3 DIY Kits- Test Instruments & Tools
- 3D Printer & Supplies
Description
Shipping & Payment
Warranty
Q&A
Wholesale Inquiry
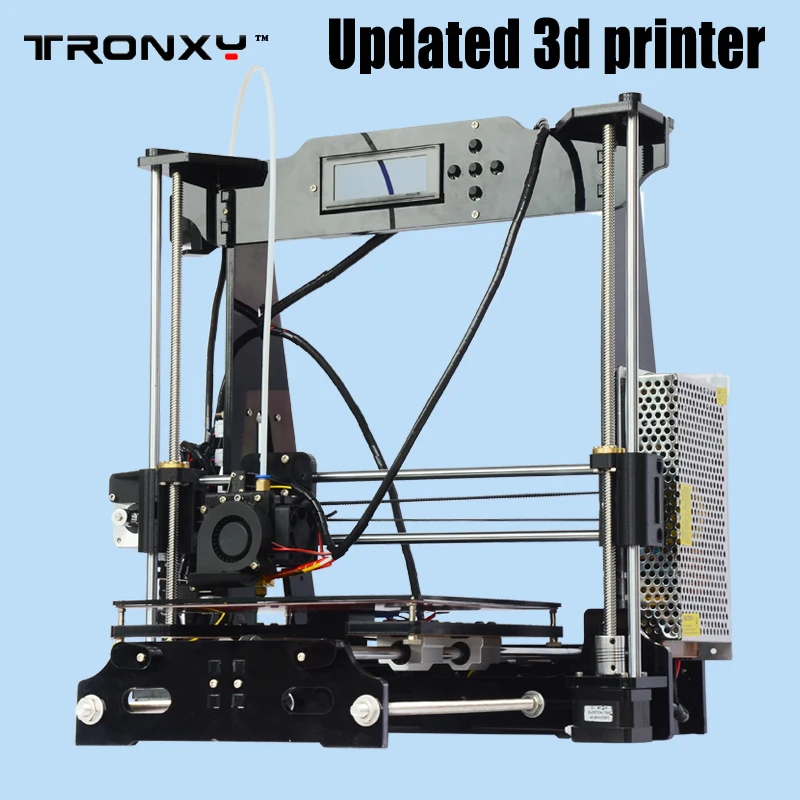
Anet upgraded A8 DIY i3 3D printer with auto self-leveling function, features 2004 LCD screen, 5 keys for easy operation, support SD card and off-line printing, customized MK8 nozzle, sturdy and compact lead screw, advanced and high-speed motor, updated sophisticated mainboard, superior power supply system, work well with many types of 3D filament, such as ABS, PLA, HIPS, PP and Nylon etc. Widely applied to many field, printing 3D toys, teaching equipment, and other technological devices, great for stimulating users' creativity and inspiration and realizing their ideal. Assembling DIY 3D printer is a pretty fun experience, all of the kits are produced under the strict observation, high quality products at a reasonable price, this printer is highly recommended for beginner and various 3D works lovers with abundant imagination.
Features:
Upgraded A8 DIY i3 3D printer with a new feature of auto self-leveling function, easy for operation.
2004 LCD screen, English interface, 5 keys for easy operation, support SD card and off-line printing.
Customized MK8 nozzle with sophisticated technology to produce smooth filaments fluently.
T-shape lead screw, high quality stainless steel, more durable and sturdy for use.
Advanced and high-speed motor, continue to prolonged work hours for greatly improved the working efficiency.
Updated sophisticated V2.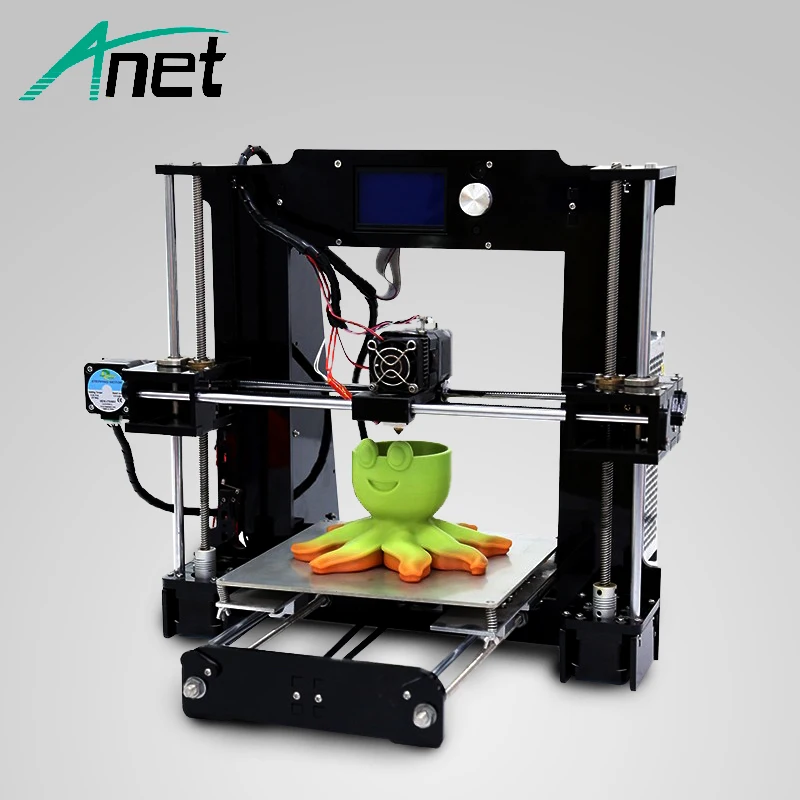 0 version mainboard, supporting multi-function, higher accuracy.
Superior power supply system for safely using, 240W, 110V/220V.
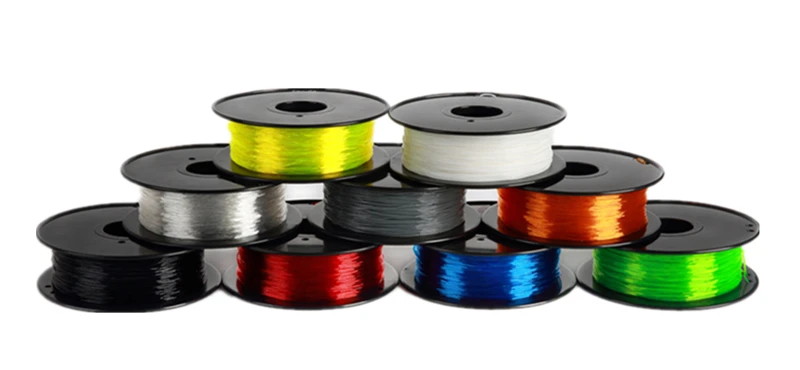
Heated hotbed and nozzle with wide range temperature adjustments allow the printer to compatible with many 3D filament types, such as ABS, PLA, HIPS, PP and Nylon etc.
Electronic installation manual are stored in the free SD card, card reader, other necessary parts and tools for assembling are included.
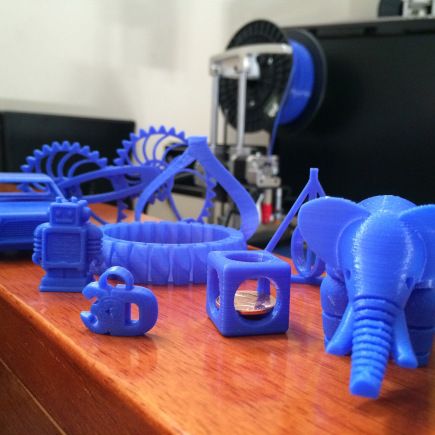
Wide application for printing architectural and manufacture model design, teaching and medical equipment, and other technological devices, as well as 3D toys for children, great for stimulate users' creativity and inspiration, makes their ideal concrete.
Specifications:
Screen: LCD2004
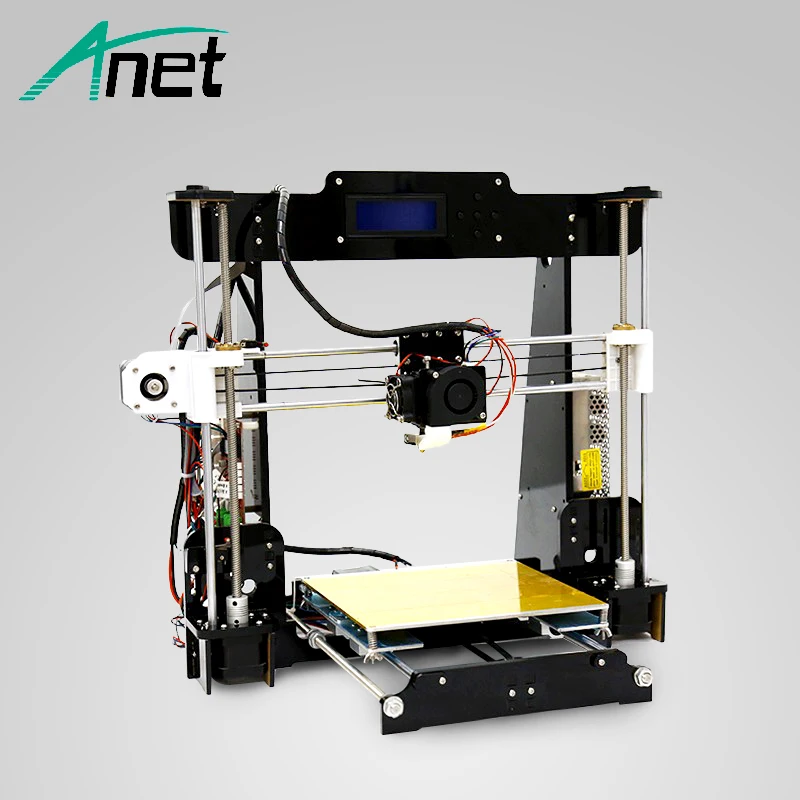
Frame Material: Acrylic
Hotbed Material: Aluminum Alloy
Nozzle Quantity: 1
Printing color: Single
Printable Material: ABS/PLA/HIPS/PRTG/TPU/Wood/Nylon/PP etc
Filament Diameter: 1.75mm
Plug: EU/US/UK/AU(optional)
Voltage: 110/220V
Current: 20A
Power: 240W
Item Size(Assembled): 50 * 45 * 40cm / 19. 7 * 17.7 * 15.7in
Item Weight: 8Kg / 17.6Lbs
Package Size: 51 * 31 * 21cm / 20.1 * 12.2 * 8.3in
Package Weight: 8.9Kg / 19.6Lbs
Technological Parameter:
Max. Printer Size: 220 * 220 * 240mm
Printer Speed: 10-120mm/s
Nozzle Diameter: 0.4mm
Layer Thickness: 0.1-0.3mm
Printing Accuracy: 0.12mm
XY Axis Accuracy: 0.015mm
Z Axis Accuracy: 0.005mm
Nozzle Temperature: Max. 260°C
Hot Bed Temperature: 50-100°C
Recommend ABS Setting: Nozzle: 230 °C Hotbed: 80 °C
Recommend PLA Setting: Nozzle: 210 °C Hotbed: 50 °C
Software Requirement:
Operating System: Windows XP/Win7/Win8/Mac/Linux
Printing Software: Cura / Repetier-host
File Type: .STL / .OBJ / G-code
Offline: Yes
Package List:
1 * Set DIY 3D Printer Kit
1 * SD Card(Installation Instruction Included)
1 * Card Reader
4 * Hex Wrench
1 * Open Spanner
1 * Nipper
1 * Screwdriver
1 * Roll of Filament
Note:
Please check the parts number before assembling.
The filament and the models showed in the picture not included, but 10 meters white filament attached.
The installation instruction, print model STL, software, test file GCODE and tool list pictures are included in the free SD card.
Customer Reviews
There are no customer reviews yet.
- 5 stars
- 4 stars
- 3 stars
- 2 stars
- 1 stars
Share your thoughts with other customers and get Cafago Points, the first 5 reviews get DOUBLE Cafago Points!
Write a Customer Review
Be the first to review this item
Top Sellers More
- 58 GOGOBEST GF600 Electric Bicycle 40V 1000W Power Top Speed 40km/h
€2999.99
€1269.99
- 54 GOGOBEST GF700 Electric Bike 48V 500W 17.5Ah Battery Max Speed 50km/h
€2999.99
€1399.99
- 57 Niubility B14 Folding Electric Bike 48V 400W 15AH Battery Max Speed 25km/h
€1399.99
€609.99
- 55 BEZIOR XF200 Folding Electric Bike 48V 1000W Motor Max Speed 40km/h
€2899.99
€1319.99
- 53 KAISDA K1V Folding Electric Bike 36V 250W 10.4AH Battery Max Speed 25km/h
€1499.99
€719.99
Anet A8 Review – Best cheap 3D Printer?
Ever since I was a kid, I liked building things. My biggest passion was Lego bricks. Creating, discovering, being creative and making your own world is amazing. When I first heard of 3D Printing and 3D printers, I was fascinated with them. I thought – this must be the next big thing. The thing you can use to build everything you ever wanted.
Anet A8 High Accuracy Desktop 3D Printer Flash Sale!
Anet A8 High Accuracy Desktop 3D Printer Flash Sale!
However a few years back the 3d printing technology was quite new and way over my budget. That’s why I was stoked when I heard that there is a $190 3d printer which works close to those in $1000 range.
This printer is called Anet A8, produced by an Anet company based in China. A8 picked up amazing reviews on the web. When given the opportunity to review it, I never had second thoughts.
Anet A8 is a completely DIY 3D printer that you have to assemble yourself. According to communities online, when calibrated and upgraded properly it can print like those expensive printers. Moreover, it is said, that the assembly can be done by a total newbie.
In this Anet A8 review, I will test the Anet A8 from a beginners perspective. Can this cheap $170 3D printer be any good? Let’s find out.
When given an opportunity to review this 3D printer I was so scared. There were tons of “what if” insecurities. What if I burn my house? What if I am unable to build it? What if it does not print that well?
3D printing with Anet A8 printerIf you’re a complete newbie reading this review I am quite sure you have similar fears. Do not panic. I will guide you through my journey with Anet A8. Step by step. Be aware that before I assembled and started using A8, I had zero experience in 3D printing.
Note: Gearbest has a promotion for Anet A8 and you can get it below retail price. Use coupon code: A8KIDA Check out the promotion on this link.
Anet A8 overview and specification
What is Anet A8? Anet A8 is completely do it yourself 3D printer, priced at around 170-200$. When fully assembled it enables you to print 3D objects from different kind of materials and create 3D objects of any shape. It can use different types of materials to print, though it works best with PLA and ABS.
Below is a table with Anet A8 specs.
Printer size
Packgage size
Printer Weight
Package Weight
Print Area
Print speed
Nozzle diameter
Layer thickness
XY-axis positioning accuracy
Z-axis positioning accuracy
Material diameter
Printer Frame Material
Platform board material
Operating Temperature Range
Supported file formats
Pre-Assambled
LCD Screen
510 x 400 x 415 mm
200. 8 x 157.5 x 163.7″
510 x 400 x 415 mm
204.7 x 137.8 x 86.6″
8.5 kg
300 oz″
9.120 kg
322 oz
220 x 220 x 240mm
86.6 x 86.6 x 9.45″100 mm/s
0.4mm
0.1-0.3mm
0.012 mm
0.004 mm
1.75mm
Acrylic
Aluminum
10 to 30°C
G-code, OBJ, STL
Remember to use coupon code A8KIDA for a discount on GearBest
How does it work?
In laymen words, Anet A8 3D printer works like any 3D printer. Here is an overview of Anet A8 basic elements.
Provided that you previously calibrated the printer, here are the steps :
- You power it on.
- Pre-heat it depending on the material you use. (Quick Setting> Pre-heat PLA/ABS)
- You insert a filament inside the extruder hole. This can be tricky and take a while to master.
- You select an object from an SD card by going to SD Card > Print a file
- Printer per-heats once again and start’s printing.
- Extruder pulls the filament into a tiny screw which has a PTFE pipe and guides it to heat end and a nozzle where filament (material) melts at a certain point.
- Printer moves onto X, Y and Z axis and adds melted filament layer by layer onto a heated bed.
- Once the printing is finished, you will see 100% on the screen and printer will become idle.
- You can remove the 3d printed object from the heat bed.
Imagine a regular PC printer. It prints ink onto a piece of paper. Well, 3D printer does the same. It prints melted material onto a heated bed. The only difference is that regular printer does not move up, whereas 3D printer moves around it’s X axis, applying material one layer over another.
To answer your questions first
So here are few questions that all of us have when considering to buy Anet A8.
- I am a complete novice. Will I be able to assemble and use it? – Relax, you will. There is step by step instructions and huge community support. Be patient and do not be afraid to ask for help.
- I do not know how to make a 3d model – Do not worry. You do not need to know that. There are websites where you can download 3D models for free and print them out on your printer.
- Is it safe to use it indoors? – It is indeed safe to use inside with PLA. PLA material is biodegradable and does not emit toxins. It is perfectly safe to use and even though I expected a plastic smell at first, I was surprised and unable to smell anything with the PLA.

- Can it cause a fire? – Yes, like any electronic device, 3D printer can cause a fire. They are not a toy, and you have to supervise your printer while it prints, especially until you master it and learn how to use it. There are plenty of things you can do to improve its safety and you can read about them online or in Facebook groups dedicated to the printer.
- Which material should I use? – For start, start with the PLA. It’s easier to learn. Once you master your 3D printing skills, you can move on to another material.
- Does it require PC? – Even though it can be controlled it through the PC via the USB, it can work completely independently as a separate machine and does not require to be connected to a computer.
- Is it noisy? – You can certainly hear A8 while it prints. There are improvements you can do like making an enclosure to reduce the noise and adding something to prevent vibrations below the printer.
- How firm are the printed objects? This depends on the material you use and the infill of an object.
- Can I print with other materials? – Even though I have yet to test this, users of Anet A8 recommend that you upgrade to a new extruder before you begin experimenting with other materials besides PLA and ABS.
| Preview | Product | Price | |
|---|---|---|---|
3D Printer Solid Polymer LM8UU Bearing 8mm shaft - Igus Drylin.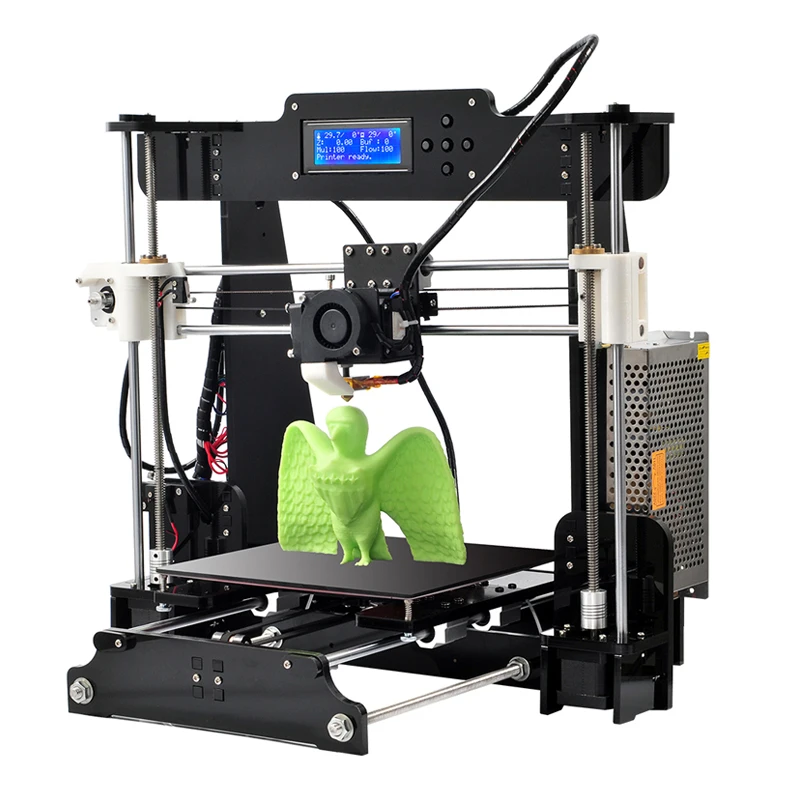 .. .. | $7.99 | Buy on Amazon | |
| Anet A8 Complete Auto Bed Leveling Kit Glass Compatible with Detailed... | Buy on Amazon | ||
3D Printer Heat Bed Power Module SIMPZIA General Add-on Hot Bed Mosfet. .. .. | Buy on Amazon | ||
| URBEST Inlet Module Plug 5A Fuse Switch Male Power Socket 10A 250V 3... | $8.99 | Buy on Amazon | |
WINSINN Leveling Spring Component - M3 Screw Knob - for 3D Printer Hot. .. .. | Buy on Amazon | ||
| [Gulfcoast Robotics] Aluminum Y Carriage Plate Upgrade for Anet A8 3D... | Buy on Amazon | ||
eTopxizu 12v 30a Dc Universal Regulated Switching Power Supply 360w.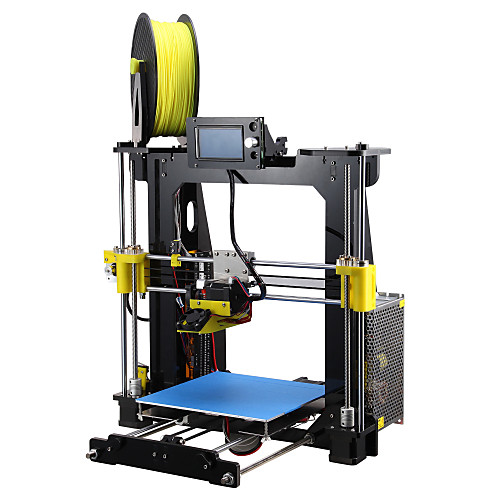 .. .. | $19.99 | Buy on Amazon | |
| Anet Auto Leveling Position Sensor for Anet A8 3D Printer, Upgrade... | $14. 19 19 | Buy on Amazon |
Before my printer arrived
Before my Anet A8 printer arrived, I wanted to prepare myself. I did not want to burn my house or something since those are some of the stories I read which can happen with any 3D printer from time to time.
That’s why while my printer was dissembled in a box traveling from China, I became my research.
The first thing I did is joining two popular groups of Anet A8 owners. Once in a while, I would read things owners of printers post there. Problems they encounter, solutions, upgrades, pretty much anything that can ever happen to your printer, can be found in one of those groups on Facebook.
Due to the poor organization on the content on Facebook groups (FB is the only one to be blamed here), finding proper information in those group can be hard. That’s why I wanted to read a book about 3D printers.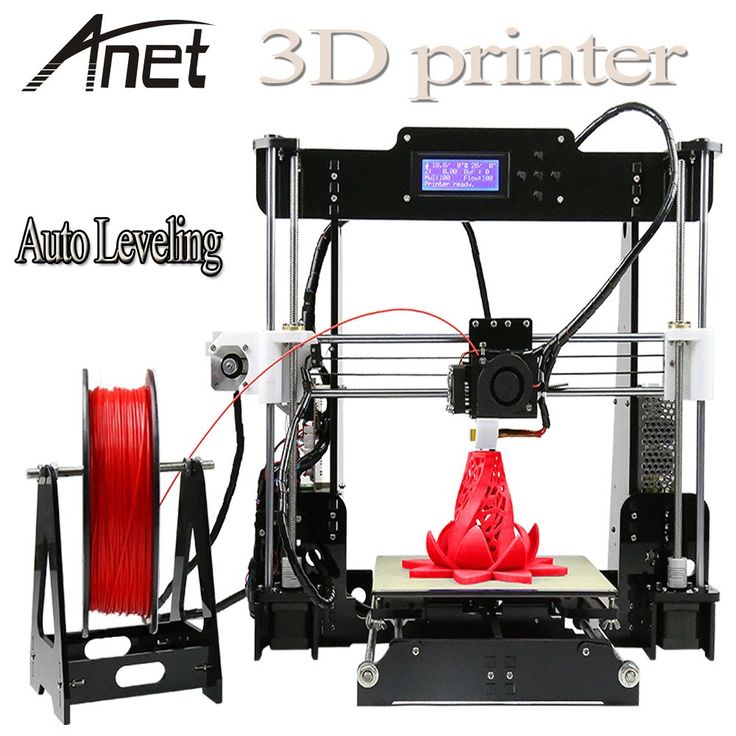
I got a hold of a fantastic book on the subject of 3D printing. Getting Started with 3D Printing. Since this is not a book review, I’d just like to mention that it’s quite easy to read with plenty of information.
I’ve re-read it when my printer arrived and when I started to print. It was quite helpful and easy to follow up. So if you like reading and want to learn more about 3D printing in general, this is a very well-written piece.
Besides wondering around 3D groups and reading a book, I also watched tons of YouTube videos. There is plenty of information, and my recommendation is, if you have the time, educate yourself and learn from others mistakes before your printer arrives. Not that it will eliminate all mistakes, but it will decrease the number of things that can go wrong.
What’s inside the box?
Once my 3D printer arrived, besides horrific custom fee I had to pay for it (I live in the non-EU country) I was over the moon. Anet A8 arrives in a huge box which weights around 10kg. Prior to opening the box, make sure to open it on the front side to avoid parts falling out.
Once opened, the box contains 3 layers of smaller rectangular styrofoam boxes. Those smaller boxes are filled with all the parts that you’ll need to assemble your 3D printer. When I say all the parts, I really mean it. It contains everything to get you started. I was amazed at the number of things these guys included.
The manufacturer added tools such as a screwdriver, 4 types of a hex wrench, plastic nippers and even a USB reader with a microSD card. Parts are sorted inside the box with no particular order, so it won’t matter much if you mix something up while unpacking.
List of parts that come in Anet A8 3D printer box.All of the parts and tools are neatly packed. Personally, my packet arrived safe and sound and no part was even scratched, let alone damaged in any way.
The first thing that got me scared is that there was no printed manual. I slowly began to panic, until I realized that all the instructions are located on a MicroSD memory card which comes in a box.
The user manual is written in Chinese and English. It consists of a couple of folders located on an SD card. The only sort of printed instruction is on an A4 paper which illustrated how to connect wiring to the mainboard of the printer, everything else is on the USB you receive.
One tip, before you start assembling the printer, make sure that all the parts are there. I’d recommend that you print out the “Parts List” file and tick each part as you find them in one of the styrofoam boxes. I counted even the tiniest parts such as screws and noticed that in my box there were few extra bolts and screws.
I would like to mention that besides things included in the “List” I also received a 10m white PLA filament, a material used for printing. It was not listed, so I really do not know if it comes in every Anet A8 box or not. Either way, you will also have to buy filament separately, since officially it’s not included. More about materials later.
Anet A8 Assembly
I will be honest with you, it was scary thinking how the heck am I going to assemble this thing? I have never built anything more complex than a Lego before, so I was quite worried. Luckily it is not as complicated as it first looks. It’s just time-consuming and requires patience and concentration.
Besides a written manual which is decent (though not perfect) Anet published three videos on how to assemble and start the A8 printer.
- Assembly video part 1 (assembling the frame of the printer)
- Assembly video part 2 (assembling the remaining parts and electronics)
- Assembly video part 3 – debugging (this video shows printer calibration and how to do your first print)
Quality of those videos is quite good. The person showing you how to build a printer does things quite slowly. However, some parts might not be entirely clear to you, so always take a look at the manual if there’s something you do not understand. Double check everything.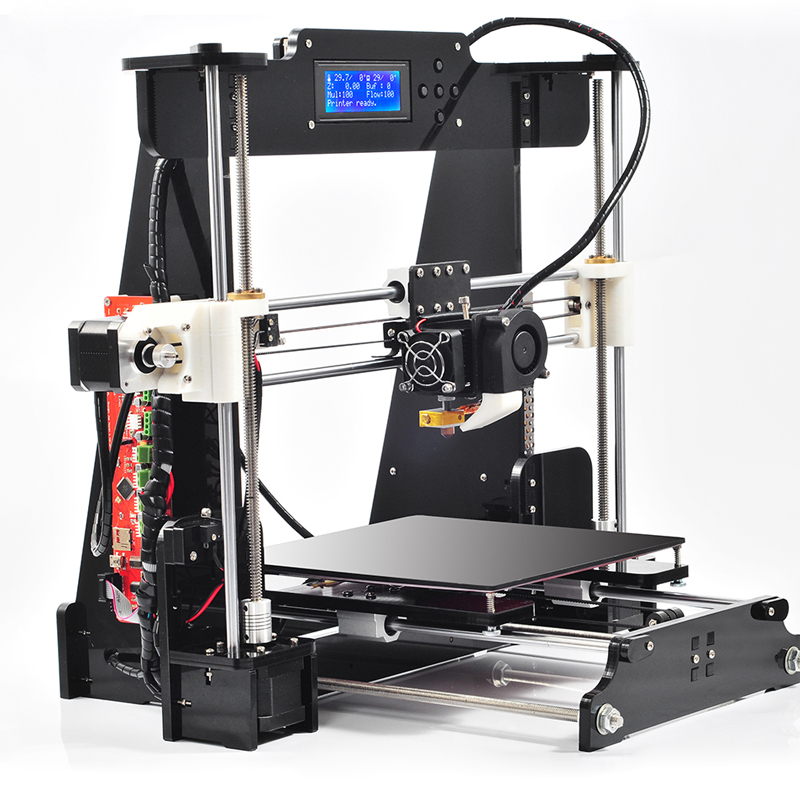
It took me 3 days to assemble Anet A8. Yes, 3 days. On the first day, I did the parts checklist. It took me another hour to remove acrylic protectors from parts that will be a printer’s frame once assembled. Then, I began slowly completing the frame.
It did not go smoothly since I ignored the instructions and assembled few parts incorrectly. Luckily, I decided to be calm and follow the directions no matter how obvious they seem sometimes. I believe total day one took me 3 hours in total.
On the second day, I plugged in all the electronics and added remaining parts onto a frame. This is the most complicated part. It took me 5 hours for this from what I remember, perhaps even more. What is fantastic is that there is no soldering necessary. All the electronics and wires only have to be plugged into the mainboard.
Even though I had everything set up after 2 days, the third day was the first time I turned my printer on. What was a bit confusing is that I had no idea what to do when I plugged it in. There were no instructions that a third video had to be watched in order to calibrate the printer and start printing.
In the third video, you will learn how to debug the printer, calibrate and level the hotbed and do your first print.
Onto a memory card, there are some files you can print. I recommend that you start small with Box-1.75mm PLA-A8 or something. I made a mistake and started with a bigger figure, which means more material (filament) and more time to print.
So after 3 days, I was ready to begin my first print, brace yourself, here we go.
Update 01/11/2019 Thanks to L.Woodington and D. Wilding who discovered an interesting error in the instruction video of the Anet A8 Assembly 1. The metal H frame is mounted wrongly in the video, which causes the cables of the hotbed to be curved. After mounting the H frame the opposite way, so that the middle line which sticks is facing the ground, my belts got aligned perfectly which reduced some noise in my experience. A photo says thousands of words, so take a look at the image below.
My first prints with Anet A8
After calibrating my printer according to the instruction video, I initialized the printing of the Baymax figure. The result was, hot – literally. My Baymax ended up completely melted.
My first attempt to 3d print a figure did not go as expected. Baymax became Firemax.I was unable to remove it from the hotbed. I had no idea what went wrong, so I asked on one of the Facebook groups dedicated to Anet A8 printer. In the meanwhile, I stopped the printing and turned the printer off.
So what happened? The thermistor, a tiny cable which measures the temperature of the hotend, plugged out.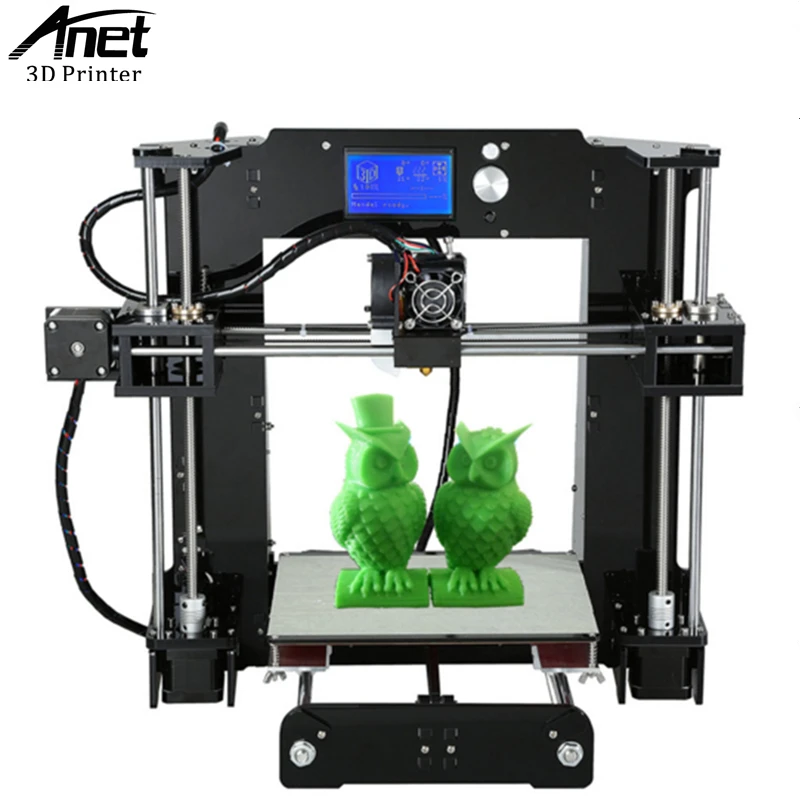 Which meant that it was sending wrong temperature data to my printer causing it to heat over 230 degrees. Since optimal printing temperature for PLA material at 180-220 degrees, it ended up completely melted.
It proved later that thermistor can cause serious issues even a fire. I would highly recommend that you make sure it’s adjusted well. So my first 3D print and I already managed to “catch” one of the worst things. It is quite a serious mistake to happen, and I’m sure it does not happen to people very often, but it happened to me. Can it get any worse?
After I made sure thermistor is checked, I wanted to give my Baymax figure a rebirth. I initialized the printer again and carefully watched. It all started well, but then, all of a sudden my Baymax became alive. It started to wobble and move all over the hotbed. Dear God, what now?
I asked again for the help on the Facebook support group and the solution was – my hotbed was not leveled up well.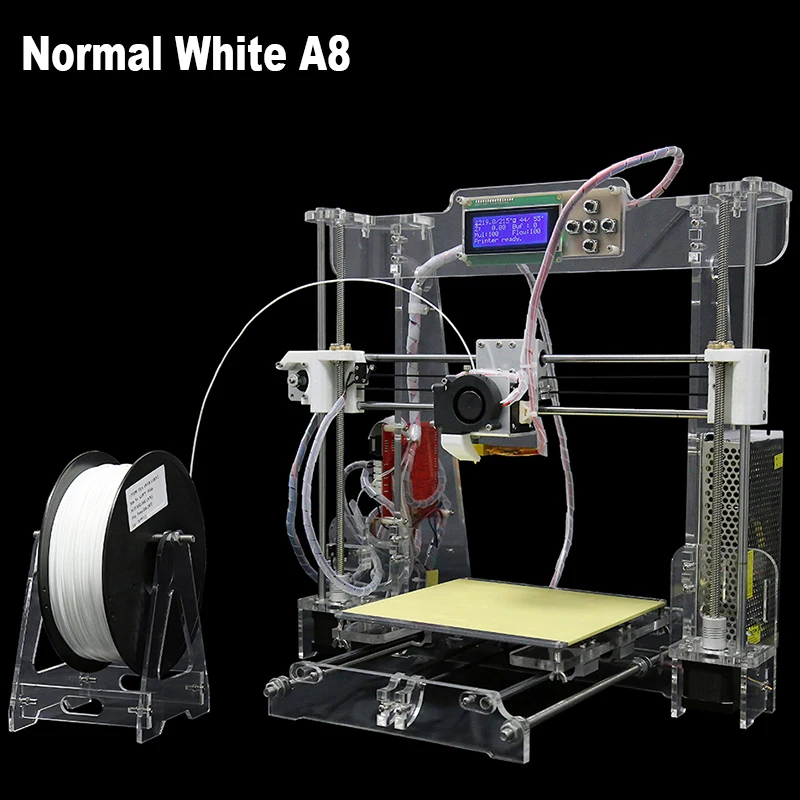 One more newbie mistake. You are excited to start printing that you never pay enough attention to such details.
Leveling the hotbed manually is one of the most boring but yet essential things to do. If the first layer goes wrong, an entire figure will end up messed up.
Okay, so I took another 20 minutes to adjust and re-level my hotbed according to instructions in the Assembly Video #3,
Third time lucky! Finally, my 3D printed Baymax began to print. I can’t explain to you how excited I was seeing that everything was according to the plan. This little fella took around 7 hours to print (mostly because whoever made it added 100% infill, which means the entire figure is filled 100% from the inside, which is absolute overkill and waste of time for such print (usually I now use 20%).
While printing it, I realized I do not have enough printing material – filament. This is because I got many pieces of multicolored 10m filament.
So it’s my first successful print and already I had to learn how to change the filament without interrupting the printer.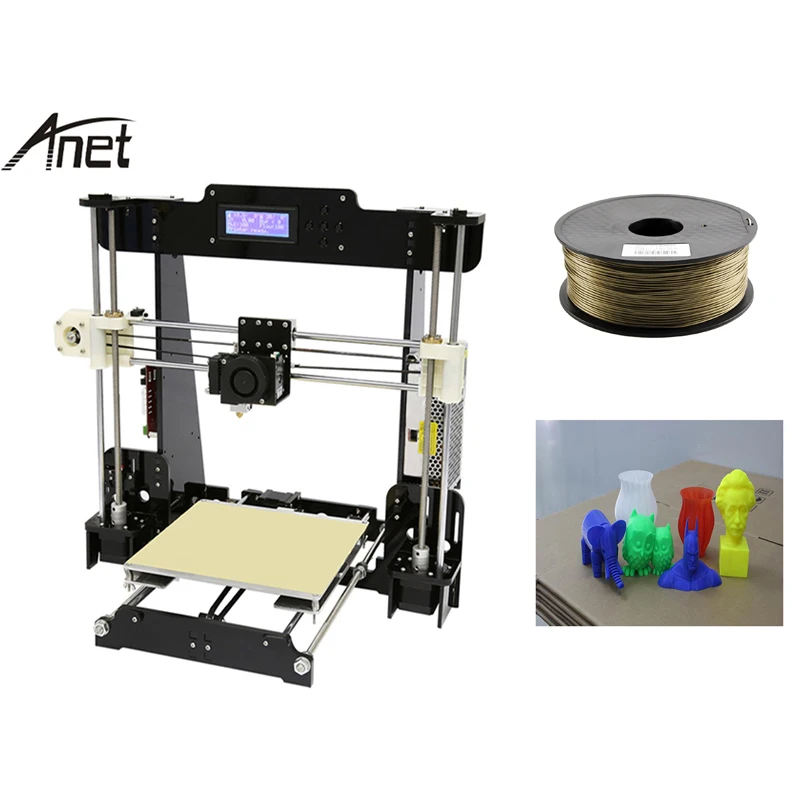 Facebook support group here I come again. – The solution was to simply pause the print – take out the old filament and add a new one. Resume printing. TA-DA!
After 7 hours, this was the result. It looks like Baymax who survived World War II, but comparing it to my first two attempts it was great, at least it survived. It was far from perfect, but I was over the moon.
These two guys were my first successful prints. Still not perfect, but I was on a roll.I then realized that for first few prints it’s way better to print out something smaller, so I downloaded a tiny Pikachu (link here) scaled it down a little bit into a software and printed the little fella out as well. Compared to the big fella figure, this one finished in approximately 30 minutes.
Later I discovered that this sort of wavy structure was caused because of my belts not being tight enough.
I was on fire! I was ready to conquer the 3D world. The humble community of Anet A8 owners advised me to start printing upgrades for the printer itself. Can you believe it? Printing the parts for the 3D printer to improve its performance.
This was my next move. I printed out two tiny upgrades a button cap and a filament guide. And then… another problem – my extruder (a thing which extrudes filament) – got clogged. Filament did not want to come out of it. You can guess what I did next? Yes, a Facebook group for some advice.
So I had to disassemble the whole thing. In a photo below you can see what happened.
Do you think I managed to fix it easily? Of course not, as an ignorant newbie, I only made things worse.
Quick summary: Filament got stuck, I tried to use pincer to pull it out, of course, it broke making a tiny piece stuck in there. Then I tried to melt it down with a lighter, burning a ptfe tube inside. Even though it looks unimportant without ptfe tube, you can’t print. I cut a tiny piece of a tube, put it back inside, my printed started leaking. I was unable to print out anything.
So this tiny tube is important! You need to have it in whole inside the screw. A tiny part that of ptfe that sticks out goes into a nozzle direction. Its purpose is not only to guide filament through the nozzle precisely but also to make sure filament does not melt before it reaches the nozzle.
A solution? I had to buy a new ptfe tube. But not only that, I also bought few more spare parts, which according to the 3d printing community are a must. Those parts are sort of expendables.
Here are the things I bought, and if you plan to buy this printer, I recommend you do that as well, most of them are like $1-2 :
- ptfe tubes (highly recommended)
- 6X nozzles of various sizes (highly recommended)
- Rubber belt (highly recommended)
- heater block
- thermistor
- heater
The last two items, I bought just in case, still haven’t used them, since my thermistor and heater work well, for now.
| Preview | Product | Price | |
|---|---|---|---|
| PTFE Teflon tubing 5ft- 2mm ID X 4mm OD for 1.75 Filament Bowden 3D... | $6.99 | Buy on Amazon | |
| Anet A2 / A8 3D Printer Part, 5PC 0.4mm Brass Extruder Nozzle Print... | $9.99 | Buy on Amazon | |
FYSETC 3D Printer Belt 5 Meters/ 16.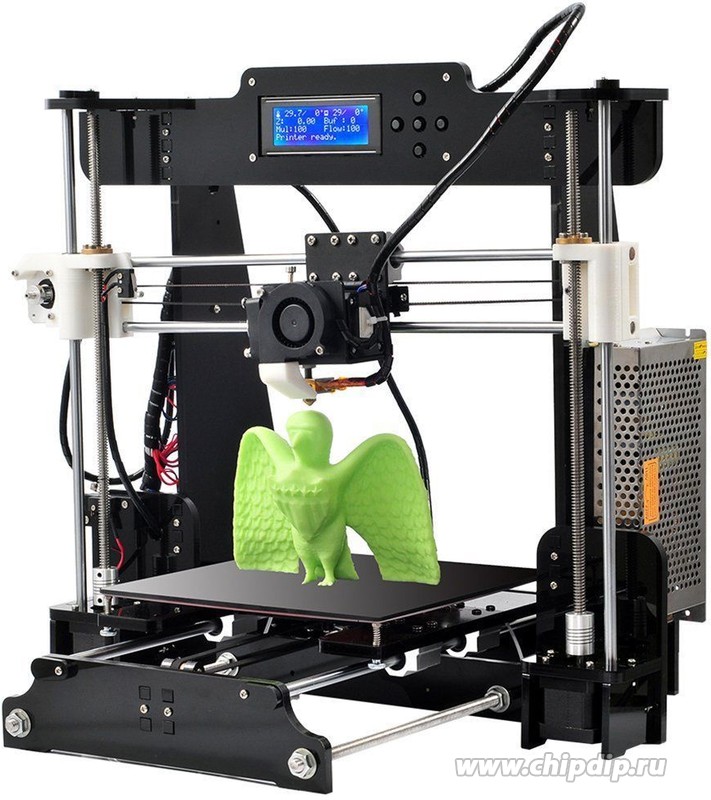 4 Ft Length GT2 6mm Timing Belt... 4 Ft Length GT2 6mm Timing Belt... | $8.88 | Buy on Amazon | |
| BIQU Aluminum Heater Block Specialized for MK7 MK8 3D Printer... | Buy on Amazon | ||
Ewigkeit 12V 40W Cartridge Heater 620 Ceramic and NTC Thermistor 100K.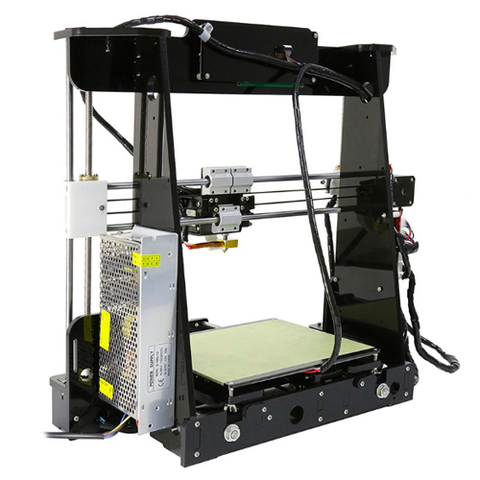 .. .. | $11.99 | Buy on Amazon | |
| Ewigkeit 12V 40W Cartridge Heater 620 Ceramic and NTC Thermistor 100K... | $11.99 | Buy on Amazon |
What I learned from my failures
- Make sure thermistor is connected properly
- Proper heatbed leveling is essential – this is the cause of most problems I had.

- Tightening the belts is important it reduces wobbly prints
- Buying spare parts saves plenty of time and trouble later
- Small things, such as tiny ptfe tube are there for a reason, do not try to be a smart-ass and ignore them.
- The same type of material from different manufacturers have different points of melting – print this calibration tower to test the optimal temperature of the particular filament, it helps.
Anet A8 upgrades
So here I am nearly two months after my first Anet A8 print. During that period I learned tons of stuff about my printer and 3d printing in general. While I am far being done yet, there are upgrades that I did which improved my 3D prints beyond my wildest dreams.
After improving the printer, my models look like they’re printed with those $1000 machines. But I am not done yet, I will continue to print, read and educate myself to have even better prints.
Here’s a list of upgrades that you can download for free from Thingyverse and print them on your own printer!
- Semi-Circular Anet A8 Fan Duct – improves air circulation
- Extruder Button Anet A8 – to stop your thumb from pain the metal made screw on extruder causes when pressed
- Filament Guide Horizontal – guides your filament into an extruder more precisely
- Filament Guide – guides your filament into an extruder more precisely
- T Corners – to make it more stable and reduce vibrations
- Improved X belt tensioner – helps you adjust and tension belts much better than the original design
- Improved Y belt tensioner – helps you adjust and tension belts much better than the original design
From all of the above upgrades, I’ve seen the biggest results and improvements after adding belt tensioners in combination with the rubberized belt. In the instruction video, I understood that the belts should not be that tight, where in reality they should. Tighter belts mean less wobbly prints.
I plan to test few more belt types, such as this (eBay link) fiberglass reinforced belt. One more upgrade which I plan to do is improve the safety of electronics by adding a mosfet.
There are lots of other things I intend to do with Anet A8, so make sure to check back or follow Pevly on social media for updates. (Facebook, Instagram, YouTube)
UPDATE 01/10/2019
I wrote a detailed article about upgrades on Anet A8.
Print quality
So I proudly present to you my 3D printed objects. All printed on Anet A8 with some minor improvements and 3d printed upgrades. Compare them to the first ones I made. The difference is huge.
This fish fossil is completely flexible and its parts move. It was printed in one part which show exceptional designing skills by the person who made a model.3D Printed Empire State building is one of my bigger successes so far.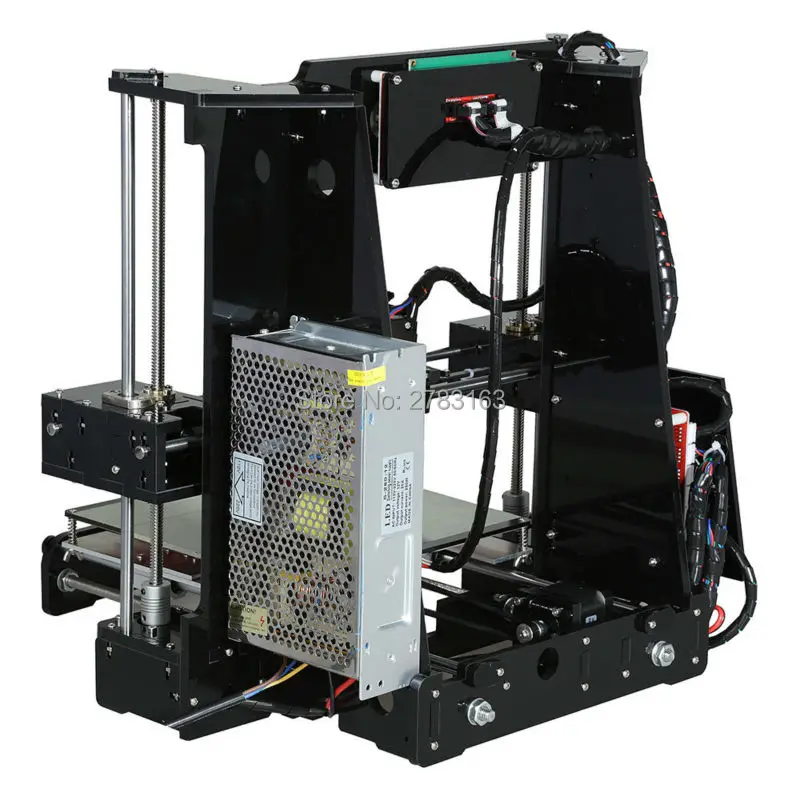 Printing functional things is equally possible. 3D printed stand for Kindle Paperwhite.3D printed memory card holder is another example of functional items that you can print with a 3D printer.Latest update on my printing quality with A8. Dragon on the left has been intentionally colored like this as a part of an experiment.
https://youtu.be/5_heq5ayGSY
https://youtu.be/LhIv_oclAPE
https://youtu.be/xpBHgnzlbdg
Software
You do not have to know to 3D model in order to use a 3D printer. I’m sure it makes process far more enjoyable when you print something you made yourself, but no worries it’s not obligatory.
The process is quite easy. You go to a website which has 3D models. The most popular site I used is Thingyverse. Once you find and download the model, you have to unzip the file and locate your model.
Some 3D models can be printed as a whole, in one part, others have parts that have to be printed separately and later glued or assembled, depending on the model. Your next task is to import a model or a part of it into a slicer. Slicer is a 3d modeling software which will adjust the model according to your printer.
The recommended beginners software is Cura. Inside the manual, you’ll find how to configure Cura 14.07 with your Anet A8. I highly recommend that you do your first prints with that version of Cura. Mostly because you have the manual and explanation how to configure it with Anet A8.
Cura 14.07 (above) vs Cura 2.3.1 (below)Inside slicer, you can do tons of stuff. Scale your model, switch its printing position, printing quality, speed, etc. A good thing about Cura is that it tells you how much filament you’ll need for a specific figure, how much it will weight and how much it will take to print it out.
These are all approximate values though. All these settings influence your output one way or another. For instance, printing speed influences the quality of the print, but also the printing time. If you need to print something faster with fewer perfections, you’ll go with higher speed.
All of these settings take time to master. You will have to experiment and learn.
The above photographs illustrate the difference in print quality and printing time when printing speed is adjusted.
Can I use newer Cura version with Anet A8?
Yes, you can upgrade to newer versions. I personally started with 14.07, but when I learned how to use Cura, I switched to 2.3.1 version with no issues. I only had to re-configure it all over again. Configuration Anet A8 with latest Cura is easy when someone already made the configuration file and instructions how to do it. You can find those files in the Official A8 group on Facebook.
Newer is always better in most cases. For instance, I noticed that 2.3.1 takes far less time to render the object and its interface is more appealing.
I’d like to thank Jan Hedström and many others who helped me learn how to configure Cura among tons of other things.
User interface and navigation
If you’re a regular reader of Pevly blog, you know we’re a huge fan of user-friendly products.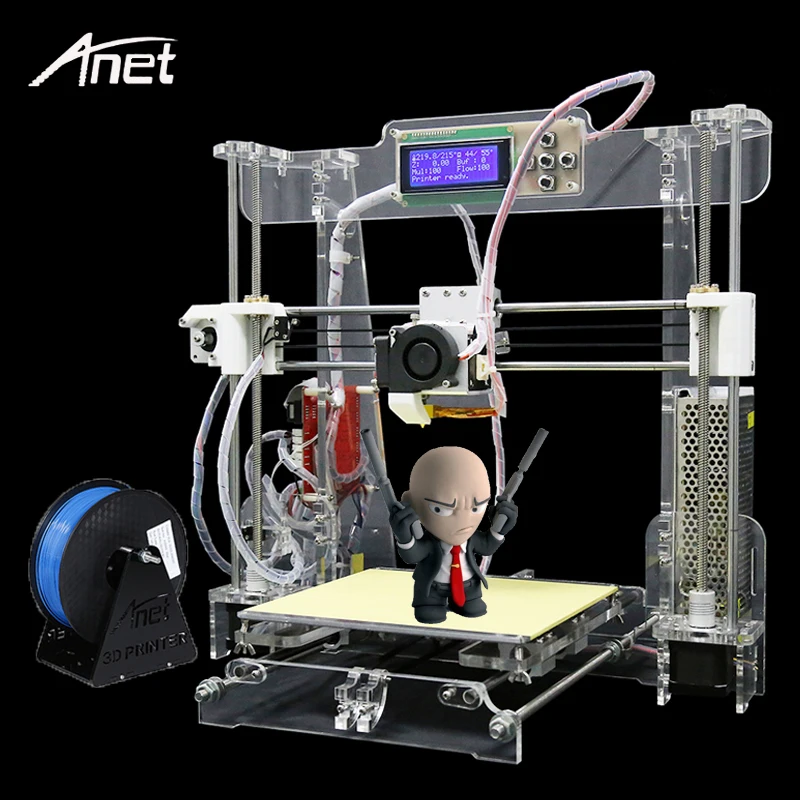 While Anet A8 is marketed as an affordable 3D printer, which beginners can use it’s not that user-friendly. Most of the things are not that intuitive and the user navigation is quite unclear. For instance even nearly 2 months of using it I am still unable to recognize all the functions that printer displays on the screen.
One of the major improvements that can be made is to make the interface of the printed simpler, clearer and less clunky.
As for the third-party software which you use for slicing the 3D model are concerned, you can use basically any you want, but Anet recommends Cura 14.7 which you can find online or on a memory card. Since it’s a third-party software, there’s no point in reviewing its interface.
Summary
My journey with Anet A8 has been a love-hate game all the way. I hate that I love my Anet. There were times when I wanted to pull my hair out by trying to figure out what went wrong with the printer. Also, there was a period where I jumped around the house being amazed at the quality of my print.
Please understand that most of the problems I encountered with Anet A8 printer are because of my ignorance of 3D printing in general. This is my first 3D printer and like with any new technology you encounter, there is a huge learning curve.
Even though I had quite decent theoretical knowledge about 3D printing by reading books about it, the best way to learn to 3D print is – to print, fail and make mistakes.
One thing is sure, Anet managed to create a decent quality printer, which takes a bit of time to assemble and master. Would I recommend this to a person who is on a budget and wants to enter the 3D printing world? Absolutely, but once again, be aware that it will take time to get quality prints. It requires upgrades and getting to know the material you’re printing with.
What guys behind Anet managed to do is to remove the barriers so that you no longer need 700-2000$ for a 3D printer. The 3d printing industry is becoming more and more competitive and I’m ecstatic about that.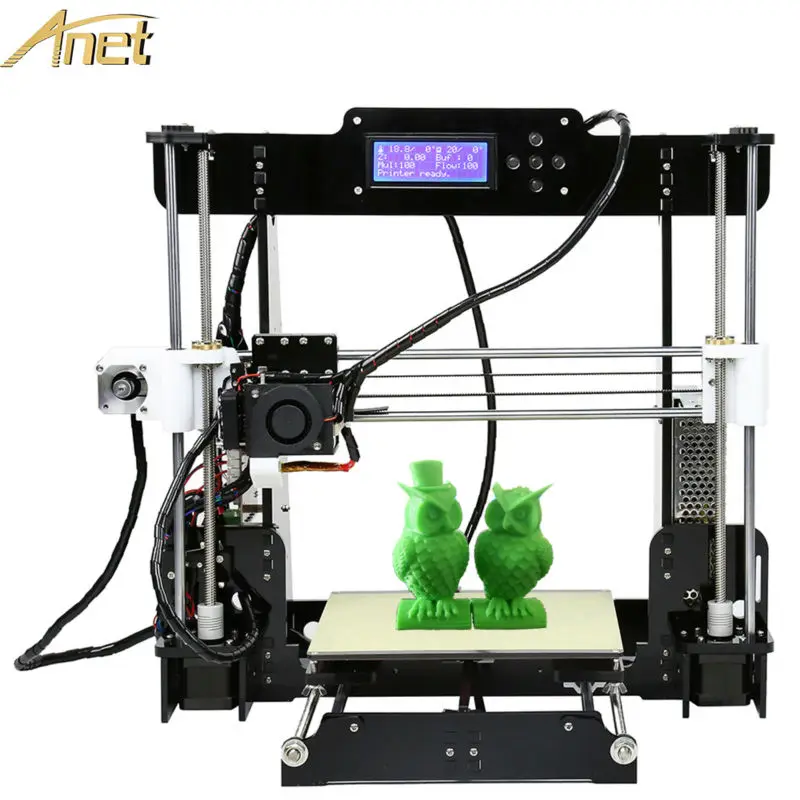 Competition means better products, lower prices, and incremental innovations.
Perhaps the biggest advantage of A8 besides its cheap price is the wonderful and humble community of people behind it. There are tons of good people who like you and me once had problems with their printer and are willing to help you out.
Pros
- Affordable price (possibly lowest cost printer with such specs on the market)
- Huge community and support
- Excellent for entering the 3D print world
- Decent instructions video and documentation for assembling
- When calibrated and adjusted properly together with few printed improvements it prints are impressive for the price of the printer.
- It can be compared to way more expensive printers when the print quality is concerned.
- Extremely enjoyable process of learning
Cons
- Comes in parts
- Takes time to assemble it
- Acrylic frame
- Electronics is not the highest quality (according to the people who understand electronics way better than I do)
- Plastic belts
- Not easy to insert filament into an extruder
- User experience
- User navigation
If you need any technical assistance with your Anet A8, there is no better way then visiting these 2 groups on Facebook :
- OFFICIAL Anet 3D printer Support Group
- Anet A-series 3D Printer Help & Discussion
- Anet A8 Wiki page
Where to buy original Anet A8?
There have been warnings of people ordering Anet A8 and receiving something completely different, though it looks the same. That’s why you should be careful and order only from officially licensed retailers, here are some.
For any other questions, feel free to drop me a comment. If you already own an Anet A8, feel free to let me know how it works for you, I’m sure your experience will help people who are still unsure if A8 is right for them.
Read more about Anet :
- Anet A8 Best upgrades
- Anet A6 detailed review
- All Anet printers compared
Thanks for taking the time to read this whole review. I wish I could talk to you a bit more, but my Anet A8 just finished a new print, so I have to remove it and admire its beauty.
Anet A8 Updated Reprap i3 High Precision Desktop 3D Printer DIY Kits
Anet A8 Updated Reprap i3 High Precision Desktop 3D Printer DIY Kits- Test tools and tools
- 3D printer and consumables
-
Description
-
Delivery and payment
-
Warranty
-
Q&A
-
Bulk request
A3 Fashion A8 DIY i3 Upgraded 3D Printer features 4 inch LCD screen, 5 keys for convenient use, support SD card and offline printing, MK8 customizable nozzle, durable and compact lead screw, advanced and high-speed motor, upgraded complex motherboard, excellent power supply system, works well with many types of 3D filaments, such as ABS, PLA, HIPS, PP and Nylon, etc.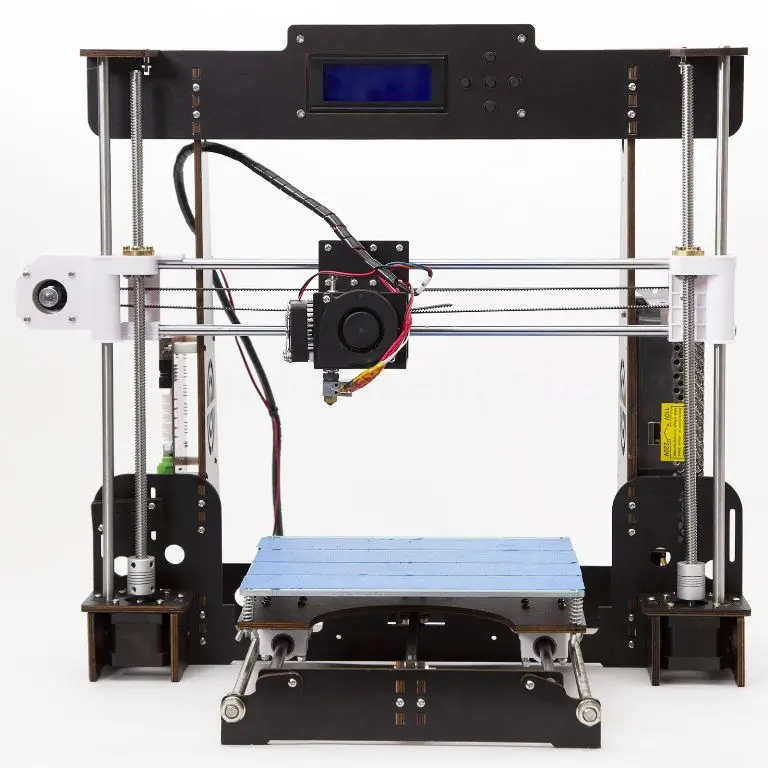 Widely applied to many field, 3D printed toys, teaching equipment and other technology devices, great for stimulating user creativity and inspiration and realizing their ideal. Assembling a DIY 3D printer is quite a fun experience, all kits are produced under strict supervision, high quality products at a reasonable price, this printer is highly recommended for beginners and 3D enthusiasts with abundant imagination.
Features:
2004 LCD screen, English interface, 5 keys for easy operation, SD card support and offline printing.
MK8 tuned nozzle with sophisticated technology for smooth passage of smooth fibers.
T screw, high quality stainless steel, more solid and durable to use.
Advanced and high speed motor, extended long working hours to greatly improve work efficiency.
Updated version 2.0 version 2.0 supporting multi-functional, higher accuracy.
Superior power system for safe use, 240W, 110V/220V.
Heated steam and nozzle with wide temperature settings enable the printer to be used with many types of 3D filaments such as ABS, PLA, HIPS, PP and Nylon, etc.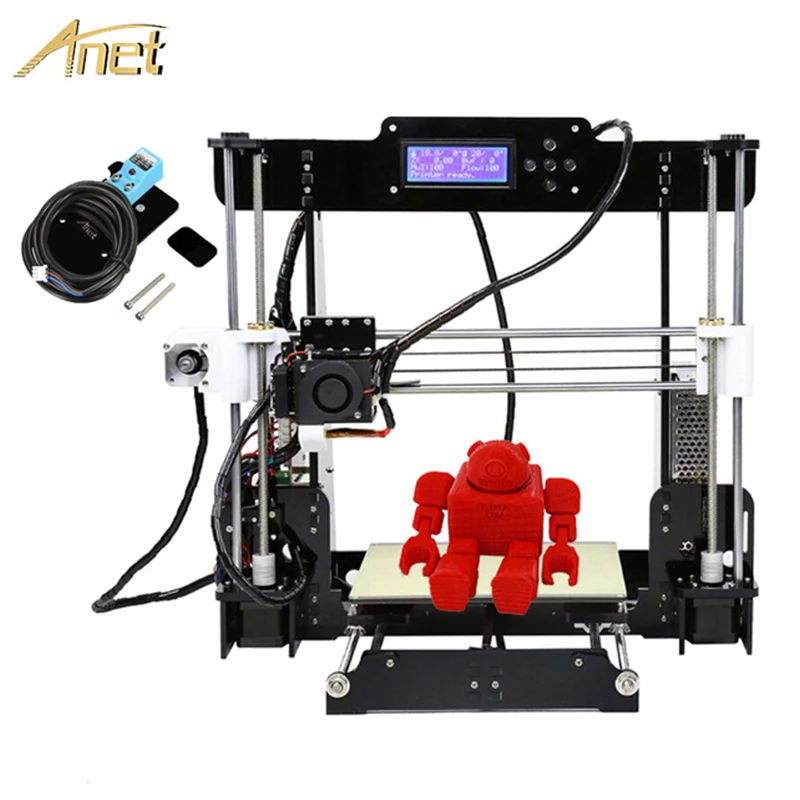 .
.
Electronic installation manual is stored on a free SD card, card reader, other necessary parts and assembly tools, filament (1 roll) random color.
Wide application for architectural and manufacturing model printing, teaching and medical equipment and other technology devices, as well as 3D toys for children, great for stimulating creativity and inspiring users, makes them an ideal concrete.
Features:
Screen: LCD2004
Frame material: Acrylic
Hot material: aluminum alloy
Number of nozzles: 1
Print color: Single
Print material: ABS/PLA/HIPS/PRTG/TPU/Wood/Nylon/PP etc.
Filament diameter: 1.75mm
Plug: EU/US/UK/AU(optional)
Voltage: 110/220V
Current: 20A
Power: 240W
Item size (assembled) : 50 * 45 * 40cm / 19.7 * 17.7 * 15.7in
Item weight: 8Kg / 17.6Lbs
Package size: 51 * 31 * 21cm / 20.1 * 12.2 * 8.3in
Package weight: 9.5Kg / 20.9Lbs
Technology parameter:
Max. Printer size: 220*220*240mm
Print speed: 10-120mm/s
Nozzle diameter: 0.4mm
Layer thickness: 0.1-0.3mm
Print precision: 0.12mm
Axis precision XY: 0.015 mm
Z-axis accuracy: 0.005 mm
Nozzle temperature: max. 260° C
Hot water temperature: 50-100°C
Recommend ABS Setting: Nozzle: 230°C Hotbed: 80°C
PLA Recommended Installation: Nozzle: 210°C Hot Bar: 50°C
Software Requirement:
Operating System: Windows XP/Win7/Win8/Mac/Linux
Printing Software: Cura/Repetier-host
File Type : .STL / .OBJ / G-code
Offline: Yes
Package List:
1 * Install DIY 3D Printer Kit
1 * SD Card (Installation Instructions Included)
1 * Memory Card Reader
4 * hex key
1 * Open wrench
1 * Nipper
1 * Screwdriver
1 * Roll of thread (0.5 kg)
Note:
Please check the part number before assembly.
Red thread and models shown in the picture are not included, but 1 roll of 0. 5kg thread (color random delivery) attached to the package.
Free SD card includes installation instructions, printable STL model, software, GCODE test file, and tool list images.
Customer reviews
No reviews yet.
- 5 stars
- 4 stars
- 3 stars
- 2 stars
- 1 stars
Share your thoughts with other customers and get Cafago points, the first 5 reviews get x2 Cafago points!
Write a review
Be the first to review this product
Best Products More
- 58 GOGOBEST GF600 Electric Bike 40V 1000W Max Speed 40km/h
€2999.99
€1269.99
- 54 GOGOBEST GF700 Electric Bike 48V 500W 17.5Ah Battery Max Speed 50km/h
€2999.99
€1399.99
- 57 Niuability B14 Electric Bicycle 48V 400W 15AH Folding Battery Max Speed 25km/h
€1399.99
€609.99
- 55 BEZIOR XF200 Folding Electric Bike 48V 1000W Max Motor Speed 40km/h
€2899.99
€1319.99
- 53 KAISDA K1V Folding Electric Bike 36V 250W 10.4AH Battery Max Speed 25km/h
€1499.99
€719.99
3D Printer Printing in Murmansk: 500-TOVARS: Free delivery, 56% discount [Go]
Partnership program Upers
Murmansk
Catalog
9012 Clothing and shoes
Clubs
Building materials
Health and beauty
Health and beauty
Textile and leather
Textile and leather 918
25259
3D Printer , Twotrees, BLU-3 V2, Size Press 235 * 235 280MM, Black and Blue Type: 3D PRICE , , , , , , , , , , , , , , , , , 9023RAMS I
153 680
3D Printer Makeblock McRate with a nozzle for laser engraving manufacturer: Makeblock
Reads more than the goods
160112 9012 9012 9012 9012 9012 9012 9012 9012 9012 9012 9012 9012 9012 9012 9012 9012 9012 9012 9012 9012 9012 9012 9012 9012 9012 901OL0236 Press 180 180
More prices and similar goods
68 220
3D Sublimation Printer , 3D 9021 In,
More prices and similar goods
12 562
30639
3D Printer Tronxy Crux 1, 3D PRICE , SENSOR SENSOR, SENSOR, CLEAKEN SENSOR, CLEAKEN0112
MORE DETAILSMore prices and similar items
92 657
3D printer EU Stock, large TRONXY X5SA-500 PRO, auto level sensor, high precision, large, DIY, Chinese size printing 3D
MORE DETAILSMore prices and similar items
318 964
0237 250*250*250
More prices and similar goods
12 436
17766
3D - Printer Tronxy Crux1 mini, model of spare parts for extruder, Direct Direct Direct Direct, Direct Direct Direct .