
Best 3d printer adhesive
Best 3D Printer Bed Adhesives – Sprays, Glue & More – 3D Printerly
There are many options when it comes to 3D printer bed adhesives, and it can start to get people confused on what they should be using. This article is going to try and simplify your options to narrow down what you should make use of.
You can choose from different glue sticks, hairsprays, mixtures like ABS slurry, types of tape to stick down to your print bed, or even print surfaces that have great adhesion by themselves.
Keep reading through this article for some great products and tips throughout.
What is the Best Adhesive/Glue to Use for 3D Printer Beds?
Elmer’s disappearing glue stick is the leading brand to use for 3D beds because of its easy and hassle-free bonding. The glue formula is purple, but it dries transparently while ensuring a strong bond.
As this glue dries fast, stays smooth, and provides strong adhesion, it can be used in various 3D printing projects.
Elmer’s disappearing glue stick is non-toxic, acid-free, safe, and easily washable. You can trust its quality for all of your 3D printing projects without any doubt.
- Easy to use
- No mess bonding
- Easy to see where glue has been applied
- Dries clear
- Non-toxic and safe
- Washable and dissolves with water
A user shared his experience stating that the factor of having purple color while applying and then drying transparent is a great help in 3D printing.
It helped him a lot especially when it comes to ensuring effective coverage of the whole print bed. Its strong adhesion also allowed him to use only a thin layer to get the job done.
Get some Elmer’s Disappearing Glue Stick from Amazon today.
How to Use Glue Stick for 3D Printer Bed Adhesion
- Make sure your bed is leveled properly before applying the glue
- Heat up your build surface
- Start from the top corner from your bed and apply the glue in long downward motions to the other end
- Use reasonable pressure, so you don’t apply the glue unevenly
- Let the glue dry for a minute to see a matte finish and start your printing process.

What is the Best Spray/Hairspray to Use for 3D Printer Build Surfaces?
Different hair sprays are widely used for 3D printer build surfaces but L’Oréal Paris Advanced Hairspray is considered one of the best.
It offers an extremely strong bond for your 3D prints. This anti-humidity hairspray can be applied evenly and dries extremely fast.
When it comes to ease of use, you cannot beat a hair spray because you only have to spray the print bed, and you are ready to go.
- Humidity resistant
- String adhesion properties
- Pleasant odor
- Easy to use
A user stated in his feedback that he has been using this to spray his hair for a long time but when he read that it can be used in 3D printing, he decided to give it a try.
Using this hairspray changed his way of working as it can be applied easily, provide strong adhesion, and bring amazing results with most of the 3D printer filaments.
One thing to keep in mind is that it is highly flammable so keep it away from direct fire or flames.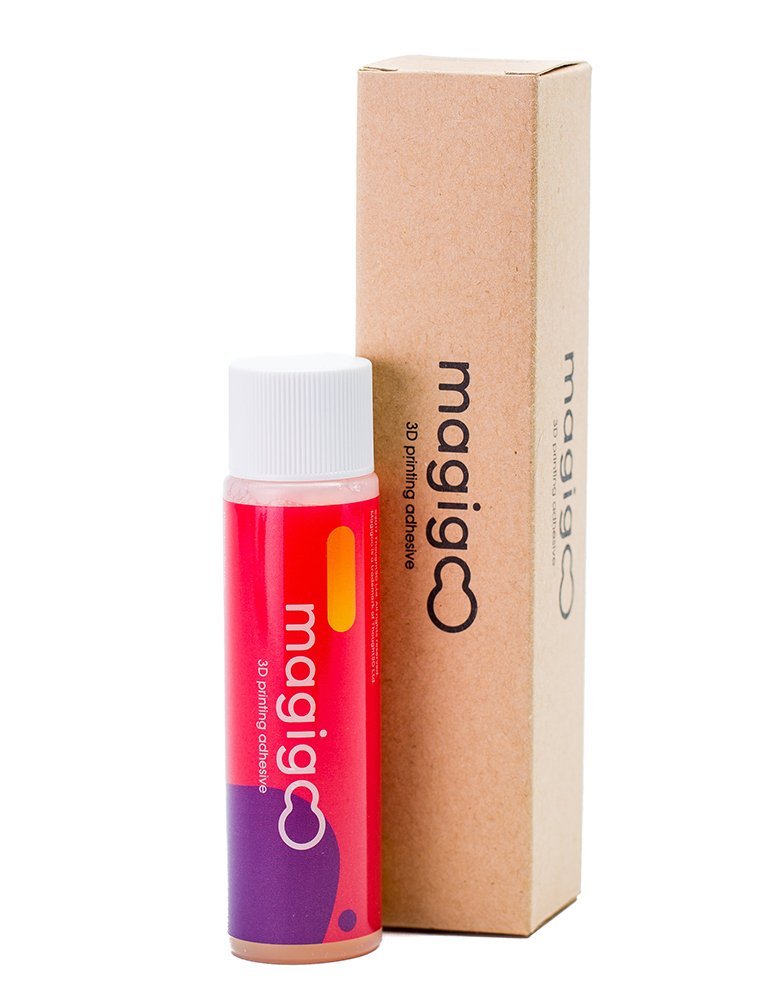
Check out the L’Oréal Paris Advanced Hairstyle Lock It Bold Control Hairspray on Amazon.
How to Use Hairspray for 3D Printer Bed Adhesion
- Give your bed surface a wipe with a sterile pad, isopropyl alcohol or a good surface cleaner
- Dry the bed surface with a paper towel – make sure not to touch the top surface with your fingers
- Heat up the print bed to your desired temperature
- Get your hairspray and apply short, even sprays across the bed surface
- Some people recommend putting your can of hairspray under warm water before spraying – to provide a finer mist
What is the Best Adhesion Tape to Use for Your Build Platform?
ScotchBlue Original Painter’s Tape is the one of the best adhesion tapes to use for your build platform.
This blue tape offers strong adhesion to the print bed no matter whether you are using ABS or PLA. Some filament bonds to build surfaces really strongly, making it hard to remove, so with the painter’s tape, it provides an extra surface to reduce that bond.
Once your model has finished printing on the build plate, it is a lot easier to remove in comparison to without.
The tape is easy to use and remove as well because of its 6.25 inches width. This width allows you to put a piece of this tape on a large part of your print bed instead of cutting and pasting various 1-inch parts of adhesion tape.
For almost all types of the commonly used print bed, only a small piece of this tape will be enough for your whole print.
- Adheres well to the print bed
- Easy print removal
- Easy to apply and remove
- Leave no residues behind
One of the users says that he used this blue tape while printing PLA, ABS, and PETG and got the expected results. It adheres well and is easy to use.
Another reviewer of this product says “for 3D printing, I’ll never not use this product” because its very effective, and you can even use the same tape over again until it rips.
The tape being so wide means that it doesn’t take many runs over the build surface to cover the whole thing.
You can check out this amazing ScotchBlue Original Painter’s Tape on Amazon.
How to Use Painter’s Tape for 3D Printer Bed Adhesion
- Simply take some tape and place the roll at the top of the bed surface
- Unroll the tape to cover the bed from top to bottom and repeat until the whole bed is covered
- It should be done sticky side down onto the bed.
How Do You Increase Bed Adhesion?
Although there are many minor to major techniques and settings that can increase the bed adhesion but the most beneficial are listed below. You can enhance bed adhesion if you:
- Clean the Build Plate to Remove Dirt and Residues
- Level the Build Plate Perfectly
- Alter and Adjust the Cooling Fan Speed
- Calibrate Nozzle and Printing Temperature
- Take Help from 3D Printer Brims and Rafts
- Configure and Calibrate First Layers Settings
- Use 3D Printer Bed Adhesives
Best Print Bed Adhesion for 3D Printing ABS
There are many options when it comes to getting the best bed plate adhesion for your ABS 3D prints. Most of these options work well, so you can choose between them depending on what works for you.
- Glue Sticks
- ABS Slurry/Juice
- Painter’s Tape
- Using a PEI bed surface
The video below shows you how to make the famous “ABS Slurry” that many people mention for getting good adhesion for ABS. It’s simply a mixture of ABS filament dissolved in acetone, until the consistency is fairly thick (like yogurt).
3D Printing Glue Stick Vs Hairspray – Which is Better?
Both glue stick and hairspray can provide you with successful adhesion for your 3D prints to the print bed, but people wonder which is better.
Many people who have tried both say that hairspray tends to bring more success overall, especially with surfaces like borosilicate glass and ABS filament.
Glue sticks can stick a little too well for PLA on glass surfaces, especially if it is a larger 3D print.
Other people mention that using Elmer’s Disappearing Glue provided the best results to get rid of warping issues, allowing them to go from using rafts and brims to just skirts.
Hairspray is really easy to clean compared to glue. A simple wash with hot water should take the layer of hairspray and doesn’t chunk together like glue does.
Some people said that hairspray can be messy, too liquid, and annoying to clean off, but this depends on what type of hairspray you are getting as not all brands are the same.
One user who uses hairspray said that they spray their before a 3D print and only washes it off after around 10 prints, so you can really make life easier once you use the right product and know the proper process.
When you look at other people’s experiences with glue sticks and hairspray, the general idea seems to be that hairspray is cleaner, easier to clean and re-apply, and lasts more 3D prints before needing to apply another coat.
Glue can be pretty messy, and for one person who does time lapses, glue doesn’t look too great, especially on glass.
When you hear the experience of one user, they say “hairspray on a glass bed is pure magic”.
Using a PEI Bed Surface for 3D Print Adhesion
PEI sheets are adhesive plastic sheet material that is specially designed to bear the heat cycles of 3D printing. Gizmo Dork’s PEI Sheet from Amazon is a very popular and well-loved product in the 3D printing community.
These sheets adhere well to the print bed while allowing you to print models of your interest.
PEI sheets don’t require any constant cleaning, maintenance, chemical adhesives, and provide a smooth fine print that can be removed easily.
Best Glue For 3D Printing
Having the right glue is essential for 3D printing when it comes to both bed adhesion and parts bonding. This is the best glue for 3D printing.
The best glues for 3D printing to obtain sufficient bed adhesion are Elmer’s Disappearing Purple Glue Stick, Magigoo, Stick Stick, and Scotch Purple Glue Stick. The best glues for bonding 3D printed parts together are super glue, PVC pipe cement, and 3D printing pen filaments.
Bed adhesion and parts bonding are two of the most essential aspects of creating the perfect 3D printed items. And for both of these processes, you need some sort of glue or adhesive. In this article, we’ll explain what each of these processes is and why having the right glue is so important, and then we’ll give you our favorite glue choices for 3D printing.
Our goal when you visit this site is to find exactly what you’re looking for. We want this to be your one-stop-shop for all things 3D printing, so we’ve compiled endless research and brought in the opinions of other enthusiasts to get the best list possible. You should have no trouble finding the perfect glue for 3D printing in this article!
Why Is Glue Needed For 3D Printing?
When you’re getting ready to tackle some 3D printing projects, it’s time to check off the essential items that you need. Of course you have your computer, the 3D printer, and filament. Cha-ching! All set, right? Well, not quite. At least not if you want to have the best possible chance of success when it comes to creating the parts and products you imagined.
Don’t forget the glue! Having the right glue for 3D printing is an absolute necessity. Bed adhesion and parts bonding are two of the most important aspects of 3D printing that are often overlooked or ignored because some enthusiasts think they’re either unimportant or that the types of glue that you use are inconsequential. How wrong they are!
Let’s take a quick look at what these processes are and why you need glue for them.
Bed Adhesion
If you’ve never heard this term, it’s one that you’ll become familiar with as you spend more and more time with 3D printing. When I first started, I was having common issues with parts not sticking to the print bed and corners and edges ending up curling or being in poor condition. That’s when I started looking for what was wrong and came across bed adhesion.
Bed adhesion is simply the act of your print actually sticking to the print bed or print plate. During any 3D printing process, the first layer is always the most important. If this first layer does not stick (or adhere) to the print bed, you’ll be in for a long day when the subsequent layers start getting deposited. That’s where bed adhesion and using glue come in.
One of the easiest ways to handle an issue with bed adhesion is just to apply a layer of adhesive or glue to the print bed directly. This way, that crucial first layer — and all subsequent layers — should stay in place, including all corners and edges. This leads to far more consistent parts and finished products that you’ll undoubtedly be happier with.
Bonding Parts
This one is a bit easier to think about and imagine, even if you haven’t dealt with it before just yet. But the other aspect of 3D printing that may require you to use some glue is when you’re trying to bond parts together. Sometimes the final product that you’re creating is too big or too complex to be created on its own and requires the use of multiple parts that are bonded together.
That’s where glue comes in! You’ll be happy to hear later on in this article that the vast majority of parts and pieces can be bonded with a simple glue that many people already have laying around the house. But there are also other types of glue that are ideal for specific applications, and even some more innovative methods of bonding that are worth looking into.
Best Glues For 3D Printing
To make it easier to find exactly what you need, I’m going to separate this into two sections. First, I’ll go over the four best types of glue for dealing with bed adhesion issues. Then I’ll show you the three best types of glue on the market for bonding 3D printed parts together.
Let’s dive into the good stuff.
Best Glue For Bed Adhesion
Elmer’s Disappearing Purple Glue Stick
Picture of Elmer’s Disappearing Purple Glue SticksThe easiest (and arguably best) type of glue to use for bed adhesion is Elmer’s Disappearing Glue Stick. If you’re into arts and crafts or you have any kids around the house, there’s a decent chance that you already have some of this stuff laying around. If not, you can pick up a 4-pack of glue sticks for just $3 on Amazon and you’ll be set for a long time.
A glue stick is perfect for bed adhesion because it’s super easy to apply, easy to clean up, and has just the right amount of stickiness. It’s strong and sticky enough to hold the print down as desired, but it won’t cause the print to stick to the bed and require too much force to remove it like some other adhesives on the market. Some 3D printing materials adhere more than others and will be far too sticky if used with other adhesives.
And last but certainly not least, the Elmer’s Disappearing Purple Glue Stick is… purple! That might not seem like a benefit of any kind, but it actually makes it super easy to tell where you’ve applied glue so far and where you haven’t. This makes it simple to refrain from overapplying the glue or missing any spots, so always opt for the purple glue over any sort of clear glue!
Magigoo
Picture of a Magigoo Glue StickWhile the glue stick above is great for most applications, you might want to consider something that was designed specifically for 3D printing in the first place. That’s where Magigoo comes in. Created by Thought3D, Magigoo might look like a normal glue stick at first glance, but it’s actually a liquid rather than a normal glue stick.
Deposited through a membrane at the end of the stick, you apply Magigoo just like a glue stick, and the design applies a super smooth amount that’s exactly what you need. Just keep it moving on the print bed so you don’t over apply it anywhere, and you’ll be good to go. This design also prevents it from making a mess or spilling everywhere if the tube is knocked over.
Without a doubt, the best feature about Magigoo is that it deactivates naturally when the print bed is cooled. Since it was designed for this specific application, the special formula releases its hold on the print after you’re finished printing, making it simple to remove the final product without damage. It’s much more expensive than a normal glue stick, but it might be worth it since you can buy a tube of Magigoo specific to different printing materials.
Stick Stick
Picture of the Stick Stick 3D Printer AdhesionFor another type of glue that was designed specifically for 3D printing bed adhesion issues, you should consider Stick Stick from MatterHackers. As a website dedicated to selling 3D printing supplies and supplying enthusiasts with everything they need to get into the hobby, MatterHackers is a great place to look. You’ll find a heck of a lot more things than just glue!
But when it comes to glue, Stick Stick is one of the best options on the market. The bottle is designed to work in a similar manner to how Magigoo works, meaning it’s super simple. Just shake it up, remove the lid, and flip it over. Gently run the applicator end of the bottle along the print bed and you’ll get the perfect amount of adhesive as you go.
The adhesive will dry once the print bed starts to heat up, and it will deactivate once the plate starts to cool, just like the product above. So all you have to do is wait for the print to cool and you can simply pop it off without risk of damage. Just clean the print bed with warm water and it’ll wipe away with very little elbow grease. Easy to use from start to finish!
Scotch Purple Glue Stick
Picture of Scotch Purple Glue SticksI know, I know. Another purple glue stick. Since you’ve already read about Elmer’s Disappearing Purple Glue Stick above, I won’t spend too much time going into the nitty-gritty details here. But the Scotch Purple Glue Stick is another great option and works wonders without breaking the bank, costing just $5 for a two-pack from Amazon.
As a glue stick, this is very easy to apply and you can get an even coat all over the surface of your print bed in almost no time at all. Additionally, with its purple hue, it’s super simple to see where the adhesive is and where you still need to apply more. For a cheap method of bed adhesion that works wonders, you can’t go wrong with either of the purple glue sticks in this guide!
Best Glue For Bonding 3D Printed Parts
Super Glue
Picture of Super Glue TubesLike I mentioned much earlier in the article, the easiest type of glue to use when it comes to bonding 3D printed parts together is super glue. You may even have some laying around the house, but if not, don’t worry. You don’t need any sort of special 3D printing-specific super glue or anything, and you can pick up this pack of four tubes from Scotch for less than one dollar per tube.
Super glue is incredibly easy to use and it cures quickly, which makes it an ideal choice for quickly attached parts and pieces of 3D printed material together. With how fast it cures and holds things together, make sure you’re ready to put the pieces together before you start applying it. And also try your best to keep it off your skin and fingers, or it can be a pain (literally!) to remove.
If you’re able to attach flat surfaces or surfaces that were designed to fit together, it will work wonders. If the edges and surfaces are a little rough, just take some sandpaper lightly to the areas you’ll be gluing to improve the area of contact. Lastly, I recommend doing this work on a dedicated workstation or with some sort of plastic or paper protection to cover furniture and other surfaces.
PVC Pipe Cement
Picture of Gorilla Clear PVC Pipe CementAs the name suggests, I really am referring to the type of plumber’s cement that’s used by, well, plumbers! Designed to attach PVC and other plastic pipes to one another, this special formula reacts with plastic and basically forces the two pieces to fuse together. But these cements are usually colored, so the attachment points might be visible after it cures, so keep that in mind.
The bond created by plumber’s cement is incredibly strong, but I must say that it’s not the easiest type of glue to use for bonding parts together. This product usually has a twist-off cap with a spherical applicator at the end, designed to apply a liberal amount of cement to the faces of PVC pipe. Great for plumbing, but can be difficult to apply in moderation.
Since this type of glue has to react with the actual plastic in the filament, the surfaces can’t be dirty or greasy, or else it won’t react as well. Also note that the materials need to be some sort of plastic, like ABS or PLA to work.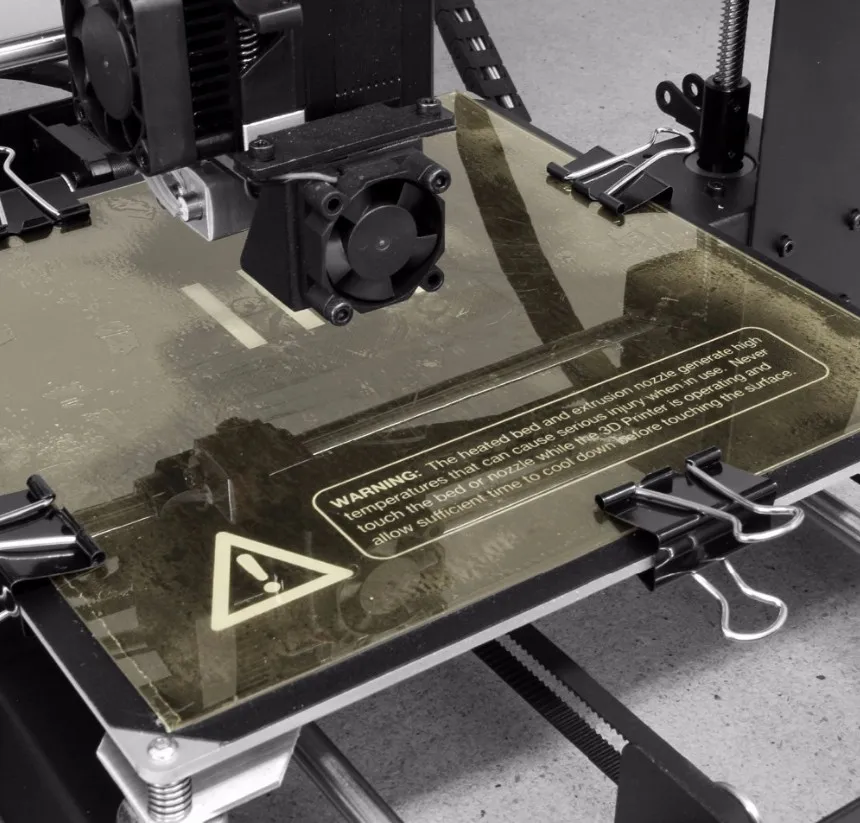 Any non-plastic 3D printing material will not work with plumber’s cement.
3D Printing Pen
Picture of the 3Doodler Create+ 3D Printing PenNow this one is a little bit different than any of the other types of glue on this list, but it’s definitely worth considering — using a 3D printing pen to attach other pieces together! A 3D printing pen is basically a small 3D printer that can fit in the palm of your hand which you can use to pretty much draw and doodle in 3D, like the 3Doodler Create+.
Most of them work by heating up the filament to its melting point and then extruding it through a hot tip, much like a hot glue gun. And while you certainly could just use a hot glue gun for this, a 3D pen can attach the pieces and parts together with the exact same material that they’re made out of themselves, including even the same color!
If done carefully, this can create a nearly seamless transition between components. That said, this method of bonding is not as strong as any of the others, so I wouldn’t recommend using a 3D pen to connect any parts that are mechanical and/or functional. It also requires a bit more money than the other types of bonding, since you have to buy the pen itself. But you’ll also have another method of 3D printing from there and moving forwards!
Testing liquid adhesives for adhesion
Technician
Subscribe to the author
Subscribe
Don't want
11
So we managed to assemble the whole team of liquid products to increase the adhesion of the table in 3D printing. And this means that Mnogo3D, obsessed with adhesion, is back with you. Picaso 3D glue, 3DM 3D glue and I made 4D glue gathered in our hands at the same time. The first two are already familiar to the readers of the portal according to the test "Adhesion means: professional versus amateur". The last one just arrived. And so we will do a test of who is capable of what. In order not to be bored, the glue stick "Kalyaka-Malyaka" and Eeeee ... Povidone on isopropyl alcohol will take part in the test. Kalyaka is the standard of adhesion and it is needed as a guideline. And povidone to debunk or confirm the myth that a professional remedy can be created at home.
Since the last test, we have diluted our "Nurofen", bringing the concentration to approximately 1 sachet of medicine per 0.5 liter of alcohol. And very thoroughly mixed, getting rid of the flakes. Thanks for the recommendations on finalizing the solution to Ilya Pinchuk and advice on the test in general.
This time we decided not to test on nylon, ABS is enough. For the purity of the experiment, we will carry out the test on the material from two manufacturers. Black is Chinese, sold under the Good3D brand, and gray is from REC.
Disclaimer: I express my gratitude to the portal 3DToday because 3DM glue, as well as REC gray plastic are winnings in competitions held by him. Let's not forget Top3DShop either. Glue Picaso provided by them for the last test free of charge.
4D glues "I made" and "Kalyaka-malyaka" were bought from office. dealers without informing about the intention to conduct testing.
Introducing the participants. Glue from Picaso and 3DM are longtime players in the 3D printing market. Their composition is declared the same: Water, Isopropyl alcohol, P-complex and flavor. But manufacturers are different. 3DM smells stronger of alcohol. Either they saved on the fragrance, or the spirit was vigorous. 4D glue "I made" is different. In its composition, PVP is immediately indicated. It has a yellowish tint and is thicker. The smell of alcohol is less noticeable. On the contrary, there is a pronounced woody smell. Apparently the wombat is on the label for a reason. All three are supplied in 250 ml squeeze bottles. "I did" is also available in 100 ml bottles.
Homemade remedy is simpler and cheaper. In a pharmacy, we buy a sachet of medicine Enterodez 5 grams with the active ingredient POvidone and dissolve it in 0.5-1.0 liters of isopropyl or ethyl alcohol. Doesn't dissolve well. Therefore, you need to periodically shake the bottle until the flakes disappear. Why Povidone and where does the pharmacy?! It's simple, PVP is polyvinylpyrrolidone. And its other name is just povidone or polyvidone. This substance has a very wide range of applications in medicine and chemistry. But it is one thing to know the composition, and another to know the recipe. In the last test, homemade did not show itself in any way. Let's see what happens this time.
Magic glue stick "Kalyaka-Malyaka" is also not simple and has its own legends. We took several briquettes of this glue. we prefer this particular method of adhesion and can debunk a few more myths about it. Actually everything is in the photo.
Even in one briquette there are tubes of different shades of yolk with contents of different shades of pink. Also different ends of the glue. Some are pointed, while others are flat. And all this in one sealed pack from the dealer.
And so... to the test!
Test piece:
Frame with 0.8mm wall, 15x150mm, 50mm high. We print with a nozzle of 0. 8 mm and a layer of 0.3. The first layer is 50% of the base layer height. Speed up to 50 mm/sec. Brim at 5 perimeters. Printer open Corexy with ball screw. The temperature in the room is 22-25 degrees, without drafts. The surface is a mirror. The conditions are deliberately set to be unrealistic, so that it would be easier to evaluate the result by the amount of printed material.
The idea was to put 4 parts side by side and see what happens.
But the idea turned out to be so-so. A part that went out of the way caused the test to stop. Here, either apply the Olympic system, or test it for a long time and dreary piece by piece.
We settled on the last method and started printing the same code with different adhesives. Accordingly, they waited for the platform to cool down, washed it, dried it, degreased it with pure alcohol, dried it, and applied the composition.
Contrary to advertising, one coat of compound does not work! Not even two work. Applying a large amount is also not an option. You need at least three layers. And for 3DM, even three layers do not work. In this regard, for the outsiders of the first round, the adhesives 3DM and "I did" were given a second chance to prove themselves. In the second attempt, only 3DM was given a second chance. The concentration of the substance, apparently, is less in it. Therefore, after a failed attempt on 3 layers, the printing was repeated on 4. The difference, as they say, is "on the face." Assigned seats are our subjective decision on typing comfort. And it wasn't easy. You run the test. You control that the brim began to stick to the table. If the composition is small, then a new layer of the composition was applied and the test was started again. If the print has gone, then you sit and wait for the coveted click and crackle of the extruder on skipping steps. You fix the % of the task completion and the separation. Stop printing. Table cooling, washing, drying and new. Over 100 photographs were taken. Let's show some.
Picasso 1st attempt.
Most printing stopped within 30-50%. The best results were shown only by "Kalyaka-Malyaka".
3DM glue and its 3rd attempt.
It should be noted that REC plastic, unlike Good3D, is more rigid and more prone to delamination. On it, the subjects showed poorer results. In particular, in the second attempt, when printing on a painter, the plastic tore the brim, and not completely tore it off, as in all other cases.
And almost broke another corner
Well, actually the results.
And in tabular form:
Thanks for reading.
Sincerely, Mnogo3D (3D printing in Ryazan and beyond)
PS Eta4Ever was the first in our VK mini-survey to guess which of the trinity of liquids is the best. Cool!
adhesion glue
Follow author
Follow
Don't want
11
Best adhesive found
jrBush
Loading
04/24/2019
3252
Personal diaries
WANHAO DUPLICATOR I3 MINI
Hello everyone, the time has come for me to share my experience in the field of 3D printing, I don’t know how experienced I am, but at the moment I printed 2kg. Filament.
So we're talking about table glue.
I will say that from the moment I was given the printer and until this post I had no problems with adhesion, but after the tube of pencil that came with the printer ran out and I went to the store for the first glue I came across, I had to go online and find out what many users of 3D printers experience problems with sticking to the table, or rather the lack of it, so I’ll say that not all glue sticks are really suitable for this,
For myself, I think the ideal glue is “Erich Krause” to spread thicker and there are no problems, by the way, it is not necessary to clean the glue with alcohol or window cleaner after each print, you can safely apply a layer on top of the old glue.
So there is one glue that made me write this post, and not because it was difficult for me to extract the part, but because I could not do it, see for yourself:
0002 Don't want
1
Article comments
More interesting articles
iBabka
Loading
03/13/2023
770