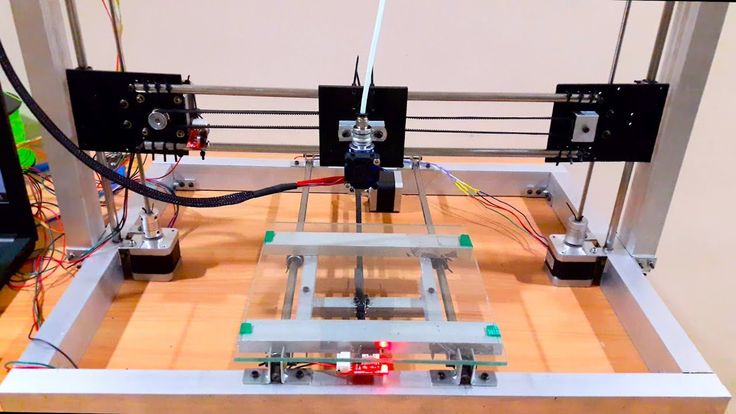
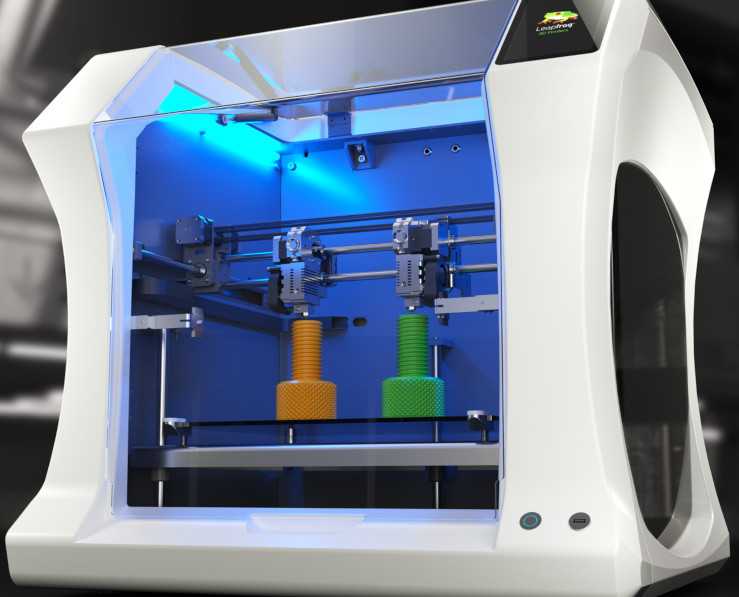
Anycubic i3 mega 3d printer upgrades
Anycubic I3 Mega & Mega S Upgrade Guide
With this, I want to sum up all basic upgrades, mods, some suggestions and more.
I have made a little test print you can try to print.
You can download it HERE.
This Guide includes:
- some basics, mods and upgrades for the bed
- some suggestions for the hotend (cover, silent fan, better cooling)
- new spool holder and better management of the filament
- some design advancements
- vibration dampers
- making the printer completely silent (fans, new motor drives)
- some useful tips for a firmware upgrade
Table of Content
- Slicer
- Basics
- Bed
- Hot End
- Filament
- Overall
- Advanced
- Silent Printer
- Other
- Firmware
- Calibrating the Extruder
- List of Spare Parts
Slicer
You can find everything about Slicer Here.
Basics
So first, everything you really need, or which is easy to do.
Bed
The Ultrabase is the best bed, I ever have used. But it must be clean!
So please keep it clean!
Before every print, I would suggest, that you clean it. Just take some isopropanol and give it a wipe with a towel.
You can also use nail polish remover as long as it is NOT ACETON!
Leveling!Then, you really must level the bed perfectly. Do it as long, as it is perfect (at least for you). I really had problems with my front right corner, because when I loosen it, the rear left goes down and vice versa. Also, my bed is also not perfectly flat, but it works. You maybe have to change the screw wich hits the end stops.
Bed handleOne more thing for the bed, a little bed handle so you don’t burn your fingers:
You can use this or this.
With this you can tension your printbed belt: Y-Tensioner
Bed isolationThe bed has no isolation, further a lot of heat is lost and the heating takes longer. Therefore, you can install a isolation.
Hot End
Cover/CaseSo first, I made a new Cover with bigger (Honeycomb Style) holes, for a better airflow: Hotend Cover
For this cover, I would recommend that you change the right fan for a silent one like the Noctua NF A4x10.
The left turbo fan is quite good. Altough it is very loud, I would keep it.
There are several designs for fan ducts. I would say they really help, and I also use one.
A really big advantage is, that they provide cooling from both sides.
I use this Part Cooling Fan Duct.
Covers and cable managementThis is just a little cover for the cables, doesn’t do much, but it protects the cables. cable holder
When you print high objects, the cable may get squeezed at the top.
To prevent this, you can use a cable guide.
For this, you must cut the old cable ties and put new cable ties on it.
You could also use this little Cover.
Or you print a Cable chain.
Filament
Buy whatever Filament you like. The most are even from the same manufacturer, but with another brand name on it.
I can recommend: Amazon Basic, Eryone, Geetech, 3D Jake …
(You don´t need this for the new Anycubic S Pro (Mega S)
Basically, the original filament spool holder is crap.
I remixed one from philwild. Mine fits perfectly together with the thing I will talk about next.
This is my filament spool holder: Filament Spool Holder
Filament Sensor Holder(You don´t need this for the new Anycubic S Pro (Mega S)
I really had some Problems with the original magnetic ball thing. It always fell off, then I tried some other holder which leaded to filament breaking. So I designed my own.
With this holder, the Motor is mounted at an angle, so the filament doesn’t bend as much. Furthermore, the angle to the Spool holder is much better.
This is my Sensor Holder: Sensor Holder
However, you can also just disconnect the sensor.
Overall
This is just a nice tool rig. You can put all your tools in. Nothing more to add.
Tool Rig
And a holder for your caliper:
Caliper Holder
Face PlateThis will really let your printer be the best out of all. Ok, no. It’s just for aesthetics.
So I want to list here 2 different Face Plates.
On my printer, I use this one: FacePlate
The white under this plate is just paper or any other material. Can be any color.
The other one: FacePlate
VibrationThe printer can sometimes vibrate very much.
The simple way: Just put some foam (when you order something, you will get some for sure) under the feet. It will help some, but not for long. But I still use it (I just order enough).
Nevertheless, you can print this: Squash Feet
These ones are not as high. (with my guide, you don’t need to mount the power supply fan outside, so the printer doesn’t need so much space beneath it.)
For this vibration dampers you need 4x Squash Balls.
LightingOk, so there are basically 2 variations.
Lightning on the hotend, or lightning on the housing.
For the Hotend:A ring lightning which directly lights the printed part: Ring LED Holder
A compatible led would be this LED Ring 80mm.
Important! If you also have the fan duct installed, you need to print this one: Ring LED Holder 100mm
Furthermore you´ll need to buy the bigger LED Ring 100mm .
Or you just glue some led´s into the cover. You need some 12V LED.
To install any leds, just connect it to the right fan cables.
For the Housing:A led stripe around the printer.
To mount it print this: LED Mount
And a led strip.
You can cut the strip and just connect it to the powersupply.
Advanced
Ok, so you have done all above, but want your printer to be even better?
What about that loud sound’s you printer does? Do you have some Z wobbling?
OK, then make your Anycubic silent.
At this step, you have to open the bottom plate of the printer. Please turn the power off and unplug the cable!
Silent Printer
Power Supply Cover and FanOne of the loudest fans on this printer is the PSU fan.
I got inspired from some other designs, and designed my own PSU cover.
On the one side, the power supply gets much more air, on the other side, it is much quieter with it.
You can find my blog post about it here:
Motor Driver Fan duct and FanOk, next on the list is the fan next to the power supply.
For this, I would recommend printing this fan duct: Fan Duct
Again, you also need a new, not as noisy fan. You need a 40mm x 10mm fan.
For fan installation, use the included orange plastic things to tighten them to the cover or fanduct. They reduce the vibrations a lot.
Motor DriverWhen all your fans are quiet, there is still one sound. It’s a very high-pitched annoying sound.
But first check, if you even can swap your driver. On some, they are soldered on. On others not. It depends when and where you bought the printer. For this, you have to open your printer.
Swappable Drivers
The drivers are the small black boards with the silver heatsink on it. On the one, you can see that you can take it of and swap them. You can also see the black plastic mount below.
So if you have the swappable drivers you can go on.
Solderd Drivers
The 32bit Trigorilla board has soldered drivers. They are directly on the big board. When it looks like the picture above, you can´t swap your drivers (At least not without soldering).
If you have this board you could buy a new 16 bit Trigorilla board.
Swapping Drivers
You will need 5x TMC 2208: (for: X, Y, Z, E0 (Extruder), E1 (second Z)
There are some different versions on the market.
If you can find some, which are called V2.0 you just can swap then out.
Also, when you get them, check again if they are really V2.0
If you don´t find any, or got delivered others, you have to flash a new firmware.
Be sure, to then take the right hex file (Marlin-AI3M-vx.x.x-TMC2208.hex).
You can find more to this under the section Firmware.
I recommend these TMC2208.
Installation
Look at the marks on the board and on the driver, don´t put it in in the false direction.
When you install it, you must also check the voltage and probably change it.
For this you will need a mutlimeter.
There is no universal Vref. Its different for everyone. You will need to test it for your printer.
But at least, stay between 0,8 and 1,4 V.
My Voltage:
- X driver = 1,15V
- Y = 1,15V
- Z (Z1) = 1,15V
- E0 (Extruder) = 1,25V
- E1 (second Z) = 1,15V
You can measure the voltage on the upper right hole (or on the screw, but you must turn this to change the voltage) on the driver and on the Ground GND.
Now just put the fan duct back on.
Now just test all axis. They should all work.
If not, open the printer again, and check if any driver is very hot (nearly burn your fingers). If yes, this driver is maybe broken.
If no one is too hot, check the voltage again. Than check the cables if every is plugged in correctly.
If it still don´t work just comment..
Also test printing a part.
When you get shifting layers or under extrusion, you have to increase the voltage a bit (in 0,05V or 0,1V steps).
Other
Z-WobbleMaybe you have noticed it, maybe not. But the clutches for the Z-Axis are very stiff.
Therefore I changed them with better coulings.
These ones are much more flexible and will eliminate any Z-Wobbling.
But the installation is kinda pain.
You must unscrew the motors from the top, and then put the clutch out.
When you have the opportunity, you should take the screw drive out, and clean it (You will never do it again).
After cleaning, put a some oil or lubricant on it again.
MosfetPersonally, I didn´t install it.
But there is a slight chance, that the motherboard could get to hot on very long prints.
Furthermore, it could than be destroyed.
You can print this Mosfet Holder: Mosfet Holder ; He also explains how to mount it.
And then buy two 2 pieces of a mosfet.
Firmware
The features of a new firmware:
- No more annoying sound at the start.
- PID Control
- 12V at fan
- Better print quality
- Thermal runaway protection
- mesh bed leveling
This guy did a really good job. He also describes everything very good: Firmware Upgrade
Please also read his explanation carefully!
But I will also do some simple explanation.
If you use still your stock driver take this version:
Marlin-AI3M-vx.x.x-stock_drivers.hex
When you have the TMC2208 V2.0 take this version:
Marlin-AI3M-vx.x.x-TMC2208_reversed.hex
With any other (like TMC2208 V1.2) take this version:
Marlin-AI3M-vx.x.x-TMC2208.hex
To do the update, you now have to connect the printer to your pc.
Now, just open Cura, and go to Setting -> Printer -> Manage Printer -> and update firmware
Now select the right .hex and update it.
Calibration of the Extruder
First, you will need to download Pronterface:
Download Printrun Pronterface
Just start it up and connect it with your printer via usb cable.
Connection with MacPronterface Printrun software on Mac is via /dev/cu.SLAB_USBtoUART and is 250000
If the field under extrusion is red and you can´t write the extrusion length in it like it is on the picture below,
than follow try this steps: Printrun Pronterface Fix
Now on the printer, remove the plug or fitting on the extruder in which the filament tube is inserted.
Than cut the filament at the top of the extruder so you can measure the length later.
Now in Pronterface:
Write in the space right: ” M503 “and send it.
M503
Should look like this:
Now search the “ M92 X80. 00 …. “ line and note the values : E xx.xx
For example, mine: E92.60
At the left fill in at length:100mm at the speed 100mm/min
Than extrude 100mm filament
Now measure the length:
I measured: 96.56
Now calculate:
100 / measured * noted xx.xx
For me:
100/96.56*92.60 = 95.90
Than copy the “ M92 X80.00 …. “ line and change the E to your calculated E.
My Line would look like this:
M92 X80.00 Y80.00 Z400.00 E95.90
Copy your own line than into the field and send it
Than type M500 and also send it.
M500
Now you should be finished!
List of Spare Parts
Some spare parts which are special for the Anycubic Mega:
Mainboard
Hotend
The Ultrabase bed
Nozzle
Thermister
Thank you!
Just wanted to say thank you to this amazing community.
To everyone, who also built anything to make this printer better.
To everyone, who is helping others.
And especially to these people, which helped me at the beginning.
(*) This all was a lot of work, so I decided to make all my Amazon links, which I would have included anyway, to affiliate links.
There are not any costs for you. But when you buy with my link, I earn a bit.
Also if you want to donate you can do this here:
Post Tags: #Anycubic#Bed#extruder#Firmware#guide#Hotend#powersupply#Silent#Spare Parts
Similar Posts
Anycubic Mega S Upgrades - Fans, Hotend, Spool Holder & More
- Author
- Recent Posts
Martin
Besides many test devices, Martin now has his fourth own 3D printer running and prints as a hobby for friends, family and himself. He is happy to share his experience with each new article.
Latest posts by Martin (see all)
Disclosure: Links marked with * are Affiliate Links. I earn from qualifying purchases if you decide to make a purchase through these links – at no additional cost for you!
The Mega S from Anycubic* has become one of the most popular 3D printers on the market thanks to its reliable performance and good value for your money. Nevertheless, there are numerous upgrades for this model as well, such as alternative fans, hotends and spool holders to make printing easier and optimize the result.
These are the 5 best upgrades for the Anycubic Mega S:
- Hotend fan: Noctua NF-A4x10 FLX*
- Mainboard & power supply fan: Scythe Kaze Jyu Slim*
- Stepper Motor: Stepper Motors 2208*
- Hotend: ANYCUBIC Hotend Extruder 1.75 mm*
- Spool holder: DIY on Thingiverse
We’ll go into detail about these and many more upgrades for your Mega S in this post.
Table of Contents:
- 1 Upgrades for the Anycubic Mega S
- 1.
 1 Quieter Fans
 - 1.2 Stepper motor
- 1.3 Alternative Hotends
- 1.4 Spool holder
- 1.5 Upgrades for the operation
- 1.6 Printing area lighting
- 1.7 Upgrades for the print bed
- 1.8 Protection of the cables and the 3D printer
- 1.9 Firmware upgrade
- 1.10 Stability upgrade: the Face Plate
- 1.11 More stability – Z-axis upgrade
- 1.12 Full control over the filament – Calibrate the extruder
- 1.
- 2 Further Information
- 3 Related Questions
- 3.1 Where do I get the upgrades for my Anycubic Mega S?
- 3.2 Can the upgrades be done by beginners?
- 3.3 Are there upgrades for all 3D printers?
- 4 Conclusion: Are Upgrades for the Anycubic Mega S Worth It?
Upgrades for the Anycubic Mega S
Quieter Fans
The Anycubic Mega S* is relatively loud during the printing process. On the one hand, this is due to its open printing area, but on the other hand, it is also due to its fans. Especially the fans in the hotend and the power supply can be replaced to reduce the noise during printing.
Hotend
Replacing the hotend with a quieter fan is relatively simple and possible for just a few bucks. Quieter alternatives are available from many different manufacturers and are usually available for around $10. It is important that they have the dimensions 40x10mm so that they fit in the printer.
A popular very quiet fan for the hotend is, for example, the Noctua NF-A4x10 FLX*, which only gets just under 18 dB loud. It is one of the most reliable fans that also provides good cooling. However, you should refrain from installing an even more powerful fan, since the Anycubic Mega S usually does not manage to get a larger and more powerful fan going without an additional firmware modification, since it usually only outputs 9 instead of 12V.
Noctua NF-A4x10 FLX*Check Price at:
Amazon*
An inexpensive and yet very quiet alternative for a fan at the hotend is the NoiseBlocker BlackSilent XM2*, which also measures 40x10mm. With a noise level of just 14 dB, this fan is even significantly quieter than the one from Noctua.
Mainboard
Replacing the case fan to cool the motherboard and driver can also make for quieter printing and is very inexpensive. The Scythe Kaze Jyu Slim* fan, for example, fits perfectly in the Anycubic Mega S and is very quiet. Thanks to the included metal bracket, you can easily install the case fan into your 3D printer.
If you also turn the base plate of your printer by 180°, the ventilation slots will be exactly above the fan, so that it gets more air.
Scythe Kaze Jyu Slim*Check Price at:
Amazon*
Power supply unit
However, the fan in the power supply of the Mega S probably produces the highest noise. You should only dare to replace this fan if you know what to do, since very high voltages usually still flow through the power supply even when it is turned off, which can be life-threatening.
Alternatively, you can of course ask a professional for help. We also recommend installing a Scythe Kaze Jyu Slim fan* in the power supply. Since this fan does not fit exactly into the PSU due to its different dimensions, you can print a suitable case for the fan. You can find templates for this at Thingiverse.
Stepper motor
Replacing the stepper motor is also very successful in reducing printer noise. If you install the 2208 stepper motors*, the print head moves almost silently.
TMC2208 Stepper Motor*Check Price at:
Amazon*
Alternative Hotends
Just like most other 3D printers, the Anycubic Mega S can have a clogged or even broken hotend. Therefore, it is recommended that you purchase an alternative high-quality hotend in case of an emergency, which will eliminate these problems.
A good option here is the ANYCUBIC Hotend Extruder 1.75 mm*, which fits perfectly on the Mega S from Anycubic. This hotend is very cleanly manufactured, the cables are securely fixed and covered with tubes, so that it works reliably for a long time.
Check Price at:
Amazon*
Replacing the hotend on this printer is also very easy, you just have to loosen the four screws on the print head, unplug the two connectors in the hotend and disconnect the hose on the extruder, and you can insert the new hotend.
Spool holder
The placement of the filament holder on the Anycubic S is not in the optimal location on the right side of the printer and is not suitable for (normal) sized spools.
In order for large filament spools to fit on the holder, it must be adapted. For example, you can simply print out a small placeholder element with your own printer, insert it in between and screw it in place with slightly longer screws. At Thingiverse, you can find numerous templates for printing matching spool holders, so that you can optimally place your filament roll on the Anycubic Mega S (link to the model).
Alternatively, you can find many coil holders for sale online*, but it is usually cheaper to print the holders yourself with your own 3D printer.
Upgrades for the operation
In order to be able to conveniently operate your Anycubic Mega S 3D printer, you can not only operate your printer directly on the device itself but also easily download software of your choice. This allows you to control the 3D printer conveniently via a web interface on your computer.
A good option for this is OctoPrint. With this software, you can adjust the settings of your printing process. Thanks to the very clear web interface, this is usually much easier and more detailed than on the printer itself. If you have linked your printer to a webcam or camera, the printing from the Anycubic Mega S can be monitored and recorded with OctoPrint.
If desired, the software even sends you a notification via email as soon as a printing process has been completed. In addition, you can also use numerous other functions, so-called plug-ins, with the open-source platform OctoPrint. These include, among others, the popular slicer software Cura.
With this, you can design your own 3-dimensional objects. OctoPrint is free for personal use, but there are also paid versions with advanced features. By default, the Anycubic Mega S does not have Wi-Fi access. However, if you also buy a Raspberry Pi*, a small, very inexpensive single-board computer, you can use all the functions of OctoPrint conveniently and independently of location via a local WLAN network.
In addition to the OctoPrint software, there are many other providers for operating the Anycubic Mega S via a web interface. These include, for example, the Polar Cloud and the Repetier Server. These are especially recommended for you if you want to control several printers at the same time.
Printing area lighting
A not necessary but very nice upgrade for your 3D printer is also an illumination of the printing area, so that you always have a particularly good and beautiful view of your printed objects, even if the room in which your printer is located may not be optimally lit.
You can simply print out a template for a print frame. You can also find templates for this at Thingiverse, for example. All you have to do is attach an LED strip* to this holder. The lighting is particularly practical for recording the printing process since the camera shots are much better from an illuminated printing area. However, you should make sure that you use warm white LEDs, as the light from cold white LEDs is too bright.
Upgrades for the print bed
With the so-called Ultrabase*, the Anycubic Mega S has a very good hotplate with first-class adhesion. In order for the print to function properly and the result to be as clean as possible, it is important that the Ultrabase is extremely clean.
For this purpose, it is recommended to clean the plate with a clean cloth and some isopropanol before each print. It is important to note that no acetone is included, as this would destroy the print bed.
So that you don’t burn your fingers when removing the print bed to detach your printed object, there are also numerous templates for so-called bed handles. With these small holders, the print bed can be easily removed from the printer without the risk of burning your fingers.
The purchase of insulation mats* can also be very practical. You can cut them to fit your printer and stick them on. The purpose of the mats is to reduce the heating time and to keep the temperature of the print bed constant. In addition, you can save some electricity with the help of the insulation mats and even reduce the noise, because the scratching of the nozzle is dampened.
Protection of the cables and the 3D printer
To ensure that the cables of your Anycubic Mega S 3D printer last as long as possible and do not suffer any breakage, you can get yourself various cable covers and holders*. You can either buy them or make them yourself with your Mega S printer.
To protect your entire printer from dust and dirt, special protective enclosures* are very handy. With these covers, you can cover your printer if you don’t use it for a longer period of time.
Firmware upgrade
A firmware update of the 3D printer Anycubic Mega S can also bring you many advantages. To update the Marlin firmware, connect your printer to your computer, open the Cura software and select “Update firmware” in the settings.
After the update, depending on the version, you can look forward to a better quality of printed objects, lower startup noise, and thermal runaway protection.
Stability upgrade: the Face Plate
Depending on the surface your 3D printer is standing on, this position can influence your printing result. To ensure a good and stable stand of your Anycubic Mega S, you can print a so-called FacePlate.
These bases are also easy to make yourself with your 3D printer. Alternatively, you can also print out your own feet, such as the Low Profile Squash Feet for the printer, which absorb and reduce the vibration of the device.
More stability – Z-axis upgrade
With some devices, the Z-axis of the Anycubic Mega S also wobbles a bit depending on the pressure, since the couplings for the Z-axes are relatively stiff. To stabilize the axis a bit, there are good upgrades for your 3D printer here as well. More flexible than the standard couplings are, for example, the AFUNTA couplings*.
However, the installation of these couplings is a bit more complex, as you have to unscrew the motors from above and then replace the couplings.
Full control over the filament – Calibrate the extruder
The correct setting for the filament delivery rate, or flows, can be very idle and laborious on a 3D printer, as often too much or too little filament is sent into the extruder by default.
Often this flow cannot be adjusted properly even with the settings in the slicer, which can lead to poor results when printing. However, this can be prevented by calibrating the extender. For the calibration of the Anycubic Mega S, you only need a caliper, a tape measure and a folding rule. The easiest way to calibrate is to use the OctoPrint software, but you can also simply connect your printer to the PC via USB.
Further Information
The Anycubic Mega S* is the successor of the i3 Mega* from the Chinese manufacturer Anycubic, which is one of the most renowned suppliers of 3D printers. The Mega S strongly resembles its predecessor in most features, such as design, dimensions of the build space and nozzle diameter. Unlike the i3 Mega, however, the newer Mega S is also suitable for printing with more flexible filaments such as TPU*. This is due to the further development of the extender.
Also, unlike its predecessor, the Mega S has a coil holder on the right side. Since the Anycubic Mega S is so similar to the i3 Mega, almost all upgrades that are available for the predecessor model can also be installed and used for the Mega S. However, due to the further development of the Mega S, such as the extruder, not all upgrades are necessary.
In general, the Anycubic Mega S is considered a reliable printer even without many upgrades, and it delivers very good print results, especially for its low price. With little effort and usually also rather low costs, these results can still be optimized. However, it should always be noted that some upgrades can void the manufacturer’s warranty or work on the printer, such as replacing the fan on the power supply, should only be performed by professionals due to the high voltages.
Related Questions
Where do I get the upgrades for my Anycubic Mega S?
Most upgrades and accessories for your 3D printer are available at major online retailers and in the online stores of the manufacturers or software for 3D printers. You can even print many parts yourself with the Anycubic Mega S. Especially in Thingiverse you can find numerous templates.
Can the upgrades be done by beginners?
First, you should familiarize yourself with the 3D printer to understand how it works. Most of the components are easy to replace, so even beginners can install these upgrades. However, you should be very careful with some parts like the power supply.
Are there upgrades for all 3D printers?
Yes, almost any commercially available 3D printer can always be improved and extended to perfect the printing result. The components and templates are often similar, but not always applicable to all models.
Conclusion: Are Upgrades for the Anycubic Mega S Worth It?
The Anycubic Mega S* delivers reliable and high-quality printing even without many upgrades. Especially considering its price, this device is absolutely worth it.
However, if the relatively high noise level during printing bothers you, you can reduce it with a few simple steps, such as replacing the fan on the hotend or using an insulating mat. Smaller tools and gadgets, such as the small feet or the extension for the filament roll holder, can also be easily printed and attached thanks to the numerous templates on the web.
Other upgrades, such as replacing the fan on the power supply or stabilizing the Z-axis with more flexible couplings, are sometimes a bit more complex. So it’s up to you whether the small improvements are worth the respective work and costs.
In general, however, it can be said that most of the upgrades can be done cheaply and easily. Especially if you enjoy tinkering, installing the upgrades on your Anycubic Mega S 3D printer can even be a lot of fun.
Disclosure: This website is the property of Martin Lütkemeyer and is operated by Martin Lütkemeyer. Martin Lütkemeyer is a member of the Amazon Services LLC and other Affiliate Programs. These are affiliate advertising programs designed to enable websites to earn advertising revenue through advertising and linking to Amazon.com and others. Links marked with * are affiliate links.
Technician
Subscribe to the author
Subscribe
I do not want
12
For a long time I dreamed of remaking some nodes in Anycubic i3 Mega, but I did not want to fence the artisanal garden, but for normal remedies I needed a 3D printer, and with a print area much larger than that of the Cube.
In short, it was necessary to disassemble the Cube, and then model the details in place. I didn't have that opportunity. Therefore, everything remained only in plans for the future. And this is the future. I bought myself a second QIDI X-MAX printer. Well, I really wanted to print normally, without dancing with ABC tambourines, and most importantly, Nylon and Carbon. Yes, and the working area at the Cube has long ceased to suit, as well as the drygo-table. In short, the goal has been for a long time, but the price bites a lot at what I wanted. But then my anniversary came, and my friends and my wife gave me a substantial amount, and without a second's hesitation, I got into a credit card with an insufficient amount and bought myself a QIDI X-MAX, which I had my eye on for a long time.
But back to the old Cube. I was not going to write it off from the accounts, an excellent printer for simple plastics, for everyday printing. I have already run, more than 80 kg of plastic. Both belts have already worn out, I changed them, the table already needs to be replaced, but the printer works great, predictable, and does not mow. Those. as a second printer, it suits me just fine. In short, I finally removed all the old frenziedly screaming coolers from the drivers and PSU. I also removed the PSU cover. On QIDI I printed spacers with fastening for 120 coolers, and installed 2 120 coolers.
Power -by -power wire for the table and wire with a temperature sensor, which are simply angry, replaced. I put an acoustic wire of 2.5 squares on the heating, flexible wires on the sensor, I don’t know their abbreviations. Next, a caterpillar cable channel for them was printed, it will not allow a strong kink of these wires in one place, and will distribute the kink over a significant length of the wires, which will eliminate their fractures.
I also removed the filament sensor, the contact in which I got lately, I just temporarily removed the connector from it and put a jumper there. Of course, for good, it would be worth replacing the drivers with quieter ones, but I’ll probably leave that for later, you must first pay for QIDI in full. Then I will order a new table and a set of drivers. The old man will still give heat ... After turning it on, I was pleasantly surprised by the greatly reduced noise level. And at the same time, he carried his hand to the floor - it blows specifically. Alterations was satisfied in the end. I did not seek to make a spaceship out of the Cube, I just eliminated what really bothered and annoyed me.
Follow author
Follow
Don't want
12
More interesting articles
28
Subscribe to the author
Subscribe
Don't want
A few tricks to speed up 3D printing and save filament! Kura allows you to use...
Read more
chak198
Loading
25. 10.2022
852
6
Subscribe to the author
Subscribe
Don't want
Good day, dear colleagues! Today we will make the correct connection of LARGE (or not very...
Read more
AKDZG
Loading
14.02.2015
842260
362
Follow author
Subscribe
Don't want
Many 3D printers run the popular Marlin firmware. The firmware is initially configured ...
Read more
3D printer modifications - print quality is higher, quieter operation
Based on our extensive experience with different 3D printers, we have prepared several modifications that will improve print quality, make your 3D printer quieter and functional in operation.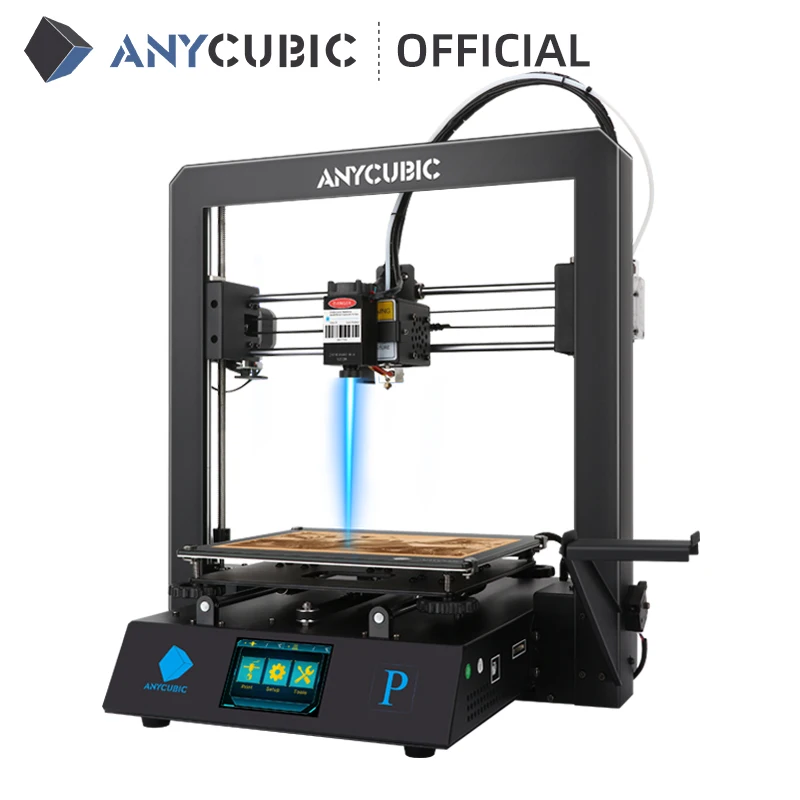
1. Dampers for motors (Buy here)
The damper is a simple passive device that consists of two strips of metal filled with rubber. It turns out the correct vibration decoupling without hard contact. The main task of dampers is to dampen small vibrations from the operation of motors, thereby significantly reducing noise and damping small print irregularities that arise from it. Hard rubber is used, so this installation of dampers will not affect the tension of the belts and the rigidity of the printer itself in any way. In fact, installing a damper even on one motor makes the printer noticeably quieter in operation. There is a thread on the metal plate itself, so there will be no transmission of vibration and noise through the fixing screw. The only thing I advise you, before ordering dampers, be sure to check whether there is enough space for its installation on your printer model. The height of this insert is 7 millimeters, and it happens that you can stick it to all points of installation of motors.
2. TMC Drivers 2208 (Buy here)
This is another upgrade that greatly reduces the noise from the printer motors. Most often, 3D printers have an old, and therefore cheap, replacement A4988 driver installed, and when it works, an unpleasant howling, whistling humming noise occurs from the motors. This sound comes from the motors themselves, but it is the drivers that control them that create it. The fact is that manufacturers strive to reduce the cost of the printer, not caring about the noise during its operation, which is why they install the A4988. But, of course, there are many modern drivers on the market today. One of them is TMC 2208. Its feature is that it is almost completely compatible with the A4988 driver. It is enough to take out the A4988 and install the TMC 2208 instead. Of course, it is important to observe the pinout of the contacts, otherwise you can stupidly burn not only the driver itself, but also the control board. The pins are signed, so just be careful. Next, you need to adjust the motor current for your printer. This is done by a variable resistor on the driver itself. There are no exact setting values, since printers and their mechanics are different. The point here is that you need to set the minimum required current so that there are no skipped steps when moving. For example, for an Anycubic Kossale delta on lubricated and easy-rolling rails, I got a value of 1.1 volts. According to the formula, this is approximately 0.75 amperes per motor. In general, this value is suitable for most printers, but I repeat, you must calculate the settings yourself using the formula indicated on the product page on Aliexpress. And the last thing that is required of you is to invert the operation of the motor. The output pins on the drivers are located differently, so you will either have to invert the firmware outputs, replacing false with true, or physically rearrange the wires in the motor connector. They are signed on the driver itself 1A, 1B, 2A, 2B.
 And here we also just observe their new pinout. But of course, the easiest way to do this is in the firmware.
So let's do it again: First, install the new driver, following the pinout. Second, we adjust the current with a variable resistor. And third, we invert the operation of the motors either in the firmware or in the physical connector. After that, the output is an absolutely quiet printer.
When ordering, please note that for deltas you need to install three drivers - on the X, Y and Z axes. And for the cartes only 2 drivers will be enough - on the X and Y axes.
It would seem, well, what's wrong with that, nozzles in most cases are sold under 10 pieces for one dollar, but there are those that cost 5 bucks for one nozzle. But for a printer, this little detail is almost the most important, because the quality of the nozzle will determine how the extruded thread of hot plastic is formed, and how it will fit on the model. In appearance, all nozzles are similar and no significant difference can be seen between them. But it is worth looking at them under a microscope and this difference will immediately become noticeable. Some nozzles have scuffs on the edges, others are generally bent, but there are also almost perfectly even ones. After studying all the nozzles, we can say that there is not a single visual good among cheap nozzles and it turns out that you will have to arm yourself with a microscope and check cheap nozzles for their curvature before installing them on the printer, or immediately buy expensive and high-quality ones.
Still neglected by many in printing, but the main cause of nozzle gaps is dust and dirt that builds up over time on the spools of filament or is already present on them during production. Therefore, I recommend covering them with bags and additionally printing a dust filter, stuffing foam rubber in it and putting plastic on them. Installing such a simple filter significantly reduces the likelihood of nozzle clogging and saves you from one of the most common problems with 3D printers.
4. Foil insulation (Buy here)
Manufacturers of Chinese 3D printers save on everything, especially budget models. Therefore, printers often come without a table insulation at all. But its absence, of course, causes heat loss and uneven heating of the table, which leads to large models coming off during long-term printing. If you have a table without insulation, then I definitely recommend ordering foil insulation. It costs only 2-3 dollars. It is simply molded on the self-adhesive from below, immediately insulating the entire table, and thereby stabilizing its temperature. Of course, instead of it, you can use a sheet cork or any other heat insulator, because the tables usually do not heat up above 100 degrees.
5. Tensioners (Buy here)
Probably the most useful little thing. They are needed for GT2 belts. On many models, it is very difficult to tighten the belts by hand and often does not work well. But in order for the print to be of high quality, the belts must ring like a string. For this, you need to use such small spring tensioners. They need to be installed in places where they do not interfere with the movement of the carriage. This is usually a point near the attachment of the belt to the extruder.
6. Linear bushings (Buy here)
If your printer has steel guides and steel linear bearings roll along them, over time, dust settled on the guides will get into the bearing balls, blocking them. Bounce, jamming and uneven movement of the carriage and table along the axes appear. In this case, you need to remove and wash the bearings from dirt. An alternative to them is a plastic sleeve. It is not affected by dust and even completely dirty does not produce a rumbling noise when moving.
7. Ultrabase - Ultrabase (Buy here)
This perforated tabletop is the best choice for long term printer installation. If you have a film on your table, then over time we recommend replacing it with Ultrabase. These glasses are even, heat-resistant and have good plastic adhesion. Thus, such a coating provides a high-quality bottom layer of the model. Perforation is needed so that when the table cools down, the model itself comes off and can be easily removed without any effort. Ultrabase base can be used without any additional adhesives.
8. Scroll fans (Buy here)
Most of the budget 3D printer models come from China with a weak plastic blowing-cooling system. This causes a number of problems when printing fast model layers, when the plastic does not have time to cool down, flows down or, on the contrary, lifts up. Therefore, the cooling system of such printers has to be modified and made more powerful. As a replacement for standard fans, it is best to use radial snail fans. They create several times more powerful cooling air flow and allow you to completely eliminate plastic laying defects by quickly cooling it at the outlet of the nozzle. You can take the simplest cheap fan models, or you can take more expensive branded models. For example, a Sunon fan with the same size and power consumption blows one and a half times more powerful and runs quieter.
9. Octo print (Buy here)
Many of you are familiar with the Raspberry PI single board computer, which can be used as a print server to run printing on a 3D printer. There will be no improvements in the quality and accuracy of printing, the control code and the mechanics of the printer remain the same, but the server will allow you to remotely control and start print jobs. Installing and configuring Octoprint is simple, you just need to deploy the finished image from disk to USB flash drive. Next, directly on the computer, open the configuration file from this flash drive and configure the Wi-fi network connection. If you connect the network with an Ethernet wire, then no configuration is required at all. Optionally, you can connect a webcam for visual remote control of printing. A list of compatible cameras is on the Octoprint website, for example Logitech c270.