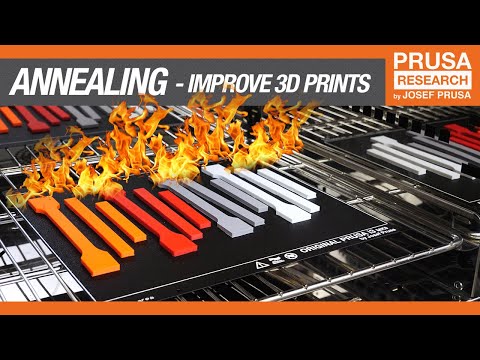
Annealing 3d prints
How to improve your 3D prints with annealing
Probably everyone involved in practical 3D printing has been thinking about improving the physical and mechanical properties of their prints. You could try out some special materials, but those are usually both expensive and hard to print. The only other obvious option is to tweak your print settings, which has its own limitations. Surely there must be a better way! Well… of course there is, otherwise this article would end right here. 🙂
Annealing is a process of increasing temperature to improve firmness, tensile strength and a heat resistance of a given object. It’s a well-known procedure when creating metal or injected plastic parts. With 3D prints it’s just less known – it’s applicable nonetheless. Let’s look right into it.
How does it work?In a nutshell, we are talking about heating plastic to a point when its molecules are able to rearrange, thus making their structure more firm, stable, and with lesser inner tension. We want to achieve a so-called “glass transition temperature”. At such temperature, a printed object still retains its shape but is softened and there are ongoing changes on the molecular level, improving its structural stability.
In the following chapter, we will explain the basic nature of this process from a physics point of view. This will help us understand why exactly annealing helps to improve mechanical and heat resistance, and why it’s so important to find the optimal temperature.
If you are not much into theory, feel free to skip it and go right to the practical part, where we present actual results of annealing, using various materials at different temperatures.
Macromolecular structureMost of the commonly used 3D printing materials are polymers, i.e. long, repetitive molecular chains. Polymers have two types of molecular structures: amorphous (chaotic) or semi-crystalline (partially organized). There is no exact dividing line, though, molecules could have various levels of arrangement. Crystalline structures are usually harder and more rigid (similar to a diamond, even though that’s not a polymer), amorphous polymers are more elastic and flexible.
If you heat up a plastic polymer inside a nozzle, its structure is likely to be amorphous. Imagine spaghetti, but with polymer chains instead of pasta dough. The plastic is then rapidly cooled down to room temperature, therefore its structure remains the same. Because a 3D printed part is mostly amorphous, its heat resistance, firmness, and tensile strength are inferior to crystalline materials with organized molecular chains.
Glass transition temperature
To improve the qualities of our prints we need to rearrange their molecular chains to make them more arranged, ergo, more similar to crystalline polymers. The higher level of arrangement could be reached by heating, or more precisely, by reaching the correct glass-transition temperature. “Okay, so I melt that plastic a bit and it crystallizes, right?” Well, yes… But actually no. If we heat up crystalline materials, at a certain point they just liquefy (i.e. reach liquefaction, or simply a melting point). But there is a difference between a melting point and glass transition temperature. Amorphous polymers don’t have an exact melting point. Instead of liquefying right away, they soften gradually. This range between a completely solid-state and a liquid state is called the glass transition temperature.
Material Glass transition temperature Printing (~melting) temperature
PLA 65 °C (149 °F) 215 °C (419 °F)
PET(G) 75 °C (167 °F) 230 °C (446 °F)
ABS 105 °C (221 °F) 255 °C (491 °F)
Forming of crystals (i. e. molecular organization) inside polymers could only occur when the temperature reaches the glass transition, but also stays below the melting point. For amorphous polymers, their melting point is when the glass transition ends. At that point, the molecular structure shatters and the molecules start to move freely. On the contrary, at temperatures below the glass transition, the molecules are too “numb” to move sufficiently.
Usually, amorphous polymers have quite a wide margin between the beginning of the glass transition and the melting point. For example, with PLA we are talking about a range of 65 to 170 °C (149 to 338 °F). But what exact temperature should we choose for optimal results?
It’s quite simple. The higher the temperature, the more the individual layers merge together, thus increasing the firmness of the object. However, the material also shrinks, warps and at a certain point, it softens so much the object just collapses. Obviously, to get the best result we have to find a sweet spot between keeping the dimensions and shape correct and making the object as firm as possible. Proper annealing time depends on the size and shape of the object. For example, samples we used for testing were heated for 30 minutes using an electric oven.
Annealed samples
How different filaments react to annealing?We decided to test 4 different materials (PLA, PETG, ASA, ABS), 3 of them coming from our own production lines (see our website). We printed everything with a 100% infill (this is important for preserving dimensional stability). There were 4 different experimental setups, to find the best material and temperature for annealing:
Comparison of the untreated and annealed sample of PLA; Author: Jiří Kmošek. Method: Scanning electron microscope. Laboratory of chemical-technological faculty of restoration, University of Pardubice
Comparison of an untreated and annealed sample of PETG; Author: Jiří Kmošek. Method: Scanning electron microscope. Laboratory of chemical-technological faculty of restoration, University of Pardubice
1) Dimensional changes – We prepared a total of 560 prisms shaped objects, each sized 80×10×4mm, which we annealed using various temperatures. More precisely, these objects were split into 4 batches (one for each material), divided by 20 pieces for each temperature level. 20 pieces were left at room temperature, others were heated at 70, 90, 110, 130, 150 and 170 °C (158, 194, 230, 266, 302 and 338 °F) and left to cool down slowly. Subsequently, we measured all dimensions and determined the average change of each axis at different temperatures, to quantify the impact on the object shape.
The charts above show that all samples shrink the most in the X-axis (i.e. in their longest dimension). Y-axis dimension also shrunk, but usually to a much lesser extent. On the contrary, in the Z-axis the dimensions actually extended. As for various materials, PLA undergoes quite significant dimensional changes even at 70 °C (158 °F). Higher temperatures caused warping and at 170 °C (338 °F) the object completely collapsed (melted). For PETG, the suitable temperature is about 90-110 °C (194-230 °F). In this range, neither the warping or dimensional changes are too significant. At higher temperatures, PETG deforms gradually, up to 170 °C (338 °F), when it melts just like the PLA. Both ASA and ABS turned out to be unsuitable for annealing (more on this later). As for dimensional changes, these materials warped more than the others, even at low temperatures.
2) Charpy impact test, also known as “4J, not great, not terrible” – The main reason why we prepared so many objects was to use them later for the Charpy impact test. In this experiment we used a Charpy pendulum to measure the amount of energy needed to break each object, comparing various materials at different annealing temperatures.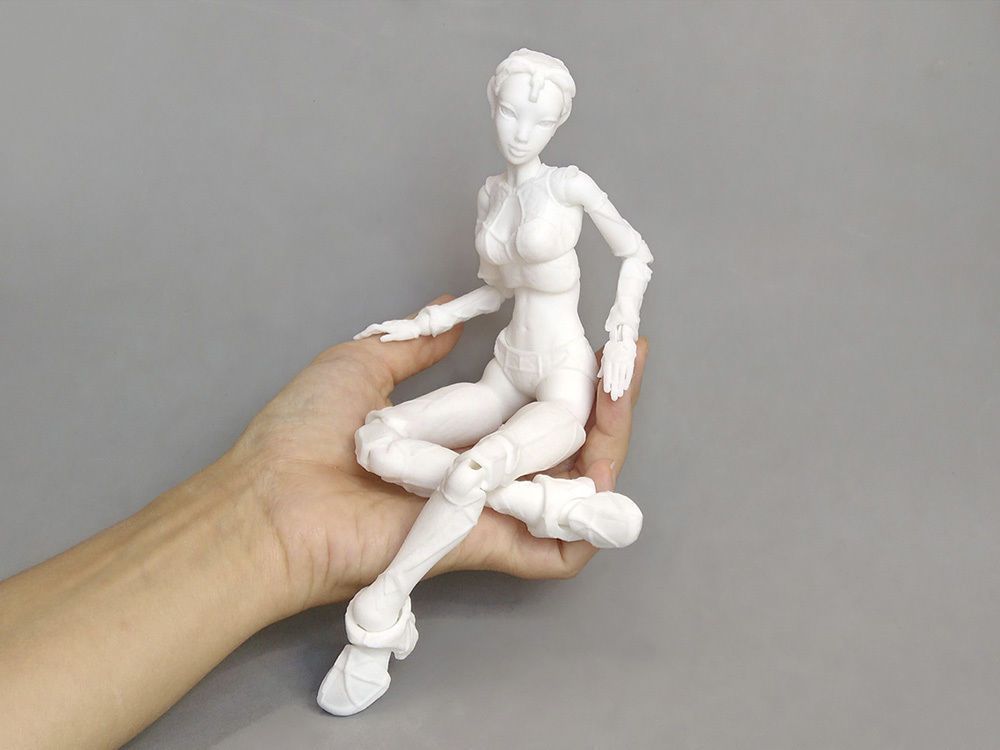 At this point it’s important to mention our pendulum couldn’t measure a higher amount of energy than 4J, therefore some of the results are under-measured. Regarding mechanical durability, PETG is the clear winner. When annealed above 130 °C (266 °F), these were the only samples that could repeatedly withstand 4J. This test further reinforces our assumptions about suitable annealing temperature for PETG, which is probably higher than 90 °C (194 °F). Both ASA and ABS basically remain unchanged up to a point when they start to warp badly (110 °C [230 °F] and above). PLA turned out to be too brittle at any temperature. At 170 °C (338 °F) its durability resembled that of the other materials, but only at a cost of unacceptable shape deformations.
Naturally, such a test brings quite significant measuring deviations (you can see the maximums in the PETG chart). This is why we used 20 samples of each material and temperature to achieve a reasonable level of objectivity.
This deviation is probably caused by variations in the printing quality of the individual pieces. Above 130 °C (266 °F), in the same batch we could observe both samples which could withstand the 4J (maximum energy we could measure), and also outright inferior samples (for example, PETG sample annealed at 150 °C [302 °F], withstanding just 0,688J). Mechanical durability could be affected by some tiny air bubbles or other internal defects that survive the annealing process. When aiming for durable mechanical parts, we advise taking these deviations into account.
3) Tensile strength test – For this test, we printed standardized samples for an EZ-LX tensile tester. We used batches of 6 pieces each, again, one left untreated, others annealed at 70, 90, 110, 130, 150 and 170 °C (158, 194, 230, 266, 302 and 338 °F), then allowed to cool down slowly. We measured the force needed for ripping each sample apart and then calculated an average for each temperature level. We converted force expressed in newtons (N) to kilograms, to give you a better idea of what values we are talking about. Without any doubt, PLA was the strongest, when annealed at 90 °C (194 °F) and above. PETG was the second best, improving at levels above 110 °C (230 °F). Oddly though, annealing at 70-90 °C (158-194 °F) had the opposite, degrading effect. Similar behavior could be observed with ABS as well, although its breaking point is about 30 kg lower. Untreated ASA (without annealing) has values similar to PETG, although, unlike PETG, ASA shows virtually no improvement with increased temperatures.
4) Heat resistance test – Together with parts for the tensile strength test, we also annealed batches of two standardized samples each, for a heat resistance test. Precisely speaking, we tested a heat deflection temperature (HDT). We examined at what temperature an annealed part softens and bends by a given value (circa 2 mm), while stressed either by a 25g or a 100g weight. Because of warping and dimensional changes occurring at higher temperatures, we tested only batches annealed at a maximum of 110 °C (230 °F). There was no point in testing the higher temperature batches which were already deformed, with some samples even being too short for the standardized tester. We slowly heated the whole setup and monitored at which temperature each sample bent by 2 mm.
Again, both ASA and ABS did not change its characteristics almost at all, while PETG values didn’t start to improve until 110 °C (230 °F). Heat resistance of PLA dramatically increased at annealing temperatures of 90 °C (194 °F) and above.
After performing all these tests, we evaluated our results and determined the most suitable material and temperature for optimal results. The best performer is PLA annealed at 90 °C (194 °F) and above. PLA at the same temperature wins the tensile strength test as well. PETG excels in the impact test, mainly at 110 °C (230 °F) and higher. However, PLA samples were warping badly at temperatures higher than 70 °C (158 °F). This is why we prefer PETG annealed at 110 °C (230 °F) as an overall winner.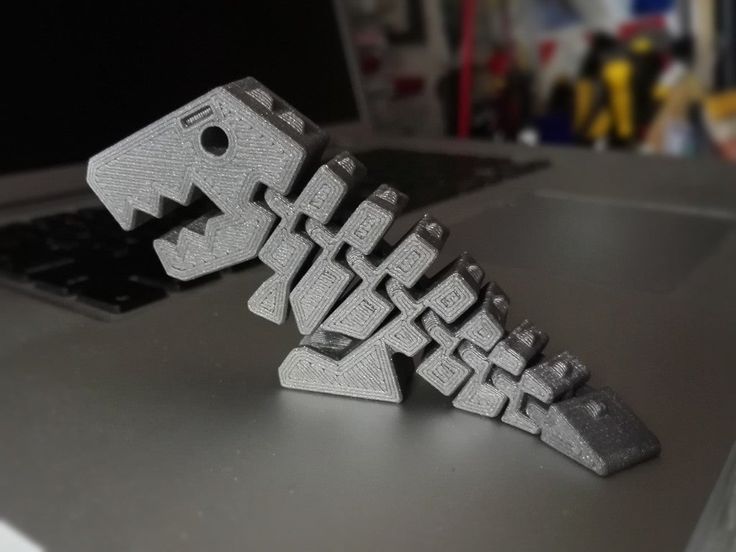 At this temperature, there is still a reasonable shape and dimension stability, while durability already exceeds that of an untreated sample.
While durability and tensile strength dramatically increases with higher temperatures, it’s not worth all the deformation issues.
We classify the ASA and ABS as outright unsuitable for annealing – in every test they consistently scored worse than PETG.
Annealing transparent materialsWait, our series of tests are actually not over yet. Annealing basically merges the individual print layers together, right? So, if you anneal a transparent material, do you actually make it perfectly clear? We asked this question ourselves. And the answer is, in theory, yes, but practically… not quite.
We tried to anneal a small circular shape made of PETG, at 70-170 °C (158-338 °F). By the time you reach (almost) a total clarity, a few tiny bubbles away from perfection, it all collapses and melts completely. If you use lower temperatures, clarity remains the same as on an untreated model, just with added warping.
If you dreamed about creating complicated sculptures and then annealing them to look like made of ice, you have to choose a different path. ASA or ABS smoothed with acetone, slow printing with low layers, etc. More on this topic here.
Practical examples
Now we understand the annealing basics, knowing both its advantages and disadvantages. We learned how to increase the mechanical and thermal durability and how to avoid warping and dimensional changes. Let’s try to print out something useful and improve it with annealing. It won’t be applicable in each case, so let us demonstrate what works and what does not.
Our first example are spare parts for our Original Prusa i3 MK3S printers. The same as with all the previous tests, all parts were printed with a 100% infill. We already know that PETG at 110 °C (230 °F) performs best, but out of curiosity we also printed a second set from Prusament Lipstick Red PLA.
PETG was annealed at 110 °C (230 °F), PLA at 90 °C (194 °F), both for 45 minutes this time, to make sure even the bigger parts warm thoroughly. We aimed for a tougher, heat resistant extruder. Sadly, we found out that the level of warping makes both materials completely unusable for such parts with complicated shapes and relatively precise dimensions.
Annealing the Original Prusa i3 MK3S extruder cover: untreated part on the left, annealed parts on the right.
What is annealing good for, then? It does its job with simple parts, which need to improve their mechanical durability and tensile strength. As an example, we annealed simple hooks, which could use some more tensile strength. We printed them from PLA and annealed at 90 °C (194 °F) for 30 minutes. Another example is two PETG prints: a cupboard handle and a simple measuring cup, again, annealed at 110 °C (230 °F) for 30 minutes.
Annealing at homeYou don’t need a lab or any dedicated tools for successful annealing. A simple hot air oven will do. Use an electric oven, though, not a gas one! Gas ovens are less safe, also they don’t provide an even level of heat, often the real local temperature could be higher than what you read from the thermometer. Place the objects on a plate (you can use a chopping board), so they don’t warp or stick to your tools or to the oven. Keep your eye on the process all the time! Imagine a burned pizza – well, burned plastic also doesn’t smell like victory. We take no responsibility for your burned prints (or pizzas)! 30 minutes might be a good rule of thumb, but make sure you adjust the time according to size, shape, and material of the particular object. If you need precise dimensions, anneal the first batch, measure the amount of shrinking, then print a second batch scaled up accordingly.
We experimented with annealing of 4 different materials. While for PLA and PETG this method is usable and has its merits (to an extent), for ASA and ABS the advantages are negligible, while warping and deformations reach unacceptable levels.
On the other hand, it’s almost incredible how dramatically could annealing improves the characteristics of PLA or PETG. Shape and dimensional changes still present a major disadvantage, but in this case, it’s outweighed by the benefits. In particular, PLA has vastly improved tensile strength, PETG excels in impact durability. Annealing is an effective technique, but not for complicated and detailed prints. For example, you could begin with improving the tensile strength of PLA coat hangers. Or make your PLA prints more heat resistant (untreated PLA already softens at 60° C [140° F]). Do you expect your print to often hit the ground? Use annealed PETG to improve its impact durability.
Let us remind you that common 3D printing materials show the shape and dimensional changes at relatively low temperatures (70 °C [158 °F]). If you want to keep a precise shape and size, anneal your print, measure the changes, scale it up and print again. Then you get an object both with improved characteristics and correct size. Keep in mind that if you use printed parts in machinery, which could have an operating temperature of 80 °C (176 °F), some deformations will occur over time.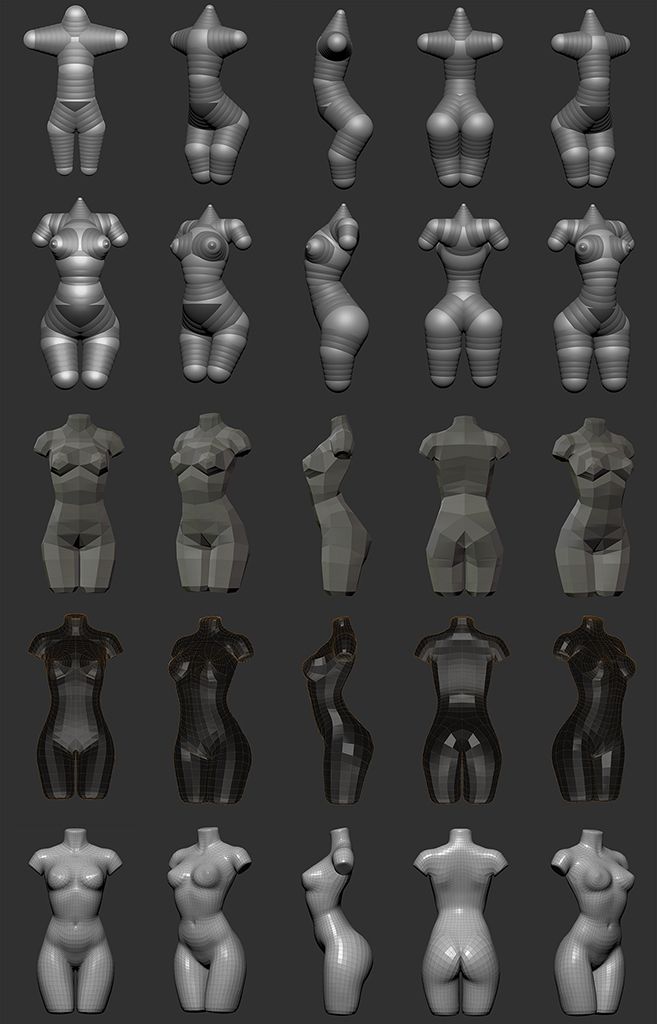
Do you have any experience with annealing? Feel free to share it with us! We would love to learn about new methods and interesting projects, which could be improved by this simple trick.
How To: Anneal Tough PLA for Stronger 3D Printed Parts
PLA isn't known for its thermal resistance, but 3D printing materials have advanced to create Tough PLA: the same easy-to-print material with new advanced properties.
Posted on July 9, 2020
by
Alec Richter
PLA is a fantastic 3D printing material: any 3D printer is capable of printing PLA, users of all experience levels can use it with ease, and it’s available in an astounding number of colors. But every material has different characteristics, and although incredibly useful, PLA isn't resistant to higher temperatures. Just leaving a PLA print in a hot car will cause it to soften and deform, and if you’re in a place that gets hot enough, the 3D print may just collapse on itself or shrink in bizarre ways. Fortunately, there are derivatives of PLA that look to unlock the next step in its evolution as a 3D printing material, like MatterHackers PRO Series Tough PLA and HTPLA. Let’s take a look at what makes these special.
What is Tough PLA and HTPLA?
MatterHackers PRO Series Tough PLA, or Proto Pasta’s HTPLA both fill the same niche of providing easy-to-print capabilities while still being able to bring the properties of other more advanced materials into the picture. The key to unlocking these properties though is the process of annealing: heating up 3D printed parts in a controlled manner to manage and change their internal stresses, forming a much stronger part than before.
PLA 3D prints get significantly softer if they are left in a car on a hot day.
What are the advantages of annealing?
By annealing, you will dramatically increase the glass transition temperature of the 3D printed part, so instead of getting soft at 55°C, your 3D printed part should be able to survive temperatures as high as 85°C without deforming. Annealing also makes the 3D prints more impact resistant than average PLA or even ABS 3D printed parts. Whether or not you actually anneal the printed parts, HTPLA and Tough PLA sand much easier than regular PLA, so post-processing becomes a much easier task than before as well.
3D prints that are more simplly and geometrically shaped tend to fair better when annealing that other shapes.
Annealing works by getting the plastic to a hot enough temperature to allow its amorphous structure to change and morph into a much stronger, crystalline structure, but this sort of “reorienting and repositioning” of the crystals will cause the printed part to shrink and grow slightly. Printed parts tend to shrink in X and Y, but grow slightly taller in Z. The geometry of a 3D printed part will affect how drastically its shape will change with parts designed for mechanical purposes tending to fare better than others because they are usually big blocks or have large cross-sectional areas that end up keeping things constrained well enough to hold together.
Procedure:
Print Settings
First thing you will need to do is make sure you have the right print settings. Since you are inherently stressing the 3D print by annealing it, infill with any sort of sparsity will cause it to contract in unpredictable ways, which is why manufacturers of these filaments will recommend that any part you intend to anneal you print at 100% infill. To truly get 100%, make sure you change your infill pattern to lines instead of hexagons, triangle, or grid, as these patterns can still cause the generated infill pattern to not truly take up 100% of the volume.
Hexagon infill at 100% tends to leave small voids within the print rather than creating a part 100% solid.
Annealing Preparation
Once your part is finished printing, get it as clean as possible by removing any brims or minor imperfections. Make sure you clean off any bed adhesive residue that is left behind on the printed part as well.
A quick blast with a blow torch will clean up any stringing on a finished 3D print.
From here, you can use one of two methods to anneal your 3D printed parts. The first method is ideal, but not every 3D print will be able to meet the requirements to perform it. Parts will need to be small enough to fit into a container, and still have a couple inches between the part and the walls of the container. For the 3D prints that are too large for this, you can follow method 2.
Method 1
Find an oven safe container (like a glass or metal bowl) that’s larger than your 3D printed part and leaves at least two inches of space around it on all sides. Add at least two inches of fine sand to the bottom of the container and place your part on top of it. Gently pour sand all around it and make sure it fills all the voids. By adding sand, you support your printed part on all sides so it can’t warp or shrink nearly as much it would without the support. Preheat your oven to 95-115°C (200-230°F) and let it hold temperature for 10 minutes to make sure the oven has had enough time to stabilize and not overshoot the set temperature. Then insert the sand-packed bowl and leave it in for an hour to make sure the sand has enough time to fully heat up and transfer that to your part. After an hour is up, insert a thermometer into the sand to make sure the internal temperature is the same as what the oven’s thermometer reads to know that your part is adequately heated. Remove the container and let it cool to room temperature.
A glass container filled with sand is a suitable method of anneal Tough PLA 3D prints.
Method 2
Preheat your oven to 95-115°C (200-230°F) and let it hold temperature for 10 minutes, to make sure it has enough time to hold the temperature steady and not overheat your parts. After that time has passed, set your printed parts on a tray and leave them in the oven for 6-10 minutes. You should be able to see your part flex a little as it crystallizes and then stabilizes its form. Then take them out and let them cool to room temperature. You may notice that your part has shrunk or changed shape slightly. In that case, you may be able to reprint your part to account for the shrinkage and growth, like if a 100mm long block shrunk to 99.5mm, then you would want to scale it up so it shrinks down to 100mm after annealing.
Method 2 is simpler but less controlled than method 1.
And that’s really all there is to it. It’s not an exact science, but your 3D printed parts should hold up a lot better to heat than it would have before and should have some extra strength in general as well. Even still, you can sand and finish these parts just as you could before annealing so you can still make your presentation-ready parts. I hope that this gives you a good direction to go with your HTPLA and Tough PLA 3D prints and encourages you to at least experiment with annealing. Do you regularly anneal and heat treat your 3D prints and have any helpful tips? I’d love to hear about them and share them with the community, let me know in the comments down below!
Happy annealing!
Article Tags
- 3D Printing
- Firmware
- 3D Design
- MatterControl
- Press Releases
- Small Business
- Automotive
- E3D
- Jewelry Making
- Engineering
- Entertainment Industry
- MatterControl Touch
- ESD Materials
- NylonX
- BCN3D
- Open Source
- Crafty Pen
- Digital Fabrication Anatomy
- How To
- Hardware and Upgrades
- Tips and Tricks
- Weekend Builds
- Top Ten
- Education
- Tech Breakdown
- Women in 3D Printing
- Project Ideas
- Advanced Materials
- Reference
- Pulse Dual Extrusion
- Product Spotlight
- Aerospace
- Jobs
- Military & Government
- Multi-Tool Machines
- Getting Started
- Healthcare
- How To Succeed With Any 3D Printing Material
- Creality3D
- Architecture
- 3D Printer Reviews
- Hacker of the Month
Related Products
View all related productsHow does annealing affect the properties of PLA, PETG, ABS and ASA plastics? Finding the optimal annealing temperature - qbed
| What does annealing 3D prints do? To what extent do the characteristics of plastics improve after annealing? How to choose the optimal annealing temperature? |
|---|
PLA printouts sent to anneal
PLA is one of the most beloved filaments by 3D printers. However, many PLA users have at least once thought about how great it would be to improve the heat resistance and strength of this plastic: the fact is that PLA printouts are quite fragile and begin to soften already at a temperature of 50-65 °C, which significantly reduces the possibility of their operation.
In an attempt to improve the thermophysical and mechanical properties of PLA and other popular plastics, makers began to experiment with annealing printouts at different temperatures, that is, they began to heat products in the glass transition temperature range in order to make their molecular structure more ordered and durable, as well as get rid of residual voltage (read all about the annealing process and its practical application here).
In 2019, the manufacturers of Prusa 3D printers decided to structure their experiments with annealing and find out how four popular plastics - PLA, PETG, ABS and ASA - will react to different baking temperatures, namely, how dimensions, mechanical strength, tensile strength and heat resistance will change for these plastics when annealed at 70, 90, 110, 130, 150 and 170 °C (a report on their experiments is published here). In this article, we'll talk about what the Prusa team found out.
Article content:
Experiment scale
How do the dimensions of printouts change after annealing?
Does annealing add strength?
Does the tensile strength of annealed products increase?
How does annealing affect heat resistance?
Total. What plastics should be annealed and at what temperatures?
Scale of experiment
The theory of annealing plastics is as follows: By heating products in an electric oven, we can increase their strength and heat resistance . Sounds tempting. But a number of questions arise:0011
-
Can annealing really improve the physical and mechanical properties of printouts?
-
How much improvement in strength and heat resistance for different plastics after annealing?
-
At what temperature should different plastics be fired for optimum results?
These are the questions that the Prusa team tried to answer. The Pruševites—yes, the printer is actually named after its creator, Josef Průša, which is why I call it Prusa and not Prusa—conducted a series of tests measuring the tensile strength of materials, their heat resistance, mechanical strength, and other properties after baking.
about 800 prismatic objects from PLA, PETG, ABS and ASA were printed for tests (you can download them here). All test pieces were printed with 100% infill Infill=100% to minimize their shrinkage/expansion during the annealing process.
Samples for hardening. Original picture here
Within each test printouts from different plastics were divided into groups and were heated to different temperatures in an electric oven for 30 minutes . After that, samples were left to cool in the switched off furnace to room temperature (read more about the process of annealing plastic in my previous article).
Back to content
How do the print sizes change after annealing?
To determine how printouts change after baking, the Prusa team printed 560 test pieces size 80×10×4 mm from PLA, PETG, ABS and ASA - that is, 140 samples of from each material. Further, these 140 objects were divided into 7 groups , , 20 pieces in each . The first group of 20 pieces was not annealed , the remaining groups were annealed at temperatures of 70, 90, 110, 130, 150 and 170 °C .
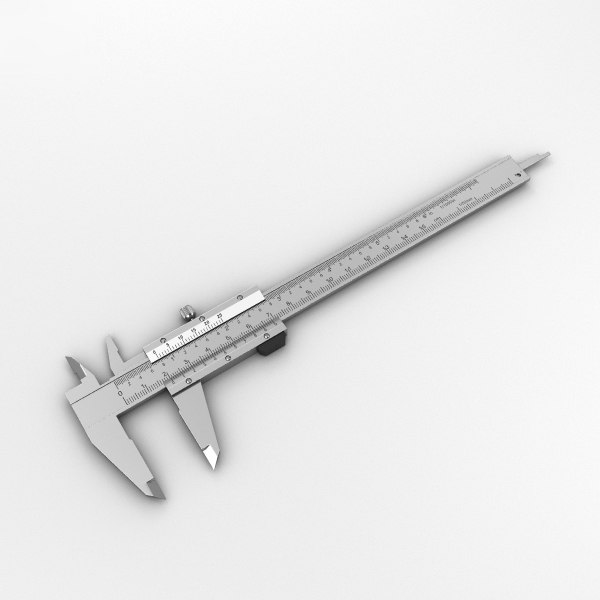
Before and after annealing, all samples were measured with a caliper along three axes. The sizes for each group of samples were averaged. The data obtained are shown in the graphs below.
Percentage shrinkage of annealed products along the X axis. Original graph here
Y-axis shrinkage of annealed products. Original graph here
Percentage shrinkage of annealed products along the Z axis. Original graph here
Measurements show that printouts experience the most shrinkage along the longest side of model , in this case it was the X axis. Shrinkage was also observed along the Y axis, but slightly less significant. But along the Z axis, the printouts increased in size.
Resize printouts at different firing temperatures. Original picture here
PLA printouts were the most susceptible to size change: already at 70 °C they began to deform in all axes, and with a further increase in temperature they were distorted even more, until began to melt at 170 °C .
PETG prints withstood temperatures up to 90 °C without much deformation, and after increasing the temperature to 110 °C and above began to distort . At 170 °C PETG started to melt.
ASA and ABS began to deform at 110°C.
Back to content
Does annealing add strength?
After shrink/expansion measurements all 560 printouts sent for mechanical strength measurement with a Sharpy pendulum. As part of this strength test, all samples were struck with a pendulum in the middle and measured the amount of energy required to destroy the printouts.
Charpy pendulum impact test. Original picture here
The objectivity of the test was ensured by a large number of test samples: after all, there were 20 pieces in the disposition, annealed at different temperatures PLA, PETG, ABS and ASA printouts. Such a number of printouts made it possible to minimize the influence of external factors on the strength measurement: the fact is that the quality of test samples and the quality of their annealing differ in one way or another from product to product, which, in turn, can affect the test results. It should be noted that the strength of annealed products varied quite significantly within the test groups: at the same annealing temperature, samples from the same group could withstand both 4 J and 0.7 J impacts.
The results of the strength test are shown in the graph below. It is worth considering, however, that the maximum amount of energy that the pendulum could produce was 4 J, although some test samples could withstand a stronger impact.
Measurement of impact strength of annealed printouts. Original chart here
As can be seen from the graph, mechanical strength increased the most for PETG printouts . Only PETG printouts baked at over 130°C could withstand the 4J impact of without interruption.
ASA strength began to increase at 130 °C and above , while ABS strength increased significantly only at 150 °C . But since these plastics deform significantly at such temperatures, the strength they have acquired does not play a special role.
PLA printouts are still brittle despite annealing. Only at 170°C , these printouts are equal in strength to ABS samples, but the trouble is that at this annealing temperature, the deformation of the PLA printouts is too large.
Back to content
Does the tensile strength of annealed products increase?
42 samples of from each plastic were printed for the tensile strength test. As in previous experiments, the samples were divided into 7 groups , , 6 pieces in each . The first group of 6 pieces was not annealed , the remaining groups were annealed at temperatures of 70, 90, 110, 130, 150 and 170 °C .
Using a special device, all samples were stretched in opposite directions, measuring the force required to break the products. The average figures are presented in the chart below.
Tensile Strength Tester. Original picture here
Tensile strength measurement of annealed printouts. Original chart here
As the graph shows, when annealed at 90°C or more, PLA's tensile strength increased more than other plastics.
For PETG, the tensile strength increased only at temperatures above 110 °C , but annealing at 70-90 °C significantly reduced it.
Similar behavior could be observed with ABS; its tensile strength remained lower than that of PETG.
ASA's tensile strength remained virtually unchanged at all annealing temperatures.
Back to content
How does annealing affect heat resistance?
In order to determine how the annealing process affects the thermal stability of products, the Prushev team measured the heat distortion temperature of annealed and unannealed test specimens.
To determine the heat distortion temperature, the printouts were slowly heated while subjecting them to a load of 25 g or 100 g until the specimens are deflected to the specified depth of 2 mm .
Thermal deformation temperature measurement of annealed and unannealed specimens. Original picture here
For the test, the Prushevites printed 8 test samples from each material and divided them into 4 groups by 2 pieces .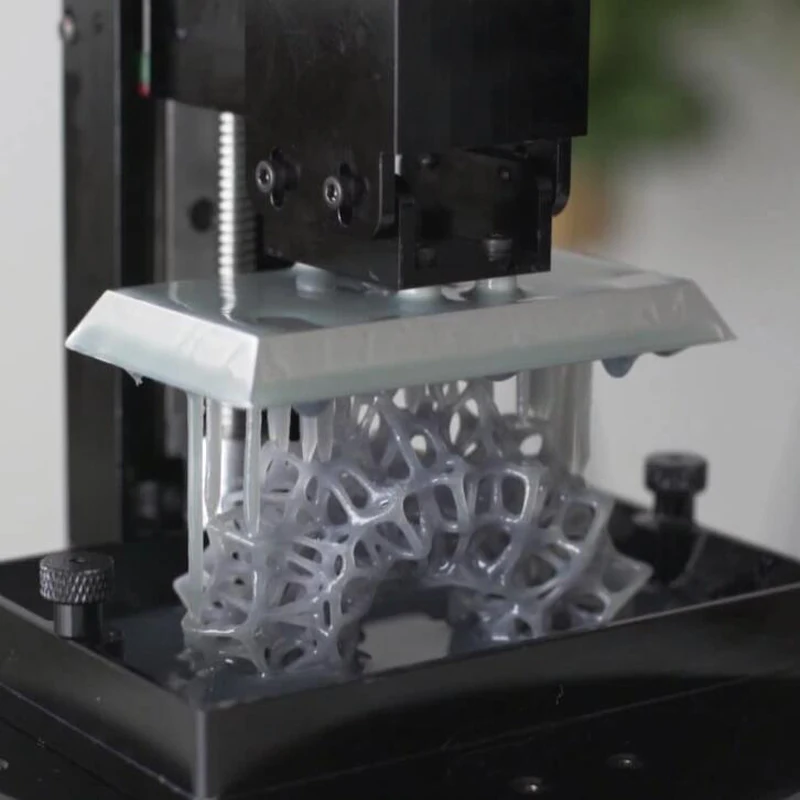 For each material, 1 group remained unannealed, the remaining 3 were annealed at 70, 90, 110°C . There was no point in testing samples annealed at higher temperatures, since they were too deformed even before the test. The measurement results are shown in the graph below.
Comparison of heat distortion temperature of annealed and unannealed printouts. Original chart here
From the graph, we can see that PLA's heat resistance increased dramatically at annealing temperatures of 90 and 110 °C . Such a jump could not but rejoice, if not for a single BUT: annealing at such temperatures deforms PLA products quite strongly and, in fact, can only be applied to objects with simple geometry and the absence of precision parts (which I have seen from my own experience - details here) .
The heat resistance of PETG only increased slightly when annealed at 110°C.
For ASA and ABS, the heat resistance remained virtually unchanged at all annealing temperatures.
Back to content
Total. What plastics should be annealed and at what temperatures?
If we take another look at the test results, we can easily see that of the four materials tested, only PLA and PETG make sense to anneal (at least according to the data obtained by the Prusa team).
The fact is that for ASA mechanical strength indicators improve only when annealed above 130 °C, but at this temperature the printouts are too deformed. ASA annealing has practically no effect on the thermal stability.
With ABS the situation is similar. The impact strength improves when annealed above 150°C, the tensile strength increases when annealed above 130°C, but the heat resistance remains almost unchanged. But when annealed above 130°C, the printouts are already so deformed that small improvements in mechanical strength are no longer worth the trouble.
With PLA the situation is more interesting. Already at annealing at 70 °C, the tear strength of PLA printouts increases significantly, and the heat resistance at annealing is higher than 90 °C almost doubles. The only disadvantage of PLA annealing is severe deformation of products even at 70 °C . However, if you are printing objects with a simple shape, say hooks, then increasing the physical and mechanical properties of PLA by annealing may come in handy. The main thing here is to choose the optimal temperature and baking time for your product, minimizing the deformation of the printouts and at the same time maximizing their properties. The optimal temperature and time will vary from product to product (depending on the size and quality of printouts), but annealed at 90 °C for 30 minutes.
PETG's mechanical strength begins to increase when annealed at 110°C, and when annealed at 130°C, the impact strength almost doubles. Heat resistance increases slightly only when baked at 110 ° C. Given that PETG printouts hold their shape well up to 110 °C , you can safely bake them at this temperature, counting on improved mechanical strength. As with PLA, it is best to anneal simple geometries without high-precision details.
If you are inspired to experiment with baking your products, then I hasten to please you: you can bake printouts at home using a conventional electric oven. Read an article on how to do this here - in this article I talk in detail about the process of annealing plastic products and share my results of annealing PLA printouts.
Read about the process of hardening plastics in an electric oven here
If the article was useful to you, share it on social networks. networks :) You can also always leave your comment below or write to me on IG. Happy Printing <3D
Back to Contents
Back to Contents
GalleryWhat 3D Printing Can Do
WATCH
Glossary3D Modeling and Additive Manufacturing Terms
WATCH
3D printing materialsK. 3 Comments
(There is a solution) Can I put PLA parts in my car (in the sun)?
The sun will rot the most if not all plastics, with PLA, ABS and PETG rot to varying degrees and at different rates. Thus, even if part of your fence, such as the edges, is visible, at some point they will inevitably be exposed to the sun (though perhaps not enough), making them brittle.
However, as you yourself said, it's not the direct sunlight that bothers you the most here, but the heat. As this informative article suggests, using PLA for long-term topical use involves:
PLA is great as there is less warping than ABS.
Interestingly, it also notes (again, this is due to sunlight, in your case this is not a problem):
As an additional note, PLA has significant UV resistance.
Related Questions
While your question is not a duplicate per se, there are already a number of questions (and answers) on this topic that I remember seeing and being relevant.
While I have cited some of the relevant parts below, it might also be worth taking a look at other posts at these links:
- Using PLA outdoors?
Be aware that PLA has a much lower temperature at which it starts to become flexible. One summer I had PLA printed parts in my car for 3 hours and when I got back they were bent.
I don't know about the weather conditions in your local environment, but if you are experiencing high temperatures and your sign is hanging in direct sunlight, I would suggest that you protect the letters from bending (e.g. cover them with a layer of epoxy or something similar) .
- Constant operating temperature PLA
The property you are looking for in a thermoplastic (which will determine the constant operating temperature) is the glass transition temperature. This is the point at which the plastic begins to flow and becomes deformable, as described by the Evil Master.
PLA reaches this state at around 60°C while ABS is around 105°C, just according to your specifications. To go a little further, polycarbonate achieves a glass transition temperature of around 150°C and Ultem at 217°C.
- ABS or PLA for structural printed parts?
50 °C is hot for you. The glass transition temperature of PLA is 65°C. It can get really hot in a car under the midday sun.
... if a part is designed strong enough to be used in PLA, it will do no better in "stronger" ABS. If the PLA part is "more accurate" and "less deformed" - this may well improve its use. Aside from the community's widespread commitment to self-replication (or mostly self-replication with some metal parts), there are plenty of arguments to make most printer parts out of machined metal, for that matter - much stronger than ABS or PLA.
- Outdoor 3d printing: what types of filament are the most weather resistant?
PLA will also melt slowly in direct sunlight.
Learn more